• Skip to main content
  • Skip to primary sidebar

Camp.Grill.Eat. logo

menu icon
go to homepage
  • Recipes
  • About
  • Subscribe
  • Contact
    • Facebook
    • Pinterest
    • YouTube
  • search icon
    Homepage link
    • Recipes
    • About
    • Subscribe
    • Contact
    • Facebook
    • Pinterest
    • YouTube
  • ×
    Home » Recipes

    Recipe Index

    August 5, 2024 Beef Recipes

    Grilled Striploin Steak Skewers

    These grilled striploin steak skewers are soaked in a flavor-packed marinade and quickly cooked on the grill (or over the campfire). They cook up in only a few minutes, making them perfect for an effortless weeknight or camping meal.

    Steak skewrs on a platter with salad and potatoes on the side.

    Skewers are a staple for us on camping trips at home, with these marinated steak skewers falling into the rotation along with grilled bang bang chicken skewers, marinated salmon kebabs, and citrusy scallop skewers. I love them because they're so quick to make and cook, and really, who doesn't love meat on a stick?!

    [feast_advanced_jump_to]

    Why This Recipe is Great for Camping

    • You can get the meat marinating before you head out on your trip so you've got less to do at camp.
    • They can be cooked on your grill or campfire grate and cook up quickly.
    • These marinated steak skewers require only a handful of ingredients and take up minimal cooler space. They're also an amazing way to enjoy steak.

    Ingredients and Substitutions

    Ingredients for grilled striploin steak skewers--steak, garlic, Worcestershire sauce, and oil.
    • Steak--I highly recommend using thin striploin steak here for the most tender and flavorful kebabs. However, this will also work with sirloin steak. If you can, marinate it for a few extra hours to maximize tenderness. If you've got extra meat, give these Blackstone steak bites a try or cook up a Blackstone cheesesteak!
    • Worcestershire sauce--This umami-packed condiment delivers plenty of flavor to your marinade. Note that original Worcestershire sauce is not gluten-free, but you can purchase gluten-free versions of the sauce, if necessary.
    • Oil--I use olive oil for the marinade, but if you're camping and you just have vegetable oil or some other neutral oil on hand, that will work fine. No need to bring extra stuff along.
    • Garlic--One minced clove lends a pleasant garlic flavor to the skewers, but if you're a garlic fiend, feel free to double it.

    Important Steps

    A garlic, oil, and Worcestershire marinade in a small bowl.
    Strips of steak marinated in a resealable bag.
    1. Whisk the Worcestershire sauce, oil, and garlic together in a small bowl.
    2. Place the sliced beef strips into a resealable bag and pour the marinade in. Seal and stash in the fridge for at least 1 hour and up to 24 hours.
    Six steak skewers on a baking sheet.
    Six steak skewers on a grill.
    1. Thread the striploin steak strips onto soaked wooden or metal skewers, using about 3 pieces per skewer. Season with salt and pepper.
    2. Grill over medium heat until tender and cooked to your desired doneness.

    FAQs

    What should I serve with these?

    Serve these striploin skewers with crispy smashed potatoes or campfire garlic bread, and a marinated vegetable salad or grilled stuffed mushrooms for an easy outdoor meal. To make this into a surf-and-turf meal, offer Blackstone crab cakes as a starter!

    How do I prevent flare-ups when cooking steak skewers?

    To avoid flare-ups when cooking these kebabs, be sure to soak your skewers (if using wooden), trim the steak of any fat or gristle before slicing, and always clean your grill grate before using.

    Tips and Troubleshooting

    • To get ahead, start marinating the beef before heading out on your trip, if you'll be enjoying them within 24 hours. Otherwise, feel free to mix up the marinade and store it in your cooler for up to 3 days before adding the meat.
    • If your steak has any fat or gristle, trim it before slicing and marinating the meat.
    • If you are using wooden skewers, soak them for an hour before threading and grilling the beef. Metal skewers don't require any preparation.
    • When grilling, always start with a well-oiled grate. If the meat doesn't want to release when you try to turn it, give it an extra 30 seconds. It will release when it's ready.
    Six steak skewers piled on a wooden serving board.

    More Grilling Recipes You'll Love

    A whole grilled honey lime chicken on the grill.
    Grilled Honey Lime Chicken
    Strips of grilled flanken short ribs on a wooden board.
    Grilled Flanken Short Ribs

    Tried This Recipe?

    If you've tried this recipe, please leave a comment below. Follow me on Instagram, Facebook, YouTube, or Pinterest for more great camping and grilling recipes.

    Recipe

    Six steak skewers piled on a wooden serving board.

    Grilled Striploin Steak Skewers

    These grilled steak skewers are an easy meal of tender marinated beef that cooks up quickly. No forks or knives required!
    No ratings yet
    Print Recipe Pin Recipe
    Prep Time 15 minutes mins
    Cook Time 5 minutes mins
    Total Time 1 hour hr 20 minutes mins
    Course Main Course
    Cuisine American
    Servings 6 skewers
    Calories 159 kcal

    Equipment

    • 6 wooden or thin metal skewers (soaked if wooden)

    Ingredients
      

    • 2 tablespoons Worcestershire sauce
    • 2 teaspoons olive oil
    • 1 clove garlic minced
    • 1 pound striploin steak thinly sliced into long ½-inch-thick strips
    • Salt and freshly ground black pepper

    Instructions
     

    • Whisk the Worcestershire sauce, olive oil, and garlic together in a small bowl.
    • Place the sliced beef in a resealable bag and pour the marinade over. Seal the bag and massage gently to coat the beef.
    • Stash the marinating beef in the fridge or cooler for at least 1 hour and up to 24 hours.
    • Prepare a grill or campfire coals for medium heat.
    • Remove the beef from the marinade and discard the marinade.
    • Thread the steak strips onto the skewers in an S-pattern, using about 3 strips per skewer. Season with salt and pepper.
    • Grill over medium heat, turning once, until cooked to your desired doneness, about 2 minutes per side for medium-rare.

    Notes

    • Get ahead--Start marinating the beef before heading out on your trip, if you'll be enjoying them within 24 hours. Otherwise, feel free to mix up the marinade and store it in your cooler for up to 3 days before adding the meat.
    • Trim the beef--If your steak has any fat or gristle, trim it before slicing and marinating the meat.
    • Soak the skewers--If you are using wooden skewers, soak them for an hour before threading and grilling the beef. Metal skewers don't require any preparation.
    • Be patient--When grilling, always start with a well-oiled grate. If the meat doesn't want to release when you try to turn it, give it an extra 30 seconds. It will release when it's ready.

    Nutrition

    Serving: 1skewerCalories: 159kcalCarbohydrates: 1gProtein: 21gFat: 10gSugar: 1g
    Keyword grilled beef, skewer recipes
    Tried this recipe?Let us know how it was!

    August 2, 2024 Blackstone Griddle Recipes

    Blackstone Smashed Potatoes

    These Blackstone smashed potatoes have irresistibly crispy edges and creamy centers, and are one of the best Blackstone griddle recipes you'll ever try. They're finished with fresh herb butter to create a comforting potato side dish that you'll have on permanent rotation.

    A large plate filled with smashed potatoes.

    If you've never tried making griddle smashed potatoes before, you're in for a treat. The large surface area of the griddle is ideal for cooking spuds to golden, crispy perfection. Serve them alongside garlic steak bites, turkey smash burgers, or shrimp or scallop skewers for an easy outdoor meal.

    [feast_advanced_jump_to]

    Why This Recipe is Great for Camping

    • This Blackstone smashed potatoes recipe requires only a few ingredients and can be prepared using your camp stove and outdoor griddle.
    • They require minimal cooler space.

    Ingredients and Substitutions

    Ingredients for Blackstone smashed potatoes--herbs, butter, oil, and potatoes.
    • Potatoes--I highly recommend using new potatoes, if you can find them, for this recipe. They're the perfect size and their thin skins crisp up beautifully. If you can't find new potatoes, use small yellow or red potatoes, ideally no larger than 2 inches (5 cm) in diameter. High starch potatoes, like Russets, won't hold their shape as well as smaller, waxier potatoes.
    • Herbs--Use any combination of your favorite fresh herbs here. Rosemary, thyme, oregano, and parsley are all great choices.
    • Butter--This finishes the recipe with a little extra richness, but if you want to keep the recipe vegan or dairy-free, you can use olive oil in its place.

    How to Make Smashed Potatoes on the Blackstone

    Whole potatoes in a pot of simmering water.
    Eight whole potatoes on a rimmed baking sheet.
    1. Cook the whole potatoes in boiling water until just tender.
    2. Drain and cool slightly on a baking sheet.
    Smashed potatoes drizzled with oil on a baking sheet.
    Smashed potatoes cooking on a Blackstone griddle.
    1. Use the heel of your hand or the bottom of a small glass to smash the potatoes. It's ok if some of them break apart. Drizzle with oil and sprinkle with salt.
    2. Cook the smashed potatoes on a griddle over medium-low heat until golden brown and crispy on both sides.
    Melted butter and herbs in a small bowl with a brush on the side.
    A person brushing herb butter over smashed potatoes on a Blackstone griddle.
    1. Mix the melted butter and herbs in a small bowl.
    2. Brush the herb butter onto the potatoes during the last 5 minutes of cooking.

    FAQs

    Can I make these in a cast iron skillet?

    You can, but you may need to work in batches to avoid crowding the potatoes. You want to make sure there is space around each potato to let it crisp up nicely.

    Can I add garlic to my smashed potatoes?

    Sure. Dice up a clove of garlic and add it to the herb butter before brushing it on to the potatoes.

    Tips and Troubleshooting

    • After boiling the potatoes, let them cool slightly but don't let them cool completely. They'll be easiest to smash when they're still a little warm.
    • If your potatoes are crisping up too quickly or getting too dark, reduce the heat. I find that for a covered Blackstone griddle, medium-low heat works best. If you're using an uncovered griddle, the temperature may need to be closer to medium.
    • Store leftover smashed potatoes in a sealed container in the fridge or your cooler for up to 3 days. Reheat over low heat on the griddle, or in a warm oven.
    • This recipe is suitable for gluten-free and vegetarian diets. To make it vegan or dairy-free, use oil instead of butter.
    Smashed potatoes cooking on a Blackstone griddle.

    More Potato Recipes You'll Love

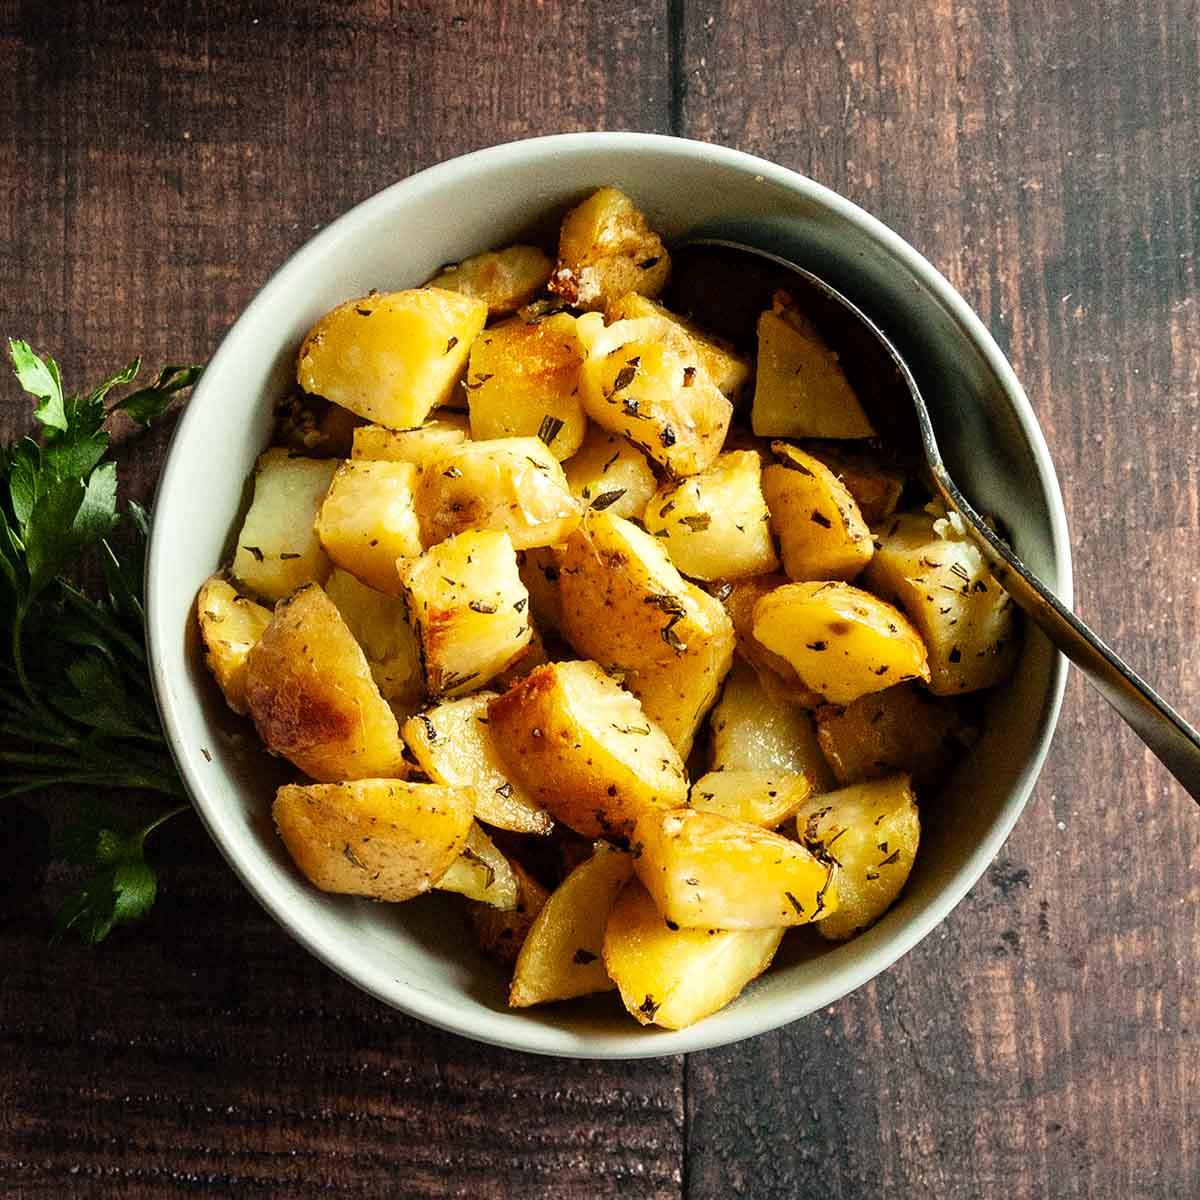
    A bowl of make ahead roasted potatoes with fresh herbs and some parsley on the side.
    Make-Ahead Roasted Potatoes
    A pot of mashed potatoes with a wooden spoon resting inside.
    Cheesy Garlic Mashed Potatoes

    Tried This Recipe?

    If you've tried this recipe, please leave a comment below. Follow me on Instagram, Facebook, YouTube, or Pinterest for more great camping and grilling recipes.

    Recipe

    A large plate filled with smashed potatoes.

    Blackstone Smashed Potatoes

    A woman's face.Angie Zoobkoff
    These smashed potatoes are smothered in herb butter and cooked on your griddle to crispy, golden perfection.
    No ratings yet
    Print Recipe Pin Recipe
    Prep Time 10 minutes mins
    Cook Time 50 minutes mins
    Total Time 1 hour hr 13 minutes mins
    Course Side Dish
    Cuisine American
    Servings 4 servings
    Calories 318 kcal

    Equipment

    • Griddle or cast iron skillet

    Ingredients
      

    • 2 pounds small potatoes (2-inch diameter)
    • Salt
    • 3 tablespoons vegetable oil
    • Freshly ground black pepper
    • 2 tablespoons butter melted
    • 1 tablespoon chopped fresh herbs

    Instructions
     

    • Place the whole potatoes in a pot of cold salted water so that they are covered. Bring to a boil over high heat, then reduce heat to medium-low and simmer until the potatoes are just tender when pierced, 18 to 20 minutes.
    • Drain the potatoes and dump them on a baking sheet. Let cool for 5 to 10 minutes.
    • When the potatoes are cool enough to handle, use the heel of your hand or the bottom of a small glass and firmly press on the potato until it begins to break. You don't need to completely flatten the potatoes; just press them until they begin to break apart.
    • Drizzle the potatoes with oil and season with salt and pepper. Gently toss them to coat. It's ok if some of the potatoes fall apart.
    • Heat your griddle to medium-low. Arrange the potatoes in a single layer and cook, with the griddle covered if possible, flipping occasionally, until golden brown and crispy, about 30 minutes total.
    • While the potatoes are cooking, mix the melted butter and herbs in a small bowl. During the last 5 minutes of cooking, brush generously with the herb butter.
    • Transfer the potatoes to a platter and serve immediately.

    Video

    Notes

    • Don't let them cool completely--After boiling the potatoes, let them cool slightly but don't let them cool completely. They'll be easiest to smash when they're still a little warm.
    • Adjust the temperature--If your potatoes are crisping up too quickly or getting too dark, reduce the heat. I find that for a covered Blackstone griddle, medium-low heat works best. If you're using an uncovered griddle, the temperature may need to be closer to medium.
    • Storage and reheating--Store leftover smashed potatoes in a sealed container in the fridge or your cooler for up to 3 days. Reheat over low heat on the griddle, or in a warm oven.
    • Dietary--This recipe is suitable for gluten-free and vegetarian diets. To make it vegan or dairy-free, use oil instead of butter.

    Nutrition

    Serving: 1portionCalories: 318kcalCarbohydrates: 40gProtein: 4gFat: 16gCholesterol: 15mgFiber: 6gSugar: 3g
    Keyword blackstone cooking, crispy potatoes
    Tried this recipe?Let us know how it was!

    July 31, 2024 Collections

    11 Homemade BBQ Sauce Recipes

    Skip the preservative-laden bottled stuff from the store and whip up one of these 11 amazing homemade bbq sauce recipes. Choose from classics like Alabama white sauce or traditional bbq sauce, or find some new favorites infused with peach, cherry, or spicy mustard.

    1
    Recipe and photo credit: State of Dinner
    Texas BBQ Sauce
    Elevate your BBQ game with our easy-to-make Texas BBQ sauce recipe. Sweet, tangy, and slightly spicy, it’s the perfect complement to any meat.
    Get the recipe: Texas BBQ Sauce
    2
    A jar of hot honey bbq sauce with a spoon held above it.
    Hot Honey BBQ Sauce
    This homemade spicy honey bbq sauce is made with tomato sauce, hot honey, vinegar, and spices. It's easy to make and ready in just 15 minutes.
    Get the recipe: Hot Honey BBQ Sauce
    3
    Recipe and photo credit: Vindulge
    Alabama White BBQ Sauce
    This Alabama white BBQ sauce is all about tang, a little sweet, and a little heat. This white BBQ sauce is perfect with chicken and wings.
    Get the recipe: Alabama White BBQ Sauce
    4
    A small jar filled with peach bbq sauce with two peaches and two serrano peppers next to it.
    Peach Bourbon BBQ Sauce
    This easy homemade bbq sauce transforms sweet summer peaches into a grilling staple. A little bit of serrano pepper and bourbon give it a pleasant kick.
    Get the recipe: Peach Bourbon BBQ Sauce
    5
    Recipe and photo credit: Killing Thyme
    Smoky Maple BBQ Sauce
    Sweet, smoky, saucy goodness is what you get with this homemade BBQ sauce. Perfect for all meats & veggies—grilled, slow cooked, or air fried!
    Get the recipe: Smoky Maple BBQ Sauce
    6
    Recipe and photo credit: Peel with Zeal
    Spicy Mustard BBQ Sauce
    Make a delicious spicy mustard BBQ sauce for your grilled chicken, pork, or shrimp. This traditional South Carolina sauce adds the perfect tangy kick to your cookout!
    Get the recipe: Spicy Mustard BBQ Sauce
    7
    Korean BBQ Sauce
    Recipe and photo credit: Moon and Spoon and Yum
    Korean BBQ Sauce
    Korean BBQ sauce is a fantastic addition to vegetarian cooking. It brings a sweet and savory kick to Asian and non-Asian dishes alike.
    Get the recipe: Korean BBQ Sauce
    8
    Recipe and photo credit: Nuts and Twigs
    Cherry BBQ Sauce
    Sweet, tangy, and super easy to make, this homemade Cherry BBQ Sauce is everything you want in a BBQ sauce. With just a handful of ingredients, it's the perfect mix of sweet cherries and smoky goodness.
    Get the recipe: Cherry BBQ Sauce
    9
    Recipe and photo credit: Vindulge
    Vinegar Based BBQ Sauce (Carolina Style)
    An easy and basic homemade Vinegar Based BBQ Sauce. This recipe is inspired by Carolina BBQ and is great on low and slow pork and chicken.
    Get the recipe: Vinegar Based BBQ Sauce
    10
    Recipe and photo credit: Pinch Me I'm Eating
    Carolina Gold BBQ Sauce
    Sweet and tangy mustard-based Carolina Gold BBQ sauce is the perfect match for pulled pork and comes together in only five minutes!
    Get the recipe: Carolina Gold BBQ Sauce
    11
    Classic BBQ Sauce
    Recipe and photo credit: Simply Stacie
    Classic BBQ Sauce
    This classic homemade BBQ sauce is tangy, sweet, and smoky and is easy to whip up with simple ingredients. Slather it on chicken, steak, or ribs.
    Get the recipe: Classic BBQ Sauce

    July 29, 2024 Desserts

    Grilled Skillet Peach Cobbler

    This easy skillet peach cobbler recipe is prepared in your cast iron skillet and cooked on the grill. It's an excellent grilled summer dessert that tops sweet juicy peaches with tender biscuit dough for a truly irresistible treat.

    A whole skillet peach cobbler with two spoons resting on top.

    Peach season is fleeting, and while there are so many pies and tarts to be enjoyed, it also coincides with the hottest days of the year. Which is why I turn to the grill again and again for making simple cast iron skillet desserts like grilled plum galette and this easy skillet peach cobbler. It works just as well as the oven, the kitchen stays cool, and I get to satisfy my peach craving.

    [feast_advanced_jump_to]

    Why You'll Love This Recipe

    • It's easy to make and requires minimal dishes. No stand mixer required!
    • You can make it in your oven or on the grill, making it ideal for those days when it's too hot to turn on the oven.

    Ingredients and Substitutions

    Ingredients for skillet peach cobbler--peaches, milk, butter, baking powder, flour, sugar, spices, and lemon.
    • Peaches--Look for firm unblemished fragrant peaches that give slightly when gently squeezed. Avoid peaches that have bruised spots or are mushy. Got extras? Make peach melba overnight oats for a special breakfast treat!
    • Spices--I use a combination of cinnamon and ginger because the warm notes pair beautifully with the sweet peaches.
    • Butter--If you need to use salted butter, reduce the amount of salt in the cobbler topping to ½ teaspoon. Keep your butter cold until you're ready to use it as it will be easier to work into the dough.
    • Milk--You can use any milk you have on hand, whether skim, whole, or non-dairy. You can even use light cream or half and half. The higher the fat content, the more tender your cobbler topping will be.

    Important Steps

    A bowl of sliced peaches tossed with flour, sugar, and spices.
    Milk being added to a flour and butter mixture.
    1. Combine the sliced peaches with 2 tablespoons of flour, brown sugar, lemon juice, cinnamon, ginger, and a pinch of salt. Toss to evenly coat the peaches.
    2. Whisk the flour, granulated sugar, baking powder, and salt in a medium bowl. Use your fingers or a pastry cutter to work the butter into the flour mixture. Stir in the milk until the dough just comes together.
    An uncooked skillet peach cobbler.
    A skillet peach cobbler on a grill grate.
    1. Butter a cast iron skillet. Arrange the peaches in an even layer in the skillet and top with the biscuit dough.
    2. Grill over indirect heat until the cobbler is lightly browned and the peaches are juicy and bubbling.

    FAQs

    Can I make this in the oven?

    Yes. Follow the instructions in the recipe and bake it in a preheated 375°F oven until the cobbler topping is lightly browned, about 30 minutes.

    Can I use a different size skillet?

    You can use a slightly smaller (10-inch) skillet for this recipe, however, the cooking time may be a little longer. I don't recommend using a larger skillet as the filling will be spread too thinly.

    How should I serve my grilled peach cobbler?

    Serve warm, topped with a dollop of whipped cream, or a scoop of vanilla ice cream.

    Tips and Troubleshooting

    • Avoid lifting the lid on the grill as much as possible as the temperature will fluctuate each time it's opened.
    • I find that it typically takes a little longer to cook the cast iron peach cobbler on the grill than in the oven.
    • Store leftover cobbler loosely covered at room temperature for up to 24 hours, or transfer to a sealed container and store in your fridge for up to 3 days.
    • Leftover grilled peach cobbler makes a great breakfast!
    A portion of skillet peach cobbler in a bowl with ice cream and the remaining cobbler in the skillet.

    More Skillet Dessert Recipes You'll Love

    A whole cast iron skillet blueberry cake, dusted with powdered sugar, with a sieve full of powdered sugar on the side.
    Cast Iron Skillet Blueberry Cake
    A cast iron skillet. filled with apple crisp and two scoops of ice cream on top.
    Skillet Bourbon Apple Crisp

    Tried This Recipe?

    If you've tried this recipe, please leave a comment below. Follow me on Instagram, Facebook, YouTube, or Pinterest for more great camping and grilling recipes.

    Recipe

    A whole skillet peach cobbler with two spoons resting on top.

    Grilled Skillet Peach Cobbler

    A woman's face.Angie Zoobkoff
    Enjoy this easy cast iron skillet peach cobbler, topped with tender biscuit dough without heating up your kitchen.
    No ratings yet
    Print Recipe Pin Recipe
    Prep Time 25 minutes mins
    Cook Time 35 minutes mins
    Total Time 1 hour hr
    Course Dessert
    Cuisine American
    Servings 6 servings
    Calories 345 kcal

    Equipment

    • 12-inch cast iron skillet

    Ingredients
      

    For the peaches

    • ⅓ cup light brown sugar
    • 2 tablespoons all-purpose flour
    • 1 tablespoon lemon juice
    • ½ teaspoon cinnamon
    • ¼ teaspoon ground ginger
    • Pinch salt
    • 6 cups sliced fresh peaches

    For the cobbler topping

    • 1½ cups all-purpose flour
    • ⅓ cup granulated sugar
    • 1½ teaspoons baking powder
    • ¾ teaspoon salt
    • 6 tablespoons unsalted butter cubed, plus more for the skillet
    • ½ cup milk

    Instructions
     

    Make the peach layer

    • Preheat a grill to 375°F and prepare it for indirect cooking. (I use two low burners on either side of the grill.)
    • In a large bowl, combine the brown sugar, flour, lemon juice, spices, and salt. Add the peaches and toss well to coat them evenly.

    Make the cobbler topping

    • In a medium bowl, whisk the flour, sugar, baking powder, and salt together.
    • Add the cubed butter and using a pastry cutter or your fingers, work it in until it's the size of peas and is evenly distributed through the flour mixture.
    • Pour in the milk and use a fork to stir just until the dough is evenly moistened. Don't overwork the dough.

    Assemble and cook the cobbler

    • Butter a 12-inch cast iron skillet. Dump the peaches into the buttered skillet and smooth into an even layer.
    • Drop spoonfuls of the dough over the peach filling. There's no need to be too exact about this, just aim for an even layer over the top. It's ok if there are a few gaps here and there.
    • Place the skillet over indirect heat and grill until the cobbler topping is a light golden brown and the peach filling is bubbling, about 35 minutes.
    • Carefully remove the hot skillet from the grill and let cool slightly before serving.

    Notes

    • Don't peek--Avoid lifting the lid on the grill as much as possible as the temperature will fluctuate each time it's opened.
    • Cooking time--I find that it typically takes a little longer to cook the cobbler on the grill than in the oven.
    • Storage--Store leftover cobbler loosely covered at room temperature for up to 24 hours, or transfer to a sealed container and store in your fridge for up to 3 days.

    Nutrition

    Serving: 1portionCalories: 345kcalCarbohydrates: 56gProtein: 4gFat: 12gCholesterol: 32mgSodium: 405mgFiber: 1gSugar: 29g
    Keyword cobbler, grilled dessert, peach desserts
    Tried this recipe?Let us know how it was!

    July 26, 2024 Everyday Staples

    Peach Bourbon BBQ Sauce

    This easy peach bourbon bbq sauce recipe pairs fresh summer peaches with some peppery heat and a boozy kick to create an irresistible condiment that you'll want to grab from the fridge every time you fire up the grill.

    A small jar filled with peach bbq sauce with two peaches and two serrano peppers next to it.

    I have absolutely no control at the farmer's market during peach season, and every year I convince myself that 40, 60, 80 pounds of peaches isn't too much. A week later, after questioning my own sanity and filling the freezer with peach slices for smoothies, canning peach halves, and gorging on fresh peach cobbler and pie, there are always still a few of those gorgeous fruits left. Those are destined for quick peach salsas and this easy homemade bbq sauce.

    If you've got a few peaches on hand and a free half hour, make this recipe for peach bourbon barbecue sauce. It's a little sweet, a little spicy, and at the height of peach season, it's my absolute favorite way to glam up grilled chicken wings or ribs.

    [feast_advanced_jump_to]

    Why You'll Love This Recipe

    • It's an easy-to-make homemade condiment and is ready in just 30 minutes.
    • It's a fantastic way to add flavor to grilled chicken or ribs.
    • You can make it in advance and pack it along on camping trips.

    Ingredients and Substitutions

    Ingredients for peach bourbon bbq sauce--peaches, paprika, serrano, bourbon, Dijon, vinegar, brown sugar, and Worcestershire sauce.
    • Peaches--Look for firm peaches that give slightly when squeezed but aren't soft. Avoid any fruit that has dark, mushy spots.
    • Serrano pepper--I recommend removing the seeds and white pith from inside the pepper before dicing. This will give you a pleasant heat in your sauce. If you are spice-averse, feel free to skip the pepper. You could also use a jalapeño, if you prefer a milder heat level.
    • Bourbon--You don't need to break the bank for this recipe. Use a bourbon that you like the taste of but it's not necessary to splurge on a fancy bottle.

    How to Make Peach Barbecue Sauce

    A saucepan filled with diced peaches in liquid.
    Peach bbq sauce in a blender.
    1. Combine all of the ingredients in a medium saucepan and bring to a simmer. Cook until the peaches are very soft.
    2. Transfer the contents of the saucepan to a high-speed blender and blitz until smooth.

    FAQs

    How long will this sauce stay fresh?

    If stored in a sealed container in the refrigerator, this sauce will keep for up to 2 weeks. For longer storage, pop it in the freezer.

    Is this recipe suitable for canning?

    This peach whiskey bbq sauce recipe can be safely processed in a hot water bath for 15 minutes, adjusting for altitude. However, since it makes a small batch, I generally find it easier to freeze instead of processing.

    Can you freeze peach bbq sauce?

    Yes. Freeze the sauce in a freezer-safe container or jar for up to 3 months. When freezing, always leave some room in your container for expansion. Thaw in the refrigerator overnight before using.

    Tips and Troubleshooting

    • If your sauce is too thick after blending, drizzle in a little water until it reaches your desired consistency. If it's too thin, simmer it over medium-low heat until it reduces and thickens.
    • This recipe is suitable for dairy-free diets.
    A scalloped bowl filled with peach bbq sauce with two peaches and two serrano peppers next to it.

    More Homemade Condiment Recipes You'll Love

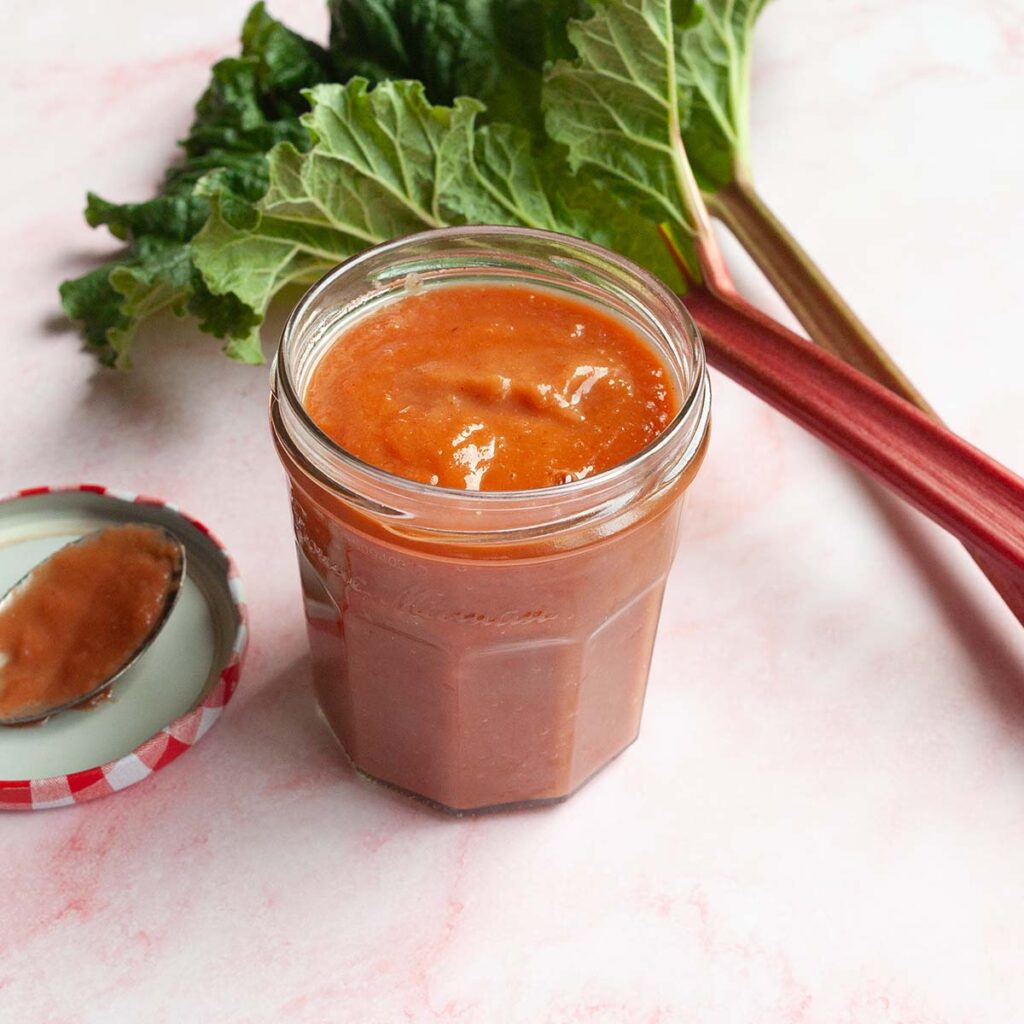
    A jar of rhubarb bbq sauce with rhubarb stalks in the background.
    Rhubarb BBQ Sauce
    A jar filled with huckleberry sauce, with oranges and huckleberries in the background.
    Huckleberry Sauce

    Tried This Recipe?

    If you've tried this recipe, please leave a comment below. Follow me on Instagram, Facebook, YouTube, or Pinterest for more great camping and grilling recipes.

    Recipe

    A small jar filled with peach bbq sauce with two peaches and two serrano peppers next to it.

    Peach Bourbon BBQ Sauce

    A woman's face.Angie Zoobkoff
    This easy homemade bbq sauce transforms sweet summer peaches into a grilling staple. A little bit of serrano pepper and bourbon give it a pleasant kick.
    No ratings yet
    Print Recipe Pin Recipe
    Prep Time 15 minutes mins
    Cook Time 15 minutes mins
    Total Time 30 minutes mins
    Course Condiment
    Cuisine American
    Servings 1.25 cups
    Calories 39 kcal

    Equipment

    • Blender

    Ingredients
      

    • 3 medium peaches peeled and diced (about 2 cups or 1 lb)
    • ½ serrano pepper seeded and diced
    • ½ cup light brown sugar
    • ¼ cup apple cider vinegar
    • 3 tablespoons bourbon
    • 1 tablespoon Dijon mustard
    • 1 tablespoon Worcestershire sauce
    • 1 teaspoon smoked paprika
    • ¼ teaspoon salt

    Instructions
     

    • Combine all of the ingredients in a medium saucepan.
    • Bring to a simmer over medium heat. Reduce heat to medium low and simmer until the peaches are very soft, about 15 minutes.
    • Carefully transfer the contents of the saucepan to a high speed blender. Blitz until smooth.
    • Transfer the sauce to a sealed container or jar and cool completely before refrigerating. Use within 2 weeks or freeze for longer storage.

    Notes

    • Adjust the consistency--If your sauce is too thick after blending, drizzle in a little water until it reaches your desired consistency. If it's too thin, simmer it over medium-low heat until it reduces and thickens.
    • Dietary--This recipe is suitable for dairy-free diets.

    Nutrition

    Serving: 1tablespoonCalories: 39kcalCarbohydrates: 8gSodium: 50mgFiber: 1gSugar: 8g
    Keyword homemade bbq sauce, homemade condiments
    Tried this recipe?Let us know how it was!

    July 24, 2024 Camping

    18 Best Vegetarian Camping Recipes

    Whether you're committed to a full-time vegetarian diet or just want to incorporate a meatless meal occasionally, this collection of 18 vegetarian camping meal ideas includes breakfasts, salads, mains, and sides that are certain to satisfy.

    1
    Recipe and photo credit: Killing Thyme
    Vegetarian Breakfast Tacos
    These healthy breakfast tacos are stuffed with black beans and eggs, making them the perfect weekend breakfast!
    Get the recipe: Vegetarian Breakfast Tacos
    2
    Two hash brown patties topped with sliced avocado, everything bagel spice, and hot sauce.
    Hash Brown Avocado Toast
    This fun variation on regular avocado toast uses crispy hash brown patties and tops them with creamy avocado, everything bagel seasoning, and hot sauce, if you like. It's an easy handheld breakfast, perfect for any day of the week.
    Get the recipe: Hash Brown Avocado Toast
    3
    A stack of pancakes, maple syrup, and blueberries on a plate with blueberries and bacon in the background.
    Easy Camping Pancakes
    These fluffy camping pancakes, made on your cast-iron skillet or griddle, are soft and buttery, with crisp edges. Top them with plenty of maple syrup for the ultimate breakfast treat.
    Get the recipe: Cast Iron Skillet Pancakes
    4
    Recipe and photo credit: Small Town Woman
    Cowboy Caviar
    Tasty Cowboy caviar made with beans, black eyed peas, and fresh vegetables all in a lime vinaigrette. Serve as a dip, or spoon over grilled fish, grilled chicken, omelettes, tacos, and burritos.
    Get the recipe: Cowboy Caviar
    5
    A white bowl filled with pasta salad.
    Camping Pasta Salad
    This make-ahead tortellini salad with artichokes, tomatoes, olives, and creamy Italian dressing is a summer staple for camping, potlucks, and picnics.
    Get the recipe: Camping Pasta Salad
    6
    A bowl filled with raw vegetable marinated salad.
    Overnight Marinated Vegetable Salad
    This easy marinated salad is a colorful combination of crunchy raw vegetables tossed in a simple vinaigrette dressing. Healthy never tasted so good.
    Get the recipe: Marinated Vegetable Salad
    7
    A person pulling an English muffin grilled cheese sandwich apart.
    English Muffin Grilled Cheese
    Your favorite grilled cheese sandwich just got even better thanks to two(!) types of cheese and a crispy toasted English muffin.
    Get the recipe: English Muffin Grilled Cheese
    8
    Recipe and photo credit: Serene Trail
    Vegan Walking Tacos (Frito Pie)
    Crunchy corn chips are smothered with chili beans and loads of fresh veggies. These vegan walking tacos (Frito pie) are quick, easy, customizable, and a crowd favorite! They are the perfect meal for around the campfire.
    Get the recipe: Vegan Walking Tacos
    9
    Gnocchi, tomatoes, mozzarella and basil in a foil packet on a plate.
    Caprese Gnocchi Foil Packets
    Classic caprese salad flavors collide with tender potato gnocchi to create an easy vegetarian foil packet meal.
    Get the recipe: Caprese Gnocchi Foil Packets
    10
    Recipe and photo credit: Happy Kitchen
    Perfect Vegan Sloppy Joes
    These vegan sloppy joes are the perfect addition to your vegan sandwich collection! Satisfy your craving for classic comfort food with a healthy twist.
    Get the recipe: Vegan Sloppy Joes
    11
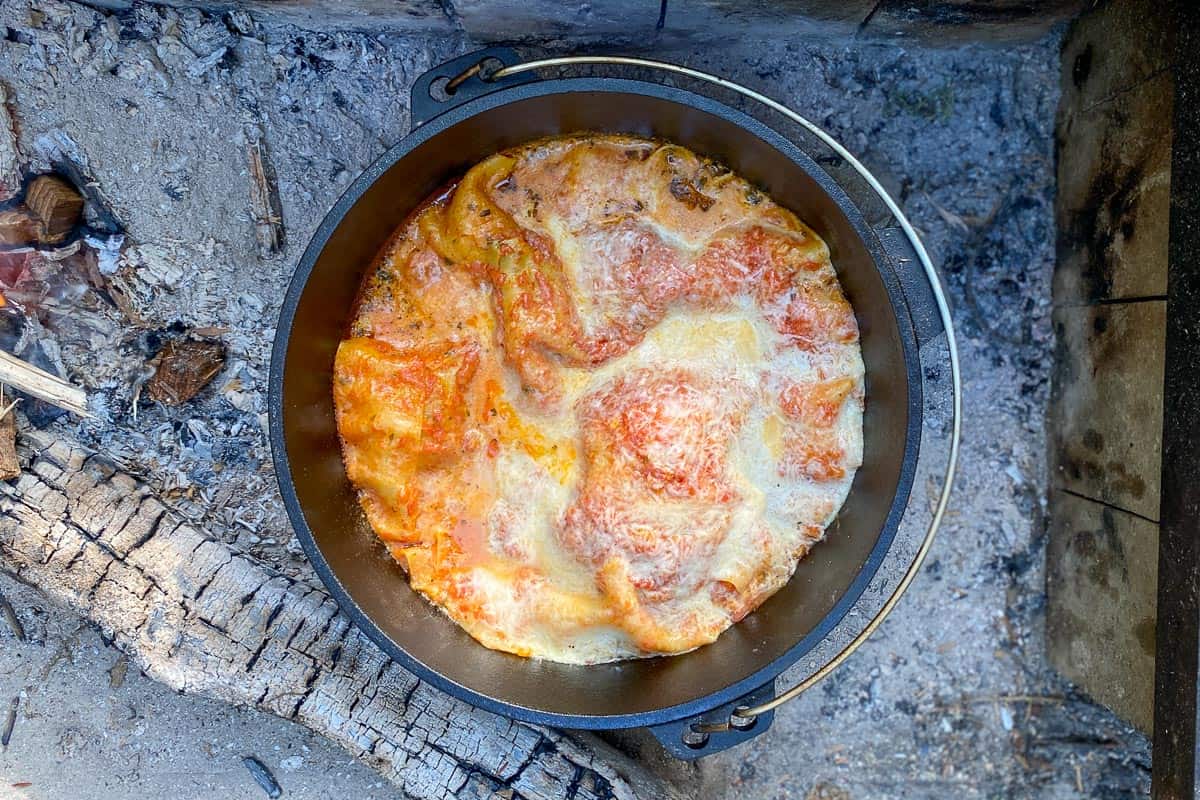
    Campfire Vegetarian Lasagna
    Recipe and photo credit: Champagne Tastes
    Campfire Vegetarian Lasagna
    This easy vegetarian campfire lasagna is cooked in a cast iron Dutch oven, and is perfect for camping meals and cookouts.
    Get the recipe: Campfire Vegetarian Lasagna
    12
    Creamy mac and cheese in a pot with a wooden spoon resting in it.
    Camping Mac and Cheese
    This creamy one-pot macaroni and cheese is made in just one pot with a handful of pantry ingredients and requires only 20 minutes of your time.
    Get the recipe: Dutch Oven Mac and Cheese
    13
    Recipe and photo credit: Champagne Tastes
    Campfire Red Lentil Stew
    This easy vegan campfire Dutch oven recipe features an easy take on Indian dal. These spiced red lentils are cooked in a Dutch oven right on the campfire!
    Get the recipe: Campfire Red Lentil Stew
    14
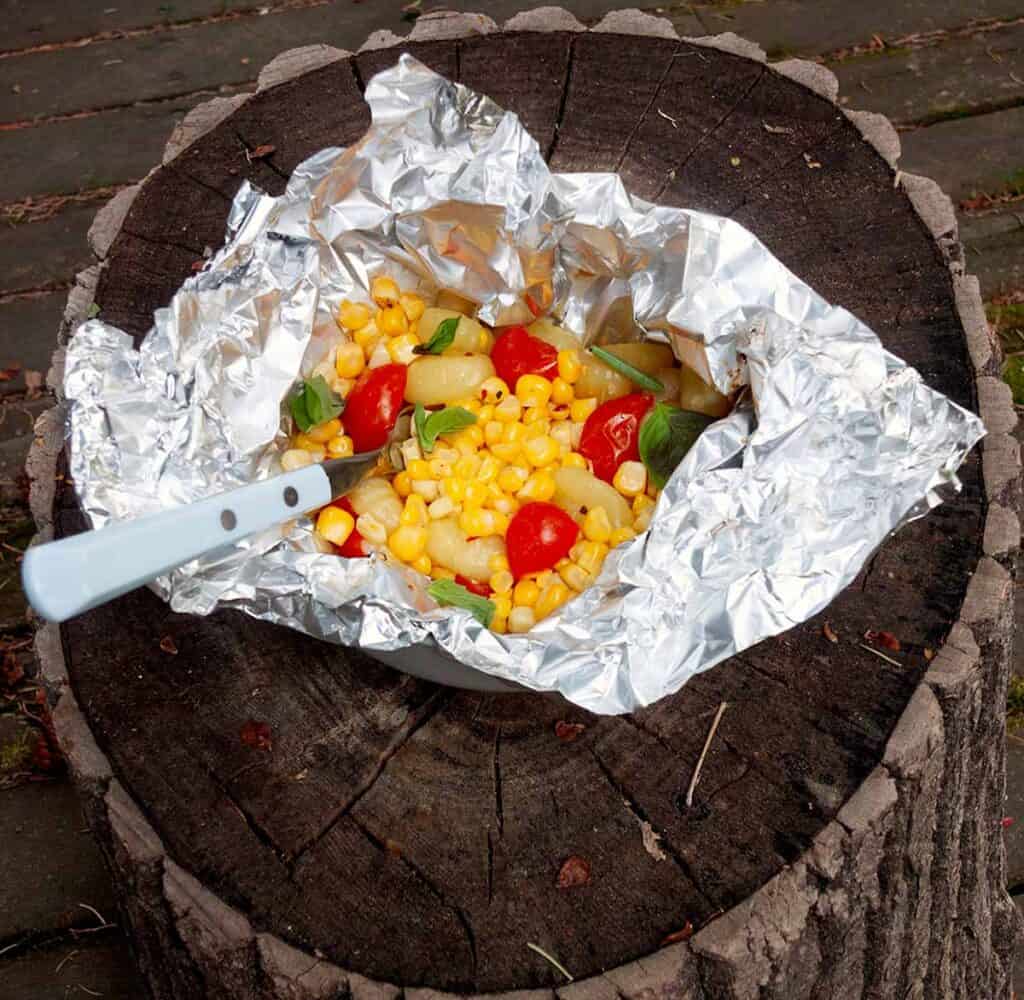
    An open foil packet filled with gnocchi, corn, tomatoes, and basil on a wooden tree stump.
    Corn and Tomato Gnocchi Foil Packets
    These vegetarian campfire foil packets are made with tender gnocchi, sweet summer tomatoes and corn, all bathed in a buttery sauce. It's fun, easy camping food that requires minimal cooler space and uses only one bowl.
    Get the recipe: Corn and Tomato Gnocchi Foil Packets
    15
    Recipe and photo credit: Moon and Spoon and Yum
    Grilled Foil Packet Adobo Potatoes
    Every bite of these delicious grilled foil packet potatoes with adobo seasoning will surely delight everyone at the dinner (or camping) table!
    Get the recipe: Grilled Foil Packet Adobo Potatoes
    16
    Recipe and photo credit: The Forked Spoon
    Easy Grilled Veggie Skewers
    These veggie skewers are grilled to perfection and drizzled with tangy balsamic vinegar and brushed with a fresh garlic herb sauce.
    Get the recipe: Grilled Veggie Skewers
    17
    A shucked ear of corn on top of several other unshucked cooked ears of corn.
    Campfire Corn
    Minimal effort and sweet buttery flavor make this smoky campfire corn on the cob the perfect camping side dish.
    Get the recipe: Campfire Corn
    18
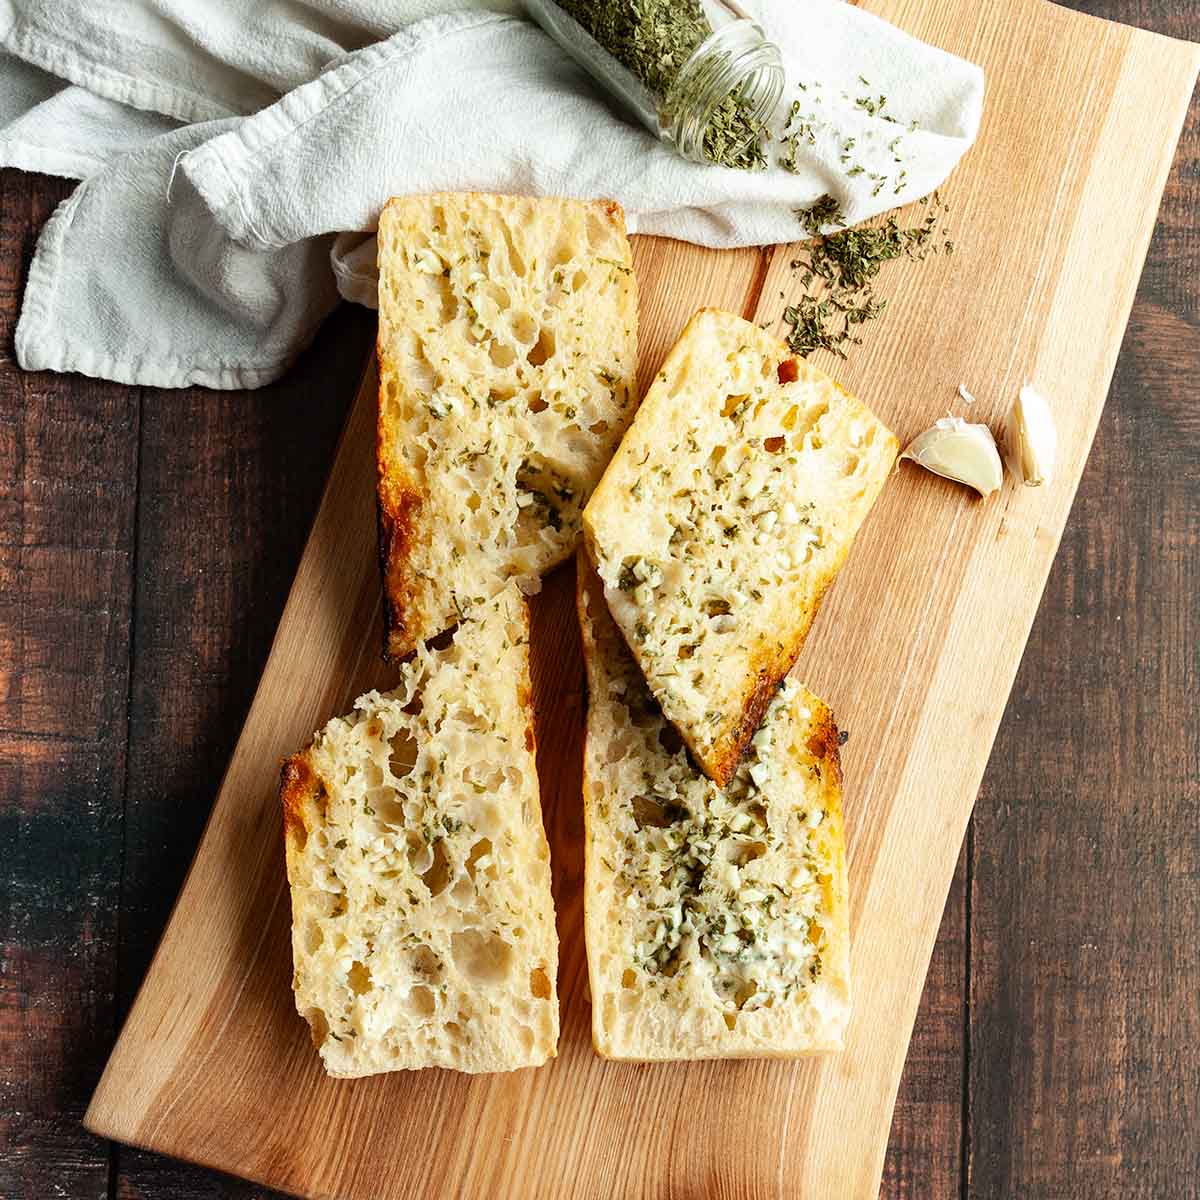
    Four pieces of toasted garlic bread on a wooden cutting board.
    Campfire Garlic Bread
    This easy camping garlic bread recipe is made with homemade garlic butter that's schmeared over bread, and the whole shebang is wrapped in foil and toasted over the campfire. It's an easy camping side dish that goes well with pasta, stew, chili, and soup.
    Get the recipe: Campfire Garlic Bread

    July 22, 2024 Camping

    Campfire Corn

    This campfire corn on the cob is an easy summer camping side dish that's super simple to make. This sweet, juicy corn needs only a slather of butter and a sprinkle of salt to steal the spotlight from everything else on the table.

    A shucked ear of corn on top of several other unshucked cooked ears of corn.

    If you've never tried cooking corn on a campfire, you're in for a treat. Soaking and cooking it in the husk ensures that the corn stays juicy and sweet, with no burned spots.

    [feast_advanced_jump_to]

    Why This Recipe is Great for Camping

    • It requires only 3 ingredients and is simple to make.
    • There's minimal dishes to clean up.

    Ingredients and Substitutions

    Ingredients for campfire corn--corn, butter, and salt.
    • Corn--Choose corn that has bright green husks that are closed tightly. Avoid ears that have dried out husks or are brown or mushy.

    How to Cook Corn on a Campfire

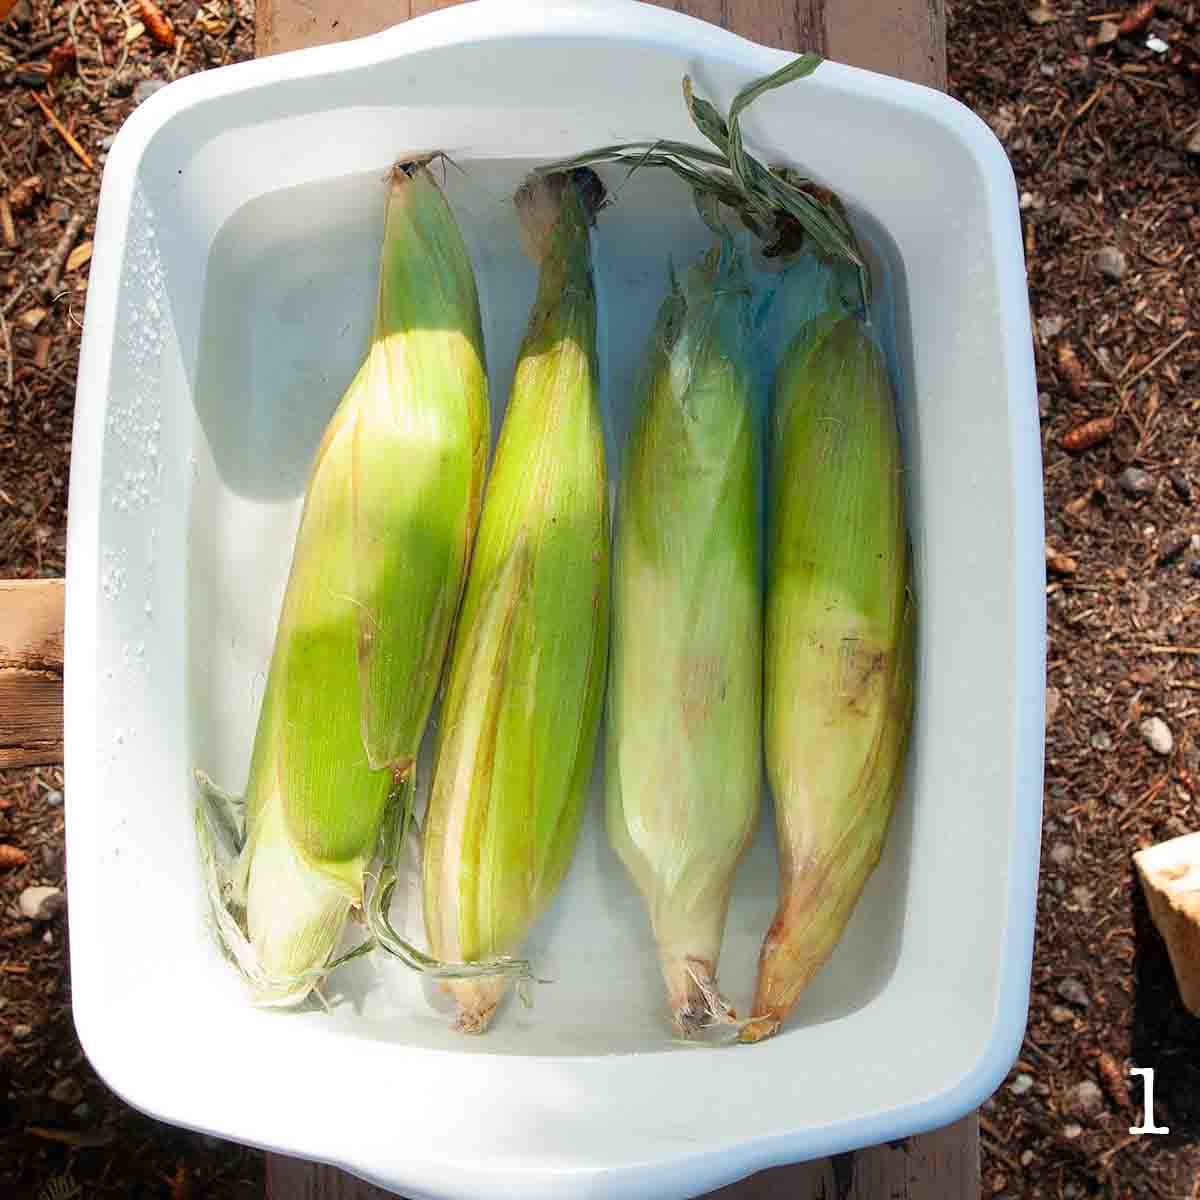
    Four ears of corn in a bucket of water.

    1. Soak the corn in its husk.

    Five ears of corn cooking on a campfire grate.

    2. Cook the corn on a campfire grate set over hot coals, turning occasionally, until cooked through. Shuck and serve with butter and salt.

    FAQs

    Can I make this on my grill?

    Yes. To make grilled corn, follow the directions for soaking the corn then grill it over medium-low heat, turning occasionally, until tender.

    What's the best way to store corn on the cob?

    Regardless of how you're planning on cooking it, keep your corn on the cob in its husk in the refrigerator or your cooler until you're ready to cook it. This will prevent the corn from turning starchy. It will be best if cooked within 3 days.

    My corn is already shucked. Can I still make this?

    Yes. If you've purchased pre-shucked corn, coat each ear with a little butter and wrap them individually in foil. Cook over the hot coals until tender, turning occasionally. Cooking in foil will take less time than cooking in the corn husk.

    How can I tell if it's ready?

    To check your corn, carefully pull back part of the husk to expose the top of the corn. The kernels should be plump, tender, and bright yellow.

    Tips and Troubleshooting

    • After peeling the husk back from the cooked corn cob, leave it attached and use it as a handle.
    • Don't cook over open flame. This will cause the corn to cook unevenly. Always use hot coals, which will provide an even heat. The cooking time will be dependent on how hot your coals are and how close the corn is to the heat.
    • Don't worry if the husks begin to turn black. The inside is well protected by the many layers of husk.
    • This recipe is suitable for gluten-free and vegetarian diets.
    Four ears of corn cooking over a campfire grate.

    More Camping Recipes You'll Love

    An open foil packet filled with gnocchi, corn, tomatoes, and basil on a wooden tree stump.
    Corn and Tomato Gnocchi Foil Packets
    A foil packet with shrimp, steak, corn, red onion and a piece of garlic bread on top.
    Surf and Turf Foil Packets

    Tried This Recipe?

    If you've tried this recipe, please leave a comment below. Follow me on Instagram, Facebook, YouTube, or Pinterest for more great camping and grilling recipes.

    Recipe

    A shucked ear of corn on top of several other unshucked cooked ears of corn.

    Campfire Corn

    A woman's face.Angie Zoobkoff
    Minimal effort and sweet buttery flavor make this smoky campfire corn on the cob the perfect camping side dish.
    No ratings yet
    Print Recipe Pin Recipe
    Prep Time 1 hour hr
    Cook Time 25 minutes mins
    Total Time 1 hour hr 25 minutes mins
    Course Side Dish
    Cuisine American
    Servings 5 servings
    Calories 225 kcal

    Ingredients
      

    • 5 ears corn in the husk
    • 5 tablespoons butter
    • Table salt

    Instructions
     

    • Place the unshucked ears of corn in a large bucket, tub, or bowl and cover with water. Soak for 1 hour.
    • While the corn is soaking, prepare a campfire and let it burn down to hot coals. It will take you about 20 minutes to develop coals after starting the fire.
    • Place the corn directly on the campfire grate set over the hot coals. Cook the corn, turning occasionally, and adding more coals as needed to maintain a medium-high heat, until tender, 25 to 30 minutes.
    • Pull the husks back from the corn and serve with butter and a sprinkling of salt.

    Video

    Notes

      • Built in handle--After peeling the husk back from the cooked corn, leave it attached and use it as a handle.
      • Avoid open flames--Don't cook over open flame. This will cause the corn to cook unevenly. Always use hot coals, which will provide an even heat. The cooking time will be dependent on how hot your coals are and how close the corn is to the heat.
      • Char happens--Don't worry if the husks begin to turn black. The inside is well protected by the many layers of husk.
      • Dietary--This recipe is suitable for gluten-free and vegetarian diets.

    Nutrition

    Serving: 1earCalories: 225kcalCarbohydrates: 27gProtein: 5gFat: 13gCholesterol: 31mgFiber: 4gSugar: 5g
    Keyword corn on the cob, easy camping sides
    Tried this recipe?Let us know how it was!

    July 19, 2024 Breakfast

    Huckleberry Sauce

    This sweetly spiced huckleberry sauce recipe showcases the wild berry in the best possible way. Spoon it over skillet pancakes, spread it onto toast, dip your Blackstone Monte Cristo in it, or drizzle it over vanilla ice cream or cheesecake for an elevated version of your everyday favorites.

    A jar filled with huckleberry sauce, with oranges and huckleberries in the background.

    Recipe at a Glance: Huckleberry Sauce

    • DETAILS
      • Total Time: 15 minutes
      • Preparation method: Stovetop
    • HIGHLIGHTS
      • This huckleberry sauce recipe is a simple homemade condiment made from fresh or frozen huckleberries.
      • It's quick to make and will last for a few weeks in the fridge or can be frozen for longer storage.
      • Use this sweet sauce as a topping for pancakes, waffles, ice cream, cheesecake, and more.

    Although my family has spent many hours picking huckleberries on camping trips and hikes, we were recently gifted a bucket that we didn't have to work for. Most of them were greedily consumed out of hand on every trip past the refrigerator, but I was able to stash some in the freezer, and the rest were transformed into this simple sauce that will elevate everything from breakfast to dessert.

    [feast_advanced_jump_to]

    Ingredients and Substitutions

    Ingredients for huckleberry sauce--huckleberries, cardamom, orange, cinnamon, sugar, and cornstarch.
    • Orange--I use the juice and zest of the orange to complement the berries and add flavor to the sauce. You can use any type of medium-sized orange, such as Navel, Cara Cara, or Valencia. Your orange should give you about 2 tablespoons of zest and 4 to 6 tablespoons of juice. You will need 3 tablespoons of juice for the recipe.
    • Huckleberries--If you live in the Pacific Northwest, you may find these fresh at local markets and farm stands. Frozen will work fine too, and you can order frozen berries online. You can also substitute blueberries.
    • Sugar--This adds sweetness to the sauce and can be adjusted based on your personal preference and the sweetness of your berries.
    • Cornstarch--This is used to thicken the sauce. If you prefer a very runny sauce, you can omit it, or add a little extra if you want it to thicken to a spreadable consistency.

    How to Make Huckleberry Sauce

    A cornstarch slurry in a small bowl.

    1. Stir the cornstarch and 1 tablespoon of orange juice together in a small bowl.

    A saucepan with huckleberries, sugar, and orange zest.

    2. Combine the huckleberries, orange zest, sugar, and spices in a medium saucepan.

    A saucepan with simmering huckleberry sauce in it.

    3. Bring to a simmer over medium-low heat and cook until the berries begin to burst and release their juices.

    Cornstarch slurry being poured into a saucepan of huckleberry sauce.

    4. Pour in the cornstarch slurry and stir to combine. Cook until the sauce is thickened.

    FAQs

    Can I use frozen huckleberries?

    Definitely. You don't need to thaw them before cooking, but the cooking process may take an extra minute or two.

    Can I substitute blueberries?

    Yes. Although huckleberries are smaller and not as sweet as blueberries, they can be substituted with 2 cups of fresh or frozen blueberries. If you are making blueberry sauce, you may need to reduce the sugar slightly.

    How to Use Huckleberry Sauce

    This sweet berry sauce can be used in many ways. Here are a few of my favorites:

    • Spread it onto toast or scones for a breakfast treat.
    • Drizzle it over ice cream or cheesecake for a simple dessert.
    • Use it as a dip for your Monte Cristo sandwich.
    • Spoon it over pancakes or cinnamon roll French toast.
    • Layer it with Greek yogurt and granola to create a breakfast (or dessert) parfait.
    • Mix it into overnight oats for an easy breakfast.
    • Offer it as an edible gift when visiting friends.

    Storage & Freezing

    Keep your sauce in a sealed jar in the fridge for up to 2 weeks. For longer storage, spoon the sauce into a freezer safe container or resealable bag and freeze for up to 3 months. Thaw in the fridge overnight before using.

    Tips and Troubleshooting

    • If your sauce thickens too much, stir in extra orange juice or water, 1 tablespoon at a time until you reach your desired consistency.
    • Store huckleberry sauce in a sealed container in the fridge for up to 2 weeks.
    • This huckleberry compote is suitable for gluten-free, dairy-free, and vegan diets.
    A bowl of vanilla ice cream with huckleberry sauce on top.

    More Homemade Sauce Recipes You'll Love

    A jar of hot honey bbq sauce with a spoon held above it.
    Hot Honey BBQ Sauce
    A jar of rhubarb bbq sauce with rhubarb stalks in the background.
    Rhubarb BBQ Sauce

    Tried This Recipe?

    If you've tried this recipe, please leave a comment below. Follow me on Instagram, Facebook, YouTube, or Pinterest for more great camping and grilling recipes.

    Recipe

    A jar filled with huckleberry sauce, with oranges and huckleberries in the background.

    Huckleberry Sauce

    A woman's face.Angie Zoobkoff
    Use this sweetly spiced berry sauce to elevate everything from breakfast to dessert.
    No ratings yet
    Print Recipe Pin Recipe
    Prep Time 5 minutes mins
    Cook Time 10 minutes mins
    Total Time 15 minutes mins
    Course Condiment
    Cuisine American
    Servings 16 tablespoons
    Calories 31 kcal

    Ingredients
      

    • 1 medium orange zested and juiced
    • 1 tablespoon cornstarch
    • 2 cups huckleberries
    • ¼ cup granulated sugar
    • ¼ teaspoon ground cinnamon
    • ⅛ teaspoon ground cardamom

    Instructions
     

    • Mix the cornstarch with 1 tablespoon orange juice in a small bowl.
    • Combine the huckleberries, orange zest, 2 tablespoons orange juice, sugar, and spices in a medium saucepan.
    • Bring to a simmer over medium-low heat and cook until the berries begin to burst and become juicy, about 8 minutes.
    • Stir in the cornstarch slurry and continue to cook until the sauce thickens, about 1 minute.
    • Remove from the heat and let the sauce cool slightly. Transfer to a lidded jar or container and let it cool completely before stashing in the fridge. The sauce will thicken more as it cools.

    Notes

    • Thinning the sauce--If your sauce thickens too much, stir in extra orange juice or water, 1 tablespoon at a time until you reach your desired consistency.
    • Storage and freezing--Store in a sealed container in the fridge for up to 2 weeks or freeze for up to 3 months.
    • Dietary--This recipe is suitable for gluten-free, dairy-free, and vegan diets.

    Nutrition

    Serving: 1tablespoonCalories: 31kcalCarbohydrates: 8gSodium: 4mgSugar: 3g
    Keyword berry sauce, homemade condiments, huckleberries, wild hucklberries
    Tried this recipe?Let us know how it was!

    July 17, 2024 Collections

    13 No Bake Desserts {That Don't Have to Be Kept Frozen}

    When temperatures soar during the summer, I'm all about keeping the kitchen as cool as possible. That doesn't mean skipping dessert, though! Sweet treats that are made without turning the oven on are my go-to.

    My biggest pet peeve with no bake dessert recipes is that so many of them need to stay frozen until right before serving. That's fine if you're at home, but if you want to head out camping or meet friends for a picnic, you'll need an easy dessert that can be tossed in a cooler without fear of it turning into a soupy mess.

    These 13 no bake desserts don't require a permanent stay in the freezer, so feel free to whip one up, plop it in your cooler, and head to the beach.

    1
    Recipe and photo credit: Eat Cook Bake
    Mars Bar Rice Krispie Squares
    This Mars Bar Rice Krispie squares recipe is made with golden syrup and crispy cereal to make an easy dessert.
    Get the recipe: Mars Bar Rice Krispie Squares
    2
    A coconut yogurt parfait topped with macerated cherries in a jar with fresh cherries scattered around the jar.
    Coconut Yogurt Parfait
    These easy make-ahead coconut yogurt parfaits include layers of creamy coconut-flavored yogurt, crunchy granola, and juicy macerated cherries.
    Get the recipe: Coconut Yogurt Parfait
    3
    Recipe and photo credit: The Forked Spoon
    Chocolate Mousse
    This easy chocolate mousse recipe is decadent and rich in chocolate flavor. Perfectly thick and silky smooth, it’s the ultimate chocolate dessert - no eggs required!
    Get the recipe: Chocolate Mousse
    4
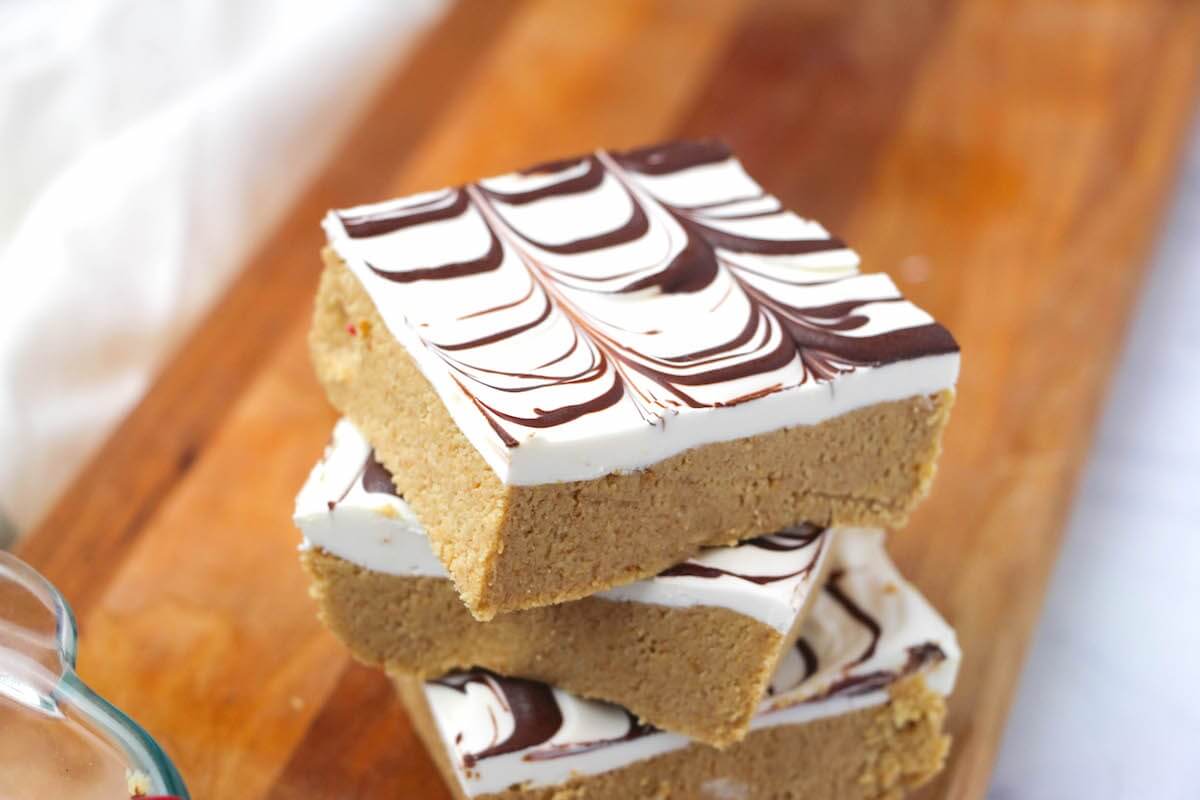
    No Bake Peanut Butter Bars
    Recipe and photo credit: The Soccer Mom Blog
    No Bake Peanut Butter Bars
    Just like your lunch lady used to make! These no bake peanut butter bars are thick, creamy, and crave-able! (And super easy!)
    Get the recipe: No Bake Peanut Butter Bars
    5
    A layered lemon curd dessert cup in a small jar with a marshmallow on top.
    Lemon Curd Dessert Cups
    These easy layered lemon dessert cups are a perfect springtime or Easter Mason jar dessert idea. They're made with just 4 ingredients and can be partially prepared in advance, making them ideal for camping.
    Get the recipe: Lemon Curd Dessert Cups
    6
    Recipe and photo credit: Cutefetti
    No Bake Nutella Pie
    Nutella has to be one of the best ideas ever. If you need a fix, you have come to the right place. Now you can enjoy it in even more ways with this easy no-bake Nutella pie.
    Get the recipe: No Bake Nutella Pie
    7
    Recipe and photo credit: Dancing Through the Rain
    Snickers Caramel Apple Salad
    This easy Snickers caramel apple salad is a fantastic twist on your classic fruit salad! A sweet dessert that everyone will love!
    Get the recipe: Snickers Caramel Apple Salad
    8
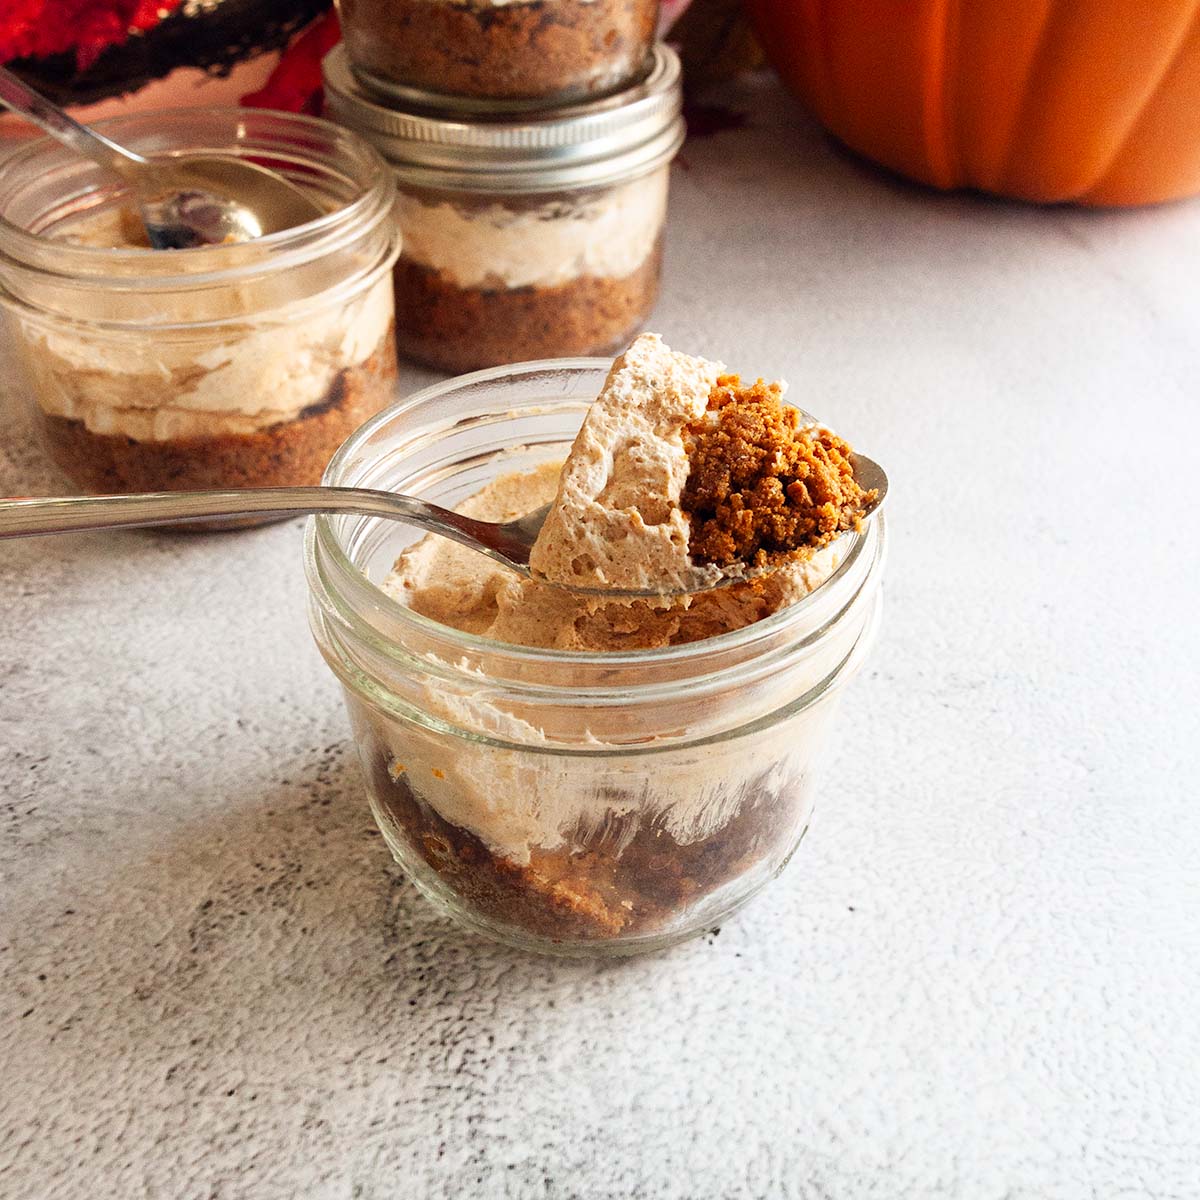
    A spoonful of no-bake mini pumpkin cheesecake resting on top of a mason jar filled with the cheesecake.
    Mini Pumpkin Cheesecake
    These no-bake mini pumpkin cheesecakes are perfect for packing along on your Thanksgiving camping trip. They're made in advance and can be stashed in your cooler or fridge for up to 4 days. They'll never last that long though as everyone will be fighting over these easy treats that are made with crunchy Biscoff cookie crust and creamy spiced whipped topping.
    Get the recipe: Mini Pumpkin Cheesecake
    9
    Recipe and photo credit: Mae's Menu
    Edible Brownie Batter
    Satisfy your sweet tooth with this simple recipe for edible brownie batter. It’s made just 8 ingredients in about 10 minutes!
    Get the recipe: Edible Brownie Batter
    10
    Recipe and photo credit: On My Kid's Plate
    Strawberry Shortcake Truffles
    Creamy strawberry shortcake truffles are no bake, and use Golden Oreos and fresh strawberries to make this sweet and delicious treat!
    Get the recipe: Strawberry Shortcake Truffles
    11
    Recipe and photo credit: Eat Cook Bake
    Easy Twix Rocky Road
    This Twix rocky road is so easy to make that you won’t even need to turn your oven on! It’s sweet and crunchy, perfect for any occasion.
    Get the recipe: Twix Rocky Road
    12
    Recipe and photo credit: The Simple Sweet Life
    Giant Homemade Peppermint Patty
    This giant homemade peppermint patty takes everything you love about the classic candy and super-sizes it. Done in 30 minutes with no baking required.
    Get the recipe: Giant Homemade Peppermint Patty
    13
    Recipe and photo credit: Homemade Hooplah
    Classic No Bake Cookies
    This recipe is a tried and true classic! Quick-cooking oats are mixed with a melted chocolate peanut butter sauce to make these simple and tasty cookies.
    Get the recipe: Classic No Bake Cookies

    July 15, 2024 Chicken & Turkey

    Grilled Honey Lime Chicken

    This grilled honey lime chicken elevates classic bbq chicken by finishing it with a tangy buttery glaze that infuses the tender, juicy meat with plenty of flavor.

    A whole grilled honey lime chicken on the grill.

    A rotation of grilled chicken recipes are a summer staple at our house, particularly on the weekends, when the days are spent working in the yard and garden. In addition to mozzarella-stuffed grilled chicken, this tangy honey lime grilled chicken has been on repeat, thanks to its simple preparation and outstanding flavor. Spatchcocking the chicken allows it to cook faster and more evenly than a whole uncut chicken, so it stays juicy and tender.

    [feast_advanced_jump_to]

    Why You'll Love This Recipe

    • It's an easy, healthy way to make a whole grilled chicken.
    • It stays juicy and tender and cooks faster than a whole uncut chicken.
    • There is minimal hands-on time.
    • You can easily scale it to make extra chickens if you're feeding a crowd.

    Ingredients and Substitutions

    Ingredients for grilled honey lime chicken--whole chicken, hot honey, butter, spices, and lime.
    • Whole chicken--I used a 3 to 3 ½-pound chicken to feed my family of four for this honey lime chicken recipe. If you have a much larger chicken, or are cooking two chickens, increase the amount of seasoning and hot honey sauce accordingly. You can ask your butcher to spatchcock your chicken for you, if you prefer.
    • Hot honey--There are many brands of hot honey available for purchase online or at the supermarket. It won't make the chicken overly spicy, but if you prefer to avoid any heat, you can use regular honey.
    • Lime--A single lime should yield about 2 tablespoons juice and 2 teaspoons of zest. If your lime is stingy, grab a second one and juice that as well.

    Important Steps

    A whole chicken with the backbone removed.
    A bowl of lime juice, lime zest, and hot honey.
    1. Cut the back bone from the chicken and press firmly on the breasts to create a flat spatchcocked chicken. Season the chicken with salt, pepper, and paprika.
    2. Mix the hot honey, butter, lime zest, and lime juice in a small bowl.
    A partially cooked whole spatchcocked chicken on a grill.
    A person brushing a grilled chicken with sauce.
    1. Grill the chicken on medium heat, skin side up, for 30 minutes. Flip and cook skin side down for 5 minutes.
    2. Flip the chicken skin side up and baste with the hot honey mixture. Continue to cook, basting frequently, until the chicken is cooked through.

    FAQs

    How can I tell when the chicken is done?

    The best way to check for doneness is by measuring the internal temperature of the chicken in a few spots, including the thickest spots of the breasts and thighs where it should read 165°F for fully cooked chicken.

    If you don't have a thermometer, cut into the thickest part of the breast. The meat should be completely white and juices should run clear.

    What's the best way to carve a spatchcocked chicken?

    First, let your chicken cool for about 10 minutes before carving. This will help to prevent the juices from gushing out when you carve it. Always use a sharp heavy knife for carving.

    To carve the chicken, I like to slice the wings off first by cutting through the joint that attaches them to the chicken.

    Similarly with the legs, I slice through the joint that attaches each leg to the chicken. Once detached, slice between each thigh and leg to create four separate pieces.

    At this point, you should be left with the two connected breast pieces. Slice along the length of the breast bone to create two breasts, then cut each breast piece in half.

    What should I serve with this?

    My favorite sides with grilled chicken are fresh spring vegetables when in season, roasted potatoes and tangy coleslaw, but since you've got the grill fired up, smoked sweet potatoes or grilled beets with goat cheese would also be excellent side dishes.

    Tips and Troubleshooting

    • If your hot honey glaze solidifies, give it a quick zap in the microwave or rewarm in a saucepan over low heat until it melts.
    • For the most accurate results, use an instant read thermometer for measuring the internal temperature of the chicken.
    • Leftover chicken can be stored in a sealed container in the fridge for up to 3 days. To use leftover grilled chicken, shred it and make shredded chicken tacos or stuff it into a sandwich.
    • This recipe is suitable for gluten-free diets.
    Cut up pieces of bone-in chicken on a platter.

    More Chicken Recipes You'll Love

    A platter of crispy grilled chicken wings with salad and bbq sauce in the background.
    Crispy Grilled Chicken Wings
    Six chicken skewers on a rectangular platter with a dish of sauce on the side.
    Grilled Bang Bang Chicken Skewers

    Tried This Recipe?

    If you've tried this recipe, please leave a comment below. Follow me on Instagram, Facebook, YouTube, or Pinterest for more great camping and grilling recipes.

    Recipe

    A whole grilled honey lime chicken on the grill.

    Grilled Honey Lime Chicken

    A woman's face.Angie Zoobkoff
    Give your BBQ chicken an upgrade with this tangy, buttery hot honey glaze that's brushed onto grilled spatchcocked chicken.
    No ratings yet
    Print Recipe Pin Recipe
    Prep Time 15 minutes mins
    Cook Time 45 minutes mins
    Total Time 1 hour hr
    Course Main Course
    Cuisine American
    Servings 4 servings
    Calories 340 kcal

    Ingredients
      

    • One 3 ½-pound whole chicken
    • 1 teaspoon table salt
    • 1 teaspoon paprika
    • ½ teaspoon freshly ground black pepper
    • 2 tablespoons butter melted
    • 2 tablespoons hot honey
    • 1 lime zested and juiced

    Instructions
     

    • Preheat the grill to 375°F. This works best if you can keep multiple burners on low heat.
    • Remove the back bone from the chicken by cutting along each side of the backbone with sharp kitchen shears or a large knife. Remove the back bone, then flip the chicken over so that the breasts are facing up. Use the heel of your hand to firmly press on the breast bone until you hear it crack. The chicken should lay flat.
    • Combine the salt, paprika, and pepper in a small bowl. Sprinkle it all over the chicken.
    • Mix the melted butter, hot honey, lime zest, and lime juice together in a small bowl.
    • Place the chicken breast side up on the grill and cook for 30 minutes. Flip and cook for 5 minutes to crisp up the skin.
    • Flip the chicken so it is breast side up again, and brush generously with the hot honey and lime glaze. Continue cooking, basting every 5 minutes, until the internal temperature reaches 165°F, 45 to 50 minutes total.
    • Give the chicken one last brush of glaze before removing it to a cutting board. Let it rest for 10 minutes before carving and serving.

    Notes

      • Melting the glaze--If your hot honey glaze solidifies, give it a quick zap in the microwave or rewarm in a saucepan over low heat until it melts.
      • Measuring internal temperature--For the most accurate results, use an instant read thermometer for measuring the internal temperature of the chicken.
      • Leftovers and storage--Leftover chicken can be stored in a sealed container in the fridge for up to 3 days. To use leftover grilled chicken, shred it and make shredded chicken tacos or stuff it into a sandwich.
      • Dietary--This recipe is suitable for gluten-free diets.

    Nutrition

    Serving: 1portionCalories: 340kcalCarbohydrates: 11gProtein: 38gFat: 16gCholesterol: 127mgSodium: 736mgFiber: 1gSugar: 9g
    Keyword grilled chicken, spatchcock chicken
    Tried this recipe?Let us know how it was!

    July 12, 2024 Camping

    S'more Nachos

    These campfire s'more nachos have all the classic s'more flavors and are the perfect way for everyone to enjoy a campfire dessert without making a mountain of individual s'mores. They're also a great option to make on the grill or in the oven if you don't have access to a fire.

    A person lifting a graham cracker from a tray of s'more nachos.

    S'more nachos have been a favorite camping dessert recipe for my kids since they were tiny. I love them because they're an easy dessert that doesn't require any dishes, even the littlest hands can help to assemble them, and everyone can enjoy them without fear of a marshmallow catching fire.

    [feast_advanced_jump_to]

    Why This Recipe is Great for Camping

    • This unique nacho recipe requires only a handful of pantry ingredients that don't require any cooler space.
    • No dishes!
    • Kids love assembling (and devouring) them.

    Ingredients and Substitutions

    Ingredients for s'more nachos--mini rolo, graham crackers, marshmallows, and chocolate chips.
    • Graham crackers--These form the base of the nachos and are perfect for scooping up the gooey melted chocolate and marshmallow.
    • Marshmallows--Use mini marshmallows for this as they are easier to layer the nachos and evenly distribute throughout the pan. If you only have large marshmallows, cut or tear them into smaller pieces.
    • Rolo pieces and chocolate chips--This adds the chocolate component of the s'mores, but feel free to get creative with your favorite types of chocolate bars and chocolate chips.

    Important Steps

    Graham crackers, mini marshmallows, chocolate chips, and mini rolo pieces layered in a foil pan.
    A covered foil pan over a campfire grate.
    1. Place a layer of graham crackers on the bottom of an 8-inch foil pan. Top with marshmallows, chocolate chips, and Rolo pieces.
    2. Cover the foil pan and place over hot coals on a campfire. Cook until the marshmallows and chocolate are softened and beginning to melt.

    FAQs

    Can I make these on the grill or in the oven?

    Yes. To make them on the grill, prepare your grill for indirect cooking or set it to the lowest possible heat. Place the covered foil pan on the cool side of the grill, cover, and cook until the marshmallows and chocolate begin to melt, 10 to 15 minutes.

    To make them in the oven, preheat the oven to 350°F. Place the uncovered foil pan in the oven and cook until the marshmallows and chocolate begin to melt, 10 to 15 minutes.

    Do I have to use a disposable pan?

    Nope. You can also make these in your cast iron skillet or Dutch oven over the fire. If making them in the Dutch oven, I recommend lining it with parchment paper and using it to remove the nachos before serving to avoid anyone burning themselves on the sides of the pot.

    Tips and Troubleshooting

    • Don't cook over direct flame or you will burn the chocolate. Steady heat from hot coals works best.
    • To double the s'more nachos recipe, use a 9-by-13-inch pan, or two 8-inch square pans.
    A foil pan filled with melted marshmallows and chocolate on graham crackers.

    More S'more-Inspired Recipes You'll Love

    Two jars filled with Golden Grahams, chocolate cookies, mini marshmallows, and chocolate chips.
    S'more Nachos
    Two campfire waffle cones filled with marshmallows, Rolo pieces, and Teddy Grahams.
    Campfire Cones

    Tried This Recipe?

    If you've tried this recipe, please leave a comment below. Follow me on Instagram, Facebook, YouTube, or Pinterest for more great camping and grilling recipes.

    Recipe

    A person lifting a graham cracker from a tray of s'more nachos.

    S'more Nachos

    A woman's face.Angie Zoobkoff
    These easy s'more nachos have all the flavors of the classic campfire dessert layered in nacho form!
    No ratings yet
    Print Recipe Pin Recipe
    Prep Time 5 minutes mins
    Cook Time 10 minutes mins
    Total Time 15 minutes mins
    Course Dessert
    Cuisine American
    Servings 3 servings
    Calories 486 kcal

    Equipment

    • 8-by-8-inch foil pan

    Ingredients
      

    • 12 graham crackers
    • 1 cup mini marshmallows
    • ½ cup mini or regular Rolo pieces
    • ⅓ cup chocolate chips

    Instructions
     

    • Prepare a bed of hot coals in a campfire.
    • Arrange a layer of graham crackers on the bottom of an 8-inch foil pan. Sprinkle the marshmallows, Rolo, and chocolate chips on top. If you don't need all the graham crackers to cover the bottom, you can assemble the nachos in layers.
    • Cover the foil pan and place it over hot coals (not direct flame!). Let it cook until the marshmallows and chocolate are beginning to melt, about 10 minutes. The cooking time will depend on how close your pan is to the heat.
    • Remove from the heat, uncover, and dig in!

    Notes

    • Keep the heat low--Don't cook over direct flame or you will burn the chocolate. Steady heat from hot coals works best.
    • Doubling the recipe--To double the recipe, use a 9-by-13-inch pan, or two 8-inch square pans.

    Nutrition

    Serving: 1portionCalories: 486kcalCarbohydrates: 85gProtein: 6gFat: 17gCholesterol: 3mgSodium: 363mgFiber: 4gSugar: 45g
    Keyword campfire cooking, s'mores desserts
    Tried this recipe?Let us know how it was!

    July 10, 2024 Camping

    11 One-Pot Camping Meals

    You don't need a lot of fancy cooking equipment to eat amazing meals when you're camping. These 11 one-pot camping meals are proof. They require only a cast iron skillet or Dutch oven to create incredible breakfasts, lunches, or dinners, and even an amazing one-pot brownie for dessert! Best of all, you've only got one pot to wash. Want more? Check out these 11 easy one-pot pasta recipes.

    1
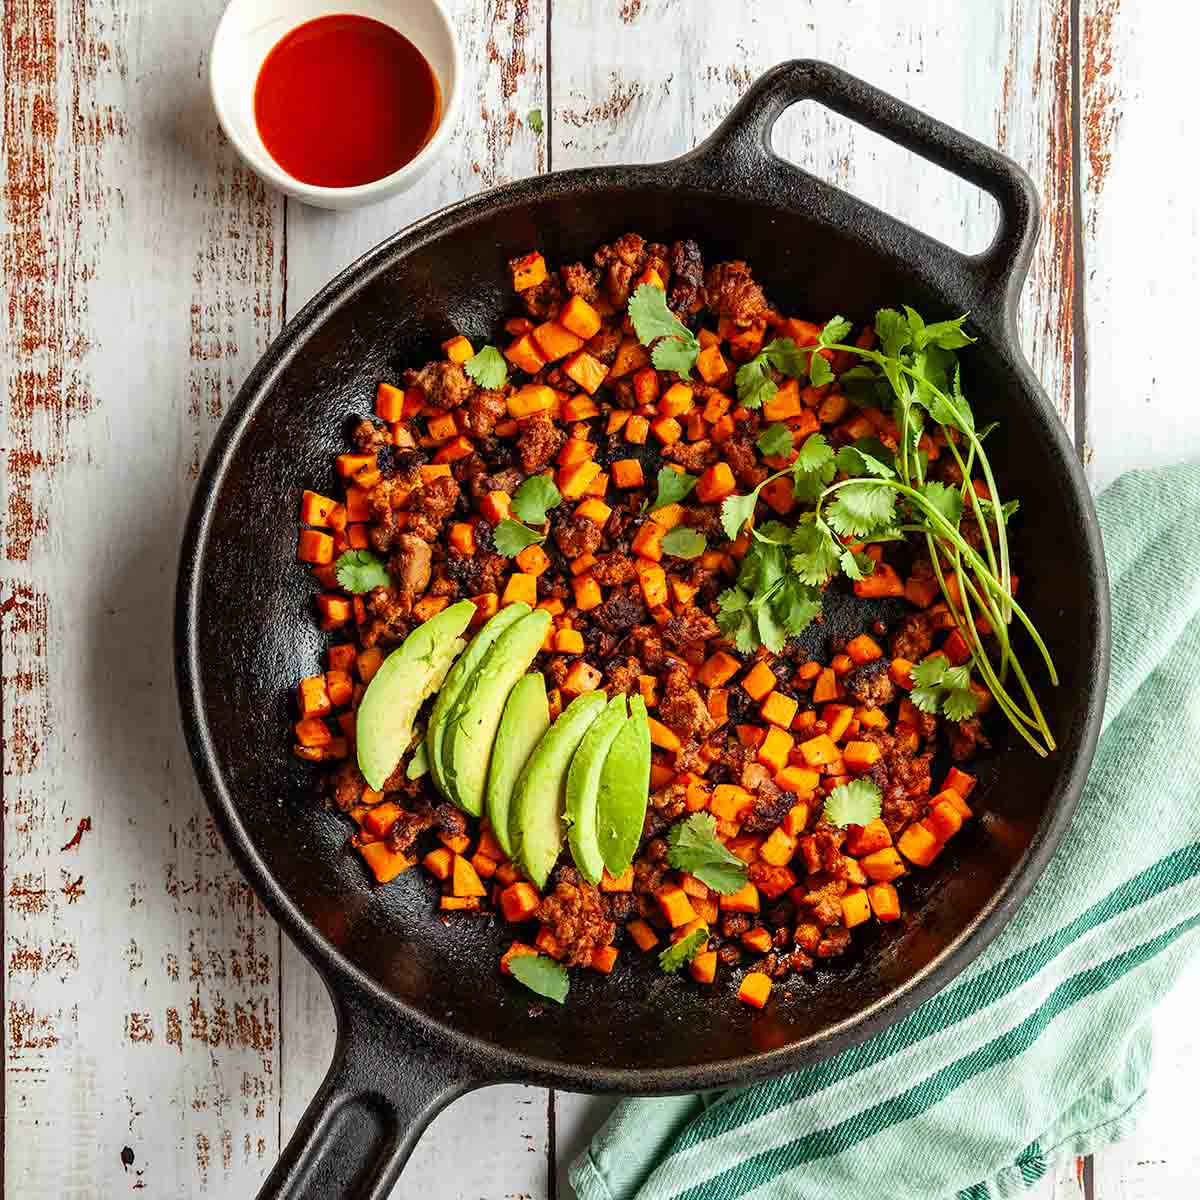
    A cast iron skillet filled with chorizo and sweet potato hash with sliced avocado and cilantro on top.
    Chorizo Sweet Potato Hash
    This hearty and satisfying sweet potato chorizo hash is made in your cast iron skillet with fresh sausage, diced sweet potatoes, red onion, and is topped with avocado and cilantro.
    Get the recipe: Chorizo Sweet Potato Hash
    2
    Recipe and photo credit: xoxo Bella
    Hearty Cowboy Beef and Rice Skillet
    This Tex-Mex inspired cowboy beef and rice skillet makes a hearty, tasty dinner for cowboys, as well as for everyone else. And it’s easy to make using just one pot.
    Get the recipe: Hearty Cowboy Beef and Rice Skillet
    3
    Campfire Shrimp Boil
    Recipe and photo credit: Champagne Tastes
    Campfire Shrimp Boil
    This campfire shrimp boil features mussels, shrimp, corn, and potatoes cooked with beer in a Dutch oven! It’s a fancy outdoor meal ready in less than 30 minutes.
    Get the recipe: Campfire Shrimp Boil
    4
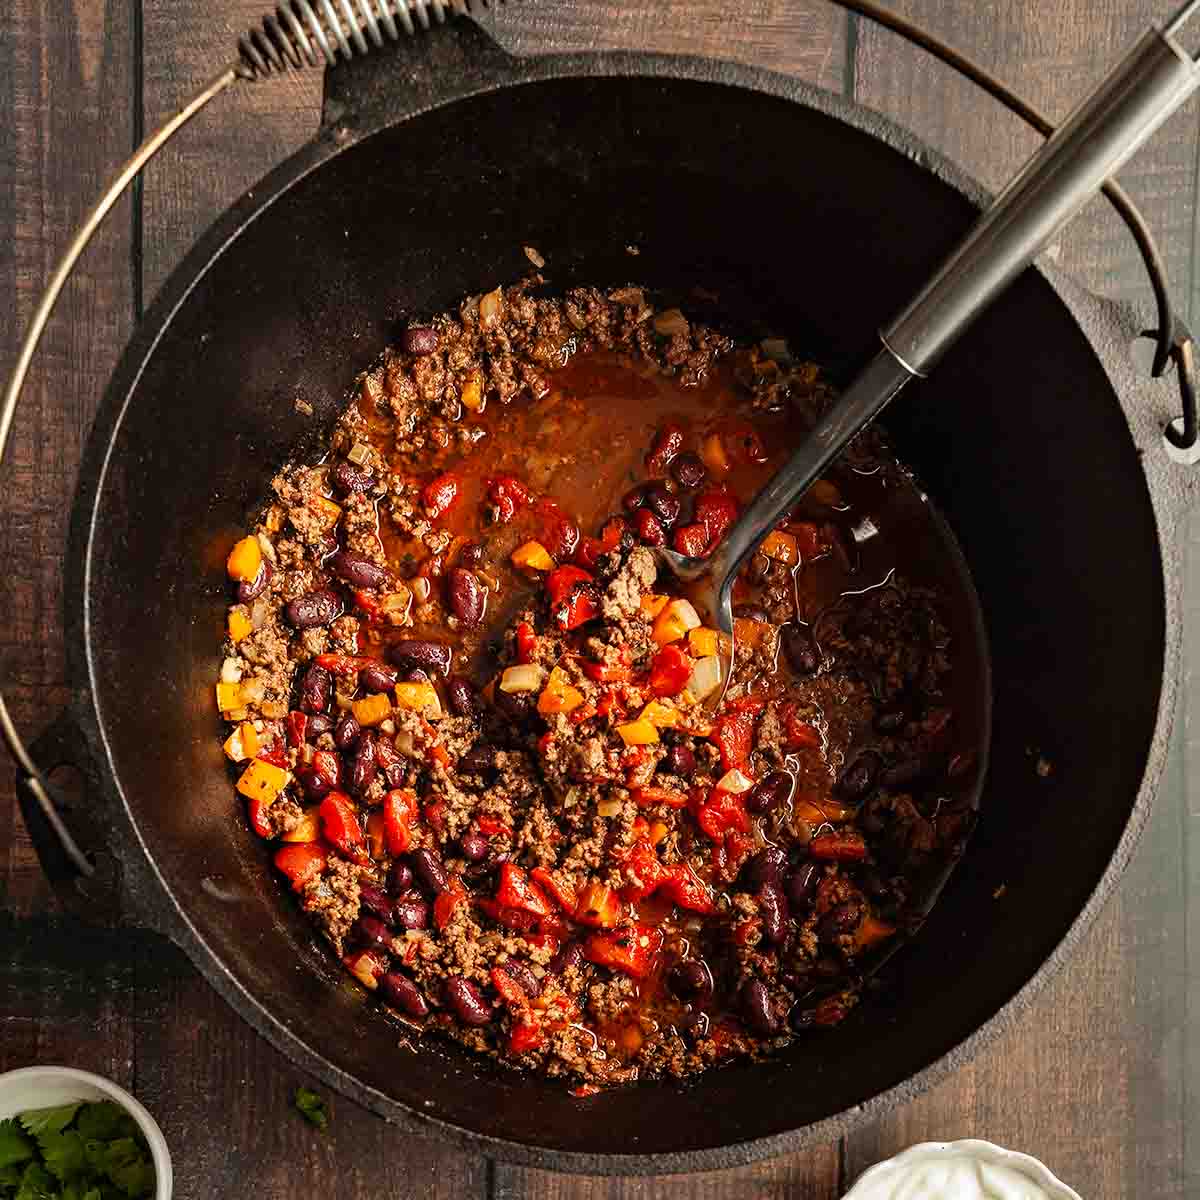
    A Dutch oven filled with campfire chili with a metal spoon resting inside.
    Dutch Oven Campfire Chili
    This ground beef chili for camping is made in your cast iron Dutch oven over the campfire. It's hearty and satisfying and easily the best chili recipe I've ever tried.
    Get the recipe: Dutch Oven Campfire Chili
    5
    Recipe and photo credit: A Little and A Lot
    Dutch Oven Pot Pie with Cheddar Biscuits
    This easy Dutch oven pot pie topped with cheddar thyme biscuits can be made with chicken or turkey and cooked in the oven or over a campfire.
    Get the recipe: Dutch Oven Pot Pie
    6
    A cast iron skillet filled with French onion gnocchi with a bunch of thyme on the side.
    French Onion Skillet Gnocchi
    This easy skillet gnocchi combines the classic flavors of French onion soup with tender plump potato dumplings. It's made entirely in your cast iron skillet and is a great side or main dish for camping.
    Get the recipe: French Onion Skillet Gnocchi
    7
    Recipe and photo credit: A Cedar Spoon
    Skillet Cheesy Hamburger Pasta
    Skillet cheesy hamburger pasta is a hearty, comforting meal that will feed your whole family and only dirties one pot.
    Get the recipe: Skillet Cheesy Hamburger Pasta
    8
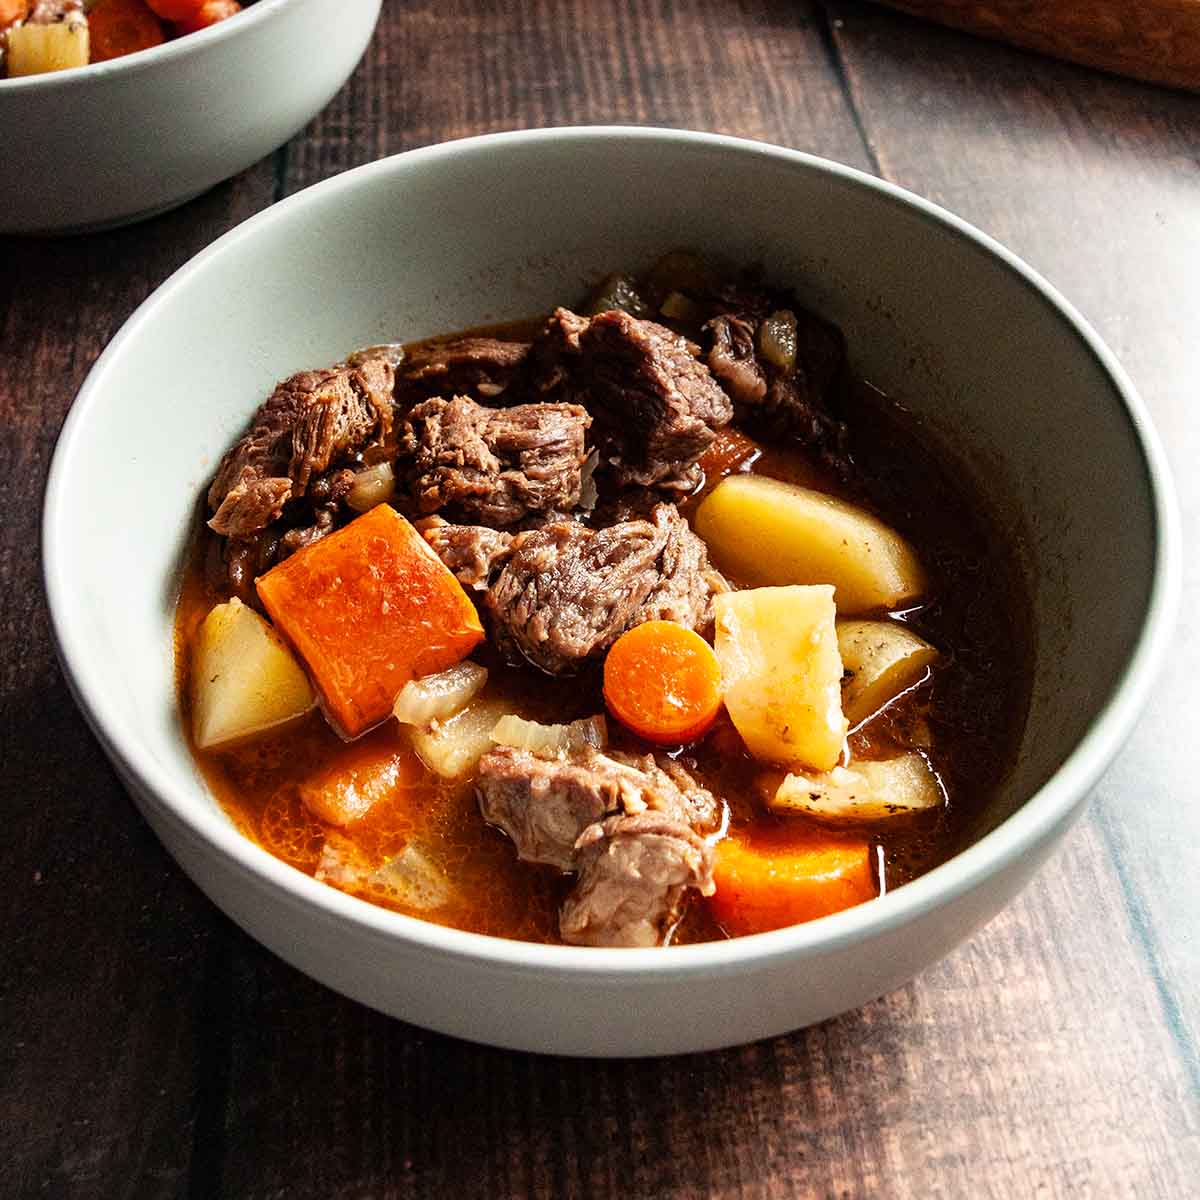
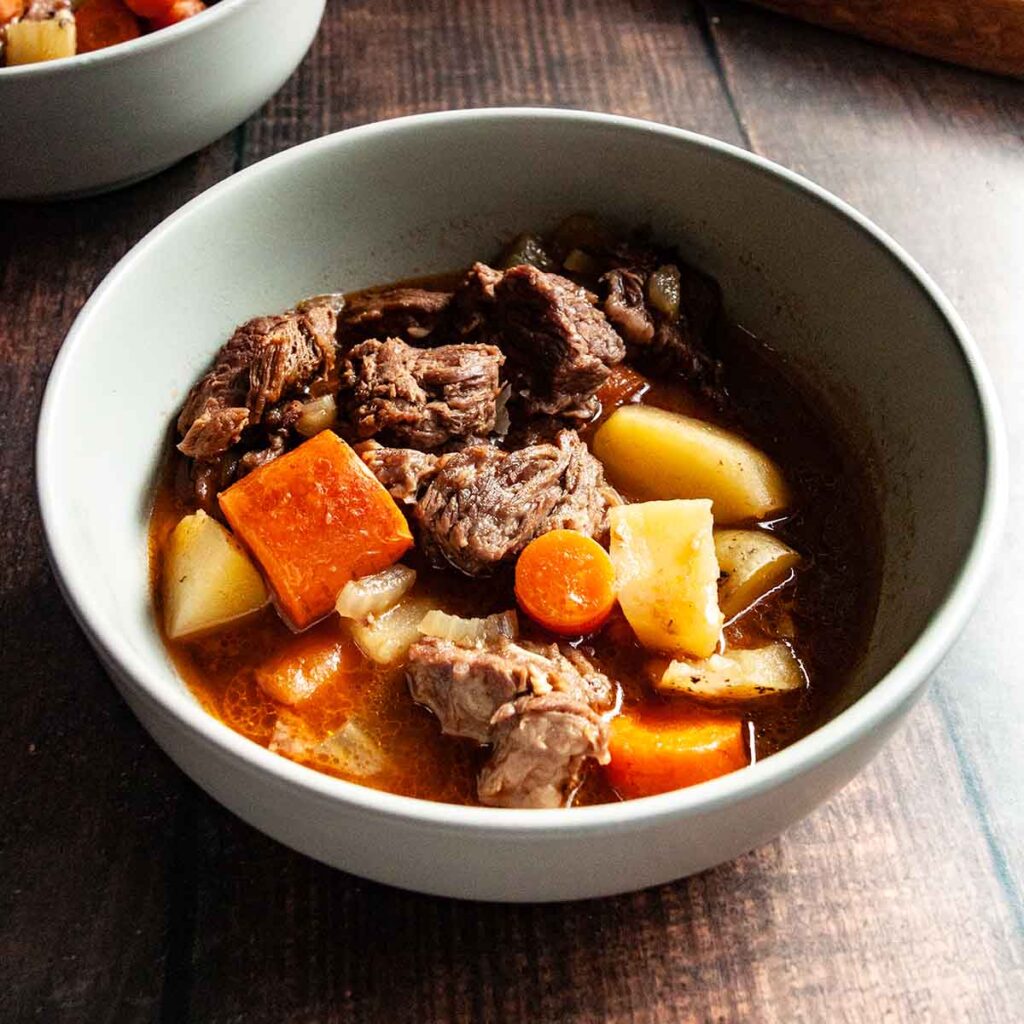
    A bowl of beef stew with carrots and potatoes on a wooden table.
    Campfire Dutch Oven Beef Stew
    This cool-weather camping stew is made with tender beef, potatoes, carrots, celery, and onions, gently simmered in a rich beef gravy.
    Get the recipe: Campfire Dutch Oven Beef Stew
    9
    A pot of cowboy stew and two bowls filled with the stew on a table.
    Texas Cowboy Stew
    This hearty stew, filled with ground beef, kielbasa, bacon, and vegetables is the perfect campfire Dutch oven meal.
    Get the recipe: Texas Cowboy Stew
    10
    Creamy mac and cheese in a pot with a wooden spoon resting in it.
    Camping Mac and Cheese
    This creamy one-pot macaroni and cheese is made in just one pot with a handful of pantry ingredients and requires only 20 minutes of your time.
    Get the recipe: Dutch Oven Mac and Cheese
    11
    Recipe and photo credit: A Red Spatula
    Dutch Oven Brownies
    Are you looking for a chocolatey dessert for your next camping trip? I know you will love this simple Dutch oven brownies recipe.
    Get the recipe: Dutch Oven Brownies

    Want more ways to use your Dutch oven when camping? Check out this collection of Dutch oven camping meals.

    July 8, 2024 Camping

    Caprese Gnocchi Foil Packets

    These caprese gnocchi foil packets have the classic combination of tomatoes, mozzarella, and basil mixed with tender potato dumplings to create an easy and satisfying vegetarian camping meal that requires minimal cooler space.

    Gnocchi, tomatoes, mozzarella and basil in a foil packet on a plate.

    On a recent camping trip, we enjoyed some chicken foil packets that included all the traditional caprese flavors--tomatoes, mozzarella, and fresh basil. They were fantastic, and given my undying love for gnocchi recipes, those pillowy bites of potato seemed like a natural replacement for the chicken to create a simple vegetarian camping meal.

    If you'd prefer to keep it high in protein, feel free to add thinly sliced chicken to your packets before cooking.

    [feast_advanced_jump_to]

    Why This Recipe is Great for Camping

    • Most of the ingredients can be stored at room temperature, so they don't take up precious cooler space.
    • These vegetarian foil packets are hearty and satisfying.
    • You only need to dirty (and wash) one bowl!

    Ingredients and Substitutions

    Ingredients for Caprese gnocchi foil packets--gnocchi, basil, oil, balsamic vinegar, mozzarella, oregano, and tomatoes.
    • Gnocchi--Use the shelf-stable gnocchi that don't require refrigeration for this gnocchi foil packet recipe.
    • Tomatoes--Any type of chopped fresh tomatoes will work here.
    • Basil--You'll use whole leaves of basil for cooking the gnocchi foil packs to infuse them with flavor, then chopped fresh basil for serving.
    • Fresh mozzarella--I recommend using fresh mozzarella for this recipe, however, if you don't have it available to you, shredded mozzarella will work in its place.

    Important Steps

    A bowl of gnocchi and tomatoes.
    A portion of gnocchi and tomatoes topped with basil leaves on a double layer of aluminum foil.
    1. Combine the gnocchi, tomatoes, oil, balsamic vinegar, oregano, salt, and pepper in a large bowl.
    2. Divvy the mixture among four large sheets of foil. Top each pile with two fresh basil leaves and fold them up to create foil packets.
    Four foil packets on a grill.
    Cubes of fresh mozzarella added to a foil packet on a grill.
    1. Cook the foil packets over a campfire or on a grill until the gnocchi are tender.
    2. Open the foil packets, remove the basil leaves, and add the cheese. Close them up again and continue to cook until the cheese melts. Sprinkle with fresh basil before serving.

    FAQs

    What's the best way to fold a foil packet?

    Place your food in the center of the foil. Bring the long edges of the foil up to meet, and then fold them over a couple of times, creating a seam that runs over the top of your food. Then working with one end at a time, fold it over a few times to seal the end.

    I like this method for folding a foil packet because it's easy to open the seal on top to check them for doneness and then close, if necessary, and it also creates an easy pouch for eating when opened.

    How do I avoid burning my gnocchi foil packets?

    As with most food, steady even heat is key. If you're making them on the grill, let it preheat fully before putting the foil packets on it.

    If you're making them over the campfire, ensure that you have hot coals from an established fire under the grate. Don't put the foil packets over wood that is giving off steady flames as that will deliver uneven heat and may cause them to burn.

    Can I make these in the oven?

    Definitely. Follow the instructions for preparing the packets, then bake in a 375°F (190°C) oven until the gnocchi are tender and the tomatoes are beginning to break down, about 15 minutes. Open and add the cubed cheese to each packet. Close and cook until the cheese is melted, about 3 minutes more. Sprinkle with basil before serving.

    Tips and Troubleshooting

    • I don't recommend flipping the foil packets while they are cooking. The steam created in the pouch will ensure that everything ends up perfectly cooked. Flipping them can cause some of the tomato juices to leak out.
    • If you're not using heavy-duty foil, use a double layer for each packet.
    • Leftovers can be stored in an airtight container in the fridge or your cooler for up to 3 days. Rewarm in a skillet over low heat, or make a new foil pouch and rewarm it gently.
    • This recipe is suitable for vegetarian diets.
    Two gnocchi, tomato, and mozzarella foil packets garnished with fresh basil.

    More Gnocchi Recipes You'll Love

    An open foil packet filled with gnocchi, corn, tomatoes, and basil on a wooden tree stump.
    Corn and Tomato Gnocchi Foil Packets
    A cast iron skillet filled with French onion gnocchi with a bunch of thyme on the side.
    French Onion Skillet Gnocchi

    Tried This Recipe?

    If you've tried this recipe, please leave a comment below. Follow me on Instagram, Facebook, YouTube, or Pinterest for more great camping and grilling recipes.

    Recipe

    Gnocchi, tomatoes, mozzarella and basil in a foil packet on a plate.

    Caprese Gnocchi Foil Packets

    A woman's face.Angie Zoobkoff
    Classic caprese salad flavors collide with tender potato gnocchi to create an easy vegetarian foil packet meal.
    No ratings yet
    Print Recipe Pin Recipe
    Prep Time 10 minutes mins
    Cook Time 15 minutes mins
    Total Time 25 minutes mins
    Course Main Course
    Cuisine Italian
    Servings 4 servings
    Calories 482 kcal

    Equipment

    • Heavy duty aluminum foil

    Ingredients
      

    • 1½ pounds gnocchi
    • 2 cups chopped fresh tomatoes
    • 4 tablespoons olive oil
    • 2 tablespoons balsamic vinegar
    • 1 teaspoon dried oregano
    • ½ teaspoon salt
    • ¼ teaspoon freshly ground black pepper
    • 8 leaves fresh basil
    • 4 ounces fresh mozzarella cubed
    • 4 teaspoons chopped fresh basil

    Instructions
     

    • Preheat a grill for medium heat (350 to 375°F) or a bed of hot coals in a campfire.
    • Combine the gnocchi, tomatoes, oil, balsamic vinegar, oregano, salt, and pepper in a large bowl. Mix well.
    • Divide the mixture among four large sheets of heavy duty aluminum foil. Place two whole basil leaves on top of each gnocchi serving. Fold up the foil to create 4 individual foil packets.
    • Place the foil packets on the grill or on a grate over the hot coals. Cook until the gnocchi is tender and the tomatoes are beginning to break down, about 15 minutes.
    • Carefully open each foil packet and remove the basil leaves. Divide the cheese evenly among the foil packets and close to seal them again.
    • Cook until the cheese is melted, about 3 minutes. Remove from the heat and open the carefully to let the steam escape.
    • Top with chopped fresh basil and serve.

    Notes

    • Don't flip--I don't recommend flipping the foil packets while they are cooking. The steam created in the pouch will ensure that everything ends up perfectly cooked. Flipping them can cause some of the tomato juices to leak out.
    • If using regular foil--If you're not using heavy-duty foil, use a double layer of regular foil for each packet.
    • Storage and reheating--Leftovers can be stored in an airtight container in the fridge or your cooler for up to 3 days. Rewarm in a skillet over low heat, or make a new foil pouch and rewarm it gently.
    • Dietary--This recipe is suitable for vegetarian diets.

    Nutrition

    Serving: 1packetCalories: 482kcalCarbohydrates: 56gProtein: 12gFat: 22gCholesterol: 30mgFiber: 5gSugar: 2g
    Keyword caprese, vegetarian camping meal, vegetarian foil packets
    Tried this recipe?Let us know how it was!

    July 6, 2024 Collections

    11 Easy Chicken Recipes Ready in 30 Minutes or Less

    Whether it's a lazy summer day or a busy weeknight, these 11 easy chicken recipes ready are the ones you'll reach for over and over again. From simple grilled chicken dinners to easy pasta recipes or a one pan chicken skillet meal, they're simple to prepare, incredibly satisfying, and ready in 30 minutes or less.

    1
    Recipe and photo credit: The Food Blog
    Grilled Boneless Chicken Thighs
    These grilled boneless chicken thighs are tender, juicy and delicious. They’re equally perfect for entertaining or busy weeknights!
    Get the recipe: Grilled Boneless Chicken Thighs
    2
    Two Cajun chicken foil packets on plates with forks on the side.
    Cajun Chicken Foil Packets
    These easy 5-ingredient chicken and veggie foil packs are a healthy meal that's filled with tender boneless chicken thighs, peppers, and onions, all gently infused with Cajun seasoning.
    Get the recipe: Cajun Chicken Foil Packets
    3
    Mozzarella Stuffed Chicken Wrapped in Parma Ham
    Recipe and photo credit: Cucina by Elena
    Mozzarella Stuffed Chicken Wrapped in Parma Ham
    This mozzarella-stuffed chicken wrapped in Parma ham (or Prosciutto Di Parma in Italian) Recipe is an Italian classic everyone LOVES!
    Get the recipe: Mozzarella-Stuffed Chicken
    4
    Six chicken skewers on a rectangular platter with a dish of sauce on the side.
    Grilled Bang Bang Chicken Skewers
    This bang bang grilled chicken is an easy meal of grilled boneless chicken breast that's finished with a creamy, tangy, slightly spicy sauce.
    Get the recipe: Grilled Bang Bang Chicken Skewers
    5
    Recipe and photo credit: Dished
    Speedy Smash Chicken Caesar Tacos
    Give the smash taco trend a chicken Caesar salad twist and thank me later! I’m talking a lemony chicken topping, smashed onto mini tortillas, pan-fried until golden, and topped with a crunchy, umami Caesar salad (plus extra Caesar dressing for dipping!) Perfect for busy weeknights or a crowd-pleasing party bite.
    Get the recipe: Chicken Caesar Tacos
    6
    Recipe and photo credit: The Fresh Cooky
    Blackstone Chicken Fried Rice
    If you want a better-than-takeout chicken fried rice, you will love this quick and easy recipe that can be entirely made on your hibachi style Blackstone griddle.
    Get the recipe: Chicken Fried Rice
    7
    Marry Me Chicken Pasta
    Recipe and photo credit: Love and Other Spices
    Marry Me Chicken Pasta
    Marry me chicken pasta is a quick and easy recipe with juicy, spice-marinated chicken in a creamy, sun-dried tomato sauce. Perfect for weeknight dinners or special occasions, this crowd-pleaser is sure to become a family favorite.
    Get the recipe: Marry Me Chicken Pasta
    8
    Recipe and photo credit: Wholesome Made Easy
    Skillet Parmesan Chicken
    For this quick skillet parmesan chicken and zucchini crispy chicken cutlets and garlicky zucchini cook in one pan on the stove from start to finish.
    Get the recipe: Skillet Parmesan Chicken
    9
    Recipe and photo credit: A Farm Girl's Kitchen
    Sun-Dried Tomato Chicken
    This creamy sun dried tomato chicken has a delicious cream sauce with garlic.
    Get the recipe: Sun-Dried Tomato Chicken
    10
    Recipe and photo credit: Haute and Healthy Living
    Pesto Chicken Burgers
    These delicious low carb pesto chicken burgers are wonderfully juicy and full of flavor! They can be cooked on a grill, or on the stovetop.
    Get the recipe: Pesto Chicken Burgers
    11
    Recipe and photo credit: Seasonal Cravings
    Caprese Chicken
    This easy 5-ingredient caprese chicken is everything you want in a one-pan meal. It’s wholesome, healthy, delicious, hearty, total comfort food, and a family favorite.
    Get the recipe: Caprese Chicken

    July 5, 2024 Blackstone Griddle Recipes

    Chicken and Bacon Sandwich

    This chicken and bacon sandwich is anything but boring. A juicy marinated chicken cutlet is topped with crispy bacon, fresh lettuce and tomato, and a garlicky mustard aioli. Make this crave-worthy sandwich on your Blackstone griddle (or any griddle) for an easy weeknight meal at home or on your next camping trip.

    A chicken and bacon sandwich on a brioche bun with lettuce and tomato.

    I love sandwiches in almost any form, as long as they are interesting and packed with flavor. For a quick lunch at home or at camp I make English muffin grilled cheese sandwiches or turkey ciabatta sandwiches, which are also perfect for tucking into a picnic basket or taking on a hike.

    But when we've got a little time and want a satisfying meal that can double as lunch or dinner, this Blackstone chicken sandwich recipe is my go-to. The garlic mustard mayo doubles as a marinade, resulting in juicy, tender chicken. Topped with crispy indulgent bacon and your favorite fixings, it's an incredibly satisfying handheld meal.

    [feast_advanced_jump_to]

    Why This Recipe is Great for Camping

    • You can prep the marinade and/or get the chicken marinating before heading out on your trip.
    • These bacon and chicken sandwiches are an easy Blackstone chicken dinner that cooks up quickly and can be made on your griddle or cast iron skillet.

    Ingredients and Substitutions

    Ingredients for chicken and bacon sandwich--buns, mustard, mayo, chicken, garlic powder, tomatoes, and bacon.
    • Mayo--This is an excellent marinade and tenderizer for chicken, and doubles as a classic sandwich topping. You can use regular or reduced-fat mayo for this recipe.
    • Mustard--I like the bite of whole grain mustard here, but feel free to use Dijon, if you prefer.
    • Chicken cutlets--These are thin pieces of chicken which are available at most supermarkets. You can also slice boneless skinless chicken breast halves in half horizontally to create two thin pieces.
    • Bacon--I use applewood smoked bacon for this recipe as I think that flavor works well here. You can use a different type, if you prefer, but I do recommend using a thicker cut bacon so that it will cook in about the same time as the chicken and will be less likely to stick to your griddle. Tip: Cook some extra bacon and make BLAT sandwiches the next day!
    • Buns--I love brioche burger buns for their rich flavor, and they hold up really well here, but any type of burger bun or sturdy bread, such as sourdough, will work here.

    How to Make a Chicken Cutlet Sandwich

    Mayo, mustard, and garlic powder in a bowl.
    Chicken cutlets in a mayo marinade in a sealed plastic bag with a bowl of mustard mayo on the side.
    1. Mix the mayo, mustard, and garlic powder together. Season with salt and pepper.
    2. Place the chicken cutlets in a resealable bag and add ⅓ cup of the mayo mixture. Marinate for at least 2 hours and up to 24 hours.
    Four strips of bacon cooking on a Blackstone.
    Chicken cutlets cooking on a Blackstone.
    1. Cook the bacon on one side of a large griddle until crispy.
    2. Cook the chicken cutlets on the other side of the griddle until cooked through. Assemble the sandwiches on buns with the remaining mayo mixture, chicken, bacon, lettuce, and tomato.

    FAQs

    Can I make this in my cast iron skillet?

    Yes. Cook the bacon in the skillet until crispy, then wipe out the skillet, leaving a thin layer of fat. Cook the chicken in the greased skillet and assemble the sandwich as directed in the recipe.

    How long can I marinate the chicken?

    You can marinate the chicken for up to 24 hours. I don't recommend letting it go any longer than that as the chicken can become mushy.

    Tips and Troubleshooting

    • To get ahead, mix up your marinade and sauce before heading out on your camping trip. If you'll be cooking the chicken on the first day of your trip, go ahead and get it marinating before you leave.
    • This chicken bacon sandwich recipe is suitable for dairy-free diets.
    A chicken and bacon sandwich on a brioche bun with lettuce and tomato.

    More Blackstone Griddle Recipes You'll Love

    A halved patty melt in a basket lined with a checkered paper.
    Blackstone Patty Melt
    A turkey smash burger on a plate with potato wedges and a beer and raw veggies in the background.
    Turkey Smash Burgers with Caramelized Onions

    Tried This Recipe?

    If you've tried this recipe, please leave a comment below. Follow me on Instagram, Facebook, YouTube, or Pinterest for more great camping and grilling recipes.

    Recipe

    A chicken and bacon sandwich on a brioche bun with lettuce and tomato.

    Chicken and Bacon Sandwich

    A woman's face.Angie Zoobkoff
    This chicken bacon sandwich is anything but boring. Topped with crispy bacon, garlic and mustard aioli, lettuce, and tomato, it's a handheld meal that you'll return to again and again.
    No ratings yet
    Print Recipe Pin Recipe
    Prep Time 15 minutes mins
    Cook Time 10 minutes mins
    Total Time 2 hours hrs 30 minutes mins
    Course Main Course
    Cuisine American
    Servings 4 sandwiches
    Calories 532 kcal

    Equipment

    • Blackstone griddle or similar

    Ingredients
      

    • ½ cup mayonnaise
    • ¼ cup whole grain mustard
    • ¼ teaspoon garlic powder
    • 4 chicken cutlets
    • 4 slices applewood smoked thick-cut bacon
    • Sliced tomato for serving
    • Shredded iceberg lettuce for serving

    Instructions
     

    • Mix the mayonnaise, mustard, and garlic powder together in a medium bowl.
    • Place the chicken cutlets in a resealable plastic bag and add ⅓ cup of the mayo mixture. Massage gently to evenly coat the chicken with the mayo. Refrigerate for at least 2 hours and up to 24 hours. Cover and refrigerate the remaining mayo mixture.
    • Heat a large griddle over medium-low heat.
    • Arrange the bacon slices on one side of the griddle in a single layer and cook, turning occasionally until crispy, 12 to 15 minutes.
    • While the bacon is cooking, place the chicken on the other side of the griddle and cook, flipping once, until it reaches an internal temperature of 165°F (74°C), 10 to 12 minutes.
    • To assemble the sandwiches, spread each side of the bun with some of the remaining mayo and mustard aioli. Top with a piece of chicken, a slice of crispy bacon, lettuce, and tomato. Serve immediately.

    Notes

    • Get ahead--Mix up your marinade and sauce before heading out on your camping trip. If you'll be cooking the chicken on the first day of your trip, go ahead and get it marinating before you leave.
    • Dietary--This recipe is suitable for dairy-free diets.

    Nutrition

    Serving: 1sandwichCalories: 532kcalCarbohydrates: 42gProtein: 42gFat: 23gCholesterol: 118mgFiber: 1gSugar: 9g
    Keyword blackstone cooking, blackstone griddle, griddle chicken recipes
    Tried this recipe?Let us know how it was!

    July 3, 2024 Camping

    19 Easy Kid-Friendly Camping Meals

    Keep the kids full and happy with this collection of 19 easy kid-friendly camping meals. There are great breakfast, lunch, dinner, snack, and dessert options that everyone will love.

    1
    Recipe and photo credit: Champagne Tastes
    Campfire Monte Cristos
    These campfire monte cristos feature cheese, jam, and your choice of ham or turkey for a golden, sweet and savory sandwich!
    Get the recipe: Campfire Monte Cristos
    2
    A walking taco with Doritos and cheese with lettuce, sour cream, and tomato surrounding it.
    Camping Walking Tacos
    An easy handheld camping meal made with spiced ground beef and all your favorite taco fixings piled into a bag of nacho chips. Easy, fast, and kid-friendly.
    Get the recipe: Camping Walking Tacos
    3
    Recipe and photo credit: Couch Potato Camping
    Mini Corn Dog Muffins
    Easy to make mini corn dog muffins are great for camping. They are a fun breakfast, hearty snack and mini meal paired with chili or soup.
    Get the recipe: Mini Corn Dog Muffins
    4
    Recipe and photo credit: Champagne Tastes
    Campfire Pizza with Veggies
    This easy campfire pizza is cooked in a cast iron pan over a fire, and is an easy and delicious vegetarian pizza that’s perfect for camping, cookouts, and bonfires.
    Get the recipe: Campfire Pizza
    5
    Recipe and photo credit: My Mini Chefs
    Easy Cheese Quesadilla
    This easy cheese quesadilla recipe is quick, delicious and so easy to make. They make a great lunch or a quick dinner that’s sure to satisfy.
    Get the recipe: Easy Cheese Quesadilla
    6
    A stack of pancakes, maple syrup, and blueberries on a plate with blueberries and bacon in the background.
    Easy Camping Pancakes
    These fluffy camping pancakes, made on your cast-iron skillet or griddle, are soft and buttery, with crisp edges. Top them with plenty of maple syrup for the ultimate breakfast treat.
    Get the recipe: Cast Iron Skillet Pancakes
    7
    Recipe and photo credit: Fox Farm Home
    Loaded Campfire Nachos
    These loaded campfire nachos are easy to make (and clean up!) and are a perfect meal for a family camping adventure.
    Get the recipe: Loaded Campfire Nachos
    8
    Two campfire waffle cones filled with marshmallows, Rolo pieces, and Teddy Grahams.
    Campfire Cones
    Everything you love about s'mores, stuffed into a waffle cone and cooked over the campfire until melted and gooey.
    Get the recipe: Campfire Cones
    9
    Recipe and photo credit: Fresh Off the Grid
    French Toast Sticks
    Golden buttery sticks, perfect for dunking in sweet maple syrup. These French toast sticks make a fun finger-food breakfast for kids and grown-ups alike.
    Get the recipe: French Toast Sticks
    10
    Two jars filled with Golden Grahams, chocolate cookies, mini marshmallows, and chocolate chips.
    S'mores Trail Mix
    A quick and easy snack mix that delivers all the classic s'mores flavors with none of the mess!
    Get the recipe: S'mores Trail Mix
    11
    Recipe and photo credit: Two Healthy Ktichens
    Granola Crunch Apple-Peanut Butter Sandwich Wraps
    These crunchy peanut butter sandwich wraps are fast, easy and so adaptable! Perfect on-the-go make-aheads, they’re full of fruits, whole grains and protein!
    Get the recipe: Granola Crunch Apple-Peanut Butter Wraps
    12
    A person pulling an English muffin grilled cheese sandwich apart.
    English Muffin Grilled Cheese
    Your favorite grilled cheese sandwich just got even better thanks to two(!) types of cheese and a crispy toasted English muffin.
    Get the recipe: English Muffin Grilled Cheese
    13
    Recipe and photo credit: Spoons of Flavor
    Cheesy Ramen Noodles
    This cheese ramen noodle requires 5 minutes and 4 simple ingredients making it perfect for a quick meal that both adults and kids will enjoy.
    Get the recipe: Cheesy Ramen Noodles
    14
    Recipe and photo credit: Fox Farm Home
    Campfire Banana Boats
    ​These campfire banana boats are so easy to make and are such a fun dessert for a family camping trip. They are sure to be a crowd pleaser!
    Get the recipe: Campfire Banana Boats
    15
    Recipe and photo credit: xoxo Bella
    Campfire Hot Dog and Potato Foil Packs
    Eating around the campfire is one of life’s great pleasures, but you can also use a grill or the oven. Hot dog and potato foil packs are just always so good!
    Get the recipe: Campfire Hot Dog and Potato Foil Packs
    16
    Six cheese biscuits in a Dutch oven lined with parchment.
    Dutch Oven Biscuits
    These tender, cheesy biscuits are a great side dish or camping breakfast that are cooked in your cast iron Dutch oven over the fire.
    Get the recipe: Dutch Oven Biscuits
    17
    Three shredded chicken tacos on a blue platter with sour cream, avocado, and cilantro.
    Dutch Oven Shredded Chicken Tacos
    These smoky chicken tacos are prepared in your Dutch oven over the campfire. They're an easy camping meal that's perfect for your next trip.
    Get the recipe: Dutch Oven Shredded Chicken Tacos
    18
    Recipe and photo credit: The Littlest Crumb
    Crispy Pan Fried Gnocchi
    This crispy pan fried gnocchi topped with a light garlic butter parmesan sauce is an easy meal that takes only 20 minutes to make.
    Get the recipe: Crispy Pan Fried Gnocchi
    19
    Recipe and photo credit: Budget Delicious
    S’mores Nachos
    S’mores nachos are a sweet twist on everyone’s favorite campfire treat and it’s so easy to make this 15-minute smores dessert recipe.
    Get the recipe: S'mores Nachos

    July 1, 2024 Breakfast

    Coconut Yogurt Parfait

    This easy coconut yogurt parfait recipe is an ideal make-ahead breakfast or dessert made with layers of creamy coconut-flavored yogurt, macerated cherries, and crunchy granola. Enjoy them at home or toss them into your cooler and pack along on your next camping trip.

    A coconut yogurt parfait topped with macerated cherries in a jar with fresh cherries scattered around the jar.

    I love that these simple homemade yogurt parfaits are an easy dessert or breakfast ready in just 20 minutes, made with everyday staples, customizable to suit your tastes, and can be prepared in advance. This makes them perfect for on-the-go breakfasts or an easy healthy-ish dessert. Add them to your recipe rotation for at home or on camping trips.

    [feast_advanced_jump_to]

    Why This Recipe is Great for Camping

    • You can prepare the yogurt and granola parfait at home and pack it along for an easy camping breakfast or dessert.
    • It's a great make-ahead breakfast or dessert that doesn't require freezing.
    • It's served in individual portions, making it great for meal planning and prep.

    How to Make a Yogurt Parfait

    Ingredients for coconut yogurt parfait--yogurt, granola, cherries, and sugar.
    • Cherries--Pit your cherries before tossing them with sugar. This is a great use for cherries that are very ripe as they'll release plenty of juice. Don't use very crunchy or underripe cherries.
    • Yogurt--I recommend using a thick Greek-style or high fat coconut flavored yogurt to create the creamiest parfait and to help to maintain distinct layers as it sits. The juice from the macerated cherries will loosen the yogurt a bit as you eat it. If you prefer a different flavor or coconut isn't available to you, vanilla yogurt is a great substitution or feel free to swap in strawberry yogurt fruit dip.
    • Granola--The recommended chunky chocolate cherry granola pairs wonderfully with the macerated cherries but you can use your favorite homemade or store-bought granola. If it's a chunky-style granola, break it into small pieces before adding to the parfait jars.

    Important Steps

    A bowl of pitted halved cherries topped with sugar.
    A jar partially filled with yogurt.
    1. Mix the cherries and sugar in a bowl and let them site until they start to release juices.
    2. Spoon a layer of yogurt into individual jars.
    A jar with a layer of yogurt topped with a layer of granola.
    A bowl of macerated cherries next to a yogurt parfait in a jar.
    1. Top with a layer of granola.
    2. Spoon a second layer of yogurt over the granola. Top with the macerated cherries and finish with a sprinkle of granola.

    FAQs

    Can I make these with a different type of fruit?

    Yes, definitely. Strawberries, raspberries, diced peaches, plums, or nectarines would all work well. You can even skip the fruit and layer with spoonfuls of huckleberry sauce.

    Can I use frozen fruit?

    You can, but thaw them before adding to the parfait. You can toss the frozen fruit with sugar before thawing, but let them thaw completely before layering in the jar.

    Tips and Troubleshooting

    • Simplify the recipe by using store-bought granola.
    • To get ahead, prepare your yogurt parfaits up to 48 hours in advance. Keep refrigerated or store in your cooler until you're ready to serve.
    • This recipe is suitable for gluten-free diets.
    Three jars of coconut yogurt parfait.

    More Make-Ahead Camping Recipes You'll Love

    Eight cinnamon rolls in a cast iron Dutch oven.
    Dutch Oven Cinnamon Rolls
    A layered lemon curd dessert cup in a small jar with a marshmallow on top.
    Lemon Curd Desssert Cups

    Tried This Recipe?

    If you've tried this recipe, please leave a comment below. Follow me on Instagram, Facebook, YouTube, or Pinterest for more great camping and grilling recipes.

    Recipe

    A coconut yogurt parfait topped with macerated cherries in a jar with fresh cherries scattered around the jar.

    Coconut Yogurt Parfait

    A woman's face.Angie Zoobkoff
    These easy make-ahead coconut yogurt parfaits include layers of creamy coconut-flavored yogurt, crunchy granola, and juicy macerated cherries.
    No ratings yet
    Print Recipe Pin Recipe
    Prep Time 20 minutes mins
    Total Time 20 minutes mins
    Course Breakfast, Dessert
    Cuisine American
    Servings 4 parfaits
    Calories 259 kcal

    Equipment

    • 4 pint-sized jars or individual serving dishes

    Ingredients
      

    • 1 cup cherries pitted and halved
    • 2 tablespoons granulated sugar
    • 2 cups full-fat coconut-flavored yogurt (regular or Greek)
    • 1¼ cups chunky chocolate cherry granola broken into small pieces

    Instructions
     

    • Place the cherries in a medium bowl and sprinkle with the sugar. Toss well to combine and let the cherries sit at room temperature until they release some juices, about 15 minutes.
    • Spoon ¼ cup yogurt into the bottom of each jar or serving dish.
    • Top with ¼ cup granola, followed by another ¼ cup of the cherries and their juices.
    • Sprinkle 1 tablespoon over the top of each parfait. Serve immediately or cover and refrigerate for up to 48 hours.

    Notes

    • Make it easier--Simplify the recipe by using store-bought granola.
    • Get ahead--Prepare your yogurt parfaits up to 48 hours in advance. Keep refrigerated or store in your cooler until you're ready to serve.
    • Dietary--This recipe is suitable for gluten-free diets.

    Nutrition

    Serving: 1parfaitCalories: 259kcalCarbohydrates: 46gProtein: 10gFat: 15gCholesterol: 38mgSodium: 74mgFiber: 3gSugar: 32g
    Keyword camping breakfast, granola parfait, make-ahead meals, yogurt and granola
    Tried this recipe?Let us know how it was!

    June 29, 2024 Camping

    12 Best Homemade Hiking Snacks

    These 12 best homemade hiking snacks are portable, packable, make-ahead foods that are perfect for hitting the trails or enjoying on a picnic at your destination. Whip up an easy batch of trail mix, nosh on some homemade granola bars or dried fruit, or learn how to make your own jerky.

    1
    Recipe and photo credit: xoxo Bella
    Tropical Trail Mix
    Let this delicious blend of tropical fruits, nuts and yogurt clusters bring some extra sunshine into your day. Tropical trail mix is an energizing, sweet and delicious snack.
    Get the recipe: Tropical Trail Mix
    2
    A bowl of cranberry energy balls with almonds scattered around.
    Cranberry Energy Balls
    These sweet and nutty energy bites are quick and easy to make and loaded with plenty of nutritious ingredients (plus a little chocolate).
    Get the recipe: No-Bake Fruit and Nut Energy Bites
    3
    Recipe and photo credit: Chef Ani
    Homemade Raspberry Fruit Leather
    Homemade raspberry fruit leather is made with only four ingredients: raspberries, apple juice concentrate, maple syrup (optional), and lemon juice. Try it today!
    Get the recipe: Homemade Raspberry Fruit Leather
    4
    A jar filled with chunky granola bites and fresh cherries scattered around the jar.
    Chunky Chocolate Cherry Granola
    These crispy crunchy granola bites are laden with dried fruit, coconut, and chocolate chips. They're perfect for an easy breakfast or portable hiking snack.
    Get the recipe: Chunky Chocolate Cherry Granola
    5
    Recipe and photo credit: Flavorful Eats
    Spicy Seasoned Pretzels
    Coated in a zesty, homemade spice blend, these spicy seasoned pretzels are the ultimate snack - crunchy, flavorful, and perfectly spicy!
    Get the recipe: Spicy Seasoned Pretzels
    6
    Recipe and photo credit: Chew Out Loud
    15-Minute Chocolate Avocado Energy Bars
    These chocolate avocado energy bars are here to provide healthy energy when you need it. They’re super as hiking fuel or midday pick-me-up.
    Get the recipe: 15-Minute Chocolate Avocado Energy Bars
    7
    A bowl of pretzel rail mix with small bowls of M&Ms and fish crackers nearby.
    Butter Toffee Trail Mix
    This easy homemade holiday trail mix includes butter toffee pretzels, crackers, chocolate chips, and M&Ms. It's a festive snack perfect for your holiday camping trip or Christmas parties.
    Get the recipe: Butter Toffee Trail Mix
    8
    Recipe and photo credit: In the Kitch
    Cinnamon Apple Chips
    This apple chip recipe brings together the classic autumnal combination of fresh apples and warm cinnamon.
    Get the recipe: Cinnamon Apple Chips
    9
    Recipe and photo credit: Binky's Culinary Carnival
    Homemade Deer Jerky
    We will guide you on a mouthwatering journey to create venison jerky, a traditional snack loved by adventurers, hunters, and foodies alike.
    Get the recipe: Homemade Deer Jerky
    10
    Recipe and photo credit: Get Inspired Everyday!
    Peanut Butter Granola Bars
    Easy to make, these peanut butter granola bars with a chocolate drizzle make the perfect gluten free, vegan, dairy free, healthy snack.
    Get the recipe: Peanut Butter Granola Bars
    11
    A bowl of nut free grail mix.
    Homemade Nut-Free Trail Mix
    This trail mix without nuts is easy to make in just 5 minutes with only a handful of everyday ingredients. It's perfect for camping, hiking, snacking, or kids lunch boxes.
    Get the recipe: Nut-Free Trail Mix
    12
    Recipe and photo credit: Little Healthy Bites
    Soft & Chewy Apple Peanut Butter Oatmeal Bars
    These soft and chewy apple peanut butter oatmeal bars are like a cross between granola bars and baked oatmeal. Only 5 ingredients required!
    Get the recipe: Soft & Chewy Apple Peanut Butter Oatmeal Bars

    June 28, 2024 Breakfast

    Chunky Chocolate Cherry Granola

    This chunky chocolate cherry granola doubles as an easy camping breakfast or a portable homemade hiking snack. Made with oats, dried cherry, coconut flakes, and chocolate chips, these granola chunks will keep you fueled for hours.

    A jar filled with chunky granola bites and fresh cherries scattered around the jar.

    I love almost any kind of granola for breakfast, but when it comes to snacking, I think granola is best served in chunks that are portable, packable, and easy to munch on. These granola bites combine dried cherries, coconut flakes, and oats to create clusters that are perfect for snacking or breakfast. As an added bonus, making chunky granola is actually even easier than the crumbly version because you don't have to stir it at all!

    [feast_advanced_jump_to]

    Why This Recipe is Great for Camping

    • You can make it ahead of time and pack it along for breakfast or as a hiking snack along with a bag of pear chips.
    • It doesn't take up any precious cooler space.

    Ingredients and Substitutions

    Ingredients for chunky chocolate cherry granola--oil, oats, chocolate chips and coconut flakes, honey, vanilla, brown sugar, and dried cherries.
    • Oats--Plain rolled oats work best here. You can use the quick-cooking kind if that's all you've got, but don't use steel-cut oats for this granola recipe.
    • Oil--This is the main liquid component of the recipe. You can use any type of neutral-flavored oil such as vegetable, sunflower, or safflower.
    • Honey--The sticky sweetness of honey does double-duty here in helping to bind everything together and adds sweetness to the granola bites. You can use maple syrup if you want to keep the recipe vegan.
    • Dried cherries--I love the combination of chocolate, cherry, and coconut, but you can substitute a different type of dried fruit, if you prefer. Dried cranberries or raisins will work well here.
    • Coconut flakes--I used dried sweetened coconut flakes for this recipe. Since this isn't an overly sweet recipe, if you're using unsweetened coconut, add an extra tablespoon of brown sugar to the liquid mixture.
    • Chocolate chips--Use your favorite type of chocolate chips here. Semi-sweet, milk, or dark chocolate chips are all great choices.

    Important Steps

    Oats, dried cherries, coconut flakes, and chocolate chips mixed together in a bowl.
    Honey, oil, and vanilla mixed together in a measuring glass with a whisk resting inside.
    1. Mix the oats, coconut, chocolate chips, and dried cherries in a large bowl.
    2. Whisk the oil, honey, brown sugar, and vanilla together in a liquid measuring cup.
    Liquid ingredients being mixed into a bowl of oats, dried cherries, and coconut flakes.
    Unbaked granola pressed into parchment pline baking sheet.
    1. Pour the liquid ingredients over the dry mixture and stir well to thoroughly coat the mixture.
    2. Firmly press the granola into a parchment-lined baking sheet. Bake in a 325°F oven without stirring until it smells toasted and is golden brown in color. Cool completely before breaking into chunks.

    FAQs

    Can I add nuts to the recipe?

    Yes. You can replace some or all of the coconut or chocolate chips with an equal volume of your favorite chopped nut.

    How long will these granola chunks stay fresh?

    If stored in an airtight container or resealable bag, homemade granola will keep for up to 1 month. For longer storage, freeze the granola for up to 3 months.

    How should I serve this?

    You can enjoy these chunky granola bites as they are as a portable snack, mixed with milk or yogurt for breakfast, or layered with yogurt and fruit to create a parfait. You may prefer to break the pieces into small chunks if mixing with something else.

    Tips and Troubleshooting

    • Take the time to really mix the granola up before baking. It should begin to clump together as everything becomes evenly coated with the liquid mixture.
    • Store your chocolate cherry granola in an airtight container or resealable bag in a cool, dark place.
    • This recipe is suitable for gluten-free and vegetarian diets. To make it vegan, use maple syrup instead of honey.
    A bowl of chunky granola bite with fresh cherries and a bowl of yogurt nearby.

    More Make-Ahead Camping Snacks You'll Love

    Several no-bake energy bites in a dish with almonds scattered around.
    Fruit and Nut Energy Bites
    A bowl of nut free grail mix.
    Nut-Free Trail Mix

    Tried This Recipe?

    If you've tried this recipe, please leave a comment below. Follow me on Instagram, Facebook, YouTube, or Pinterest for more great camping and grilling recipes.

    Recipe

    A jar filled with chunky granola bites and fresh cherries scattered around the jar.

    Chunky Chocolate Cherry Granola

    A woman's face.Angie Zoobkoff
    These crispy crunchy granola bites are laden with dried fruit, coconut, and chocolate chips. They're perfect for an easy breakfast or portable hiking snack.
    No ratings yet
    Print Recipe Pin Recipe
    Prep Time 10 minutes mins
    Cook Time 50 minutes mins
    Total Time 1 hour hr
    Course Breakfast, Snack
    Cuisine American
    Servings 12 servings
    Calories 243 kcal

    Ingredients
      

    • 4 cups rolled oats
    • 1 cup dried cherries
    • ¾ cup shredded coconut flakes
    • ½ cup chocolate chips
    • ½ cup vegetable oil
    • ⅓ cup honey
    • ¼ cup light brown sugar
    • 2 teaspoons vanilla
    • ¾ teaspoon salt

    Instructions
     

    • Preheat oven to 325°F. Line a rimmed baking sheet with parchment paper.
    • In a large bowl, mix the oats, dried cherries, coconut, and chocolate chips.
    • In a medium bowl or liquid measuring cup, whisk the oil, honey, brown sugar, vanilla, and salt together until the sugar dissolves.
    • Pour the liquid mixture over the oats. Stir well to evenly coat the granola. As it becomes uniformly mixed, the granola should begin to clump together.
    • Firmly press the granola into an even layer in the prepared baking sheet. It should fill the whole sheet.
    • Bake, rotating the baking sheet once during cooking, until the granola is deep golden brown and smells toasted, about 50 minutes.
    • Remove the baking sheet from the oven and let the granola cool completely, about 1 hour. Once cool, break the granola into chunky pieces.

    Notes

    • Storage and freezing--Store your chocolate cherry granola in an airtight container or resealable bag in a cool, dark place for up to 1 month or freeze for up to 3 months.
    • Dietary--This recipe is suitable for gluten-free and vegetarian diets. To make it vegan, use maple syrup instead of honey.

    Nutrition

    Serving: 0.66cupCalories: 243kcalCarbohydrates: 38gProtein: 5gFat: 8gFiber: 5gSugar: 11g
    Keyword camping breakfast, easy breakfast, hiking food
    Tried this recipe?Let us know how it was!

    June 26, 2024 Blackstone Griddle Recipes

    9 Epic Griddle Breakfast Recipes to Start Your Day

    We're told endlessly that breakfast is the most important meal of the day, so why not make it the most delicious meal of the day, too? These 9 griddle breakfast recipes are satisfying meals that can be prepared on your Blackstone or other griddle and will keep you fueled all morning long. They're great for lazy weekend brunch, camping trips, or feeding a crowd.

    1
    Recipe and photo credit: Learning to Smoke
    Chorizo Breakfast Burritos
    Chorizo breakfast burritos are made with potatoes, chorizo, and two types of cheese. Start your day with one of these handheld flavor bombs!
    Get the recipe: Chorizo Breakfast Burritos
    2
    A serving of scrambled eggs, topped with cheese and two toast halves on a plate.
    Blackstone Scrambled Eggs
    These creamy scrambled eggs cook up on your outdoor griddle to a perfectly light and fluffy texture. Topped with Cheddar cheese, they're an elevated everyday breakfast staple.
    Get the recipe: Blackstone Scrambled Eggs
    3
    Recipe and photo credit: Learning to Smoke
    Breakfast Sliders with Country Gravy
    Make the ultimate breakfast sandwiches in slider form! These breakfast sliders combine sausage, hash browns, eggs, and cheese all on toasted Hawaiian rolls. Dip in country gravy for the complete breakfast experience!
    Get the recipe: Breakfast Sliders with Country Gravy
    4
    Several slices of maple sriracha bacon on a plate with maple syrup and sriracha in the background.
    Maple Sriracha Griddle Bacon
    This sweet and spicy bacon is easy to make in only 20 minutes and with just 3 ingredients. Try it today and take your breakfast to the next level.
    Get the recipe: Maple Sriracha Griddle Bacon
    5
    Recipe and photo credit: Mae's Menu
    Bagel French Toast
    With a golden brown and crispy exterior and a lightly chewy custard-like center, bagel French toast is our new favorite variation on the breakfast classic. Easy to make and perfect for breakfast and brunch!
    Get the recipe: Bagel French Toast
    6
    Two hash brown patties topped with sliced avocado, everything bagel spice, and hot sauce.
    Hash Brown Avocado Toast
    This fun variation on regular avocado toast uses crispy hash brown patties and tops them with creamy avocado, everything bagel seasoning, and hot sauce, if you like. It's an easy handheld breakfast, perfect for any day of the week.
    Get the recipe: Hash Brown Avocado Toast
    7
    Recipe and photo credit: Erica's Recipes
    Griddle Hash Browns
    Griddle hash browns with eggs are easy to prepare and so flavorful to complement breakfast or brunch. Make these hash browns on your Blackstone or griddle, then cook the eggs on top.
    Get the recipe: Griddle Hash Browns
    8
    A stack of pancakes, maple syrup, and blueberries on a plate with blueberries and bacon in the background.
    Fluffy Buttermilk Pancakes
    These fluffy camping pancakes, made on your cast-iron skillet or griddle, are soft and buttery, with crisp edges. Top them with plenty of maple syrup for the ultimate breakfast treat.
    Get the recipe: Fluffy Buttermilk Pancakes
    9
    Recipe and photo credit: Erica's Recipes
    The Hangover Burger
    The Hangover Burger is a well seasoned bacon and egg burger served on a buttery toasted brioche bun with cheese layered between two griddle smashed patties for the ultimate breakfast smashed burger.
    Get the recipe: The Hangover Burger

    June 24, 2024 Camping

    3-Ingredient Guacamole

    This simple guacamole recipe requires only three ingredients--avocado, lime juice, and salt--and five minutes of effort to create a creamy scoopable dip for snacking on or dolloping atop chorizo tacos, skillet nachos, sausage quesadillas, and more.

    A bowl of guacamole with chips and lime wedges on the side.

    I've tried guacamole almost every way I can think of--with chunks of mango, crumbles of creamy blue cheese, finely chopped cilantro, diced jalapeño, and so on. Truthfully, I love them all, but when I need a quick snack fix, this basic guacamole recipe is the one I turn to over and over again. It's ready in a flash, it's creamy, satisfying, and a guaranteed crowd-pleaser. Use it as a simple dip or to dollop atop your chicken nachos, or dunk your quesadillas in.

    [feast_advanced_jump_to]

    Why You'll Love This Recipe

    • It's quick and easy to make with minimal ingredients.
    • It's a healthy snack that's suitable for all diets.

    Ingredients and Substitutions

    Ingredients for 3-ingredient guacamole--avocado, limes, and salt.
    • Avocado--Ripe avocados should be very dark green and should yield slightly when squeezed gently. Avoid any hard bright green avocados or any very soft fruit.
    • Limes--I highly recommend using freshly squeezed lime juice for the best flavor. If you must use the bottled stuff you can, but start with less than the recipe calls for and taste as you go as it tends to be more concentrated.

    How to Make Homemade Guacamole

    A bowl of mashed avocado.
    A bowl of mashed avocado with lime juice squeezed over.
    1. Scoop the avocado flesh into a medium bowl and use a fork or masher to mash to your desired consistency.
    2. Squeeze the lime juice over the avocado and add the salt. Stir to combine, taste, and adjust the seasoning as needed.

    FAQs

    Can I make this in advance?

    Avocado begins to brown quickly when exposed to air. The addition of citrus helps to slow this process, so you can make the guacamole a couple of hours before serving, but not any longer than that. After spooning it into your serving dish, place a sheet of plastic wrap over the top of the dip and press it against the surface so that there isn't any air trapped under the plastic. Refrigerate until ready to serve.

    Can I add other mix-ins?

    Sure. If you want to jazz up your guac, stir in some finely chopped fruit, crumbled cheese, fresh cilantro, chopped tomato, or a little bit of spice, such as garlic powder or cayenne.

    How can I ripen an avocado quickly?

    Underripe avocados are very difficult to mash and don't have a lot of flavor. If your fruit is still a little too firm, pop it in a paper bag with a banana or apple, fold the bag over to close, and let it sit at room temperature for 1 to 2 days.

    Tips and Troubleshooting

    • Make or uncover the guacamole just before serving so that it doesn't brown too quickly. If the surface of the dip has begun to brown, scrape off the top layer and mix well to get it back to its vibrant green shade.
    • This 3-ingredient guacamole recipe is suitable for gluten-free, dairy-free, and vegan diets.
    A bowl of chips and two smaller bowls of guacamole and salsa.

    More Camping Snack Recipes You'll Love

    A foil pan filled with buffalo chicken dip with carrots, crackers, and bread cubes nearby.
    Make-Ahead Buffalo Chicken Dip
    A bowl of spiced pepitas with some spilling over the top.
    Spiced Pepitas

    Tried This Recipe?

    If you've tried this recipe, please leave a comment below. Follow me on Instagram, Facebook, YouTube, or Pinterest for more great camping and grilling recipes.

    Recipe

    A bowl of guacamole with chips and lime wedges on the side.

    3-Ingredient Guacamole

    A woman's face.Angie Zoobkoff
    This simple guacamole recipe requires only 3 ingredients and five minutes of effort to create a creamy dip that's perfect for snacking.
    No ratings yet
    Print Recipe Pin Recipe
    Prep Time 5 minutes mins
    Total Time 5 minutes mins
    Course Snack
    Cuisine Mexican
    Servings 1 cup
    Calories 219 kcal

    Ingredients
      

    • 3 medium ripe avocados halved and pitted
    • Juice of 1 lime (2 to 3 teaspoons)
    • ¼ teaspoon salt plus more to taste

    Instructions
     

    • Scoop the avocado flesh into a medium bowl and use a fork or masher to mash until smooth.
    • Squeeze in the lime juice and add ¼ teaspoon salt. Mix well. Taste and add more salt, if needed. Serve immediately.

    Notes

    • Keep it green--Make or uncover the guacamole just before serving so that it doesn't brown too quickly. If the surface of the dip has begun to brown, scrape off the top layer and mix well to get it back to its vibrant green shade.
    • Dietary--This recipe is suitable for gluten-free, dairy-free, and vegan diets.

    Nutrition

    Serving: 0.25cupCalories: 219kcalCarbohydrates: 12gProtein: 3gFat: 20gFiber: 9gSugar: 1g
    Keyword dips, fresh avocado, homemade guacamole
    Tried this recipe?Let us know how it was!

    June 22, 2024 Collections

    16 Sweet S'more-Inspired Desserts

    S'mores are the quintessential camping dessert, but there's no reason to reserve those indulgent flavors only for camping trips. Enjoy everything you love about classic s'mores in these 16 sweet s'more-inspired desserts, which include cupcakes, ice cream, cookies, and more.

    1
    Recipe and photo credit: Simply Stacie
    S’mores Cupcakes
    S’mores Cupcakes have everything you love about s’mores without the campfire. Marshmallows, graham crackers and chocolate cake - yum!
    Get the recipe: S'mores Cupcakes
    2
    Two jars filled with Golden Grahams, chocolate cookies, mini marshmallows, and chocolate chips.
    S'mores Trail Mix
    A quick and easy snack mix that delivers all the classic s'mores flavors with none of the mess!
    Get the recipe: S'mores Trail Mix
    3
    Recipe and photo credit: To Simply Inspire
    S’mores Cookies
    These s’mores cookies are the ultimate summer treat made with a delicious cookie base, chocolate chips, graham cracker pieces, and gooey marshmallows. It’s a fun cookie version of the classic campfire dessert!
    Get the recipe: S'mores Cookies
    4
    Recipe and photo credit: To Simply Inspire
    Golden Graham Cereal Bars
    These Golden Graham cereal bars a no-bake treat similar to classic Rice Krispie treats but made with Golden Graham cereal. Mixed into a yummy combination of melted, gooey marshmallows and butter and pressed into bars along with chocolate for a perfect sweet, crunchy S’mores treat.
    Get the recipe: Golden Graham Cereal Bars
    5
    Two campfire waffle cones filled with marshmallows, Rolo pieces, and Teddy Grahams.
    Campfire Cones
    Everything you love about s'mores, stuffed into a waffle cone and cooked over the campfire until melted and gooey.
    Get the recipe: Campfire Cones
    6
    Recipe and photo credit: All That's Jas
    No-Churn S’mores Ice Cream
    This no-churn s’mores ice cream is the best and much cooler (no pun intended) version of the traditional nighttime campfire treat.
    Get the recipe: No-Churn S'mores Ice Cream
    7
    The Simple Sweet Life
    S’more Tart
    Homemade graham cracker crust, rich chocolate ganache and a billowy meringue come together to make the ultimate s’more tart! It’s as easy as it is delicious!
    Get the recipe: S'more Tart
    8
    S’mores Ice Cream Pie
    Recipe and photo credit: Cooking with Curls
    S’mores Ice Cream Pie
    S’mores ice cream pie combines the flavors of a classic s’more with the creaminess of ice cream into a delightful, frozen dessert.
    Get the recipe: S'mores Ice Cream Pie
    9
    Recipe and photo credit: Chisel & Fork
    S’mores Crème Brûlée
    This s’mores crème brûlée consists of a chocolate custard topped with crushed graham crackers and toasted marshmallows, bringing back campfire memories.
    Get the recipe: S'mores Crème Brûlée
    10
    Recipe and photo credit: Rose Bakes
    S'mores Rice Krispie Treats
    These s' mores Rice Krispie treats have all the goodness of Rice Krispie treats mashed up with the best smores ingredients: graham crackers, milk chocolate, and toasty marshmallows! The perfect mash-up treat for smore’s lovers!
    Get the recipe: S'mores Rice Krispie Treats
    11
    A jar filled with graham cracker crumbs, marshmallow fluff, chocolate pudding, and whipped cream on top.
    S'mores in a Jar
    For when you're craving s'mores, but don't have a campfire.
    Get the recipe: S'mores in a Jar
    12
    Recipe and photo credit: Homebody Eats
    S’mores Macarons
    These macarons are topped with graham crackers and then filled with marshmallow buttercream and Hershey’s ganache. They’re perfect for the summer.
    Get the recipe: S'mores Macarons
    13
    Recipe and photo credit: Emily Fabulous
    S’more Meringue Cups
    S’mores meringue cups are an updated version of the classic campfire s’more in a graham cracker cup with chocolate and toasted meringue!
    Get the recipe: S'more Meringue Cups
    14
    Recipe and photo credit: Little Black Skillet
    Mini S’mores Pies
    Enjoy the classic s’mores flavors of graham crackers, chocolate bars, and toasted marshmallow in miniature pie form.
    Mini S'mores Pies
    15
    Recipe and photo credit: Three Olives Branch
    S’mores Tart
    This s’mores tart is a fun and simple dessert, perfect for the summer! A graham cracker crust is filled with a layer of melted chocolate, marshmallow fluff, and topped the s’mores ingredients.
    Get the recipe: S'mores Tart
    16
    Recipe and photo credit: Easy Dessert Recipes
    S’mores Brownies
    These s’mores brownies are the perfect way to celebrate the last bits of warm weather. They’re easy to make and even more delicious to eat.
    Get the recipe: S’mores Brownies

    June 21, 2024 Blackstone Griddle Recipes

    Blackstone Scrambled Eggs

    Wondering if it's possible to make creamy, fluffy scrambled eggs on a Blackstone griddle? Yes, it is, and they'll easily rival the best that you make indoors. Get ready to add this Blackstone scrambled eggs recipe to your griddle breakfast favorites.

    A serving of scrambled eggs, topped with cheese and two toast halves on a plate.

    I'll be the first to admit that making scrambled eggs on a large surface griddle isn't as easy as in a skillet because there's nothing to contain them, so you have to be working quickly and constantly to achieve those beautifully fluffy curds. However, it definitely has its advantages. That even heat from the cast iron helps to cook the eggs quickly and evenly and you can cook as many or as few as you'd like, thanks to the large surface area.

    [feast_advanced_jump_to]

    Why You'll Love This Recipe

    • You can scale the Blackstone eggs recipe to make as many eggs as you like.
    • It's a very quick breakfast recipe to make.
    • You can cook up an entire breakfast on the griddle alongside your eggs. Try them with maple Sriracha bacon and griddle pancakes or stuff them into a tortilla with bacon for an easy breakfast quesadilla.

    Ingredients and Substitutions

    Ingredients for Blackstone scrambled eggs--eggs, half and half, salt and pepper, and shredded cheese
    • Half and half--A little extra fat adds richness to the eggs and helps to make them creamy. You can use regular milk, or splurge and go with heavy cream.
    • Cheddar cheese--I think cheese is a wonderful addition to eggs, but if you prefer yours unadorned, that is completely fine. If you're using the cheese, I recommend grating it yourself. Pre-shredded cheese doesn't melt well.

    Important Steps

    Three eggs in a glass bowl with a whisk.
    Beaten eggs in a bowl with a whisk and half and half poured into it.
    1. Crack the eggs into a large bowl and whisk well.
    2. Whisk in the half and half and salt and pepper.
    Scrambled eggs cooking on a large griddle surface.
    Scrambled eggs on a griddle surface topped with shredded cheese.
    1. Heat the griddle over medium-low heat. Spray it with cooking spray. Pour the eggs onto the heated griddle, and working quickly, use a wide metal spatula to constantly scrape the eggs towards the middle.
    2. Once soft curds begin to develop, sprinkle most of the cheese over the top and fold it into the eggs, continuing to scrape and gently fold until the eggs are set and the cheese is melted. Serve with the remaining cheese on top.

    FAQs

    How can you tell when they're done?

    To avoid overcooked griddle scrambled eggs, scoop them off the griddle while they are still slightly shiny. They should have soft fluffy curds that still have a little sheen to them.

    What's the secret to fluffy scrambled eggs?

    Don't use your spatula to chop or flip the eggs while they're cooking. Instead, working constantly, use your spatula to push the eggs towards each other. The cooked egg on the bottom will push up and uncooked egg will spill over, creating volume and a light consistency.

    Tips and Troubleshooting

    • If you have a silicone ring, place it on the griddle before adding your eggs to help contain the spread just until the eggs begin to set.
    • Let your griddle heat up before adding the eggs. They'll set more quickly and run less.
    Two plates topped with scrambled eggs and toast triangles.

    The Most Important Thing to Remember

    Give your full attention to the griddle when cooking these eggs. It is critical to be constantly scraping the eggs towards the center and they will cook quickly, so don't try to multitask or leave them unattended.

    More Blackstone Griddle Recipes You'll Love

    A bowl of pierogies and a bowl of kielbasa with onions with a salad and a dish of sour cream on the side.
    Blackstone Pierogies and Kielbasa
    Slices of bacon cooking on a Blackstone griddle.
    Maple Sriracha Griddle Bacon

    Tried This Recipe?

    If you've tried this recipe, please leave a comment below. Follow me on Instagram, Facebook, YouTube, or Pinterest for more great camping and grilling recipes.

    Recipe

    A serving of scrambled eggs, topped with cheese and two toast halves on a plate.

    Blackstone Scrambled Eggs

    A woman's face.Angie Zoobkoff
    These creamy scrambled eggs cook up on your outdoor griddle to a perfectly light and fluffy texture. Topped with Cheddar cheese, they're an elevated everyday breakfast staple.
    No ratings yet
    Print Recipe Pin Recipe
    Prep Time 5 minutes mins
    Cook Time 5 minutes mins
    Total Time 10 minutes mins
    Course Breakfast
    Cuisine American
    Servings 1 to 2 servings
    Calories 174 kcal

    Equipment

    • Blackstone griddle (or other large griddle)

    Ingredients
      

    • 3 large eggs
    • 1 tablespoon half and half
    • ¼ teaspoon salt
    • ⅛ teaspoon freshly ground black pepper
    • Nonstick cooking spray
    • ¼ cup shredded Cheddar cheese

    Instructions
     

    • Crack the eggs into a medium bowl. Whisk until thoroughly combined.
    • Whisk in the half and half and season with salt and pepper.
    • Preheat the griddle over medium-low heat. Spray the surface with cooking spray.
    • Pour the eggs onto the preheated griddle surface, and working quickly and constantly, use a metal spatula to push the eggs toward the center until they begin to set. Work from all directions to create a mound of eggs in the center.
    • Once curds begin to develop, sprinkle most of the cheese over the top, reserving a little for serving. Continue scraping and pushing the egg curds until they are light and fluffy and just set. The cheese should be mostly melted.
    • Scoop the eggs onto a plate and sprinkle with the remaining cheese before serving.

    Notes

    • Keep it contained--If you have a silicone ring, place it on the griddle before adding your eggs to help contain the spread just until the eggs begin to set.
    • Preheat--Let your griddle heat up before adding the eggs. They'll set more quickly and run less.

    Nutrition

    Serving: 0.5recipeCalories: 174kcalCarbohydrates: 1gProtein: 13gFat: 13gCholesterol: 297mgSodium: 487mgSugar: 1g
    Keyword blackstone cooking, blackstone griddle, camping breakfast, scrambled eggs
    Tried this recipe?Let us know how it was!

    June 19, 2024 Collections

    15 Satisfying Side Dishes to Make on the BBQ

    When it comes to grilling and smoking recipes, meaty steaks, BBQ chicken recipes, and fresh grilled salmon recipes often steal the spotlight. But when the temperatures outside soar and it's too hot to turn on the oven, why not make the whole meal on the BBQ? I've got 15 incredible side dishes that will nudge those mains out of the spotlight and steal the show. What's your favorite side dish to cook on the grill?

    1
    Recipe and photo credit: CopyKat Recipes
    Grilled Artichokes with Garlic Aioli
    Grilled artichokes with garlic aioli is the perfect dish for spring when the artichokes are fresh and in season.
    Get the recipe: Grilled Artichokes
    2
    Four pieces of toasted garlic bread on a wooden cutting board.
    Grilled Garlic Bread
    Make this toasted garlic bread on your grill or over the campfire. Grilled garlic bread is the perfect side dish for grilled fish, steak, or chicken or to serve alongside an easy pasta.
    Get the recipe: Grilled Garlic Bread
    3
    Recipe and photo credit: Two Healthy Kitchens
    Grilled Potatoes in Foil
    These extra-easy grilled potatoes eliminate 3 common, additional cooking steps. But you still get wonderfully tender, fluffy potatoes with lots of yummy golden-brown spots! Try them and see!
    Get the recipe: Grilled Potatoes in Foil
    4
    Recipe and photo credit: Two Healthy Ktichens
    Grilled Asparagus
    This grilled asparagus recipe is easy and so flavorful! Perfectly crisp-tender with a speedy lemon and garlic “marinade” & parmesan cheese!
    Get the recipe: Grilled Asparagus
    5
    Half-moon slices of kohlrabi with a bowl of dip on the side.
    Grilled Kohlrabi
    These char-kissed slices of kohlrabi paired with creamy dipping sauce will have you happily devouring your daily dose of veggies.
    Get the recipe: Grilled Kohlrabi
    6
    A bowl of cubed smoked sweet potatoes with crispy edges, with several thyme sprigs on the side.
    Smoked Sweet Potatoes
    This is a fantastic side dish to enjoy at Thanksgiving or year round. It's made on your grill or smoker, where cubed sweet potatoes are tossed with sage, butter, and oil, and smoked until tender.
    Get the recipe: Smoked Sweet Potatoes
    7
    Recipe and photo credit: Healthy Fitness Meals
    Honey Balsamic Grilled Zucchini
    My honey balsamic grilled zucchini recipe was such a huge hit at my family BBQ gathering. It’s so good and pairs well with everything!
    Get the recipe: Honey Balsamic Grilled Zucchini
    8
    Recipe and photo credit: Foxes Love Lemons
    Grilled Peach Salad with Burrata
    This peach burrata salad has rustic pesto croutons that you’ll want to gobble up before they even reach the table.
    Get the recipe: Peach Burrata Salad
    9
    Recipe and photo credit: In the Kitch
    Grilled Pierogies
    These grilled pierogies are made with dumpling wrappers to keep it simple and a cheesy, smooth potato filling.
    Get the recipe: Grilled Pierogies
    10
    A bowl of grilled beets with crumbled goat cheese and fresh mint.
    Grilled Beets with Goat Cheese
    An easy, healthy, side dish of tender grilled beets and creamy goat cheese with a bright and tangy lemon dressing.
    Get the recipe: Grilled Beets with Goat Cheese
    11
    Recipe and photo credit: Piper Cooks
    Mexican Street Corn (Elote)
    Try this Mexico inspired grilled corn, made with lime juice, mayo, cilantro, chipotle chili powder and Queso Blanco (or Cotija). This is a great, easy and delicious vegetable side dish for your next BBQ or backyard dinner party.
    Get the recipe: Mexican Street Corn
    12
    Six grilled stuffed mushrooms on a plate.
    Grilled Stuffed Mushrooms
    This easy appetizer features a rich garlic, cream cheese, and panko filling tucked inside juicy grilled mushrooms. Perfect for any time of the year.
    Get the recipe: Grilled Stuffed Mushrooms
    13
    A cast iron skillet filled with scalloped potatoes with sprigs of thyme on top.
    Scalloped Potatoes on the Grill
    These grilled scalloped potatoes are creamy and tender, with slightly smoky caramelized edges. They're an easy side dish with just 5 ingredients.
    Get the recipe: Grilled Scalloped Potatoes
    14
    Recipe and photo credit: Christina's Cucina
    Grilled Polenta
    Grilled polenta with cheese is indescribably delicious, simple and nutritious. Bring grilled polenta to your menu; it’s addictive!
    Get the recipe: Grilled Polenta
    15
    Recipe and photo credit: The Waddle and Cluck
    Grilled Vegetable Skewers with Zesty Balsamic Marinade
    These grilled veggie skewers packed with a rainbow of produce will be your new summer obsession. The balsamic herb marinade makes them irresistible.
    Get the recipe: Grilled Vegetable Skewers

    June 17, 2024 Breakfast

    Dutch Oven Biscuits

    These campfire Dutch oven biscuits are a perfect way to start to the day or wonderful to enjoy as a warm, cheesy dinnertime side. They're cooked in your cast iron Dutch oven over the fire and are ready in about 30 minutes.

    Six cheese biscuits in a Dutch oven lined with parchment.

    If you're familiar with Cheddar Bay biscuits that are served at a popular seafood chain restaurant, then you already know what these biscuits taste like. They're light, cheesy, and lightly spiced with garlic and cayenne. The dough comes together easily and there's no kneading required, making them perfect for breakfast (with some turkey sausage patties) or as a side to campfire chili, grilled Old Bay shrimp, or Dutch oven beef stew.

    [feast_advanced_jump_to]

    Why This Recipe is Great for Camping

    • You can mix up the dry ingredients ahead of time so you've got less to do at camp.
    • They come together quickly and there's no kneading or rolling required.

    Ingredients and Substitutions

    Ingredients for Dutch oven biscuits--flour, baking soda, cheese, spices, milk, and butter.
    • Self-rising flour--This is a type of flour that has baking powder and salt already mixed in and is ideal for some baking applications. It's available in most grocery stores or you can make it yourself following the formula in the FAQ section below.
    • Spices--I use a combination of garlic powder, parsley flakes, and cayenne to give the biscuits a savory spiced flavor. If you're making them for breakfast and don't want to include the spices, feel free to omit them.
    • Butter--For light, tender biscuits, make sure to use cold butter.
    • Milk--You can use any type of milk for this Dutch oven biscuit recipe. I have tested it with dairy and non-dairy milk and both provide great results.
    • Cheddar--Don't use pre-shredded cheese here as it doesn't melt well. Always grate it yourself for best results.

    How to Make Biscuits in a Dutch Oven

    A bowl of dry ingredients with a whisk resting inside.
    Pieces of butter being worked into dry ingredients with a pastry blender.
    1. Whisk the dry ingredients in a large bowl.
    2. Use a pastry blender or two knives to blend the butter into the dry ingredients.
    Liquid added to dry ingredients in a bowl and a red spatula for mixing them.
    Cheese being mixed into a biscuit dough.
    1. Pour in the milk and gently mix until the dry ingredients are evenly moistened.
    2. Fold in the Cheddar cheese.
    Six balls of biscuit dough in a Dutch oven lined with parchment.
    A Dutch oven with coals on the lid.
    1. Divide the dough into six pieces and place them inside a parchment-lined Dutch oven.
    2. Place the Dutch oven on top of hot coals and cover the lid with hot coals. Cook until the biscuits are fluffy and the cheese is melted.

    FAQs

    Can I make my own self-rising flour?

    Yes. To create your own self-rising flour for this Dutch oven biscuits recipe, mix a scant 1 cup all-purpose flour, 1 ½ teaspoons baking powder, and ¼ teaspoon salt.

    Can I make these in the oven?

    Yes. You can use a regular large Dutch oven and bake them in the oven, uncovered at 400°F for about 15 minutes. They're ready when they're golden brown and the cheese is melted.

    How do I know when my coals are ready?

    If you're using charcoal briquettes, let them burn in a chimney until they are mostly white/grey before using. This typically takes 15 to 20 minutes.

    Tips and Troubleshooting

    • To get ahead, mix your dry ingredients in a resealable plastic bag before heading out on your camping trip.
    • I don't recommend using your fingers to mix the butter into the flour. It gets too warm and the biscuits will end up gummy.
    • Line your Dutch oven with parchment. It will make it easier to clean and easier to lift the biscuits out of the hot Dutch oven.
    • They're best enjoyed warm and served immediately after making.
    A cheese biscuit on a white plate with a bowl of biscuits nearby.

    More Bread Recipes You'll Love

    A loaf of Irish soda bead with a couple of slices cut from it.
    Dutch Oven Soda Bread
    Four pieces of toasted garlic bread on a wooden cutting board.
    Campfire Garlic Bread

    Tried This Recipe?

    If you've tried this recipe, please leave a comment below. Follow me on Instagram, Facebook, YouTube, or Pinterest for more great camping and grilling recipes.

    Recipe

    Six cheese biscuits in a Dutch oven lined with parchment.

    Dutch Oven Biscuits

    A woman's face.Angie Zoobkoff
    These tender, cheesy biscuits are a great side dish or camping breakfast that are cooked in your cast iron Dutch oven over the fire.
    No ratings yet
    Print Recipe Pin Recipe
    Prep Time 10 minutes mins
    Cook Time 20 minutes mins
    Total Time 30 minutes mins
    Course Breakfast, Side Dish
    Cuisine American
    Servings 6 biscuits
    Calories 141 kcal

    Equipment

    • 6-to-8-quart cast iron Dutch oven

    Ingredients
      

    • 1 cup self-rising flour
    • ¼ teaspoon baking soda
    • ¼ teaspoon garlic powder
    • ¼ teaspoon dried parsley
    • 1 pinch cayenne pepper
    • 3 tablespoons cold unsalted butter cut into cubes
    • ½ cup milk
    • ⅓ cup shredded Cheddar cheese

    Instructions
     

    • Prepare a batch of hot coals in a chimney or fire by burning them until they turn white. You'll need about 30 coals.
    • In a large bowl, whisk together the flour, baking soda, garlic powder, parsley flakes, and cayenne.
    • Add the cubed butter and use a pastry blender or two knifes to blend the butter into the flour until it is pea-sized.
    • Pour in the milk and stir just until the dry ingredients are fully moistened.
    • Fold in the Cheddar cheese.
    • Line a cast iron Dutch oven with parchment paper. Divide the dough into six pieces and place them inside the Dutch oven. Cover with the lid.
    • Arrange 10 hot coals in the fire pit and set the Dutch oven on top. Place 20 coals on the lid. Cook until the biscuits are fluffy and tender, and the cheese is melted, 15 to 20 minutes. The cooking time will be dependent on the heat of your coals and the outdoor conditions. It may take longer if it's a cool or windy day.
    • Remove the biscuits and serve immediately.

    Notes

    • Get ahead--Mix your dry ingredients in a resealable plastic bag before heading out on your camping trip.
    • Don't use your fingers--I don't recommend using your fingers to mix the butter into the flour. It gets too warm and the biscuits will end up gummy.
    • Make life easier--Line your Dutch oven with parchment. It will make it easier to clean and easier to lift the biscuits out of the hot Dutch oven.
    • Serve warm--They're best enjoyed warm and served immediately after making.

    Nutrition

    Serving: 1biscuitCalories: 141kcalCarbohydrates: 13gProtein: 4gFat: 8gCholesterol: 23mgFiber: 1gSugar: 1g
    Keyword campfire cooking, cheddar biscuits, dutch oven cooking, homemade biscuits
    Tried this recipe?Let us know how it was!

    June 15, 2024 Collections

    20 Homemade Condiments That Taste Better Than Store-Bought

    In a world of ever rising grocery prices, wouldn't it be nice to be able to make your own condiments, particularly ones that taste better than the stuff off the shelf? These 20 homemade condiment recipes allow you to do exactly that. Make as much or as little as you like of your favorite everyday staples including salad dressings, mayonnaise, homemade bbq sauce, and more.

    1
    Recipe and photo credit: Savory Experiments
    Classic Cocktail Sauce
    Classic cocktail sauce is more than just ketchup and horseradish. Come see how to make a spectacular, restaurant quality sauce in just 5 minutes!
    Get the recipe: Classic Cocktail Sauce
    2
    Recipe and photo credit: An Expression of Food
    Homemade Thousand Island Dressing
    This homemade Thousand Island dressing recipe is super easy to make with just 8 ingredients, it can be whipped up in no time! And it’s perfect for sandwiches, french fries, burgers and more!
    Get the recipe: Homemade Thousand Island Dressing
    3
    A jar of hot honey bbq sauce with a spoon held above it.
    Hot Honey BBQ Sauce
    This homemade spicy honey bbq sauce is made with tomato sauce, hot honey, vinegar, and spices. It's easy to make and ready in just 15 minutes.
    Get the recipe: Hot Honey BBQ Sauce
    4
    Recipe and photo credit: Serene Trail
    Basil Balsamic Vinaigrette
    This basil balsamic vinaigrette is a tangy, creamy, delicious addition to any salad! Fresh aromatic basil leaves pair perfectly with deeply flavored balsamic vinegar for the most irresistible dressing. Just blend a few simple ingredients and drizzle it over your meal or save it for later!
    Get the recipe: Basil Balsamic Vinaigrette
    5
    Recipe and photo credit: Savory Experiments
    Nashville Hot Sauce
    Nashville hot sauce is a regional hot sauce made from cayenne pepper, other spices and brown sugar. Served on fried chicken!
    Get the recipe: Nashville Hot Sauce
    6
    Recipe and photo credit: Cooking in the Keys
    Tartar Sauce
    Whip up this easy tartar sauce recipe for fish sticks and fried shrimp. Tartar sauce is flavored mayo, packed with pickles and capers.
    Get the recipe: Tartar Sauce
    7
    A jar of nut-free pesto on a cutting board with fresh basil, garlic, and parmesan on the side.
    Nut-Free Pesto
    This homemade pesto is made with basil, Parmesan, olive oil, and garlic, and contains no nuts, making it safe for those with allergies.
    Get the recipe: Nut-Free Pesto
    8
    Recipe and photo credit: Chew Out Loud
    Creamy Caesar Dressing
    Once you’ve made your own creamy Caesar dressing, none other will satisfy. Homemade Caesar dressing is immensely fresh and flavorful
    Get the recipe: Creamy Caesar Dressing
    9
    Recipe and photo credit: Know Your Produce
    Homemade Teriyaki Sauce
    Our homemade teriyaki sauce recipe is so easy you won’t buy store-bought ever again! Make it in 5 minutes with just 5 ingredients.
    Get the recipe: Teriyaki Sauce
    10
    Recipe and photo credit: Happy Kitchen
    Roasted Garlic Sauce
    This creamy vegan roasted garlic sauce is perfect for salads, casseroles, bowls, and more. Use it as a healthier vegan alternative to mayo.
    Get the recipe: Roasted Garlic Sauce
    11
    A small glass pitcher half full of lemon thyme vinaigrette.
    Lemon Thyme Vinaigrette
    I like to think of this easy lemon thyme vinaigrette as sunshine in a jar. Made with only a handful of everyday ingredients, it's guaranteed to brighten any dish it gets drizzled over.
    Get the recipe: Lemon Thyme Vinaigrette
    12
    Recipe and photo credit: Natasha's Home
    Homemade Mayonnaise
    Learn how to make mayonnaise in 2 minutes with this ultimate guide! Fool-proof, no-fail recipe you will want to make again and again.
    Get the recipe: Homemade Mayonnaise
    13
    Recipe and photo credit: It's Not Complicated
    Sweet Chili Sauce
    A delicious homemade version of the Asian classic, and so much better than store bought. Also makes a fantastic edible gift!
    Get the recipe: Sweet Chili Sauce
    14
    Recipe and photo credit: Quiet Baking Day
    Homemade Chocolate Syrup
    Amp up any dessert, fruit board, or ice cream with a super easy homemade chocolate syrup. Only a few ingredients, but tastes impressive.
    Get the recipe: Homemade Chocolate Syrup
    15
    Recipe and photo credit: The Forked Spoon
    Buffalo Sauce
    Homemade Buffalo sauce is so easy to make at home using simple pantry ingredients. Tangy, spicy, and so much better than store-bought buffalo wing sauce, this recipe takes just 5 minutes to make and tastes delicious with everything.
    Get the recipe: Homemade Buffalo Sauce
    16
    Recipe and photo credit: The Honour System
    White BBQ Sauce
    This white BBQ sauce is tangy with a definite spicy kick. Drizzle on grilled chicken or spin into pulled sandwiches.
    Get the recipe: White BBQ Sauce
    17
    Recipe and photo credit: Flavours Treat
    Honey Mustard Sauce
    Homemade honey mustard sauce – creamy, silky smooth, tangy and sweet 5 minute dipping sauce made with just 4 ingredients.
    Get the recipe: Honey Mustard Sauce
    18
    Homemade Ranch Dressing
    Recipe and photo credit: The Virtual Caterer
    Homemade Ranch Dressing
    Discover how to make real restaurant-style ranch dressing from scratch at home with fresh herbs and spices.
    Get the recipe: Homemade Ranch Dressing
    19
    Recipe and photo credit: Life Currents
    Pepper Jelly
    Homemade pepper jelly is sweet, spicy, spreadable, and perfect on a cheese plate or charcuterie board.
    Get the recipe: Pepper Jelly
    20
    Recipe and photo credit: Sava's Kitchen
    Homemade Blue Cheese Dip
    Need a dip for buffalo wings on a game day? Try this homemade creamy and tangy blue cheese dip recipe that's ready in 5 minutes.
    Get the recipe: Homemade Blue Cheese Dip

    June 14, 2024 Beef Recipes

    Surf and Turf Foil Packets

    These surf and turf foil packets are a flavor-packed and mess-free camping dinner made with tender bites of striploin steak, juicy jumbo shrimp, fresh corn, and red onion all tossed with garlic and Old Bay. Cook them over the fire or the grill at home or on your next camping trip.

    Two foil packets with shrimp, steak, corn, red onion and a piece of garlic bread on top.

    A steak and shrimp dinner on a camping trip may sound a little fancy, but after you dive into these mouthwatering steak foil packets, you'll be adding them to the repeat-every-camping-trip list. Serve this steak and seafood dinner with some campfire garlic bread on the side and you've got a complete meal.

    [feast_advanced_jump_to]

    Why This Recipe is Great for Camping

    • The whole meal is cooked in a foil packet, so there are very few dishes to clean up.
    • They're ready in just 30 minutes and can be made over the campfire or on your portable grill.

    Ingredients and Substitutions

    Ingredients for surf and turf foil packets--onion, corn, butter, oil, shrimp, Old Bay, garlic, and steak.
    • Steak--Striploin is my steak of choice for grilling thanks to its great marbling and tenderness, so it was a natural choice for these foil packets. Cut your meat cubes the same size so that they cook evenly. Cutting it into 1-inch pieces will give you medium-rare beef.
    • Shrimp--Use jumbo shrimp for this surf and turf foil packet recipe. Small shrimp will be overcooked and rubbery by the time the corn is cooked. Be sure to peel and devein your shrimp before adding them to the packets.
    • Oil and butter--I use both here because the oil is great at evenly distributing the seasoning mixture, while the butter adds a lot of flavor and richness to the dish. If you need to keep it dairy free, you can use only oil, but be sure to drizzle each packet with a little oil before closing them up.
    • Corn--Break your corn cobs into 4 pieces to keep them at a manageable size for folding up the foil packets.

    How to Make Surf and Turf Foil Packs

    Steak, shrimp, red onion, and corn mixed together in a glass bowl.

    1. Combine the steak, shrimp, corn, and red onion in a large bowl.

    Oil, garlic, and Old Bay seasoning in a small glass bowl.

    2. Mix the oil, garlic, and Old Bay seasoning in a small bowl until combined.

    Dressing poured over a mixture of steak, shrimp, corn, and red onion.

    3. Pour the oil mixture over the steak and shrimp and mix well to coat everything in spiced oil.

    A portion of steak, shrimp, corn, and onion for surf and turf foil packets on a double layer of foil.

    4. Divide the mixture among four double layers of aluminum foil.

    A surf and turf foil packet topped with pieces of butter.

    5. Dot the butter over each portion. Fold and seal the sheets of foil to create individual foil packets.

    Four foil packets on the grill.

    6. Cook over hot coals or a grill set to medium heat until the shrimp are bright pink and opaque throughout.

    FAQs

    What is surf and turf?

    Surf and turf refers to the combination of seafood (surf) and meat that feeds on grass (turf). You may also hear it referred to as 'reef and beef'.

    How can I tell when they're done?

    You want to make sure that your shrimp are fully cooked before eating. The shrimp should be bright pink and opaque throughout and the corn should be bright yellow.

    Can I use a different cut of beef?

    Yes, definitely. Striploin is very tender, but you could substitute tenderloin or ribeye for equally tender results. You could also use sirloin steak for a more economical meal, as I do with my beef and broccoli foil packets. I don't recommend using tough cuts of beef, like stew meat, as it will be tough after the short cooking time.

    Tips and Troubleshooting

    • To get ahead, shuck your corn and mix up your garlic, oil, and seasoning before heading out on your trip. Store the seasoned oil in a sealed container.
    • Use a double layer of aluminum foil to prevent any juices from leaking out.
    • If you want to keep your beef rare, cut it into larger pieces so that it doesn't cook all the way through while the shrimp cooks.
    A foil packet with shrimp, steak, corn, red onion and a piece of garlic bread on top.

    More Foil Packet Recipes You'll Love

    Two Cajun chicken foil packets on plates with forks on the side.
    Cajun Chicken Foil Packets
    An open foil packet filled with gnocchi, corn, tomatoes, and basil on a wooden tree stump.
    Corn and Tomato Gnocchi Foil Packets

    Tried This Recipe?

    If you've tried this recipe, please leave a comment below. Follow me on Instagram, Facebook, YouTube, or Pinterest for more great camping and grilling recipes.

    Recipe

    A foil packet with shrimp, steak, corn, red onion and a piece of garlic bread on top.

    Surf and Turf Foil Packets

    A woman's face.Angie Zoobkoff
    Enjoy all your favorite steakhouse flavors cooked over the campfire or grill with these easy steak and shrimp foil packets.
    No ratings yet
    Print Recipe Pin Recipe
    Prep Time 10 minutes mins
    Cook Time 15 minutes mins
    Total Time 22 minutes mins
    Course Main Course
    Cuisine American
    Servings 4 servings
    Calories 530 kcal

    Ingredients
      

    • 12 ounces striploin steak cut into 1-inch cubes
    • 12 ounces jumbo shrimp peeled and deveined
    • 1 small red onion thinly sliced
    • 3 ears fresh corn shucked and each cut into 4 pieces
    • 3 tablespoons olive oil
    • 2 teaspoons Old Bay seasoning
    • 3 cloves garlic minced
    • Salt and freshly ground black pepper
    • 3 tablespoons butter cut into small pieces
    • Chopped fresh parsley for serving (optional)
    • Lemon wedges for serving (optional)

    Instructions
     

    • Prepare a campfire and let it burn down to hot coals or prepare a grill for medium heat (375°F).
    • In a large bowl, combine the steak, shrimp, red onion, and corn.
    • Mix the oil, Old Bay, and garlic in a small bowl. Season well with salt and pepper.
    • Pour the seasoned oil over the steak and shrimp mixture and toss well to combine and thoroughly coat everything.
    • Arrange four double layers of aluminum foil on a flat surface. Divide the surf and turf mixture equally among the foil sheets.
    • Dot the butter over the mixture, dividing it evenly.
    • Fold up and seal each packet. Place foil packs on a grate over hot coals or on the grill grate.
    • Cook until the shrimp is pink and opaque throughout and the corn is bright yellow, 12 to 15 minutes. If you're cooking over the campfire, your cooking time will be very dependent on the heat of your coals and the distance the foil packs are from the heat.
    • Open each packet. Top with chopped fresh parsley, if using, and serve with lemon wedges, if desired.

    Notes

    • Get ahead--Shuck your corn and mix up your garlic, oil, and seasoning before heading out on your trip. Store the seasoned oil in a sealed container.
    • Double up--Use a double layer of aluminum foil to prevent any juices from leaking out.
    • For rare beef--If you want to keep your beef rare, cut it into larger pieces so that it doesn't cook all the way through while the shrimp cooks.

    Nutrition

    Serving: 1packetCalories: 530kcalCarbohydrates: 20gProtein: 46gFat: 30gCholesterol: 202mgFiber: 2gSugar: 3g
    Keyword campfire cooking, foil pack cooking, steak and shrimp
    Tried this recipe?Let us know how it was!

    June 12, 2024 Camping

    16 Outstanding Dutch Oven Recipes for Camping

    The humble Dutch oven is a kitchen workhorse and many people rely on them for everyday cooking. When you're camping, the cast iron Dutch oven is equally valuable. It acts as a portable oven that retains and distributes heat perfectly, meaning you can create outstanding one-pot meals, snacks, sides, dinner, and even dessert at camp with just your pot and some hot coals. Here are a few of my favorite Dutch oven camping recipes. What's yours?

    1
    The Easiest Campfire Nachos
    Recipe and photo credit: Fresh Off the Grid
    The Easiest Campfire Nachos
    These campfire nachos are a fun and easy camping meal idea! This is one of our favorite recipes to make on camping trips and are perfect for sharing with a group.
    Get the recipe: Campfire Nachos
    2
    A Dutch oven filled with campfire chili with a metal spoon resting inside.
    Dutch Oven Campfire Chili
    This ground beef chili for camping is made in your cast iron Dutch oven over the campfire. It's hearty and satisfying and easily the best chili recipe I've ever tried.
    Get the recipe: Dutch Oven Campfire Chili
    3
    Recipe and photo credit: Champagne Tastes
    Campfire Chicken Enchiladas
    These campfire chicken enchiladas are filled with veggies, chicken, and beans, then covered in pepper jack cheese and cooked in a cast-iron Dutch oven. A delicious camping meal!
    Get the recipe: Campfire Chicken Enchiladas
    4
    A spiral cut ham on a rectangular platter with orange slices, pomegranate wedges, and parsley sprigs.
    Dutch Oven Ham
    This Dutch oven ham is coated in a brown sugar, orange, and mustard glaze and can be made over your campfire or on your stovetop or camp stove. It's perfect for your holiday camping trip.
    Get the recipe: Dutch Oven Ham
    5
    Recipe and photo credit: Champagne Tastes
    Campfire Red Lentil Stew
    This easy vegan Campfire Dutch Oven Recipe features an easy take on Indian dal. These spiced red lentils are cooked in a Dutch oven right on the campfire!
    Get the recipe: Campfire Red Lentil Stew
    6
    Three shredded chicken tacos on a blue platter with sour cream, avocado, and cilantro.
    Dutch Oven Shredded Chicken Tacos
    These smoky chicken tacos are prepared in your Dutch oven over the campfire. They're an easy camping meal that's perfect for your next trip.
    Get the recipe: Dutch Oven Shredded Chicken Tacos
    7
    A Dutch oven filled with baked beans on a campfire grate.
    Dutch Oven Baked Beans
    Made with canned navy beans, bacon, onion, and a sweet and tangy sauce, this hearty crowd-pleasing dish will keep all of your campers happy.
    Get the recipe: Dutch Oven Baked Beans
    8
    Recipe and photo credit: Let's Camp S'more
    Dutch Oven Mac and Cheese
    Enjoy this easy Dutch Oven Macaroni and Cheese recipe on your next camping trip. This simple camping recipe only requires 5 ingredients.
    Get the recipe: Dutch Oven Mac and Cheese
    9
    A loaf of Irish soda bead with a couple of slices cut from it.
    Dutch Oven Irish Soda Bread
    This homemade Irish soda bread is prepared in your Dutch oven and can be cooked in your oven at home or in a bed of hot coals while camping. It's a great side dish for pairing with soups, stews, and dips.
    Get the recipe: Dutch Oven Soda Bread
    10
    A bowl of beef stew with carrots and potatoes on a wooden table.
    Campfire Dutch Oven Beef Stew
    This cool-weather camping stew is made with tender beef, potatoes, carrots, celery, and onions, gently simmered in a rich beef gravy.
    Get the recipe: Campfire Dutch Oven Beef Stew
    11
    Recipe and photo credit: Recipes From a Pantry
    Campfire Stew
    This post is the ULTIMATE guide to making Campfire Stew! Campfire Stew is hearty, flavourful and delicious, and in this post you’ll learn how to make it in the Instant Pot, slow cooker, oven, and of course on the campfire. Includes step-by-step instructions and photos!
    Get the recipe: Campfire Stew
    12
    A serving of shepherd's pie on a plate.
    Dutch Oven Shepherd's Pie Recipe
    This campfire shepherd's pie is filled with ground beef or lamb and vegetables under a blanket of creamy mashed potatoes. It's perfect cool-weather comfort food.
    Get the recipe: Dutch Oven Shepherd's Pie
    13
    Recipe and photo credit: Budget Delicious
    Dutch Oven Chicken
    Dutch Oven Chicken with tender potatoes is an easy-to-make all-in-one family meal. Dutch oven roast chicken is so flavorful and satisfying.
    Get the recipe: Dutch Oven Chicken
    14
    A bowl of chicken noodle soup with a spoon resting inside and a bun on the side.
    Dutch Oven Chicken Noodle Soup
    This comforting chicken noodle soup recipe is made in your Dutch oven and can be cooked over your campfire, camp stove, or on your stovetop at home. It's chock full of tender chicken thighs, vegetables, and egg noodles.
    Get the recipe: Dutch Oven Chicken Noodle Soup
    15
    A chocolate peanut butter cake in a Dutch oven.
    Recipe and photo credit: Let's Camp S'more
    Dutch Oven Chocolate Peanut Butter Cup Cake
    This easy Dutch oven chocolate peanut butter cake is made with Reece’s Peanut Butter Cups. Everyone will love this simple camping cake recipe!
    Get the recipe: Dutch Oven Chocolate Peanut Butter Cup Cake
    16
    Two plates of cranberry cobbler on a wooden table with fir branches nearby.
    Dutch Oven Cranberry Cobbler
    This festive Dutch oven cobbler has tender spiced cranberries topped with sweet biscuit dough. It's perfect for your holiday camping trip, or any time you're craving an easy dessert.
    Get the recipe: Dutch Oven Cranberry Cobbler

    Needs some tips on how to use it? Check out this helpful information on how to cook with a cast iron Dutch oven.

    June 10, 2024 Camping

    Campfire Cones

    These campfire dessert cones take all the classic s'mores flavors--chocolate, marshmallow, and sweet graham cookie--and stuff it into a waffle cone. They're the perfect portable camping dessert treat for kids and adults alike.

    Two campfire waffle cones filled with marshmallows, Rolo pieces, and Teddy Grahams.

    If you're looking to change up your s'mores game, give these campfire s'more cones a whirl. You can get as creative as you want with the filling, and the kids will love stuffing their waffle cones with all of their favorite treats.

    [feast_advanced_jump_to]

    Why This Recipe is Great for Camping

    • It's an easy s'more-inspired dessert that doesn't require any cooler space.
    • You can make as few or as many as you need at a time.
    • Kids love them!

    Ingredients and Substitutions

    Ingredients for campfire cones--waffle cones, chocolate chips, Rolo pieces, Teddy Grahams, and marshmallows.
    • Waffle cones--I highly recommend using waffle cones instead of regular ice cream cones for this recipe. Their unique shape allows them to be filled and covered with foil without everything sticking to the foil.
    • Marshmallows--I use a combination of jumbo and mini marshmallows. The jumbo size is perfect for "plugging" the bottom of the cone, while the mini ones are ideal to mix into the filling. If you only have mini marshmallows, use 4 or 5 to fill the bottom.
    • Teddy Grahams--I like golden Teddy Grahams here for their sweet graham flavor, but any small sweet crunchy cookie will work.
    • Chocolate chips and Rolo pieces--These add the chocolate component of classic s'mores to this campfire cones recipe, but feel free to get creative and use your favorite chocolate candies here.

    How to Make Waffle Cone S'mores

    Two waffle cones, each with a jumbo marshmallow in it.
    Two waffle cones filled with marshmallows, chocolate chips, Teddy Grahams, and Rolo pieces.
    1. Place a jumbo marshmallow (or a handful of small marshmallows into the bottom of each cone.
    2. Fill the remaining cone with chocolate chips, Rolo pieces, mini marshmallows, and Teddy Grahams.
    Two campfire cones wrapped in foil.
    Two campfire cones cooking over a fire.
    1. Wrap each cone in foil.
    2. Cook over hot coals or very low flame until the filling is soft and the chocolate is mostly melted.

    FAQs

    Can I make this on a grill instead of a campfire?

    Yes. If you can set up your grill for two-zone cooking, use that and put the cones on the cooler side of the grill. If not, set them over the lowest possible flame for cooking.

    Can I make these in advance?

    You can fill and wrap your cones up to 24 hours in advance. Marshmallows go stale pretty quickly after that.

    What types of other fillings can I use?

    The sky's the limit. Toss in some fresh fruit, like diced strawberries or sliced bananas. Add some crunchy colorful candies, like Reese's pieces or M&M's. Try it with caramel chips instead of chocolate.

    Tips and Troubleshooting

    • Use heavy duty aluminum foil for wrapping your cones, or wrap with a double layer of foil.
    • Cook over hot coals or very low flame. If you cook the campfire cones over strong flames, they will burn.
    • To check for doneness, carefully peel back the foil. The marshmallows and chocolate should be very soft and almost melted. If it's not done, cover and put it back on the grate for a few extra minutes. The cooking time will be dependent on the heat of your fire and the distance your grate is from the heat.
    Two campfire waffle cones filled with marshmallows, Rolo pieces, and Teddy Grahams.

    More Campfire Dessert Recipes You'll Love

    A scoop of strawberry rhubarb crisp on a blue plate with three strawberries.
    Strawberry Rhubarb Campfire Crisp
    Cranberry cobbler with biscuit topping in a Dutch oven.
    Dutch Oven Cranberry Cobbler

    Tried This Recipe?

    If you've tried this recipe, please leave a comment below. Follow me on Instagram, Facebook, YouTube, or Pinterest for more great camping and grilling recipes.

    Recipe

    Two campfire waffle cones filled with marshmallows, Rolo pieces, and Teddy Grahams.

    Campfire Cones

    A woman's face.Angie Zoobkoff
    Everything you love about s'mores, stuffed into a waffle cone and cooked over the campfire until melted and gooey.
    No ratings yet
    Print Recipe Pin Recipe
    Prep Time 5 minutes mins
    Cook Time 10 minutes mins
    Total Time 15 minutes mins
    Course Dessert
    Cuisine American
    Servings 4 cones
    Calories 420 kcal

    Ingredients
      

    • 4 waffle cones
    • 4 jumbo marshmallows
    • 32 mini marshmallows
    • 32 honey Teddy Grahams
    • 16 Rolo pieces
    • ¼ cup chocolate chips

    Instructions
     

    • Prepare a campfire and let it burn until you have hot coals or a very low flame.
    • Stuff one jumbo marshmallow into the bottom of each cone.
    • To each cone, add 8 mini marshmallows, 8 Teddy Grahams, 4 Rolo pieces, and 1 tablespoon of chocolate chips. I recommend layering or alternating the ingredients as you add them to the cones so that you get a little bit of everything in each bite.
    • Wrap each cone in foil so it's completely enclosed.
    • Place the cone with the taller side of the cone shell down on a grate over the fire and let it cook until the filling is almost melted and gooey, about 10 minutes.
    • Unwrap and enjoy!

    Notes

    • Wrapping--Use heavy duty aluminum foil for wrapping your cones, or wrap with a double layer of foil.
    • Cooking temperature--Cook over hot coals or very low flame. If you cook the campfire cones over strong flames, they will burn.
    • How to tell if they're ready--To check for doneness, carefully peel back the foil. The marshmallows and chocolate should be very soft and almost melted. If it's not done, cover and put it back on the grate for a few extra minutes. The cooking time will be dependent on the heat of your fire and the distance your grate is from the heat.

    Nutrition

    Serving: 1coneCalories: 420kcalCarbohydrates: 76gProtein: 5gFat: 11gCholesterol: 6mgSodium: 143mgFiber: 1gSugar: 53g
    Keyword campfire desserts, campfire waffle cones, s'mores cones, s'mores desserts
    Tried this recipe?Let us know how it was!

    June 8, 2024 Collections

    11 Marvelous Make-Ahead Camping Meals

    If you're looking for a stress-free camping trip, I highly recommend making as much food ahead of time as possible. These 11 make-ahead camping meals will allow you to enjoy a relaxing vacation while still enjoying incredible food. There are easy, portable breakfast options, salads, and simple dinners that only require some reheating. Let me know your favorite make-ahead camping meal in a comment below.

    1
    Recipe and photo credit: Fresh Off the Grid
    Sloppy Joes
    These easy Sloppy Joes are fast, simple, and as tasty as you remember! Perfect for BBQ’s, camping, and weeknight dinners.
    Get the recipe: Sloppy Joes
    2
    A white bowl filled with pasta salad.
    Camping Pasta Salad
    This make-ahead tortellini salad with artichokes, tomatoes, olives, and creamy Italian dressing is a summer staple for camping, potlucks, and picnics.
    Get the recipe: Camping Pasta Salad
    3
    A jar half filled with oats and dried fruits.
    Make-Ahead Oatmeal for Camping
    Keeping a stash of these apple cinnamon camping oatmeal jars on hand means you've always got a quick and easy breakfast ready to go in minutes.
    Get the recipe: Make-Ahead Oatmeal for Camping
    4
    Recipe and photo credit: Camping for Foodies
    Easy Beef And Broccoli
    Advanced meal prep means less time cooking at camp. You’ll love this beef and broccoli freezer meal that cooks in just 10 minutes.
    Get the recipe: Easy Beef and Broccoli
    5
    A bowl of make ahead roasted potatoes with fresh herbs and some parsley on the side.
    Make-Ahead Roasted Potatoes
    These crispy roasted potatoes can be parboiled and stored in your fridge, cooler, or freezer until you're ready to roast them. The soft, creamy centres and crispy edges will make them a favorite all year round.
    Get the recipe: Make-Ahead Roasted Potatoes
    6
    Best Homemade Granola
    Recipe and photo credit: Get Inspired Everyday!
    Best Homemade Granola
    Easy to make and much cheaper than store bought, this homemade granola is way tastier. It’s a healthy breakfast or snack, gluten free & vegan.
    Get the recipe: Homemade Granola
    7
    A bowl filled with raw vegetable marinated salad.
    Overnight Marinated Vegetable Salad
    This easy marinated salad is a colorful combination of crunchy raw vegetables tossed in a simple vinaigrette dressing. Healthy never tasted so good.
    Get the recipe: Overnight Marinated Vegetable Salad
    8
    Recipe and photo credit: Fresh Off the Grid
    Instant Pot Chili
    Spice up dinner with this Instant Pot Chili recipe! This easy meal is perfect to make ahead for busy weeknights or camping trips.
    Get the recipe: Instant Pot Chili
    9
    Two halves of a burrito on a plate with hot sauce drizzled over them.
    Make-Ahead Camping Burritos
    These cheesy meat, bean, and rice burritos are the ideal make-ahead camping meal. They're easy to prepare and quick to reheat at camp.
    Get the recipe: Make-Ahead Camping Burritos
    10
    Recipe and photo credit: Camping for Foodies
    Pesto Tortellini Bake
    If you’re looking for an easy peasy meal with tons of flavor, try this pesto tortellini bake freezer meal. Camping make-ahead, dump & cook.
    Get the recipe: Pesto Tortellini Bake
    11
    Recipe and photo credit: On My Kid's Plate
    Pancake Mix Muffins
    These pancake mix muffins make the best quick breakfast. Make strawberry, banana chocolate chip and blueberry pancake muffins in one pan!
    Get the recipe: Pancake Mix Muffins

    June 7, 2024 Camping

    Dutch Oven Baked Beans

    These Dutch oven baked beans are a hearty and comforting side dish or meal to make over the campfire. For this classic campfire cooking recipe, navy beans, bacon, and onion are cooked in a sweet and tangy sauce that's so good everyone will be clamoring for more.

    A Dutch oven filled with baked beans on a campfire grate.

    So long, Bush's. When you can make campfire beans as good as these, there's no reason to ever go back to the ones out of a can. I know I never will.

    [feast_advanced_jump_to]

    Why This Recipe is Great for Camping

    • It's a hearty side dish or meal that will feed plenty, making it great for multiple meals, or for serving a crowd.
    • This campfire baked beans recipe only requires one pot!

    Ingredients and Substitutions

    Ingredients for Dutch oven baked beans--brown sugar, maple syrup, onion, vinegar, ketchup, bacon, beans, mustard powder.
    • Navy beans--For ease of preparation, I use canned navy beans for this recipe. You could soak and cook dried beans, but that will add a few hours of cooking time. Be sure to rinse and drain your canned beans before using them.
    • Bacon--This adds a salty, savory flavor to the beans. If you want to keep them vegetarian, you can omit the bacon, and use a little oil to cook the onion.
    • Maple syrup and brown sugar--These give the sauce its signature sweetness. This recipe isn't overly sweet, but you can adjust the sweetness to taste after it has finished cooking with extra sugar or maple syrup.
    • Vinegar--I use apple cider vinegar because the flavor works well here, but you could swap in white vinegar or white wine vinegar, if necessary.

    How to Cook Baked Beans on a Campfire

    Bacon cooking in a Dutch oven over a campfire.
    Bacon and onion cooking in a Dutch oven over a campfire.
    1. Cook the bacon in the Dutch oven over hot coals or very low flame.
    2. When the bacon is mostly cooked and the fat has rendered, stir in the onion and cook until softened.
    Water being added to a Dutch oven of baked beans on a campfire.
    A covered Dutch oven cooking over a campfire.
    1. Add the remaining ingredients and enough water to cover the beans.
    2. Cover the Dutch oven and let the beans simmer until tender and thickened, stirring occasionally. Thin with additional water, if needed.

    FAQs

    Can I make this on my stovetop or camp stove?

    Yes. Use a regular Dutch oven, and follow the recipe directions, cooking the bacon and onion over medium or medium-low heat. Once covered, simmer the beans over low heat until thickened.

    Can you freeze baked beans?

    Definitely. Once the beans are completely cool, store them in a sealed container in the freezer for up to 6 months. Thaw in the fridge overnight and reheat in a pot or Dutch oven over low heat until warmed through. Take care when reheating as the softened beans can split easily.

    What should I serve with these campfire beans?

    These beans are a great side dish to go along with make-ahead camping ribs or seared steak and corn on the cob, or you can enjoy them as a meal with a side salad and some campfire garlic bread.

    Tips and Troubleshooting

    • To get ahead, drain and rinse your beans before heading out on your camping trip. Store them in a sealed container in your cooler for up to 2 days before cooking.
    • Leftover beans can be stored in a sealed container in the fridge or cooler for up to 3 days or frozen for longer storage. Reheat gently over low heat.
    A blue bowl filled with Dutch oven baked beans.

    More Camping Dutch Oven Recipes You'll Love

    A bowl of beef stew with carrots and potatoes on a wooden table.
    Campfire Dutch Oven Beef Stew
    A Dutch oven filled with campfire chili with a metal spoon resting inside.
    Dutch Oven Campfire Chili

    Tried This Recipe?

    If you've tried this recipe, please leave a comment below. Follow me on Instagram, Facebook, YouTube, or Pinterest for more great camping and grilling recipes.

    Recipe

    A Dutch oven filled with baked beans on a campfire grate.

    Dutch Oven Baked Beans

    Made with canned navy beans, bacon, onion, and a sweet and tangy sauce, this hearty crowd-pleasing dish will keep all of your campers happy.
    No ratings yet
    Print Recipe Pin Recipe
    Prep Time 15 minutes mins
    Cook Time 2 hours hrs
    Total Time 2 hours hrs 15 minutes mins
    Course Side Dish
    Cuisine American
    Servings 8 servings
    Calories 374 kcal

    Equipment

    • Cast iron Dutch oven with lid

    Ingredients
      

    • 8 ounces bacon sliced into thin strips
    • 1 medium onion diced
    • Three (15-ounce) cans navy beans drained and rinsed
    • ½ cup ketchup
    • ⅓ cup brown sugar
    • 2 tablespoons apple cider vinegar
    • 2 tablespoons maple syrup
    • 1 tablespoon mustard powder
    • Pinch cayenne pepper optional
    • 2 to 4 cups water
    • Salt and freshly ground black pepper

    Instructions
     

    • Prepare a campfire and let it burn down to a bed of hot coals.
    • Set a large (5 to 7 quarts) cast iron Dutch oven over the fire. You can place the Dutch oven directly in the coals, or set it on a grate above the heat. I find having it elevated easier for replacing the coals underneath.
    • Add the bacon and cook until most of the fat is rendered and the bacon is mostly cooked, but not crispy, about 20 minutes.
    • Stir in the onion and cook until softened, 10 to 15 minutes.
    • Add the beans, ketchup, brown sugar, apple cider vinegar, maple syrup, mustard powder, and cayenne, if using, and mix well. Pour in enough water to just cover the beans.
    • Cover the Dutch oven and bring the beans to a simmer. Cook, covered, stirring occasionally, and replacing the coals as needed, until the sauce is thickened and the beans are tender, about 1 ½ hours. If the beans begin to look dry or start sticking while cooking, pour in extra water. You want them to be in a thick sauce.
    • Season to taste with salt and pepper before serving.

    Notes

    • Cooking time--Cooking time will vary depending on how hot your fire is and how close your pot is to the heat. My times were based on using very hot coals with the pot set on a grate about 8 inches above the heat.
    • Get ahead--Drain and rinse your beans before heading out on your camping trip. Store them in a sealed container in your cooler for up to 2 days before cooking.
    • Storage--Leftover beans can be stored in a sealed container in the fridge or cooler for up to 3 days or frozen for longer storage. Reheat gently over low heat.

    Nutrition

    Serving: 1portionCalories: 374kcalCarbohydrates: 53gProtein: 21gFat: 9gCholesterol: 21mgSodium: 617mgFiber: 15gSugar: 16g
    Keyword baked beans, campfire beans, camping side dishes, dutch oven cooking
    Tried this recipe?Let us know how it was!

    June 5, 2024 Collections

    22 Amazing Seafood Dinners in 30 Minutes or Less

    These seafood dinners have a lot of things going for them. They're fresh, delicious, and best of all, ready in 30 minutes or less. Find some new and impressive ways to prepare shrimp, crab, mussels, lobster, and more, all completely doable on a weeknight.

    1
    Recipe and photo credit: Savory Experiments
    Maryland Crab Cakes
    This Maryland crab cake recipe is made with jumbo lump crab meat with little filler, plus secrets to making the best crab cakes ever!
    Get the recipe: Maryland Crab Cakes
    2
    Four garlic butter shrimp skewers on a rectangular platter, sprinkled with fresh parsley.
    Garlic Butter Shrimp Skewers
    These garlic butter shrimp skewers are quickly cooked on your griddle until sweet and buttery. They're an easy camping or weeknight meal that's ready in just 20 minutes.
    Get the recipe: Garlic Butter Shrimp Skewers
    3
    Recipe and photo credit: A Tasty Kitchen
    Spicy New Zealand Mussels
    Spicy New Zealand Mussels, a delicious dish using green lipped NZ mussels with a hint of Thai flavours.
    Get the recipe: Spicy New Zealand Mussels
    4
    Recipe and photo credit: The Healthful Ideas
    Shrimp Salad Sandwich
    This shrimp salad sandwich is packed with flavor, easy to make, and perfect for lunch or a light dinner.
    Get the recipe: Shrimp Salad Sandwich
    5
    Sheet Pan Crab Legs
    Recipe and photo credit: xoxo Bella
    Sheet Pan Crab Legs
    This sheet pan crab legs recipe is easy to cook. These baked crab legs are ideal for any special occasion as an appetizer or main dish.
    Get the recipe: Sheet Pan Crab Legs
    6
    Recipe and photo credit: Nibble and Dime
    Easy Pan Seared Shrimp
    This easy recipe for pan seared shrimp can be made in only 10 minutes! The cold-start cooking method will give perfect results every time - you’ll get tender shrimp without risk of overcooking!
    Get the recipe: Easy Pan Seared Shrimp
    7
    Four citrus scallop skewers on a slate board.
    Citrus Scallop Skewers
    A quick bath in an orange, oil, and Aleppo pepper marinade turns these easy scallop skewers into a restaurant-quality meal.
    Get the recipe: Citrus Scallop Skewers
    8
    Easy General Tso Shrimp Stir Fry
    Recipe and photo credit: xoxo Bella
    Easy General Tso Shrimp Stir Fry
    General Tso shrimp is an easy Chinese shrimp dish which you can rustle up in less than 30 minutes with flavors that are better than takeout!
    Get the recipe: Easy General Tso Shrimp Stir Fry
    9
    Recipe and photo credit: Homemade Heather
    Bacon Wrapped Baked Lobster Tails
    Indulge in the succulent flavors of bacon wrapped baked lobster tails! Perfect for seafood lovers looking for a decadent meal.
    Get the recipe: Bacon Wrapped Lobster Tails
    10
    Shrimp Caesar Salad
    Recipe and photo credit: Valerie's Kitchen
    Shrimp Caesar Salad
    This restaurant-quality shrimp Caesar salad is made with oven roasted shrimp, homemade croutons, and a made from scratch Caesar dressing.
    Get the recipe: Shrimp Caesar Salad
    11
    Recipe and photo credit: The Petite Cook
    Linguine alle Vongole - Clam Linguine
    Linguine alle vongole is one of the most popular Italian seafood recipes. Learn how to make this restaurant-worthy dish in just 10 minutes!
    Get the recipe: Clam Linguine
    12
    Recipe and photo credit: Mae's Menu
    Sweet and Sour Shrimp Stir-Fry
    Enjoy the flavors of takeout without all the heft, sodium, and processed sugar with this sweet and sour shrimp recipe!
    Get the recipe: Sweet and Sour Shrimp Stir-Fry
    13
    Recipe and photo credit: The Foodolic
    Creamy Seafood Chowder
    Creamy seafood chowder is a grown-up version; it features a base of wine-infused cream with saffron, clams, mussel meat, Salicornia salt, and prawn.
    Get the recipe: Creamy Seafood Chowder
    14
    Creamy Tomato Shrimp Pasta
    Recipe and photo credit: The Healthful Ideas
    Creamy Tomato Shrimp Pasta
    This creamy tomato shrimp pasta is hearty, delicious, and packed with flavor! It comes together in just 30 minutes and it’s always a hit.
    Get the recipe: Creamy Tomato Shrimp Pasta
    15
    Recipe and photo credit: Organically Addison
    Lobster Tails with Garlic Butter
    This lobster tail recipe is quick, easy and so flavorful! The lobster meat is juicy, flavorful and buttery. Great for any occasion!
    Get the recipe: Lobster Tails with Garlic Butter
    16
    Baked Scallops with Ritz Crackers
    Recipe and photo credit: CopyKat Recipes
    Baked Scallops with Ritz Crackers
    Baked scallops with Ritz crackers are simply incredible! Get the easy recipe and learn how to bake scallops with a buttery cracker topping.
    Get the recipe: Baked Scallops with Ritz Crackers
    17
    Recipe and photo credit: Flavorful Eats
    Harissa Shrimp Skillet
    Harissa Shrimp Skillet is a delectable one-pan recipe made with succulent shrimp sauteed with fresh garlic and onion in butter, spicy harissa and fresh herbs! This shrimp is perfect for tacos, over rice, or right out of the pan with a loaf of crusty bread!
    Get the recipe: Harissa Shrimp Skillet
    18
    Snow Crab Legs Three Ways
    Recipe and photo credit: Savory Experiments
    Snow Crab Legs Three Ways
    Snow crab legs are easy to make and take so little time -- they can elevate a casual gathering and are perfect for a special occasion!
    Get the recipe: Snow Crab Legs Three Ways
    19
    Recipe and photo credit: The Heirloom Pantry
    Uni Pasta (Sea Urchin Cacio e Pepe)
    Uni Pasta (Sea Urchin Cacio e Pepe) is a rich and creamy twist on traditional cacio e pepe. This uni pasta recipe features cheesy noodles, buttery sea urchin, and strips of salty nori (seaweed).
    Get the recipe: Uni Pasta
    20
    Recipe and photo credit: Life as a Strawberry
    30 Minute Hoisin Shrimp Lettuce Wraps
    These hoisin shrimp lettuce wraps are full of flavor and ready in under 30 minutes. A perfect quick, healthy weeknight dinner!
    Get the recipe: Hoisin Shrimp Lettuce Wraps
    21
    Recipe and photo credit: Gypsy Plate
    Scallop Pasta with Cherry Tomatoes
    This scallop pasta with cherry tomatoes is super easy to make and on your table in just 20 minutes.
    Get the recipe: Scallop Pasta with Cherry Tomatoes
    22
    Recipe and photo credit: Chew Out Loud
    15-Minute Lemon Pepper Shrimp Scampi
    This super quick version of Lemon Pepper Shrimp Scampi takes just 15 minutes and a handful of ingredients to pull off. A healthy, succulent weeknight meal.
    Get the recipe: 15-Minute Lemon Pepper Shrimp Scampi

    June 3, 2024 Blackstone Griddle Recipes

    Hash Brown Avocado Toast

    This hash brown avocado toast is a crispy handheld breakfast flavor bomb that is perfect for at home or at camp. Crispy hash brown patties are topped with creamy avocado, everything bagel spice, and a drizzle of hot sauce, if you like, for an easy breakfast that's ready in less than 20 minutes.

    Two hash brown patties topped with sliced avocado, everything bagel spice, and hot sauce.

    A few months ago, I meandered into the kitchen while my daughter was preparing breakfast. I watched, fascinated, as she painstakingly layered perfect slices of avocado onto crispy hash browns, then sprinkled everything bagel spice with perfect precision and oh-so-carefully drizzled hot sauce over the top. It was a masterpiece, almost too good to eat. Almost.

    While I was a little disappointed that she didn't want to share that day, I knew this recipe was going to be an everyday AND camping breakfast staple. And it is. Those frozen hash brown patties crisp up beautifully on your griddle or in your cast-iron skillet (but if you're a rule-follower, you can just make them in the oven like the package says), and the creamy avocado and savory spice blend complement them perfectly. See for yourself.

    [feast_advanced_jump_to]

    Why This Recipe is Great for Camping

    • It's an easy handheld breakfast that can be made on your griddle or skillet.
    • The hash brown avocado toast recipe scales easily depending on how many people you're serving.
    • It's suitable for all diets.

    Ingredients and Substitutions

    Ingredients for hash brown avocado toast--hash browns, everything bagel spice, and avocado.
    • Frozen hash brown patties--These frozen potato patties are available in the freezer section of most supermarkets. They cook up easily on a griddle or in a skillet, and you don't need to add butter or oil as long as your skillet is well seasoned or nonstick.
    • Avocado--Choose dark colored avocados that give slightly when squeezed. Avoid hard bright green (underripe) or mushy avocados (overripe). Use extra avocado to make 3-ingredient guacamole.
    • Everything bagel seasoning--This is a combination of dried onion, dried garlic, sesame seeds, and other spices. There are several pre-made varieties available at the supermarket and online, or you can make your own.

    How to Make Avocado Toast on a Hash Brown

    Two hash brown patties on a griddle.
    Two hash brown patties topped with sliced avocado with a bowl of everything bagel spice nearby.
    1. Fry the hash brown patties on a seasoned griddle or cast-iron skillet until crispy and browned, flipping once during cooking.
    2. Top with sliced avocado, a sprinkle of everything bagel seasoning, and a drizzle of hot sauce, if desired.

    FAQs

    Can I make this in my oven?

    Yes. If you don't want to cook your hash browns on the stovetop or on your griddle, follow the oven directions on the package and proceed with the recipe once they're cooked.

    How do I know when my hash browns are done?

    The hash browns will be darkened and crispy (but not burnt) on the outside, and should be releasing some oil. You should be able to cut through them easily and the center should be hot.

    Tips and Troubleshooting

    • There is one caveat to this recipe if you're making it while camping. You do need access to a freezer to keep the hash browns frozen until you're ready to cook, so it is best suited to trailers, rvs, and motorhomes that have a freezer.
    • This recipe is suitable for gluten-free, dairy-free, and vegan diets.
    Two hash brown patties topped with sliced avocado, everything bagel spice, and hot sauce.

    More Breakfast Recipes You'll Love

    A cast iron skillet filled with chorizo and sweet potato hash with sliced avocado and cilantro on top.
    Sweet Potato Chorizo Hash
    A stack of pancakes, maple syrup, and blueberries on a plate with blueberries and bacon in the background.
    Cast Iron Skillet Pancakes

    Tried This Recipe?

    If you've tried this recipe, please leave a comment below. Follow me on Instagram, Facebook, YouTube, or Pinterest for more great camping and grilling recipes.

    Recipe

    Two hash brown patties topped with sliced avocado, everything bagel spice, and hot sauce.

    Hash Brown Avocado Toast

    A woman's face.Angie Zoobkoff
    This fun variation on regular avocado toast uses crispy hash brown patties and tops them with creamy avocado, everything bagel seasoning, and hot sauce, if you like. It's an easy handheld breakfast, perfect for any day of the week.
    5 from 1 vote
    Print Recipe Pin Recipe
    Prep Time 5 minutes mins
    Cook Time 6 minutes mins
    Total Time 15 minutes mins
    Course Breakfast
    Cuisine American
    Servings 1 serving
    Calories 322 kcal

    Ingredients
      

    • 2 frozen hash brown patties
    • ½ avocado sliced
    • ¼ teaspoon everything bagel seasoning
    • Hot sauce optional

    Instructions
     

    • Heat a griddle to medium or set a cast iron skillet over medium heat.
    • Cook the hash browns, flipping once, until both sides are golden brown and crispy and the center is soft and hot, about 5 minutes per side.
    • Transfer the hash browns to a plate. Top with sliced avocado, everything bagel seasoning, and hot sauce, if desired. Serve immediately.

    Notes

    • Dietary--This recipe is suitable for gluten-free, dairy-free, and vegan diets.

    Nutrition

    Serving: 2hash brownsCalories: 322kcalCarbohydrates: 34gProtein: 3gFat: 22gFiber: 5g
    Keyword avocado toast, blackstone cooking, griddle cooking, hash brown breakfast
    Tried this recipe?Let us know how it was!

    June 1, 2024 Blackstone Griddle Recipes

    15 Incredible Blackstone Griddle Recipes

    Fire up your griddle and get ready to cook! These 15 incredible Blackstone griddle recipes include great choices for breakfast, lunch, or dinner. Whether you've got an amazing griddle set up in your backyard, or your packing your portable one along on your next camping trip, these recipes belong on your must-make list of the best Blackstone griddle recipes.

    Breakfast Bites

    1
    Recipe and photo credit: Learning to Smoke
    Breakfast Sliders with Country Gravy
    Make the ultimate breakfast sandwiches in slider form! These breakfast sliders combine sausage, hash browns, eggs, and cheese to create the perfect hearty meal to start your day.
    Get the recipe: Breakfast Sliders with Country Gravy
    2
    Several slices of maple sriracha bacon on a plate with maple syrup and sriracha in the background.
    Maple Sriracha Griddle Bacon (on a Blackstone)
    This sweet and spicy bacon is easy to make in only 20 minutes and with just 3 ingredients. Try it today and take your breakfast to the next level.
    Get the recipe: Maple Sriracha Bacon
    3
    Recipe and photo credit: Erica's Recipes
    Griddle Hash Browns
    Griddle hash browns with eggs are easy to prepare and so flavorful to complement breakfast or brunch. Make these hash browns on your Blackstone or griddle, then cook the eggs on top.
    Get the recipe: Griddle Hash Browns
    4
    How to Make Biscuits on Blackstone Griddle
    Recipe and photo credit: A Grill for All Seasons
    How to Make Biscuits on Blackstone Griddle
    This Biscuits on Blackstone recipe is simple and easy! If you’re a fan of homemade biscuits, let this simple recipe win you over.
    Get the recipe: Blackstone Griddle Biscuits

    Mid-day Munchies

    5
    A person pulling an English muffin grilled cheese sandwich apart.
    English Muffin Grilled Cheese
    Your favorite grilled cheese sandwich just got even better thanks to two(!) types of cheese and a crispy toasted English muffin.
    Get the recipe: English Muffin Grilled Cheese
    6
    Recipe and photo credit: Piper Cooks
    Big Mac Quesadillas
    Full of savory beyond beef (you can use regular ground beef!), melty cheese, tart pickles, shredded romaine lettuce, and a tangy homemade special sauce.
    Get the recipe: Big Mac Quesadillas

    Dinner & Sides

    7
    Two turkey smash burgers with melted cheese and caramelized red onion on plates with potato wedges.
    Turkey Smash Burgers with Caramelized Onions
    These juicy turkey burgers are a perfect griddle meal. They're tucked inside a toasted bun and topped with melted cheese, sweet caramelized onions, and spicy mayo.
    Get the recipe: Turkey Smash Burgers with Caramelized Onions
    8
    Recipe and photo credit: Ole Blue Dog
    Honey Soy Glazed Salmon
    This Honey Soy Salmon is an easy restaurant quality recipe done in less than 30-minutes on the Blackstone Griddle or stove top.
    Get the recipe: Honey Soy Glazed Salmon
    9
    A bowl of sautéed mushrooms with strips of meat in the background.
    Griddle Sautéed Mushrooms
    These rich, buttery sautéed mushrooms are prepared on your griddle and ready in less than 15 minutes.
    Get the recipe: Griddle Sautéed Mushrooms
    10
    Recipe and photo credit: Or Whatever You Do
    Blackstone Beef Teriyaki
    Beef Teriyaki is a classic dish that combines the rich flavors of beef with the sweet and savory taste of teriyaki sauce. This recipe takes it a step further by infusing the steak with a
    Get the recipe: Blackstone Beef Teriyaki
    11
    Four garlic butter shrimp skewers on a rectangular platter, sprinkled with fresh parsley.
    Garlic Butter Shrimp Skewers
    These garlic butter shrimp skewers are quickly cooked on your griddle until sweet and buttery. They're an easy camping or weeknight meal that's ready in just 20 minutes.
    Get the recipe: Garlic Butter Shrimp Skewers
    12
    Recipe and photo credit: The Sweet Simple Things
    Smoky Garlic Asparagus on Blackstone
    This delicious smoky garlic asparagus on Blackstone is the perfect healthy side dish for a warm summer evening!
    Get the recipe: Smoky Garlic Asparagus
    13
    Juicy Pork Chops on the Blackstone
    Recipe and photo credit: Stef's Eats and Sweets
    Juicy Pork Chops on the Blackstone
    These juicy Pork Chops on the Blackstone are simple to prepare, cook quickly, and are topped with beer soaked peppers and onions.
    Get the recipe: Juicy Pork Chops on the Blackstone
    14
    Four citrus scallop skewers on a slate board.
    Citrus Scallop Skewers
    A quick bath in an orange, oil, and Aleppo pepper marinade turns these easy scallop skewers into a restaurant-quality meal.
    Get the recipe: Citrus Scallop Skewers
    15
    Blackstone Philly Cheesesteaks
    Recipe and photo credit: Food Hussy
    Blackstone Philly Cheesesteaks
    Blackstone Philly Cheesesteaks are loaded with steak, onions, mushrooms & cheeeeeese! And you can make them in 15 minutes!
    Get the recipe: Blackstone Philly Cheesesteaks

    May 31, 2024 Camping

    Dutch Oven Shredded Chicken Tacos

    These Dutch oven shredded chicken tacos are an easy camping meal that can be prepared in your cast iron Dutch oven over the campfire. Smoky, spiced boneless chicken gently cooks until it shreds easily, then gets tucked into soft tortillas with cheese and all your favorite taco fixings.

    Three shredded chicken tacos on a blue platter with sour cream, avocado, and cilantro.

    No camping trip is complete without a taco night, and when you're tired of regular ground beef tacos, give this shredded chicken recipe a try. The meat is juicy and tender with a bit of a smoky bite, and they're perfect topped with cheese, hot sauce, sour cream, avocado or guacamole, and cilantro.

    [feast_advanced_jump_to]

    Why This Recipe is Great for Camping

    • You can prepare and serve the chicken directly from your Dutch oven.
    • It's an easy, healthy meal with minimal clean up and only a few ingredients.
    • These easy tacos are ready in less than 45 minutes!

    Ingredients and Substitutions

    Ingredients for Dutch oven shredded chicken tacos--tortillas, broth, chipotles, chicken, and cotija cheese.
    • Chipotle chiles--This recipe uses canned chipotle chiles to add some heat and smokiness to the shredded chicken. Any extra chipotles can be frozen for another use, along with the sauce, or it can be used for marinating grilled flanken short ribs.
    • Broth--I use chicken broth to add some flavor to the chicken and keep it moist while it cooks.
    • Chicken--Boneless skinless chicken breasts work best here as their long fibers are naturally suited to shredding.
    • Cotija cheese--This is a fantastic creamy cheese that's great for stuffing into tacos, but you could use another good shredding cheese, like Cheddar or Pepper Jack.

    Important Steps

    A Dutch oven with chipotles and chicken broth.
    Two boneless chicken breasts in a Dutch oven with chicken broth and chipotles.
    1. Combine the chipotle chiles and chicken broth in a cast iron Dutch oven.
    2. Add the chicken. Cover the Dutch oven.
    A covered Dutch oven over a fire.
    A white bowl filled with shredded chicken.
    1. Cook over hot coals until the chicken reaches an internal temperature of 165°F.
    2. Transfer the chicken to a bowl and shred with two forks. Serve with flour tortillas, cheese, and any other desired taco toppings.

    FAQs

    Can I make this on the camp stove or stovetop at home?

    Yes. Follow the recipe using your regular Dutch oven and place it over medium-low heat. Cook the chicken, covered, until it reaches an internal temperature of 165°F, about 30 minutes. Let it cool slightly and shred with two forks.

    Can I cook my chicken from frozen?

    Cooking the chicken from frozen will take longer and may result in unevenly cooked chicken, so I recommend thawing it completely before cooking.

    What can I do with leftovers?

    Leftover Dutch oven pulled chicken is perfect for stuffing into quesadillas or wraps. If you know that you'll want extra to pack for lunch the next day, double the chicken.

    Tips and Troubleshooting

    • Use an instant read thermometer to ensure the chicken is fully cooked to an internal temperature of 165°F.
    • Store leftover shredded chicken in a resealable container or bag in your cooler or fridge for up to 3 days. Spoon a little of the cooking liquid over it to help keep it moist. Cooked shredded chicken can also be frozen for up to 3 months.
    Three shredded chicken tacos on a blue platter with sour cream, avocado, and cilantro.

    More Chicken Recipes You'll Love

    A platter filled with crispy grilled chicken wings with a jar of bbq sauce and a salad in the background.
    Crispy Grilled Chicken Wings
    Two Cajun chicken foil packets on plates with forks on the side.
    Cajun Chicken Foil Packets

    Tried This Recipe?

    If you've tried this recipe, please leave a comment below. Follow me on Instagram, Facebook, YouTube, or Pinterest for more great camping and grilling recipes.

    Recipe

    Three shredded chicken tacos on a blue platter with sour cream, avocado, and cilantro.

    Dutch Oven Shredded Chicken Tacos

    A woman's face.Angie Zoobkoff
    These smoky chicken tacos are prepared in your Dutch oven over the campfire. They're an easy camping meal that's perfect for your next trip.
    No ratings yet
    Print Recipe Pin Recipe
    Prep Time 10 minutes mins
    Cook Time 26 minutes mins
    Total Time 36 minutes mins
    Course Main Course
    Cuisine American, Mexican
    Servings 4 servings
    Calories 440 kcal

    Equipment

    • Cast iron Dutch oven with lid

    Ingredients
      

    • 2 canned chipotle chiles diced
    • ¾ cup chicken broth
    • 1 pound boneless skinless chicken breasts (2 large)
    • 1 cup shredded or torn cotija cheese
    • Flour tortillas
    • Hot sauce, avocado, cilantro, and sour cream for serving (optional)

    Instructions
     

    • Prepare a bed of hot coals in your campfire.
    • Combine the chipotles and chicken broth in the Dutch oven.
    • Add the chicken breast and cover the Dutch oven with its lid.
    • Set the Dutch oven over the bed of hot coals and cook until the chicken has reached an internal temperature of 165°F, 30 to 35 minutes. Remove from the coals.
    • Uncover the Dutch oven and let the chicken cool for a couple of minutes. Transfer the chicken and a spoonful of the juices to a bowl and shred the chicken with two forks. (Alternatively, to save on dishes, you can shred the chicken directly in the pot.)
    • Serve the shredded chicken with flour tortillas, cheese, and all your other favorite taco toppings.

    Notes

    • Use a thermometer--Use an instant read thermometer to ensure the chicken is fully cooked to an internal temperature of 165°F.
    • Storage--Store leftover shredded chicken in a resealable container or bag in your cooler or fridge for up to 3 days. Spoon a little of the cooking liquid over it to help keep it moist. Cooked shredded chicken can also be frozen for up to 3 months.

    Nutrition

    Serving: 1portionCalories: 440kcalCarbohydrates: 36.2gProtein: 35.6gFat: 17gCholesterol: 102mgSodium: 948mgFiber: 2.3gSugar: 3.2g
    Keyword camping dinner ideas, chicken tacos, dutch oven cooking
    Tried this recipe?Let us know how it was!

    May 29, 2024 Collections

    14 Amazing & Easy Fruit Crisps

    These 14 juicy fruit crisps aren't only stunning to look at and incredibly satisfying to devour, they're also exceptionally easy to make. Most of them require no more than tossing together a fruit filling, topping it with an oat crust, and popping it in the oven, on the grill, or over your campfire. Find your new favorite dessert from this sweet collection of fruit crisp recipes.

    1
    Recipe and photo credit: Little Black Skillet
    Blackberry Peach Crisp
    Discover the perfect dessert of the summer: my blackberry peach crisp. Top with scoops of vanilla ice cream for the ultimate treat.
    Get the recipe: Blackberry Peach Crisp
    2
    A cast iron skillet. filled with apple crisp and two scoops of ice cream on top.
    Skillet Bourbon Apple Crisp
    This cast-iron skillet apple crisp is made on the grill with sweetly spiced apples and the crispiest oat topping imaginable. An ample splash of bourbon makes it extra special.
    Get the recipe: Skillet Bourbon Apple Crisp
    3
    Cherry Almond Crisp
    Recipe and photo credit: Cooking with Curls
    Cherry Almond Crisp
    This homemade cherry almond crisp is filled with fresh, sweet cherries and topped with a crunchy oat crumble. Serve with vanilla ice cream.
    Get the recipe: Cherry Almond Crisp
    4
    Recipe and photo credit: Vintage Kitchen Notes
    Easy Blackberry Crisp
    A simple fruit dessert featuring fresh blackberries and a crunchy crumble topping. It takes little work to assemble, and you can have it on the table in an hour. It’s also good with frozen berries.
    Get the recipe: Easy Blackberry Crisp
    5
    Recipe and photo credit: Kitchen at Hoskins
    Blueberry Crisp
    This blueberry crisp has a crumbly coconut-almond streusel topping that is absolutely divine with vanilla ice cream. Less than 6 minutes of prep!
    Get the recipe: Blueberry Crisp
    6
    Recipe and photo credit: Foodie and Wine
    Peach Crisp
    Peach crisp, a fusion of tangy peaches and buttery crumbles, is the ultimate summer dessert. Make on the Blackstone or stovetop.
    Get the recipe: Peach Crisp
    7
    Recipe and photo credit: FODMAP Everyday
    Tropical Crisp
    Our tropical crisp combines pineapple, coconut, papaya, banana, lime, vanilla and chocolate.  Easy to make and unlike any dessert you have ever had.
    Get the recipe: Tropical Crisp
    8
    A scoop of strawberry rhubarb crisp on a blue plate with three strawberries.
    Strawberry Rhubarb Campfire Crisp
    This sweet-tart crisp is filled with fresh strawberries and rhubarb and topped with a buttery cinnamon-oat streusel.
    Get the recipe: Strawberry Rhubarb Campfire Crisp
    9
    Recipe and photo credit: The Curly Spoon
    Easy Apple And Blackberry Crumble
    This easy apple and blackberry crumble is a delicious dessert that you can make in no time!
    Get the recipe: Easy Apple and Blackberry Crumble
    10
    Recipe and photo credit: Debra Klein
    Healthy Mixed Fruit Crisp
    This mixed fruit crisp is crispy, chewy, sweet and refreshing. Use fresh or frozen fruit for a healthy vegan and gluten-free dessert.
    Get the recipe: Healthy Mixed Fruit Crisp
    11
    Recipe and photo credit: I Heart Eating
    Cranberry Apple Crisp
    Cranberry apple crisp takes the best of sweet apple crisp and adds a tart cranberry twist! The fruit crisp is delicious, comforting dessert.
    Get the recipe: Cranberry Apple Crisp
    12
    Recipe and photo credit: Simply Stacie
    Individual Raspberry Crisp
    A light and fruity summer treat. Great dessert for dinner parties!
    Get the recipe: Individual Raspberry Crisp
    13
    Two open foil packet pear crisps surrounded by pears.
    Foil Packet Pear Crisp
    This juicy foil packet pear crisp is a simple autumn dessert featuring tender spiced pears topped with a crispy oat mixture. Make it over the campfire, on your grill, or in the oven.
    Get the recipe: Foil Packet Pear Crisp
    14
    Recipe and photo credit: Strength and Sunshine
    Strawberry Crisp
    This healthy strawberry crisp recipe is the best quick & easy summer dessert! Gluten-free, vegan, made with juicy sweet fresh strawberries!
    Get the recipe: Strawberry Crisp

    May 27, 2024 Blackstone Griddle Recipes

    Griddle Sautéed Mushrooms

    These simple sautéed mushrooms are quickly cooked on your Blackstone griddle (or any large griddle) and are ready in less than 15 minutes. Try these rich buttery 'shrooms alongside easy Blackstone pork chops or Blackstone steak bites for an easy weeknight meal.

    A bowl of sautéed mushrooms with strips of meat in the background.

    We eat a lot of mushrooms, mostly because their rich, meaty flavor is so satisfying, and there are so many incredible varieties to choose from. Regular white or cremini mushrooms get mixed into cream sauce and spooned atop skillet pork chops, but when we come across assorted wild mushrooms, particularly shiitake, oyster, or chanterelle, they deserve to have their flavors shine. Which is exactly what they do after a quick sear on the griddle and a sprinkle of lemon pepper seasoning.

    [feast_advanced_jump_to]

    Why You'll Love This Recipe

    • This sautéed mushrooms recipe is an easy side dish that is a great addition to many meals.
    • They're quick to cook, and ready in less than 15 minutes.

    Ingredients and Substitutions

    Ingredients for griddle sautéed mushrooms--mushrooms, butter, lemon pepper, and oil.
    • Oil and butter--I highly recommend using a combination of oil and butter. The oil will help to prevent the fat from burning, and the butter will add plenty of flavor.
    • Mushrooms--Any combination of mushrooms works here. If you've only got white button mushrooms, that will do fine, but I highly encourage seeking out a variety of wild mushrooms, as their varied flavors and textures will elevate your dish. Korean markets are an excellent place to stock up on assorted mushrooms.
    • Lemon pepper seasoning--Check the label on your seasoning. If it doesn't contain salt, you'll need to season the mushrooms with salt as well as the lemon pepper. If it does have salt, taste the finished dish, and adjust as needed.

    How to Sauté Mushrooms on a Blackstone Griddle

    Butter melting on a Blackstone griddle surface.
    Torn mushrooms cooking on a Blackstone griddle surface.
    1. Melt the butter with the oil on a hot griddle.
    2. Add the mushrooms and cook, stirring only a few times, until the liquid releases and evaporates, and the mushrooms are browned. Season with lemon pepper and serve.

    FAQs

    How do you avoid soggy mushrooms?

    To get flavorful, browned, crispy-edged mushrooms, the key is to let the liquid cook out and evaporate. Don't crowd the mushrooms when cooking, as they need space for all that liquid to release. Also, don't stir them too frequently. Maintaining contact with the hot surface allows them to brown and crisp.

    What's the best way to clean mushrooms?

    If your mushrooms appear pretty clean, you only need to gently wipe away any dirt or debris with a damp paper towel or cloth. If your mushrooms have a lot of dirt stuck to them, gently swish them in a bowl of cold water, rinse, and dry immediately. Excess water will get absorbed into the mushrooms, making the cooking process longer. Clean and slice your mushrooms just before cooking them.

    What should I serve with these mushrooms?

    These are a terrific side dish to go along with a grilled protein, such as grilled flanken short ribs or bacon-wrapped pork tenderloin. A big bowl of garlic mashed potatoes is also a great accompaniment.

    Tips and Troubleshooting

    • Resist the urge to stir these frequently. Letting them sit without stirring allows the edges to caramelize.
    • This mushroom recipe is suitable for gluten-free and vegetarian diets. To make this dairy-free or vegan, omit the butter and add 2 extra tablespoons of oil.
    Mushrooms cooking on a Blackstone griddle.

    More Side Dish Recipes You'll Love

    Six zucchini fritters on a plate with a bowl of sour cream on the side.
    Blackstone Zucchini Fritters
    Green bean casserole in a cast iron skillet with fried onions on the side.
    Skillet Green Bean Casserole

    Tried This Recipe?

    If you've tried this recipe, please leave a comment below. Follow me on Instagram, Facebook, YouTube, or Pinterest for more great camping and grilling recipes.

    Recipe

    A bowl of sautéed mushrooms with strips of meat in the background.

    Griddle Sautéed Mushrooms

    A woman's face.Angie Zoobkoff
    These rich, buttery sautéed mushrooms are prepared on your griddle and ready in less than 15 minutes.
    No ratings yet
    Print Recipe Pin Recipe
    Prep Time 5 minutes mins
    Cook Time 10 minutes mins
    Total Time 15 minutes mins
    Course Side Dish
    Cuisine American
    Servings 4 servings
    Calories 116 kcal

    Equipment

    • Blackstone griddle or other large griddle

    Ingredients
      

    • 2 tablespoons vegetable or olive oil
    • 2 tablespoons butter
    • 1 pound assorted mushrooms sliced or torn into 1-inch pieces
    • 1 teaspoon lemon pepper seasoning
    • Salt optional

    Instructions
     

    • Heat your griddle to medium-high.
    • Add the butter and oil and let the butter melt.
    • Once the butter has melted and foamed, add the mushrooms and spread in a single layer.
    • Cook, stirring only a few times, until the liquid releases and evaporates, and the mushrooms are golden brown, 8 to 10 minutes.
    • Season with lemon pepper. Taste and season with salt, if needed. Serve immediately.

    Notes

    • Resist the urge to stir--Letting them sit without stirring allows the edges to caramelize.
    • Dietary--This recipe is suitable for gluten-free and vegetarian diets. To make this dairy-free or vegan, omit the butter and add 2 extra tablespoons of oil.

    Nutrition

    Serving: 1portionCalories: 116kcalCarbohydrates: 0.8gProtein: 0.9gFat: 12.6gCholesterol: 15mgSodium: 63mgFiber: 0.3gSugar: 0.4g
    Keyword blackstone cooking, blackstone griddle, how to cook mushrooms, mushroom recipes
    Tried this recipe?Let us know how it was!

    May 25, 2024 Blackstone Griddle Recipes

    8 Mouthwatering Smash Burger Recipes

    These 8 mouthwatering smash burger recipes will have you firing up your griddle immediately. They each have their own unique flavor combination, but you're guaranteed to get perfectly juicy burger patties with crispy seared edges no matter which you choose. Whether you prefer beef, turkey, veggie, or one with all the fixings, there's a burger for you. Find your new favorite today.

    1
    Recipe and photo credit: Carne Diem
    Spicy Double Smash Burger on Texas Toast
    These Spicy Texas Smash Burgers take the Oklahoma onion burger and Texas style it with grilled and fried jalapenos, pepper jack cheese, Texas toast.
    Get the recipe: Spicy Double Smash Burgers
    2
    Two turkey smash burgers with melted cheese and caramelized red onion on plates with potato wedges.
    Turkey Smash Burgers with Caramelized Onions
    These juicy turkey burgers are a perfect griddle meal. They're tucked inside a toasted bun and topped with melted cheese, sweet caramelized onions, and spicy mayo.
    Get the recipe: Turkey Smash Burgers with Caramelized Onions
    3
    Recipe and photo credit: Winding Creek Ranch
    Grilled Smash Burgers
    Learn how to make the PERFECT smash burger on the grill with this EASY step-by-step recipe - complete with HOMEMADE burger sauce!
    Get the recipe: Grilled Smash Burgers
    4
    Recipe and photo credit: This Little Home
    Cheesy Loaded Nacho Burgers With Fresh Guacamole
    A delicious juicy smashed burger patty topped with cheese, guacamole and crispy nachos. We even make our own burger sauce for these Nacho burgers.
    Get the recipe: Cheesy Loaded Nacho Burgers
    5
    Recipe and photo credit: Carolyn's Cooking
    (Not Philly) Cheesesteak Smash Burgers
    These cheesesteak-inspired burgers are packed with flavor and easy to make. Two types of cheese, peppers, and onions make them a burger you'll crave.
    Get the recipe: (Not Philly) Cheesesteak Smash Burgers
    6
    Recipe and photo credit: Home Cooking Collective
    Impossible Smash Burgers
    These vegetarian smash burgers are a delicious take on the classic, starring crispy smashed impossible meat patties and all the fixings.
    Get the recipe: Impossible Smash Burgers
    7
    A burger with cheese, lettuce, and tomato on a plate.
    Blackstone Smash Burgers with Onions
    Your everyday smash burger just got a major upgrade, thanks to crispy fried onions and melted provolone cheese.
    Get the recipe: Blackstone Smash Burgers with Onions
    8
    Recipe and photo credit: Erica's Recipes
    The Hangover Burger
    The Hangover Burger is a well seasoned bacon and egg burger served on a buttery toasted brioche bun with cheese layered between two griddle smashed patties for the ultimate breakfast smashed burger.
    Get the recipe: Hangover Burger

    May 24, 2024 Camping

    Strawberry Rhubarb Campfire Crisp

    This strawberry rhubarb campfire crisp is an easy campfire dessert that is simple to prepare and enjoy at camp. The strawberry rhubarb filling is topped with a buttery cinnamon oat streusel that has just the right amount of sweetness to make it perfect for ending your meal (or indulging in at breakfast!)

    A scoop of strawberry rhubarb crisp on a blue plate with three strawberries.

    We've all got our favorite camping desserts, from classic s'mores to banana boats, but during the fleeting rhubarb season, there's nothing quite like a sweet-tart strawberry rhubarb crisp enjoyed warm around the fire. (If rhubarb season has passed you by, try this pear crisp for an equally cozy dessert.)

    [feast_advanced_jump_to]

    Why This Recipe is Great for Camping

    • This fruit crisp recipe is easy to assemble and can be prepared entirely over your campfire.
    • It can be partially prepared ahead of time and doesn't require much cooler space.
    • Leftovers are great for breakfast!

    Ingredients and Substitutions

    Ingredients for strawberry rhubarb campfire crisp--strawberries, rhubarb, flour, butter, sugar, cinnamon, and oats.
    • Strawberries--Choose bright red strawberries that are firm and sweet smelling. Avoid strawberries that are bruised, mushy, or have wilted tops. Got extra strawberries? Try these grilled strawberry skewers.
    • Rhubarb--This works best with young, thin rhubarb. Look for stalks that are ½ to 1-inch thick and are brightly colored. The thicker stalks can be stringy. Got extra rhubarb to use up? Make rhubarb bbq sauce!
    • Butter--If you use salted butter for your crisp, don't add the extra salt to the topping.
    • Oats--You can use regular or quick-cooking oats here, but not steel-cut oats.

    Important Steps

    Sliced strawberries and rhubarb coated with sugar, flour, and cinnamon in a foil baking tray.
    A glass bowl with flour, sugar, cinnamon, and oats.
    1. Butter an 8-inch foil baking pan. Combine the strawberry rhubarb filling ingredients in the pan and mix well.
    2. In a separate bowl, combine the oat topping mixture without the butter.
    An uncooked strawberry rhubarb crisp topped with oat mixture in a foil baking tray.
    An uncooked strawberry rhubarb crisp topped with cubes of butter.
    1. Sprinkle the oat topping over the fruit filling.
    2. Dot the butter cubes over the oat filling.
    A covered foil tray cooking over a campfire.
    A cooked strawberry rhubarb crisp on a campfire grate.
    1. Cover with foil and cook over hot coals.
    2. Cook until the filling is bubbly and the topping is browned. Cool slightly before serving.

    FAQs

    Do I need to peel my rhubarb?

    If you're making this crisp during peak rhubarb season (April to June), you don't need to peel the rhubarb. If you're using late season or mid-summer rhubarb that is very thick and fibrous, use a sharp knife to peel away the outer layer of the rhubarb stalks before slicing.

    Can I make this on a grill?

    Yes. Set your grill for two-zone cooking at medium heat, if possible. (If not, get your burner as low as it will go.) Set the crisp, uncovered over the cool side of the grill, cover with the lid, and cook until the filling is bubbling and the topping is browned.

    How should I serve my campfire crisp?

    This is best served warm. If you're in an RV and have access to a freezer, then it's excellent topped with a scoop of vanilla ice cream. If you've only got a cooler, try it on its own, or with a drizzle of whipping cream or a generous topping of canned whipped cream. You could even spoon some strawberry yogurt fruit dip on top for extra strawberry flavor.

    Can I make this in a cast iron skillet?

    Definitely. Follow the instructions, but use a buttered 12-inch (or larger) skillet. Cover it with foil while cooking over the fire.

    Tips and Troubleshooting

    • To get ahead, mix your oat topping ingredients before heading out to camp. Store it in a resealable bag or container until you're ready to sprinkle it over the crisp.
    • Let the crisp cool for at least 15 minutes before eating. The filling will be too hot to eat immediately after cooking and it will also thicken as it cools.
    • Store leftover crisp in a sealed container at room temperature or in your cooler for up to 3 days.
    A cooked strawberry rhubarb crisp in a foil try on a campfire grate.

    More Dessert Recipes You'll Love

    A cast iron skillet. filled with apple crisp and two scoops of ice cream on top.
    Skillet Bourbon Apple Crisp
    A piece of blueberry skillet cake on a plate with a fork resting beside it.
    Cast Iron Skillet Blueberry Cake

    Tried This Recipe?

    If you've tried this recipe, please leave a comment below. Follow me on Instagram, Facebook, YouTube, or Pinterest for more great camping and grilling recipes.

    Recipe

    A scoop of strawberry rhubarb crisp on a blue plate with three strawberries.

    Strawberry Rhubarb Campfire Crisp

    A woman's face.Angie Zoobkoff
    This sweet-tart crisp is filled with fresh strawberries and rhubarb and topped with a buttery cinnamon-oat streusel.
    No ratings yet
    Print Recipe Pin Recipe
    Prep Time 15 minutes mins
    Cook Time 45 minutes mins
    Total Time 1 hour hr
    Course Dessert
    Cuisine American
    Servings 6 servings
    Calories 216 kcal

    Equipment

    • 8-inch square foil pan
    • Aluminum foil

    Ingredients
      

    For the strawberry rhubarb filling

    • 2 cups strawberries sliced
    • 2 cups rhubarb sliced into ½-inch pieces
    • 2 tablespoons all-purpose flour
    • ¼ cup granulated sugar
    • 1 teaspoon cinnamon

    For the oat topping

    • 1 cup rolled oats
    • 6 tablespoons all-purpose flour
    • ¼ cup granulated sugar
    • 1 teaspoon cinnamon
    • ¼ teaspoon salt
    • 6 tablespoons unsalted butter cut into small cubes, plus more for the pan

    Instructions
     

    Make the filling

    • Prepare a bed of hot coals in a campfire.
    • Butter an 8-inch foil pan. Combine the strawberries, rhubarb, flour, sugar, and cinnamon in the pan and stir to mix well.
    • Stir the oats, flour, sugar, cinnamon, and salt together in a medium bowl. Spoon the oat filling over the fruit so that it covers it completely.
    • Scatter the butter cubes over the topping.
    • Cover the pan tightly with foil and cook over hot coals (not direct flame) until the top is golden and the filling is bubbling, 45 to 50 minutes.
    • Cool for at least 15 minutes before serving.

    Notes

    • Get ahead--Mix your oat topping ingredients before heading out to camp. Store it in a resealable bag or container until you're ready to sprinkle it over the crisp.
    • Storage--Store leftover crisp in a sealed container at room temperature or in your cooler for up to 3 days.
    • Using cast-iron--You can also make this in a buttered 12-inch cast iron skillet. Cover tightly with foil while cooking.

    Nutrition

    Serving: 1portionCalories: 216kcalCarbohydrates: 26.1gProtein: 2.6gFat: 12.2gCholesterol: 31mgFiber: 3gSugar: 11.6g
    Keyword campfire desserts, fruit crisp, rhubarb season
    Tried this recipe?Let us know how it was!

    May 22, 2024 Camping

    14 Homemade Camping Snacks for Kids

    Whether you're on a hike, playing games at the picnic table, or playing tag at the park, it's pretty much inevitable that before long you'll be met with a chorus of "I'm hungry" from any children you have in tow. Come prepared with some of these great homemade camping snacks for kids, and keep them happy until the next meal rolls around.

    1
    Recipe and photo credit: Couch Potato Camping
    Rainbow Fruit Kabobs
    Eat the colors of the rainbow with these easy to make fruit kabobs. These colorful fruit skewers are a perfect side dish or healthy dessert.
    Get the recipe: Rainbow Fruit Kabobs
    2
    Two jars filled with Golden Grahams, chocolate cookies, mini marshmallows, and chocolate chips.
    S'mores Trail Mix
    A quick and easy snack mix that delivers all the classic s'mores flavors with none of the mess!
    Get the recipe: S'mores Trail Mix
    3
    Recipe and photo credit: Gimme From Scratch
    Homemade Pita Chips
    This simple recipe is quick and easy and super versatile. If you’ve never made baked pita chips, you’re going to be surprised at just how simple they are to make.
    Get the recipe: Homemade Pita Chips
    4
    Recipe and photo credit: Couch Potato Camping
    Fluffer Nutter Cookies
    Fluffer Nutter cookies are perfect to make for camping because they don’t melt in the heat and have protein to fill you up.
    Get the recipe: Fluffer Nutter Cookies
    5
    Recipe and photo credit: Fox Farm Home
    Gone Fishing Camping Snack
    This fishing camping snack for kids is so fun! If you are looking for a simple snack for camping trips or summer play this is a great choice!
    Get the recipe: "Gone Fishing" Camping Snack
    6
    A bowl of cranberry energy balls with almonds scattered around.
    Cranberry Energy Balls
    These sweet and nutty energy bites are quick and easy to make and loaded with plenty of nutritious ingredients (plus a little chocolate).
    Get the recipe: No-Bake Fruit and Nut Energy Bites
    7
    Easy S’mores Bites
    Recipe and photo credit: Dizzy, Busy & Hungry
    Easy S’mores Bites
    Make these Easy S’mores Bites for a fun brown bag treat! With only 3 ingredients, this convenient and mess-free version of the classic campfire dessert is perfect for school lunches.
    Get the recipe: Easy S'mores Bites
    8
    A bowl of strawberry fruit dip with strawberries and cherries scattered around it.
    Strawberry Yogurt Fruit Dip
    This simple strawberry yogurt dip for fruit requires only 4 ingredients and 10 minutes of your time.
    Get the recipe: Strawberry Yogurt Fruit Dip
    9
    Recipe and photo credit: Simply Oatmeal
    Oatmeal Bars
    These homemade chocolate chip oatmeal bars are thick, chewy, gooey, and delicious! Quick and easy, they are great for every occasion.
    Get the recipe: Oatmeal Bars
    10
    Ranch Snack Mix
    Recipe and photo credit: Chew Out Loud
    Ranch Snack Mix
    This ranch snack mix is a huge hit, whether it’s for a party, a healthy after school snack, or lunch boxes. The irresistible flavors of this crunchy, natural ranch snack mix will keep them coming back for more.
    Get the recipe: Ranch Snack Mix
    11
    Recipe and photo credit: Starters & Treats
    Walking Banana Pudding
    This fun and delicious walking banana pudding recipe is the perfect dessert for a picnic, camping or party!
    Get the recipe: Walking Banana Pudding
    12
    A bowl of pretzel rail mix with small bowls of M&Ms and fish crackers nearby.
    Butter Toffee Trail Mix
    This easy homemade holiday trail mix includes butter toffee pretzels, crackers, chocolate chips, and M&Ms. It's a festive snack perfect for your holiday camping trip or Christmas parties.
    Get the recipe: Butter Toffee Trail Mix
    13
    Recipe and photo credit: xoxo Bella
    Homemade No Bake Granola Bars
    Homemade no bake granola bars are great for any occasion, from breakfast or brunch to a post-workout or after-school snack. They’re sweet, chewy and so tasty!
    Get the recipe: No-Bake Granola Bars
    14
    Recipe and photo credit: Homemade Hooplah
    Puppy Chow
    The classic puppy chow: crunchy Chex cereal covered in chocolate, peanut butter, and sugar. It’s the ultimate sugary snack food (and perfect for gifting, too)!
    Get the recipe: Puppy Chow
    • « Go to Previous Page
    • Page 1
    • Interim pages omitted …
    • Page 4
    • Page 5
    • Page 6
    • Page 7
    • Page 8
    • Page 9
    • Go to Next Page »

    Primary Sidebar

    A woman's face.

    Hi, I'm Angie! I'm so glad you're here. I can't wait to share my favorite camping and grilling recipes with you.

    More about me →

    Summer Favorites

    • Skewers of grilled strawberries on a plate, drizzled with dark syrup.
      Grilled Strawberries
    • Four grilled shrimp skewers on a platter with lemon wedges and cocktail sauce on the side.
      Grilled Old Bay Shrimp
    • A whole skillet peach cobbler with two spoons resting on top.
      Grilled Skillet Peach Cobbler
    • Two Cajun chicken foil packets on plates with forks on the side.
      Cajun Chicken Foil Packets

    Popular Recipes

    • A small skillet filled with caramelized bananas.
      Campfire Bananas Foster
    • A mini cast iron skillet filled with cornbread.
      Mini Skillet Cornbread
    • A grilled cheese sandwich cut in half and a handful of potato chips.
      Campfire Grilled Cheese Two Ways
    • A skillet with three chicken breasts and a skillet filled with cheesy gnocchi.
      18 Easy Cast Iron Skillet Meals for Camping

    Footer

    ↑ back to top

    About

    • Privacy Policy

    Newsletter

    • Sign Up for Emails

    Let's Connect

    • Contact

    Copyright © 2025 Camp.Grill.Eat.

    Rate This Recipe

    Your vote:


    A rating is required
    A name is required
    An email is required