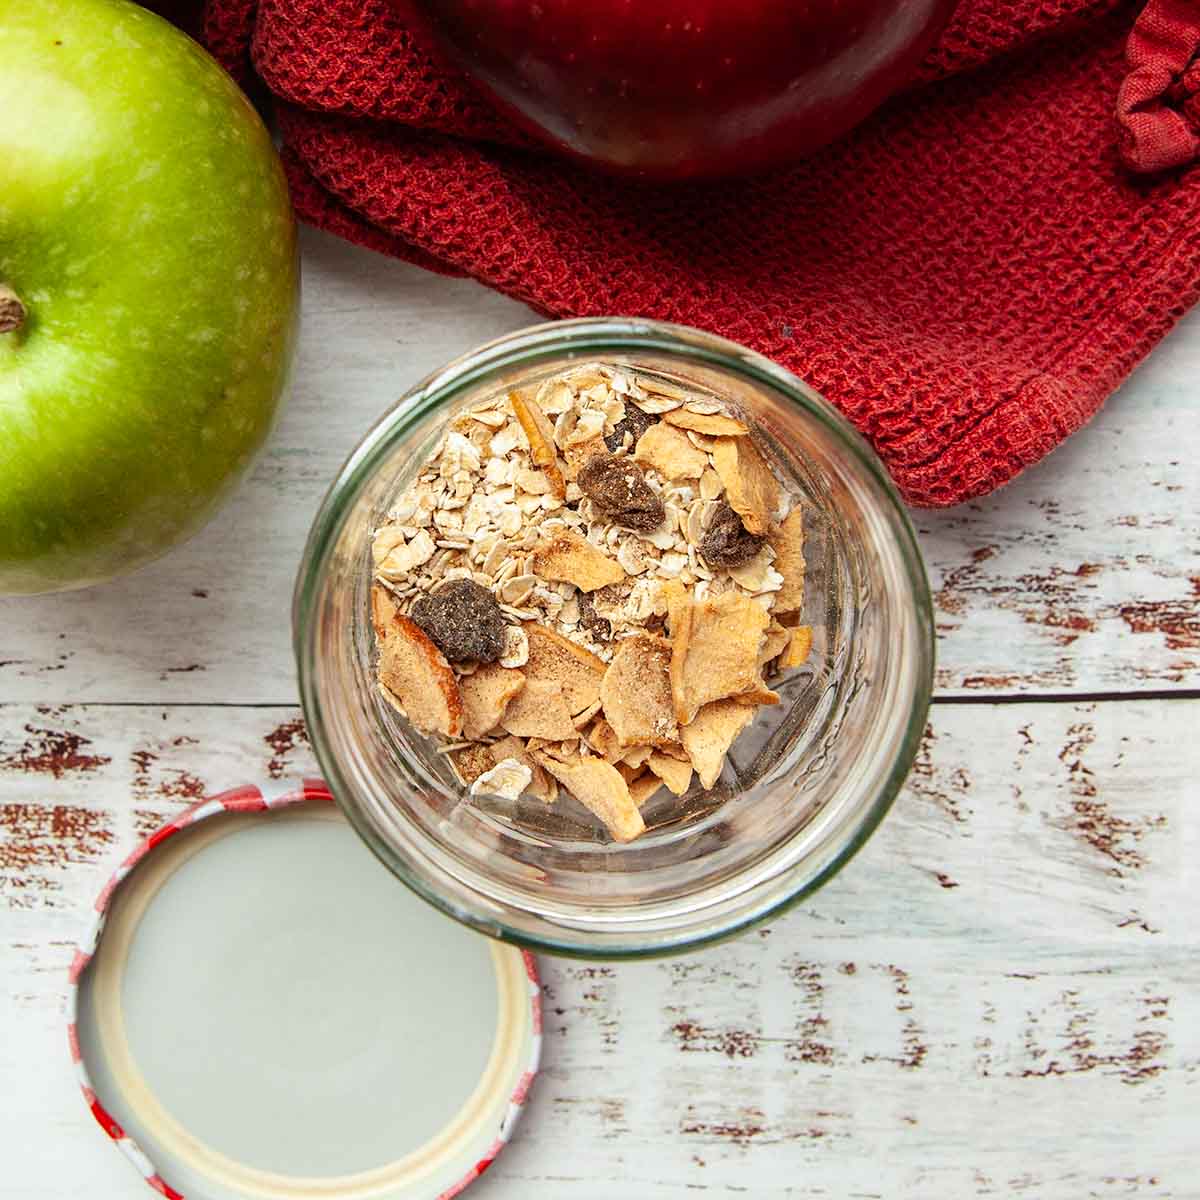
• Skip to main content
  • Skip to primary sidebar

Camp.Grill.Eat. logo

menu icon
go to homepage
  • Recipes
  • About
  • Subscribe
  • Contact
    • Facebook
    • Pinterest
    • YouTube
  • search icon
    Homepage link
    • Recipes
    • About
    • Subscribe
    • Contact
    • Facebook
    • Pinterest
    • YouTube
  • ×
    Home » Recipes

    Recipe Index

    October 21, 2024 Blackstone Griddle Recipes

    Blackstone Pierogies and Kielbasa

    These Blackstone pierogies and kielbasa are an easy Blackstone weeknight meal of fried dumplings, tender smoked sausage, and sautéed onions that can be made entirely on your outdoor griddle in less than 30 minutes.

    A bowl of pierogies and a bowl of kielbasa with onions with a salad and a dish of sour cream on the side.

    Pierogies and kielbasa are a family favorite for us, and although we frequently enjoy the dumplings boiled and drizzled with butter, I love the browning and crispiness of pan-fried pierogies. The large surface area of the Blackstone or outdoor griddle means you can cook your dumplings, sausage, and onion all at once without juggling multiple pans.

    Why You'll Love This Recipe

    • It comes together and cooks quickly, making it easy for a weeknight meal.
    • The heat retention of the cast iron griddle promotes plenty of browning and crisped edges on the sausage and pierogies.

    Ingredients and Substitutions

    Ingredients for Blackstone pierogies and kielbasa--onion, kielbasa, frozen pierogies, and oil.
    • Pierogies--You can use any flavor of frozen pierogies, or an assortment.
    • Oil--Any neutral flavored oil will work here, like vegetable or sunflower or olive oil. Use whatever you've got on hand.
    • Kielbasa--This is a type of smoked sausage popular in Polish cuisine. It's not necessary to remove the outer layer of this sausage. You can use another type of smoked sausage or garlic sausage, if you prefer.

    How to Cook Pierogies on the Blackstone

    A Blackstone griddle surface coated with oil.
    Pierogies, kielbasa, and onions cooking on a Blackstone griddle.
    1. Heat the griddle to medium. Coat the surface evenly with oil.
    2. Add the pierogies to one side and the sausage and onion to the other side, and cook, flipping once, until everything is golden and cooked through.

    FAQs

    Can I make this in my cast iron skillet?

    Yes, but you'll need to cook everything in batches to avoid crowding.

    Do I need to boil the pierogies first?

    No. They will cook through from the heat of the griddle.

    What should I serve with this?

    A bowl of sour cream and some melted butter are a must for drizzling overtop. A light side dish like a green salad or overnight marinated salad would make a great accompaniment to this simple meal.

    Tips and Troubleshooting

    • Monitor the temperature of the griddle. If the pierogies, sausage, or onion begin to burn, reduce the heat.
    • Store leftovers in an airtight container in the fridge and enjoy within 3 days.
    • Reheat in a skillet or on the Blackstone over medium-low heat until warmed through.
    Four pierogies on a plate with three slices of kielbasa, some onions, and a dollop of sour cream.

    More Blackstone Recipes You'll Love

    A bowl filled with cubes of seared sirloin steak with parsley sprinkled on top.
    Blackstone Steak Bites
    A large plate filled with smashed potatoes.
    Blackstone Smashed Potatoes

    Tried This Recipe?

    If you've tried this recipe, please leave a comment below. Follow me on Instagram, Facebook, or Pinterest for more great camping and grilling recipes.

    Recipe

    A bowl of pierogies and a bowl of kielbasa with onions with a salad and a dish of sour cream on the side.

    Blackstone Pierogies and Kielbasa

    A woman's face.Angie Zoobkoff
    The Blackstone griddle (or any large griddle) is perfect for cooking frozen pierogies, smoked sausage, and tender caramelized onions all in one go.
    No ratings yet
    Print Recipe Pin Recipe
    Prep Time 5 minutes mins
    Cook Time 15 minutes mins
    Total Time 20 minutes mins
    Course Main Course
    Cuisine Polish
    Servings 4 servings
    Calories 666 kcal

    Equipment

    • Blackstone griddle (or other large griddle)

    Ingredients
      

    • ¼ cup oil
    • 1 medium onion cut in half and sliced into half-moons
    • 1 ring (11 oz/300 g) kielbasa or other smoked sausage sliced into ½-inch pieces
    • 30 to 35 frozen pierogies
    • Melted butter and sour cream for serving

    Instructions
     

    • Heat the griddle to medium. Coat the surface with an even layer of oil.
    • Arrange the onion and sausage in a single layer on one side of the griddle and arrange the pierogies in a single layer on the other side.
    • Cook, flipping the pierogies and sausage once, until cooked through and golden brown on the outside, about 6 minutes per side.
    • Serve immediately, with butter and sour cream on the side.

    Notes

    • Adjust the heat--Monitor the temperature of the griddle. If the pierogies, sausage, or onion begin to burn, reduce the heat.
    • Storage--Store leftovers in an airtight container in the fridge and enjoy within 3 days.
    • Reheating--Reheat in a skillet or on the Blackstone over medium-low heat until warmed through.

    Nutrition

    Serving: 1portionCalories: 666kcalCarbohydrates: 72gProtein: 22gFat: 32gCholesterol: 74mgFiber: 3gSugar: 5g
    Keyword 30 minute meals, blackstone cooking, blackstone griddle
    Tried this recipe?Let us know how it was!

    October 19, 2024 Camping

    15 Cozy Cold Weather Camping Meals

    Stay warm and keep your belly full with this collection of 15 cozy cold weather camping meals. Try these hearty and satisfying soups, stews, hot drinks, warm desserts, and more on your next fall or winter camping trip.

    1
    A glazed cinnamon roll on a plate with an unglazed one in the background.
    Dutch Oven Cinnamon Rolls
    Swirled with cinnamon sugar and topped with sweet glaze, these campfire cinnamon rolls are the ultimate camping breakfast.
    Get the recipe: Dutch Oven Cinnamon Rolls
    2
    Recipe and photo credit: Dutch Oven Daddy
    Dutch Oven Lasagna
    Dutch oven lasagna has all the flavor of your favorite lasagna but is made in your cast iron Dutch oven or camp oven over coals.
    Get the recipe: Dutch Oven Lasagna
    3
    A Dutch oven filled with baked beans on a campfire grate.
    Dutch Oven Baked Beans
    Made with canned navy beans, bacon, onion, and a sweet and tangy sauce, this hearty crowd-pleasing dish will keep all of your campers happy.
    Get the recipe: Dutch Oven Baked Beans
    4
    Recipe and photo credit: Budget Delicious
    Dutch Oven Chicken
    Dutch oven chicken with tender potatoes is an easy-to-make all-in-one family meal that works perfectly as a hearty and satisfying cold weather camping dinner.
    Get the recipe: Dutch Oven Chicken
    5
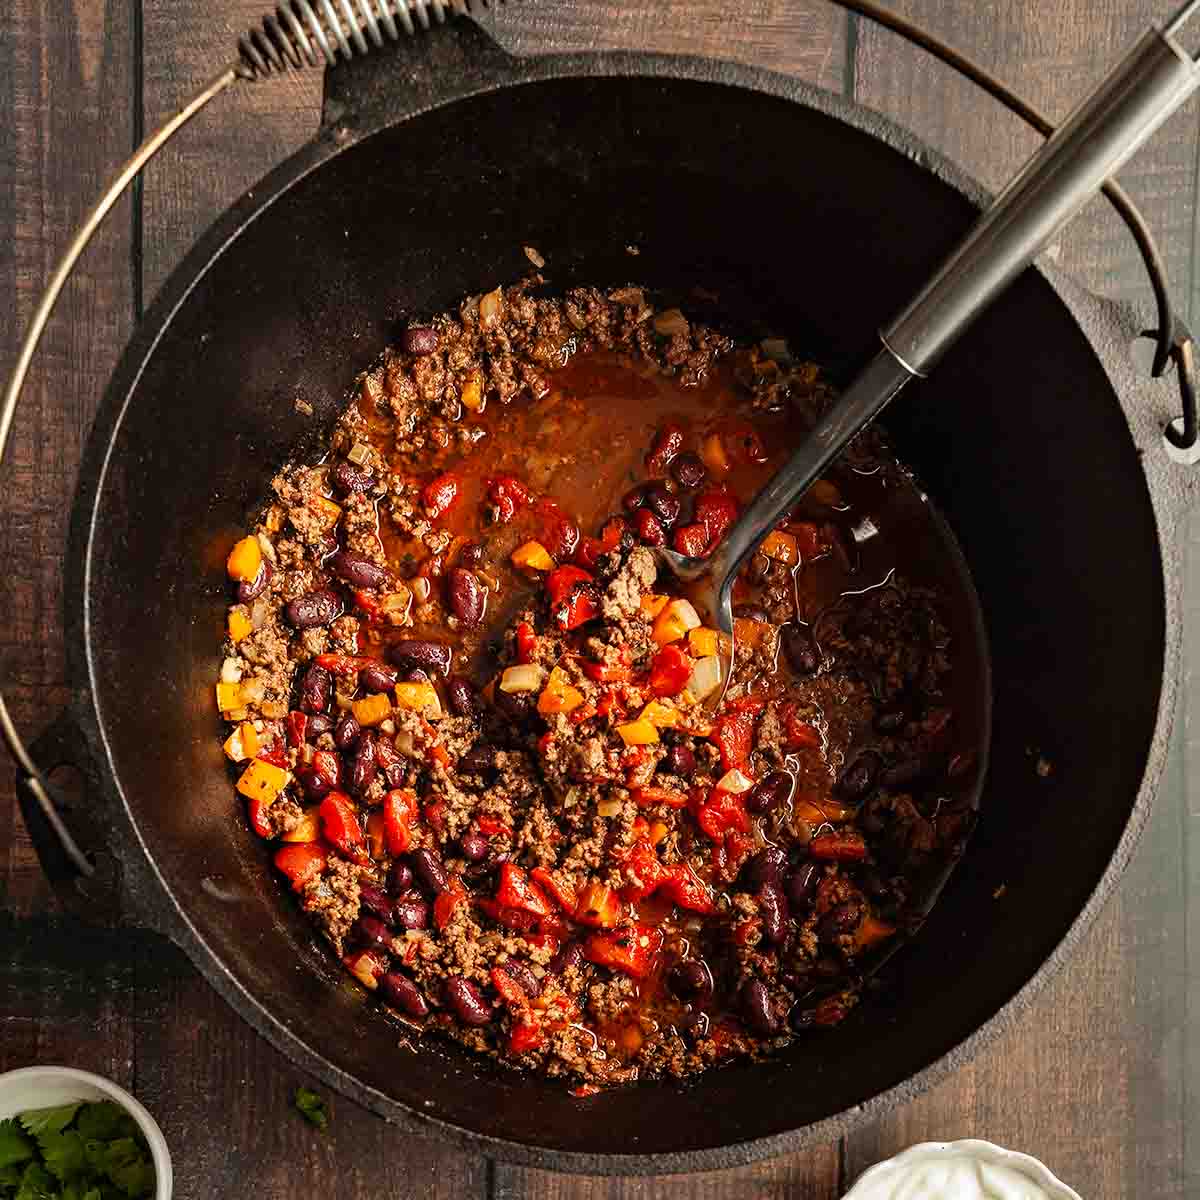
    A Dutch oven filled with campfire chili with a metal spoon resting inside.
    Dutch Oven Campfire Chili
    This ground beef chili for camping is made in your cast iron Dutch oven over the campfire. It's hearty and satisfying and easily the best chili recipe I've ever tried.
    Get the recipe: Dutch Oven Campfire Chili
    6
    Recipe and photo credit: xoxo Bella
    Pie Iron Tater Tots with Cheese
    Pie iron cheesy tots are easy to make and a great reason to invest in a pie iron or two. Tater tots, peppers, onion and shredded cheese unite to make this flavorful dish.
    Get the recipe: Pie Iron Tater Tots
    7
    Recipe and photo credit: The Yummy Bowl
    Hamburger Foil Packets
    Hamburger foil packet meals (or hobo dinners) are a delicious combination of hamburger patty meat, baby potatoes, carrots, and onion in a mixture of Italian seasoning and other flavorful aromatics.
    Get the recipe: Hamburger Foil Packets
    8
    A bowl of chicken noodle soup with a spoon resting inside and a bun on the side.
    Dutch Oven Chicken Noodle Soup
    This comforting chicken noodle soup recipe is made in your Dutch oven and can be cooked over your campfire, camp stove, or on your stovetop at home. It's chock full of tender chicken thighs, vegetables, and egg noodles.
    Get the recipe: Dutch Oven Chicken Noodle Soup
    9
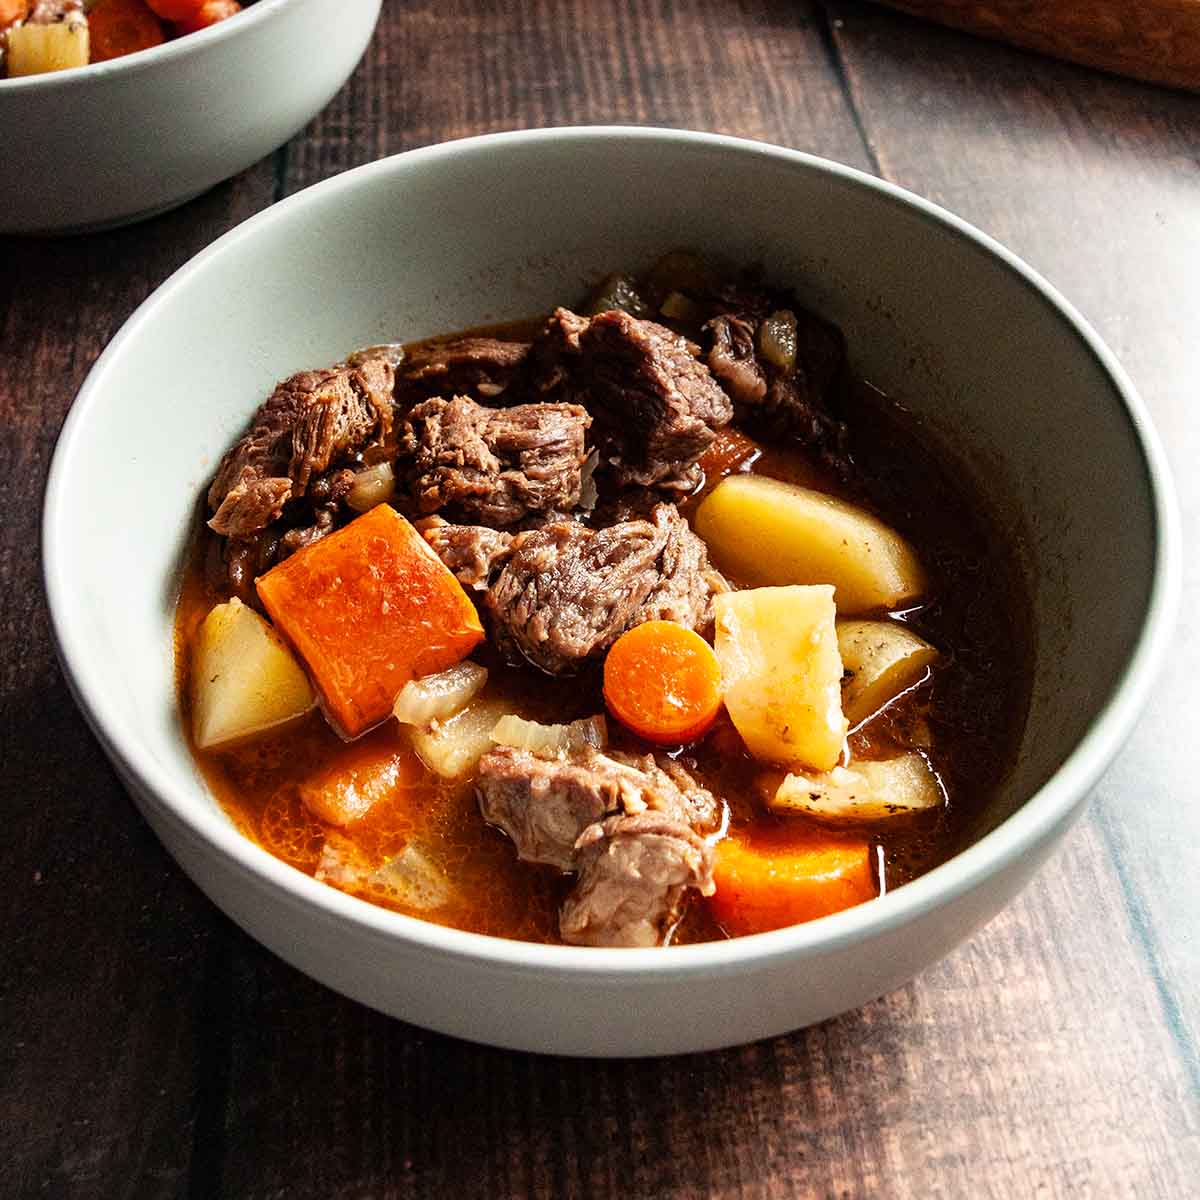
    A bowl of beef stew with carrots and potatoes on a wooden table.
    Campfire Dutch Oven Beef Stew
    This cool-weather camping stew is made with tender beef, potatoes, carrots, celery, and onions, gently simmered in a rich beef gravy.
    Get the recipe: Dutch Oven Beef Stew
    10
    A cast iron skillet filled with French onion gnocchi with a bunch of thyme on the side.
    French Onion Skillet Gnocchi
    This easy skillet gnocchi combines the classic flavors of French onion soup with tender plump potato dumplings. It's made entirely in your cast iron skillet and is a great side or main dish for camping.
    Get the recipe: French Onion Skillet Gnocchi
    11
    Recipe and photo credit: Home Time Activities
    Meatball and Potato Soup
    This meatball and potato soup is a delicious recipe for a cozy cool weather camping dinner. It uses frozen meatballs and is packed with lots of vegetables.
    Get the recipe: Meatball and Potato Soup
    12
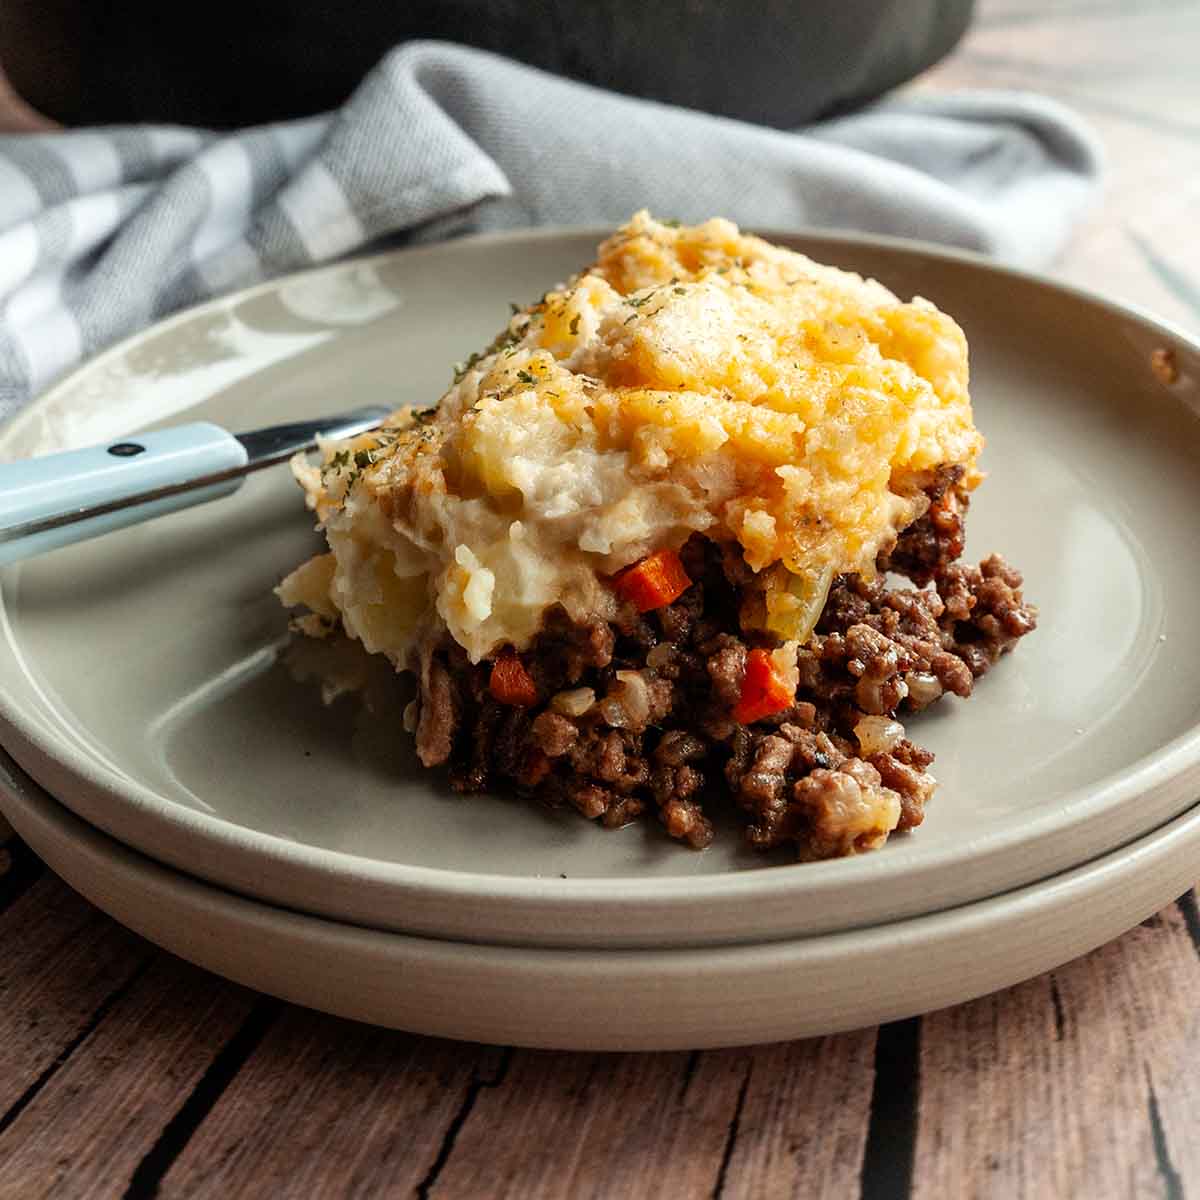
    A serving of shepherd's pie on a plate.
    Dutch Oven Shepherd's Pie Recipe
    This campfire shepherd's pie is filled with ground beef or lamb and vegetables under a blanket of creamy mashed potatoes. It's perfect cool-weather comfort food.
    Get the recipe: Dutch Oven Shepherd's Pie
    13
    Two mugs of dark hot chocolate with cinnamon sticks in them, sitting in the snow.
    Dark Hot Chocolate
    This rich and creamy dark hot chocolate, made with milk, dark chocolate, sugar, vanilla, and cinnamon is so easy to make that you'll never go back to the packaged mix.
    Get the recipe: Dark Hot Chocolate
    14
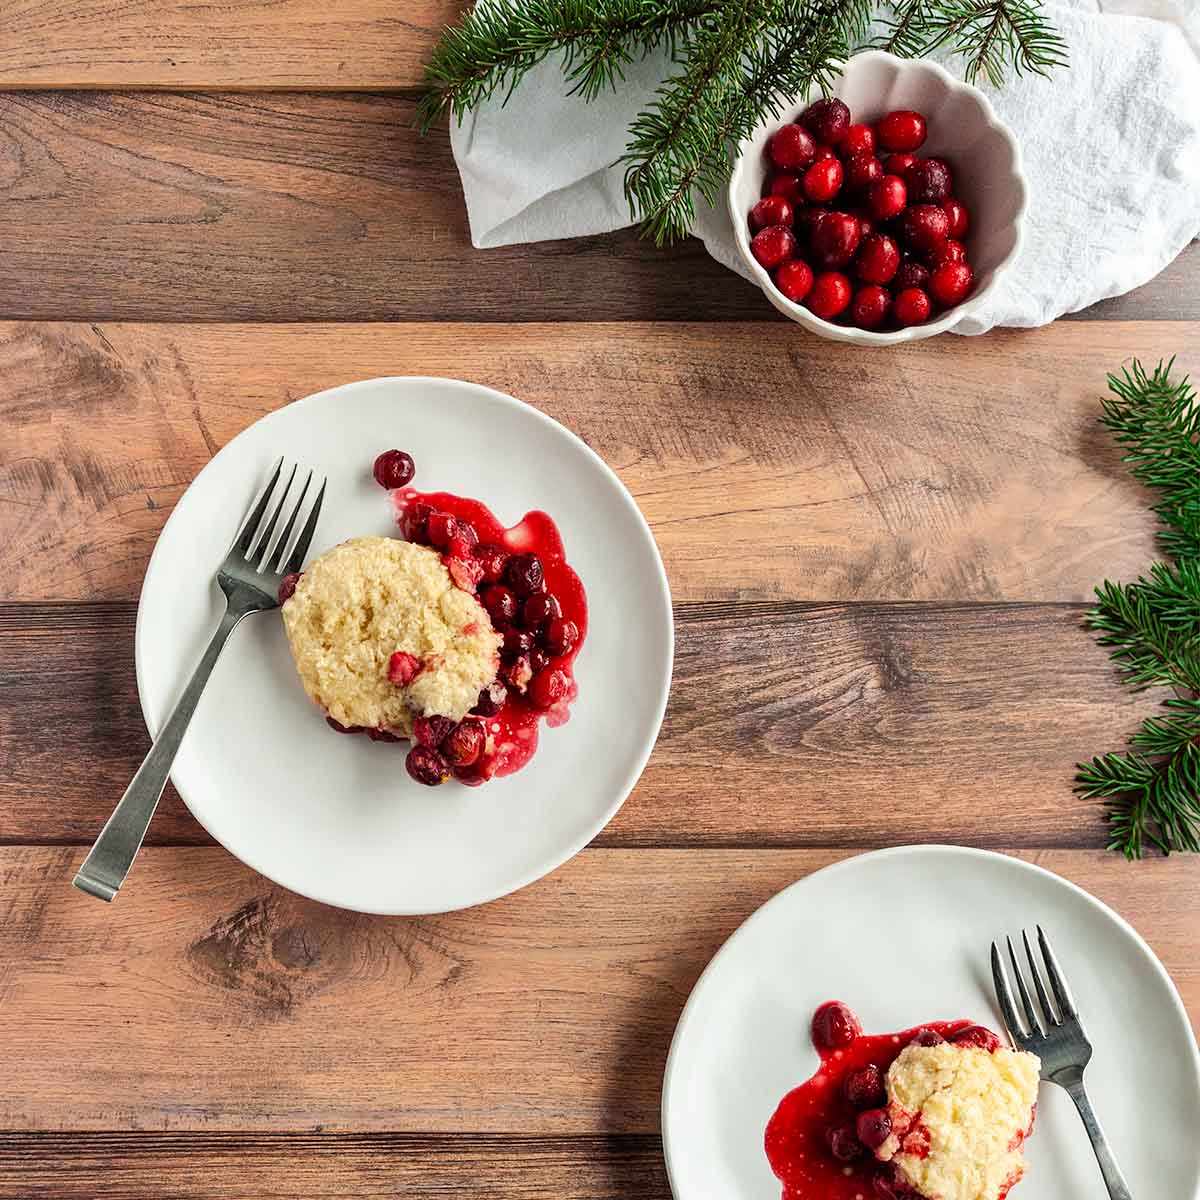
    Two plates of cranberry cobbler on a wooden table with fir branches nearby.
    Dutch Oven Cranberry Cobbler
    This festive Dutch oven cobbler has tender spiced cranberries topped with sweet biscuit dough. It's perfect for your holiday camping trip, or any time you're craving an easy dessert.
    Get the recipe: Dutch Oven Cranberry Cobbler
    15
    Recipe and photo credit: Stef's Eats and Sweets
    Apple Pie Spice Campfire Donuts
    These apple pie spice campfire donuts can be made easily in your cast iron pan with just four ingredients!
    Get the recipe: Apple Pie Spice Campfire Donuts

    October 18, 2024 Breakfast

    Dutch Oven Cinnamon Rolls

    These Dutch oven cinnamon rolls are a camping breakfast treat to make in your Dutch oven over the fire. Prep them at home and cook them at camp for an extra special breakfast.

    A glazed cinnamon roll on a plate with an unglazed one in the background.

    Our camping breakfasts usually involve a chorizo breakfast hash, breakfast sandwiches, or campfire pancakes and bacon, because they're easy to make, hearty, and satisfying. But, if I'm feeling organized, I make these cinnamon rolls ahead of time, pack them along, and cook them up at camp.

    These are a fantastic Dutch oven recipe for camping that everyone loves, but if you don't want to make a fire to cook breakfast, these can also be cooked in your RV oven or regular oven at home.

    Why This Recipe is Great for Camping

    • You can make them in advance at home and cook them at camp. They can even be frozen.
    • They can be cooked in your cast iron Dutch oven over the fire, or cooked in a baking dish or foil tray in your RV oven.
    • The cinnamon roll recipe makes plenty so they can double as dessert later in the day.

    Ingredients and Substitutions

    Ingredients for Dutch oven cinnamon rolls--milk, flour, egg, brown and white sugar, butter, yeast, and cinnamon.
    • Flour--Regular all-purpose flour works fine here. I have not tested this recipe with gluten-free flour.
    • Yeast--I used active dry yeast for this recipe, but you can substitute instant yeast and skip the proofing step.
    • Milk--Whole milk works best here, but you can use low-fat or non-dairy, if you prefer.
    • Egg--This adds richness and tenderness to the dough and shouldn't be skipped.

    How to Make Campfire Cinnamon Rolls

    Milk and yeast in a measuring jug with a whisk resting inside.
    Flour, sugar and cinnamon whisked together in a bowl.
    1. Combine the warm milk, yeast, and 1 tablespoon granulated sugar in a measuring jug. Let stand until the yeast is foamy.
    2. Whisk the flour, remaining granulated sugar, cinnamon, and salt in a large bowl.
    Dry and wet ingredients being mixed in a bowl with a spatula.
    A ball of cinnamon roll dough.
    1. Pour the milk mixture into the flour and add the beaten egg and melted butter. Mix until no dry patches remain.
    2. Turn the dough out onto a lightly floured surface and knead until smooth. Let it rest for 15 minutes.
    Cinnamon roll dough rolled into a square and topped with butter.
    Cinnamon roll dough topped with cinnamon sugar.
    1. While the dough is resting, mix the brown sugar and cinnamon together. Roll the dough out to an 8-inch square, then spread the softened butter over the dough.
    2. Sprinkle the cinnamon sugar over the dough.
    A rolled up dough log for cinnamon rolls.
    A log of cinnamon roll being cut into individual rolls.
    1. Roll the dough into an 8-inch log.
    2. Slice the dough into eight 1-inch pieces. Transfer them to an airtight container, separating them with pieces of parchment and store in the fridge or cooler until you're ready to bake.
    Eight un-risen cinnamon rolls in a Dutch oven.
    A Dutch oven with hot coals on top.
    1. Place the rolls in a Dutch oven (4 quart or larger) lined with parchment paper. Cover them with a towel and let them rise until puffy and doubled in size.
    2. Prepare hot coals in a chimney. Place 8 below the Dutch oven and 16 on the lid and cook until golden. Whisk together glaze ingredients, if using, and serve with warm rolls.

    FAQs

    Can I freeze these before cooking?

    Yes. Once the cinnamon bun dough has been rolled and sliced, freeze the individual rolls on a parchment-lined baking sheet until solid. Pop them into a resealable bag and keep frozen for up to 2 weeks. At camp, defrost and proceed with the recipe.

    What should I serve with these?

    A bowl of fresh cut fruit or berries, and breakfast sausages are great accompaniments.

    How can I cook these in my oven?

    To make these in your oven at home, or in your RV oven at camp, place the rolls in a round baking dish or pie plate and let them rise as directed in the recipe. Bake at 375°F until golden brown, about 30 minutes.

    Tips and Troubleshooting

    • The dough should be easy to work with, but still slightly tacky to the touch. Resist the urge to add extra flour.
    • Use a serrated knife to slice the rolls.
    • If you are using a large Dutch oven with a diameter of 9 inches or larger, you can minimize cleanup and get ahead by popping the un-risen rolls into a 9-inch round foil pan. When you're ready to cook, let them rise in the pan and set it directly inside your Dutch oven, or bake in the foil pan in the oven.
    • If your glaze is too thin, stir in extra icing sugar, 1 tablespoon at a time. If it's too thick, thin with additional milk, 1 teaspoon at a time.
    • Like Dutch oven monkey bread, these are best enjoyed the same day that they are cooked, but can be stored in an airtight container for up to 1 day. Wrap in foil and rewarm in the oven or Dutch oven or use leftovers to make cinnamon roll French toast or chop them up and make Dutch oven bread pudding.
    Eight cinnamon rolls in a cast iron Dutch oven.

    More Camping Breakfast Recipes You'll Love

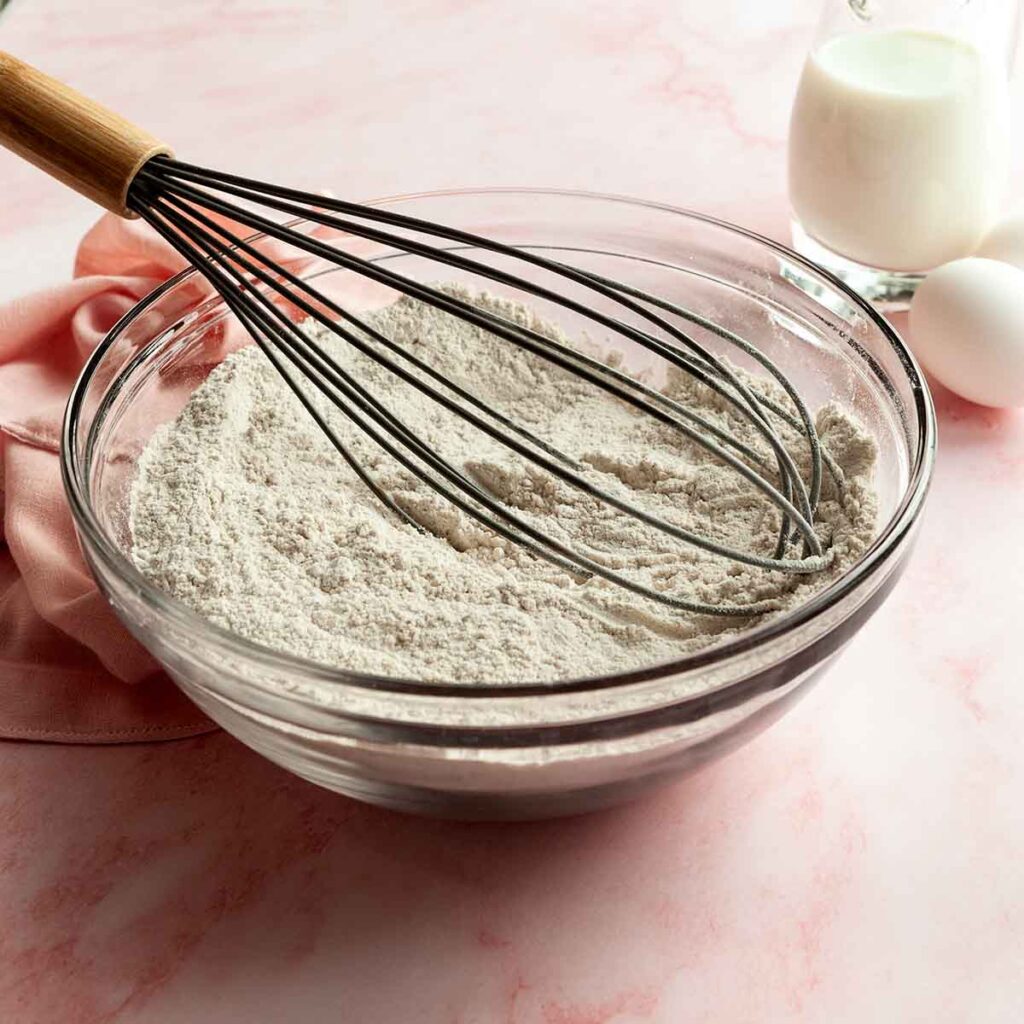
    A glass bowl filled with gingerbread pancake mix, with a whisk resting inside and a pitcher of milk and two eggs in the background.
    Gingerbread Pancake Mix
    A cast iron skillet filled with chorizo and sweet potato hash with sliced avocado and cilantro on top.
    Chorizo Sweet Potato Hash

    Tried This Recipe?

    If you've tried this recipe, please leave a comment below. Follow me on Instagram, Facebook, or Pinterest for more great camping and grilling recipes.

    Recipe

    A glazed cinnamon roll on a plate with an unglazed one in the background.

    Dutch Oven Cinnamon Rolls

    A woman's face.Angie Zoobkoff
    Swirled with cinnamon sugar and topped with sweet glaze, these campfire cinnamon rolls are the ultimate camping breakfast.
    No ratings yet
    Print Recipe Pin Recipe
    Prep Time 30 minutes mins
    Cook Time 40 minutes mins
    Total Time 2 hours hrs 30 minutes mins
    Course Breakfast, Dessert
    Cuisine American
    Servings 8 rolls
    Calories 218 kcal

    Equipment

    • Cast iron Dutch oven (4 quarts or larger)

    Ingredients
      

    For the dough

    • ½ cup milk warmed
    • 2 tablespoons granulated sugar divided
    • 2 teaspoons active dry yeast
    • 2 cups all-purpose flour (250 g) plus more for kneading and rolling
    • 2 teaspoons ground cinnamon
    • ¼ teaspoon salt
    • 1 large egg beaten
    • 2 tablespoons unsalted butter melted

    For the filling

    • ¼ cup brown sugar
    • 2 teaspoons ground cinnamon
    • 2 tablespoons unsalted butter softened

    For the glaze (optional)

    • 1 cup icing sugar
    • 1 tablespoon milk
    • ½ teaspoon vanilla extract

    Instructions
     

    Make the dough

    • Combine the warm milk, 1 tablespoon granulated sugar, and yeast in a measuring jug. Let stand until foamy, about 5 minutes.
    • Whisk the flour, remaining 1 tablespoon sugar, cinnamon, and salt together in a large bowl.
    • Add the egg and melted butter, and pour in the milk and yeast mixture. Stir until everything is combined and no dry patches remain.
    • Dump the dough onto a lightly floured surface and knead until the dough is soft, smooth, and slightly sticky, 3 to 5 minutes. Let it rest for 15 minutes.

    Make the filling

    • While the dough is resting, combine the brown sugar and cinnamon in a small bowl.
    • On a lightly floured surface, roll the dough to an 8-inch square.
    • Spread the softened butter over the surface of the dough, covering as much as possible. Sprinkle the cinnamon sugar over the butter.
    • Roll the dough up into an even log. Slice it into eight 1-inch pieces.
    • If preparing in advance, transfer the rolls to an airtight container, separating each roll with a piece of parchment. Store in the fridge or cooler until you're ready to cook them, up to 2 days.
    • When you're ready to bake, remove the rolls from the cooler or fridge and arrange them in a single layer in a parchment-lined Dutch oven. Cover loosely, then place in a warm spot and let them rise until puffy and doubled in size, 1 to 1½ hours.
    • While the rolls are rising, prepare 24 hot coals in a chimney. (Alternatively, you can use hot campfire embers).
    • When the cinnamon buns have risen, cover the Dutch oven with its lid, and place in your fire pit, with 8 coals directly underneath and 16 coals on the lid.
    • Bake until the buns are golden brown and cooked through, 35 to 45 minutes.

    Make the glaze (optional)

    • Stir the icing sugar, milk, and vanilla together in a small bowl.
    • Drizzle over warm rolls and serve immediately.

    Notes

    • Don't over-flour--The dough should be easy to work with, but still slightly tacky to the touch. Resist the urge to add extra flour.
    • Slice them easily--Use a serrated knife to slice the rolls.
    • Minimize cleanup--If you are using a large Dutch oven with a diameter of 9 inches or larger, you can minimize cleanup and get ahead by popping the un-risen rolls into a 9-inch round foil pan. When you're ready to cook, let them rise in the pan and set it directly inside your Dutch oven, or bake in the foil pan in the oven.
    • Adjusting the glaze--If your glaze is too thin, stir in extra icing sugar, 1 tablespoon at a time. If it's too thick, thin with additional milk, 1 teaspoon at a time.
    • Storage and reheating--These are best enjoyed the same day that they are cooked, but can be stored in an airtight container for up to 1 day. Wrap in foil and rewarm in the oven or Dutch oven.

    Nutrition

    Serving: 1 rollCalories: 218kcalCarbohydrates: 36gProtein: 5gFat: 7gCholesterol: 17mgFiber: 2gSugar: 11g
    Keyword campfire cinnamon rolls, cinnamon rolls, dutch oven cooking
    Tried this recipe?Let us know how it was!

    October 16, 2024 Collections

    14 Boneless Pork Chops Recipes That Will Never Get Boring

    Tired of the same old boring pork chop dinner? Not anymore. These 14 easy boneless pork chops recipes are juicy and tender, and so tasty that you'll be happily adding this inexpensive cut of meat to your grocery list every week.

    1
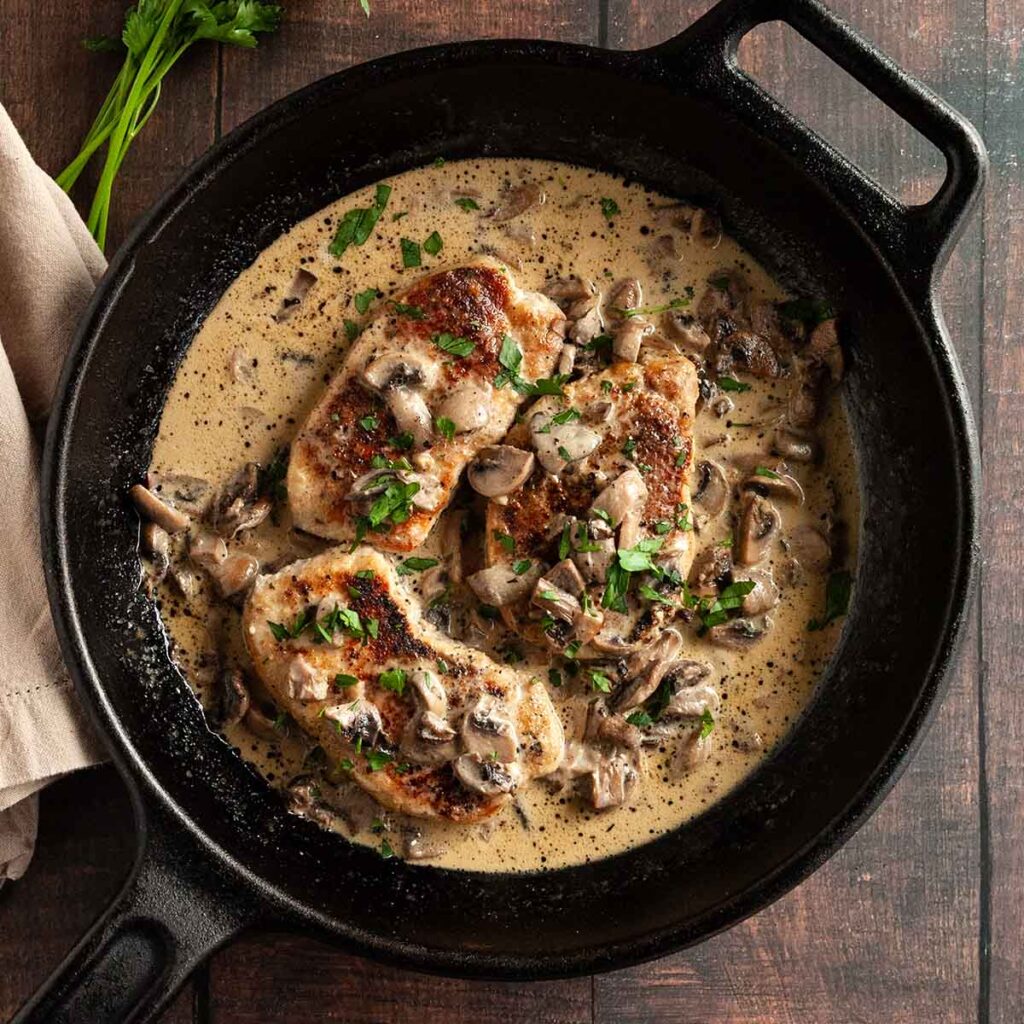
    Three pork chops in a cast-iron skillet with mushroom gravy on top and around the pork chops.
    Skillet Pork Chops with Mushroom Gravy
    This easy meal of cast-iron skillet pork chops with creamy make-ahead mushroom gravy is ready in just 20 minutes.
    Get the recipe: Skillet Pork Chops with Mushroom Gravy
    2
    Recipe and photo credit: The Forked Spoon
    Pork Schnitzel
    Pork Schnitzel is an easy and delicious weeknight dinner made of boneless pork chops that have been pounded flat, then breaded and fried until golden and crispy. Popular throughout Europe, particularly in Austria and Germany, it’s the perfect versatile comfort food loved by all ages.
    Get the recipe: Pork Schnitzel
    3
    Recipe and photo credit: The Short Order Cook
    Creamy Dijon Pork Chops
    This 30-minute recipe for creamy pork chops will wow you. Juicy pork chops in a rich mustard herb sauce with white wine, parmesan, and spinach is amazing. Fancy enough for company but easy enough for any weeknight dinner.
    Get the recipe: Creamy Dijon Pork Chops
    4
    A platter of seared pork chops topped with apples and onions.
    Blackstone Pork Chops with Apples and Onions
    This easy meal of juicy pork chops topped with caramelized onion and apple is the perfect way to celebrate autumn.
    Get the recipe: Pork Chops with Apples and Onions
    5
    Recipe and photo credit: Plating Pixels
    Juicy Grilled Pork Chops
    Discover how to make juicy grilled pork chops in minutes with just a few simple steps.
    Get the recipe: Juicy Grilled Pork Chops
    6
    Recipe and photo credit: The Cookin Chicks
    Ranch Coated Pork Chops
    These easy Shake n Bake-inspired pork chops are packed with flavor and only require a few simple ingredients!
    Get the recipe: Ranch Coated Pork Chops
    7
    Recipe and photo credit: Like Hot Keto
    Pork Chop Pizzaiola
    Pork chop pizzaiola is a delicious and quick weeknight dinner that you can put on the table in under 30 minutes with just five ingredients! Tender and juicy pork cutlets topped with melty gooey cheese, pizza sauce, and pepperoni – this is the ultimate comfort food!
    Get the recipe: Pork Chop Pizzaiola
    8
    Recipe and photo credit: Living Chirpy
    Pan Seared Pork Chops with Mushroom Sauce
    These pan seared pork chops with mushroom and pea marsala sauce will become your favorite pork dish after just one bite. An amazingly yummy dinner that takes only 30 minutes!
    Get the recipe: Pan Seared Pork Chops
    9
    Recipe and photo credit: Erica's Recipes
    Coffee-Rubbed Pork Chops over Creamy Queso Corn
    Made with bright fresh salsa, and creamy cheesy corn, these simple grilled pork chops are guaranteed to be on repeat.
    Get the recipe: Coffee-Rubbed Pork Chops
    10
    Recipe and photo credit: Foxes Love Lemons
    Honey Mustard Pork Chops
    Honey mustard pork chops are easy enough for a weeknight, but delicious enough for a special occasion. Comes together in one skillet!
    Get the recipe: Honey Mustard Pork Chops
    11
    Recipe and photo credit: Little Sunny Kitchen
    Easy Baked Pork Chops
    Baked pork chops are super moist and tender and made with a delicious dry rub, an optional brine, and with just 20 minutes in the oven, dinner is served!
    Get the recipe: Easy Baked Pork Chops
    12
    Recipe and photo credit: Everyday Eileen
    Honey Garlic Pork Chops and Potatoes
    Honey garlic pork chops with yellow potatoes is an easy dinner with a tangy, savory sauce over juicy, tender pork chops and potatoes.
    Get the recipe: Honey Garlic Pork Chops
    13
    Recipe and photo credit: Peel with Zeal
    Boneless Pork Chop Skillet Dinner
    Whip up this fresh and flavorful one-skillet boneless pork chop dinner in under 30 minutes! Packed with healthy white beans and spinach, it’s both gluten- and dairy-free.
    Get the recipe: Boneless Pork Chop Skillet Dinner
    14
    Recipe and photo credit: Binky's Culinary Carnival
    Pork Cordon Bleu
    This pork cordon bleu is a different take on the classic chicken version with a few secrets to keep the pork tender and juicy.
    Get the recipe: Pork Cordon Bleu

    October 15, 2024 Articles

    Top 6 Tips for Cold Weather Camping

    Exploring nature in the chillier months of the year can be incredibly rewarding and offer some spectacular scenery and experiences, but it's important to do it safely. These top 6 tips for cold weather camping will help you prepare for and enjoy your camping trip, even when the snow flies and the temperatures dip below freezing.

    A river running through a mountainous region covered in snow.

    Photo credit: Matthew Sichkaruk

    Stay Dry

    This is the most important thing to remember. If you're wet, it's going to be very difficult to stay warm. Moisture will draw heat from your body and keep you shivering.

    To ensure that you stay dry throughout the trip, pack more clothes than you think you'll need and store them in sealed plastic bags to keep them dry. Have an extra set of dry sleeping clothes which you can keep stashed in your sleeping bag. Bring a waterproof outer layer with you and use it as needed.

    If your clothes get wet, change as soon as possible, and keep the wet clothes away from the dry.

    Although it's very important to keep your body dry to stay warm, this also applies to your firewood. Keep kindling in a sealed container or tote to make it easy to start a fire quickly. Larger pieces of firewood can be covered with a tarp to protect them.

    A backpack, two mugs, a campfire and two marshmallow roasting sticks in the snow.

    Photo credit: eepic.diller

    Know Before You Go

    Check the weather forecast as you plan for your trip. It's the easiest part of the whole process and it will help you know what to expect and what to pack. Always err on the side of caution since the weather can change without warning and forecasts aren't 100% accurate.

    Dress in Layers

    You've packed plenty of dry clothes, so make sure to use them! Temperatures can fluctuate significantly throughout the day, so it's important to dress in layers that can be removed and added as needed.

    Start with a moisture-wicking base layer that will keep your body dry. There are a variety of synthetic materials that will do this, and silk and merino wool are also good choices.

    Add an insulating layer to keep you warm. Good choices include fleece, down, or wool. The thicker the layer, the warmer you will be, so use your judgement based on the temperatures you'll be facing. You don't want to be too warm, as that will cause you to sweat.

    Your top layer should be a protective one that will protect you from snow, rain, and wind. Choose something that is breathable but has a water-repellent coating.

    Pack Extra Food

    Regardless of what type of adventure you're on, your body is going to work harder in cold weather to keep you warm. Burning more calories means you'll need more energy, and may need to eat more frequently or have larger meals. You can also keep plenty of hot beverage on hand, like tea, coffee, or dark hot chocolate.

    A Thermos and two mugs on a tree stump outside in the snow.

    Photo credit: Freepik

    I recommend planning nutrient dense meals that are suited to cold weather camping, like hearty turkey chili or Dutch oven shepherd's pie. Also, wind, snow, and rain can make it difficult to start a fire, so be sure to bring plenty of snacks that don't require cooking.

    Protect Your Extremities

    Exposing your fingers, toes, face, and ears to extreme cold can result in frostbite, but those types of temperatures are generally too cold for camping, anyway. That said, your extremities are the furthest from your heart, so your heart has to work hard to get blood there and as soon as you start to get cold, those are the first areas to suffer. It becomes difficult to use your fingers and it's just plain uncomfortable.

    Insulating your hands, feet, and head means that your body doesn't have to work as hard to keep you warm. Always pack more socks than you think you'll need, and wear extra pairs, if needed, particularly when you're sleeping. If they get wet, change them immediately. In cold weather, wear gloves or mittens and a hat, and make sure it covers your ears.

    Bring the Right Equipment

    Don't make your body work any harder than it already has to in order to keep you warm. Cold-rated camping equipment is designed to help you out.

    A tent covered with snow on a mountain.

    Photo credit: Mathieu Delauriers

    Choose a sturdy tent that's waterproof. Bring a warm sleeping bag that is nice and snug, along with a couple of sleeping pads to protect your from the frozen ground. A hot water bottle is also handy to keep you warm in your sleeping bag.

    Camper Tip

    Stash your phone in your sleeping bag with you while you sleep. It will keep it warm and prevent the battery from draining.

    Keep in mind that not all camp stoves are created equal. If you are bringing one along, make sure that it is designed for use in cold weather.

    October 14, 2024 Beef Recipes

    Blackstone Steak Bites

    These Blackstone steak bites are an easy weeknight meal made on your outdoor griddle. To create these juicy morsels, cubes of tender sirloin steak are marinated with garlic and Worcestershire sauce, then quickly seared on cast iron and finished with butter.

    A bowl filled with cubes of seared sirloin steak with parsley sprinkled on top.

    A large outdoor griddle, like the Blackstone, is a rockstar at creating everything from epic griddle breakfasts to easy weeknight meals, like pierogies and kielbasa and these buttery garlic steak bites. The large surface area means you don't have to cook in batches and have plenty of space to brown each piece perfectly. Whip up a batch of these and watch them get devoured instantly.

    Why You'll Love This Recipe

    • There's minimal hands on time and the meat cooks quickly, making it easy for a weeknight meal or an easy camping dinner.
    • The heat retention of the cast iron griddle promotes plenty of browning and crisped edges.

    Ingredients and Substitutions

    Ingredients for Blackstone steak bites--Worcestershire sauce, butter, garlic, oil, parsley, and steak.
    • Sirloin steak--Cut the meat into even sized cubes so that they all cook in the same amount of time. Freezing the meat for 15 minutes can make it easier to cut. For an even more tender bite, substitute striploin steak.
    • Oil--Any neutral flavored oil will work here, like vegetable or sunflower or olive oil. Use whatever you've got on hand.
    • Garlic--Two cloves will give you plenty of garlic flavor, but if you really love it, toss in an extra clove.

    How to Make Steak Bites on the Blackstone

    Garlic, oil, and Worcestershire sauce mixed together in a bowl.
    Cubes of sirloin steak coated in marinade in a resealable bag.
    1. Combine the Worcestershire sauce, oil, and garlic in a small bowl.
    2. Place the cubed beef in a resealable bag and pour the marinade over. Seal the bag, toss to coat everything, then stash in the fridge for 2 hours.
    Cubes of sirloin steak cooking on a Blackstone griddle.
    Butter melting into seared sirloin steak cubes on a Blackstone griddle.
    1. Drain the meat and pat dry. Cook over medium-high heat on a large griddle until the edges are browned and the meat is cooked to your desired doneness.
    2. Reduce the griddle heat to low, add the butter and toss it with the meat. Scoop into a bowl and sprinkle with parsley.

    FAQs

    Can I make this in my cast iron skillet?

    Yes, but you'll need to cook the steak in batches to avoid crowding and steaming the meat. Once it's all seared, toss it back in the skillet and finish it with the butter.

    What should I serve with this?

    Since you've got the griddle fired up, serve other amazing Blackstone griddle recipes, like these crispy Blackstone smashed potatoes, Blackstone asparagus, or griddle sautéed mushrooms alongside to create a full meal.

    Tips and Troubleshooting

    • Let your griddle get hot before adding the meat so that it will begin to sear immediately.
    • Take care to spread your meat in an even layer on the griddle, leaving room between each piece to allow it to sear. Crowding the meat will cause it to steam.
    • Store leftovers in an airtight container in the fridge and enjoy within 3 days.
    • Reheat in a skillet over medium-low heat until warmed through.
    • To make this gluten-free, use gluten-free Worcestershire sauce.
    Steak bites cooking on a Blackstone griddle.

    More Beef Recipes You'll Love

    Strips of grilled flanken short ribs on a wooden board.
    Grilled Flanken Short Ribs
    Six steak skewers piled on a wooden serving board.
    Grilled Striploin Steak Skewers

    Tried This Recipe?

    If you've tried this recipe, please leave a comment below. Follow me on Instagram, Facebook, or Pinterest for more great camping and grilling recipes.

    Recipe

    A bowl filled with cubes of seared sirloin steak with parsley sprinkled on top.

    Blackstone Steak Bites

    A woman's face.Angie Zoobkoff
    For these buttery steak bites, sirloin steak is marinated then seared on your outdoor griddle and finished with butter to create completely irresistible morsels of juicy steak.
    No ratings yet
    Print Recipe Pin Recipe
    Prep Time 10 minutes mins
    Cook Time 10 minutes mins
    Total Time 2 hours hrs 20 minutes mins
    Course Appetizer, Main Course
    Cuisine American
    Servings 6 servings
    Calories 260 kcal

    Equipment

    • Blackstone or large outdoor griddle

    Ingredients
      

    • 3 tablespoons Worcestershire sauce
    • 1 tablespoon olive or vegetable oil
    • 2 cloves garlic minced
    • 1 ½ pounds (680 g) sirloin steak cut into 1 ½-inch cubes
    • Salt and freshly ground black pepper
    • 1 tablespoon butter cut into small cubes
    • 2 tablespoons chopped fresh Italian parsley

    Instructions
     

    • Combine the Worcestershire sauce, oil, and garlic in a small bowl.
    • Place the steak cubes in a resealable plastic bag, then pour the marinade over. Seal the bag and toss to coat the beef evenly. Stash the meat in the fridge for 2 hours.
    • Drain the meat and pat day. Season lightly with salt and pepper.
    • Heat a Blackstone or other large griddle to medium high.
    • Add the beef to the hot griddle and sear, turning occasionally, until the beef is seared on all sides and cooked to your desired doneness, 6 to 8 minutes total.
    • Reduce the heat to low and stir in the butter. Quickly toss it with the beef, then scoop everything into a serving bowl.
    • Garnish with parsley and serve immediately.

    Notes

    • Get it hot--Let your griddle get hot before adding the meat so that it will begin to sear immediately.
    • Don't crowd--Take care to spread your meat in an even layer on the griddle, leaving room between each piece to allow it to sear. Crowding the meat will cause it to steam.
    • Storage--Store leftovers in an airtight container in the fridge and enjoy within 3 days.
    • Reheating--Reheat in a skillet over medium-low heat until warmed through.
    • Dietary--To make this gluten-free, use gluten-free Worcestershire sauce.

    Nutrition

    Serving: 1portionCalories: 260kcalCarbohydrates: 3gProtein: 35gFat: 11gCholesterol: 107mgSodium: 172mgSugar: 2g
    Keyword blackstone cooking, blackstone griddle, easy beef dinners, steak bites
    Tried this recipe?Let us know how it was!

    October 12, 2024 Chicken & Turkey

    12 Delicious Recipes for Leftover Turkey

    Anyone else look forward to leftover turkey as much as the main event? I love it stuffed into sandwiches (along with all the other leftovers), baked into casseroles and pot pie, stirred into soups, and added to creamy pastas. There's no need to stop there, though. These 12 delicious recipes for leftover turkey are inspiration to truly get creative with your turkey leftovers.

    1
    Recipe and photo credit: The Feathered Nester
    Tater Tot Turkey Casserole
    Hearty and comforting, this turkey casserole is a perfect way to use up leftover Thanksgiving turkey for a delicious family meal.
    Get the recipe: Tater Tot Turkey Casserole
    2
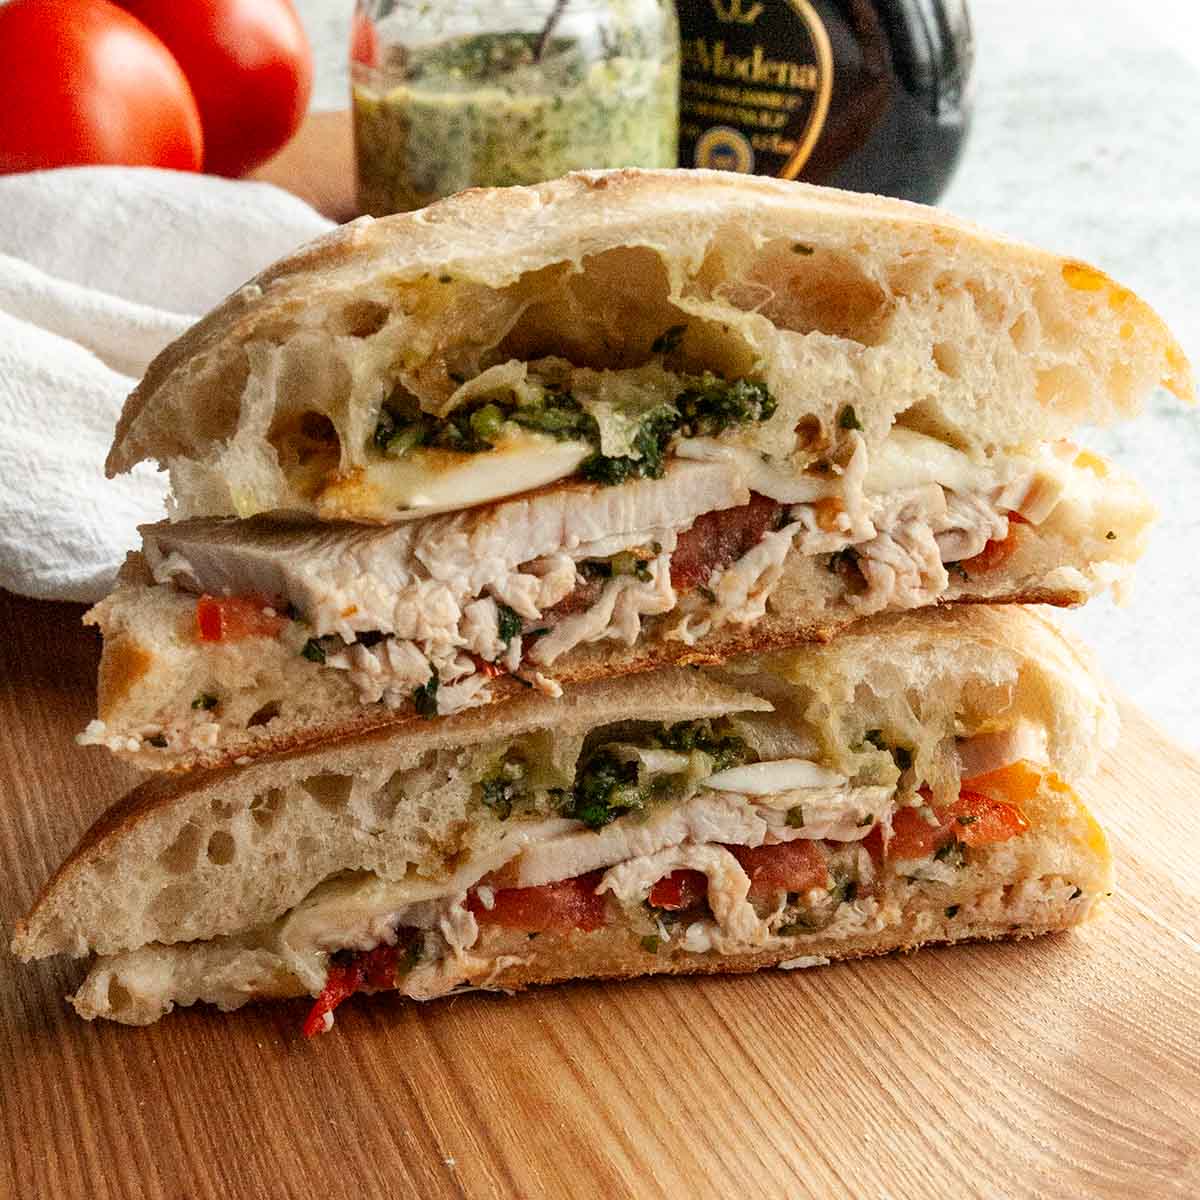
    Two halves of a turkey ciabatta sandwich with tomatoes, pesto, and mozzarella, stacked on top of each other on a cutting board.
    Turkey Ciabatta Sandwich
    This easy sandwich is loaded with sliced turkey, pesto, cheese, and tomatoes and can be toasted or served cold. It's a fantastic way to use up leftover turkey!
    Get the recipe: Turkey Ciabatta Sandwich
    3
    Recipe and photo credit: My Suburban Kitchen
    Turkey Spinach Lasagna Rolls
    Use your leftovers to create some delicious turkey spinach lasagna rolls. They are so good that no one will mind eating leftover turkey after the holiday.
    Get the recipe: Turkey Spinach Lasagna Rolls
    4
    Recipe and photo credit: Seasoned and Salted
    Turkey Puff Pastry Pot Pie
    Transform your leftover Thanksgiving turkey into a flavorful turkey puff pastry pot pie with a crunchy golden crust with moist and chewy filling.
    Get the recipe: Turkey Puff Pastry Pot Pie
    5
    Recipe and photo credit: I Heart Eating
    Turkey Cranberry Sliders
    Turkey cranberry sliders turn leftover Thanksgiving turkey and cranberry sauce into a new meal! The sliders take just minutes to make!
    Get the recipe: Turkey Cranberry Sliders
    6
    Recipe and photo credit: Carolyn's Cooking
    Leftover Turkey Taquitos
    These turkey taquitos are an amazing way to use up leftovers and they're so easy to make!
    Get the recipe: Leftover Turkey Taquitos
    7
    Recipe and photo credit: The Forked Spoon
    Turkey Soup
    Homemade turkey soup is an easy way to repurpose holiday leftovers into a nourishing and delicious dinner that will last you for days. Use what’s left of your holiday turkey, add some vegetables and barley, and transform your leftover turkey dinner into soup in under an hour!
    Get the recipe: Turkey Soup
    8
    A turkey quesadilla cut into 4 pieces on a plate with a dish of cranberry relish and a mint sprig.
    Turkey Quesadilla
    Laden with roast turkey, two types of cheese, and cranberry relish, this quesadilla is the perfect way to enjoy leftover turkey.
    Get the recipe: Turkey Quesadilla
    9
    Recipe and photo credit: Cooking Gorgeous
    Leftover Turkey Shepherd’s Pie
    This leftover turkey shepherd’s pie recipe is the perfect way to use up leftover Turkey meat from Thanksgiving or Christmas roast dinner.
    Get the recipe: Leftover Turkey Shepherd's Pie
    10
    Recipe and photo credit: Dr. Davinah's Eats
    Leftover Turkey Salad
    Use your leftover turkey in this easy turkey salad recipe with cranberries, crispy bacon, and a sweet and tangy dressing. Ready in 15 minutes.
    Get the recipe: Leftover Turkey Salad
    11
    Recipe and photo credit: Everyday Shortcuts
    Thanksgiving Egg Rolls
    Thanksgiving egg rolls takes Thanksgiving leftovers stuffed and wrapped into an egg roll, then deep-fried. Perfect for dipping into gravy!
    Get the recipe: Thanksgiving Egg Rolls
    12
    Turkey and Stuffing Casserole
    Recipe and photo credit: The Foodie Physician
    Turkey and Stuffing Casserole
    This creamy turkey and stuffing casserole is the perfect way to repurpose your Thanksgiving leftover turkey or any leftover chicken.
    Get the recipe: Turkey and Stuffing Casserole

    October 11, 2024 Chicken & Turkey

    Turkey Quesadilla

    This cheesy turkey quesadilla is laden with roast turkey, two types of cheese (yes, two!), and cranberry relish or sauce. It's so good that you're going to want to make sure you save some leftover Thanksgiving turkey just so that you can make this handheld meal.

    A turkey quesadilla cut into 4 pieces on a plate with a dish of cranberry relish and a mint sprig.

    There's a lot that you can do with leftover Thanksgiving turkey, from turkey sandwiches to pot pie, but I love this easy turkey quesadilla recipe most for a couple of reasons. It makes use of multiple leftovers, and doesn't require the commitment or effort that a large casserole would. It's also incredibly easy to make, but is a nice change from the rut of a traditional leftover turkey sandwich.

    Why You'll Love This Recipe

    • It's a great way to use up leftover Thanksgiving turkey.
    • Quesadillas are an easy lunch recipe for camping or at home.
    • You can make as many or as few as you need.

    Ingredients and Substitutions

    Ingredients for turkey quesadilla--tortilla, provolone, turkey, brie, cranberry relish, and Dijon.
    • Tortilla--Use your favorite brand of large flour tortillas. Feel free to use whole wheat or white.
    • Turkey--Shredded or sliced turkey will work here, and if you don't have turkey on hand, chicken will also stand in nicely.
    • Provolone cheese--Shredded provolone will be easier to distribute on your tortilla, but if you can only get sliced provolone, use one slice and break it into a few pieces.
    • Brie--This adds a rich, creamy element to your quesadilla. Feel free to substitute another creamy soft cheese, like Camembert.
    • Cranberry relish--I like cranberry relish, and that's what I always serve at Thanksgiving, but feel free to use your own cranberry sauce, or the canned variety. It adds a sweet-tart flavor that balances the richness of the cheese and the bite of the mustard.

    How to Make Turkey Quesadillas

    A person spreading Dijon mustard on a flour tortilla.
    A flour tortilla topped with shredded cheese and turkey.
    1. Spread 2 teaspoons Dijon mustard over half a tortilla.
    2. Top the mustard with provolone and shredded turkey.
    A flour tortilla with cranberry relish on one half and turkey and cheese on the other side.
    A quesadilla cooking in a skillet.
    1. Place thin slices or pieces of Brie on top of the turkey. Spread cranberry relish over the other half of the tortilla. Fold in half.
    2. Cook over medium heat, flipping once, until both sides are golden brown and the cheese is melted.

    FAQs

    Do I need to grease my skillet?

    Nope. The tortilla won't stick to your skillet.

    Can I make this on my Blackstone griddle?

    Definitely. Using a large griddle is a great way to make multiple quesadillas at once.

    Tips and Troubleshooting

    • Scale the recipe to make as many or as few quesadillas as you want. You can fit two into a cast iron skillet, or use a large griddle to cook more than two at once.
    • I recommend layering cheese on either side of the turkey mixture in the quesadilla. This will help to glue the whole thing together.
    • A pizza cutter works well for slicing your quesadilla into even triangles.
    • Change it up and try dipping your quesadilla into leftover turkey gravy!
    Two pieces of turkey quesadilla on a plate with a dish of cranberry relish.

    More Lunch Recipes You'll Love

    Four triangles of quesadilla on a plate, with one resting in a bowl of marinara sauce.
    Italian Sausage Quesadilla
    A person pulling an English muffin grilled cheese sandwich apart.
    English Muffin Grilled Cheese

    Tried This Recipe?

    If you've tried this recipe, please leave a comment below. Follow me on Instagram, Facebook, or Pinterest for more great camping and grilling recipes.

    Recipe

    A turkey quesadilla cut into 4 pieces on a plate with a dish of cranberry relish and a mint sprig.

    Turkey Quesadilla

    A woman's face.Angie Zoobkoff
    Laden with roast turkey, two types of cheese, and cranberry relish, this quesadilla is the perfect way to enjoy leftover turkey.
    No ratings yet
    Print Recipe Pin Recipe
    Prep Time 5 minutes mins
    Cook Time 10 minutes mins
    Total Time 15 minutes mins
    Course Main Course
    Cuisine American
    Servings 1 quesadilla
    Calories 486 kcal

    Ingredients
      

    • 2 teaspoons Dijon mustard
    • 1 large flour tortilla
    • 1 ounce provolone cheese shredded
    • ½ cup shredded or sliced roast turkey
    • 1 ounce Brie cheese cut into slices
    • 1 tablespoon cranberry relish or sauce plus more for dipping

    Instructions
     

    • Spread 2 teaspoons of Dijon mustard over half of the tortilla.
    • Sprinkle the provolone over the mustard and top with the turkey.
    • Place the slices of Brie in an even layer over the turkey.
    • Spread the cranberry relish or sauce on the other half of the tortilla. Fold it in half to close.
    • Place the folded tortilla in a large cast iron skillet and cook over medium heat, flipping once, until both sides are golden brown and the cheese is melted, about 5 minutes per side.
    • Cut into wedges and serve with extra cranberry sauce for dipping, if desired.

    Notes

    • Scaling--Scale the recipe to make as many or as few quesadillas as you want. You can fit two into a cast iron skillet, or use a large griddle to cook more than two at once.
    • Help it stick--I recommend layering cheese on either side of the turkey mixture in the quesadilla. This will help to glue the whole thing together.
    • Slicing--A pizza cutter works well for slicing your quesadilla into even triangles.

    Nutrition

    Serving: 1quesadillaCalories: 486kcalCarbohydrates: 34gProtein: 37gFat: 22gCholesterol: 101mgSodium: 1053mgFiber: 1gSugar: 14g
    Keyword camping lunch ideas, easy lunch recipes, leftover turkey, thanksgiving leftovers
    Tried this recipe?Let us know how it was!

    October 9, 2024 Collections

    15 Awesome Ways to Use Apple Cider

    Apple cider isn't just for autumn or just for baked goods. It can elevate everything from your breakfast pancakes to pulled pork. From sweet to savory, these 15 awesome ways to use apple cider will convince you to keep a bottle in the fridge year round.

    1
    Apple Cider Pancakes
    Recipe and photo credit: The Healthful Ideas
    Apple Cider Pancakes
    Delicious fluffy chocolate chip apple cider pancakes with stewed apples. The perfect weekend brunch!
    Get the recipe: Apple Cider Pancakes
    2
    Two tall glass mugs filled with hot apple cider cocktail with a cinnamon stick resting on top.
    Hot Apple Cider Cocktail
    This combination of sweet mulled cider and spiced rum is the perfect way to stay warm on those cool autumn evenings.
    Get the recipe: Hot Apple Cider Cocktail
    3
    Recipe and photo credit: Little Sweet Baker
    Baked Apple Cider Donuts
    Bursting with the flavors of fall and apples, these baked apple cider donuts are not just easy to make, they are super scrumptious!
    Get the recipe: Apple Cider Donuts
    4
    Apple Cider Chicken
    Recipe and photo credit: Valerie's Kitchen
    Apple Cider Chicken
    This tender, herbed apple cider chicken with roasted Brussels sprouts and apples is a delicious fall-inspired meal!
    Get the recipe: Apple Cider Chicken
    5
    Recipe and photo credit: Dollop of Dough
    Apple Cider Donut Bread
    Apple cider donut bread has all the flavors of fall with reduced apple cider, warm spices, and a cinnamon sugar coating. It’s easy to make!
    Get the recipe: Apple Cider Donut Bread
    6
    A platter of seared pork chops topped with apples and onions.
    Blackstone Pork Chops with Apples and Onions
    This easy meal of juicy pork chops topped with caramelized onion and apple is the perfect way to celebrate autumn.
    Get the recipe: Blackstone Pork Chops with Apples and Onions
    7
    Recipe and photo credit: Ooh La La It's Vegan
    Apple Cider Mimosa
    An apple cider mimosa is like a party in a glass with crisp bubbly champagne and sparkling apple cider. The perfect fall brunch cocktail.
    Get the recipe: Apple Cider Mimosa
    8
    Recipe and photo credit: Live to Sweet
    Apple Upside Down Cake
    This apple upside down cake is a spiced cake with sliced apples and cider caramel. It's like fall on a plate!
    Get the recipe: Apple Upside Down Cake
    9
    Recipe and photo credit: Super Golden Bakes
    Cider Braised Pork Shoulder
    For this cider braised pork shoulder, a pork roast cooks in cider and broth with onions, butternut squash, and apples until it becomes meltingly tender.
    Get the recipe: Cider Braised Pork Shoulder
    10
    A carved grilled turkey on a wooden board with gravy and salad nearby.
    Grilled Spatchcock Turkey
    This grilled turkey recipe uses a simple apple cider brine to infuse the bird with plenty of flavor and keep it juicy while grilling.
    Get the recipe: Grilled Spatchcock Turkey
    11
    Recipe and photo credit: Recipes From a Pantry
    Thanksgiving Punch
    This festive Thanksgiving punch is bursting with flavors of apple, cranberry, and warm spices. Perfect for serving at holiday gatherings!
    Get the recipe: Thanksgiving Punch
    12
    Recipe and photo credit: xoxo Bella
    Apple Cider Grilled Chicken Skewers with Gouda Cheese Sauce
    These apple cider grilled chicken skewers pair the sweetness of cider with the appeal of chicken. The Gouda cheese sauce is amazing too.
    Get the recipe: Apple Cider Grilled Chicken Skewers
    13
    Recipe and photo credit: Baste Cut Fold
    Sea Salt Apple Cider Caramels
    Caramel candies infused with apple cider and finished with a sprinkling of sea salt. Ideal for autumn gifting!
    Get the recipe: Sea Salt Apple Cider Caramels
    14
    Recipe and photo credit: The Sage Apron
    Cider Braised Chicken Thighs with Bacon & Shallots
    These cider braised chicken thighs have a crispy skin, juicy chicken and a flavorful pan sauce with bacon, shallots and sage.
    Get the recipe: Cider Braised Chicken Thighs
    15
    Recipe and photo credit: I Heart Eating
    Caramel Apple Cobbler Cake
    Spiced caramel apple cobbler cake recipe is a moist apple pudding cake that has a caramel sauce that forms as the cake bakes!
    Get the recipe: Caramel Apple Cobbler Cake

    October 8, 2024 Articles

    How To Cook Thanksgiving Dinner on the Grill

    Whether your oven is on the fritz or you just enjoy grilling, it's possible to cook a spectacular Thanksgiving dinner on the grill. Read on for all the recipes you'll need and a step-by-step plan for how to execute it.

    Grilled Thanksgiving Dinner Recipes

    A carved grilled turkey on a wooden board with gravy and salad nearby.

    A grilled spatchcock turkey stays moist and juicy, thanks to an overnight brine, and it cooks up in a fraction of the time of a whole bird. Get the recipe: Grilled Spatchcock Turkey

    A cast iron skillet filled with sausage stuffing, garnished with parsley.

    This sausage stuffing cooks in your cast iron skillet on the grill. It's got all the classic flavors of your favorite Thanksgiving dressing, but with plenty of crispy toasted edges. Get the recipe: Skillet Sausage Stuffing

    A bowl of cooked carrots with rosemary sprigs on the side.

    These grilled carrots are a super easy mess-free side dish. The carrots cook in foil in a buttery herb sauce until perfectly tender. Get the recipe: Grilled Carrots in Foil

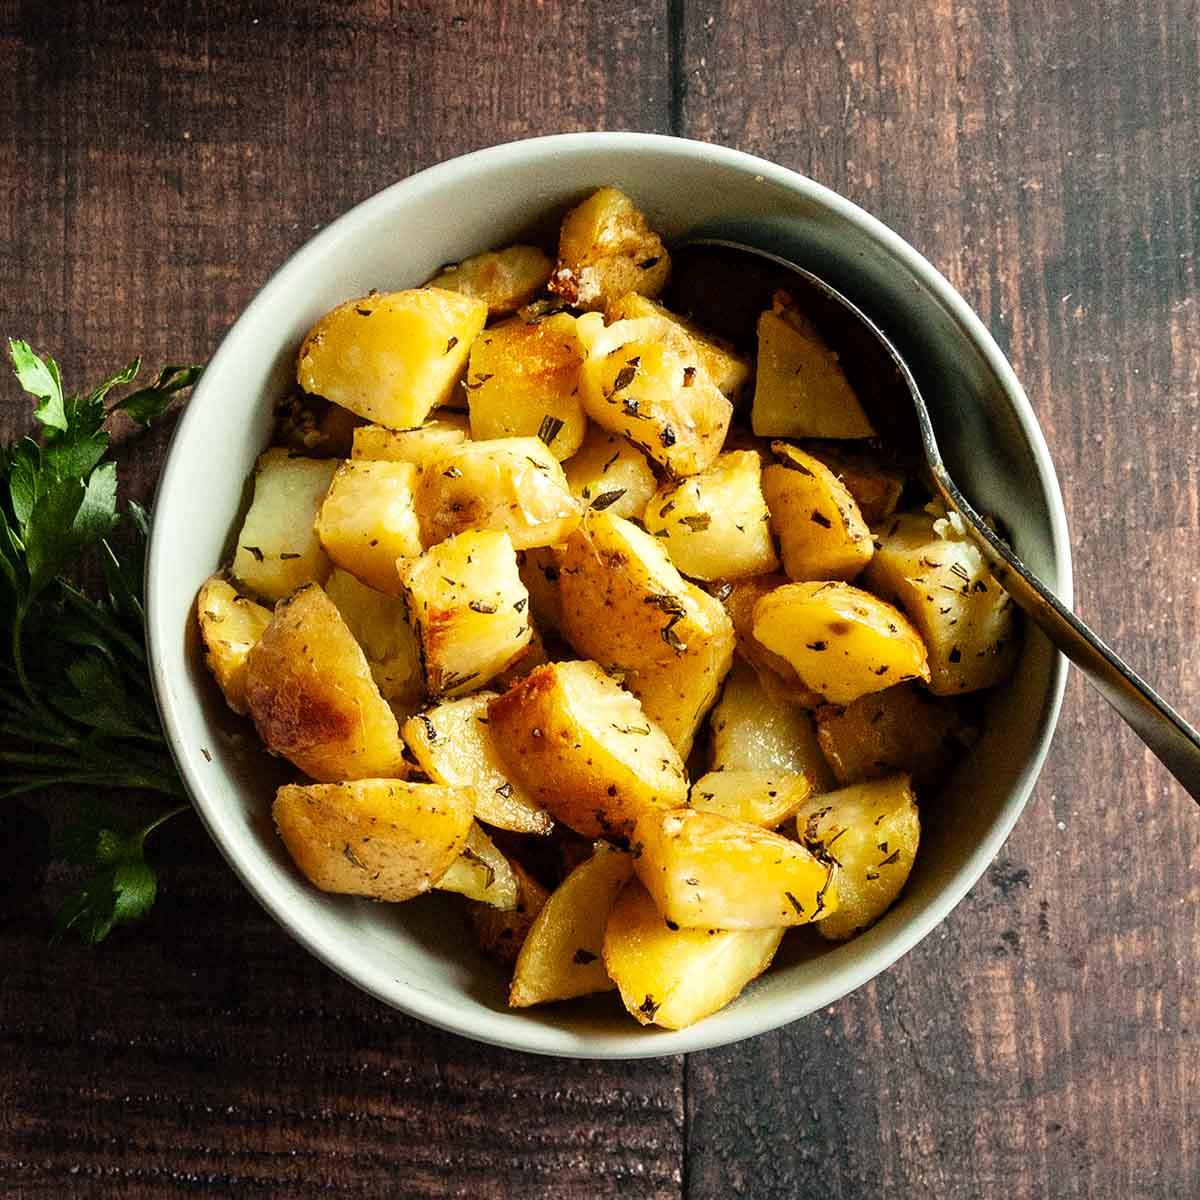
    A bowl of make ahead roasted potatoes with fresh herbs and some parsley on the side.

    Being able to prep your potatoes a full day ahead of time will save you plenty of time on the big day. Get the recipe: Make-Ahead Roasted Potatoes

    A cast iron skillet. filled with apple crisp and two scoops of ice cream on top.

    A slightly boozy apple crisp with a big scoop of vanilla ice cream on the side is the perfect finish to your autumn meal. Get the recipe: Skillet Bourbon Apple Crisp

    How to Make Thanksgiving Dinner on the Grill

    Even the fanciest of grills have limited space, so it's important to have a plan so that everything is ready to eat at the same time. This step-by-step plan ensures that your turkey has time to rest and that your sides will be hot when they arrive at the dinner table.

    The day before

    There are a few things you can do to get organized so that everything is ready for the next day.

    • Start brining your turkey. It needs a full day to brine, so get it going early in the day.
    • Cube the bread for your stuffing and let it dry overnight.
    • Parboil your potatoes, toss them with the oil and herbs, and stash them in their foil tray in the fridge. (If you don't have access to a stovetop or side burner, you can parboil them in a grill-safe pot directly over an open grill.)
    • Mix up your apple crisp topping without the butter. (Doing this ahead of time is optional, but it will save you a little time the next day.)

    Thanksgiving Day

    • 4 to 5 hours before dinner, drain the turkey and get it chilling in the fridge.
    • 2 ½ to 3 hours before dinner, start grilling the turkey. Note that the turkey and stuffing will require indirect heat, so you'll need to prepare your grill for 2-zone cooking.
    • While the turkey is cooking, prepare your stuffing and finish assembling your apple crisp. Note that if you don't have access to 2 cast iron skillets, you can make your apple crisp in a foil pan.
    • When the turkey is done, pull it off the grill and let it rest, loosely covered with foil. Immediately place the stuffing on the grill along with the potatoes.
    • While the turkey rests, get your carrot foil pack(s) ready.
    • Add the carrots to the grill when you uncover the stuffing.
    • While all the sides finish cooking, carve the turkey.
    • Pull the sides off the grill and slide the apple crisp in. Remember to set a timer so that you don't forget about it while you're enjoying dinner! (Alternatively, you can cook your apple crisp early in the day and rewarm it briefly before serving.)

    The best news of all? There's almost nothing to clean up!

    October 7, 2024 Cast Iron Skillet Recipes

    Skillet Sausage Stuffing

    Made with bread cubes, Italian sausage, Parmesan, onion, and celery, this skillet sausage stuffing has all the classic flavors of the traditional holiday side dish, but is made on your grill, leaving your oven free for all the other dishes.

    A cast iron skillet filled with sausage stuffing, garnished with parsley.

    With all the juggling of oven space and temperatures for big turkey dinners, I've been desperate to find a way to make homemade stuffing that didn't require an oven. It turns out that the grill and my trusty cast iron skillet were perfect for this task. The heat retention of the skillet allows it to develop so many crispy edges (my favorite part!) while still remaining soft in the center. Like grilled spatchcock turkey, it has taken up a permanent spot in my grilled Thanksgiving dinner repertoire. Try it and find out why.

    Why You'll Love This Recipe

    • It's made entirely in one skillet, which means less dishes for you.
    • It's a holiday dish that's cooked on the grill, leaving your oven free for turkey, other sides, and desserts.
    • The heat retention of the cast iron skillet promotes plenty of browning and crisped edges.

    Ingredients and Substitutions

    Ingredients for skillet sausage stuffing--eggs, parsley, celery, bread, broth, onion, sausage, Parmesan, butter, oil, and garlic.
    • Bread cubes--To speed up the drying process, you can toast your bread cubes in a 325°F oven for 15 minutes instead of letting them dry overnight.
    • Italian sausage--You can use your favorite type of Italian sausage here, whether that's spicy, mild, or sweet. If you purchase sausage in casings, use a sharp knife to slice open the casing and remove it before cooking the sausage.
    • Broth--Use turkey broth if you have it on hand. If not, chicken broth is perfectly acceptable here.
    • Parmesan--Grate your cheese from a block. Pre-shredded cheese doesn't melt or incorporate well.

    How to Make Grilled Sausage Stuffing

    Bread cubes on a baking sheet.
    Italian sausage browning in a cast iron skillet.
    1. Arrange the bread cubes on a rimmed baking sheet and let them dry overnight.
    2. Cook the sausage in 2 teaspoons oil in a cast iron skillet over medium heat until browned and cooked through. Transfer to a bowl using a slotted spoon.
    Onion and celery cooking in a cast iron skillet.
    A bowl of whisked egg, broth, Parmesan, and celery, with a cheese grater on the side.
    1. Add 1 tablespoon butter to the fat in the skillet, then stir in the onion, celery, and garlic. Season with salt and pepper and cook until softened.
    2. Whisk the eggs, broth, Parmesan, and parsley together in a bowl.
    All the ingredients for stuffing being mixed in a large bowl.
    A cast iron skillet filled with uncooked sausage stuffing.
    1. Add the bread cubes to the sausage then pour the broth mixture over. Stir well to combine.
    2. Scoop the stuffing into a buttered 12-inch cast iron skillet.
    A covered skillet on a grill.
    An uncovered skillet of sausage stuffing on a grill.
    1. Grill, covered, over indirect medium heat (400°F) until hot throughout.
    2. Uncover and cook until the edges are dark golden brown and crispy.

    FAQs

    How can I tell when it's done?

    The stuffing should be crispy and dark golden brown on the edges and hot throughout.

    Can you freeze leftover stuffing?

    Yes, stuffing freezes well for up to 3 months. Let it cool completely before freezing, then store it in a freezer safe container. Let it thaw in the refrigerator before reheating.

    Can I cook this in my oven?

    Definitely. Cook the stuffing in a skillet or baking dish in a 400°F oven. The timing should remain the same.

    Tips and Troubleshooting

    • Make sure that your skillet is thoroughly coated with butter or oil before grilling the dressing to avoid any sticking.
    • Using a skillet larger or smaller than 12-inches is possible, but may change the cooking time.
    • Store leftovers in an airtight container in the fridge and enjoy within 3 days or freeze for longer storage.
    • To reheat, place the leftover stuffing in your skillet and reheat, covered with foil, over medium-low heat on the grill. Alternatively, you can reheat it in a 350°F oven in a covered baking dish or skillet.
    A cast iron skillet filled with sausage stuffing, garnished with parsley.

    More Grilling Recipes You'll Love

    A carved grilled turkey on a wooden board with gravy and salad nearby.
    Grilled Spatchcock Turkey
    A cast iron skillet filled with scalloped potatoes with sprigs of thyme on top.
    Scalloped Potatoes on the Grill

    Tried This Recipe?

    If you've tried this recipe, please leave a comment below. Follow me on Instagram, Facebook, or Pinterest for more great camping and grilling recipes.

    Recipe

    A cast iron skillet filled with sausage stuffing, garnished with parsley.

    Skillet Sausage Stuffing

    A woman's face.Angie Zoobkoff
    Yes, you can make stuffing on the grill. It has all the classic Thanksgiving flavors, but requires none of your oven space.
    No ratings yet
    Print Recipe Pin Recipe
    Prep Time 20 minutes mins
    Cook Time 1 hour hr 5 minutes mins
    Total Time 1 day d
    Course Side Dish
    Cuisine American
    Servings 8 servings
    Calories 367 kcal

    Equipment

    • 12-inch Cast iron skillet

    Ingredients
      

    • 6 cups (1-inch) Italian or French bread cubes
    • 2 teaspoons olive oil
    • 1 pound Italian sausage (hot, mild, or sweet)
    • 1 tablespoon butter plus more for the skillet
    • 1 medium onion diced
    • 2 stalks celery diced
    • 2 cloves garlic minced
    • Salt and freshly ground black pepper
    • 2 large eggs beaten
    • 1 cup turkey broth
    • ½ cup grated Parmesan cheese
    • 2 tablespoons chopped Italian parsley

    Instructions
     

    • Arrange the bread cubes in a single layer on a rimmed baking sheet and let dry, uncovered, overnight.
    • Heat 2 teaspoons oil in a 12-inch cast iron skillet over medium heat. Cook, stirring frequently, and breaking up the sausage with a wooden spoon, until browned and cooked through, 10 to 12 minutes.
    • Use a slotted spoon to scoop out the sausage and transfer to a very large bowl. Leave the sausage drippings in the skillet.
    • Add 1 tablespoon butter to the fat in the skillet and set over medium heat.
    • Stir in the onion, celery, and garlic. Season with salt and pepper, and cook, stirring frequently, until softened, about 10 minutes. If the onion and garlic begin to brown, reduce the heat to medium low.
    • Scoop the vegetables into the bowl with the sausage. Stir in the bread cubes and let the mixture cool for 10 minutes.
    • Prepare a grill for indirect heat (400°F), ideally with the cool zone in the center and burners on either side of the cool zone. (If your grill will only accommodate a cool zone on one side and the hot on the other, rotate the skillet when you uncover it.)
    • In a medium bowl, whisk the eggs, broth, Parmesan, and parsley together. Season with salt and pepper.
    • Pour the broth mixture over the stuffing and stir well to thoroughly combine everything.
    • Wipe out the cooled skillet and coat thoroughly with butter.
    • Scoop the stuffing mixture into the skillet and press gently to help it stick together. Cover with foil.
    • Grill over indirect heat until hot throughout, about 20 minutes. Uncover and continue to cook until the edges are crisped and golden brown, about 15 minutes more.
    • Serve directly from the skillet.

    Notes

    • Butter the skillet--Make sure that your skillet is thoroughly coated with butter or oil before grilling the dressing to avoid any sticking.
    • Adjusting the skillet size--Using a skillet larger or smaller than 12-inches is possible, but may change the cooking time.
    • Storage--Store leftovers in an airtight container in the fridge and enjoy within 3 days or freeze for longer storage.
    • Reheating--Place the leftover stuffing in your skillet and reheat, covered with foil, over medium-low heat on the grill. Alternatively, you can reheat it in a 350°F oven in a covered baking dish or skillet.

    Nutrition

    Serving: 1portionCalories: 367kcalCarbohydrates: 23gProtein: 17gFat: 24gCholesterol: 98mgFiber: 2gSugar: 2g
    Keyword grilled side dishes, grilled stuffing, grilled Thanksgiving sides, homemade sausage stuffing, Thanksgiving sides
    Tried this recipe?Let us know how it was!

    October 5, 2024 Articles

    A Simple Thanksgiving Camping Dinner

    If you've never tried camping at Thanksgiving, I urge you to give it a try. If you've done it before, you already know how enjoyable the crisp air and stunning fall colors can be, as well as how rewarding it is to enjoy your Thanksgiving dinner outdoors.

    Several dishes on a checkered tablecloth with a vintage camper in the background.

    It's tempting to overdo it. The first time we camped for Thanksgiving, I went all out and cooked a turducken and two types of pie. Delicious? Yes. Enjoyable? No. Much of this simple Thanksgiving camping dinner can be prepared ahead of time, and you won't need any fancy equipment beyond your trusty Dutch oven and cast iron skillet.

    Thanksgiving Camping Dinner Recipes

    Snacks & Cocktails

    Kick off your holiday meal with a creamy Buffalo chicken dip and cozy hot apple cider cocktails while you're prepping the main event. The dip can be made entirely ahead of time and cooked over the fire, and your mulled cider can also be prepped at home.

    Two tall glass mugs filled with hot apple cider cocktail with a cinnamon stick resting on top.

    Warm up the mulled cider at camp and add rum, if desired. Get the recipe: Hot Apple Cider Cocktail.

    A foil pan filled with buffalo chicken dip with carrots, crackers, and bread cubes nearby.

    Get the recipe: Buffalo Chicken Dip.

    Dinner

    Now isn't the time for seven different dishes, so I've included an easy campfire turkey recipe, as well as two sides. If you want more, stop by the store and grab some dinner rolls.

    A sliced turkey breast on a plate with onions on top.

    This easy Dutch oven turkey is made with a boneless turkey breast (making carving a dream!) and cooks in a sauce that doubles as gravy. If you would like cranberry sauce, make your favorite at home before heading out or grab a can from the store.

    Get the recipe: Dutch Oven Turkey Breast

    Green bean casserole in a cast iron skillet with fried onions on the side.

    Yes, your beloved green bean casserole is completely doable while camping! This version uses a make-ahead mushroom sauce and is prepared in your cast iron skillet over the fire or on your camp stove. Get the recipe: Skillet Green Bean Casserole.

    A bowl of make ahead roasted potatoes with fresh herbs and some parsley on the side.

    Prep these easy roasted potatoes at home and finish cooking them over the fire or on your portable grill. Get the recipe: Make-Ahead Roasted Potatoes.

    Dessert

    I highly recommend making these mini pumpkin cheesecakes, since they can be prepared at home and tossed in the cooler, and there's no cooking involved. If you simply must have pie, do make it in advance or pick up a couple from the store.

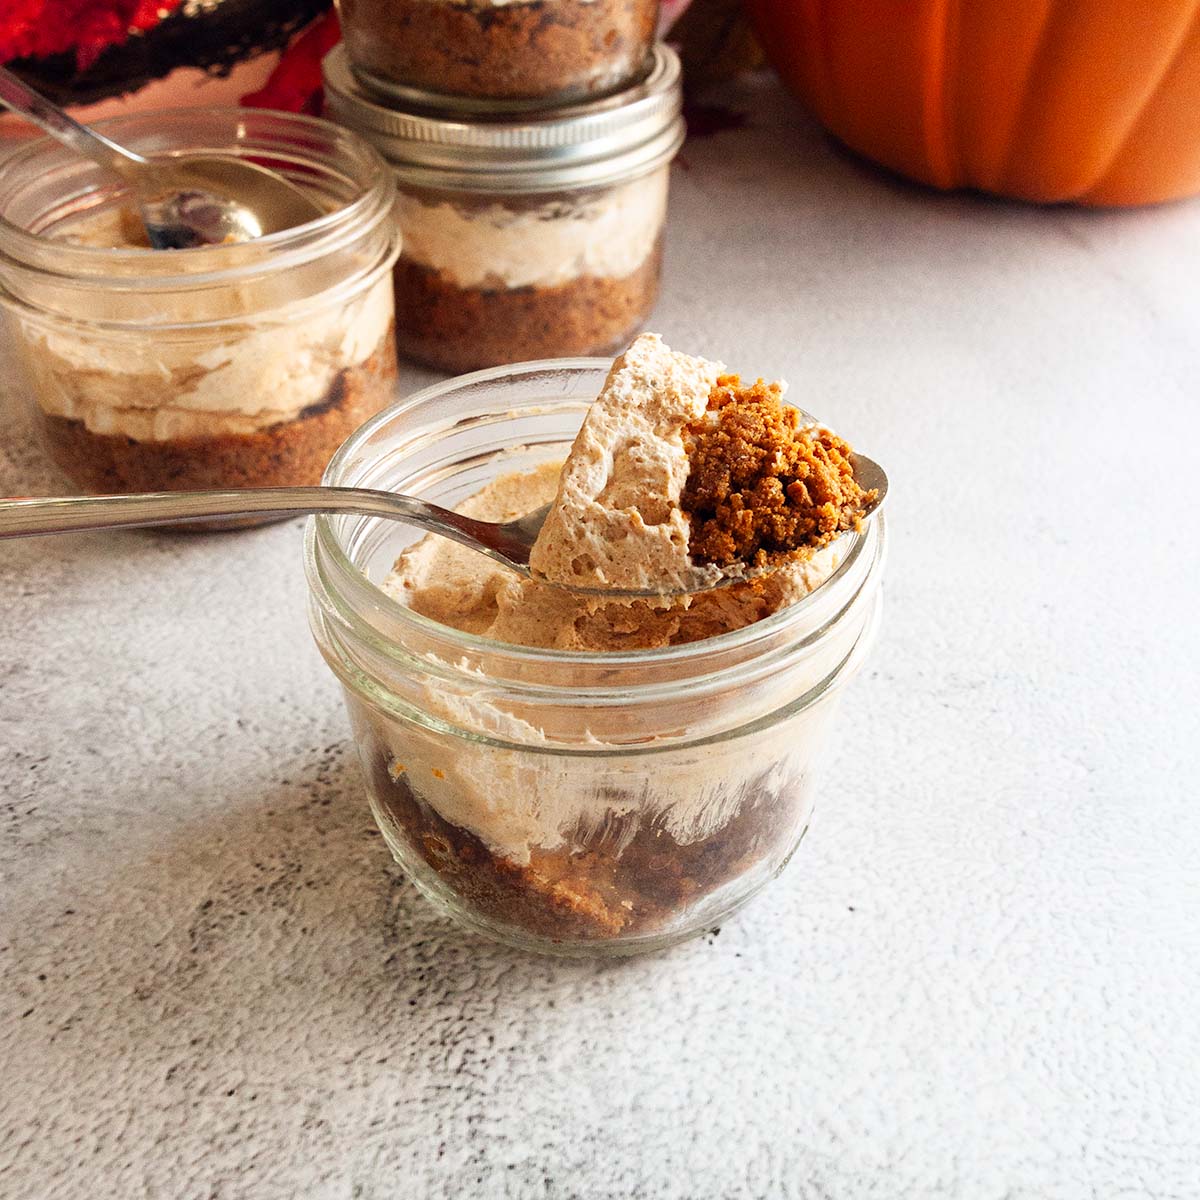
    A spoonful of no-bake mini pumpkin cheesecake resting on top of a mason jar filled with the cheesecake.

    Get the recipe: No-Bake Mini Pumpkin Cheesecake.

    How to Get Ahead

    There are a few things I recommend doing before heading out to make your Thanksgiving meal easy to prepare and enjoy.

    • Up to 1 month before the trip, prep the roasted potatoes and the make-ahead mushroom sauce and freeze them. If you don't want to freeze them, prep them up to 2 days in advance and store them in the fridge.
    • Up to 2 days before your trip, make your mini pumpkin cheesecakes and store them in the fridge until you go. You can also make the mulled cider and the Buffalo chicken dip and keep that in the fridge.
    • Just before leaving, wash and trim your beans.

    Equipment You'll Need

    All of these recipes are designed to be made with minimal equipment and can be prepared over a campfire using a cast iron skillet or Dutch oven, or can be made in advance in a foil pan. You will need to pack the following few items (in addition to regular utensils and plates/cups):

    • Cast iron skillet and Dutch oven
    • Long handled tongs
    • Heat resistant gloves or a pot holder

    Happy camping and bon appétit!

    October 4, 2024 Chicken & Turkey

    Grilled Spatchcock Turkey

    A simple apple cider brine and a stint on the grill over indirect heat ensures your grilled spatchcock turkey is juicy and tender, with shatteringly crisp skin. It's guaranteed to be the star of your holiday table (and your leftover turkey sandwiches!)

    A carved grilled turkey on a wooden board with gravy and salad nearby.

    If you've never tried grilling a spatchcock turkey before, now is the time. It cooks up much more quickly than a traditional roast turkey, and cooks more evenly, making it less prone to drying out. All this, and it leaves your oven completely free for other important things, like dessert.

    Why You'll Love This Recipe

    • A spatchcock turkey cooks much faster than a whole turkey.
    • It's a holiday recipe that's cooked on the grill, leaving your oven free for sides and desserts. Or you can make it as part of a full grilled Thanksgiving dinner.
    • The brining process keeps it tender and juicy.

    Ingredients and Substitutions

    Ingredients for grilled spatchcock turkey--turkey, apple cider, allspice and cloves, salt, butter, and herbs.
    • Apple cider--This is a pressed apple juice that's available at most supermarkets during the fall, not the hard cider that contains alcohol. Got leftover apple cider? Try one of these 15 amazing recipes that use apple cider.
    • Spices--Use whole spices for brining your turkey. Ground spices will make the spice flavor very strong.
    • Salt--Since you're using a large quantity of salt here and since crystal sizes can vary significantly from brand to brand, I recommend weighing your salt. You want 6 ¼ ounces (175 g) of salt, which is 1 ¼ cups of Diamond brand kosher salt, or about ¾ cup of Morton kosher salt.
    • Turkey--This grilled turkey recipe works best with a medium sized turkey, about 11 to 13 pounds. You can make it with a larger turkey, but you will need to increase the amount of brine, and the cooking time will be longer.
    • Butter--I use salted butter here but if you've only got unsalted, add a big pinch of salt to your herb butter before rubbing it on the turkey.
    • Herbs--Use your favorite combination of finely chopped herbs, like parsley, rosemary, thyme, or sage.

    How to Make Spatchcock Grilled Turkey

    A pot of apple cider brine with cloves and allspice floating in it.
    A whole turkey in a pot of brine.
    1. Combine the 1 quart of the cider, salt, and spices in a large pot and bring to a boil, stirring to dissolve the salt.
    2. Add the remaining cider and water and let it cool to room temperature. Submerge the turkey in the brine, cover, and chill overnight.
    A person removing the backbone from a turkey.
    A spatchcocked turkey on a wire rack.
    1. Drain the turkey and pat dry. Remove the backbone from the turkey. You can save it for stock.
    2. Flip the turkey over and press down on the breast bone to flatten it. (Yep, this particular turkey was missing a wing. Don't fret if yours is, too!) Place it on a rack set in a baking sheet and chill, uncovered for 2 hours.
    Butter and herbs mashed together in a bowl.
    A person rubbing butter under the skin of a turkey.
    1. Mash the butter and herbs together in a small bowl.
    2. Rub half of the butter under the skin of the turkey.
    A spatchcock turkey on a grill.
    A person brushing butter onto a spatchcock turkey on a grill.
    1. Grill the turkey over indirect heat for 1 hour.
    2. Melt the remaining herb butter and baste the turkey every 10 minutes until cooked through. Let it rest for at least 30 minutes before carving.

    FAQs

    What does brining do for my turkey?

    Soaking your turkey in a salt-water solution before grilling will add flavor and help it retain moisture, keeping it juicy throughout the cooking process. The sweetness from the cider and flavor from the whole spices will add an extra level of flavor to your bird.

    How can I tell when it's done?

    An instant-read thermometer is the most reliable way to determine doneness. Poke it in a few places, including the center of the breast and the thickest part of the thigh. It should read 165°F when it's ready.

    What should I serve with this cider-brined turkey?

    This is a Thanksgiving-worthy turkey dinner, so I recommend serving it with smoked turkey gravy and traditional Thanksgiving sides, such as skillet sausage stuffing, cheesy garlic mashed potatoes or smoked sweet potato casserole, and skillet green bean casserole.

    Tips and Troubleshooting

    • For this size of turkey, I find that a canning pot or large stockpot works well for containing the turkey and brine. If you are using a larger container, you may need to increase the amount of brine in order to submerge the turkey.
    • If your turkey isn't submerged in the brine, you can use a plate or a zip-top bag filled with water to help submerge it.
    • If your turkey begins to brown too much during cooking, tent it loosely with foil.
    • Leftover turkey is fantastic in these turkey quesadillas or transform them into easy turkey sliders.
    • This recipe is suitable for gluten-free and dairy-free diets.

    More Grilling Recipes You'll Love

    A bowl of cubed smoked sweet potatoes with crispy edges, with several thyme sprigs on the side.
    Smoked Sweet Potatoes
    A cast iron skillet. filled with apple crisp and two scoops of ice cream on top.
    Skillet Bourbon Apple Crisp

    Tried This Recipe?

    If you've tried this recipe, please leave a comment below. Follow me on Instagram, Facebook, or Pinterest for more great camping and grilling recipes.

    Recipe

    A carved grilled turkey on a wooden board with gravy and salad nearby.

    Grilled Spatchcock Turkey

    A woman's face.Angie Zoobkoff
    This grilled turkey recipe uses a simple apple cider brine to infuse the bird with plenty of flavor and keep it juicy while grilling.
    No ratings yet
    Print Recipe Pin Recipe
    Prep Time 45 minutes mins
    Cook Time 1 hour hr 40 minutes mins
    Total Time 1 day d 6 hours hrs
    Course Main Course
    Cuisine American
    Servings 8 to 10 servings
    Calories 468 kcal

    Ingredients
      

    For the brine

    • 3 quarts (2.8 l) apple cider divided
    • ¾ cup (175 g) Diamond Brand kosher salt (or 1 ¼ cups Morton kosher salt)
    • 1 tablespoon whole allspice
    • 1 tablespoon whole cloves
    • 3 quarts (2.8 l) cold water
    • One (11-to-13-pound) turkey

    For the herb butter

    • 1 stick salted butter softened to room temperature
    • 2 tablespoons chopped fresh herbs

    Instructions
     

    Make the brine

    • In a large stockpot, combine 1 quart apple cider, the salt, allspice, and cloves and bring to a simmer over medium high heat. Stir until the salt is dissolved.
    • Remove from the heat and stir in the remaining 2 quarts apple cider, and the water. Let the brine cool to room temperature. If necessary, transfer the brine to a large stock pot, canning pot, or other vessel that will accommodate the turkey snugly.
    • Add the turkey to the brine, ensuring that it's submerged. Cover and refrigerate for 24 hours.
    • Drain the turkey and pat it dry with paper towel.
    • Place the turkey breast side down on a work surface and use a pair of heavy-duty kitchen shears or a sharp knife to cut down each side of the back bone. Remove the back bone. The turkey should sort of flop open like a book.
    • Flip the turkey over so that it's breast side up and the legs are sticking out each side. Push down on the center of the breast bone until you hear a crack.
    • Place the chicken on a wire rack set in a rimmed baking sheet and refrigerate, uncovered, for 2 hours.

    Make the herb butter

    • Prepare a grill for medium (375°F) indirect heat. Ideally you want to have a burner on either side of the cool zone. (If your grill won't accommodate this, heat one side and leave the other side as the cool zone.)
    • Mash the butter and herbs together in a small bowl. Reserve half of the herb butter for basting.
    • Remove the turkey from the fridge and use your fingers to separate the skin from the meat without tearing the skin. Rub the remaining half of the herb butter under the skin, distributing it as evenly as possible.
    • Place the turkey, skin side up on the cool zone of the grill, cover, and cook for 1 hour. (If you only have burners lit on one side of the grill, I recommend turning the turkey after 30 minutes.)
    • Melt the remaining herb butter.
    • After the turkey has cooked for 1 hour, begin basting it with the herb butter every 10 minutes or so, until the turkey is golden brown and has reached an internal temperature of 165°F, 30 to 50 minutes more (about 8 minutes per pound).
    • Remove the turkey from the grill and let it rest at least 30 minutes before carving.

    Notes

    • Best container--For this size of turkey, I find that a canning pot or large stockpot works well for containing the turkey and brine. If you are using a larger container, you may need to increase the amount of brine in order to submerge the turkey.
    • Submerge it!--If your turkey isn't submerged in the brine, you can use a plate or a zip-top bag filled with water to help submerge it.
    • Cover it--If your turkey begins to brown too much during cooking, tent it loosely with foil.
    • Dietary--This recipe is suitable for gluten-free and dairy-free diets.

    Nutrition

    Serving: 1portionCalories: 468kcalProtein: 52gFat: 27gCholesterol: 177mg
    Keyword brined turkey, grilled turkey, spatchcock turkey, thankgsgiving grilling
    Tried this recipe?Let us know how it was!

    October 2, 2024 Collections

    15 Amazing Ways to Use Pumpkin Seeds

    Pumpkin seeds, or pepitas, are a nutritious seed that are perfect for adding a nutty crunch to baked goods, salads, grain bowls, and more. Whether you have a stash in the fridge or find yourself with a bowlful after carving your pumpkin, here are 15 amazing ways to use pumpkin seeds.

    1
    Recipe and photo credit: The Heirloom Pantry
    Pumpkin Banana Muffins
    Pumpkin banana muffins are a delicious combination of ripe banana, pumpkin, and warm fall flavors. Enjoy these tender, moist muffins as is or add mix-ins, like chocolate chips and pumpkin seeds.
    Get the recipe: Pumpkin Banana Muffins
    2
    A bowl of nut free grail mix.
    Homemade Nut-Free Trail Mix
    This trail mix without nuts is easy to make in just 5 minutes with only a handful of everyday ingredients. It's perfect for camping, hiking, snacking, or kids lunch boxes.
    Get the recipe: Nut-Free Trail Mix
    3
    Recipe and photo credit: The Dizzy Cook
    Pepita Crusted Salmon
    Healthy, fast, delicious, this pepita crusted salmon is the perfect weeknight dinner that will help boost brain health and fit many dietary restrictions.
    Get the recipe: Pepita Crusted Salmon
    4
    Recipe and photo credit: Piper Cooks
    Pepita Pesto
    Ever tried pesto with pumpkin seeds? Its unique nutty flavor, thanks to the toasted pumpkin seeds, will take your homemade pesto to another level.
    Get the recipe: Pepita Pesto
    5
    A bowl of spiced pepitas with some spilling over the top.
    Spiced Pepitas
    These toasted spiced pepitas are an easy, nutritious snack that requires only 5 ingredients and are ready in just 10 minutes. Perfect for hiking, camping, or as an easy party snack.
    Get the recipe: Spiced Pepitas
    6
    Recipe and photo credit: Our Love Language is Food
    Dark Chocolate Bark with Fruit and Nuts
    This easy better-for-you dessert option is made with dark chocolate, nuts, seeds, and dried cherries create the ultimate sweet and salty treat!
    Get the recipe: Dark Chocolate Bark
    7
    A large platter of smoked pumpkin seeds.
    Recipe and photo credit: Carne Diem
    Smoked Pumpkin Seeds
    Don’t let those pumpkin seeds from carving your Jack-O-Lanterns go to waste. These roasted pumpkin seeds make the perfect salty snack. With so many different flavor options, everyone in the family can enjoy their favorite.
    Get the recipe: Smoked Pumpkin Seeds
    8
    Savoury Steak and Squash Salad
    Recipe and photo credit: xoxo Bella
    Savoury Steak and Squash Salad
    This savoury steak and squash salad salad has a wonderful apple maple dressing. This is one of the best fall salads!
    Get the recipe: Steak and Squash Salad
    9
    Recipe and photo credit: Kitchen at Hoskins
    Breakfast Cookies
    These breakfast cookies are one of the healthiest cookies you’ll ever eat! Made using nutritious ingredients, they have a hearty and chewy texture with crispy edges. And they're made in one bowl!
    Get the recipe: Breakfast Cookies
    10
    Two plates of grilled tuna salad with a bowl of pepitas, a dish of salt, and a jar of vinaigrette on the side.
    Grilled Tuna Steak Salad
    This tuna steak salad made with fresh grilled tuna, sweet blackberries, mixed greens, crunchy spiced pumpkin seeds, and a zesty lemon herb dressing is an easy, healthy meal.
    Get the recipe: Grilled Tuna Salad
    11
    Recipe and photo credit: Running to the Kitchen
    Smooth & Creamy Pumpkin Seed Butter
    This super creamy homemade pumpkin seed butter with hints of honey and vanilla is a great nut-free alternative spread.
    Get the recipe: Pumpkin Seed Butter
    12
    Recipe and photo credit: Chew Out Loud
    No-Bake Pumpkin Energy Bites
    Let the snack times roll, with these easy and healthy pumpkin energy bites! Packed with only the good stuff.
    Get the recipe: No-Bake Pumpkin Energy Bites
    13
    Recipe and photo credit: Beyond the Chicken Coop
    Pumpkin and Sunflower Seed Bread
    Made with white whole wheat flour and nutritious seeds, his pumpkin and sunflower seed bread is tasty and delicious.
    Get the recipe: Pumpkin and Sunflower Seed Bread
    14
    Recipe and photo credit: My Kids Lick the Bowl
    Homemade Energy Bars
    These no-bake seed and nut bars are easy to make and loaded with nutritious goodies, including almonds, pumpkin seeds, and sunflower seeds.
    Get the recipe: Homemade Energy Bars
    15
    Recipe and photo credit: In the Kitch
    Pumpkin Seed Milk
    Pumpkin seed milk is an easy, vegan milk recipe. It is sweetened with a touch of agave nectar and flavored with a hint of vanilla.
    Get the recipe: Pumpkin Seed Milk

    October 1, 2024 Collections

    12 Thanksgiving Side Dishes That Don't Require an Oven

    Oven space is at a premium when you're cooking Thanksgiving dinner, and it always feels like you're doing a juggling act to get everything cooked on time. These 12 Thanksgiving side dishes relieve some of the pressure by eliminating the need for an oven. They can be made on your stovetop (or camp stove), on the grill, and some don't require any cooking at all.

    1
    Recipe and photo credit: The Savory Cipolla
    Flash Fried Brussels Sprouts with Parmesan and Pancetta
    These flash fried Brussels sprouts are tossed with red wine vinegar and balsamic glaze, and topped with crispy pancetta and Parmesan cheese.
    Get the recipe: Brussels Sprouts with Parmesan and Pancetta
    2
    Green bean casserole in a cast iron skillet with fried onions on the side.
    Skillet Green Bean Casserole
    This easy green bean casserole is made in a skillet with homemade mushroom sauce, fresh green beans, and crispy fried onions. You can make it over your campfire, or on your camp stove, grill, or stovetop.
    Get the recipe: Skillet Green Bean Casserole
    3
    Recipe and photo credit: The Food Blog
    Creamy Parsnip Puree
    This creamy parsnip puree recipe is a delicious change from mashed potatoes and just as simple to make. This simple side dish goes with everything!
    Get the recipe: Creamy Parsnip Puree
    4
    A bowl of cooked carrots with rosemary sprigs on the side.
    Grilled Carrots in Foil
    Infused with rosemary, garlic, and butter, these grilled carrots in foil are so delicious, everyone will be asking for seconds.
    Get the recipe: Grilled Carrots in Foil
    5
    Recipe and photo credit: Cucina by Elena
    Fall Harvest Salad with Apple and Butternut Squash
    Fall harvest salad with apple and butternut squash is perfect for your holiday table with all the delicious flavors of autumn!
    Get the recipe: Fall Harvest Salad
    6
    A bowl of make ahead roasted potatoes with fresh herbs and some parsley on the side.
    Make-Ahead Roasted Potatoes
    These crispy roasted potatoes can be parboiled and stored in your fridge, cooler, or freezer until you're ready to roast them. The soft, creamy centres and crispy edges will make them a favorite all year round.
    Get the recipe: Make-Ahead Roasted Potatoes
    7
    Recipe and photo credit: Peel with Zeal
    Thanksgiving Rice with Apples and Cranberries
    This Thanksgiving rice with apples and cranberries is the perfect alternative to traditional stuffing. It’s filled with delicious fall flavors like crunchy apples, and sweet cranberries.
    Get the recipe: Thanksgiving Rice
    8
    A bowl of cubed smoked sweet potatoes with crispy edges, with several thyme sprigs on the side.
    Smoked Sweet Potatoes
    This is a fantastic side dish to enjoy at Thanksgiving or year round. It's made on your grill or smoker, where cubed sweet potatoes are tossed with sage, butter, and oil, and smoked until tender.
    Get the recipe: Smoked Sweet Potatoes
    9
    Recipe and photo credit: The Virtual Caterer
    Make Ahead Cranberry Orange Relish
    This cranberry orange relish is so good you will never want to buy store-bought cranberry sauce ever again. It only takes 5 minutes to make and one day to marinate, and no cooking is required!
    Get the recipe: Cranberry Orange Relish
    10
    A pot of mashed potatoes with a wooden spoon resting inside.
    Cheesy Garlic Mashed Potatoes Recipe
    These creamy mashed potatoes are loaded with garlic, two types of cheese, and tangy sour cream. They're the perfect holiday (or anytime!) side dish and can be prepared ahead of time.
    Get the recipe: Cheesy Garlic Mashed Potatoes
    11
    Recipe and photo credit: Happy Honey Kitchen
    Stovetop Sausage Stuffing
    Jazz up box Stove Top Stuffing recipes with my easy stovetop sausage stuffing. This hearty Thanksgiving side dish is made with simple ingredients in under 30 minutes.
    Get the recipe: Stovetop Sausage Stuffing
    12
    Pomegranate Couscous Salad
    Recipe and photo credit: Cooking with Carlee
    Pomegranate Couscous Salad
    Pomegranate couscous salad is a bright and fresh make-ahed side dish that is a light and festive side dish for the holidays.
    Get the recipe: Pomegranate Couscous Salad

    September 30, 2024 Camping

    Hot Apple Cider Cocktail

    This easy hot apple cider cocktail features warm cider that's been mulled with cinnamon, cloves, and allspice, then topped with a shot of spiced rum. It's perfect for keeping you warm on the cool autumn evenings.

    Two tall glass mugs filled with hot apple cider cocktail with a cinnamon stick resting on top.

    Cozying up around the campfire is one of the best parts of autumn camping trips, and it's made even better with a warm beverage in hand, whether that's this fall-inspired apple cider rum cocktail, a mug of black forest hot chocolate, or some mulled pomegranate juice.

    Why This Recipe is Great for Camping

    • The mulled cider can be made in advance and heated up at camp over the campfire or on the camp stove.
    • It's an ideal camping drink for cool-weather trips.

    Ingredients and Substitutions

    Ingredients for hot apple cider cocktail--cinnamon, apple cider, cloves, allspice, spiced rum, and orange.
    • Apple cider--This is a pressed apple juice that's available at most supermarkets during the fall, not the hard cider that contains alcohol. Got leftover apple cider? Try one of these 15 amazing recipes that use apple cider.
    • Spices--Use whole spices for mulling your cider. Ground spices will be very difficult to strain and will make the spice flavor very strong.
    • Orange--I prefer to use long strips of orange zest as they're easy to remove and add a subtle orange flavor. If you want a stronger orange flavor, you can add extra strips of orange peel, or you can use finely grated zest.
    • Spiced rum--Use your favorite spiced rum. Dark rum will also work as a substitute.

    How to Make a Mulled Cider Cocktail

    A pot of apple cider with orange zest and whole spices inside.
    Mulled cider being strained through a small sieve.
    1. Combine the cider, whole spices, and orange zest in a small pot over medium heat. Simmer for 10 minutes.
    2. Strain the mulled cider through a fine mesh sieve.
    Mulled cider being divided between two tall glass mugs.
    A person adding rum to a tall glass mug of apple cider.
    1. Divide the cider between two mugs.
    2. Top each glass with a shot of spiced rum.

    FAQs

    How can I make the spice flavor stronger?

    Simmering the spices in the apple cider for a longer period of time will intensify the flavor of the cider. You can simmer it for up to one hour, however, you will need to start with an extra ¼ to ½ cup of cider to account for evaporation over the longer simmering time.

    Can I make this in advance?

    You can simmer the cider and spices up to 3 days in advance. Strain and store the mulled cider in the fridge until you're ready to enjoy it. Rewarm the liquid over medium heat until boiling, then divide it between mugs and top with the rum.

    Can I make this without alcohol?

    Definitely. Prepare the mulled cider as directed and skip adding the shot of rum at the end.

    Tips and Troubleshooting

    • To skip the straining step, bundle the spices and orange zest in a piece of cheesecloth and tie the ends together. Once you're finished simmering the cider, simply grab the cheesecloth pouch and remove it. No straining required.
    • If you're enjoying this in the great outdoors, skip the mugs and pour your cocktail into a thermal mug with a lid. This will keep it warm for much longer.
    • This recipe is suitable for gluten-free, dairy-free, and vegan diets.

    More Drink Recipes You'll Love

    Two glasses of cranberry pomegranate cocktail with orange twists on the rims.
    Cranberry Pomegranate Cocktail
    Two mugs of dark hot chocolate with cinnamon sticks in them, sitting in the snow.
    Dark Hot Chocolate

    Tried This Recipe?

    If you've tried this recipe, please leave a comment below. Follow me on Instagram, Facebook, or Pinterest for more great camping and grilling recipes.

    Recipe

    Two tall glass mugs filled with hot apple cider cocktail with a cinnamon stick resting on top.

    Hot Apple Cider Cocktail

    A woman's face.Angie Zoobkoff
    This combination of sweet mulled cider and spiced rum is the perfect way to stay warm on those cool autumn evenings.
    No ratings yet
    Print Recipe Pin Recipe
    Prep Time 5 minutes mins
    Cook Time 10 minutes mins
    Total Time 15 minutes mins
    Course Drinks
    Cuisine American
    Servings 2 drinks
    Calories 124 kcal

    Ingredients
      

    • 1 cup apple cider
    • 1 cinnamon stick
    • 6 whole cloves
    • 6 whole allspice
    • 4 (4-inch) strips orange zest
    • 2 ounces (4 tbsp) spiced rum

    Instructions
     

    • Combine the cider, spices, and orange zest in a small pot.
    • Bring the mixture to a low simmer over medium heat. Let it simmer slowly for 10 minutes. You want it to just barely be simmering, not boiling.
    • Strain the mixture through a fine-mesh sieve into a heatproof measuring glass.
    • Divide the strained liquid between two mugs. Top each one with 1 ounce of spiced rum. Serve immediately.

    Video

    Notes

      • Skip the straining--To skip the straining step, bundle the spices and orange zest in a piece of cheesecloth and tie the ends together. Once you're finished simmering the cider, simply grab the cheesecloth pouch and remove it. No straining required.
      • Keep it hot--If you're enjoying this in the great outdoors, skip the mugs and pour your cocktail into a thermal mug with a lid. This will keep it warm for much longer.
      • Dietary--This recipe is suitable for gluten-free, dairy-free, and vegan diets.

    Nutrition

    Serving: 1drinkCalories: 124kcalCarbohydrates: 15gSodium: 30mgSugar: 15g
    Keyword apple cider cocktail, hot drinks, rum cocktail
    Tried this recipe?Let us know how it was!

    September 27, 2024 Camping

    Make-Ahead Buffalo Chicken Dip

    This make-ahead Buffalo chicken dip has everything you love about Buffalo wings--chicken, hot sauce, and blue cheese--in creamy, rich dip form that's perfect for sharing with friends. You can make it ahead of time and pack it along on your next camping trip and cook it over the fire, on your grill, or in your RV oven.

    A foil pan filled with buffalo chicken dip with carrots, crackers, and bread cubes nearby.

    This Buffalo chicken dip with blue cheese is one of my favorite snacks for camping. I love that it can be made in advance and that there's plenty to share with whoever we're camping with. And, like my skillet beer cheese dip, it's easy to heat up over the fire or on the grill, and even easier to devour.

    Why This Recipe is Great for Camping

    • It's a great camping snack that can be made in advance (ie. perfect for a stress-free camping weekend!) and is perfect for sharing with friends.
    • You can cook it over the campfire, on your grill, or in your RV oven.

    Ingredients and Substitutions

    Ingredients for buffalo chicken dip--shredded chicken, hot sauce, cream chese, sour cream, Cheddar, and blue cheese.
    • Cream cheese--Use full-fat cream cheese here. It will give you the creamiest mixture, and melts better than low-fat cheese.
    • Sour cream--Again, full-fat is best, but you can get away with reduced fat for the sour cream.
    • Hot sauce--You want a vinegar-based hot sauce, such as Frank's Red Hot. This is what gives it the classic Buffalo flavor.
    • Chicken--Feel free to use any kind of leftover chicken (it's great with the chicken from these Dutch oven chicken tacos!), cook up some chicken breasts or thighs, or purchase a rotisserie chicken at the store. I recommend using a mixture of light and dark meat if it's available to you.
    • Shredded cheddar cheese--Use full-fat cheddar and grate it yourself. Pre-shredded cheese doesn't melt well.
    • Blue cheese--I will always choose blue cheese dip over ranch anytime I have Buffalo wings, so the same goes for this dip. However, if blue cheese isn't your thing, it's completely fine to leave it off.

    How to Make Buffalo Chicken Dip

    A bowl filled with blended cream cheese, buffalo sauce, and sour cream with a hand mixer resting inside.
    Chicken and shredded Cheddar added to a bowl of buffalo dip.
    1. Beat the cream cheese, hot sauce, and sour cream in a bowl until smooth.
    2. Fold in the chicken and cheddar cheese.
    An uncooked buffalo chicken dip in a foil tray.
    A covered foil tray over hot coals.
    1. Spread the dip into a square foil pan and sprinkle the blue cheese over.
    2. Cover with foil and cook over hot coals (or in the oven or on the grill) until bubbling.

    FAQs

    Can you freeze this dip?

    Yes. You can freeze the unbaked dip for up to 3 months. Wrap your covered pan well with plastic wrap before freezing. Thaw in the refrigerator or in your cooler overnight before heating.

    Can I make this in the oven?

    Definitely. Bake the covered dip in a 350°F oven until beginning to bubble in the center, about 30 minutes.

    What should I serve for dipping?

    You can serve anything you'd normally have with your favorite chicken wings, like carrot or celery sticks, as well as crackers or sturdy bread cubes.

    Tips and Troubleshooting

    • Cut the cream cheese into small cubes before beating it. This will make it easier to beat and give you a smoother consistency.
    • If you're not preparing this in advance, you can make and cook it in your cast iron skillet. Don't store it in your skillet though, as the acid in the hot sauce can damage your skillet.
    • Leftover dip can be stored in your refrigerator or cooler for up to 3 days. It will become very firm after chilling, so you'll need to rewarm it gently over low heat until softened and heated through.
    • This recipe is suitable for gluten-free diets.

    More Dip Recipes You'll Love

    A small skillet filled with caramel apple dip with chopped almonds on top and apples on the side.
    Caramel Apple Dip
    A person scooping up some Guinness cheese dip with a pretzel cracker.
    Guinness Cheese Dip

    Tried This Recipe?

    If you've tried this recipe, please leave a comment below. Follow me on Instagram, Facebook, or Pinterest for more great camping and grilling recipes.

    Recipe

    A foil pan filled with buffalo chicken dip with carrots, crackers, and bread cubes nearby.

    Make-Ahead Buffalo Chicken Dip

    A woman's face.Angie Zoobkoff
    Everything you love about Buffalo chicken wings in a creamy, scoop-able dip.
    No ratings yet
    Print Recipe Pin Recipe
    Prep Time 15 minutes mins
    Cook Time 45 minutes mins
    Total Time 1 hour hr
    Course Appetizer, Snack
    Cuisine American
    Servings 8 servings
    Calories 284 kcal

    Equipment

    • 8-inch square foil pan

    Ingredients
      

    • 1 package (8 ounces) full-fat cream cheese softened
    • ½ cup sour cream
    • ½ cup Buffalo-style hot sauce
    • 2 cups shredded cooked chicken
    • 1 cup shredded cheddar cheese
    • ¼ cup crumbled blue cheese

    Instructions
     

    • Beat the cream cheese, sour cream, and hot sauce together in a medium bowl until smooth.
    • Fold in the chicken and cheddar.
    • Spread the dip mixture evenly (it will be very thick) in the foil pan. Sprinkle the blue cheese over the top.
    • Cover the pan with foil, then wrap with plastic wrap and store in your fridge or cooler for up to 2 days before cooking.
    • When you're ready to cook, prepare a bed of hot coals in a campfire or prepare a grill for indirect cooking over medium heat. Remove the plastic wrap from the pan, but leave the foil cover in place.
    • Cook over hot coals (not direct flame) or over indirect heat on your covered grill until the dip is soft and bubbling in spots, 40 to 45 minutes. Uncover and serve warm with your favorite dippers.

    Notes

    • Get the smoothest dip--Cut the cream cheese into small cubes before beating it. This will make it easier to beat and give you a smoother consistency.
    • Use your skillet--If you're not preparing this in advance, you can make and cook it in your cast iron skillet. Don't store it in your skillet though, as the acid in the hot sauce can damage your skillet.
    • Storage and reheating--Leftover dip can be stored in your refrigerator or cooler for up to 3 days. It will become very firm after chilling, so you'll need to rewarm it gently over low heat until softened and heated through.
    • Dietary--This recipe is suitable for gluten-free diets.

    Nutrition

    Serving: 1portionCalories: 284kcalCarbohydrates: 9gProtein: 17gFat: 20gCholesterol: 82mgSodium: 650mgSugar: 5g
    Keyword Buffalo chicken, camping dip, cheese dip
    Tried this recipe?Let us know how it was!

    September 26, 2024 Collections

    Top 10 Favorite Fall Foods

    Every year, when readers are polled for their favorite fall foods, the list changes slightly, but many of the foods stay the same. Some are regional specialties, but there are always several consistent themes from coast to coast.

    Comfort food reigns supreme, including chili, stew, and cozy favorites, like chicken and dumplings and creamy chowders. If you've got a sweet tooth, you probably won't be surprised to learn that apple, pear, and pumpkin dominate the desserts on the list, with the most popular food being pie. Here are a few of the best versions of the fall foods you love.

    1
    Recipe and photo credit: Cinnamon and Sage Co.
    Baked Apple Cider Doughnuts
    Fluffy and sweet, these baked apple cider doughnuts are the perfect way to get ready for sweater weather and all your favorite things that come with fall.
    Get the recipe: Apple Cider Doughnuts
    2
    A small skillet filled with caramel apple dip with chopped almonds on top and apples on the side.
    Caramel Apple Dip
    This sweet and creamy scoop-able dip is an easy make-ahead dessert for camping or for sharing with friends at home.
    Get the recipe: Caramel Apple Dip
    3
    Recipe and photo credit: xoxo Bella
    Lazy Chicken and Dumplings
    This nostalgic and cozy chicken and dumplings recipe is one of the best comfort food recipes you can make with chicken and a canned biscuits shortcut.
    Get the recipe: Chicken and Dumplings
    4
    A Dutch oven filled with campfire chili with a metal spoon resting inside.
    Dutch Oven Campfire Chili
    This ground beef chili for camping is made in your cast iron Dutch oven over the campfire. It's hearty and satisfying and easily the best chili recipe I've ever tried.
    Get the recipe: Dutch Oven Campfire Chili
    5
    Recipe and photo credit: This Silly Girl's Kitchen
    Southern Buttermilk Biscuits
    One of life’s greatest joys is sinking your teeth into fluffy, warm Southern buttermilk biscuits. Our recipe uses simple ingredients that come together in no time!
    Get the recipe: Southern Buttermilk Biscuits
    6
    Recipe and photo credit: Modern Honey
    The Best Pumpkin Pie
    The best pumpkin pie recipe is sweet, rich, and creamy made with cream cheese and butter, topped with homemade whipped cream in a flaky buttery crust.
    Get the recipe: Pumpkin Pie
    7
    A small skillet filled with beer cheese dip, topped with shredded cheese, tomatoes, and scallions with chips on the side.
    Skillet Beer Cheese Dip
    This beer cheese dip with cream cheese, smoked Gouda, Cheddar, and beer is easy to make in your cast iron skillet. It can be made over the campfire, on your camp stove, or on a regular stove.
    Get the recipe: Skillet Beer Cheese Dip
    8
    Recipe and photo credit: A Tasty Kitchen
    Creamy Clam Chowder
    This creamy clam chowder recipe creates a smoky comforting shellfish dish. Serve with crusty bread for a great crowd pleaser.
    Get the recipe: Creamy Clam Chowder
    9
    Two open foil packet pear crisps surrounded by pears.
    Foil Packet Pear Crisp
    This juicy foil packet pear crisp is a simple autumn dessert featuring tender spiced pears topped with a crispy oat mixture. Make it over the campfire, on your grill, or in the oven.
    Get the recipe: Foil Packet Pear Crisp
    10
    Baked potatoes topped with sour cream and scallions.
    Campfire Baked Potatoes
    A campfire classic made with Russet potatoes that are wrapped in foil and buried in coals. They come out with crispy skin and soft, fluffy interiors. Load them up with your favorite toppings and enjoy!
    Get the recipe: Campfire Baked Potatoes

    September 25, 2024 Collections

    11 Easy One-Pot Pasta Recipes

    Whether you're at home or camping, having a few easy one-pot pasta recipes in your arsenal means you can have dinner on the table in a flash, with minimal fuss or cleanup. And this collection of comforting pasta recipes are so delicious that you won't have to even worry about dealing with leftovers.

    1
    Recipe and photo credit: Kelly Neil
    Lasagna Stew
    Craving lasagna but short on time? This hearty lasagna stew is a quick and easy one-pot meal. Perfect for a weeknight dinner!
    Get the recipe: Lasagna Stew
    2
    A pot of cheeseburger pasta with plates, napkins, and forks on the side.
    One-Pot Cheeseburger Tortellini
    This creamy tortellini has all your favorite burger elements--beef, tomato, cheese, and mustard--with the convenience of a one-pot meal.
    Get the recipe: Cheeseburger Tortellini
    3
    Recipe and photo credit: Piper Cooks
    One-Pot Creamy Zucchini and Mushroom Pasta
    This pasta is creamy and satisfying and this cooking method is super easy, quick, and rewarding. Zucchini season has never been so delicious!
    Get the recipe: Creamy Zucchini and Mushroom Pasta
    4
    Recipe and photo credit: Lauren From Scratch
    One Pot Cajun Chicken and Broccoli Alfredo
    This one pot Cajun chicken and broccoli alfredo is creamy, decadent, and full of Cajun flavor! Easy weeknight meal and ready in one hour!
    Get the recipe: Cajun Chicken and Broccoli Alfredo
    5
    Creamy mac and cheese in a pot with a wooden spoon resting in it.
    Camping Mac and Cheese
    This creamy one-pot macaroni and cheese is made in just one pot with a handful of pantry ingredients and requires only 20 minutes of your time.
    Get the recipe: Dutch Oven Mac and Cheese
    6
    Recipe and photo credit: Semi Homemade Kitchen
    Easy One Pan Beef Enchilada Pasta
    Discover the perfect fusion of Tex-Mex and Italian flavors in this quick and easy beef enchilada pasta recipe.
    Get the recipe: Beef Enchilada Pasta
    7
    One-Pot French Onion Pasta
    Recipe and photo credit: Sunglow Kitchen
    One-Pot French Onion Pasta
    This French onion pasta features caramelized onions, fresh thyme, and Gruyere cheese, all cooked in a single pot. It’s restaurant-worthy, yet simple.
    Get the recipe: One-Pot French Onion Pasta
    8
    Recipe and photo credit: The Clean Eating Couple
    One Pot Chicken Parmesan Pasta
    This cheesy pasta is everything you love about chicken Parmesan, just with WAY less work and the ease of a one pot meal.
    Get the recipe: Chicken Parmesan Pasta
    9
    Creamy Spaghetti
    Recipe and photo credit: The Clever Meal
    Creamy Spaghetti
    Dreaming of a bowl of creamy spaghetti ready in no time? This super easy one-pot recipe ready in less than 15 minutes is for you.
    Get the recipe: Creamy Spaghetti
    10
    Recipe and photo credit: Flavor the Moments
    One Pot Ground Beef Stroganoff
    This one pot ground beef stroganoff recipe is an easy, one pot dinner that the entire family will love. It takes 5 minutes of prep and it’s ready in 30 minutes!
    Get the recipe: One-Pot Ground Beef Stroganoff
    11
    Recipe and photo credit: Valerie's Kitchen
    Chicken and Spinach Skillet Pasta
    Dry pasta cooks up perfectly tender in a luscious sauce with chicken, spinach and tomatoes in this one pot chicken and spinach skillet pasta.
    Get the recipe: Chicken and Spinach Skillet Pasta

    September 23, 2024 Breakfast

    Pear Chips

    These homemade pear chips are an easy, healthy snack that's perfect for camping or hiking. You can make them in advance and pack them along on your trip and they don't require any cooler space.

    A stack of pear chips with a pear in the background.

    Pears are one of my favorite autumn fruits. The super ripe and juicy ones get eaten out of hand, and the ones that are still a little crunchy get folded into foil packet pear crisps, or stuffed and baked in the Dutch oven, or turned into these handy little chips, which are great for camping and hiking, but make a pretty terrific mid-afternoon snack at home, too.

    Why This Recipe is Great for Camping

    • They're a great hiking or kid-friendly camping snack that can be made in advance.
    • They don't require any cooler space.
    • They're a healthy treat everyone can enjoy and a popular fall recipe.

    Ingredients and Substitutions

    Three pears on a baking sheet.
    • Pears--You can use any type of pear for these homemade chips, but choose pears that are slightly underripe. Overripe or soft pears will be difficult to slice and will take a long time to dry.

    How to Make Pear Chips

    A person slicing pears on a mandoline.
    Thin slices of pear on a parchment-lined baking sheet.
    1. Use a mandoline or sharp knife to slice the pears thinly. Remove any seeds.
    2. Arrange the pear slices on parchment-lined baking sheets and bake in a 225°F oven until crisp.

    FAQs

    Why are my dried pear slices chewy?

    Any moisture left in the fruit is going to make it a little chewy. To avoid this, cut your slices as thin as possible, and cook them until they are beginning to curl and feel dry. Let them cool completely before storing them as they'll crisp up more as they cool.

    Do I need to peel the pears?

    It's up to you. Some people find the pear skin a little tough and gritty on larger pieces of fruit, however, with very thin slices I don't find this is noticeable.

    Variation: Cinnamon Sugar Pear Chips

    If you prefer your chips a little on the sweeter side, mix together 3 tablespoons of sugar and 1 teaspoon of cinnamon and sprinkle over them before baking.

    Tips and Troubleshooting

    • A mandoline will give you the thinnest, most even slices. If you have to cut them by hand it will still work, but you may end up with slightly thicker chips, which will take longer to bake.
    • Store them in an airtight container at room temperature for up to 1 week. They will soften over time as they absorb moisture.
    • This pear chips recipe is suitable for gluten-free, dairy-free, and vegan diets.
    A bowl of pear chips with two pears nearby.

    More Healthy Camping Snack Recipes You'll Love

    Several no-bake energy bites in a dish with almonds scattered around.
    No-Bake Fruit and Nut Energy Bites
    A jar filled with chunky granola bites and fresh cherries scattered around the jar.
    Chunky Chocolate Cherry Granola

    Tried This Recipe?

    If you've tried this recipe, please leave a comment below. Follow me on Instagram, Facebook, or Pinterest for more great camping and grilling recipes.

    Recipe

    A stack of pear chips with a pear in the background.

    Pear Chips

    A woman's face.Angie Zoobkoff
    These homemade pear chips are easy to make with only one ingredient, and are a healthy snack that's perfect for camping or hiking.
    No ratings yet
    Print Recipe Pin Recipe
    Prep Time 10 minutes mins
    Cook Time 2 hours hrs
    Total Time 2 hours hrs 10 minutes mins
    Course Snack
    Cuisine American
    Servings 2 servings
    Calories 29 kcal

    Ingredients
      

    • 1 large pear peeled if desired

    Instructions
     

    • Preheat the oven to 225°F (107°C). Line two rimmed baking sheets with parchment paper.
    • Slice a small round off the bottom of the pear and discard. Using a mandoline or very sharp knife, slice the pear into â…›-inch (3-mm) rounds. Remove any seeds from the slices.
    • Arrange the pear slices in a single layer on the baking sheets.
    • Bake the pear chips for 1 hour, then rotate the sheets and continue cooking until the pears have curled around the edges and appear dry, 45 to 60 minutes more. They will crisp more as they cool.

    Notes

      • Slicing the pear--A mandoline will give you the thinnest, most even slices. If you have to cut them by hand it will still work, but you may end up with slightly thicker chips, which will take longer to bake.
      • Storage--Store them in an airtight container at room temperature for up to 1 week. They will soften over time as they absorb moisture.
      • Dietary--This recipe is suitable for gluten-free, dairy-free, and vegan diets.

    Nutrition

    Serving: 25 chipsCalories: 29kcalCarbohydrates: 7gSodium: 1mgFiber: 2gSugar: 5g
    Keyword camping snacks, healthy snacks, hiking food, homemade fruit chips
    Tried this recipe?Let us know how it was!

    September 20, 2024 Beef Recipes

    One-Pot Cheeseburger Tortellini

    This one-pot cheeseburger pasta recipe boasts everything you love about burgers--beef, cheese, tomato, and mustard--and comes together with the convenience and minimal effort of a one-pot pasta meal that's ready in under 25 minutes.

    A pot of cheeseburger pasta with plates, napkins, and forks on the side.

    One-pot camping meals are ideal, as they involve minimal dishes to clean and are generally pretty satiating. Like my Dutch oven macaroni and cheese recipe, this cheeseburger tortellini ticks both of those boxes.

    To make it simpler for camping than traditional cheeseburger pasta, which uses lean ground beef and requires the pasta to be cooked separately, I swapped in store-bought beef tortellini, which quickly gets steamed in the Dutch oven before being mixed with the rest of the ingredients to create an easy camping dinner that can be made over your campfire or on your camp stove and requires only one pot to clean.

    Why This Recipe is Great for Camping

    • It only requires one pot and is ready in less than 25 minutes. No colander required.
    • You can make it on your camp stove or over your campfire.
    • It's creamy, comforting, satisfying and kid-friendly.

    Ingredients and Substitutions

    Ingredients for one-pot cheeseburger pasta--tortellini, onion, tomatoes, oil, Cheddar, cream, and mustard.
    • Tortellini--Beef tortellini can be found in the refrigerated section of most large supermarkets. I don't recommend using frozen, as it will change the cooking time.
    • Cheddar cheese--Use full-fat cheese for best results and always grate it yourself. Pre-shredded cheese doesn't melt well.
    • Cream--This will give you a luxuriously creamy pasta sauce. You can substitute half and half, if you prefer, but you will have a thinner sauce.
    • Tomatoes--Be sure to drain your can of diced tomatoes before adding them to the sauce.

    How to Make Dutch Oven Cheeseburger Pasta

    Diced onions in a Dutch oven on an induction burner.
    Water being poured into a Dutch oven filled with tortellini and onion.
    1. Heat the oil in a Dutch oven over medium heat. Add the onion and sauté until tender, stirring frequently.
    2. Add the tortellini, then pour in the water.
    A covered blue Dutch oven on an induction burner.
    A Dutch oven filled with tortellini, tomatoes, and Cheddar cheese.
    1. Cover and let the tortellini steam until the pasta is tender.
    2. Reduce the heat to low and stir in the tomatoes, cream, cheese, and mustard. Taste and adjust the seasoning.

    FAQs

    What should I serve with this?

    This is a hearty meal all on its own, but you could serve a green salad or tangy coleslaw on the side.

    Do I need to drain the pasta?

    No. The water added is just enough to steam and be absorbed by the pasta, so there's no need to drain it.

    How do I prevent my cheese sauce from splitting?

    Cheese sauce can split and become grainy if it's overheated. To avoid this, add the cheese over low heat, or remove the Dutch oven from the heat when adding the cheese, then gently warm it.

    What's the best way to rewarm leftover pasta?

    Place the leftover pasta in a pot or your Dutch oven and set over low heat. Rewarm gently, stirring occasionally. If the pasta is too thick or has clumped together, add a splash of milk or cream to loosen the sauce as it heats.

    Tips and Troubleshooting

    • To make this over a campfire, set your Dutch oven above a bed of hot coals. Depending on the distance from the coals, the cooking times may be slightly different.
    • Use caution when removing the lid of your Dutch oven after steaming the tortellini as there may be a rush of hot steam.
    • Store leftover pasta in a sealed container in your cooler or fridge for up to 3 days.
    A spoonful of cheeseburger pasta being lifted from a Dutch oven.

    More Dutch Oven Recipes You'll Love

    A Dutch oven filled with baked beans on a campfire grate.
    Dutch Oven Baked Beans
    A Dutch oven filled with campfire chili with a metal spoon resting inside.
    Campfire Chili

    Tried This Recipe?

    If you've tried this recipe, please leave a comment below. Follow me on Instagram, Facebook, or Pinterest for more great camping and grilling recipes.

    Recipe

    A pot of cheeseburger pasta with plates, napkins, and forks on the side.

    One-Pot Cheeseburger Tortellini

    A woman's face.Angie Zoobkoff
    This creamy tortellini has all your favorite burger elements--beef, tomato, cheese, and mustard--with the convenience of a one-pot meal.
    No ratings yet
    Print Recipe Pin Recipe
    Prep Time 5 minutes mins
    Cook Time 17 minutes mins
    Total Time 22 minutes mins
    Course Main Course
    Cuisine American
    Servings 4 servings
    Calories 724 kcal

    Equipment

    • Dutch oven

    Ingredients
      

    • 2 tablespoons olive oil
    • 1 small onion diced
    • Salt and freshly ground black pepper
    • 1 pound beef tortellini
    • ½ cup water
    • 1 cup whipping cream
    • 1 (14-oz) can diced tomatoes drained
    • 2 teaspoons yellow mustard
    • 1 ½ cups shredded Cheddar cheese

    Instructions
     

    • Heat the oil in a Dutch oven over medium heat for 1 minute.
    • Stir in the onion and season with salt. Cook, stirring frequently, until softened and translucent, about 8 minutes.
    • Add the tortellini and water, then quickly cover with a lid. Let the tortellini steam for 5 minutes.
    • Uncover the Dutch oven and stir in the cream, tomatoes, and mustard.
    • Reduce the heat to low and add the cheese, stirring constantly until the cheese is melted, everything is combined, and the sauce is thick, about 3 minutes. Season with salt and pepper, to taste.

    Notes

      • Cook it over a campfire--To make this over a campfire, set your Dutch oven above a bed of hot coals. Depending on the distance from the coals, the cooking times may be slightly different.
      • Be careful!--Use caution when removing the lid of your Dutch oven after steaming the tortellini as there may be a rush of hot steam.
      • Storage--Store leftover pasta in a sealed container in your cooler or fridge for up to 3 days.

    Nutrition

    Serving: 1portionCalories: 724kcalCarbohydrates: 61gProtein: 26gFat: 43gCholesterol: 150mgFiber: 1gSugar: 3g
    Keyword campfire cooking, one pot cooking, one pot pasta
    Tried this recipe?Let us know how it was!

    September 18, 2024 Collections

    15 Ways to Enjoy Autumn Fruits

    The arrival of autumn fruits at the market often conjures up images of warm apple pie, hot apple cider cocktail, and cozy fruit crisp recipes, but this sweet fall produce has so much more to offer. This collection of 15 recipes for autumn fruits ranges from sweet to savory, and includes unique ways to enjoy apples, pears, figs, and cranberries. These simple recipes are a great way to find your new favorite fall foods.

    1
    Recipe and photo credit: Sweet Fix Baker
    Easy No-Churn Cranberry Ice Cream
    This cranberry Ice cream is tart and sweet, super creamy, easy to make and with a cranberry swirl to die for!
    Get the recipe: No-Churn Cranberry Ice Cream
    2
    A small skillet filled with caramel apple dip with chopped almonds on top and apples on the side.
    Caramel Apple Dip
    This sweet and creamy scoop-able dip is an easy make-ahead dessert for camping or for sharing with friends at home.
    Get the recipe: Caramel Apple Dip
    3
    Recipe and photo credit: Food Nutters
    Brie and Pear Puff Pastry Bites
    An easy and quick recipe for delicious brie and pear puff pastry appetizer, drizzled with honey and sliced almonds.
    Get the recipe: Brie and Pear Puff Pastry Bites
    4
    Recipe and photo credit: Debra Klein
    Harvest Salad
    Dive into this harvest salad that's loaded with apples, roasted sweet potatoes and figs plus a delicious apple vinaigrette that everyone will adore.
    Get the recipe: Harvest Salad
    5
    A platter of seared pork chops topped with apples and onions.
    Blackstone Pork Chops with Apples and Onions
    This easy meal of juicy pork chops topped with caramelized onion and apple is the perfect way to celebrate autumn.
    Get the recipe: Blackstone Pork Chops with Apples and Onions
    6
    Recipe and photo credit: Small Town Woman
    Easy Baked Pears
    These five ingredient baked pears are an incredibly easy light wholesome dessert that the whole family can enjoy. This scrumptious fresh fruit dessert can be in the oven in less than five minutes.
    Get the recipe: Easy Baked Pears
    7
    Recipe and photo credit: In the Kitch
    Cinnamon Apple Chips
    This cinnamon apple chip recipe brings together the classic autumnal combination of fresh apples and warm cinnamon.
    Get the recipe: Cinnamon Apple Chips
    8
    An open foil packet pear crisp with pears in the background.
    Foil Packet Pear Crisp
    This juicy foil packet pear crisp is a simple autumn dessert featuring tender spiced pears topped with a crispy oat mixture. Make it over the campfire, on your grill, or in the oven.
    Get the recipe: Foil Packet Pear Crisp
    9
    Recipe and photo credit: Live to Sweet
    Hazelnut Fig Galette
    This hazelnut fig galette has a sweet pastry crust filled with homemade hazelnut paste, and topped with figs and honey!
    Get the recipe: Hazelnut Fig Galette
    10
    Recipe and photo credit: Live to Sweet
    Apple Shortcake
    This apple shortcake has cornmeal biscuits topped with baked caramel apples, cinnamon whipped cream, and salted caramel sauce!
    Get the recipe: Apple Shortcake
    11
    Two plates of cranberry cobbler on a wooden table with fir branches nearby.
    Dutch Oven Cranberry Cobbler
    This festive Dutch oven cobbler has tender spiced cranberries topped with sweet biscuit dough. It's perfect for your holiday camping trip, or any time you're craving an easy dessert.
    Check out this recipe
    12
    Recipe and photo credit: Through the Fibro Fog
    Baked Chicken with Apples and Honey
    This baked chicken with apples and honey is a flavourful and low carb meal, perfect for a family weeknight dinner.
    Get the recipe: Baked Chicken with Apples and Honey
    13
    Recipe and photo credit: On My Kid's Plate
    Apple French Toast Casserole
    Sweet apple French toast casserole has gooey cinnamon apples with a sweet streusel topping. Refrigerate overnight and bake in the morning!
    Get the recipe: Apple French Toast Casserole
    14
    Get the recipe: Killing Thyme
    Sweet and Savory Salmon Sliders With Cranberry Sauce
    This post is sponsored by Blue Circle Foods | Thanks for supporting the brands that I love + trust! What are you most looking forward to this holiday season? Entertaining and clinking glasses with your best pals?
    Get the recipe: Sweet and Savory Cranberry Salmon Sliders
    15
    A cast iron skillet. filled with apple crisp and two scoops of ice cream on top.
    Skillet Bourbon Apple Crisp
    This cast-iron skillet apple crisp is made on the grill with sweetly spiced apples and the crispiest oat topping imaginable. An ample splash of bourbon makes it extra special.
    Get the recipe: Skillet Bourbon Apple Crisp

    September 16, 2024 Camping

    Foil Packet Pear Crisp

    This individual foil packet pear crisp recipe has same tender fruit and crispy oat topping that you love in bourbon apple crisp, but is made with crisp pears and warm cardamom, ginger, and cinnamon spices. It's the perfect way to enjoy sweet autumn fruit. Make it over the campfire, grill, or in the oven.

    Two open foil packet pear crisps surrounded by pears.

    From sweet grilled plums to strawberry rhubarb crisp, desserts that can be made in a foil packet are ideal for their ease of preparation, and minimal clean up. And since this tender pear crisp is made in individual packets, you don't have to share. With anyone.

    Why This Recipe is Great for Camping

    • It's made in individual foil packets so there's no need to divide it up after cooking and no dishes to clean up.
    • You can make it over your campfire or on your portable grill.
    • The ingredients don't require refrigeration, making this a great no-cooler camping food.
    • Leftovers are great for breakfast (just like these baked pears)!

    Ingredients and Substitutions

    Ingredients for foil packet pear crisp--pears, oats, flour, butter, spices, and brown sugar.
    • Pears--Use ripe Bosc, Bartlett, or Anjou pears as they hold their shape the best during cooking. Avoid any pears that are overripe, or have dark or mushy spots.
    • Brown sugar--This recipe uses less sugar than most crisps, but relies on the rich molasses undertones of the brown sugar to deliver just as much sweetness.
    • Butter--If you use unsalted butter, add a big pinch of salt oat topping.
    • Oats--You can use regular or quick oats here, but not steel-cut oats.

    How to Make Campfire Pear Crisp

    A bowl with sliced pears sugar, spices, and flour.
    Pear slices tossed in a sugar and flour on sheets of foil.
    1. Toss the sliced pears with sugar, flour, and spices.
    2. Divide the pears between two large double layers of foil coated with cooking spray.
    A bowl of oats, flour, sugar, and spices.
    A bowl of oats, sugar, flour, butter, and spices.
    1. Mix the oats, sugar, flour, and spices for the filling in a large bowl.
    2. Work the butter into the filling until it is the size of small peas.
    A sealed foil packet pear crisp and the contents of a pear crisp on a sheet of foil.
    Two foil packets cooking over fire.
    1. Divide the filling in half and mound on top of the pears. Fold up the foil packets.
    2. Cook over hot coals or on the grill until the pears are tender.

    FAQs

    How should I serve my pear crisp?

    If you've got access to a freezer, then it's wonderful with a scoop of vanilla ice cream, but if not, a drizzle of whipping cream or big dollop of canned whipped cream is excellent on top.

    Can I make this in the oven?

    Yes. Prepare the foil packets as directed and bake in a 350°F (178°C) oven until the pears are tender, about 25 minutes.

    Do I need to peel the pears?

    It's up to you. I like to leave the skin on, but if you don't enjoy the added texture from the skin, feel free to peel your pears before slicing.

    Tips and Troubleshooting

    • To get ahead, mix your oat topping ingredients without the butter before heading out to camp. Store it in a resealable bag or container until you're ready to sprinkle it over the crisp.
    • Use a double layer of foil when making your foil packet to help prevent drips and flareups if one layer of the foil rips while cooking.
    • Don't cook over direct flame as it will cause your crisp to burn. Hot coals work best for distributing even heat.
    • Take care when opening your foil pouch as there will be steam inside. After opening, let the crisp cool for at least 10 minutes before eating.
    • Store leftover crisp in a sealed container at room temperature or in your cooler for up to 3 days.
    An open foil packet pear crisp with pears in the background.

    More Foil Packet Dessert Recipes You'll Love

    Spiced grilled plums in a bowl on a plate with a fork and checkered napkin on the side.
    Spiced Grilled Plums
    A scoop of strawberry rhubarb crisp on a blue plate with three strawberries.
    Strawberry Rhubarb Campfire Crisp

    Tried This Recipe?

    If you've tried this recipe, please leave a comment below. Follow me on Instagram, Facebook, or Pinterest for more great camping and grilling recipes.

    Recipe

    Two open foil packet pear crisps surrounded by pears.

    Foil Packet Pear Crisp

    A woman's face.Angie Zoobkoff
    This juicy foil packet pear crisp is a simple autumn dessert featuring tender spiced pears topped with a crispy oat mixture. Make it over the campfire, on your grill, or in the oven.
    No ratings yet
    Print Recipe Pin Recipe
    Prep Time 20 minutes mins
    Cook Time 25 minutes mins
    Total Time 45 minutes mins
    Course Dessert
    Cuisine American
    Servings 2 servings
    Calories 418 kcal

    Ingredients
      

    For the pears

    • 2 large pears cored and sliced ½-inch thick
    • 3 tablespoons brown sugar
    • 1 tablespoon all-purpose flour
    • ½ teaspoon ground ginger
    • ¼ teaspoon ground cardamom
    • Cooking spray

    For the oat topping

    • ½ cup oats
    • 2 tablespoons brown sugar
    • 1 tablespoon all-purpose flour
    • ¼ teaspoon cinnamon
    • ¼ teaspoon ground cardamom
    • 3 tablespoons salted butter cut into small cubes

    Instructions
     

    • Prepare a bed of hot coals in a campfire or preheat the grill to medium low (350°F).
    • In a large bowl, toss the pear slices with the brown sugar, flour, ginger, and cardamom.
    • Arrange two large double layers of aluminum foil on a work surface and coat with cooking spray.
    • Divide the pears between the two foil packets.
    • In the same bowl (no need to wash!) combine the oats, brown sugar, flour, cinnamon, and cardamom. Mix well.
    • Use your fingertips or a pastry cutter to work in the butter until it's the size of small peas.
    • Divide the oat topping between the foil packets. Fold up and seal each packet.
    • Cook the pear crisps over the hot coals, or over low heat on the grill until the pears are tender, about 25 minutes. Cool slightly before serving.

    Notes

    • Get ahead--Mix your oat topping ingredients without the butter before heading out to camp. Store it in a resealable bag or container until you're ready to sprinkle it over the crisp.
    • Double up--Use a double layer of foil when making your foil packet to help prevent drips and flareups if one layer of the foil rips while cooking.
    • Avoid direct flame--Don't cook over direct flame as it will cause your crisp to burn. Hot coals work best for distributing even heat.
    • Let it cool--Take care when opening your foil pouch as there will be steam inside. After opening, let the crisp cool for at least 10 minutes before eating.
    • Storage--Store leftover crisp in a sealed container at room temperature or in your cooler for up to 3 days.

    Nutrition

    Serving: 1packetCalories: 418kcalCarbohydrates: 66gProtein: 3gFat: 18gCholesterol: 46mgSodium: 132mgFiber: 8gSugar: 42g
    Keyword campfire cooking, campfire desserts, fruit dessert
    Tried this recipe?Let us know how it was!

    September 13, 2024 Blackstone Griddle Recipes

    Blackstone Pork Chops with Apples and Onions

    These Blackstone pork chops with apples and onions are a satisfying meal made with juicy cider-brined pork chops that are smothered in tender apple slices and onion wedges. It's an easy autumn-inspired recipe that's impressive enough for company.

    A platter of seared pork chops topped with apples and onions.

    Boneless pork chop recipes are quick to cook and inexpensive to make, but unless they're smothered in a sauce, like these skillet pork chops with mushroom gravy, they can end up being dry. However, there's an easy fix for that. A short brine in sweet apple cider ensures that these chops stay juicy and tender after quickly searing on your Blackstone or outdoor griddle. They're outstanding on their own, but a tangle of caramelized onion and sautéed apple slices on top takes them to the next level and directly onto your list of the best Blackstone griddle recipes.

    Why You'll Love This Recipe

    • The meat cooks up quickly and stay juicy and tender.
    • Everything cooks on one griddle, so there's no need to juggle multiple pans.

    Ingredients and Substitutions

    Ingredients for Blackstone pork chops--pork chops, onion, sugar, salt, thyme, oil, apples, and apple cider.
    • Pork chops-Like in my sweet and sour pork skewers recipe, I use boneless center cut pork chops for this recipe, but it will work with other cuts. Be sure that your chops are all cut to similar thickness so that they cook evenly.
    • Onion--I love the flavor of red onion with the apples, but white or yellow onion will also work.
    • Apple cider--This adds flavor to the brine and lends a tiny bit of sweetness to the meat. It's available at most supermarkets during fall. If you've got leftover cider, make a batch of hot apple cider cocktails to enjoy before or after dinner, or try one of these amazing apple cider recipes.
    • Apples--Use sweet, firm, eating apples for this recipe. Honeycrisp, Cosmic Crisp, Gala, or Pink Lady are all good choices. Avoid soft apples as they'll become mushy and fall apart during cooking.

    How to Cook Pork Chops on a Blackstone

    A pot filled with apple cider brine.
    Pork chops in a bag with a pot of apple cider brine next to it.
    1. Combine the apple cider, water, salt, and sugar in a saucepan and bring to a boil. Stir to dissolve the salt and sugar, then remove from the heat and cool completely.
    2. Place the pork chops in a resealable bag and pour the cooled brine over the chops. Seal and refrigerate for 1 to 2 hours.
    A person patting pork chops dry.
    Pork chops and apples and onions cooking on a Blackstone griddle.
    1. Drain the pork chops and pat dry. Season with salt and pepper.
    2. Cook the apples and onions on one side of the griddle for 10 minutes. Add the pork to the other side and sear until cooked through.

    FAQs

    What's the secret to juicy pork chops?

    As with poultry, brining pork chops helps to keep your meat juicy after cooking. As the meat soaks, it absorbs flavor from the brine, and the salt in the solution allows the meat to retain more moisture throughout cooking.

    What should I serve with this recipe?

    On the side, try this autumn-inspired pork chop meal with a grilled side dish, like grilled carrots in foil or beets with goat cheese. To complete your autumn meal, a foil packet pear crisp is perfect.

    Can I make this in my cast iron skillet?

    Yes, definitely. You will need to cook the apples and onions in the skillet first, then set them aside while you sear the pork chops in the same skillet. After the pork is finished cooking, rewarm the apples and onions in the skillet while the meat rests.

    Is there a sauce I can serve with these pork chops?

    I find that the combination of pork chops with soft apple is plenty juicy, but if you want something more on top, try it with a drizzle of balsamic glaze which will add a pleasant sweetness.

    Tips and Troubleshooting

    • Be sure to lay your bag of pork in brine flat so that the chops are submerged in brine. I like to place it inside a small baking sheet in case the bag springs a leak.
    • This Blackstone pork chops recipe will give you apples that still have a little bite. If you prefer them very soft, slice them into thinner wedges.
    • Take care to not overcook your pork chops. The brine keeps the meat juicy, but it will begin to dry out quickly once cooked past 145°F.
    • This recipe is suitable for gluten-free diets.
    A platter of seared pork chops topped with apples and onions.

    More Pork Recipes You'll Love

    Three pork chops in a cast-iron skillet with mushroom gravy on top and around the pork chops.
    Skillet Pork Chops with Mushroom Gravy
    A partially sliced grilled bacon-wrapped pork tenderloin on a wooden cutting board with a dish of green beans on the side.
    Grilled Bacon Wrapped Pork Tenderloin

    Tried This Recipe?

    If you've tried this recipe, please leave a comment below. Follow me on Instagram, Facebook, or Pinterest for more great camping and grilling recipes.

    Recipe

    A platter of seared pork chops topped with apples and onions.

    Blackstone Pork Chops with Apples and Onions

    A woman's face.Angie Zoobkoff
    This easy meal of juicy pork chops topped with caramelized onion and apple is the perfect way to celebrate autumn.
    No ratings yet
    Print Recipe Pin Recipe
    Prep Time 15 minutes mins
    Cook Time 25 minutes mins
    Total Time 2 hours hrs 30 minutes mins
    Course Main Course
    Cuisine American
    Servings 6 servings
    Calories 306 kcal

    Equipment

    • Blackstone (or other outdoor) griddle

    Ingredients
      

    For the brine

    • 1 cup apple cider
    • 1 cup water
    • 2 tablespoons kosher salt
    • 1 tablespoon granulated sugar

    For the pork chops

    • 6 boneless center cut pork chops
    • Salt and freshly ground black pepper
    • 2 large apples each cut into 16 wedges
    • 1 large red onion cut into ½-inch thick wedges
    • 2 tablespoons olive oil
    • 1 teaspoon fresh thyme leaves

    Instructions
     

    Make the brine

    • Combine the apple cider, water, salt, and sugar in a medium saucepan. Set it over medium heat and bring to a simmer, stirring to dissolve the salt and sugar.
    • Remove the brine from the heat and let it cool completely.

    Prepare the pork chops

    • Place the pork chops in a large resealable plastic bag. Pour the cooled brine over the chops and seal the bag. Refrigerate for 1 to 2 hours.
    • Drain the pork chops and pat dry. Season all over with salt and pepper.
    • In a large bowl, toss the apples and onions with oil and season well with salt and pepper.
    • Heat one side of your griddle to medium. Add the apples and onions and cook, stirring occasionally, until they soften and are dark brown, about 20 minutes. Stir in the thyme and cook for 1 minute more.
    • While the apples and onions are cooking, heat the other side of the griddle to medium. Sear the pork chops, flipping once, until golden brown and cooked to an internal temperature of 145°F, about 5 minutes per side.
    • Transfer the pork chops to a platter and let rest for 5 minutes. Pile the apples and onions on top and serve immediately.

    Notes

      • Keep it submerged--Be sure to lay your bag of pork in brine flat so that the chops are submerged in brine. I like to place it inside a small baking sheet in case the bag springs a leak.
      • For softer apples--This recipe will give you apples that still have a little bite. If you prefer them very soft, slice them into thinner wedges.
      • Don't overcook--Take care to not overcook your pork chops. The brine keeps the meat juicy, but it will begin to dry out quickly once cooked past 145°F.
      • Dietary--This recipe is suitable for gluten-free diets.

    Nutrition

    Serving: 1portionCalories: 306kcalCarbohydrates: 12gProtein: 26gFat: 18gCholesterol: 80mgFiber: 2gSugar: 10g
    Keyword blackstone cooking, blackstone griddle, pan-seared pork chops
    Tried this recipe?Let us know how it was!

    September 11, 2024 Articles

    How To Make Your Cast Iron Last Forever

    A good quality piece of cast iron cookware is a beautiful thing. You can cook almost anything in it, and it can go in the oven, on the stovetop, on your grill, and is a fantastic tool for campfire cooking. It's an investment, but if cared for properly, can last you a lifetime. Here's how to do it.

    An assortment of cast iron pots and skillets.

    Keep it clean

    Take the time to properly clean your cookware immediately after using, particularly if you've got liquid in it. There are a few ways to keep it clean. If it's not too dirty, a quick scrub with a little dish soap and a scrub brush will do the trick.

    If you've got some stubborn stuck-on bits of food, sprinkle with kosher salt and scour with a paper towel to remove the food. There are also a variety of scraper tools and chainmail scrubbing pads on the market specifically designed for cleaning cast iron.

    Scraper tools and chain mail brush for scrubbing cast iron.

    Don't use abrasive sponges or steel wool, as that will remove layers of seasoning. Never put cast iron in a dishwasher.

    Keep it dry

    Moisture is the enemy of cast iron. Over time, it will promote rust and make it unusable.

    Immediately after washing, dry it thoroughly with a paper towel or a clean rag. Don't use your favorite towel when drying your skillet. Some of the seasoning may rub off as you're drying it and leave a black residue on the towel.

    If you're going to be seasoning it, or you want to make sure that it's thoroughly dry, pop it on the stove and heat it for a few minutes to let any extra moisture evaporate.

    Season regularly

    Many cast iron pans come pre-seasoned, and you can start cooking your favorite cast-iron skillet recipes right away, although it will likely need a good seasoning after a couple of uses. You can also go ahead and season a new piece of cookware, even if it's pre-seasoned.

    Cooking with oil will help to maintain a natural nonstick coating, but over time the cast iron will loose its sheen and food may begin to stick, particularly if you've cooked something that requires heavy-duty scrubbing. This is when it's time to season.

    The seasoning process is simple. Give it a good clean and make sure it is very, very dry. You don't want any water trapped underneath the oil that could promote rust.

    A person rubbing oil into a cast iron skillet.

    Next, pour a small amount of neutral oil (like vegetable or canola) onto the pan or cookware and rub it all over--inside and out. Keep rubbing it in until the pan no longer looks or feels greasy.

    Finally, pop it into a 450°F oven, preferably upside down with a baking sheet below it to catch any excess oil, and let it bake for about an hour. Using oven mitts, carefully remove it from the oven and let it cool completely on your stovetop.

    Repeat this process as needed, a few times a year, and always clean and dry your cast iron after using to keep it as good as new.

    Cast Iron FAQs

    Is it ok to wash cast iron with soap?

    This is a hotly debated topic, and at some time, you've probably been told that your cast iron will be RUINED if you use any soap or soapy water to clean it.

    You can relax. A good scrub in soapy water isn't going to destroy your skillet. Don't let it soak in soapy water, and don't pile on the dish soap in the hopes of getting it sparkling clean, but it's fine to wash it as you would any other piece of cookware. Remember to re-season it as needed.

    What's the difference between cast iron and carbon steel?

    Cast iron and carbon steel cookware are both durable, excellent for high temperature cooking, and require special care to prevent damage and rust.

    The primary difference is that cast iron contains more carbon than steel, making it stronger, heavier, and more resilient. Carbon steel heats up and cools down more quickly than cast iron, and its lighter weight makes it easier for lifting.

    Is there anything I shouldn't cook in cast iron?

    You can cook anything in well-seasoned cast iron cookware, but there are a few foods that are not ideal.

    Cooking acidic ingredients, such as lemon or tomatoes for a long period of time can damage the seasoning, and may take on a metallic taste. Short simmering times of 30 minutes or less, like with these Italian sausage meatballs, are fine, but if you're making an all-afternoon bolognese, use an enamel-coated Dutch oven or a stainless steel pot.

    Seasoned cast iron is nonstick, but it has its limits. Foods that tend to stick, such as eggs, delicate fish fillets, and sugary sauces can be tricky and can make your dishes difficult to clean.

    Why does my cast iron feel sticky?

    If your skillet has a sticky or gummy feeling to it, you've likely used too much oil when seasoning it. Give it a good scrub with soap and water to remove any excess oil, then dry it and re-season it, taking care to work in just a thin film of oil before baking it.

    Top photo credit: Adobe Stock

    All remaining photos: Camp.Grill.Eat.

    September 9, 2024 Foil Packet Recipes

    Grilled Carrots in Foil

    These grilled carrots in foil are coated in butter and gently infused with rosemary and garlic while they cook. Not only is the flavor outstanding, but this easy carrot recipe requires only 5 ingredients, is ready in 25 minutes, and there are no dishes to clean up!

    A bowl of cooked carrots with rosemary sprigs on the side.

    At the end of summer, the garden is always exploding with carrots. Not that I'm complaining, because their flavor is incredible compared to store-bought carrots. We enjoy them raw alongside our crispy grilled chicken wings on wing night, tucked into chicken foil packets, and added to hearty Dutch oven beef stew. However, our favorite way, by far, to eat fresh carrots is gently grilled in a foil packet with rosemary and garlic. They're buttery, tender, and completely irresistible.

    Why You'll Love This Recipe

    • This foil packet side dish requires only 5 ingredients and it's ready in just 25 minutes.
    • These grilled carrots are easy to make, and since they're cooked in foil, there are no dishes to clean up!

    Ingredients and Substitutions

    Ingredients for grilled carrots in foil--carrots, oil, butter, rosemary, and garlic.
    • Carrots--Look for fat carrots with uniform thickness so that all your "coins" will be the same size. This will allow them to cook evenly.
    • Oil and butter--I use a combination of oil and butter for a couple of reasons. The oil helps to prevent the fat and carrots from burning, and the butter adds plenty of flavor. You can use all oil, if you prefer.
    • Rosemary--Choose fresh rosemary that has bright green leaves and smells fragrant. Avoid any sprigs that look brown, dull, or moldy.

    How to Grill Carrots in Foil

    A bowl of sliced carrots with salt and pepper shakers on the side.
    Sliced carrots on two sheets of aluminum foil with rosemary, garlic, and cubes of butter.
    1. Toss the carrots with oil and season well with salt and pepper.
    2. Pile the carrots on a double layer of aluminum foil and nestle the rosemary sprig and garlic cloves into the carrots. Top with cubed butter.
    A sealed foil packet.
    A foil packet cooking on the grill.
    1. Fold up and seal the foil packet.
    2. Grill over medium heat for 10 minutes. Open the foil packet, stir the carrots, and cook until tender.

    FAQs

    Can I make these over the campfire or in the oven?

    Sure. To cook over a campfire, follow the directions, cooking them over a bed of hot coals (not direct flame). They may take slightly longer to cook since your campfire grate isn't covered.

    To make baked carrots in foil, roast the carrots in the foil pack in a 375°F oven for about 20 minutes, stirring after 10 minutes.

    What should I serve with grilled carrots?

    These foil packet carrots on the grill are fantastic alongside any type of grilled meat, poultry, or fish. Try it with grilled salmon kabobs or grilled striploin steak skewers.

    Do I need to peel the carrots?

    It's up to you. I prefer to just give them a good scrub, but if yours have a lot of dirt or scarring, you may prefer to peel them.

    Tips and Troubleshooting

    • Use a double layer of foil when making your foil packet to help prevent drips and flareups if one layer of the foil rips while cooking.
    • Be careful when opening your foil pack as there will be hot steam trapped inside.
    • This recipe is suitable for gluten-free and vegetarian diets. To make it vegan, use a little extra oil instead of butter.
    A foil packet filled with cooked carrot coins an a large sprig of rosemary.

    More Vegetable Recipes You'll Love

    A bowl of grilled beets with crumbled goat cheese and fresh mint.
    Beets on the Grill
    A bowl of sautéed mushrooms with strips of meat in the background.
    Griddle Sautéed Mushrooms

    Tried This Recipe?

    If you've tried this recipe, please leave a comment below. Follow me on Instagram, Facebook, or Pinterest for more great camping and grilling recipes.

    Recipe

    A bowl of cooked carrots with rosemary sprigs on the side.

    Grilled Carrots in Foil

    A woman's face.Angie Zoobkoff
    Infused with rosemary, garlic, and butter, these grilled carrots in foil are so delicious, everyone will be asking for seconds.
    No ratings yet
    Print Recipe Pin Recipe
    Prep Time 5 minutes mins
    Cook Time 20 minutes mins
    Total Time 25 minutes mins
    Course Side Dish
    Cuisine American
    Servings 4 servings
    Calories 104 kcal

    Ingredients
      

    • 12 ounces carrots sliced into ½-inch-thick coins
    • 1½ tablespoons olive oil
    • Salt and freshly ground black pepper
    • 1 large sprig rosemary
    • 2 cloves garlic peeled
    • 1 tablespoon butter cut into small cubes

    Instructions
     

    • Prepare the grill for medium-high heat (375°F). I like to have one burner on high and one on low to place the foil packet over.
    • In a bowl, toss the carrots with olive oil and season generously with salt and pepper.
    • Pile the carrots on a double layer of aluminum foil. Nestle the rosemary and garlic in the pile of carrots.
    • Scatter the butter cubes over the carrots.
    • Fold up and seal the foil packet.
    • Place (on the low heat burner or slightly cooler side of the grill) and cook for 10 minutes.
    • Remove from the heat and carefully open the foil packet and stir the carrots. Seal the foil packet again, return it to the grill, and cook until the carrots are tender, about 10 minutes more.
    • Discard the rosemary and garlic before serving.

    Notes

      • Double up--Use a double layer of foil when making your foil packet to help prevent drips and flareups if one layer of the foil rips while cooking.
      • Avoid burns--Be careful when opening your foil packet as there will be hot steam trapped inside.
      • Dietary--This grilled carrots recipe is suitable for gluten-free and vegetarian diets. To make it vegan, use a little extra oil instead of butter.

    Nutrition

    Serving: 1portionCalories: 104kcalCarbohydrates: 8gProtein: 1gFat: 8gCholesterol: 8mgFiber: 2gSugar: 4g
    Keyword foil pack cooking, grilled carrots, grilled vegetables
    Tried this recipe?Let us know how it was!

    September 6, 2024 Camping

    Caramel Apple Dip

    When cooler weather and crisp autumn apples start appearing, it's time to change up your camping dessert game and bid farewell to the campfire cones and s'more nachos of summer. This sweet homemade caramel apple dip recipe is easy to make in advance and is the perfect autumn-inspired dessert for your cool weather camping trip or for noshing on with friends at home.

    A small skillet filled with caramel apple dip with chopped almonds on top and apples on the side.

    Although s'more-inspired desserts are a staple on our camping trips, it's nice to change things up a bit, particularly late in the season when crisp apples start appearing at the farmer's market. This easy caramel apple dip is the perfect make-ahead camping dessert; whip up the butterscotch sauce at home, stash it in your cooler, and when you're ready to enjoy it, dump it into your skillet, let it warm up over the fire, and dip and dunk to your heart's content.

    Why You'll Love This Recipe

    • You can make the caramel dip in advance before heading out to camp and warm it up when you're ready to serve.
    • It stores well, so you can enjoy it a few times throughout your trip.

    Ingredients and Substitutions

    Ingredients for caramel apple dip--butter, brown sugar, vanilla, almonds, cream, and apples.
    • Brown sugar--The use of brown sugar technically makes this a butterscotch sauce, not caramel, but the flavor is almost the same and is perfect for dipping apples. Plus, it's much easier to make than caramel.
    • Whipping cream--Use full-fat whipping cream for best results. Half and half or light cream will give you a thinner sauce that won't be thick enough for coating the apples.
    • Unsalted butter--If you need to use salted butter, don't add the extra ¼ teaspoon of salt in the recipe.
    • Almonds--These add an excellent crunchy component to the dip. Peanuts would also work well, if you prefer.
    • Apples--I like Granny Smith apples best for dipping since their tartness balances the sweetness of the sauce. Feel free to use your favorite variety or whatever you have on hand.

    How to Make Caramel Dip for Apples

    Caramel sauce bubbling in a small saucepan.
    A skillet with caramel sauce with chopped almonds in a bowl nearby.
    1. Combine the sugar, cream, butter, vanilla, and salt in a saucepan and set over low heat. Cook, stirring constantly until thickened. Cool.
    2. Transfer the sauce to a small skillet and rewarm over low heat. Top with almonds and serve.

    FAQs

    Can I freeze the caramel?

    Yes! Freeze it without the almond topping in an airtight container for up to 3 months. Thaw in the refrigerator overnight before reheating.

    Can I make it in my cast iron skillet?

    I don't recommend doing this. The mixture will bubble as it cooks and may overflow the shallow sides of the skillet. To be safe, make it in a pot or saucepan with high sides, then transfer it to the skillet when you're ready to rewarm and serve it.

    Tips and Troubleshooting

    • To make enough to feed 8 to 10 people, double the recipe and serve it in a 10-inch skillet.
    • Store the caramel in a sealed jar or container in your fridge or cooler for up to 1 week.
    • The sauce will thin as it's warmed, but if it's still too thick for dipping, stir in a tablespoon of cream to loosen it.
    • This recipe is suitable for gluten-free diets.
    A person dipping an apple wedge into a skillet of caramel apple dip.

    More Easy Dip Recipes You'll Love

    A strawberry being dipped into chocolate fondue.
    Campfire Chocolate Fondue
    A cube of bread on a fondue fork, covered in Swiss cheese dip.
    Swiss Cheese Dip

    Tried This Recipe?

    If you've tried this recipe, please leave a comment below. Follow me on Instagram, Facebook, or Pinterest for more great camping and grilling recipes.

    Recipe

    A small skillet filled with caramel apple dip with chopped almonds on top and apples on the side.

    Caramel Apple Dip

    A woman's face.Angie Zoobkoff
    This sweet and creamy scoop-able dip is an easy make-ahead dessert for camping or for sharing with friends at home.
    5 from 1 vote
    Print Recipe Pin Recipe
    Prep Time 5 minutes mins
    Cook Time 10 minutes mins
    Total Time 15 minutes mins
    Course Dessert, Snack
    Cuisine American
    Servings 4 servings
    Calories 524 kcal

    Equipment

    • 6-inch skillet

    Ingredients
      

    • 1 cup light brown sugar packed
    • ½ cup whipping cream
    • 4 tablespoons unsalted butter
    • 1 teaspoon vanilla
    • ¼ teaspoon salt
    • â…“ cup roasted salted almonds chopped (or substitute peanuts)
    • Apple wedges for serving

    Instructions
     

    • Combine the brown sugar, cream, butter, vanilla, and salt in a medium saucepan and set over low heat.
    • Bring to a simmer and cook, stirring constantly, until the mixture is uniform and begins to thicken, about 8 minutes. It will still appear thin but should coat the back of a spoon.
    • Remove from the heat and let cool. The mixture will thicken more as it cools.
    • Store in the fridge or cooler until you're ready to serve.
    • Just before serving, pour or scoop the butterscotch sauce into a 6-inch cast iron skillet. Set it over low heat on a camp stove or stovetop, or over warm coals on a campfire and heat gently until just warmed through, stirring occasionally.
    • Top with almonds and serve with apple wedges for dipping.

    Notes

    • Scaling the recipe--To make enough to feed 8 to 10 people, double the recipe and serve it in a 10-inch skillet.
    • Storage--Store the caramel in a sealed jar or container in your fridge or cooler for up to 1 week.
    • Thinning the sauce--The sauce will thin as it's warmed, but if it's still too thick for dipping, stir in a tablespoon of cream to loosen it.
    • Dietary--This recipe is suitable for gluten-free diets.

    Nutrition

    Serving: 1portionCalories: 524kcalCarbohydrates: 73gProtein: 2gFat: 26gCholesterol: 71mgFiber: 4gSugar: 66g
    Keyword camping desserts, camping dip, camping snacks, caramel apples, make-ahead desserts
    Tried this recipe?Let us know how it was!

    September 4, 2024 Collections

    22 Flavor-Packed Ways to Use Pesto

    Whether your garden is overflowing with basil and you're blitzing up jar after jar of homemade pesto or you have a half full jar of your favorite store-bought brand lurking in your fridge, you need some great ways to use it up. From pasta to pizza, these 22 ways to use pesto will have you scraping every last drop from the bottom of the jar.

    1
    Easy Pesto Tortellini Salad
    Recipe and photo credit: The Healthful Ideas
    Easy Pesto Tortellini Salad
    This pesto tortellini salad can be ready on the table in just 15 mins! Great for lunch, dinner, or as side for summer garden parties and BBQs!
    Get the recipe: Pesto Tortellini Salad
    2
    Recipe and photo credit: Cooking My Dreams
    Soft Pesto Focaccia Bread
    This soft pesto focaccia bread is a delicious twist on the fluffy classic focaccia with the vibrant, herby flavors of fresh basil pesto.
    Get the recipe: Soft Pesto Focaccia Bread
    3
    Two halves of a turkey ciabatta sandwich with tomatoes, pesto, and mozzarella, stacked on top of each other on a cutting board.
    Turkey Ciabatta Sandwich
    An easy handheld meal that's loaded with turkey, pesto, tomatoes, and cheese. Perfect for a casual camping meal or to take along on a hike or picnic.
    Get the recipe: Turkey Ciabatta Sandwich
    4
    Pesto Mac and Cheese
    Recipe and photo credit: Spend with Pennies
    Pesto Mac and Cheese
    Pesto mac and cheese is super easy, creamy, and cheesy! Made with macaroni, pesto, and havarti this creamy dish is filled with flavor.
    Get the recipe: Pesto Mac and Cheese
    5
    Recipe and photo credit: Modern Honey
    Pesto Caprese Salad
    Made with fresh cherry or grape tomatoes, vibrant pesto sauce, creamy fresh mozzarella balls, extra-virgin olive oil, balsamic glaze, basil, and spices, this is a perfect summer salad recipe!
    Get the recipe: Pesto Caprese Salad
    6
    Sliced grilled chicken on a plate with pesto drizzle around it.
    Grilled Mozzarella Stuffed Chicken Breast
    Your grilled chicken dinner just got a major facelift, thanks to the addition of gooey melted cheese and pesto.
    Get the recipe: Grilled Mozzarella-Stuffed Chicken Breast
    7
    Recipe and photo credit: Debra Klein
    Vegetable Pesto Pasta Salad
    The best pesto pasta salad is loaded with roasted veggies and delicious dairy-free pesto for a healthy side dish, ready in just 30 minutes.
    Get the recipe: Vegetable Pesto Pasta Salad
    8
    Recipe and photo credit: Simply Stacie
    Chicken Pesto Pizza
    Skip the frozen aisle and try this pizza recipe! Made with a simple pesto, tender chicken chunks, mushrooms, tomatoes and cheese.
    Get the recipe: Chicken Pesto Pizza
    9
    Pesto crusted salmon topped with lemon slices on a cutting board.
    Pesto-Crusted Salmon
    This easy grilled salmon is topped with pesto and lemon for a bright, summery, no-fuss meal that's ready in less than 30 minutes.
    Get the recipe: Pesto-Crusted Salmon
    10
    Recipe and photo credit: Homemade in the Kitchen
    Pesto Burgers
    These turkey burgers with tomato and mozzarella are slathered with basil pesto. It’s refreshing and tastes like summer!
    Get the recipe: Pesto Burgers
    11
    Recipe and photo credit: My Chef's Apron
    One Skillet Spanish Pesto Chicken Thighs
    Delicious and tender pan-seared chicken thighs are easy to make with a quick Spanish Picada pesto for an amazingly flavored dinner.
    Get the recipe: Spanish Pesto Chicken Thighs
    12
    Recipe and photo credit: The Clever Meal
    Creamy Pesto Pasta
    This stupidly simple creamy pesto pasta makes a 15-minute family meal sure to leave everyone licking their plates clean!
    Get the recipe: Creamy Pesto Pasta
    13
    Recipe and photo credit: Elle & Pear
    Creamy Pesto Gnocchi with Peas and Carrots
    Mini gnocchi cooked in a creamy pesto sauce with easy peas and carrots is a fantastic weeknight dish that's ready in just 25 minutes!
    Get the recipe: Creamy Pesto Gnocchi
    14
    Recipe and photo credit: Simply Delicious
    Twisty Pesto Bread Sticks
    These twisted bread sticks flavored with basil pesto and Parmesan cheese are incredibly moreish and addictive.
    Get the recipe: Twisty Pesto Bread Sticks
    15
    Recipe and photo credit: Simply Delicious
    Vegetarian Lasagna with Basil Pesto and Ricotta
    Vegetarian lasagna layered with creamy ricotta, aromatic tomato and vegetable sauce and mozzarella cheese is the perfect meat free dinner recipe.
    Get the recipe: Vegetarian Lasagna
    16
    Recipe and photo credit: Sprig and Spoon
    Pesto Salad Dressing
    This pesto salad dressing is a great vinaigrette for salads, sandwiches, and marinades! Bright and flavorful, this is the perfect dressing.
    Get the recipe: Pesto Salad Dressing
    17
    Recipe and photo credit: Erica's Recipes
    Oven Roasted Broccoli in Dijon Pesto Vinaigrette
    The tastiest roasted broccoli recipe is here. This oven roasted broccoli in dijon pesto vinaigrette is SO flavorful and easy to prepare it is literally guaranteed that anyone you serve this recipe to will love it.
    Get the recipe: Oven Roasted Broccoli in Dijon Pesto Vinaigrette
    18
    Recipe and photo credit: Haute and Healthy Living
    Pesto Egg Breakfast Sandwich
    This healthy pesto breakfast sandwich is the perfect option for busy mornings. Make in advance for a quick and easy breakfast!
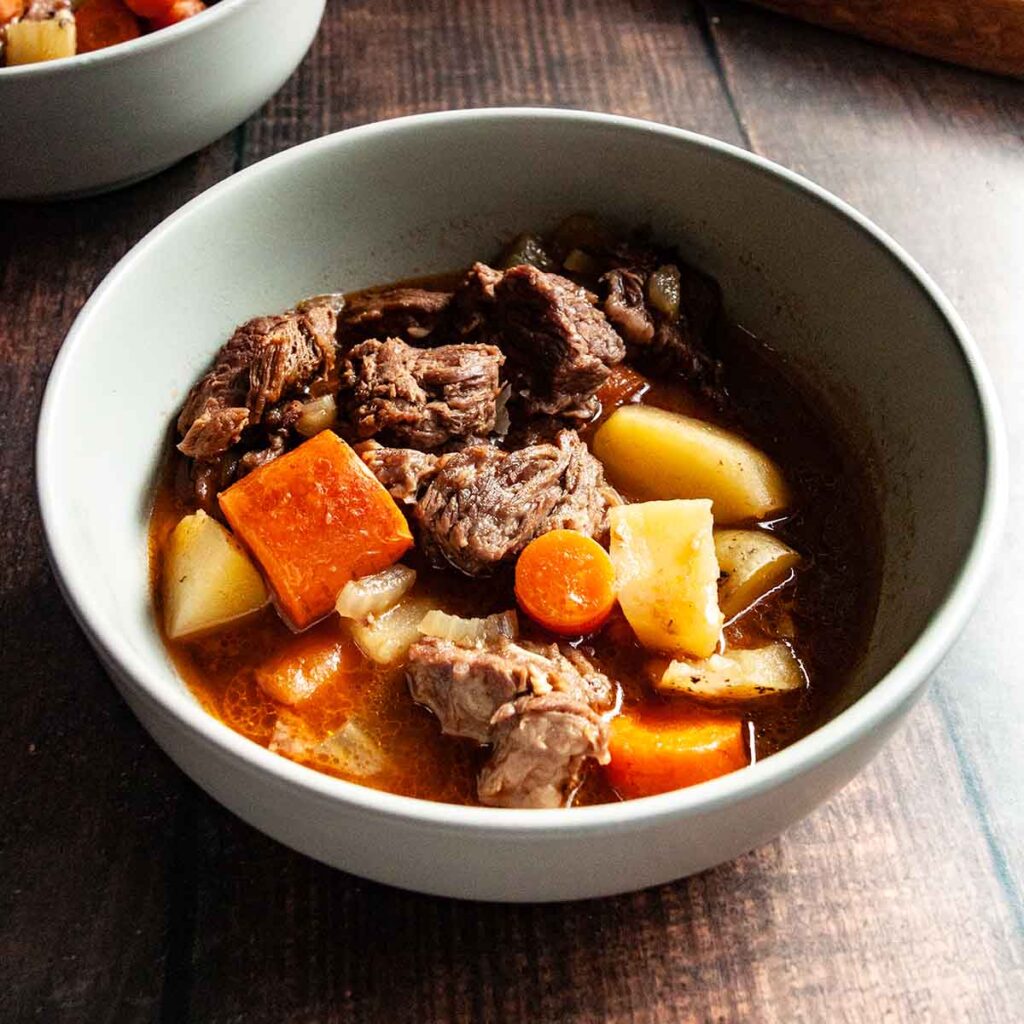
    Get the recipe: Pesto Egg Breakfast Sandwich
    19
    Recipe and photo credit: Kitchen at Hoskins
    Creamy Chicken Pesto Pasta
    This pasta in a creamy pesto sauce with juicy chicken is indulgent but not ridiculously rich. An easy 30 minute dinner!
    Get the recipe: Creamy Chicken Pesto Pasta
    20
    Recipe and photo credit: Maplevine Kitchen
    Pesto Mashed Potatoes au Gratin
    Creamy potatoes with vibrant pesto and a crispy topping – the perfect potato side dish for any occasion.
    Get the recipe: Pesto Mashed Potatoes au Gratin
    21
    Pesto Caprese Garlic Bread
    Recipe and photo credit: Carolyn's Cooking
    Pesto Caprese Garlic Bread
    A mashup of two of the best things - garlic bread and Caprese salad! This easy recipe is made with fresh bread, juicy heirloom tomatoes, pesto butter, and fresh mozzarella cheese.
    Get the recipe: Pesto Caprese Garlic Bread
    22
    Recipe and photo credit: The Peasant's Daughter
    Pesto Sliders
    Use your leftover turkey (or chicken) meat to create these moist and tasty pesto sliders the next day. The pesto keeps the mini sandwiches juicy and flavorful.
    Get the recipe: Pesto Sliders

    September 2, 2024 Camping

    Italian Sausage Meatballs

    These aren't your ordinary Italian sausage meatballs. Made with flavorful sausage and a cheesy mozzarella filling, they're an incredibly satisfying 5-ingredient meal that's easy to make and ready in less than 30 minutes.

    A skillet filled with sausage meatballs in a marinara sauce with shredded cheese on the side.

    I love make-ahead camping meals, whether make-ahead ribs or camping burritos, because that means less work for me at camp and more relaxing. But what I love even more is make-ahead food that can be used for multiple meals like these tender sausage meatballs. They can be prepped at home (and even frozen) then reheated in your skillet at camp and used for meatball subs, spaghetti and meatballs, or any other way you desire.

    Why You'll Love This Recipe

    • You can make them in advance before heading out to camp.
    • They can be served in a variety of ways, so you can make a large batch and use it for multiple meals.

    Ingredients and Substitutions

    Ingredients for Italian sausage meatballs--sausage, bread crumbs, mozzarella, egg, and marinara.
    • Italian sausage--You can use your favorite Italian sausage here, whether mild or spicy. If you purchase sausage links, you'll need to remove the casings. Got extra sausage? Try one of these amazing Italian sausage recipes.
    • Mozzarella cheese--Use firm "pizza" mozzarella, not the fresh stuff. Full-fat cheese melts more easily than low-fat, so I recommend using full-fat, if possible.
    • Bread crumbs--Use dried bread crumbs or panko bread crumbs for the Italian sausage meatballs recipe. Fresh will work, but you will need more than the recipe calls for.
    • Marinara--I love Rao's marinara, but any good quality store-bought or homemade sauce will work well.

    How to Make Meatballs with Italian Sausage

    A bowl with raw ground sausage, bread crumbs, egg, and salt and pepper.
    A person forming meatballs with a cube of cheese in the center.
    1. Combine the sausage, bread crumbs, egg, salt, and pepper in a large bowl.
    2. Shape the sausage mixture into 16 balls, pressing a cube of mozzarella into the center of each one.
    Meatballs browning in a skillet.
    Meatballs cooking in marinara sauce in a skillet.
    1. Cook the meatballs in a skillet over medium heat until browned on all sides.
    2. Pour in the marinara sauce and simmer until the sausage is cooked through.

    FAQs

    Can I freeze them?

    Yes! The cooked meatballs and sauce can be frozen for up to 3 months. After cooking them, let them cool completely, then transfer them to a freezer safe container, leaving some room for expansion. Thaw in the fridge or your cooler overnight before reheating.

    How should I serve them?

    My favorite ways to enjoy these meatballs is piled atop spaghetti or tucked into a sub roll with shredded cheese on top.

    Tips and Troubleshooting

    • If you're using very lean sausage, add some oil to your skillet before browning the meatballs to prevent them from sticking.
    • If your sauce becomes too thick while simmering, add a splash of water to loosen it.
    • Cooked meatballs and sauce can be stored in the fridge or cooler in a sealed container for up to 3 days. Reheat in a skillet over low heat until warmed through.
    A sub roll filled with sausage meatballs, shredded mozzarella, and fresh basil leaves.

    More Italian Sausage Recipes You'll Love

    Pieces of Italian sausage quesadilla stacked on top of each other.
    Italian Sausage Quesadilla
    An Italian sausage slider topped with marinara on a plate with potato chips on the side.
    Italian Sausage Sliders

    Tried This Recipe?

    If you've tried this recipe, please leave a comment below. Follow me on Instagram, Facebook, or Pinterest for more great camping and grilling recipes.

    Recipe

    A skillet filled with sausage meatballs in a marinara sauce with shredded cheese on the side.

    Italian Sausage Meatballs

    A woman's face.Angie Zoobkoff
    This Italian sausage meatball recipe is made with flavorful ground sausage and a cheesy mozzarella filling.
    No ratings yet
    Print Recipe Pin Recipe
    Prep Time 10 minutes mins
    Cook Time 18 minutes mins
    Total Time 28 minutes mins
    Course Main Course
    Cuisine Italian
    Servings 4 servings
    Calories 466 kcal

    Ingredients
      

    • 1 pound Italian sausage casings removed
    • ¼ cup dried bread crumbs
    • 1 large egg
    • ¼ teaspoon salt
    • ¼ teaspoon freshly ground black pepper
    • 16 (½-inch) cubes mozzarella
    • 2 cups marinara sauce

    Instructions
     

    • Combine the sausage, bread crumbs, egg, salt, and pepper in a large bowl and mix well.
    • Shape the sausage mixture into 16 balls, pressing a cube of cheese into the center of each ball. Close the meat completely around the cheese. Each ball should be slightly smaller than a golf ball.
    • Place the meatballs in a cast iron or nonstick skillet and cook over medium heat until the meatballs are browned all over, 8 to 10 minutes.
    • Reduce the heat to low and pour in the marinara sauce (carefully as it may splatter). Simmer until the sausage is cooked through to an internal temperature of 165°F, about 10 minutes.

    Notes

    • Avoid sticking--If you're using very lean sausage, add some oil to your skillet before browning the meatballs to prevent them from sticking.
    • Thin the sauce--If your sauce becomes too thick while simmering, add a splash of water to loosen it.
    • Storage and reheating--Cooked meatballs and sauce can be stored in the fridge or cooler in a sealed container for up to 3 days. Reheat in a skillet over low heat until warmed through.

    Nutrition

    Serving: 4 meatballsCalories: 466kcalCarbohydrates: 26gProtein: 23gFat: 29gCholesterol: 103mgSodium: 1794mgFiber: 4gSugar: 14g
    Keyword make-ahead meals, meatballs, skillet meals
    Tried this recipe?Let us know how it was!

    August 30, 2024 Chicken & Turkey

    Grilled Mozzarella-Stuffed Chicken Breast

    These grilled mozzarella-stuffed chicken breasts are an easy chicken recipe that's ready in just 30 minutes. Stuffed with gooey melted cheese and pesto, they're a great way to turn boneless chicken breasts into a winning meal.

    Sliced grilled chicken on a plate with pesto drizzle around it.

    Sure, you can toss chicken breasts onto the grill, slather on some spicy peach bbq sauce, and turn out a good meal. But if you want a truly impressive grilled dinner with only a fraction more effort, make these grilled chicken breasts with mozzarella and pesto. They're juicy and tender and bursting with flavor from the melted cheese and rich pesto. Try it the next time you fire up the grill and prepare to be wowed.

    Why You'll Love This Recipe

    • It requires only three ingredients.
    • It's an easy chicken recipe that's ready in just 30 minutes, making it ideal for any day of the week.

    Ingredients and Substitutions

    Ingredients for grilled mozzarella stuffed chicken breasts--chicken, mozzarella, and pesto.
    • Chicken breasts--Boneless skinless chicken breasts work best here since they have ample space for stuffing. I don't recommend using thighs as it's difficult to seal the filling inside.
    • Mozzarella cheese--Use firm "pizza" mozzarella, not the fresh stuff. Full-fat cheese melts more easily than low-fat, so I recommend using full-fat, if possible.
    • Pesto--Use your favorite store-bought or homemade pesto. If nut allergies are a concern, I recommend making this nut-free pesto. If you've got leftovers, try one of these easy recipes that make great use of pesto.

    How to Make Grilled Stuffed Chicken Breasts

    A person cutting into a boneless chicken breast.
    A person stuffing cubes of mozzarella into a boneless chicken breast.
    1. Cut a 2-inch-deep slit in the thickest part of each chicken breast.
    2. Stuff 3 mozzarella cubes into each slit.
    Four boneless chicken breasts stuffed with pesto on a baking sheet.
    Chicken breasts cooking on a grill.
    1. Add 2 teaspoons of pesto to each slit and seal each chicken breast with a toothpick. Season with salt and pepper.
    2. Grill over medium heat until cooked through. Slice and serve.

    FAQs

    How do I stop the filling from leaking out of the chicken?

    There are a couple of things you can do to help the cheese and pesto stay put while the chicken grills. First, cut the slit in the chicken deep enough so that the cubes of cheese aren't sitting on an exposed edge.

    Once you get the cheese and pesto into the chicken, fold over the edge and close it with a toothpick. I like to weave it so that it closes in a couple of spots. Lastly, don't panic if a little bit leaks out. It's normal and there will still be plenty of cheesy goodness to enjoy.

    What should I serve with this grilled pesto chicken?

    Crispy smashed potatoes and a grilled avocado and tomato salad or a salad of grilled beets and goat cheese are excellent accompaniments to round out your meal.

    Tips and Troubleshooting

    • When checking the internal temperature of the chicken, poke it in a few places to make sure you're measuring the meat and not the cheese or pesto.
    • This mozzarella stuffed chicken breast recipe is suitable for gluten-free diets.

    More Grilled Chicken Recipes You'll Love

    A whole grilled honey lime chicken on the grill.
    Grilled Honey Lime Chicken
    A platter of crispy grilled chicken wings with salad and bbq sauce in the background.
    Crispy Grilled Chicken Wings

    Tried This Recipe?

    If you've tried this recipe, please leave a comment below. Follow me on Instagram, Facebook, or Pinterest for more great camping and grilling recipes.

    Recipe

    Sliced grilled chicken on a plate with pesto drizzle around it.

    Grilled Mozzarella Stuffed Chicken Breast

    A woman's face.Angie Zoobkoff
    Your grilled chicken dinner just got a major facelift, thanks to the addition of gooey melted cheese and pesto.
    No ratings yet
    Print Recipe Pin Recipe
    Prep Time 10 minutes mins
    Cook Time 20 minutes mins
    Total Time 30 minutes mins
    Course Main Course
    Cuisine American
    Servings 4 servings
    Calories 348 kcal

    Ingredients
      

    • 4 boneless skinless chicken breasts
    • 1 ½ ounces mozzarella cheese cut into 12 (1-inch) cubes
    • 3 tablespoons pesto
    • Salt and freshly ground black pepper

    Instructions
     

    • Preheat a grill for medium heat (375°F).
    • Slice a 2-inch deep slit into the side of each chicken breast, taking care not to cut all the way through.
    • Place 3 mozzarella cubes inside each slit.
    • Add 2 teaspoons pesto to each slit and close each breast using a toothpick.
    • Season all over with salt and pepper.
    • Grill the chicken, flipping once, until cooked through to an internal temperature of 165°F, 10 to 12 minutes per side. Let the chicken rest for a few minutes before slicing and serving.

    Notes

    • Checking for doneness--When checking the internal temperature of the chicken, poke it in a few places to make sure you're measuring the meat and not the cheese or pesto.
    • Dietary--This recipe is suitable for gluten-free diets.

    Nutrition

    Serving: 1breastCalories: 348kcalCarbohydrates: 4gProtein: 53gFat: 13gCholesterol: 153mgFiber: 1g
    Keyword grilled chicken, stuffed chicken, weeknight grilling
    Tried this recipe?Let us know how it was!

    August 28, 2024 Breakfast

    12 Easy Breakfasts Ready in 20 Minutes or Less

    Making a quick and easy breakfast doesn't mean that you have to sacrifice any flavor. These 12 easy breakfasts are hearty and nourishing, but are ready in 20 minutes or less. Start your day off with a satisfying meal and still get everyone out the door on time.

    1
    Recipe and photo credit: On My Kid's Plate
    Silver Dollar Pancakes (Mini Pancakes!)
    Silver dollar pancakes are the perfect classic breakfast. Golden brown mini pancakes are made fast, easy and in just 20 minutes!
    Get the recipe: Silver Dollar Pancakes
    2
    A glass jar filled with orange mango smoothie.
    Orange Mango Smoothie
    This easy three ingredient smoothie comes together in 5 minutes and tastes just like a creamsicle.
    Get the recipe: Orange Mango Smoothie
    3
    Two hash brown patties topped with sliced avocado, everything bagel spice, and hot sauce.
    Hash Brown Avocado Toast
    This fun variation on regular avocado toast uses crispy hash brown patties and tops them with creamy avocado, everything bagel seasoning, and hot sauce, if you like. It's an easy handheld breakfast, perfect for any day of the week.
    Get the recipe: Hash Brown Avocado Toast
    4
    Recipe and photo credit: Just Gimme Fries
    Omelet with Salmon & Cream Cheese
    Scrumptious and quick brunch recipe with only 5 ingredients! Enjoy this savory omelet with smoked salmon & chive cream cheese.
    Get the recipe: Omelet with Salmon & Cream Cheese
    5
    Recipe and photo credit: Spend with Pennies
    Eggs in a Basket
    Eggs in a basket is the perfect option when you are craving classic eggs and toast! Fried egg in a hole of buttery crispy toast, yum!
    Get the recipe: Eggs in a Basket
    6
    A coconut yogurt parfait topped with macerated cherries in a jar with fresh cherries scattered around the jar.
    Coconut Yogurt Parfait
    These easy make-ahead coconut yogurt parfaits include layers of creamy coconut-flavored yogurt, crunchy granola, and juicy macerated cherries.
    Get the recipe: Coconut Yogurt Parfait
    7
    A plate of eggs, toast and breakfast sausage.
    Recipe and photo credit: Boulder Locavore
    Homemade Breakfast Sausage
    Perfectly seasoned homemade breakfast sausage is a delicious start to the day. Cook up as sausage patties or use the ground sausage mixture in other recipes.
    Get the recipe: Homemade Breakfast Sausage
    8
    Recipe and photo credit: Liv's Little Muffins
    Pumpkin Pie Overnight Oats
    Pumpkin pie overnight oats are the ultimate Fall breakfast, sure to satisfy any dessert cravings while still being nutritious and filling.
    Get the recipe: Pumpkin Pie Overnight Oats
    9
    A jar half filled with oats and dried fruits.
    Make-Ahead Oatmeal
    Keeping a stash of these apple cinnamon camping oatmeal jars on hand means you've always got a quick and easy breakfast ready to go in minutes.
    Get the recipe: Make-Ahead Oatmeal
    10
    A serving of scrambled eggs, topped with cheese and two toast halves on a plate.
    Blackstone Scrambled Eggs
    These creamy scrambled eggs cook up on your outdoor griddle to a perfectly light and fluffy texture. Topped with Cheddar cheese, they're an elevated everyday breakfast staple.
    Get the recipe: Blackstone Scrambled Eggs
    11
    Recipe and photo credit: I Heart Eating
    Cornflake French Toast
    Cornflake French toast recipe makes French toast that’s crunchy outside and soft on the inside. This recipe can be made in just 15 minutes!
    Get the recipe: Cornflake French Toast
    12
    Recipe and photo credit: Living Chirpy
    Breakfast Flatbread
    This breakfast flatbread recipe isn’t your run of the mill breakfast pizza that you usually see. This is nuanced, with bold flavors and healthy ingredients.
    Get the recipe: Breakfast Flatbread

    August 26, 2024 Camping

    Make-Ahead Camping Ribs

    These easy make-ahead camping ribs are cooked at home in your oven, then finished on the grill or over the campfire once you're at camp. Slathered with your favorite bbq sauce, these fall-off-the-bone ribs are a satisfying camping dinner to enjoy after a busy day exploring.

    Three pieces of grilled baby back ribs on a blue plate with a jar of bbq sauce.

    For as long as I can remember, these camping ribs have been our go-to first meal for most camping trips. They're so simple to prepare in advance and warm up quickly on the grill or campfire once you're at camp. When you've got a million other things to do to get your camp set up, and everyone is hungry, they're a lifesaver!

    Why This Recipe is Great for Camping

    • You can make them in advance and finish them at camp on your grill or over that campfire.
    • They require only four ingredients and minimal hands-on time.
    • You can easily scale the recipe depending on how many people you're feeding.

    Ingredients and Substitutions

    Ingredients for make-ahead camping ribs--back ribs, salt and pepper, and bbq sauce.
    • Baby back ribs--This will give you the most tender, fall-off-the-bone ribs. Be sure to remove the membrane from the ribs before cooking or ask your butcher to do it.
    • Barbecue sauce--Use your favorite barbecue sauce here. These are fantastic with peach bourbon BBQ sauce, but good-quality store-bought sauce will be great here, too.

    Important Steps

    A person sprinkling salt and pepper over a rack of ribs.
    A baking sheet covered with foil.
    1. Preheat the oven to 275°F. Arrange the ribs meaty side up in a roasting pan and sprinkle with salt and pepper.
    2. Cover with foil and cook until the meat is very tender, about 4 hours.
    A covered baking sheet inside an oven.
    A person brushing bbq sauce onto ribs on the grill.
    1. Let the ribs cool completely, then cut into sections, 3 to 4 ribs each. Stash in a large resealable plastic bag in your cooler or fridge until you're ready to serve.
    2. Grill the ribs over medium heat, turning occasionally and brushing with BBQ sauce, until heated through.

    FAQs

    How do I remove the membrane from my ribs?

    The membrane is a thin layer that covers the back of the ribs. To remove it, use the tip of a sharp knife to lift the corner of the membrane. Using a paper towel for grip, grab the edge of the membrane and pull it away from the ribs. It should come off in one piece, but if it breaks, just start from another corner to remove the rest.

    How far in advance can I make these?

    You can bake the ribs up to 3 days before grilling and serving.

    What should I serve with these grilled ribs?

    We usually enjoy these grilled ribs with campfire corn or campfire garlic bread and a make-ahead salad, like this overnight marinated vegetable salad. With some campfire chocolate fondue for dessert, of course!

    Tips and Troubleshooting

    • Want to boost the flavor? Feel free to replace the salt and pepper with a store-bought or homemade pork bbq rub.
    • Avoid overlapping the ribs while they are baking so that they cook evenly.
    • Save any leftover ribs and mix the meat into your loaded hash browns for a hearty breakfast.
    • This recipe is suitable for gluten-free and dairy-free diets.
    Three pieces of grilled baby back ribs on a blue plate with a jar of bbq sauce.

    More Make-Ahead Camping Recipes You'll Love

    Two halves of a burrito on a plate with hot sauce drizzled over them.
    Make-Ahead Camping Burritos
    A bowl of make ahead roasted potatoes with fresh herbs and some parsley on the side.
    Make-Ahead Roasted Potatoes

    Tried This Recipe?

    If you've tried this recipe, please leave a comment below. Follow me on Instagram, Facebook, or Pinterest for more great camping and grilling recipes.

    Recipe

    Three pieces of grilled baby back ribs on a blue plate with a jar of bbq sauce.

    Make-Ahead Camping Ribs

    A woman's face.Angie Zoobkoff
    Get a head start on your camping meals with these falling-off-the-bone back ribs that can be cooked at home and finished at camp.
    No ratings yet
    Print Recipe Pin Recipe
    Prep Time 15 minutes mins
    Cook Time 4 hours hrs 10 minutes mins
    Total Time 6 hours hrs
    Course Main Course
    Cuisine American
    Servings 6 servings
    Calories 671 kcal

    Ingredients
      

    • 2 racks baby back ribs (about 3 pounds total)
    • Salt and freshly ground black pepper
    • ½ cup store-bought or homemade bbq sauce

    Instructions
     

    • Preheat the oven to 275°F.
    • Arrange the ribs, meaty-side up in a baking dish or roasting pan and sprinkle all over with salt and pepper.
    • Cook until the ribs are very tender, about 4 hours.
    • Let the ribs cool completely, then slice into 3 to 4 rib pieces. Store the ribs in a resealable plastic bag or large covered container in the fridge or cooler until you're ready to finish them.
    • Preheat the grill for medium-low heat, or prepare a campfire with hot coals.
    • Slather the ribs with bbq sauce and arrange the pieces on the grill or campfire grate. Cook, turning occasionally, and basting with more sauce, if desired, until the ribs are heated through, about 10 minutes.
    • Serve immediately with plenty of napkins.

    Notes

    • Give them space--Avoid overlapping the ribs while they are baking so that they cook evenly.
    • Using leftovers--Save any leftover ribs and mix the meat into your loaded hash browns for a hearty breakfast.
    • Dietary--This recipe is suitable for gluten-free and dairy-free diets.

    Nutrition

    Serving: 0.3 rackCalories: 671kcalCarbohydrates: 8gProtein: 36gFat: 54gCholesterol: 180mgSugar: 5g
    Keyword bbq ribs, make-ahead meals, oven ribs
    Tried this recipe?Let us know how it was!

    August 23, 2024 Beef Recipes

    Blackstone Patty Melt

    This Blackstone patty melt recipe is an easy Blackstone beef recipe to make on your outdoor griddle that's ready in just 20 minutes. For this classic toasted sandwich, a juicy seared beef patty is smothered in melted cheese and tucked between two slices of toasted rye bread. You can keep it simple or add caramelized onions to make it authentic.

    A halved patty melt in a basket lined with a checkered paper.

    From campfire chili to Blackstone chopped cheese to make-ahead camping burritos, there are an incredible number of easy recipes to make with ground beef when you're camping. And none more simple than these patty melts on the Blackstone griddle (or any griddle). The juicy ground beef patties are topped with Pepper Jack cheese and snuggled between two slices of rye bread for this version of the classic sandwich.

    Why You'll Love This Recipe

    • You can make them on your outdoor griddle or in your cast iron skillet.
    • These spicy patty melts require only 4 ingredients and are ready in just 15 minutes.

    Ingredients and Substitutions

    Ingredients for Blackstone patty melts--ground beef, pepper Jack cheese, rye bread, and mayo.
    • Ground beef--Choose regular (80/20) or lean (85/15) ground beef so that your sandwich is nice and juicy. Extra lean doesn't have enough fat and may result in dry beef patties.
    • Rye bread--This is the type of bread traditionally used to make patty melts. In a pinch, you can use another type of bread.
    • Pepper Jack cheese--Traditionally, patty melt sandwiches are made with Swiss or Cheddar, but I like the spicy zip that the pepper Jack adds. Feel free to use a mild cheese, if you prefer.
    • Caramelized onions (optional)--These are generally included in a traditional version of the sandwich, but I made this patty melt without onions to keep the recipe simple for camping. See the FAQ below for how to add caramelized onions to your sandwiches, if you like.

    Important Steps

    Two beef balls on a Blackstone griddle.
    Two ground beef patties on a Blackstone.
    1. Season the ground beef with salt and pepper. Shape into balls and place on a heated griddle.
    2. Firmly press the meat into ½-inch-thick patties and cook, flipping once, until they've developed a crust and are just cooked through.
    Cheese slices added to the top of two patty melts.
    Two patty melts toasting on a Blackstone griddle.
    1. Spread the outside of each slice of bread with mayo. Place half the bread slices mayo side down on the griddle, then top with the patty and the cheese. Top with the second slice of bread.
    2. Toast each Blackstone griddle patty melt until golden brown and the cheese is melted.

    FAQs

    How do I make my Blackstone patty melt with onions?

    Most traditional patty melts do have caramelized onions on them, but I made them optional here to keep it simple. If you want to add onions, thinly slice one large onion and cook it alongside your beef patties on your griddle. It will reduce down in about the same time that it takes to cook the beef. When you assemble the sandwiches, pile the onions on top of the cheese and place the bread on top.

    If you're cooking it in a skillet, cook the onions first, scoop them out, then cook the beef.

    What should I serve with this?

    Keep your meal simple and offer the cast iron patty melt with raw veggies or a simple overnight marinated vegetable salad on the side.

    Tips and Troubleshooting

    • Resist the urge to flip your patty frequently. Let it cook until it develops a nice browned crust, then flip just once.
    • Like it extra cheesy? Add an extra slice to each sandwich.
    A patty melt on a Blackstone griddle.

    More Blackstone Recipes You'll Love

    A bowl of pierogies and a bowl of kielbasa with onions with a salad and a dish of sour cream on the side.
    Blackstone Pierogies and Kielbasa
    A serving of scrambled eggs, topped with cheese and two toast halves on a plate.
    Blackstone Scrambled Eggs

    Tried This Recipe?

    If you've tried this recipe, please leave a comment below. Follow me on Instagram, Facebook, or Pinterest for more great camping and grilling recipes.

    Recipe

    A halved patty melt in a basket lined with a checkered paper.

    Blackstone Patty Melt

    A woman's face.Angie Zoobkoff
    This quick camping meal made with seared ground beef patties, melted cheese, and toasted rye bread is easy to make and even easier to devour.
    No ratings yet
    Print Recipe Pin Recipe
    Prep Time 5 minutes mins
    Cook Time 15 minutes mins
    Total Time 20 minutes mins
    Course Main Course
    Cuisine American
    Servings 4 sandwiches
    Calories 522 kcal

    Equipment

    • Blackstone griddle (or other griddle)

    Ingredients
      

    • 1 pound ground beef preferable 80/20
    • Salt and freshly ground black pepper
    • 8 slices rye bread
    • 3 tablespoons mayonnaise
    • 4 slices pepper Jack cheese

    Instructions
     

    • Season the beef with salt and pepper. Shape it into 4 even balls.
    • Heat the griddle to medium-high. Place each beef ball onto the griddle, leaving plenty of space between each one. Use a smasher or strong spatula to press each one into a ½-inch-thick patty.
    • Cook, flipping once, until the patties are seared on each side and just cooked through, about 5 minutes per side.
    • Spread one side of each slice of bread with 1 teaspoon of mayonnaise.
    • Reduce the griddle heat to medium-low. Place four slices of the bread mayo-side down on the griddle. Top with the beef patties and a slice of cheese. Place the second slice of bread mayo-side up on top.
    • Toast the sandwiches until golden brown and the cheese is melted, 1 to 2 minutes per side.
    • Serve immediately.

    Notes

    • Let it cook--Resist the urge to flip your patty frequently. Let it cook until it develops a nice browned crust, then flip just once.
    • Add onions--To make it a true classic, cook onions alongside your beef patties and add them to the sandwich, on top of the cheese.
    • Make it extra cheesy--Add an extra slice to each sandwich.

    Nutrition

    Serving: 1sandwichCalories: 522kcalCarbohydrates: 34gProtein: 33gFat: 28gCholesterol: 104mgSodium: 740mgFiber: 4gSugar: 3g
    Keyword blackstone cooking, blackstone griddle, cast iron cooking, ground beef recipes, patty melt, sandwiches
    Tried this recipe?Let us know how it was!

    August 21, 2024 Collections

    12 Indulgent Bacon Recipes

    What better way to celebrate International Bacon Day on August 31 (or any day) than with 12 indulgent bacon recipes? From bacon studded scones, to easy crostini, cheesy bacon pasta, and more, there's so many ways to enjoy the crispy, salty cured meat.

    1
    Recipe and photo credit: Chew Out Loud
    Cheesy Bacon Pull-Aparts
    These cheesy bacon pull-aparts are ridiculously easy and scrumptious! They’re a quick and satisfying breakfast, lunch, or dinner the whole family adores.
    Get the recipe: Cheesy Bacon Pull-Aparts
    2
    A chicken and bacon sandwich on a brioche bun with lettuce and tomato.
    Chicken and Bacon Sandwich
    This chicken bacon sandwich is anything but boring. Topped with crispy bacon, garlic and mustard aioli, lettuce, and tomato, it's a handheld meal that you'll return to again and again.
    Get the recipe: Chicken and Bacon Sandwich
    3
    Recipe and photo credit: The Savory Cippola
    Bourbon Bacon Jam Crostini
    Toasted crostini topped with creamy brie cheese and a sweet and savory bourbon, and brown sugar bacon jam creates the perfect appetizer.
    Get the recipe: Bourbon Bacon Jam Crostini
    4
    Recipe and photo credit: The Forked Spoon
    Pasta with Bacon and Peas
    This creamy pasta with bacon and peas is an easy one-pan dinner recipe made with simple pantry ingredients. Flavorful, delicious, and perfect for busy weeknights!
    Get the recipe: Pasta with Bacon and Peas
    5
    Several slices of maple sriracha bacon on a plate with maple syrup and sriracha in the background.
    Maple Sriracha Griddle Bacon (on a Blackstone)
    This sweet and spicy bacon is easy to make in only 20 minutes and with just 3 ingredients. Try it today and take your breakfast to the next level.
    Get the recipe: Maple Sriracha Griddle Bacon
    6
    Recipe and photo credit: Bacon Wrapped Shrimp
    Bacon Wrapped Shrimp
    This amazing bacon wrapped shrimp recipe is baked with a sweet and spicy Asian based glaze that will leave you licking your lips and longing for more.
    Get the recipe: Bacon Wrapped Shrimp
    7
    Recipe and photo credit: Chenée Today
    Grilled Cheese with Bacon, Havarti, and Caramelized Onions
    How to make the BEST grown-up grilled cheese sandwich, dressed up fancy with whole grain dijon mustard, crispy bacon, sweet caramelized onions, and Havarti and Emmental cheeses!
    Get the recipe: Grilled Cheese with Bacon, Havarti, and Caramelized Onions
    8
    Recipe and photo credit: xoxo Bella
    Cheddar Bacon Scones
    If you enjoy savoury scones, you simply have to make these. In fact, these bacon cheddar scones could very well become your favourite breakfast indulgence.
    Get the recipe: Cheddar Bacon Scones
    9
    A partially sliced grilled bacon-wrapped pork tenderloin on a wooden cutting board with a dish of green beans on the side.
    Grilled Bacon-Wrapped Pork Tenderloin
    This bacon-wrapped pork tenderloin is slathered with a bourbon hot honey glaze, then grilled until tender. The crispy bacon and juicy meat will have you firing up the grill on repeat.
    Get the recipe: Grilled Bacon-Wrapped Pork Tenderloin
    10
    Recipe and photo credit: The Savory Cipolla
    Brown Sugar Bourbon Candied Bacon Skewers
    These brown sugar bourbon candied bacon skewers are slathered with a brown sugar bourbon glaze and caramelized for a sweet and savory treat.
    Get the recipe: Brown Sugar Bourbon Candied Bacon Skewers
    11
    Recipe and photo credit: Erica's Recipes
    Garlic, Bacon, and Beer Macaroni and Cheese
    Garlic, bacon, and beer macaroni and cheese has pub cheese, bacon, and garlic for a ridiculously good bacon and mac and cheese of your dreams.
    Get the recipe: Garlic, Bacon, and Beer Macaroni and Cheese
    12
    Recipe and photo credit: Ugly Duckling Bakery
    Bacon, Kale, and Leek Frittata
    Eggs are magic when you are nearly too exhausted to cook. This bacon kale frittata recipe is easily adaptable to whatever is in your fridge.
    Get the recipe: Bacon, Kale, and Leek Frittata

    August 19, 2024 Blackstone Griddle Recipes

    Loaded Hash Browns

    These loaded hash browns take an everyday breakfast staple to the next level. Simple fried potatoes get topped with all your favorite fixings, including bacon, cheese, and sour cream, to create a breakfast worth craving.

    A plate of loaded hash browns with sour cream and cheese and scallions on top.

    A plain baked potato isn't all that interesting until it gets topped with all the fixings. Then it becomes something worth getting excited about. I feel the same way about hash browns. A plate of shredded fried potatoes is fine, but it pales in comparison to a hearty breakfast hash topped with shredded cheese, chopped bacon, scallions, and sour cream. Go on, give it a try.

    [feast_advanced_jump_to]

    Why You'll Love This Recipe

    • It's a hearty and satisfying cast iron breakfast that comes together in one skillet or griddle.
    • It requires only 5 ingredients and less than 20 minutes of effort.
    • You can scale it to feed as many or as few people as you want.

    Ingredients and Substitutions

    Loaded hash browns ingredients--bacon, hash browns, cheddar, scallions, and sour cream.
    • Shredded hash browns--Frozen, pre-shredded hash browns are perfect for this loaded hash browns recipe, however, if you're camping and don't have access to a freezer, you can make them with shredded fresh potatoes. If you use fresh potatoes, I recommend squeezing them through a sieve or paper towel before cooking to remove some excess water.
    • Bacon--You can use any type of bacon for this recipe, however, I find that thick cut bacon is easier to cook on an outdoor griddle. The thin stuff sometimes sticks. If you've got extra bacon, chop it up and use it to make another indulgent breakfast, like this breakfast poutine.
    • Cheddar--Use full-fat Cheddar cheese for best results, and always grate it yourself. The pre-shredded stuff doesn't melt well.

    Important Steps

    Four strips of bacon cooking on a griddle.
    Shredded hash browns cooking on a griddle.
    1. Cook the bacon over medium heat until crispy. Set aside.
    2. Add the shredded potatoes to the bacon fat and season with salt and pepper. Fry until browned and cooked through.
    Bacon added to shredded hash browns on a griddle.
    Cheddar on top of shredded hash browns on a griddle.
    1. Chop the bacon. Stir it into the cooked hash browns.
    2. Sprinkle with cheese. Cover and cook until melted. Serve, topped with scallions and sour cream.

    FAQs

    What should I serve with these?

    This is a meal unto itself and doesn't really need anything extra, but if you want a full breakfast, feel free to make some griddle scrambled eggs or fried eggs to go alongside.

    I made these on my outdoor griddle. How should I serve them?

    Using a large outdoor griddle allows you to easily scale the recipe, however, serving becomes a little more tricky. You can get everyone to line up and take a scoop directly from the griddle, but I find it simplest to use a large spatula to carefully transfer the hash browns from the griddle to a serving platter in batches.

    Tips and Troubleshooting

    • If you've got an excessive amount of bacon fat in your skillet or griddle, remove some before adding the hash browns. You only need 1 to 2 tablespoons of fat.
    • The cheese will melt easiest if it's covered. If using an outdoor griddle, cover it with the lid while the cheese is melting; if using a skillet, place a piece of foil over the skillet for the final few moments of cooking.
    • Like your food spicy? Try adding a drizzle of hot sauce!
    • This recipe is suitable for gluten-free diets.

    More Breakfast Recipes You'll Love

    A cast iron skillet filled with chorizo and sweet potato hash with sliced avocado and cilantro on top.
    Chorizo Sweet Potato Hash
    Two hash brown patties topped with sliced avocado, everything bagel spice, and hot sauce.
    Hash Brown Avocado Toast

    Tried This Recipe?

    If you've tried this recipe, please leave a comment below. Follow me on Instagram, Facebook, YouTube, or Pinterest for more great camping and grilling recipes.

    Recipe

    A plate of loaded hash browns with sour cream and cheese and scallions on top.

    Loaded Hash Browns

    A woman's face.Angie Zoobkoff
    All your favorite potato toppings piled onto your breakfast hash browns. The perfect way to start the day.
    No ratings yet
    Print Recipe Pin Recipe
    Prep Time 5 minutes mins
    Cook Time 20 minutes mins
    Total Time 25 minutes mins
    Course Breakfast
    Cuisine American
    Servings 2 servings
    Calories 621 kcal

    Equipment

    • Griddle or cast iron skillet

    Ingredients
      

    • 4 slices thick-cut bacon
    • 3 cups frozen shredded hash browns
    • Salt and freshly ground black pepper
    • 1 cup shredded Cheddar cheese
    • 2 scallions thinly sliced
    • 2 tablespoons sour cream

    Instructions
     

    • On a griddle or in a skillet over medium heat, cook the bacon until crispy, about 12 minutes. Set aside.
    • Carefully add the hash browns to the bacon fat and cook until tender and beginning to crisp, 5 to 7 minutes. Season lightly with salt and pepper.
    • While the hash browns are cooking chop the bacon into small pieces. Stir it into the cooked hash browns.
    • Sprinkle the cheese over the top and cover the griddle or skillet to let it melt, 1 to 2 minutes.
    • Top with scallions and sour cream and serve immediately.

    Notes

    • Drain some fat--If you've got an excessive amount of bacon fat in your skillet or griddle, remove some before adding the hash browns. You only need 1 to 2 tablespoons of fat.
    • Covering your skillet--The cheese will melt easiest if it's covered. If using an outdoor griddle, cover it with the lid while the cheese is melting; if using a skillet, place a piece of foil over the skillet for the final few moments of cooking.
    • Spice it up--Like your food spicy? Try adding a drizzle of hot sauce!
    • Dietary--This recipe is suitable for gluten-free diets.

    Nutrition

    Serving: 1portionCalories: 621kcalCarbohydrates: 35gProtein: 23gFat: 43gCholesterol: 70mgSodium: 899mgFiber: 3gSugar: 2g
    Keyword blackstone cooking, breakfast hash, cast iron cooking
    Tried this recipe?Let us know how it was!

    August 16, 2024 Blackstone Griddle Recipes

    Blackstone Zucchini Fritters

    These Blackstone zucchini fritters are light and fluffy and an excellent way to make use of an abundance of summer squash. They're easy to make on you outdoor griddle at home, or when you're camping and will get devoured as fast as you can cook them up.

    Six zucchini fritters on a plate with a bowl of sour cream on the side.

    I'll be the first to admit that zucchini isn't exactly my favorite vegetable. The texture always seems too mushy for me. However, I plant it every year because it grows well, but there's only so many chocolate zucchini cakes a girl can eat, so then there's always extra zucchini that doesn't get much love.

    Until these little griddle zucchini fritters came along. I love that they're light, almost fluffy, and super tender, without any mushiness whatsoever. I also love that there's no deep-frying involved and that they can be thrown together at a moments notice and cooked outside on the griddle. If they can make me a zucchini-lover, then they can make you one, too. Try them and see for yourself.

    [feast_advanced_jump_to]

    Why You'll Love This Recipe

    • It's a great way to use up an abundance of summer squash.
    • You can scale the recipe to make as many (or as few) fritters as you like.
    • It's cooked outdoors on your griddle so there's no messy deep frying or clean up involved.

    Ingredients and Substitutions

    Ingredients for Blackstone zucchini fritters--zucchini, flour, chives, lemon, egg, and baking powder.
    • Zucchini--Choose zucchini that is dark green without any blemishes or soft spots. I prefer to use ones that are small or medium-sized as the very large overgrown ones can be watery.
    • Chives--These add a subtle onion flavor to the fritters. If you want a stronger onion flavor, feel free to substitute finely diced white onion, or thinly sliced scallions.
    • Egg--This will help to bind the zucchini mixture together. It's a fairly wet mixture and definitely needs the binder, so don't be tempted to skip the egg.
    • Flour--Regular all-purpose flour works best here. Whole grain flours make the zucchini pancakes too dense.

    Important Steps

    A person grating zucchini into a bowl.
    A person sprinkling salt over shredded zucchini in a sieve.
    1. Grate the zucchini into a large bowl.
    2. Sprinkle with salt and toss to combine. Place the zucchini in a fine mesh sieve set over the bowl or sink and let sit for 15 minutes.
    Shredded zucchini being pressed into a fine mesh sieve to release liquid.
    Zucchini fritter batter being mixed in a medium glass bowl.
    1. Use the back of a spatula or spoon to firmly press the zucchini to get as much water out as possible. Alternatively, you can wrap it in a kitchen towel and squeeze out the liquid.
    2. Discard the liquid and place the drained zucchini back into the large bowl. Add the flour, chives, egg, seasoning, lemon zest, and baking powder, and mix well to combine.
    Six zucchini fritters on a baking sheet.
    Six zucchini fritters on a Blackstone.
    1. Spray a baking sheet with cooking spray or slick with oil. Using wet hands, shape the zucchini mixture into 2 tablespoon-sized patties.
    2. Slick the griddle with oil. Cook the zucchini fritters over medium heat until golden brown and fluffy, about 5 minutes per side.

    FAQs

    Can I make them in advance?

    You can prepare the zucchini patties a few hours before cooking. Cover and store them in the fridge until you're ready to cook. I don't recommend cooking them until just before serving as they don't reheat well.

    Help! My zucchini mixture is too wet to work with.

    It's a very wet mixture, but if you find that it's impossible to work with, add an extra tablespoon of flour to the batter and try again, continuing to add until you can handle the batter with wet hands.

    Can I make these in a skillet?

    Definitely. Follow the same instructions and cook them in a cast iron skillet over medium heat. Depending on the size of your skillet, you may need to work in batches.

    Tips and Troubleshooting

    • Take care to remove as much water as possible from the zucchini to avoid soggy fritters. You'll be surprised at how much liquid it has!
    • Use wet hands for shaping your fritters. It's a very wet, sticky mixture.
    • This Blackstone griddle recipe is suitable for dairy-free and vegetarian diets.
    Six zucchini fritters stacked on a plate.

    More Blackstone Recipes You'll Love

    A large plate filled with smashed potatoes.
    Blackstone Smashed Potatoes
    A bowl of sautéed mushrooms with strips of meat in the background.
    Griddle Sautéed Mushrooms

    Tried This Recipe?

    If you've tried this recipe, please leave a comment below. Follow me on Instagram, Facebook, YouTube, or Pinterest for more great camping and grilling recipes.

    Recipe

    Six zucchini fritters on a plate with a bowl of sour cream on the side.

    Blackstone Zucchini Fritters

    A woman's face.Angie Zoobkoff
    These tender zucchini fritters are an easy way to use up an abundance of summer squash in a way that everyone will enjoy.
    No ratings yet
    Print Recipe Pin Recipe
    Prep Time 30 minutes mins
    Cook Time 10 minutes mins
    Total Time 40 minutes mins
    Course Side Dish
    Cuisine American
    Servings 6 fritters (serves 2-3)
    Calories 46 kcal

    Equipment

    • Blackstone griddle or other outdoor griddle

    Ingredients
      

    • 1 large zucchini (about 12 oz or 340 g)
    • 1 teaspoon kosher salt
    • 1 large egg lightly beaten
    • â…“ cup all-purpose flour
    • 1 tablespoon chopped fresh chives
    • 1 teaspoon all-purpose seasoning
    • ½ teaspoon lemon zest
    • ¼ teaspoon baking powder
    • Oil or cooking spray for cooking
    • Sour cream for serving (optional)

    Instructions
     

    • Grate the zucchini on the large holes of a box grater into a large bowl.
    • Scoop the zucchini into a fine mesh sieve set over the bowl or the sink and sprinkle with the salt. Toss to combine. Let the zucchini sit for 15 minutes.
    • Use the back of a spoon to firmly press the zucchini against the sieve to remove as much water as possible. Alternatively, scoop the zucchini into a kitchen towel and twist both ends to squeeze out the water.
    • Discard the zucchini liquid and return the grated and drained zucchini to the large bowl.
    • Add the egg, flour, chives, all-purpose seasoning, lemon zest, and baking powder and mix gently to combine.
    • Spray a baking sheet with cooking spray or slick with oil. Using wet hands, gently shape the zucchini mixture into 2-tablespoon sized patties and place on the baking sheet. You should get about 6 patties.
    • Heat the Blackstone or other griddle to medium and coat with cooking spray or slick with oil.
    • Use a metal spatula to gently transfer the zucchini fritters from the baking sheet to the griddle. Cook, flipping once, until golden brown and fluffy, about 5 minutes per side.
    • Serve immediately, with sour cream for dipping, if desired.

    Notes

    • Squeeze the squash!--Take care to remove as much water as possible from the zucchini to avoid soggy fritters. You'll be surprised at how much liquid it has!
    • Dietary--This recipe is suitable for dairy-free and vegetarian diets.

    Nutrition

    Serving: 1fritterCalories: 46kcalCarbohydrates: 7gProtein: 2gFat: 1gCholesterol: 31mgFiber: 1gSugar: -2g
    Keyword blackstone cooking, blackstone griddle, easy side dish recipes, zucchini recipes
    Tried this recipe?Let us know how it was!

    August 14, 2024 Collections

    9 Incredible Grilled Dessert Recipes

    When it's too hot to turn on your oven, but you're craving something to satisfy your sweet tooth, fire up the grill and make one of these 9 incredible grilled dessert recipes. From crisp to cobbler to sweet caramelized fruit, these grilled desserts are proof that the grill is for so much more than meat.

    1
    Two plates topped with grilled nectarines, candied pecans, and whipped cream.
    Grilled Nectarines with Praline Crunch
    Topped with crunchy candied pecans and fluffy cinnamon whipped cream, sweet grilled nectarines become a spectacular summer dessert.
    Get the recipe: Grilled Nectarines with Praline Crunch
    2
    A whole skillet peach cobbler with two spoons resting on top.
    Grilled Skillet Peach Cobbler
    Enjoy this easy cast iron skillet peach cobbler, topped with tender biscuit dough without heating up your kitchen.
    Get the recipe: Grilled Skillet Peach Cobbler
    3
    Recipe and photo credit: Stef's Eats and Sweets
    Smoked Chocolate S’mores Cheesecake
    This smoked chocolate s’mores cheesecake is made right outside on your smoker or grill! The perfect summer dessert and cooks to perfection!
    Get the recipe: Smoked Chocolate S'mores Cheesecake
    4
    A whole cast iron skillet blueberry cake, dusted with powdered sugar, with a sieve full of powdered sugar on the side.
    Cast Iron Skillet Blueberry Cake
    This sweet and slightly tangy lemon blueberry skillet cake is easy to make and can be baked in your oven or on the grill. It's perfect for dessert or as a breakfast coffee cake.
    Get the recipe: Cast Iron Skillet Blueberry Cake
    5
    Recipe and photo credit: Get Inspired Everyday!
    Cinnamon Glazed Grilled Pineapple
    This cinnamon glazed grilled pineapple was inspired by a Brazilian BBQ restaurant & it’s definitely addicting!
    Get the recipe: Cinnamon Glazed Grilled Pineapple
    6
    A cast iron skillet. filled with apple crisp and two scoops of ice cream on top.
    Skillet Bourbon Apple Crisp
    This cast-iron skillet apple crisp is made on the grill with sweetly spiced apples and the crispiest oat topping imaginable. An ample splash of bourbon makes it extra special.
    Get the recipe: Skillet Bourbon Apple Crisp
    7
    Recipe and photo credit: Mommy Evolution
    Grilled Banana Pound Cake Kabobs
    You’ll swoon over the amazing taste of grilled banana pound cake kabobs.
    Get the recipe: Grilled Banana Pound Cake Kabobs
    8
    Spiced grilled plums in a bowl on a plate with a fork and checkered napkin on the side.
    Spiced Grilled Plums
    Sweet summer plums are gently cooked in a foil packet in a sweetly spiced orange butter sauce. An easy summer dessert.
    Get the recipe: Spiced Grilled Plums
    9
    Recipe and photo credit: Grandbaby Cakes
    Grilled Peaches with Wine Spiked Caramel Sauce
    These brown sugar grilled peaches are drizzled with a fruity, wine spiked caramel sauce. Top with vanilla ice cream to make the ultimate summer sundae!
    Get the recipe: Grilled Peaches with Wine-Spiked Caramel Sauce

    August 12, 2024 Grilling

    Grilled Avocado and Tomato Salad

    This grilled avocado and tomato salad combines creamy avocado, tomato wedges, green onions, and crunchy pepitas with a lime dressing. A kiss of smoke from the grill transforms this simple salad into something extraordinary.

    Grilled avocado and tomato salad on a platter.

    If you thought avocado was just for 3-ingredient guacamole or plopping on your hash brown avocado toast, think again. When you toss it on the grill, it turns smoky and tender. Mix it with juicy grilled tomatoes, scallions, a quick lime dressing, and top the whole thing with crunchy spiced pepitas and you've got a show-stopping side dish.

    Why You'll Love This Recipe

    • It can be prepared on the grill alongside your main dish.
    • It's ready in just 20 minutes.
    • This grilled tomato salad is a healthy side dish that can be scaled to feed as many or as few people as you need.

    Ingredients and Substitutions

    Ingredients for grilled avocado and tomato salad--avocado, tomatoes, lime, scallions, oil, and spiced pepitas.
    • Avocado--A slightly firm avocado works best here as it will soften slightly as it cooks. Avoid any that are soft; save them for making 3-ingredient guacamole.
    • Tomatoes--Choose tomatoes that are similarly sized, or make sure that you cut the tomatoes into even wedges so that they cook in the same amount of time.
    • Lime--Your lime should give you about 2 tablespoons of juice. If it's stingy, squeeze in an extra lime.
    • Spiced pepitas--These spicy pumpkin seeds add the perfect crunchy element to your salad, but feel free to use plain toasted pepitas, if you prefer.

    Important Steps

    A person brushing tomatoes, scallions, and avocado with oil on a grill rack.
    Scallions, tomato quarters and avocado halves on the grill.
    1. Halve the avocado and quarter the tomatoes. Place them on a grill rack with the scallions and brush with oil. Season with salt and pepper.
    2. Grill over medium heat until tender and slightly charred.
    A lime dressing with a halved lime and a microplane zester on the side.
    A person pouring dressing into a bowl of grilled avocado and tomato.
    1. Whisk the lime juice, zest, and oil in a small bowl. Season with salt and pepper.
    2. Gently toss the grilled tomato avocado salad with the dressing and serve.

    FAQs

    Can I make this in advance?

    This grilled avocado salad is best enjoyed immediately after making. You can prepare the dressing up to 24 hours in advance, but cook the avocado, tomato, and scallions and dress just before serving.

    What should I serve with this grilled tomato and avocado salad?

    This salad is excellent alongside a grilled protein (since you've got the grilled fired up anyway!) Try it with bacon-wrapped grilled pork tenderloin or grilled striploin steak skewers for an easy outdoor meal.

    Tips and Troubleshooting

    • Use a grill rack coated with cooking spray for the easiest grilling experience. This will help you avoid having the scallions or tomatoes slip through the grill.
    • This recipe is suitable for gluten-free, dairy-free, and vegan diets.
    Grilled avocado and tomato salad on a platter.

    More Salad Recipes You'll Love

    A bowl filled with raw vegetable marinated salad.
    Overnight Marinated Vegetable Salad
    A salad of potatoes and asparagus on a white platter with lemon wedges and dill on the side.
    Potato Salad with Asparagus

    Tried This Recipe?

    If you've tried this recipe, please leave a comment below. Follow me on Instagram, Facebook, or Pinterest for more great camping and grilling recipes.

    Recipe

    Grilled avocado and tomato salad on a platter.

    Grilled Avocado and Tomato Salad

    A woman's face.Angie Zoobkoff
    Take your salad game up a notch by grilling your avocado, tomato, and scallions before tossing them with easy lime dressing and finishing the whole salad with crunchy spiced pepitas. You'll never look at salad the same way again.
    No ratings yet
    Print Recipe Pin Recipe
    Prep Time 10 minutes mins
    Cook Time 10 minutes mins
    Total Time 20 minutes mins
    Course Salad, Side Dish
    Cuisine American
    Servings 2 servings
    Calories 353 kcal

    Equipment

    • Grill rack

    Ingredients
      

    • Cooking spray
    • 2 large tomatoes quartered
    • 1 large avocado halved
    • 4 scallions (green onions)
    • 2 tablespoons olive oil divided
    • Salt and freshly ground black pepper
    • Zest and juice of 1 lime
    • ¼ cup spiced pepitas

    Instructions
     

    • Preheat grill to medium (400°F). Coat a grill rack with cooking spray.
    • Place the avocado halves, tomatoes, and scallions on the grill rack. Brush with 1 tablespoon oil and season with salt and pepper. Flip the avocado halves so they are flesh side down.
    • Grill until tender and slightly charred, about 2 minutes per side for the scallions, 5 to 6 minutes for the avocado, and about 5 minutes per side for the tomatoes. Transfer them to a bowl to cool as they finish cooking.
    • Cool slightly then chop the tomatoes and scallions into large chunks. Slice each avocado half.
    • Whisk the lime zest and juice with the remaining 1 tablespoon oil in a small bowl. Season with salt and pepper.
    • Pour the dressing over the salad and mix gently to combine. Serve immediately.

    Notes

    • Use a grill rack--This will help you avoid having the scallions or tomatoes slip through the grill.
    • Dietary--This recipe is suitable for gluten-free, dairy-free, and vegan diets.

    Nutrition

    Serving: 1portionCalories: 353kcalCarbohydrates: 25gProtein: 6gFat: 29gFiber: 10gSugar: 6g
    Keyword easy side dish recipes, grilled salad, grilled vegetables
    Tried this recipe?Let us know how it was!

    August 9, 2024 Camping

    Campfire Chocolate Fondue

    This campfire chocolate fondue is an easy camping dessert that comes together in just 10 minutes with just 3 ingredients, including two (yes, two!) types of chocolate.

    A strawberry being dipped into chocolate fondue.

    S'mores are the quintessential camping dessert and you could get through an entire trip just on the variations on the classic campfire treat, from s'more nachos to campfire cones. But eventually, they start to lose their appeal.

    If it's too early in the season for caramel apple dip, but you need something for dipping and dunking, try this campfire chocolate fondue. Rich, creamy chocolate that is practically begging for you to dip wedges and slices of your favorite fruits into it. And if you've got die hard s'more fans in your camp, offer some marshmallows and graham crackers for dunking and call them deconstructed s'mores.

    [feast_advanced_jump_to]

    Why This Recipe is Great for Camping

    • This campfire fondue is a fun dessert that the kids will love.
    • There are only 3 ingredients required and it's ready in just 10 minutes.
    • You can make it over the campfire or on your camp stove.

    Ingredients and Substitutions

    Ingredients for campfire chocolate fondue--cream, milk chocolate, and dark chocolate.
    • Whipping cream--This will give you the creamiest, richest chocolate fondue. You can subsitute some or all half and half for a thinner mixture, but since this is an indulgent dessert, I highly recommend making it with cream.
    • Chocolate--I use a combination of milk and dark chocolate to create a chocolate sauce that has a deep chocolate flavor but isn't too sweet. You can make this with all dark chocolate, if you prefer a slightly more bitter flavor.

    Important Steps

    A pot with a little water in it over a campfire.
    A bowl with broken up chocolate and cream.
    1. Place a small pot with an inch of water over hot coals and let it come to a simmer.
    2. Combine the cream and both types of chocolate in a heatproof bowl. Set it over the simmering water and stir frequently until the chocolate is smooth and melted.

    FAQs

    Help! My fondue is too thick. How do I fix it?

    If your fondue is too thick, stir in extra cream, half and half, or milk until you reach your desired consistency.

    What should I serve for dipping?

    My favorite fondue dippers are strawberries, sliced bananas, and mandarin orange slices. My kids also love the option of having graham crackers or whole marshmallows for dunking in the chocolate. If you love the combination of sweet and salty, pretzels would also be a great choice.

    How do I keep my chocolate warm and melted?

    You can leave the bowl of chocolate fondue over the simmering water and move it to a cool part of the campfire grate, or if you want to move away from the campfire, place the bowl inside another bowl of hot water to keep it warm and melted.

    Tips and Troubleshooting

    • If you've got leftover chocolate fondue (unlikely, I know!), cover it and store in your cooler or fridge for up to 3 days. Reheat over a pot of simmering water, stirring frequently, until smooth and melted.
    • Can't have a campfire? No problem. Use the same method on your camp stove burner.
    • This recipe is suitable for gluten-free diets.
    A bowl of melted chocolate with fruit, marshmallows, and graham crackers on the side.

    More Camping Dessert Recipes You'll Love

    Two campfire waffle cones filled with marshmallows, Rolo pieces, and Teddy Grahams.
    Campfire Cones
    Cranberry cobbler with biscuit topping in a Dutch oven.
    Dutch Oven Cranberry Cobbler

    Tried This Recipe?

    If you've tried this recipe, please leave a comment below. Follow me on Instagram, Facebook, YouTube, or Pinterest for more great camping and grilling recipes.

    Recipe

    A strawberry being dipped into chocolate fondue.

    Campfire Chocolate Fondue

    A woman's face.Angie Zoobkoff
    With just 3 ingredients and 10 minutes of effort, you can have a drool-worthy camping dessert that isn't a s'more!
    No ratings yet
    Print Recipe Pin Recipe
    Prep Time 5 minutes mins
    Cook Time 5 minutes mins
    Total Time 10 minutes mins
    Course Dessert
    Cuisine American
    Servings 4 servings
    Calories 399 kcal

    Ingredients
      

    • â…” cup whipping cream
    • 3 ½ ounces (100 g) milk chocolate broken into small pieces (1 bar)
    • 3 ½ ounces (100 g) dark chocolate broken into small pieces (1 bar)
    • Fresh fruit, marshmallows, and/or graham crackers for dipping

    Instructions
     

    • Prepare hot coals in a campfire.
    • When the coals are hot, fill a saucepan with about 1 inch of water. Set it over the hot coals and bring to a simmer. Alternatively, you can do this on your camp stove over medium-low heat.
    • Combine the cream and both types of chocolate in a medium bowl.
    • Set the bowl over the pot of simmering water and let it heat, stirring frequently, until the chocolate is melted and the sauce is smooth.
    • Serve immediately. with your favorite dippers.

    Notes

    • Storage and reheating--If you've got leftover chocolate fondue (unlikely, I know!), cover it and store in your cooler or fridge for up to 3 days. Reheat over a pot of simmering water, stirring frequently, until smooth and melted.
    • Dietary--This recipe is suitable for gluten-free diets.

    Nutrition

    Serving: 1portionCalories: 399kcalCarbohydrates: 31gProtein: 3gFat: 29gCholesterol: 65mgSodium: 45mgFiber: 2gSugar: 26g
    Keyword campfire cooking, campfire desserts, chocolate dessert
    Tried this recipe?Let us know how it was!

    August 7, 2024 Beef Recipes

    14 Ground Beef Recipes to Make on Your Next Camping Trip

    There are so many reasons to include ground beef in your camping menu plans. It's inexpensive, cooks up quickly, and can be prepared in a multitude of ways. There's no reason to make hamburgers over and over again when you have these 14 amazing ground beef recipes for camping to choose from. All of them can be made in your skillet or Dutch oven and are simple enough to prepare at camp.

    1
    Recipe and photo credit: Cinnamon and Sage Co.
    Mexican Sloppy Joes
    You and your family will love this spicy spin on a classic family favorite with Mexican Sloppy Joes, made with salsa and chili powder!
    Get the recipe: Mexican Sloppy Joes
    2
    Two halves of a burrito on a plate with hot sauce drizzled over them.
    Make-Ahead Camping Burritos
    These cheesy meat, bean, and rice burritos are the ideal make-ahead camping meal. They're easy to prepare and quick to reheat at camp.
    Get the recipe: Make-Ahead Camping Burritos
    3
    Recipe and photo credit: Cook Dinner Tonight
    Cheeseburger Macaroni
    Cheeseburger macaroni recipe makes easy, cheesy hamburger mac in about 30 minutes. This one-pot pasta recipe couldn’t be easier!
    Get the recipe: Cheeseburger Macaroni
    4
    Recipe and photo credit: Maple and Mango
    Ground Beef Fajitas
    Looking for a quick, easy and satisfying dinner idea? Try these sizzling ground beef fajitas – on the table in just 30 minutes!
    Get the recipe: Ground Beef Fajitas
    5
    A walking taco with Doritos and cheese with lettuce, sour cream, and tomato surrounding it.
    Camping Walking Tacos
    An easy handheld camping meal made with spiced ground beef and all your favorite taco fixings piled into a bag of nacho chips. Easy, fast, and kid-friendly.
    Get the recipe: Camping Walking Tacos
    6
    Recipe and photo credit: Delicious on a Dime
    Ground Beef Kebabs
    These Ground Beef Kebabs are SUPER easy to make! Pop them on the grill for a quick summer meal.
    Get the recipe: Ground Beef Kebabs
    7
    Recipe and photo credit: Thrifty Frugal Mom
    Speedy Spanish Rice with Ground Beef
    This simple, easy Spanish Rice with Ground Beef skillet recipe makes a great 30-minute dinner. It’s inexpensive but tasty and is a meal the whole family will love!
    Get the recipe: Speedy Spanish Rice with Ground Beef
    8
    A Dutch oven filled with campfire chili with a metal spoon resting inside.
    Dutch Oven Campfire Chili
    This ground beef chili for camping is made in your cast iron Dutch oven over the campfire. It's hearty and satisfying and easily the best chili recipe I've ever tried.
    Get the recipe: Dutch Oven Campfire Chili
    9
    A skillet filled with meatballs in cranberry sauce.
    Cranberry Meatballs
    This easy one-pan cast iron skillet meal features homemade beef meatballs tossed in a sweet and tangy cranberry sauce. It's perfect for casual dinners, potlucks, and camping.
    Get the recipe: Cranberry Meatballs
    10
    A person holding a bowl of chili mac.
    Recipe and photo credit: Fresh Off the Grid
    One Pot Chili Mac
    Blending the best of both worlds, chili mac combines the smoky and spicy flavor of chili with the rich and creamy texture of mac & cheese. It’s an all-American camping classic and using this recipe, you can make it using just a single pot!
    Get the recipe: One Pot Chili Mac
    11
    A serving of shepherd's pie on a plate.
    Dutch Oven Shepherd's Pie Recipe
    This campfire shepherd's pie is filled with ground beef or lamb and vegetables under a blanket of creamy mashed potatoes. It's perfect cool-weather comfort food.
    Get the recipe: Dutch Oven Shepherd's Pie
    12
    Recipe and photo credit: Stef's Eats and Sweets
    Easy Cheesy Taco Potatoes
    These easy cheesy taco potatoes are perfect to switch things up for taco night! Tender potatoes with ground beef, tomatoes, and melty cheese.
    Get the recipe: Easy Cheesy Taco Potatoes
    13
    Recipe and photo credit: WonkyWonderful
    Cheesy Ground Beef and Broccoli
    This cheesy ground beef and broccoli recipe takes less than 30 minutes to make and tastes fantastic.
    Get the recipe: Cheesy Ground Beef and Broccoli
    14
    Recipe and photo credit: This Silly Girl's Kitchen
    Easy Ground Beef Stroganoff
    This ground beef stroganoff recipe is all about cozy vibes and delicious flavors. Imagine tender ground beef, creamy sauce, and mushrooms all mixed together.
    Get the recipe: Easy Ground Beef Stroganoff
    • « Go to Previous Page
    • Page 1
    • Interim pages omitted …
    • Page 3
    • Page 4
    • Page 5
    • Page 6
    • Page 7
    • Interim pages omitted …
    • Page 9
    • Go to Next Page »

    Primary Sidebar

    A woman's face.

    Hi, I'm Angie! I'm so glad you're here. I can't wait to share my favorite camping and grilling recipes with you.

    More about me →

    Summer Favorites

    • Skewers of grilled strawberries on a plate, drizzled with dark syrup.
      Grilled Strawberries
    • Four grilled shrimp skewers on a platter with lemon wedges and cocktail sauce on the side.
      Grilled Old Bay Shrimp
    • A whole skillet peach cobbler with two spoons resting on top.
      Grilled Skillet Peach Cobbler
    • Two Cajun chicken foil packets on plates with forks on the side.
      Cajun Chicken Foil Packets

    Popular Recipes

    • A small skillet filled with caramelized bananas.
      Campfire Bananas Foster
    • A mini cast iron skillet filled with cornbread.
      Mini Skillet Cornbread
    • A grilled cheese sandwich cut in half and a handful of potato chips.
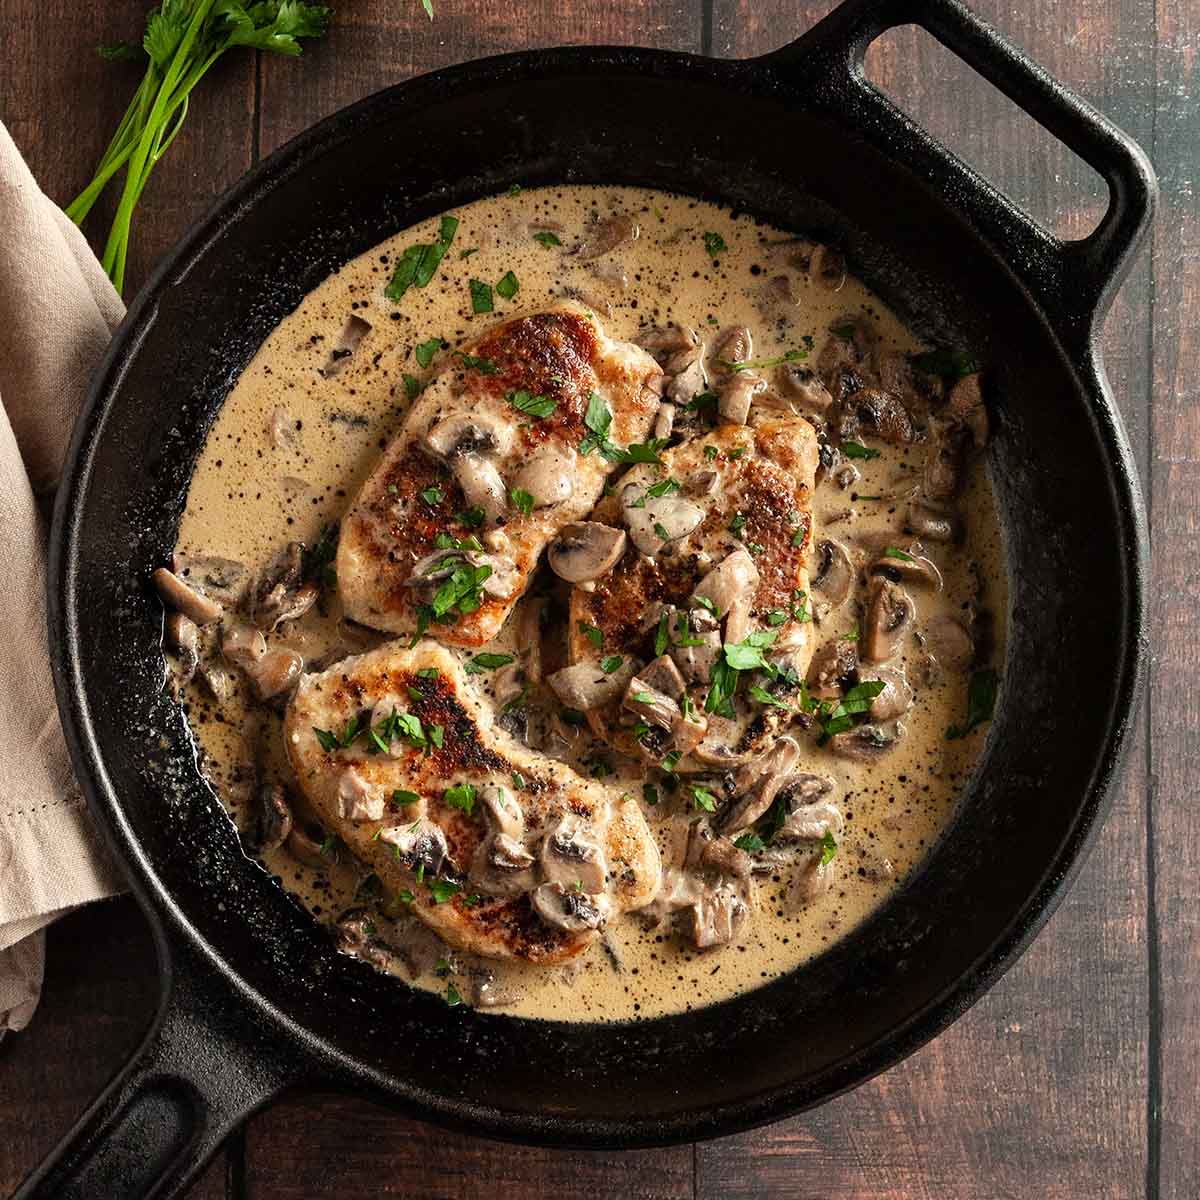
      Campfire Grilled Cheese Two Ways
    • A skillet with three chicken breasts and a skillet filled with cheesy gnocchi.
      18 Easy Cast Iron Skillet Meals for Camping

    Footer

    ↑ back to top

    About

    • Privacy Policy

    Newsletter

    • Sign Up for Emails

    Let's Connect

    • Contact

    Copyright © 2025 Camp.Grill.Eat.

    Rate This Recipe

    Your vote:


    A rating is required
    A name is required
    An email is required