• Skip to main content
  • Skip to primary sidebar

Camp.Grill.Eat. logo

menu icon
go to homepage
  • Recipes
  • About
  • Subscribe
  • Contact
    • Facebook
    • Pinterest
    • YouTube
  • search icon
    Homepage link
    • Recipes
    • About
    • Subscribe
    • Contact
    • Facebook
    • Pinterest
    • YouTube
  • ×
    Home » Recipes

    Recipe Index

    May 6, 2025 Beef Recipes

    Grilled Bacon-Wrapped Steak

    This grilled bacon-wrapped steak is an easy grilled main course that requires only 3 ingredients and is ready in just 20 minutes. It's the perfect dish for simple summer entertaining and one of the best ways to enjoy steak.

    A steak cut in half on a plate with some salad.

    When summer arrives, I'm all for simple meals that can be prepared and enjoyed outside, which makes this bacon-wrapped steak ideal. In less than 30 minutes you can toss together a quick salad, grab a loaf of crusty bread, and grill these steaks to perfection. Which means more time for you to relax and enjoy your evening.

    You can definitely splurge on tenderloin for this recipe, but the more economical sirloin steak still comes out very juicy and tender (thank you, bacon!) and your wallet will thank you.

    [feast_advanced_jump_to]

    Why You'll Love This Recipe

    • It's an impressive grilled dinner that's ready in only 20 minutes.
    • It only requires 3 ingredients.

    Ingredients and Substitutions

    Ingredients for bacon-wrapped steak--bacon, seasoning, steak.
    • Steak--You can make this with tenderloin or sirloin steak. As the name suggests, tenderloin will be more tender, but more expensive. The steak needs to be about the same thickness as the bacon in order for this recipe to work. If you can't find thick-cut steaks at your market, ask your butcher to cut them for you or purchase a small tenderloin or sirloin roast and slice them yourself.
    • Seasoning--You can use your favorite store-bought or homemade steak seasoning. We use The Keg Steak Seasoning, which is available online and at some grocery stores in Canada, but feel free to swap in your personal favorite. Be generous with the seasoning!
    • Bacon--Use regular cut bacon for this recipe, not thick cut. Thick cut bacon will not be fully cooked when your steaks are done.

    How to Cook Bacon-Wrapped Steak on the Grill

    Four uncooked bacon-wrapped steaks on a baking sheet with a small bowl of seasoning.

    1. Wrap each steak with one strip of bacon and secure with a toothpick. Season both sides of the steak.

    Four bacon-wrapped steaks on the grill.

    2. Cook the steak over medium-high heat until the bacon is crisped and the meat has reached your desired level of doneness.

    FAQs

    How do I avoid flare-ups when cooking my steak?

    The fat dripping from the bacon is likely to cause some amount of flaring, but you can minimize it by placing the steaks between lit burners on the grill grate so that they're not directly above the flame.

    How will I know when it's done?

    Since this steak is very thick, the best way to determine doneness is with an instant read thermometer. To check, stick it into the thickest part of the steak. For medium-rare beef, it's ready when the temperature reads 130°F (54°C) but if you prefer medium doneness, let it cook until the thermometer reads 140°F (60°C).

    What should I serve with this?

    For a light and easy grilled dinner, serve this bacon-wrapped steak with grilled panzanella or grilled kohlrabi. For something a bit heartier, try it with cheesy foil packet potatoes and Blackstone asparagus.

    Tips and Troubleshooting

    • If your bacon isn't as crispy as you like, use a pair of long-handled tongs to hold the sides of the meat wrapped in bacon directly against the heat for about 30 seconds.
    • This recipe is suitable for gluten-free and dairy-free diets.
    Two plates, each with a bacon-wrapped steak and a serving of tomato and cucumber salad.

    More Steak Recipes You'll Love

    A bowl filled with cubes of seared sirloin steak with parsley sprinkled on top.
    Blackstone Steak Bites
    A steak fajita foil pack with strips of steak, red pepper, and onion.
    Steak Fajita Foil Packs

    Recipe

    A steak cut in half on a plate with some salad.

    Grilled Bacon-Wrapped Steak

    A woman's face.Angie Zoobkoff
    With only 3 ingredients and 20 minutes from start to finish, this is the perfect grilled main dish for easy summer entertaining.
    No ratings yet
    Print Recipe Pin Recipe
    Prep Time 8 minutes mins
    Cook Time 12 minutes mins
    Total Time 20 minutes mins
    Course Main Course
    Cuisine American
    Servings 4 servings
    Calories 463 kcal

    Ingredients
      

    • 4 slices regular (not thick) cut bacon
    • 4 1½-to-2-inch (4-to-5-cm) thick sirloin or tenderloin steaks (about 6 oz | 170 g each)
    • 4 teaspoons Homemade or store-bought steak seasoning

    Instructions
     

    • Preheat the grill for medium-high heat (425 to 450°F | 218 to 232°C).
    • Wrap one strip of bacon around the side of each steak, securing the two ends together with a toothpick. Season both sides of the steak generously with steak seasoning.
    • Cook the steaks on the preheated grill, flipping once, until they reach the desired doneness, about 6 minutes per side for medium rare (130°F | 54°C).

    Notes

    • Crisp it up--If your bacon isn't as crispy as you like after cooking, use a pair of long-handled tongs to hold the sides of the meat wrapped in bacon directly against the heat for about 30 seconds.
    • Avoid flare-ups--To prevent the bacon from flaring, try to place the steaks between the burners so that they aren't directly over the flame.
    • Dietary--This recipe is suitable for gluten-free and dairy-free diets.

    Nutrition

    Serving: 1 steakCalories: 463kcalProtein: 42gFat: 32gCholesterol: 111mg
    Keyword grilled beef, grilled main dishes
    Tried this recipe?Let us know how it was!

    May 2, 2025 Dinner

    Grilled Panzanella

    Italian tomato and bread salad gets a summer makeover in this grilled panzanella recipe. Grilled bread and charred onions add a touch of smoky flavor to the classic combination of ripe tomatoes, cucumber, basil, and red wine vinaigrette in this simple side that's guaranteed to become a summer staple.

    A bowl of panzanella with a serving spoon on the side.
    [feast_advanced_jump_to]

    Whether you're headed to a backyard BBQ or hosting a casual dinner, your summer dining plans need this grilled panzanella salad recipe. Made with simple, fresh ingredients, and ready less than 30 minutes, it's the perfect go-to summer salad for any occasion.

    Why You'll Love This Recipe

    • You don't need an oven for this recipe, so it's perfect for hot days, and you can even make it while camping.
    • It's an easy vegetarian grilling recipe that's ready in less than 30 minutes!
    • You can do some of the prep work ahead of time.

    Ingredients and Substitutions

    Ingredients for panzanella--garlic, mustard, tomatoes, onion, vinegar, basil, oil, bread, and cucumber.
    • Bread--Use a firm artisan-style bread for this recipe, preferably one that is a day or two old. You want it to be sturdy and dry enough to hold together when it soaks up the dressing. If your bread is fresh, cut the slices and let them sit, uncovered, at room temperature for a couple of hours to dry them out.
    • Onion--You can use any type of onion for this salad. Red or sweet white onion is perfect for a mild onion flavor in the finished dish.
    • Tomatoes--These are the star of the show, so make sure you pick good ones! Look for bright red tomatoes that are unblemished and feel heavy for their size. Ripe tomatoes should give slightly when squeezed gently, but shouldn't feel mushy.

    How to Make Grilled Panzanella Salad

    Sliced onion and sliced bread on a grill rack with a dish of olive oil nearby.

    1. Place the sliced onion and bread on a grilling tray and brush with oil.

    Sliced onions and bread cooking on a grill rack on a grill.

    2. Grill, flipping once, until the bread is toasted and the onion is softened and browned.

    A bowl of vinaigrette with a whisk nearby.

    3. Whisk the dressing ingredients together.

    A bowl of chopped tomatoes with vinaigrette next to it.

    4. Season the tomatoes with salt and let sit for 5 minutes. Pour in the dressing, then add the remaining ingredients and toss to combine.

    FAQs

    What is panzanella?

    Originating in Italy, panzanella in its simplest form is a salad made from stale bread, onions, and ripe tomatoes. Cucumbers, basil, and a vinaigrette dressing are often added to the salad, and some variations also include peppers and fresh mozzarella cheese.

    Can I make panzanella in advance?

    You can grill the bread and onions and make the dressing a few hours in advance. Store the bread at room temperature and keep the onions and dressing in the fridge until you're ready to assemble the salad. The entire salad can be assembled 15 to 30 minutes before serving.

    What to Serve with this Recipe

    This grilled summer salad needs only a simple protein tossed on the (already hot) grill to make a complete meal. Try it with grilled flanken short ribs or grilled Old Bay shrimp. If you want to make a it a bigger meal, start with grilled stuffed mushrooms and finish the evening with skillet blueberry cake.

    Tips and Troubleshooting

    • I recommend using a grill tray for cooking the onions and bread. It makes transferring and flipping them much easier. If you don't have a grill tray, slide the onion slices onto a couple of skewers to prevent them from falling apart (and falling through the grill!) while cooking.
    • This recipe is suitable for vegan diets.

    More Salad Recipes You'll Love

    A bowl of bean salad with corn.
    Marinated Bean Salad
    A bowl of greek salad with dressing and oregano on the side.
    Simple Greek Salad

    Recipe

    A bowl of panzanella with a serving spoon on the side.

    Grilled Panzanella

    A woman's face.Angie Zoobkoff
    A kiss of smoke from your grill gives the classic Italian bread and tomato salad a summertime makeover.
    No ratings yet
    Print Recipe Pin Recipe
    Prep Time 15 minutes mins
    Cook Time 8 minutes mins
    Total Time 23 minutes mins
    Course Salad, Side Dish
    Cuisine Italian
    Servings 4 servings
    Calories 238 kcal

    Equipment

    • Grill tray

    Ingredients
      

    • 4 (1-inch thick) slices Italian bread or other sturdy bread
    • 1 medium onion cut into ¾-inch thick slices
    • 4 tablespoons olive oil divided
    • Salt and freshly ground black pepper
    • 1 pound ripe tomatoes (about 3) cut into 1-inch pieces
    • ½ English cucumber quartered lengthwise and cut into 1-inch pieces
    • 1 ½ tablespoons red wine vinegar
    • 1 clove garlic grated
    • 1 teaspoon Dijon mustard
    • ¼ cup thinly sliced fresh basil

    Instructions
     

    • Prepare the grill for medium-high direct heat (450°F).
    • Place the bread and onion slices on the grill tray. Brush with 1 tablespoon of the oil. Season the onion with salt and pepper.
    • Grill, turning the bread and onion slices once, until lightly charred and the onion has softened, 3 to 4 minutes per side. Remove from the grill and let cool while you make the dressing.
    • In a medium bowl, whisk the remaining 3 tablespoons olive oil, red wine vinegar, garlic, and Dijon together. Season to taste with salt and pepper.
    • Place the tomatoes in a large serving bowl and season with salt. Let the tomatoes sit for 5 minutes. This will help to draw out the juices.
    • Tear the bread slices into 1-inch chunks and chop the onions.
    • Add the cucumber, bread, and onions to the tomatoes and drizzle the dressing over. Stir to combine and garnish with fresh basil.

    Notes

    • Get ahead--Grill the bread and onions and prepare the dressing a few hours in advance.
    • No grill tray?--If you don't have a grill tray, slide the onion slices onto a couple of skewers to prevent them from falling apart (and falling through the grill!) while cooking.
    • Dietary--This recipe is suitable for vegan diets.

    Nutrition

    Serving: 1 portionCalories: 238kcalCarbohydrates: 23gProtein: 4gFat: 15gFiber: 3gSugar: 2g
    Keyword easy camping salads, grilled side dishes, summer grilling, summer salads
    Tried this recipe?Let us know how it was!

    April 29, 2025 Blackstone Griddle Recipes

    Sausage Pancakes

    These sausage pancakes take the ultimate camping breakfast combo of pancakes and sausage and combine them into a perfect savory flapjack. You can make them on your griddle or in your skillet and they're ready in less than 30 minutes.

    Three pancakes on a plate topped with maple syrup and butter.
    [feast_advanced_jump_to]

    Fluffy buttermilk pancakes, particularly those cooked in the great outdoors, are pretty phenomenal. However, if you add some cooked sausage into the batter, it takes your breakfast to the next level. (And your kids will think you're a hero.) Not only that, you don't have to juggle multiple skillets or try and time everything so that your pancakes and sausage are ready at the same time.

    Why This Recipe is Great for Camping

    • You can cook the sausage pancakes on your griddle or in your cast iron skillet and make them over the fire or on your camp stove.
    • It's a hearty breakfast that's ready in less than 30 minutes!
    • You can do some of the prep work before heading out on your camping trip.

    Ingredients and Substitutions

    Ingredients for sausage pancakes--flour, eggs, buttermilk, sausage, butter, baking powder, baking soda, and sugar.
    • Buttermilk--The acid in buttermilk reacts with baking soda and baking powder to give you light and fluffy pancakes. If you don't have regular buttermilk on hand, add 1 tablespoon for vinegar or lemon juice to 1 cup of regular milk and let it sit for 10 to 15 minutes.
    • Sausage--Any type of breakfast sausage will work here. You can find raw breakfast sausage without casings in the freezer section of some supermarkets, or you may find small fresh sausage patties in the meat cooler. If that isn't available, you can remove sausage casings by slicing the sausages lengthwise with a sharp knife.

    How to Make Pancakes with Sausage

    Sausage browning on a griddle.

    1. Cook the sausage until browned. Transfer to a bowl and let cool.

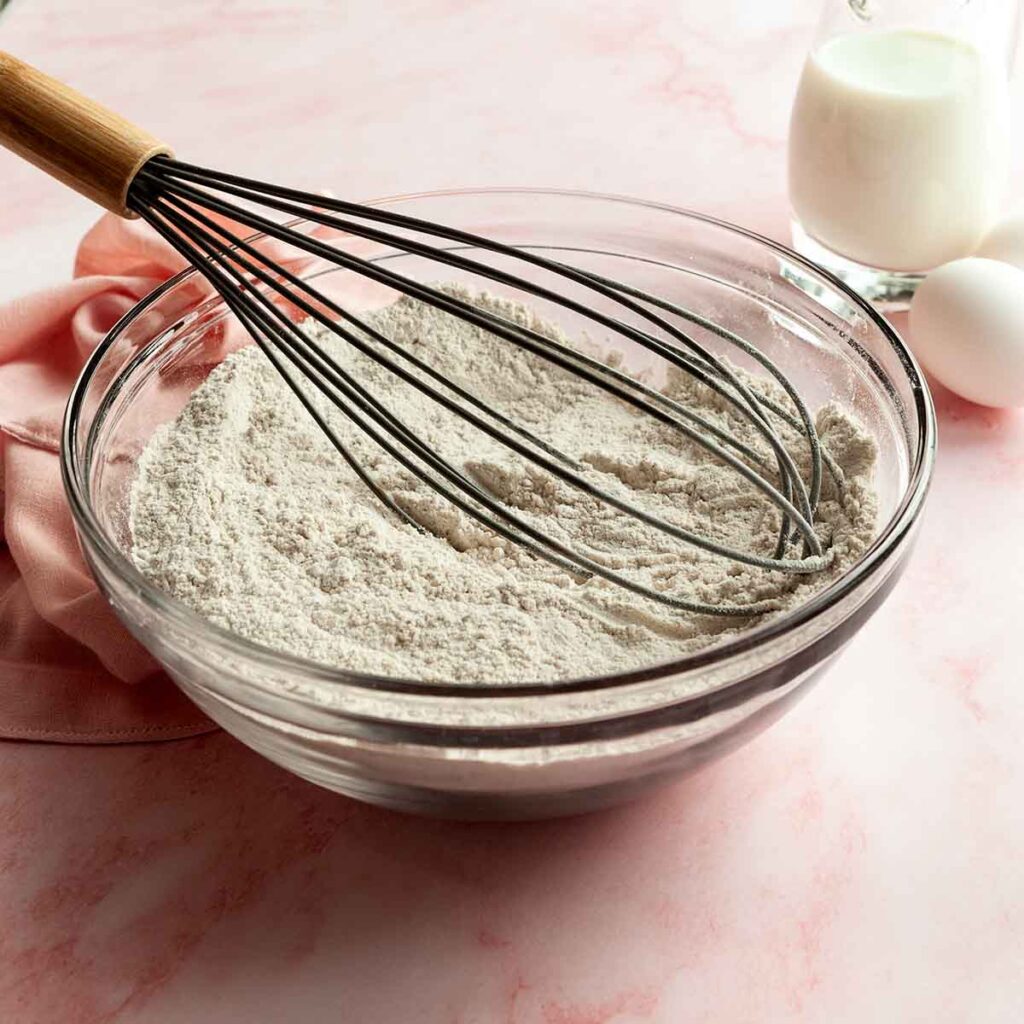
    A bowl of dry ingredients with a pitcher of milk and eggs next to it.

    2. Whisk the wet and dry ingredients in separate bowls, then add the wet to the dry and mix until just combined.

    A bowl of pancake batter with a bowl of cooked sausage next to it.

    3. Fold the cooked sausage into the pancake batter.

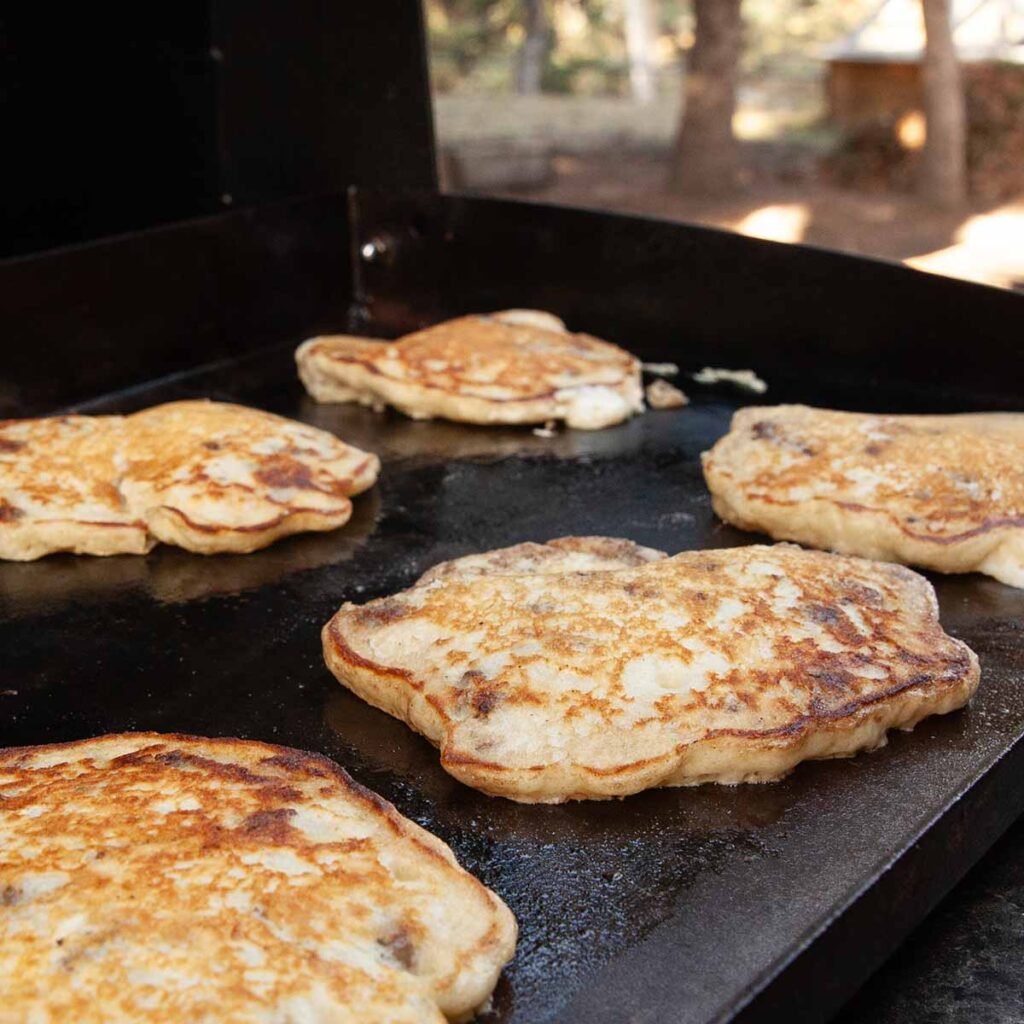
    Pancakes cooking on a griddle.

    4. Cook the pancakes on a buttered griddle or skillet until puffed and golden.

    FAQs

    How do I know when my pancakes are ready to flip?

    When you see bubbles appearing on the surface of your pancake, and the bottom of your pancake is golden brown and releases easily from the skillet, it's ready to flip.

    How can I stop my pancakes from sticking to the skillet or griddle?

    Start with a preheated surface. Use a well-seasoned cast iron pan or griddle, and add some fat, such as butter or oil, before cooking your pancakes. If the skillet or griddle appears dry between batches, add a little extra fat.

    Tips and Troubleshooting

    • To get ahead, mix the dry ingredients before heading out on your trip. Store them in a resealable bag or lidded container.
    • For the fluffiest pancakes, let your batter rest for 10 minutes before cooking the pancakes.
    Pancakes cooking on a griddle.

    More Pancake Recipes You'll Love

    A stack of pancakes, maple syrup, and blueberries on a plate with blueberries and bacon in the background.
    Cast Iron Skillet Pancakes
    A glass bowl filled with gingerbread pancake mix, with a whisk resting inside and a pitcher of milk and two eggs in the background.
    Gingerbread Pancake Mix

    Recipe

    Three pancakes on a plate topped with maple syrup and butter.

    Sausage Pancakes

    A woman's face.Angie Zoobkoff
    What's better than fluffy buttermilk pancakes? Fluffy buttermilk pancakes with sausage inside, of course.
    No ratings yet
    Print Recipe Pin Recipe
    Prep Time 15 minutes mins
    Cook Time 15 minutes mins
    Total Time 30 minutes mins
    Course Breakfast
    Cuisine American
    Servings 6 servings
    Calories 353 kcal

    Equipment

    • Griddle or skillet

    Ingredients
      

    • 8 ounces (227 g) breakfast sausage (without casings)
    • 2 cups all-purpose flour
    • 1 tablespoon granulated sugar
    • 2 teaspoons baking powder
    • 1 teaspoon baking soda
    • ½ teaspoon salt
    • 2 large eggs beaten
    • 1 ¾ cups buttermilk plus more, if needed
    • 1 tablespoon butter plus more for serving
    • Maple syrup for serving (optional)

    Instructions
     

    • Heat a griddle or skillet over medium heat. Add the sausage and cook, stirring frequently and using a wooden spoon to break up the meat, until cooked through and no pink remains, 5 to 6 minutes.
    • Use a slotted spoon to transfer the sausage to a bowl and let cool. Wipe the skillet or griddle clean with a paper towel.
    • While the sausage is cooling, make the pancake batter. Whisk the flour, sugar, baking powder, baking soda, and salt in a large bowl. Mix the eggs and buttermilk together in a separate bowl or liquid measuring jug.
    • Pour the wet ingredients into the dry and stir just until the batter is thoroughly combined and no streaks of dry flour remain. It's ok if the batter is a little lumpy, but if it's very thick, drizzle in a little extra buttermilk, 1 tablespon at a time.
    • Fold in the cooled sausage.
    • Heat the griddle or skillet over medium and add 1 tablespoon butter. When the butter is melted, drop ¼-cup scoops of the batter onto the griddle or skillet and cook, flipping once, until the pancakes are cooked through, 3 to 4 minutes per side. Reduce the heat if the pancakes are browning too quickly. Repeat with remaining batter until all the pancakes are cooked.
    • Serve hot, with butter and maple syrup, if desired.

    Notes

    • Get ahead--Mix the dry ingredients before heading out on your trip. Store them in a resealable bag or lidded container.
    • Let it rest--For the fluffiest pancakes, let your batter rest for 10 minutes before cooking the pancakes.

    Nutrition

    Serving: 2pancakesCalories: 353kcalCarbohydrates: 38gProtein: 16gFat: 15gCholesterol: 100mgSodium: 788mgFiber: 1gSugar: 6g
    Keyword camping breakfast, camping pancakes, cast iron cooking, griddle cooking
    Tried this recipe?Let us know how it was!

    April 25, 2025 Blackstone Griddle Recipes

    Blackstone Asparagus

    Made with just four ingredients and ready in less than 10 minutes, this Blackstone asparagus is the easiest spring side dish to make on your outdoor griddle.

    Cooked asparagus on a platter with lemon wedges.
    [feast_advanced_jump_to]

    Asparagus is, without question, my favorite vegetable. During its brief spring season, I eat it tossed into potato salad, roasted, grilled, and even shaved raw into salads. Lately, I'm loving it cooked on the Blackstone griddle. It's so easy to cook alongside whatever protein we're having, and it takes less than 10 minutes to make.

    Why You'll Love This Recipe

    • It's an easy, healthy asparagus side dish to make on your Blackstone or griddle.
    • It only takes 10 minutes to make.

    Ingredients and Substitutions

    Ingredients for Blackstone asparagus--asparagus, lemon, oil, and all purpose seasoning.
    • Asparagus--I prefer the thin stalks of asparagus as they are the most tender and cook quickly. If you only have the thicker stalks, they'll work, but they will take longer to cook. Look for bright green stalks with firm, closed tips. Avoid any asparagus that is wilted or has mushy tips. Snap or cut off the woody bottom inch of the asparagus spears before cooking.
    • Oil--I prefer olive oil for this recipe, but any neutral vegetable oil will work.
    • All-purpose seasoning--This homemade seasoning blend adds a subtle lemon pepper flavor to the asparagus. If your lemon pepper doesn't have salt in it, you'll need to season the asparagus lightly with salt before cooking.

    How to Cook Asparagus on the Blackstone

    Raw asparagus on a small baking sheet.

    1. Toss the asparagus with 2 teaspoons oil and the seasoning.

    Asparagus cooking on a Blackstone griddle.

    2. Cook the asparagus on a griddle over medium heat, stirring often, until crisp-tender.

    FAQs

    Can I make this in a cast iron skillet?

    Yes. You will need to use your largest skillet and I recommend trimming the asparagus so that it fits in a single layer in the skillet. You want the asparagus to have direct contact with the surface of the skillet, so you may have to cook it in two batches.

    Follow the directions, cooking over medium heat, and turning often, just until the asparagus is crisp-tender.

    What should I serve with this?

    Serve this easy griddle asparagus recipe with a simple protein that can be cooked alongside it, like garlic butter shrimp skewers, Blackstone chicken Parmesan, or Blackstone steak bites.

    Tips and Troubleshooting

    • The cooking time will be dependent on the thickness of your asparagus spears. Thin ones will cook quickly, in about 3 minutes, while very thick ones may take up to 5 minutes.
    • This recipe is suitable for gluten-free, dairy-free, and vegan diets.

    More Side Dish Recipes You'll Love

    A salad of potatoes and asparagus on a white platter with lemon wedges and dill on the side.
    Potato Salad with Asparagus
    Six zucchini fritters on a plate with a bowl of sour cream on the side.
    Blackstone Zucchini Fritters

    Recipe

    Cooked asparagus on a platter with lemon wedges.

    Blackstone Asparagus

    A woman's face.Angie Zoobkoff
    Celebrate asparagus season with this easy recipe that requires only four ingredients and is ready in less than 10 minutes.
    No ratings yet
    Print Recipe Pin Recipe
    Prep Time 5 minutes mins
    Cook Time 4 minutes mins
    Total Time 9 minutes mins
    Course Side Dish
    Cuisine American
    Servings 4 servings
    Calories 56 kcal

    Equipment

    • Blackstone (or other outdoor) griddle

    Ingredients
      

    • 12 ounces (340 g) asparagus woody ends removed
    • 4 teaspoons olive oil divided
    • 1 teaspoon all-purpose seasoning blend
    • Lemon wedges for serving

    Instructions
     

    • Arrange the asparagus on a small rimmed baking sheet. Drizzle with 2 teaspoons oil and sprinkle the seasoning blend over. Toss to combine.
    • Heat the Blackstone or other outdoor griddle to medium. Brush the remaining 2 teaspoons oil on the surface of the griddle.
    • Add the asparagus to the hot griddle in a single layer and cook, stirring frequently, until it's bright green and crisp tender, 3 to 4 minutes.
    • Serve hot, with lemon wedges for squeezing over.

    Notes

      • Size matters--The cooking time will be dependent on the thickness of your asparagus spears. Thin ones will cook quickly, in about 3 minutes, while very thick ones may take up to 5 minutes.
      • Dietary--This griddled asparagus recipe is suitable for gluten-free, dairy-free, and vegan diets.

    Nutrition

    Serving: 1 portionCalories: 56kcalCarbohydrates: 3gProtein: 2gFat: 5gFiber: 2gSugar: 2g
    Keyword blackstone cooking, blackstone griddle, easy side dish recipes
    Tried this recipe?Let us know how it was!

    April 22, 2025 Camping

    15 Easy Camping Recipes for Two

    I don't know about you, but when I go camping, my goal is to come home with as little food as possible. But when you're camping solo or with one other person, and it seems like every camping meal idea feeds a crowd, all those extras start to stack up. Enter these 15 easy camping recipes for two, which are designed to make just enough to satisfy two hungry campers, without an abundance of leftovers to deal with.

    [feast_advanced_jump_to]

    Camping Breakfasts for Two

    These simple breakfasts require only your cast iron skillet or griddle and come together in minutes. They're also the perfect way to start the day.

    1
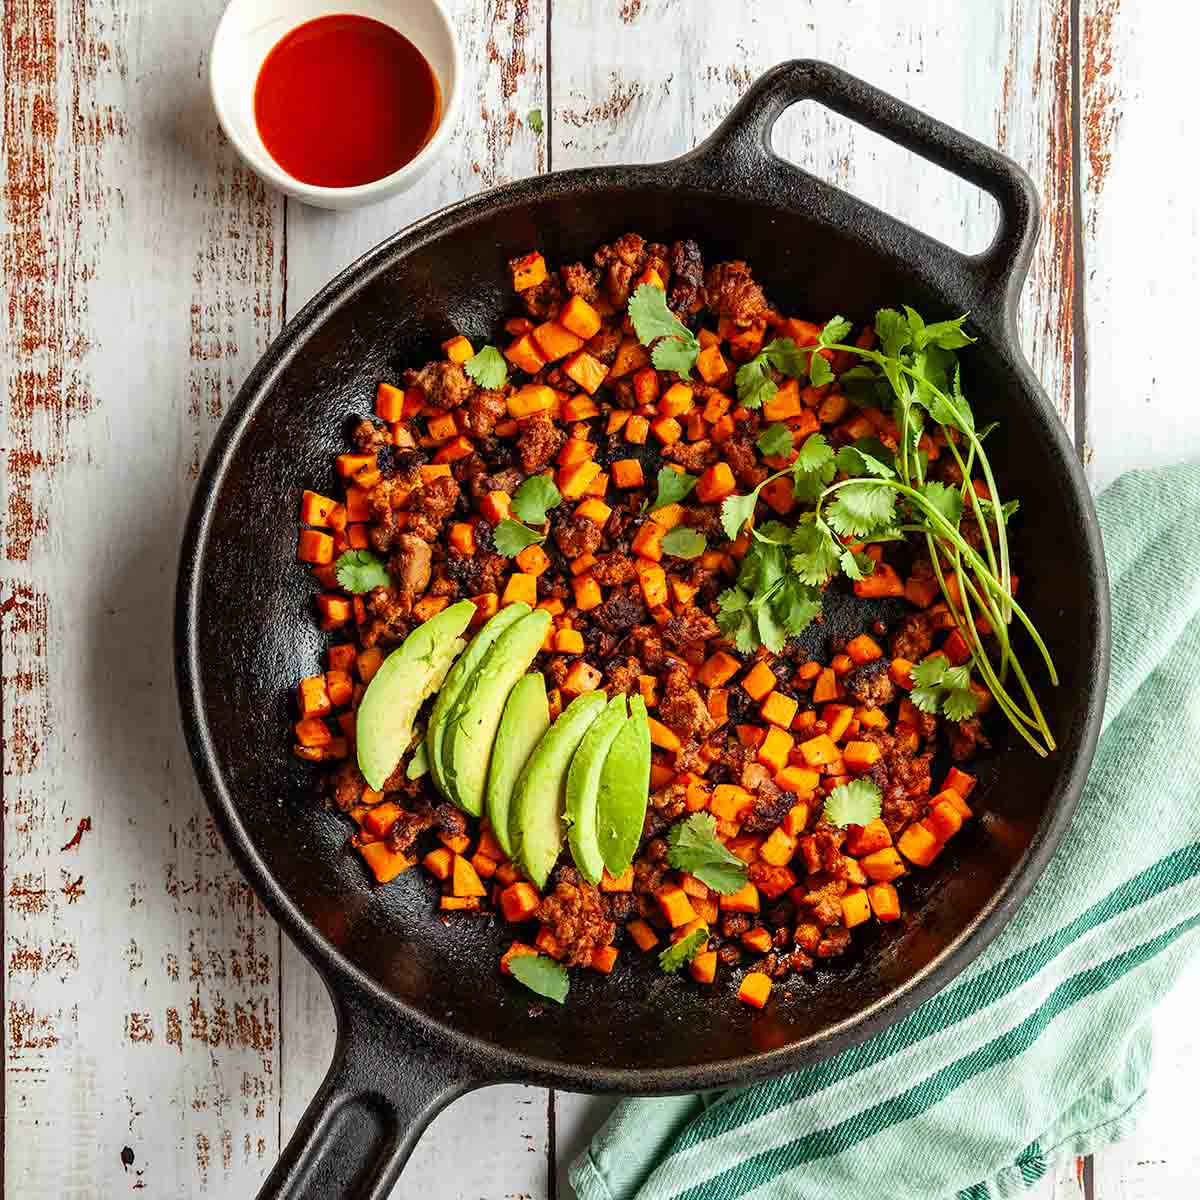
    A cast iron skillet filled with chorizo and sweet potato hash with sliced avocado and cilantro on top.
    Chorizo Sweet Potato Hash
    This hearty and satisfying sweet potato chorizo hash is made in your cast iron skillet with fresh sausage, diced sweet potatoes, red onion, and is topped with avocado and cilantro.
    Get the recipe: Chorizo Sweet Potato Hash
    2
    Recipe and photo credit: Champagne Tastes
    Campfire French Toast with Peanut Butter and Jelly
    This campfire French toast with peanut butter and jelly is a simple breakfast that can be made in a cast-iron pan in just a few minutes!
    Get the recipe: Campfire French Toast
    3
    A serving of scrambled eggs, topped with cheese and two toast halves on a plate.
    Blackstone Scrambled Eggs
    These creamy scrambled eggs cook up on your outdoor griddle to a perfectly light and fluffy texture. Topped with Cheddar cheese, they're an elevated everyday breakfast staple.
    Get the recipe: Blackstone Scrambled Eggs

    Simple Camping Meals for Two

    Whether you want a simple handheld meal like a sandwich, quesadilla, or burger, or you're going to break out the cast iron Dutch oven for something more hearty, these camping main dishes for two are guaranteed to satisfy.

    4
    A burger with cheese, lettuce, and tomato on a plate.
    Blackstone Smash Burgers with Onions
    Your everyday smash burger just got a major upgrade, thanks to crispy fried onions and melted provolone cheese.
    Get the recipe: Smash Burgers
    5
    A person pulling an English muffin grilled cheese sandwich apart.
    English Muffin Grilled Cheese
    Your favorite grilled cheese sandwich just got even better thanks to two(!) types of cheese and a crispy toasted English muffin.
    Get the recipe: English Muffin Grilled Cheese
    6
    Recipe and photo credit: Champagne Tastes
    Campfire Shrimp Boil
    This campfire shrimp boil features mussels, shrimp, corn, and potatoes cooked with beer in a Dutch oven! It’s a fancy outdoor meal ready in less than 30 minutes.
    Get the recipe: Campfire Shrimp Boil
    7
    Pieces of Italian sausage quesadilla stacked on top of each other.
    Italian Sausage Quesadilla
    These quick and easy quesadillas are made with melted mozzarella cheese, spiced Italian sausage, and red onion, all sandwiched inside a crispy flour tortilla.
    Get the recipe: Italian Sausage Quesadilla
    8
    A skillet filled with ravioli in a creamy mushroom sauce.
    Creamy Mushroom Ravioli
    This easy pasta packs plenty of umami with a double dose of mushrooms in the pasta and in the creamy sauce.
    Get the recipe: Creamy Mushroom Ravioli

    Sides & Drinks for Two

    These easy side dishes and camping drinks are so good you may just skip the main course and make a meal of them!

    9
    A foil packet filled with cheesy potatoes with a dish of sour cream on the side.
    Cheesy Foil Packet Potatoes
    These buttery, cheesy potatoes in foil can be made on the grill, over the campfire, or in your oven for an easy, oh-so-satisfying side dish.
    Get the recipe: Cheesy Foil Packet Potatoes
    10
    Two mugs of dark hot chocolate with cinnamon sticks in them, sitting in the snow.
    Dark Hot Chocolate
    This rich and creamy dark hot chocolate, made with milk, dark chocolate, sugar, vanilla, and cinnamon is so easy to make that you'll never go back to the packaged mix.
    Get the recipe: Dark Hot Chocolate
    11
    Recipe and photo credit: Let's Camp S'more
    Campfire Pizza Bread Recipe
    Create this campfire pizza bread camping recipe using a loaf of bread and pizza sauce. This pull-apart pizza recipe is sure to be a hit!
    Get the recipe: Campfire Pizza Bread
    12
    Two tall glass mugs filled with hot apple cider cocktail with a cinnamon stick resting on top.
    Hot Apple Cider Cocktail
    This combination of sweet mulled cider and spiced rum is the perfect way to stay warm on those cool autumn evenings.
    Get the recipe: Hot Apple Cider Cocktail

    Camping Desserts for Two

    It's dessert - the best part! These sweet camping treats for two are the perfect finish to a hearty meal and ideal for sharing with your favorite fellow camper.

    13
    Two open foil packet pear crisps surrounded by pears.
    Foil Packet Pear Crisp
    This juicy foil packet pear crisp is a simple autumn dessert featuring tender spiced pears topped with a crispy oat mixture. Make it over the campfire, on your grill, or in the oven.
    Get the recipe: Foil Packet Pear Crisp
    14
    A large cookie in a cast iron skillet, topped with whipped cream.
    Mini Skillet Cookie
    This chocolate chip skillet cookie is an easy grilled dessert for two, guaranteed to satisfy any sweet tooth.
    Get the recipe: Mini Skillet Cookie
    15
    Spiced grilled plums in a bowl on a plate with a fork and checkered napkin on the side.
    Spiced Grilled Plums
    Sweet summer plums are gently cooked in a foil packet in a sweetly spiced orange butter sauce. An easy summer dessert.
    Get the recipe: Spiced Grilled Plums

    April 18, 2025 Beef Recipes

    Blackstone Smash Burgers with Onions

    These Blackstone smash burgers with onions are the ultimate meal to make on your outdoor griddle. For this classic burger, a juicy seasoned beef patty is cooked together with thinly sliced onion and topped with melted provolone cheese. It's cheeseburger perfection that's ready in less than 30 minutes.

    A burger with cheese, lettuce, and tomato on a plate.

    I kept this Blackstone smash burger recipe pretty simple for a reason. Skipping any fillers and seasoning the beef with only salt and pepper lets the flavor of the beef and the fried onions truly shine. The secret to getting a juicy burger patty and perfectly cooked onions is to slice or shave your onions as thin as possible.

    [feast_advanced_jump_to]

    Why You'll Love This Recipe

    • You'll love the combination of tender beef, melted cheese, and crispy fried onion in your burger.
    • You can scale the recipe to make as many burgers as you need.
    • This Blackstone beef recipe is ready in less than 30 minutes.

    Ingredients and Substitutions

    Ingredients for Blackstone smash burgers--beef, buns, provolone cheese slices, and onion.
    • Ground beef--I recommend using lean ground beef (85/15), which will give you a little bit of fat for flavor. Don't use extra-lean as it may result in a dry burger. Got extra ground beef? Use it to make Blackstone chopped cheese sandwiches!
    • Onion--Yellow or white onions work well here. I tend to avoid using red onions or sweet onions for these smash burgers, as I find them too sweet.
    • Provolone--I think the flavor of provolone complements the beef and onions nicely, but any good melting cheese will work well here, including cheddar, Swiss, or Monterey jack.

    How to Make Smash Burgers on the Blackstone

    Thinly sliced onions on a paper towel.

    1. Toss the sliced onions with ¼ teaspoon salt and arrange on a double layer of paper towel to drain for 15 minutes.

    Two uncooked burger patties and a dish of salt and pepper.

    2. Shape the beef into two patties and sprinkle generously with salt and pepper.

    A person smashing a burger patty on a griddle.

    3. Place the beef patties on the griddle and smash to create thin burgers. Let them cook undisturbed until a crust begins to form.

    Two burger patties topped with thinly sliced onion.

    4. While the burgers are cooking, divide the onions between the burgers, piling them evenly on top.

    Two partially cooked burger patties on top of small piles of thinly sliced onion.

    5. Flip the burgers and cook for 2 minutes.

    Two burger buns and two burger patties with cheese on a Blackstone griddle.

    6. Top each burger with cheese and cook until the cheese is melted. Toast the buns while the cheese is melting.

    FAQs

    How do I slice onions paper thin?

    The key to perfect onion smash burgers is slicing the onions as thinly as possible. You can do this with a very sharp knife, but for the best results, I recommend using a mandoline.

    Can I make smash burgers in a cast iron skillet?

    Yes. Follow the recipe, cooking the burgers over medium high heat. If you're scaling the recipe to make more, I recommend only cooking two or three burgers at a time in your skillet. Overcrowding makes it difficult to flip them and your burgers won't crisp nicely.

    Tips and Troubleshooting

    • Some areas of your griddle will be hotter than others. Usually the area directly above the flame is the hottest. Cook the burgers on the hottest part of the griddle and use the cooler zone for toasting the buns.
    • You can salt and drain the onions and shape the burger patties a few hours in advance and store them in the fridge until you're ready to cook. Don't season the burgers until just before cooking though, as salt will draw moisture from the beef and can result in dry burgers.
    Two burger patties with cheese on a Blackstone griddle.

    More Blackstone Recipes You'll Love

    Four crab cakes on a platter with lemon and aioli.
    Blackstone Crab Cakes
    Two halves of a Monte Cristo sandwich stacked on to pof each other.
    Blackstone Monte Cristo

    Recipe

    A burger with cheese, lettuce, and tomato on a plate.

    Blackstone Smash Burgers with Onions

    A woman's face.Angie Zoobkoff
    Your everyday smash burger just got a major upgrade, thanks to crispy fried onions and melted provolone cheese.
    No ratings yet
    Print Recipe Pin Recipe
    Prep Time 10 minutes mins
    Cook Time 6 minutes mins
    Total Time 25 minutes mins
    Course Main Course
    Cuisine American
    Servings 2 burgers
    Calories 475 kcal

    Equipment

    • Blackstone (or other outdoor) griddle
    • Burger press

    Ingredients
      

    • ½ cup very thinly sliced onion (from about ½ medium onion)
    • ¼ teaspoon kosher salt plus more for the burger
    • 9 ounces (255 g) lean ground beef (85/15)
    • Freshly ground black pepper
    • 2 slices provolone cheese
    • 2 burger buns
    • Sliced tomato and shredded iceberg lettuce for serving (optional)

    Instructions
     

    • Toss the onions with ¼ teaspoon kosher salt and arrange in a thin layer on a double layer of paper towel. Let the onions drain for 15 minutes. Gently pat dry.
    • While the onions are resting, divide the ground beef into two equal portions and shape them into patties about 1-inch thick. Season generously with salt and pepper.
    • Preheat the Blackstone or other outdoor griddle to medium.
    • Working quickly, place each burger patty on the hot part of the griddle and immediately smash it with a burger press until about â…œ-inch thick (1 cm). Cook until the underside of the burger begins to brown and develop a crust, 2 to 3 minutes.
    • Divide the onions equally between the burgers and pile them in an even layer on the raw side of the burger.
    • Flip the burgers so that the onions are now in direct contact with the griddle. Cook until the onions are softened and beginning to crisp, 1 to 2 minutes.
    • Top each burger with a slice of cheese and continue to cook until the cheese is melted, 1 to 2 minutes more. While the cheese is melting, place the burger bun halves cut side down on the cooler zones of the griddle to let them toast for 30 seconds.
    • Serve the burgers immediately, topped with sliced tomato and shredded lettuce, if desired, along with any other classic burger condiments.

    Notes

    • Know your zones--Some areas of your griddle will be hotter than others. Usually the area directly above the flame is the hottest. Cook the burgers on the hottest part of the griddle and use the cooler zone for toasting the buns.
    • Get ahead--You can salt and drain the onions and shape the burger patties a few hours in advance and store them in the fridge until you're ready to cook. Don't season the burgers until just before cooking though, as salt will draw moisture from the beef and can result in dry burgers.

    Nutrition

    Serving: 1 burgerCalories: 475kcalCarbohydrates: 23gProtein: 38gFat: 25gCholesterol: 112mgSodium: 828mgFiber: 1gSugar: 4g
    Keyword blackstone cooking, blackstone griddle, cheeseburger, smash burgers
    Tried this recipe?Let us know how it was!

    April 16, 2025 Beef Recipes

    Steak Fajita Foil Packs

    These steak fajita foil packs transform the classic Tex-Mex dish into an easy camping dinner that can be cooked on the grill or over the campfire. Made with tender marinated steak, peppers, and onions, it's a satisfying meal that cooks in less than 15 minutes.

    A steak fajita foil pack with strips of steak, red pepper, and onion.
    [feast_advanced_jump_to]

    I love classic fajitas, but when I'm camping, if there's a way I can make something that tastes as delicious as the original with less dishes or work, I'm in. These steak foil packets have the juicy marinated steak, pepper, and onions that you'll find in the original, but without any pans to clean up, and are one of my favorite ways to enjoy steak.

    Why You'll Love This Recipe

    • It's cooked in a foil packet, making it a dishes-free camping meal.
    • You can cook them on your grill or over the campfire.

    Ingredients and Substitutions

    Ingredients for steak fajita foil packets--chili powder, oil, onion, pepper, steak, lime, cumin, and tortillas.
    • Steak--Just like with my beef and broccoli foil packets, I recomend using sirloin steak for these steak foil packets. It's lean, flavorful, and reasonably priced. Flank steak would also work well here.
    • Tortillas--I recommend using small flour tortillas. You'll be able to generously fill 3 tortillas from each foil packet.
    • Lime juice--You should be able to get 2 tablespoons of juice from 1 large lime. To help extract as much juice as possible, roll the lime firmly against a firm surface before slicing and juicing. You can also substitute bottled lime juice.

    How to Make Steak Foil Packets

    Marinade ingredients in a glass measuring cup with a whisk.

    1. Whisk the oil, lime juice, chili powder, cumin, salt, and pepper in a measuring jug.

    Steak, pepper, and onion in a plastic bag with marinade.

    2. Place the sliced steak, peppers, and onion in a resealable bag and pour the marinade over. Seal the bag and massage gently to coat. Chill for at least 1 hour and up to 8 hours.

    A portion of steak, peppers, and onions on foil before being folded into a foil packet.

    3. Divide the steak, peppers, and onions among four double layers of aluminum foil. Fold each one up to create foil packets.

    Four foil packs on the grill.

    4. Cook the foil packets over medium heat on a grill or over a campfire until cooked through. Serve with tortillas, sour cream, cilantro, and extra lime wedges.

    FAQs

    What's the best way to fold a foil packet?

    Place your food in the center of the foil. Bring the long edges of the foil up to meet, and then fold them over a couple of times, creating a seam that runs over the top of your food. Then working with one end at a time, fold it over a few times to seal the end.

    I like this method because it's easy to open the seal on top to check them for doneness and then close, if necessary, and it also creates an easy pouch for eating when opened.

    How should I store my steak foil packet leftovers?

    Remove any leftover steak and vegetables from the foil and store in a sealed container in your fridge or cooler for up to 3 days. To reheat, wrap in foil and reheat in a 300°F oven or on a low grill until warmed through.

    Tips and Troubleshooting

    • To make it easier to slice the steak, pop it in the freezer for 15 minutes before slicing. If you're camping, you can even slice the steak before heading out.
    • If you want to serve your fajita mixture in warm tortillas, wrap your tortillas in foil and toss them on the grill or over the fire while the foil packets are cooking.
    • To make this recipe gluten-free, serve it with corn tortillas.
    Two steak fajita foil packs with sour cream and tortillas on the side.

    More Foil Packet Recipes You'll Love

    A foil packet filled with cheesy potatoes with a dish of sour cream on the side.
    Cheesy Potato Foil Packets
    Two foil packets with salmon and bok choy.
    Honey Lime Salmon Foil Packets

    Recipe

    A steak fajita foil pack with strips of steak, red pepper, and onion.

    Steak Fajita Foil Packets

    A woman's face.Angie Zoobkoff
    Use a simple foil packet to turn steak fajitas into an easy mess-free camping meal.
    No ratings yet
    Print Recipe Pin Recipe
    Prep Time 15 minutes mins
    Cook Time 10 minutes mins
    Marinating 1 hour hr
    Total Time 1 hour hr 25 minutes mins
    Course Main Course
    Cuisine Tex-Mex
    Servings 4 servings
    Calories 731 kcal

    Equipment

    • Heavy duty aluminum foil

    Ingredients
      

    • ¼ cup olive oil
    • 2 tablespoons lime juice
    • 1 ½ teaspoons chili powder
    • ½ teaspoon ground cumin
    • ½ teaspoon table salt
    • ¼ teaspoon freshly ground black pepper
    • 1 ½ pounds sirloin steak cut into ¼-inch-thick slices
    • 1 medium sweet bell pepper cut into ¼-inch-thick slices
    • 1 small (or ½ large) red onion cut inot ¼-inch-thick slices
    • 12 small flour tortillas for serving
    • Sour cream, cilantro, and lime wedges for serving (optional)

    Instructions
     

    • Whisk the oil, lime juice, chili powder, cumin, salt, and pepper in a measuring jug.
    • Place the sliced steak, pepper, and onion in a large resealable plastic bag and pour the marinade into the bag. Seal the bag and massage gently to evenly coat the meat and vegetables. Let it marinate in the fridge or cooler for at least 1 hour or up to 8 hours.
    • Prepare a grill for medium heat (375°F) or prepare a campfire with hot coals.
    • Divide the steak fajita mixture among four double-layered pieces of aluminum foil, discarding any marinade that remains in the bag. Fold up each portion to create a foil packet.
    • Cook on the grill or over hot coals until the steak is cooked through and the vegetables are tender, 10 to 12 minutes.
    • Remove from the heat and open each packet carefully to let the steam escape. Pile the steak fajita mixture into tortillas and top with sour cream, cilantro, and a squeeze of lime, if desired.

    Notes

      • Get ahead--Slice the steak, pepper, and onions before heading out on your camping trip. Keep your vegetables separate from the steak until it's time to marinate.
      • Freeze before slicing--To make it easier to slice the steak, pop it in the freezer for 15 minutes before slicing or slice it before it is fully thawed.
      • Warm tortillas--Wrap your tortillas in foil and toss them on the grill or over the fire while the foil packets are cooking.
      • Dietary--To make this recipe gluten-free, serve it with corn tortillas.

    Nutrition

    Serving: 1 portionCalories: 731kcalCarbohydrates: 77gProtein: 51gFat: 24gCholesterol: 114mgFiber: 4gSugar: 5g
    Keyword foil pack cooking, foil packets
    Tried this recipe?Let us know how it was!

    April 11, 2025 Collections

    15 Best Vegetarian Grilling Recipes

    From appetizers to mains to desserts, these satisfying and flavor-packed vegetarian grilling recipes are proof that the grill isn't just for meat. Scroll down to find easy ways to showcase your favorite fruits and vegetables without turning on the oven.

    1
    Recipe and photo credit: Spabettie
    Caprese Grilled Asparagus and Lentils
    Celebrating fresh summer crops, caprese grilled asparagus and lentils make a perfect side dish or entree.
    Get the recipe: Grilled Asparagus and Lentils
    2
    Six grilled stuffed mushrooms on a plate.
    Grilled Stuffed Mushrooms
    This easy appetizer features a rich garlic, cream cheese, and panko filling tucked inside juicy grilled mushrooms. Perfect for any time of the year.
    Get the recipe: Grilled Stuffed Mushrooms
    3
    Recipe and photo credit: Kalyn's Kitchen
    Grilled Eggplant with Feta and Herbs
    Grilled eggplant with feta and herbs is a great recipe for cooking eggplant on the grill, and even eggplant avoiders will enjoy this recipe!
    Get the recipe: Grilled Eggplant with Feta
    4
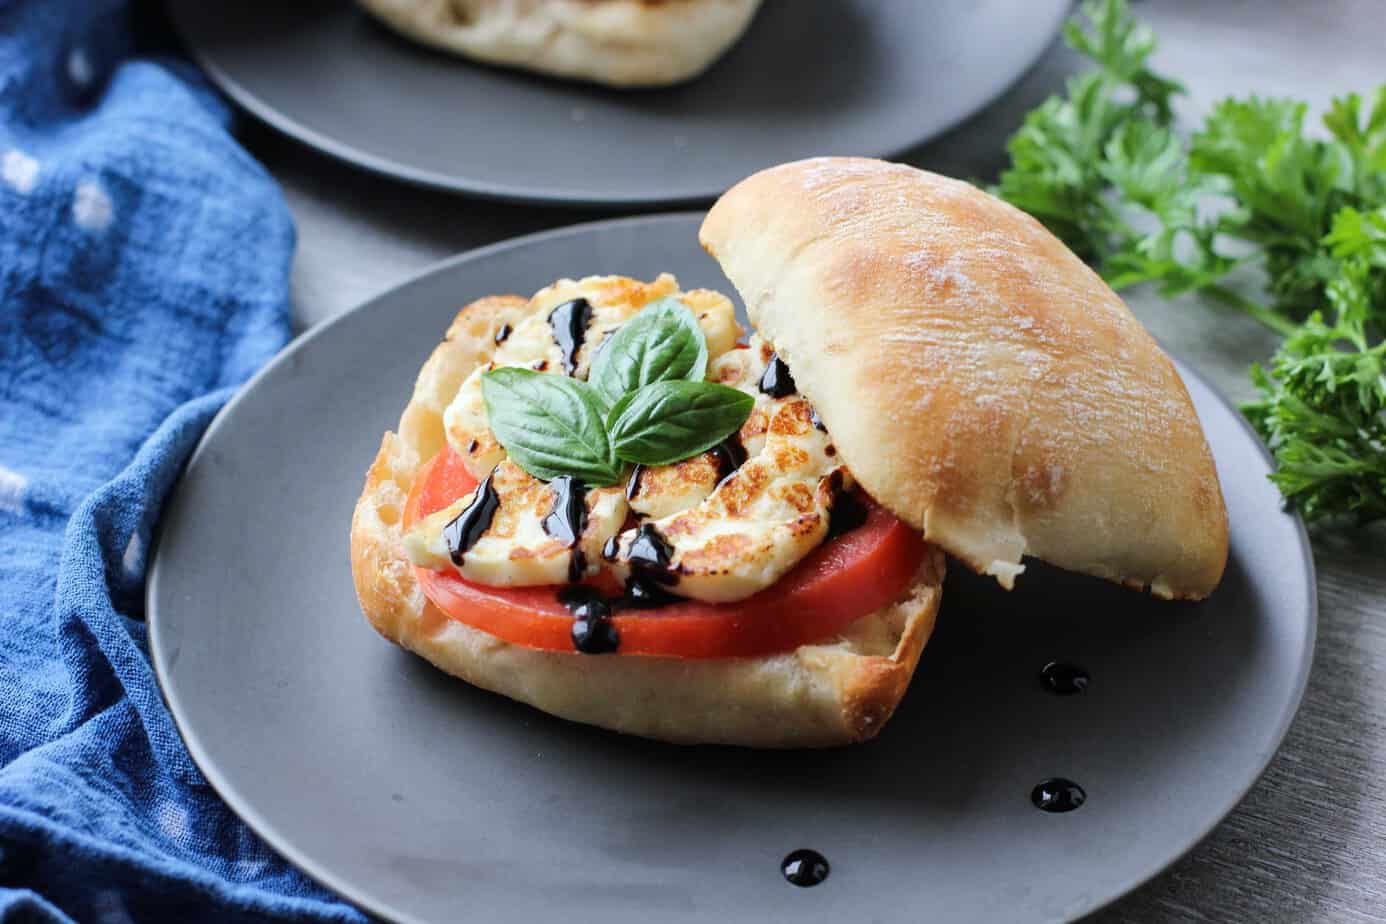
    Grilled Halloumi Sandwiches
    Recipe and photo credit: I Heart Vegetables
    Grilled Halloumi Sandwiches
    When you’re looking for an easy weeknight recipe, these grilled halloumi sandwiches are your answer! It’s a fast vegetarian recipe that can be made in less than 15 minutes!
    Get the recipe: Grilled Halloumi Sandwiches
    5
    A foil packet filled with cheesy potatoes with a dish of sour cream on the side.
    Cheesy Foil Packet Potatoes
    These buttery, cheesy potatoes in foil can be made on the grill, over the campfire, or in your oven for an easy, oh-so-satisfying side dish.
    Get the recipe: Cheesy Foil Packet Potatoes
    6
    Recipe and photo credit: This Silly Girl's Kitchen
    Marinated Grilled Vegetable Skewers
    Feeling like going meatless? Then these grilled vegetable skewers are an easy and tasty recipe that you can whip up indoors or outdoors in no time.
    Get the recipe: Grilled Vegetable Skewers
    7
    Recipe and photo credit: Foxes Love Lemons
    Grilled Peach Salad with Burrata
    This peach burrata salad has grilled peaches and luscious burrata cheese that are paired with rustic pesto croutons that you’ll want to gobble up before they even reach the table.
    Get the recipe: Grilled Peach Salad
    8
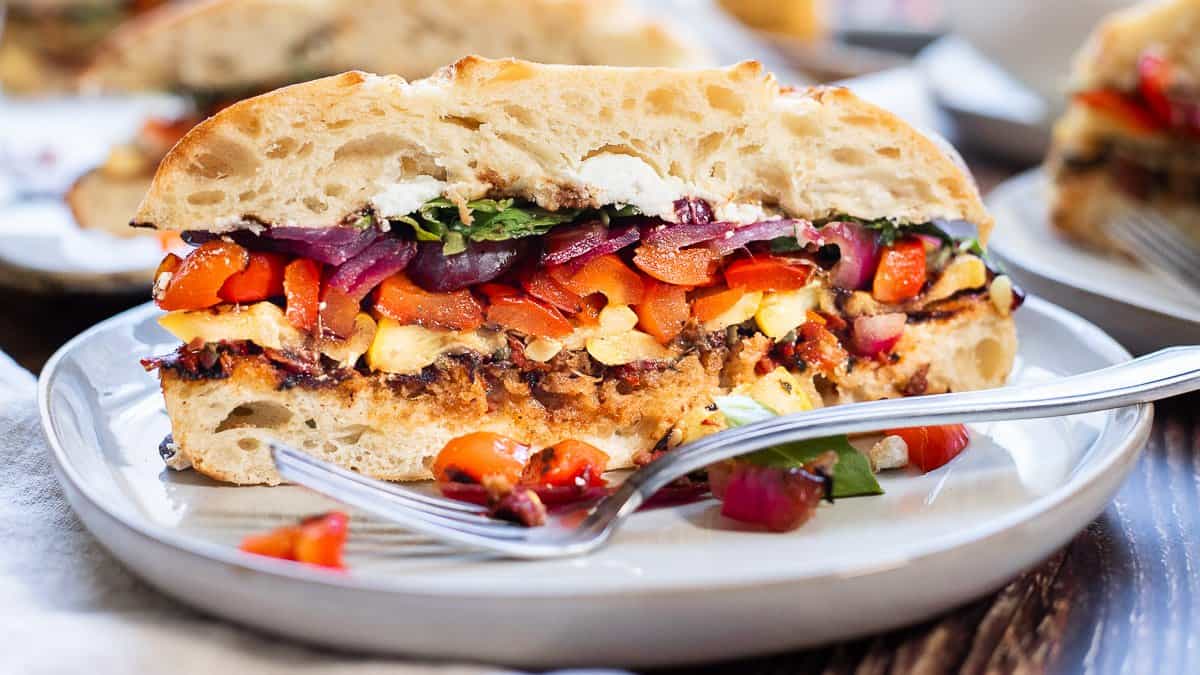
    Grilled Vegetable Sandwich with Tapenade
    Recipe and photo credit: Parsley & Parm
    Grilled Vegetable Sandwich with Tapenade
    Smoky grilled vegetables, salty, briny tapenade and creamy goat cheese make this a delicious and memorable vegetarian bbq recipe.
    Grilled Vegetable Sandwich with Tapenade
    9
    A bowl of cooked carrots with rosemary sprigs on the side.
    Grilled Carrots in Foil
    Infused with rosemary, garlic, and butter, these grilled carrots in foil are so delicious, everyone will be asking for seconds.
    Get the recipe: Grilled Carrots in Foil
    10
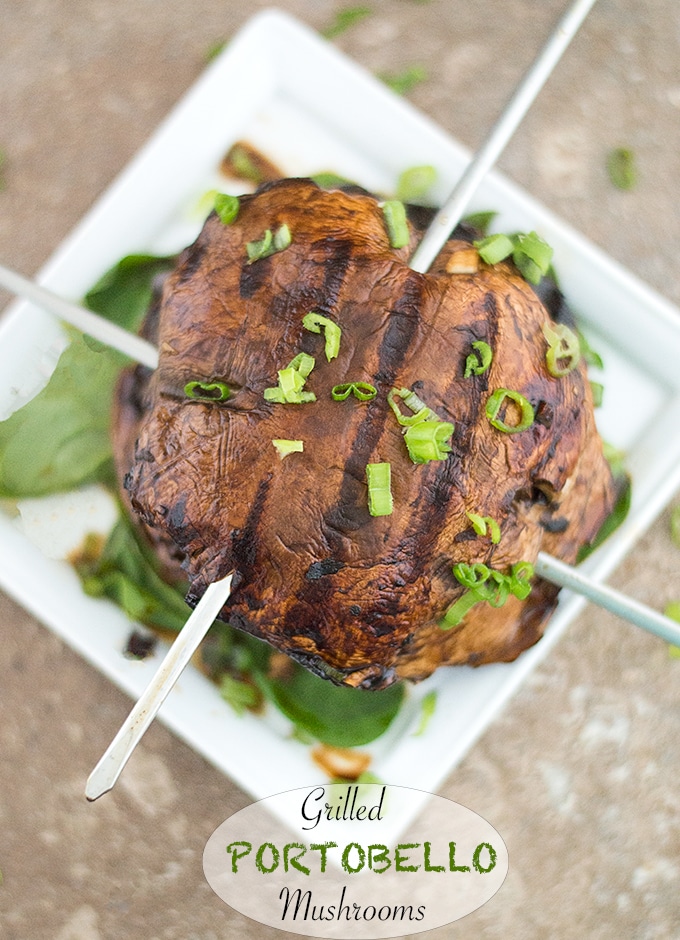
    Grilled Portobello Mushrooms
    Recipe and photo credit: Healing Tomato
    Grilled Portobello Mushrooms
    Grilled portobello mushrooms steaks are made by marinating in balsamic and soy sauce. Grill them and use them as burger buns too.
    Get the recipe: Grilled Portobello Mushrooms
    11
    A bowl of grilled beets with crumbled goat cheese and fresh mint.
    Grilled Beets with Goat Cheese
    An easy, healthy, side dish of tender grilled beets and creamy goat cheese with a bright and tangy lemon dressing.
    Get the recipe: Grilled Beets with Goat Cheese
    12
    Recipe and photo credit: Strength and Sunshine
    Grilled Cabbage Steaks
    These melt-in-your-mouth grilled cabbage steaks are the best way to serve the veggie!
    Get the recipe: Grilled Cabbage Steaks
    13
    A whole cast iron skillet blueberry cake, dusted with powdered sugar, with a sieve full of powdered sugar on the side.
    Cast Iron Skillet Blueberry Cake
    This sweet and slightly tangy lemon blueberry skillet cake is easy to make and can be baked in your oven or on the grill. It's perfect for dessert or as a breakfast coffee cake.
    Get the recipe: Grilled Blueberry Cake
    14
    Recipe and photo credit: Foodess
    Grilled Strawberry Shortcake Kebabs
    Grilled strawberries and grilled biscuits come together with a fresh strawberry sauce in a show-stopping version of the beloved summer dessert - and it doesn’t require you to turn on the oven! (Yes, even the biscuits are cooked right on the grates.)
    Get the recipe: Grilled Strawberry Shortcake Kebabs
    15
    Spiced grilled plums in a bowl on a plate with a fork and checkered napkin on the side.
    Spiced Grilled Plums
    Sweet summer plums are gently cooked in a foil packet in a sweetly spiced orange butter sauce. An easy summer dessert.
    Get the recipe: Grilled Spiced Plums

    April 8, 2025 Chicken & Turkey

    Grilled Chicken Gyros

    These grilled chicken gyros are a simple handheld meal of tender marinated chicken breast, creamy tzatziki dip, and all your favorite fixings stuffed into a soft pita. It's easy enough to make on a camping trip, but also ideal for a quick weeknight meal.

    A grilled chicken gyro on a plate with a bowl of fries and a bowl of dip in the background.

    The thing that I love most about this grilled Greek chicken gyros recipe is that it's a choose-your-own-adventure kind of meal. We get pretty excited about our wraps over here and pile on a lot of toppings, including lettuce, tomato, pickled onion, and feta cheese. You can do the same, or keep it as simple as you like. Just don't skip the tzatziki dip. It's the star of the show.

    [feast_advanced_jump_to]

    Why You'll Love This Recipe

    • It's an easy handheld meal, making it great for a casual meal at home or a dishes-free camping dinner.
    • Everyone can customize their gyro with their favorite toppings.

    Ingredients and Substitutions

    Ingredients for grilled chicken gyros--cucumber, chicken, lemon juice, oregano, pita, Greek yogurt, and garlic.
    • Chicken--You can use boneless, skinless breasts or thighs for this recipe. Cut your chicken into evenly-sized strips so that they all cook in the same amount of time.
    • Yogurt--This helps to keep the chicken moist and tender. I recommend using thick, full-fat plain Greek yogurt for this recipe. If you need to substitute a thinner type of plain yogurt, see the tips section below.
    • Cucumber--You can use long English cucumbers or the small Persian ones. It's not necessary to peel them and I think the skin adds a pleasant crunch to the sauce.

    How to Make Chicken Gyros on the Grill

    Yogurt, lemon juice, garlic, and spices being mixed together in a glass measuring jug.

    1. Combine the Greek yogurt, lemon juice, garlic, oregano, and salt and pepper in a measuring glass or bowl.

    Pieces of chicken coated in marinade in a resealable plastic bag.

    2. Place the sliced chicken in a resealable bag and pour the marinade over. Massage gently to coat the chicken. Chill for up to 8 hours.

    Ingredients for tzatziki sauce being mixed in a small bowl.

    3. Make the tzatziki sauce by stirring the remaining Greek yogurt, cucumber, lemon juice, grated garlic, and salt together.

    Strips of chicken cooking on a grill.

    4. Grill the chicken until cooked through. Assemble the gyros with grilled chicken, tzatziki sauce, and any other desired toppings.

    What to Serve with Greek Chicken Gyros

    When packed with your favorite toppings, this is a meal in itself! That said, I'll always welcome a bowl of simple Greek salad or a plate of French fries topped with a little oregano and feta cheese on the side.

    Tips and Troubleshooting

    • Don't marinate the chicken for longer than 8 hours as the acid in the marinade can cause the chicken to begin to break down and become mushy.
    • If you are using a thinner style of plain yogurt, toss your cucumbers with the ¼ teaspoon salt and let them sit in a fine-mesh sieve for 15 minutes before mixing them with the remaining sauce ingredients. This will help to release water from the cucumbers so that the sauce doesn't become too thin. If you're using thick Greek yogurt, this step isn't necessary.
    • I recommend using a grill tray for cooking the chicken to prevent the pieces from falling through the grill.
    • For easier folding, wrap your pitas in foil and warm them on the grill while the chicken is cooking.
    • Store extra chicken, and sauce separately in the fridge for up to 4 days. It's ok if the sauce begins to separate; give it a good stir to recombine before using.
    Two chicken gyros wrapped in paper with a bowl of French fries and a bowl of tzatziki sauce nearby.

    More Grilled Chicken Recipes You'll Love

    Sliced grilled chicken on a plate with pesto drizzle around it.
    Grilled Mozzarella-Stuffed Chicken
    Cut up pieces of bone-in chicken on a platter.
    Grilled Honey Lime Chicken

    Recipe

    A grilled chicken gyro on a plate with a bowl of fries and a bowl of dip in the background.

    Grilled Chicken Gyros

    A woman's face.Angie Zoobkoff
    Tender marinated grilled chicken, creamy tzatziki sauce, and all your favorite fixings stuffed into a soft pita. It's an easy camping meal or perfect for a casual night at home.
    No ratings yet
    Print Recipe Pin Recipe
    Prep Time 15 minutes mins
    Cook Time 10 minutes mins
    Marinating 4 hours hrs
    Total Time 4 hours hrs 25 minutes mins
    Course Main Course
    Cuisine Mediterranean
    Servings 4 servings
    Calories 423 kcal

    Equipment

    • Grill tray

    Ingredients
      

    For the chicken

    • 1 cup Greek yogurt
    • 1 tablespoon lemon juice
    • 2 cloves garlic minced
    • 1 teaspoon oregano
    • ½ teaspoon salt
    • ¼ teaspoon freshly ground black pepper
    • 1 pound boneless skinless chicken breast cut into 1-inch-thick strips

    For the tzatziki sauce

    • 1 cup Greek yogurt
    • ½ cup diced cucumber
    • 1 clove garlic grated
    • ¼ teaspoon salt

    For serving

    • 4 pita
    • Lettuce, tomato, crumbled feta cheese, and pickled onion optional

    Instructions
     

    Marinate the chicken

    • In a medium bowl or large measuring cup, stir 1 cup Greek yogurt, lemon juice, 2 minced garlic cloves, oregano, ½ teaspoon salt, and ¼ teaspoon pepper together.
    • Place the chicken strips into a resealable plastic bag and pour the marinade over. Seal the bag and massage gently to thoroughly coat the chicken. Stash it in the fridge for at least 2 hours and up to 8 hours.

    Make the tzatziki sauce

    • In a medium bowl, combine 1 cup Greek yogurt, ½ cup diced cucumber, 1 grated clove garlic, 1 teaspoon lemon juice, and ¼ teaspoon salt. Cover and refrigerate for at least 30 minutes or until you're ready to serve.

    Grill the chicken

    • Preheat the grill to medium (375°F).
    • Remove the chicken from the marinade, letting any excess drip back into the bag. Place the chicken on a grill tray and cook, flipping the chicken once, until cooked through, about 10 minutes.
    • To assemble the gyros, place ¼ of the cooked chicken on each pita, then top with a spoonful of tzatziki sauce, and lettuce, tomato, onion, and feta, if desired. Serve warm.

    Notes

      • Don't over-marinate--Don't marinate the chicken for more than 8 hours as the acid in the marinade can cause the chicken to begin to become mushy.
      • Using thin yogurt--If you are using a thin style of plain yogurt, toss your cucumbers with the ¼ teaspoon salt and let them sit in a fine-mesh sieve for 15 minutes before mixing them with the remaining sauce ingredients. This will help to release water from the cucumbers so that the sauce doesn't become too thin. 
      • Use a grill tray--I recommend using a grill tray for cooking the chicken to prevent the pieces from falling through the grill.
      • Warm the pita--For easier folding, wrap your pitas in foil and warm them on the grill while the chicken is cooking.
      • Storage--Store extra chicken, and sauce separately in the fridge for up to 4 days. It's ok if the sauce begins to separate; give it a good stir to recombine before using.

    Nutrition

    Serving: 1 gyroCalories: 423kcalCarbohydrates: 39gProtein: 33gFat: 14gCholesterol: 85mgSodium: 872mgFiber: 2gSugar: 5g
    Keyword camping dinner ideas, camping lunch ideas, grilled chicken, handheld meals, weeknight grilling
    Tried this recipe?Let us know how it was!

    April 4, 2025 Beef Recipes

    Dutch Oven Meatloaf

    This simple Dutch oven meatloaf for camping is easy to prepare and is cooked entirely in your cast iron Dutch oven. It's packed with flavor from simple, everyday ingredients, including tender ground beef, bread crumbs, egg, onion, and a tangy glaze on top.

    A partially sliced meatloaf on a platter with a bowl of peas and a bowl of mashed potatoes nearby.

    When I'm at home, my meatloaf recipes get pretty elaborate. There's the pre-cooking of vegetables, then all kinds of "extras", like cheese, multiple types of meat, and a multitude of seasonings. When you're camping, you don't need that kind of fuss, and if I'm being honest, good meatloaf doesn't need a lot of ingredients. (I just like to overcomplicate things!)

    I knew that I wanted a simple meatloaf recipe for camping that could be prepared in the Dutch oven and cooked over the fire. I also wanted to eliminate any extra steps that would require more work and dishes, which I try to avoid when camping. Most meatloaf recipes require you to cook the onion before adding it to the meat, to avoid bits of raw, crunchy onion in your finished loaf. I'm happy to report that by grating it raw into the meat mixture, you avoid that entirely, get a pleasant (not raw!) onion flavor in the finished dish and don't have to haul out any extra equipment!

    [feast_advanced_jump_to]

    Why This Recipe is Great for Camping

    • It's a hearty and satisfying main dish that is cooked in your cast iron Dutch oven over the fire.
    • It's made with simple, everyday ingredients, most of which you'd normally take on a camping trip!
    • You can prepare and cook it in under an hour!

    Ingredients and Substitutions

    Ingredients for Dutch oven meatloaf--ground beef, onion, Worcestershire sauce, ketchup, mustard, milk, egg, bread crumbs.
    • Ground beef--I recommend using lean ground beef (85/15), which will give you a little bit of fat for flavor. Anything fattier will give off too much liquid while cooking and using extra lean may result in a dry meatloaf.
    • Milk--You can use any type of milk you like, including non-dairy.
    • Bread crumbs--You can use plain or seasoned dry bread crumbs here, or feel free to substitute panko.

    How to Make Meatloaf in a Dutch Oven

    Soaked bread crumbs in a bowl.

    1. Combine the bread crumbs and milk in a large bowl and let soak for 5 minutes.

    A bowl with ground beef, egg, and soaked bread crumbs.

    2. Add the ground beef, egg, onion, Worcestershire, salt, and pepper, and mix well to combine.

    A shaped meatloaf in a parchment-lined Dutch oven.

    3. Shape the meatloaf mixture into a 5-by-7-inch loaf on a sheet of parchment paper. Lift the paper and transfer it to a Dutch oven.

    A covered Dutch oven with coals on the lid in a fire pit.

    4. Cook with 8 coals below and 16 on top for 30 minutes.

    A bowl with ketchup, mustard, and worcestershire sauce.

    5. Mix the ketchup, mustard, and Worcestershire sauce together to create a glaze.

    A meatloaf covered in glaze cooking in a Dutch oven.

    6. Brush the glaze on the meatloaf, cover, and continue cooking until the meatloaf is cooked through.

    FAQs

    What size Dutch oven do I need for this recipe?

    For this recipe, I recommend using a 6-to-8-quart Dutch oven. Anything smaller will be too small to hold the meatloaf.

    What should I serve with this?

    Enjoy your Dutch oven meatloaf with fluffy mashed potatoes and some grilled carrots in foil or a simple green salad tossed with sun-dried tomato vinaigrette on the side.

    How do I know when it's done?

    The meatloaf is done when it reaches 165°F (74°C) on an instant-read thermometer inserted into the center of the meatloaf. Take care to not overcook the meat as it can become dry.

    Tips and Troubleshooting

    • Since you're cooking in a Dutch oven outside, the cooking time can vary due to outside temperature and wind. If you're cooking on a very windy day, try to protect the Dutch oven with a barrier, such as a tarp.
    • Don't be tempted to slice into your meatloaf immediately. It will fall apart! Let it rest for 10 minutes before cutting and you'll be rewarded with nice even slices.
    • Slice any leftover meatloaf and store it in a sealed container in your fridge or cooler for up to 4 days. Rewarm each slice in a skillet or on a griddle until heated through. It makes a great sandwich filling, or can be added to your loaded hash browns or poutine for breakfast!
    A slice of meatloaf on a plate with peas and mashed potatoes.

    More Dutch Oven Camping Recipes You'll Love

    Cooked cornbread inside a cast iron Dutch oven.
    Dutch Oven Cornbread
    A serving of shepherd's pie on a plate.
    Dutch Oven Shepherd's Pie

    Recipe

    A partially sliced meatloaf on a platter with a bowl of peas and a bowl of mashed potatoes nearby.

    Dutch Oven Meatloaf

    A woman's face.Angie Zoobkoff
    Take your Dutch oven cooking to the next level with this simple classic beef meatloaf, topped with tangy glaze.
    No ratings yet
    Print Recipe Pin Recipe
    Prep Time 10 minutes mins
    Cook Time 45 minutes mins
    Total Time 55 minutes mins
    Course Main Course
    Cuisine American
    Servings 6 servings
    Calories 331 kcal

    Equipment

    • 6-to-8-quart cast iron Dutch oven
    • Parchment paper

    Ingredients
      

    For the meatloaf

    • ½ cup dried bread crumbs
    • ¼ cup milk
    • 1 ½ pounds (680 g) lean ground beef
    • 1 large egg lightly beaten
    • ½ medium onion grated (about â…“ cup)
    • 2 teaspoons Worcestershire sauce
    • 1 teaspoon salt
    • ½ teaspoon ground black pepper

    For the glaze

    • ¾ cup ketchup
    • 2 tablespoons yellow mustard
    • 1 tablespoon Worcestershire sauce

    Instructions
     

    Make the meatloaf

    • Prepare hot coals or embers for Dutch oven cooking. You'll need to start with 24 coals. They're ready to use when they're glowing and covered in white ash.
    • In a large bowl, combine the bread crumbs and the milk and stir together. Let soak for 5 minutes.
    • Add the beef, egg, onion, Worcestershire sauce, salt, and pepper and use your hands to mix everything thoroughly.
    • Shape the mixture into a 5-by-7-inch rectangle (about 1 ½ inches tall) on a piece of parchment paper. Use the sides of the parchment to lift the meatloaf into the Dutch oven, then cover with the lid.
    • Place the Dutch oven in the fire pit and arrange 8 coals below it and 16 on the lid. Cook for 30 minutes. After 15 minutes, begin preparing another batch of coals.

    Make the glaze

    • While the meatloaf is cooking, mix the ketchup, mustard, and Worcestershire sauce together in a medium bowl.
    • After the meatloaf has cooked for 30 minutes, uncover it and brush it all over with the glaze.
    • Cover the Dutch oven and arrange a new batch of hot coals (8 on the bottom and 16 on the lid). Cook until the internal temperature of the meatloaf reaches 165°F (74°C) on an instant read thermometer, 15 to 20 minutes more.
    • Remove the Dutch oven from the heat. Use the parchment to remove the meatloaf from the pot and let it rest for 10 minutes before slicing and serving.

    Notes

    • Protect your Dutch oven--Since you're cooking in a Dutch oven outside, the cooking time can vary due to outside temperature and wind. If you're cooking on a very windy day, try to protect the Dutch oven with a barrier, such as a tarp.
    • Let it rest--Don't be tempted to slice into your meatloaf immediately. It will fall apart! Let it rest for 10 minutes before cutting and you'll be rewarded with nice even slices.
    • Storage and reheating--Slice any leftover meatloaf and store it in a sealed container in your fridge or cooler for up to 4 days. Rewarm each slice in a skillet or on a griddle until heated through. It makes a great sandwich filling, or can be added to your loaded hash browns or poutine for breakfast!

    Nutrition

    Serving: 1 sliceCalories: 331kcalCarbohydrates: 18gProtein: 28gFat: 16gCholesterol: 115mgSodium: 927mgFiber: 1gSugar: 9g
    Keyword campfire cooking, dutch oven cooking, ground beef recipes
    Tried this recipe?Let us know how it was!

    April 1, 2025 Everyday Staples

    Sun-Dried Tomato Vinaigrette

    Give your salad a boost of flavor with this tangy sun-dried tomato vinaigrette. Made with sun-dried tomatoes, vinegar, basil, and mustard, this easy homemade dressing will quickly become your fave salad topper.

    A jar of sun-dried tomato vinaigrette with tomatoes in the background.

    Whether I'm at home or at camp, I love recipes that can be used for multiple meals, like my Italian sausage meatballs or a big batch of seasoned ground beef to make burritos or walking tacos. This sun-dried tomato basil vinaigrette recipe is no exception. Besides its obvious use as an everyday salad dressing, it can be used as a marinade, sandwich spread, and so much more.

    Why You'll Love This Recipe

    • It's incredibly versatile and can be used for several different dishes.
    • It only takes 10 minutes to make.
    • It stores well for several days.

    Ingredients and Substitutions

    Ingredients for sun-dried tomato vinaigrette--sun-dried tomatoes, basil, olive oil, Dijon, white wine vinegar, and sugar.
    • Sun-dried tomatoes--Use sun-dried tomatoes packed in oil for this homemade salad dressing recipe, as you'll also be using the seasoned oil. Sun-dried tomatoes can usually be purchased in halves or strips (julienne cut). The strips are easier to work with, since you don't have to cut anything, but if you've got the halves, simply pat them dry and slice them before adding them to the blender.
    • White wine vinegar--You can substitute red wine vinegar or apple cider vinegar, if you prefer.
    • Sugar--Feel free to swap in honey or agave, if you prefer.

    How to Make Sun-Dried Tomato Dressing

    Vinaigrette ingredients in a blender.

    1. Combine all the dressing ingredients in the blender.

    Blended vinaigrette in a blender.

    2. Blend until smooth, adding extra water, if needed to reach your desired consistency. Season to taste.

    FAQs

    How long will the dressing last in the fridge?

    If stored in a sealed container in the fridge, your sun-dried tomato dressing will last up to 1 week.

    Can you freeze this dressing?

    Yes, it can be frozen for up to 3 months. Freeze it in a sealed container or bag and thaw in the fridge. You will need to stir it well before using. For individual portions, freeze it in ice cube trays and thaw as needed.

    How to Use This Dressing

    This simple dressing can be used anywhere you'd use a bottled salad dressing. Some of my favorite uses include:

    • Drizzled over a tossed green salad
    • Used as a spread on your favorite sandwich recipe
    • Mixed into a quinoa or rice bowl for a jazzed up meal-prep lunch
    • Tossed with tomato and bocconcini for an easy side dish
    • Used as a marinade for grilled chicken

    Tips and Troubleshooting

    • I prefer to leave this vinaigrette on the thicker side after blending, so that it can be used for a variety of purposes. If I need to make a thinner batch for tossing with salad, I scoop some out of the jar and thin with a little extra oil or water.
    • If the dressing separates, give it a good stir or shake to recombine before using.
    • This recipe is suitable for gluten-free, dairy-free, and vegan diets.
    A jar of sun-dried tomato vinaigrette with fresh tomatoes nearby.

    More Dressing Recipes You'll Love

    A bowl of chunky blue cheese dressing.
    Chunky Blue Cheese Dressing
    A jar of lemon thyme vinaigrette wit ha lemon and bunch of thyme behind it.
    Lemon Thyme Vinaigrette

    Recipe

    A jar of sun-dried tomato vinaigrette with tomatoes in the background.

    Sun-Dried Tomato Vinaigrette

    A woman's face.Angie Zoobkoff
    This sun-dried tomato vinaigrette recipe is an easy homemade salad dressing that can double as a marinade, sandwich spread, and so much more.
    No ratings yet
    Print Recipe Pin Recipe
    Prep Time 10 minutes mins
    Total Time 10 minutes mins
    Course Condiment
    Cuisine American
    Servings 1 cup
    Calories 91 kcal

    Equipment

    • Blender

    Ingredients
      

    • â…“ cup chopped or julienne cut sun-dried tomatoes in oil drained (reserve oil)
    • ¼ to â…“ cup water
    • 2 tablespoons sun-dried tomato oil
    • 2 tablespoons olive oil
    • 2 tablespoons white wine vinegar
    • 2 teaspoons Dijon mustard
    • 1 ½ teaspoons dried basil
    • 1 teaspoon granulated sugar plus more if needed
    • ½ teaspoon kosher salt plus more if needed
    • ¼ teaspoon freshly ground black pepper plus more if needed

    Instructions
     

    • In a blender, combine the sun-dried tomatoes, ¼ cup water, oils, vinegar, basil, sugar, salt, and pepper.
    • Blend on high speed until emulsified, about 30 seconds, adding more water 1 tablespoon at a time to achieve the desired consistency. Season to taste with additional sugar, salt, or pepper, if desired.
    • Transfer to a lidded jar or container and refrigerate until ready to use. Stir well before using. The dressing can be stored for up to 1 week in the fridge.

    Notes

    • Thinning the dressing--I prefer to leave this vinaigrette on the thicker side after blending, so that it can be used for a variety of purposes. If I need to make a thinner batch for tossing with salad, I scoop some out of the jar and thin with a little extra oil or water.
    • Dietary--This recipe is suitable for gluten-free, dairy-free, and vegan diets.

    Nutrition

    Serving: 2 tablespoonsCalories: 91kcalCarbohydrates: 3gProtein: 1gFat: 8gSodium: 493mgFiber: 1gSugar: 2g
    Keyword homemade condiments, homemade dressing
    Tried this recipe?Let us know how it was!

    March 28, 2025 Camping

    18 Best Campfire Cooking Recipes

    From foil packet recipes to satisfying meals made in your cast iron Dutch oven, there are so many ways to cook over a campfire. This collection of the 18 best campfire cooking recipes will have you whipping up breakfast, lunch, dinner, and dessert over the fire on your next camping trip.

    1
    Two Cajun chicken foil packets on plates with forks on the side.
    Cajun Chicken Foil Packets
    These easy 5-ingredient chicken and veggie foil packs are a healthy meal that's filled with tender boneless chicken thighs, peppers, and onions, all gently infused with Cajun seasoning.
    Get the recipe: Cajun Chicken Foil Packets
    2
    A small skillet filled with beer cheese dip, topped with shredded cheese, tomatoes, and scallions with chips on the side.
    Skillet Beer Cheese Dip
    This beer cheese dip with cream cheese, smoked Gouda, Cheddar, and beer is easy to make in your cast iron skillet. It can be made over the campfire, on your camp stove, or on a regular stove.
    Get the recipe: Beer Cheese Dip
    3
    Recipe and photo credit: This Silly Girl's Kitchen
    Hamburger Hobo Dinner Foil Packets
    It doesn’t get much easier than these hobo dinner foil packets, perfect for any camping trip to a weeknight meal!
    Get the recipe: Hamburger Hobo Dinner Foil Packets
    4
    A bowl full of cinnamon sugar doughnut holes with a half eaten one on the side.
    Campfire Doughnut Holes
    A sweet breakfast or dessert treat that's perfect for enjoying around the campfire.
    Get the recipe: Campfire Doughnut Holes
    5
    A Dutch oven filled with baked beans on a campfire grate.
    Dutch Oven Baked Beans
    Made with canned navy beans, bacon, onion, and a sweet and tangy sauce, this hearty crowd-pleasing dish will keep all of your campers happy.
    Get the recipe: Dutch Oven Baked Beans
    6
    Recipe and photo credit: xoxo Bella
    Pie Iron Tater Tots with Cheese
    Pie iron cheesy tots are easy to make and a great reason to invest in a pie iron or two. Tater tots, peppers, onion and shredded cheese unite to make this flavorful dish.
    Get the recipe: Pie Iron Tater Tots
    7
    Recipe and photo credit: Dutch Oven Daddy
    Dutch Oven Mountain Man Breakfast
    Hearty and meaty, this Dutch oven mountain man breakfast uses simple ingredients to create big flavor for satisfying your hungry eaters.
    Get the recipe: Dutch Oven Mountain Man Breakfast
    8
    A bowl of chicken noodle soup with a spoon resting inside and a bun on the side.
    Dutch Oven Chicken Noodle Soup
    This comforting chicken noodle soup recipe is made in your Dutch oven and can be cooked over your campfire, camp stove, or on your stovetop at home. It's chock full of tender chicken thighs, vegetables, and egg noodles.
    Get the recipe: Dutch Oven Chicken Noodle Soup
    9
    A shucked ear of corn on top of several other unshucked cooked ears of corn.
    Campfire Corn
    Minimal effort and sweet buttery flavor make this smoky campfire corn on the cob the perfect camping side dish.
    Get the recipe: Campfire Corn
    10
    A pot of cowboy stew and two bowls filled with the stew on a table.
    Texas Cowboy Stew
    This hearty stew, filled with ground beef, kielbasa, bacon, and vegetables is the perfect campfire Dutch oven meal.
    Get the recipe: Texas Cowboy Stew
    11
    Recipe and photo credit: Champagne Tastes
    Campfire Chicken Enchiladas
    These campfire chicken enchiladas are filled with veggies, chicken, and beans, then covered in pepper jack cheese and cooked in a cast-iron Dutch oven. A delicious camping meal!
    Get the recipe: Campfire Chicken Enchiladas
    12
    Four pieces of toasted garlic bread on a wooden cutting board.
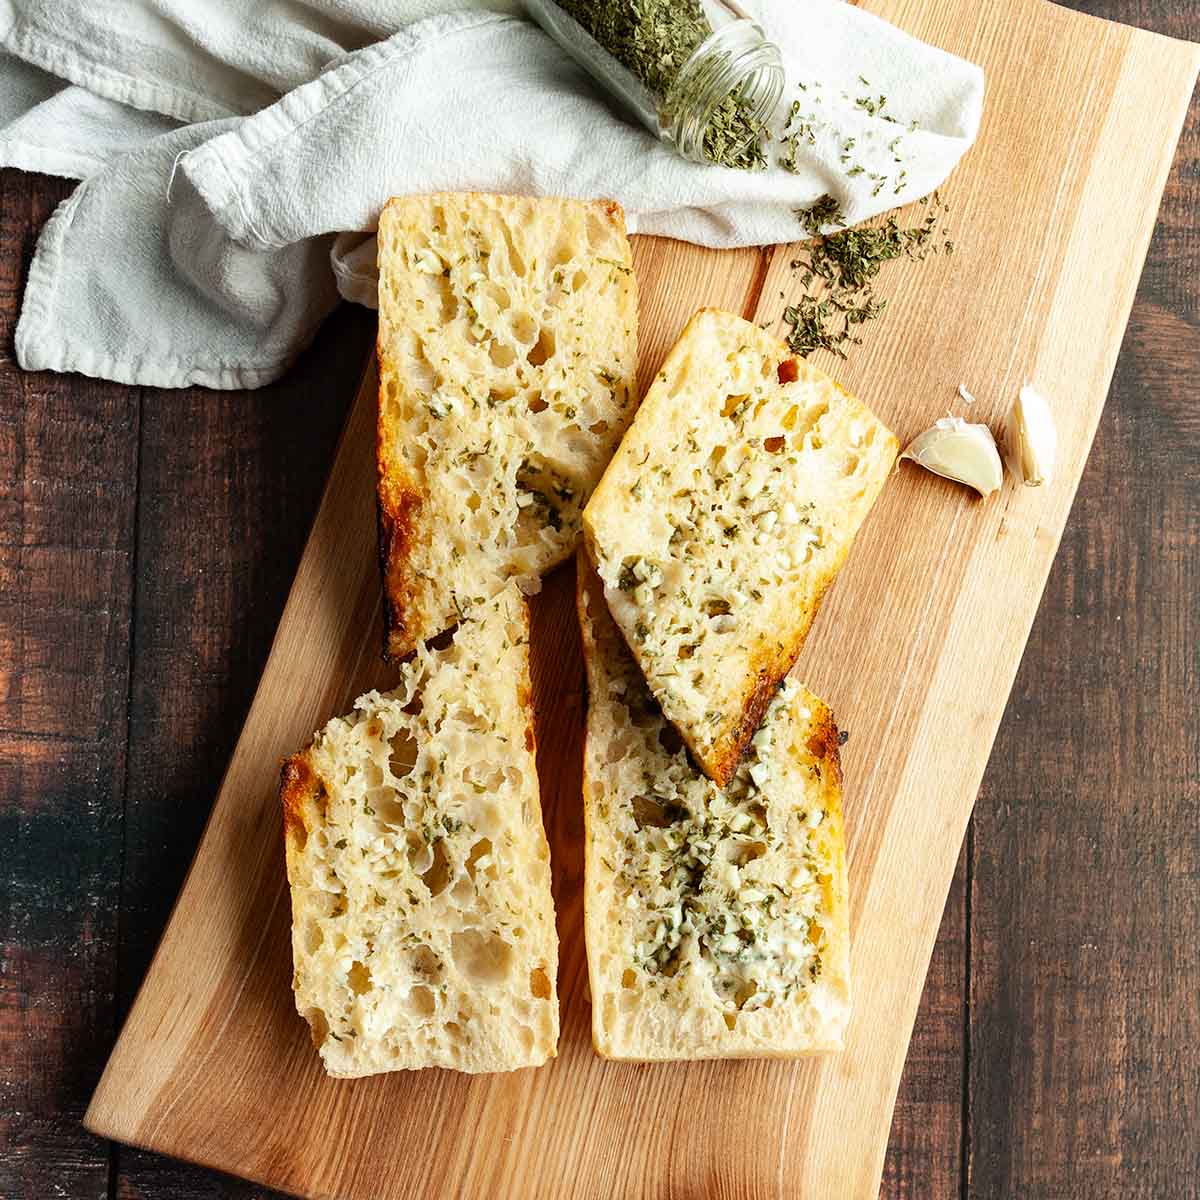
    Campfire Garlic Bread
    This easy camping garlic bread recipe is made with homemade garlic butter that's schmeared over bread, and the whole shebang is wrapped in foil and toasted over the campfire. It's an easy camping side dish that goes well with pasta, stew, chili, and soup.
    Get the recipe: Campfire Garlic Bread
    13
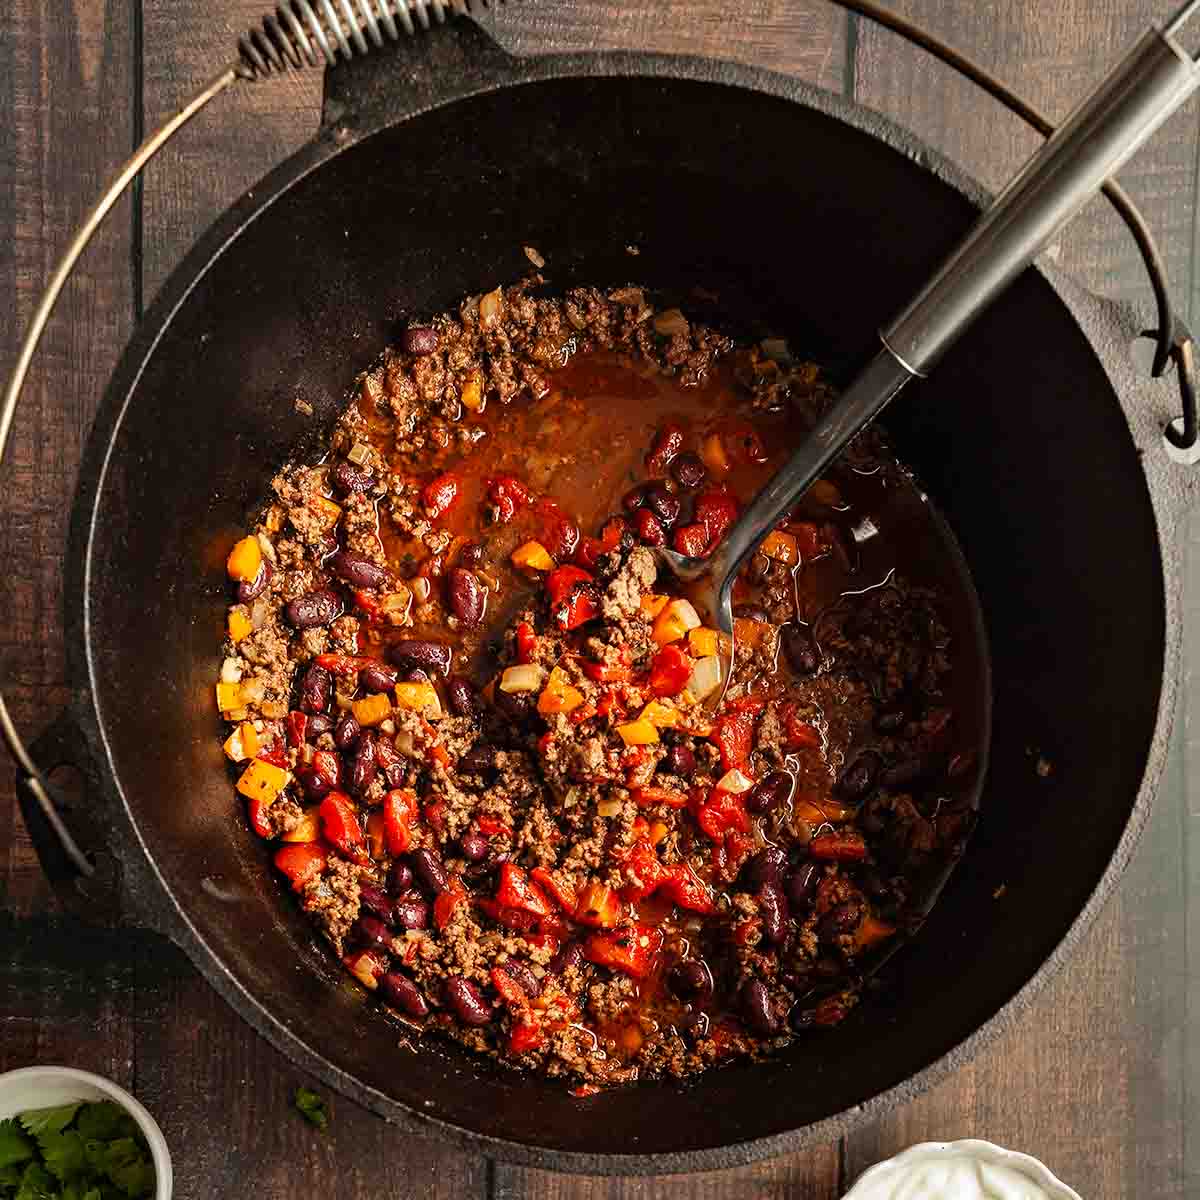
    A Dutch oven filled with campfire chili with a metal spoon resting inside.
    Dutch Oven Campfire Chili
    This ground beef chili for camping is made in your cast iron Dutch oven over the campfire. It's hearty and satisfying and easily the best chili recipe I've ever tried.
    Get the recipe: Campfire Chili
    14
    Baked potatoes topped with sour cream and scallions.
    Campfire Baked Potatoes
    A campfire classic made with Russet potatoes that are wrapped in foil and buried in coals. They come out with crispy skin and soft, fluffy interiors. Load them up with your favorite toppings and enjoy!
    Get the recipe: Campfire Baked Potatoes
    15
    A chip being pulled from a batch of nachos.
    Recipe and photo credit: Princess Pinky Girl
    Campfire Nachos
    Campfire nachos are great whether you are camping the wilderness or in the backyard! They are perfect camping recipe over the campfire, on the grill or in the oven. The bonus is no clean up is necessary!
    Get the recipe: Campfire Nachos
    16
    Two campfire waffle cones filled with marshmallows, Rolo pieces, and Teddy Grahams.
    Campfire Cones
    Everything you love about s'mores, stuffed into a waffle cone and cooked over the campfire until melted and gooey.
    Get the recipe: Campfire Cones
    17
    A scoop of strawberry rhubarb crisp on a blue plate with three strawberries.
    Strawberry Rhubarb Campfire Crisp
    This sweet-tart crisp is filled with fresh strawberries and rhubarb and topped with a buttery cinnamon-oat streusel.
    Get the recipe: Campfire Crisp
    18
    A chocolate cake in a Dutch oven.
    Dutch Oven Chocolate Cake
    Dotted with chocolate chips and laced with ribbons of fudgy chocolate pudding, this cake is the ultimate Dutch oven camping dessert.
    Get the recipe: Dutch Oven Chocolate Cake

    March 25, 2025 Camping

    Marinated Bean Salad

    This marinated bean salad is an easy make-ahead side dish made with beans, corn, onion, and a tangy lime dressing. It's packed with flavor, makes enough to feed a crowd, and takes only 15 minutes to make.

    A bowl of bean salad with corn.

    We eat a lot of salads when we're camping. Mostly because there are so many great ones that can be made ahead, including pasta salad, marinated vegetable salad, Greek salad, and more, including this easy make-ahead bean salad. It's packed with good-for-you ingredients, it's hearty and filling, and it makes a large batch, which can be used to feed your family for several days, or to feed a crowd, whether at camp or your next long weekend backyard cookout.

    [feast_advanced_jump_to]

    Why This Recipe is Great for Camping

    • It's an easy make ahead salad recipe.
    • It only takes 15 minutes to make.
    • It stores well for several days and is a great option when you need a no-cook camping recipe.

    Ingredients and Substitutions

    Ingredients for marinated bean salad--beans, cilantro, vinegar, corn, lime, oil, onion, cumin, chili, and sugar.
    • Beans--This marinated bean salad recipe uses several types of beans to give the salad plenty of flavor and color. Feel free to play around with your favorite types of beans. Always rinse and drain your canned beans as this will help reduce the sodium content and make them easier to digest.
    • Corn--I use canned corn here since it is available year round, but you can use cooked frozen or fresh corn. If you've got leftover campfire corn, feel free to mix that in to add some smoky flavor to the salad.
    • Lime--Your lime should yield 1 ½ to 2 tablespoons of juice. To help extract as much juice as possible, roll it firmly against a firm surface before juicing. If it's a little stingy, grab a second lime half and squeeze that in.

    How to Make Bean and Corn Salad

    A measuring jug filled with dressing with a halved lime next to it.

    1. Whisk the dressing ingredients together.

    A bowl of bean salad and a measuring jug of dressing.

    2. Mix the beans, corn, onion, and cilantro in a large bowl. Pour the dressing over and stir to combine. Cover and chill for at least 1 hour.

    FAQs

    How long will bean salad last in the fridge?

    If stored in a sealed container in the fridge, your bean salad will last up to 4 days.

    Can you freeze this salad?

    I don't recommend it. Although it is safe to freeze the salad, the texture of the beans will change when thawed and the salad may become mushy.

    Tips and Troubleshooting

    • If you don't like the bite of raw onion, soak your chopped onion in cold water for 10 minutes before draining and adding to the salad.
    • If the oil in the dressing solidifies while chilling, let the salad sit at room temperature for 10 minutes, and then give it a good stir before serving.
    • This recipe is suitable for gluten-free and vegan diets.
    A bowl of marinated bean salad with cilantro and a lime on the side.

    More Make-Ahead Salads You'll Love

    A bowl of greek salad with dressing and oregano on the side.
    Simple Greek Salad
    A bowl filled with raw vegetable marinated salad.
    Marinated Vegetable Salad

    Recipe

    A bowl of bean salad with corn.

    Marinated Bean Salad

    A woman's face.Angie Zoobkoff
    Made with several types of beans, corn, and a tangy lime dressing, this make-ahead salad is perfect for camping trips, potlucks, backyard cookouts, and more.
    No ratings yet
    Print Recipe Pin Recipe
    Prep Time 15 minutes mins
    Chill Time 1 hour hr
    Total Time 1 hour hr 15 minutes mins
    Course Salad, Side Dish
    Cuisine American
    Servings 10 servings
    Calories 245 kcal

    Ingredients
      

    For the dressing

    • ½ cup olive oil
    • ¼ cup red wine vinegar
    • Juice of 1 lime
    • 1 teaspoon chili powder
    • 1 teaspoon cumin
    • 1 teaspoon granulated sugar
    • Salt and freshly ground black pepper

    For the salad

    • 1 can (15 oz) black beans drained and rinsed
    • 1 can (15 oz) red kidney beans drained and rinsed
    • 1 can (15 oz) mixed beans drained and rinsed
    • 1 can (10 oz) corn drained
    • ½ cup diced red onion
    • ¼ cup chopped cilantro
    • Salt and freshly ground black pepper

    Instructions
     

    Make the dressing

    • In a glass measuring jug or lidded jar, whisk the oil, vinegar, lime juice, chili powder, cumin, and sugar together. Season to taste with salt and pepper.

    Make the salad

    • In a large serving bowl, mix the beans, corn, onion, and cilantro.
    • Pour the dressing over and mix well to thoroughly coat everything in the dressing. Season to taste with salt and pepper.
    • Cover and chill for at least 1 hour before serving. Stir well before serving.

    Notes

    • Soak the onion--If you don't like the bite of raw onion, soak your chopped onion in cold water for 10 minutes before draining and adding to the salad.
    • Let it warm up--If the oil in the dressing solidifies while chilling, let the salad sit at room temperature for 10 minutes, and then give it a good stir before serving.
    • Storage--Store leftover salad in a sealed container in the fridge or cooler for up to 4 days.
    • Dietary--This recipe is suitable for gluten-free and vegan diets.

    Nutrition

    Serving: 1 portionCalories: 245kcalCarbohydrates: 30gProtein: 9gFat: 11gSodium: 368mgFiber: 10gSugar: 3g
    Keyword 15 minute meals, easy camping salads, easy salad recipe, make-ahead side dishes
    Tried this recipe?Let us know how it was!

    March 21, 2025 Cast Iron Skillet Recipes

    Mini Skillet Cookie

    If you love soft, chewy chocolate chip cookies with crisp edges, this mini skillet cookie recipe is perfect for you. This easy grilled dessert for two is ready in less than 30 minutes and ideal for devouring warm, straight from the skillet.

    A large cookie in a cast iron skillet, topped with whipped cream.

    I'm a self-proclaimed cookie monster. They are, by far, my favorite dessert or sweet snack. I have absolutely no control around a batch of freshly baked cookies, so I was pretty excited to create this mini chocolate chip skillet cookie recipe. I get to satisfy my sweet tooth with a warm, gooey chocolate chip cookie, but don't have a whole batch lying around to tempt me.

    Why You'll Love This Recipe

    • It's an easy dessert for two to share.
    • It's ready in less than 30 minutes.
    • You can make it on your grill, so you don't have to turn on the oven on hot days.

    Ingredients and Substitutions

    Ingredients for mini skillet cookie--chocolate chips, egg yolk, vanilla, brown and white sugar, baking soda, flour, butter.
    • Chocolate chips--I recommend using semi-sweet chocolate chips for this recipe to give your cookie that classic chocolate chip cookie flavor.
    • Butter--If you need to use salted butter, you can skip adding the salt in the recipe.
    • Baking soda--This reacts with the brown sugar in the cookie dough to allow it to puff up slightly while cooking.

    How to Make a Mini Cast Iron Skillet Cookie

    A buttered mini cast iron skillet.

    1. Butter a 6-inch cast iron skillet.

    Brown sugar and melted butter in a bowl with an egg yolk and vanilla nearby.

    2. Mix the melted butter with both sugars and stir well. Stir in the egg yolk and vanilla.

    Dry ingredients being mixed into wet.

    3. Add the flour, baking soda, and salt, and mix until just combined.

    Chocolate chips being mixed into cookie dough batter.

    4. Fold in the chocolate chips.

    Raw cookie dough in a small cast iron skillet.

    5. Press the cookie dough into the prepared skillet.

    A mini skillet cookie cooking on the grill.

    6. Grill over indirect heat until slightly puffed in the center and the edges are browned.

    FAQs

    Can I bake this skillet cookie in my oven?

    Yes. Place the skillet in a preheated 350°F (180°C) oven and bake until puffed and golden on the edges, 18 to 20 minutes. I find that baking it in the oven takes less time than on the grill.

    How should I serve this?

    A drizzle of chocolate sauce and a scoop of vanilla ice cream or a dollop of whipped cream is perfect on top. I highly recommend sharing it and eating directly from the skillet.

    Tips and Troubleshooting

    • Keep the skillet over indirect heat while grilling. Direct heat may cause the bottom of the cookie to burn.
    • Avoid lifting the lid on the grill as much as possible as the temperature will fluctuate each time it's opened.
    • Want to make this while camping? This recipe for campfire cookies will show you how.
    A large cookie in a cast iron skillet.

    More Grilled Dessert Recipes You'll Love

    A skillet gingerbread cake with frosting being spread on it.
    Skillet Gingerbread Cake
    A whole skillet peach cobbler with two spoons resting on top.
    Grilled Skillet Peach Cobbler

    Recipe

    A large cookie in a cast iron skillet, topped with whipped cream.

    Mini Skillet Cookie

    A woman's face.Angie Zoobkoff
    This chocolate chip skillet cookie is an easy grilled dessert for two, guaranteed to satisfy any sweet tooth.
    No ratings yet
    Print Recipe Pin Recipe
    Prep Time 10 minutes mins
    Cook Time 20 minutes mins
    Total Time 30 minutes mins
    Course Dessert, Snack
    Cuisine American
    Servings 2 servings
    Calories 596 kcal

    Equipment

    • 6-inch cast iron skillet

    Ingredients
      

    • 3 tablespoons unsalted butter melted, plus more for the skillet
    • ¼ cup brown sugar
    • 2 tablespoons granulated sugar
    • 1 large egg yolk
    • ½ teaspoon vanilla extract
    • ½ cup all-purpose flour
    • â…› teaspoon baking soda
    • â…› teaspoon salt
    • â…“ cup chocolate chips

    Instructions
     

    • Preheat the grill for medium (350°F) indirect heat. I prefer to use heat on either side of the grilling zone for even cooking, but if you can only have heat on one side, be sure to rotate the skillet once during baking.
    • Butter a 6-inch cast iron skillet.
    • Combine the melted butter, brown sugar, and granulated sugar in a medium bowl.
    • Stir in the egg yolk and vanilla and mix well.
    • Add the flour, baking soda, and salt, and mix just until combined and no streaks of white remain. The dough will be thick. Fold in the chocolate chips.
    • Press the cookie dough into the prepared skillet.
    • Grill over indirect heat until the edges of the cookie are browned and the center of the cookie is slightly puffed and just set, about 20 minutes. Remove from heat and serve warm.

    Video

    Notes

    • Grill over indirect heat--Keep the skillet over indirect heat while grilling. Direct heat may cause the bottom of the cookie to burn.
    • Don't peek--Avoid lifting the lid on the grill as much as possible as the temperature will fluctuate each time it's opened.

    Nutrition

    Serving: 0.5 cookieCalories: 596kcalCarbohydrates: 80gProtein: 7gFat: 28gCholesterol: 157mgSodium: 263mgFiber: 2gSugar: 54g
    Keyword cast iron cooking, cast iron grilling, chocolate chip cookies, grilled dessert
    Tried this recipe?Let us know how it was!

    March 18, 2025 Blackstone Griddle Recipes

    Breakfast Poutine

    The quintessential French Canadian snack gets an indulgent breakfast makeover with the addition of crispy bacon, onion, and rich Hollandaise sauce.

    Hollandaise sauce being poured over a bowl of breakfast poutine.

    If you're familiar with poutine, the beloved French Canadian snack of French fries and cheese curds doused in gravy, then you'll love this breakfast interpretation, made with hash browns, bacon, onion, cheese curds, and Hollandaise sauce. Cooking it on your Blackstone or outdoor griddle allows you to prepare this indulgent breakfast in just 20 minutes.

    [feast_advanced_jump_to]

    Why You'll Love This Recipe

    • It's a hearty breakfast that can be prepared entirely on your Blackstone or outdoor griddle.
    • It's ready in just 20 minutes.

    Ingredients and Substitutions

    Ingredients for breakfast poutine--cheese curds, onion, hash browns, salt, bacon, oil, and hollandaise sauce.
    • Hash browns--I use frozen diced hash browns for this recipe because they cook quickly. See the FAQ section below for how to substitute fresh potatoes.
    • Bacon--I recommend using regular thin-sliced bacon for this recipe. You can use thick-cut bacon, but it may take longer to cook.
    • Cheese curds--These are widely available in the cheese section of grocery stores in Canada and throughout the Midwest. If you have difficulty locating them, check with your local cheese shop, or you can order cheese curds online. They also make a great snack!
    • Hollandaise sauce--Feel free to use your favorite homemade Hollandaise sauce recipe, or prepare it from a packet, which is widely available at grocery stores.
    • Seasoned salt--This adds a little extra flavor to your breakfast. I like Lawry's Seasoned Salt best, but feel free to use your favorite. You can also use plain table salt here, if you prefer.

    How to Make Breakfast Poutine with Hollandaise Sauce

    Hash browns cooking on a griddle.

    1. Cook the hash browns on one side of the griddle.

    Bacon and onion cooking on a griddle.

    2. Cook the bacon and onion on the other side of the griddle.

    Hashbrowns, bacon, and onion mixed together on a flat top griddle.

    3. Mix the potatoes, onion, and bacon together and season.

    Cheese curds on top of a mixture of hash browns, bacon, and onion.

    4. Add cheese curds and serve with Hollandaise sauce.

    FAQs

    Can I make this with fresh potatoes?

    Yes, you can make it using diced fresh potatoes, however, start cooking the potatoes a few minutes before the onion and bacon as they'll take longer to cook than frozen diced hash browns.

    Can I add extra protein to my breakfast poutine?

    Definitely. Feel free to add in some ground sausage or chopped sausage links, or leftover Dutch oven meatloaf or turkey sausage patties to the bacon and onion mixture, or top your poutine with a fried, poached, or scrambled eggs.

    Tips and Troubleshooting

    • Adjust the heat as needed while cooking your potatoes, bacon, and onion to avoid burning the onion and bacon.
    • If the potatoes are finished cooking before the bacon and onion, or vice-versa, simply turn off that side of the griddle. Once everything is ready, heat it back up.
    • This breakfast poutine recipe is suitable for gluten-free diets. Be sure to check your Hollandaise sauce to make sure it is gluten-free as some commercial varieties contain gluten.
    A bowl of breakfast poutine topped with Hollandaise.

    More Breakfast Recipes You'll Love

    A plate of loaded hash browns with sour cream and cheese and scallions on top.
    Loaded Hash Browns
    A serving of scrambled eggs, topped with cheese and two toast halves on a plate.
    Blackstone Scrambled Eggs

    Recipe

    Hollandaise sauce being poured over a bowl of breakfast poutine.

    Breakfast Poutine

    A woman's face.Angie Zoobkoff
    Classic poutine gets a breakfast makeover with the addition of bacon, onion, and Hollandaise sauce.
    No ratings yet
    Print Recipe Pin Recipe
    Prep Time 10 minutes mins
    Cook Time 10 minutes mins
    Total Time 20 minutes mins
    Course Breakfast
    Cuisine French
    Servings 2 servings
    Calories 833 kcal

    Equipment

    • Blackstone (or other outdoor) griddle

    Ingredients
      

    • 2 tablespoons vegetable oil
    • 2 cups diced frozen hash browns
    • 4 slices bacon cut crosswise into ½-inch pieces
    • ½ medium onion diced
    • â…› teaspoon seasoned salt
    • ½ cup cheese curds
    • ½ cup Hollandaise sauce

    Instructions
     

    • Heat one side of the griddle to medium, and pour the oil over it. Heat the other side to medium-low.
    • To the side with the oil, add the hash browns, and spread them in an even layer. Cook, stirring occasionally, until browned and cooked through, about 10 minutes.
    • Place the bacon and onion on the other side of the griddle, and cook, stirring occasionally, until the bacon is crisped and the onion is soft, about 10 minutes.
    • Stir the bacon and onion mixture into the hash browns and season with the salt.
    • Turn off the heat and add the cheese curds to the hash.
    • Divide the mixture between two bowls and top with Hollandaise sauce. Serve immediately.

    Notes

    • Monitor your heat--Adjust the heat as needed while cooking your potatoes, bacon, and onion to avoid burning the onion and bacon.
    • Avoid overcooking--If the potatoes are finished cooking before the bacon and onion, or vice-versa, simply turn off that side of the griddle. Once everything is ready, heat it back up.
    • Dietary--This breakfast poutine recipe is suitable for gluten-free diets. Be sure to check your Hollandaise sauce to make sure it is gluten-free as some commercial varieties contain gluten.

    Nutrition

    Serving: 1 bowlCalories: 833kcalCarbohydrates: 32gProtein: 26gFat: 67gCholesterol: 86mgFiber: 2gSugar: 1g
    Keyword 20 minute meals, blackstone cooking, blackstone griddle
    Tried this recipe?Let us know how it was!

    March 14, 2025 Blackstone Griddle Recipes

    6 Easy Blackstone Chicken Recipes

    These 6 easy Blackstone chicken recipes are fresh and flavorful meals that can be prepared on your outdoor griddle, making them perfect for quick weeknight meals at home, or easy dinners at camp.

    1
    A chicken and bacon sandwich on a brioche bun with lettuce and tomato.
    Chicken and Bacon Sandwich
    This chicken bacon sandwich is anything but boring. Topped with crispy bacon, garlic and mustard aioli, lettuce, and tomato, it's a handheld meal that you'll return to again and again.
    Get the recipe: Chicken and Bacon Sandwich
    2
    A bowl of chicken, pepper, and asparagus stir fry on top of rice.
    Blackstone Chicken Stir Fry
    This easy Blackstone chicken stir fry combines juicy marinated chicken, peppers, asparagus, and onion to create a flavor packed meal, perfect for any night of the week.
    Get the recipe: Blackstone Chicken Stir Fry
    3
    A plate of chicken fried rice with a pair of chopsticks resting on the edge.
    Recipe and photo credit: The Fresh Cooky
    Blackstone Chicken Fried Rice
    If you want better-than-takeout chicken fried rice, you will love this quick and easy recipe that can be entirely made on your hibachi style Blackstone griddle.
    Get the recipe: Blackstone Chicken Fried Rice
    4
    Two Buffalo chicken tacos on a plate with romaine lettuce and blue cheese dressing on top.
    Blackstone Buffalo Chicken Tacos
    Enjoy your favorite wing flavor in taco form. This easy meal is ready in just 20 minutes!
    Get the recipe: Buffalo Chicken Tacos
    5
    A small baking sheet filled with creamy chicken pasta.
    Recipe and photo credit: Stef's Eats and Sweets
    Blackstone Creamy Italian Chicken Pasta
    This Blackstone creamy Italian chicken pasta is so easy to make with just five ingredients. It's super flavorful and cooks to perfection on your outdoor griddle.
    Get the recipe: Blackstone Creamy Italian Chicken Pasta
    6
    A plate with two pieces of bbq chicken flatbread on it.
    BBQ Chicken Flatbread
    Made with tangy chicken and two types of cheese, these homemade flatbreads are a family favorite that can be prepared on your Blackstone or in your oven.
    Get the recipe: BBQ Chicken Flatbread

    March 11, 2025 Dinner

    Grilled Halibut Tacos

    These grilled halibut tacos are not your average fish tacos. Made with tender marinated halibut, crisp cabbage, and a oh-so-creamy avocado sauce, they're fresh, flavorful, and an excellent way to showcase flaky halibut.

    Two halibut tacos on a plate, with red cabbage, avocado crema, and cilantro on top.

    If I were asked to choose the best taco recipe, I'd always pick grilled fish tacos. Halibut, specifically. And while much of my family would prefer the fish battered and fried, my favorite way to make fish tacos is to grill the fish after a brief marinade, then top it with a little crunchy cabbage and a dollop of creamy avocado sauce. To me, that's fish taco perfection.

    Why You'll Love This Recipe

    • It's a fresh, healthy, and flavorful way to use fresh fish.
    • The entire meal is ready in under an hour.

    Ingredients and Substitutions

    Ingredients for halibut tacos--avocado, sour cream, lime, halibut, oil, cabbage, tortillas, and cilantro.
    • Halibut--The fish is the star of the show here, so choose a piece that's good quality. The fish should have a fresh, mild smell and should feel firm to the touch. Avoid fish that smells fishy or feels mushy or slimy.
    • Avocado--Choose dark colored avocados that give slightly when squeezed. Avoid hard bright green (underripe) or mushy avocados (overripe). Use extra avocado to make 3-ingredient guacamole.
    • Tortillas--You can use flour or corn tortillas for these tacos, depending on your preference. To keep the meal gluten-free, use corn tortillas.
    • Cabbage--Red or green cabbage works well here. To make the recipe even quicker, swap in shredded coleslaw mix.
    • Lime--Your lime should yield 1 ½ to 2 tablespoons of juice. To help extract as much juice as possible, roll it firmly against a firm surface before juicing. If it's a little stingy, grab a second lime half and squeeze that in.

    How to Make Halibut Tacos

    A bowl of vinaigrette with a halved lime nearby.

    1. Whisk the olive oil and lime juice together. Season with salt and pepper.

    Two pieces of halibut marinating in a bag.

    2. Place the fish in a resealable bag and pour the marinade over the fish. Marinate in the fridge for 30 minutes.

    Avocado, cilantro, and lime in a blender.

    3. While the fish is marinating, blend the avocado, lime juice, cilantro, and sour cream together. Season to taste.

    Two pieces of halibut cooking on foil on the grill.

    4. Grill the fish over medium heat until opaque throughout.

    FAQs

    Do I need to remove the skin from the fish before cooking?

    No. I find that the skin peels away easily after cooking.

    How do I know if the fish is ready?

    The fish should be opaque throughout and flake into large chunks easily when poked with a fork. If you prefer to measure the internal temperature on an instant read thermometer, fish is cooked through at 145°F (63°C). Take care to not overcook the fish or it may become tough.

    Tips and Troubleshooting

    • Don't let your fish marinate for more than 30 minutes as the acid in the marinade can begin to cook the fish, resulting in a mushy texture.
    • Your blended avocado crema should be light and soft with a texture similar to mousse. The amount of water you'll need will depend on the size of your avocados and the amount of juice you get from your lime. Start with less and continue adding until you've reached your desired consistency.
    • Use a double layer of foil when grilling the fish. This will make it easier to transfer to and from the grill, and will protect the fish if one layer rips.
    • If you like warm tortillas for your halibut fish tacos, wrap them in foil and warm them on the grill over low heat while the fish is cooking.
    • If made with corn tortillas, this recipe is suitable for gluten-free diets.
    Two grilled halibut tacos on a plate, surrounded by taco fixings.

    More Fish Recipes You'll Love

    Two foil packets with salmon and bok choy.
    Honey Lime Salmon Foil Packets
    Two plates of grilled tuna salad with a bowl of pepitas, a dish of salt, and a jar of vinaigrette on the side.
    Grilled Tuna Salad

    Recipe

    Two halibut tacos on a plate, with red cabbage, avocado crema, and cilantro on top.

    Grilled Halibut Tacos

    A woman's face.Angie Zoobkoff
    Tender grilled fish topped with crunchy cabbage and creamy avocado sauce equals fish taco perfection.
    No ratings yet
    Print Recipe Pin Recipe
    Prep Time 15 minutes mins
    Cook Time 20 minutes mins
    Total Time 55 minutes mins
    Course Main Course
    Cuisine American
    Servings 3 servings
    Calories 728 kcal

    Equipment

    • Heavy duty aluminum foil

    Ingredients
      

    For the fish

    • 2 tablespoons olive oil
    • 1 lime juiced
    • ¼ teaspoon salt plus more for the fish
    • ¼ teaspoon freshly ground black pepper plus more for the fish
    • 1 pound (454 g) halibut

    For the avocado crema

    • 2 avocados
    • 1 lime juiced
    • 2 tablespoons sour cream
    • ¼ cup chopped cilantro
    • 1 to 2 tablespoons water
    • Salt

    To serve

    • 2 cups shredded cabbage
    • 9 flour or corn tortillas warmed, if desired
    • Chopped fresh cilantro
    • Lime wedges

    Instructions
     

    Marinate the fish

    • In a small bowl, whisk the olive oil and lime juice together. Season with ¼ teaspoon each of salt and pepper.
    • Place the halibut in a resealable bag and pour in the marinade. Seal the bag and refrigerate for 30 minutes, flipping occasionally.

    Make the avocado crema

    • While the fish is marinating, combine the avocado flesh, lime juice, sour cream, cilantro, and 1 tablespoon of water in a blender. Blend until smooth, adding more water as needed to achieve a soft, creamy texture. Season to taste with salt.

    Grill the fish

    • Preheat the grill for medium (375°F | 191°C). Arrange a double layer of heavy duty aluminum foil on a baking sheet and fold up the edges to create a tray.
    • Remove the fish from the marinade, letting any excess drip back into the bag. Place the fish on the foil tray and season lightly with salt and pepper.
    • Place the foil tray with the fish on the grill and cook until the fish is opaque throughout and flakes easily into large chunks when poked with a fork, 16 to 18 minutes.
    • Remove the fish from the grill and break into large chunks. Serve with warm tortillas, cabbage, avocado crema, cilantro, and fresh lime wedges, letting everyone assemble their own.

    Notes

    • Don't over-marinate--Don't let your fish marinate for more than 30 minutes as the acid in the marinade can begin to cook the fish, resulting in a mushy texture.
    • Texture--Your blended avocado crema should be light and soft with a texture similar to mousse. The amount of water you'll need will depend on the size of your avocados and the amount of juice you get from your lime. Start with less and continue adding until you've reached your desired consistency.
    • Double up--Use a double layer of foil when grilling the fish. This will make it easier to transfer to and from the grill, and will protect the fish if one layer rips.
    • Warming the tortillas--Wrap your tortillas in foil and warm them on the grill over low heat while the fish is cooking.
    • Dietary--If made with corn tortillas, this recipe is suitable for gluten-free diets.

    Nutrition

    Serving: 3 tacosCalories: 728kcalCarbohydrates: 55gProtein: 38gFat: 43gCholesterol: 52mgSodium: 340mgFiber: 17gSugar: 4g
    Keyword fish tacos, grilled fish
    Tried this recipe?Let us know how it was!

    March 5, 2025 Collections

    11 Amazing Desserts in a Jar

    The beauty of these 11 amazing desserts in a jar, particularly if you're heading out camping or to a picnic or potluck, is that they can be made in advance, tucked in a cooler, and enjoyed at your leisure. You can also make as many as you need and there's also no need to pack along extra plates or serving utensils.

    1
    Recipe and photo credit: xoxo Bella
    Strawberry Shortcake in a Jar
    You don’t need many different ingredients for this mini dessert, and it’s a nice easy recipe to showcase fresh strawberries. Served in a mini mason jar or Weck jar, this individually sized dessert is perfect to pack in a picnic.
    Get the recipe: Strawberry Shortcake in a Jar
    2
    Four s'more jars with pudding, marshmallow fluff, and graham cracker topping.
    S'mores in a Jar
    For when you're craving s'mores, but don't have a campfire.
    Get the recipe: S'mores in a Jar
    3
    Recipe and photo credit: In the Kitch
    Iced Lemon Mousse
    Fresh lemons are always available, making this iced lemon mousse an excellent go-to dessert for any time of the year!
    Get the recipe: Iced Lemon Mousse
    4
    Three jars of individual pomegranate cheesecake.
    Pomegranate Cheesecake Jars
    Whip up a batch of these easy pomegranate-infused mini cheesecakes and let the accolades roll in.
    Get the recipe: Pomegranate Cheesecake Jars
    5
    Recipe and photo credit: Living Chirpy
    Chocolate Pudding
    With only four ingredients and only 20 minutes from start to finish, this chocolate pudding is a great go-to dessert for the whole family.
    Get the recipe: Chocolate Pudding
    6
    A layered lemon curd dessert cup in a small jar with a marshmallow on top.
    Lemon Curd Dessert Cups
    These easy layered lemon dessert cups are a perfect springtime or Easter Mason jar dessert idea. They're made with just 4 ingredients and can be partially prepared in advance, making them ideal for camping.
    Get the recipe: Lemon Curd Dessert Cups
    7
    Mini Homemade Banana Pudding Dessert Cups
    Recipe and photo credit: Little Black Skillet
    Mini Homemade Banana Pudding Dessert Cups
    These homemade banana pudding cups are the perfect make-ahead dessert with layers of homemade vanilla pudding, bananas, and whipped cream.
    Get the recipe: Banana Pudding Dessert Cups
    8
    A spoonful of no-bake mini pumpkin cheesecake resting on top of a mason jar filled with the cheesecake.
    Mini Pumpkin Cheesecake
    These no-bake mini pumpkin cheesecakes are perfect for packing along on your camping trip or picnic as they can be made up to 4 days in advance. They'll never last that long though as everyone will be fighting over these easy treats that are made with crunchy Biscoff cookie crust and creamy spiced whipped topping.
    Get the recipe: Mini Pumpkin Cheesecake
    9
    Recipe and photo credit: Creators of Coffee
    Easy Pistachio Tiramisu Cups
    These pretty pistachio tiramisu cups are easy make ahead desserts everyone will love. With layers of pistachio cream, sponge cake and pistachios, this individual tiramisu recipe is a quick to prepare and a delicious pistachio dessert recipe for you to try.
    Get the recipe: Pistachio Tiramisu Cups
    10
    Recipe and photo credit: The Savvy Mama Lifestyle
    Mini Apple Pie Trifle
    Need a single serving dessert? These mini apple pie trifle desserts are restaurant quality and easy to make!
    Get the recipe: Mini Apple Pie Trifle
    11
    Recipe and photo credit: Sweet Fix Baker
    Easy Bourbon Pecan Pie in a Jar
    This pecan pie in a jar recipe is not only easier to make than the original, but has a kick of bourbon to it!
    Get the recipe: Bourbon Pecan Pie in a Jar

    March 3, 2025 Camping

    Dutch Oven Cornbread

    With it's no-fuss method and quick cooking time, this tender, crisp-edged Dutch oven cornbread is the perfect camping side dish for campfire chili, camping ribs, and more.

    Cooked cornbread inside a cast iron Dutch oven.

    Quick bread, like Dutch oven beer bread or this Dutch oven cornbread recipe is ideal for camping, because it's quick to make, doesn't require any kneading, rolling, rising, or any fussing over, and it cooks quickly. Slathered with butter, it's the perfect accompaniment to your favorite Dutch oven soup and stew recipes.

    Why This Recipe is Great for Camping

    • You can mix up the dry ingredients ahead of time so you've got less to do at camp.
    • It's an easy camping side dish that can be prepared in your cast iron Dutch oven with hot coals or embers. Enjoy any leftovers for breakfast!

    Ingredients and Substitutions

    Ingredients for Dutch oven cornbread--egg, baking soda, milk, cornmeal, baking powder, oil, flour, and sugar.
    • Cornmeal--Use medium or fine grind cornmeal for the best texture in your cornbread.
    • Milk--You can use any type of milk you like, including non-dairy. Buttermilk will give you the fluffiest and best tasting bread, but I regularly make this with oat milk with excellent results.

    How to Cook Cornbread in a Dutch Oven

    Flour, cornmeal, and sugar in a glass bowl with a whisk.
    Cornbread batter being mixed in a bowl.
    1. Whisk the dry ingredients together.
    2. Combine the milk, egg, and oil and mix well. Pour it into the dry ingredients and mix gently until everything is combined.
    Uncooked cornbread batter in a cast iron Dutch oven.
    A cast iron Dutch oven in a fire pit with coals on the lid.
    1. Pour the batter into a Dutch oven lined with parchment.
    2. Cook with 8 coals below and 16 on top until golden brown and a toothpick inserted into the center of the cornbread comes out clean.

    FAQs

    What size Dutch oven do I need for this recipe?

    For this recipe, I recommend using a 6-to-8-quart Dutch oven. You can still make it in a smaller Dutch oven, but the bread will be thicker, and will require a longer cooking time. You will also need to use less coals if cooking in a smaller oven, while still maintaining the 2:1 ratio of coals on top to bottom.

    Want a smaller version? Try this mini skillet cornbread recipe.

    How should I serve this?

    This Dutch oven cornbread is best enjoyed warm, immediately after baking. Serve it with butter and a drizzle of honey, if desired.

    How long will it keep?

    Cornbread dries out pretty quickly. I recommend eating it the same day it's made, but if you want to reheat any leftovers for breakfast the next day, warm individual slices wrapped in foil and heat over low flame on the fire or grill.

    Tips and Troubleshooting

    • To get ahead, mix your dry ingredients in a resealable plastic bag before heading out on your camping trip.
    • Line your Dutch oven with parchment. It will make it easier to clean the oven after cooking and easier to lift the bread out of the hot Dutch oven. If you don't have parchment, be sure to butter the inside of your Dutch oven well.
    • Since you're cooking in a Dutch oven outside, the cooking time can vary due to outside temperature and wind. If you're cooking on a very windy day, try to protect the Dutch oven with a barrier, such as a tarp.
    A slice of cornbread topped with a pat of butter on a plate.

    More Dutch Oven Bread Recipes You'll Love

    A loaf of Irish soda bead with a couple of slices cut from it.
    Dutch Oven Soda Bread
    Six cheese biscuits in a Dutch oven lined with parchment.
    Dutch Oven Biscuits

    Recipe

    Cooked cornbread inside a cast iron Dutch oven.

    Dutch Oven Cornbread

    A woman's face.Angie Zoobkoff
    The perfect camping side dish for chili, ribs, and more. Serve it warm, topped with butter and honey.
    No ratings yet
    Print Recipe Pin Recipe
    Prep Time 10 minutes mins
    Cook Time 25 minutes mins
    Total Time 35 minutes mins
    Course Side Dish
    Cuisine American
    Servings 8 servings
    Calories 290 kcal

    Equipment

    • 6-to-8-quart cast iron Dutch oven

    Ingredients
      

    • 1 ¼ cups all-purpose flour
    • 1 ¼ cups cornmeal
    • â…“ cup granulated sugar
    • 2 teaspoons baking powder
    • ¾ teaspoon salt
    • ¼ teaspoon baking soda
    • 1 â…“ cups milk
    • 1 large egg lightly beaten
    • â…“ cup vegetable oil

    Instructions
     

    • Prepare hot coals in a chimney or campfire. You'll need 24 coals for this recipe. Line a Dutch oven with parchment paper.
    • In a large bowl, whisk the flour, cornmeal, sugar, baking powder, salt, and baking soda together.
    • Combine the milk, egg, and oil in a small bowl or jug and pour it into the dry ingredients. Mix gently until everything is combined and no dry patches remain.
    • Scrape the batter into the prepared Dutch oven and cover with the lid.
    • Set up the Dutch oven for cooking with 8 coals underneath and 16 coals on the lid. Cook until the cornbread is puffed and a toothpick inserted into the center comes out clean, about 25 minutes.
    • Slice into wedges and serve warm.

    Notes

    • Get ahead--Mix your dry ingredients in a resealable plastic bag before heading out on your camping trip.
    • Use parchment--Line your Dutch oven with parchment. It will make it easier to clean the oven after cooking and easier to lift the bread out of the hot Dutch oven. If you don't have parchment, be sure to butter the inside of your Dutch oven well.
    • Cooking time can vary--Since you're cooking in a Dutch oven outside, the cooking time can vary due to outside temperature and wind. If you're cooking on a very windy day, try to protect the Dutch oven with a barrier, such as a tarp.

    Nutrition

    Serving: 1 sliceCalories: 290kcalCarbohydrates: 42gProtein: 6gFat: 11gCholesterol: 27mgSodium: 292mgFiber: 2gSugar: 10g
    Keyword campfire cooking, dutch oven cooking, homemade bread
    Tried this recipe?Let us know how it was!

    February 28, 2025 Camping

    S'mores in a Jar

    Craving s'mores but don't have a campfire? Make s'mores in a jar! This make-ahead dessert cup combines graham crackers, marshmallow fluff, chocolate pudding, and chocolate chips into a layered treat that tastes just like the campfire classic.

    Four s'more jars with pudding, marshmallow fluff, and graham cracker topping.

    Whether you're camping but can't have a fire to toast marshmallows, or you need an easy make-ahead dessert in a jar to take to a potluck, picnic, or long weekend summer bbq, these s'mores jars are perfect. They're easy to make ahead of time and suitable for all ages. Go on, indulge your inner child.

    [feast_advanced_jump_to]

    Why You'll Love This Recipe

    • It's a make-ahead dessert that's perfect for camping, picnics, potlucks, and more.
    • It can be prepared in just 15 minutes.
    • You can scale the recipe to make as many as you need.

    Ingredients and Substitutions

    Ingredients for s'mores in a jar--chocolate chips, marshmallow fluff, graham crackers, and chocolate pudding.
    • Chocolate pudding--Use your favorite homemade or store-bought chocolate pudding. If you're preparing instant chocolate pudding, one box will make more than enough for four jars.
    • Marshmallow fluff--This is a very sticky meringue-like spread and is sometimes labeled as marshmallow creme. It's available in most large supermarkets (often located near the sundae toppings) or you can purchase marshmallow fluff online.

    How to Make S'mores Cups

    A bag of graham cracker crumbs with a rolling pin resting on top.

    1. Crush all but two of the graham crackers in a resealable plastic bag.

    Four partially assembled s'more jars with a bowl of pudding and chocolate chips on the side.

    2. Layer the graham cracker crumbs, marshmallow fluff, pudding, and chocolate chips in individual jars.

    FAQs

    How long will these s'more cups keep?

    For the best texture, I recommend enjoying these within 24 hours. After that the graham cracker crumbs will become soft, however, you can eat them up to 3 days after making them. Keep them refrigerated until you're ready to serve.

    How should I serve these?

    You can serve them just as they are, with a spoon, or extra graham crackers for dipping, or you can fancy them up with a dollop of whipped cream, a drizzle of chocolate sauce, or even a toasted marshmallow on top.

    Tips and Troubleshooting

    • Don't stress too much about the layers being perfectly even. When you eat it, everything will meld together into the perfect s'mores bite!
    • Marshmallow fluff is incredibly sticky. Once you add it to your jar, don't try to spread it as it will just create a sticky mess. To get an even layer of marshmallow fluff, let it sit for about 15 minutes after adding the fluff to the jar before topping with the pudding. The marshmallow fluff will spread out on its own to create an even layer.
    • To make graham cracker "dippers" for your jars, reserve 2 crackers before crushing the remaining ones. Break the reserved crackers in half and serve one half with each jar.
    A jar filled with graham cracker crumbs, marshmallow fluff, chocolate pudding, and whipped cream on top.

    More Make-Ahead Dessert Recipes You'll Love

    A layered lemon curd dessert cup in a small jar with a marshmallow on top.
    Lemon Curd Dessert Cups
    Three jars of individual pomegranate cheesecake.
    Pomegranate Cheesecake Jars

    Tried This Recipe?

    If you've tried this recipe, please leave a comment below. Follow me on Instagram, Facebook, or Pinterest for more great camping and grilling recipes.

    Recipe

    Four s'more jars with pudding, marshmallow fluff, and graham cracker topping.

    S'mores in a Jar

    A woman's face.Angie Zoobkoff
    For when you're craving s'mores, but don't have a campfire.
    No ratings yet
    Print Recipe Pin Recipe
    Prep Time 15 minutes mins
    Total Time 15 minutes mins
    Course Dessert
    Cuisine American
    Servings 4 dessert cups
    Calories 410 kcal

    Equipment

    • 4 ½-pint wide mouth mason jars with lids

    Ingredients
      

    • 1 sleeve (7 oz | 200 g) graham crackers
    • ¾ cup marshmallow fluff
    • 1 â…“ cup chocolate pudding
    • ¼ cup chocolate chips

    Instructions
     

    • Place the crackers in a resealable plastic bag and crush with a rolling pin. Alternatively, you can blitz them in a food processor until coarsely ground.
    • In each of the jars place ¼ cup crushed crackers. Top with 3 tablespoons marshmallow fluff, followed by â…“ cup chocolate pudding. Sprinkle with 1 tablespoon chocolate chips and 1 to 2 tablespoons of graham cracker crumbs.
    • Cover the jars with their lids and bands and store in the fridge or cooler until you're ready to serve them.

    Notes

    • Let it be--Don't stress too much about the layers being perfectly even. When you eat it, everything will meld together into the perfect s'mores bite!
    • Let it rest--Marshmallow fluff is incredibly sticky. Once you add it to your jar, don't try to spread it as it will just create a sticky mess. To get an even layer of marshmallow fluff, let it sit for about 15 minutes after adding the fluff to the jar before topping with the pudding. The marshmallow fluff will spread out on its own to create an even layer.
    • Make dippers--To make graham cracker "dippers" for your jars, reserve 2 crackers before crushing the remaining ones. Break the reserved crackers in half and serve one half with each jar.

    Nutrition

    Serving: 1 cupCalories: 410kcalCarbohydrates: 80gProtein: 5gFat: 8gCholesterol: 2mgSodium: 509mgFiber: 2gSugar: 37g
    Keyword camping desserts, make-ahead desserts, s'mores desserts
    Tried this recipe?Let us know how it was!

    February 26, 2025 Collections

    6 Nut-Free Trail Mix Recipes

    Whether you're looking for some allergy-friendly options to pack in your kid's school lunch or a hearty hiking snack, these 6 nut-free trail mix recipes are ideal. Filled with dried fruits, seeds, crackers, and more, these snack mix recipes are so good that you won't even miss the nuts.

    1
    Recipe and photo credit: xoxo Bella
    Coastal Medley Trail Mix Recipe
    This delicious blend of fruit, berries and seeds is one of the most easy family friendly recipes you can make. Coastal medley trail mix is always a winning snack.
    Get the recipe: Coastal Medley Trail Mix
    2
    Two jars filled with Golden Grahams, chocolate cookies, mini marshmallows, and chocolate chips.
    S'mores Trail Mix
    A quick and easy snack mix that delivers all the classic s'mores flavors with none of the mess!
    Get the recipe: S'mores Trail Mix
    3
    A mixture of blueberries, cheerios, and yogurt chips.
    Recipe and photo credit: The Soccer Mom Blog
    3 Ingredient Blueberry Trail Mix
    This blueberry flavored baby trail mix is a flavorful snack that you can prepare in minutes with just 3 ingredients!
    Get the recipe: Blueberry Trail Mix
    4
    A bowl of pretzel rail mix with small bowls of M&Ms and fish crackers nearby.
    Butter Toffee Trail Mix
    This easy homemade holiday trail mix includes butter toffee pretzels, crackers, chocolate chips, and M&Ms. It's a festive snack perfect for your holiday camping trip or Christmas parties.
    Get the recipe: Butter Toffee Trail Mix
    5
    A bowl of nut free grail mix.
    Homemade Nut-Free Trail Mix
    This trail mix without nuts is easy to make in just 5 minutes with only a handful of everyday ingredients. It's perfect for camping, hiking, snacking, or kids lunch boxes.
    Get the recipe: Nut-Free Trail Mix
    6
    Recipe and photo credit: Our Slice of Home
    Homemade Chex Mix
    Homemade Chex mix (oven roasted and without nuts) is a combo of different types of cereals and pretzels. Topped with a buttery seasoned mixture.
    Get the recipe: Homemade Chex Mix

    February 24, 2025 Camping

    Stovetop Tuna Noodle Casserole

    This stovetop tuna noodle casserole has all the creamy comforting flavors of the classic casserole, but is made no-cooler camping friendly, so that you can make this one-pot Dutch oven meal entirely from unrefrigerated staples at camp or at home.

    A Dutch oven filled with tuna noodle casserole.

    I get a lot of requests for camping meals that don't require refrigeration, which is why I created this recipe. It has all the same flavor and creaminess of the old-fashioned tuna noodle casserole recipe that you know and love, but is made with some simple swaps to use only shelf-stable ingredients. If you're worried that it won't be as good as the original, have no fear. My husband had seconds, and then ate all of the leftovers the next day (and he never eats leftovers!)

    Why This Recipe is Great for Camping

    • It's a one-pot camping meal that you can make in your Dutch oven that can be cooked over the campfire or camp stove.
    • It is made entirely from ingredients that don't require refrigeration, so you can make it even if you don't have a cooler or access to a fridge.
    • It's hearty and satisfying, making it an ideal cool weather camping meal.

    Ingredients and Substitutions

    Ingredients for tuna casserole--egg noodles, oil, mushrooms, garlic, broth, tuna, milk, Ritz, and onion.
    • Tuna--You can use chunk or flaked canned tuna, depending on your preference or what you've got on hand. Be sure to use tuna packed in water, not oil.
    • Milk--In order to make this a no-cooler recipe, I used shelf-stable non-dairy oat milk. You can use any type of shelf-stable non-dairy milk, or you may even be able to find shelf-stable dairy milk that doesn't require refrigeration before opening. Many are conveniently sold in 1 cup portions, which is perfect for this recipe. If you've got access to a cooler or fridge, feel free to use any type of milk you like.
    • Mushrooms--This easy tuna casserole recipe uses canned sliced mushrooms so that it can be made without a cooler. Canned mushroom pieces will also work here.
    • Chicken broth--You can use shelf-stable prepared chicken broth, or mix powdered chicken bouillon with hot water to make the required amount of broth.

    How to Make Dutch Oven Tuna Casserole

    Diced onion cooking in a Dutch oven.
    A milk and onion mixture heating in a Dutch oven.
    1. Sauté diced onion in oil until softened in a Dutch oven over your camp stove, stovetop, or campfire. Add the garlic and cook for 30 seconds.
    2. Stir in the mushrooms, then pour in the broth and milk. Bring to a simmer.
    Egg noodles added to a milk mixture in a Dutch oven.
    A covered Dutch oven on a burner.
    1. Stir in the egg noodles.
    2. Cover the Dutch oven and let the noodles cook, stirring occasionally, until the sauce is thickened and the noodles are al dente.
    Tuna being stirred into egg noodles in a pot.
    A cooked tuna casserole topped with crushed Ritz crackers.
    1. Stir in the tuna and cook over low heat until warmed through.
    2. Top with the crushed crackers and serve directly from the Dutch oven.

    FAQs

    What size Dutch oven do I need?

    This stovetop tuna casserole recipe will fit into a 3 ½ quart Dutch oven, but it will be very full. I recommend using a 4 quart Dutch oven or larger.

    Can I use a different topping?

    Absolutely. Feel free to use panko, crushed potato chips, or Corn Flakes instead of the crackers, particularly if you need to make the recipe dairy free.

    Storage & Reheating

    Store leftovers in a sealed container in your cooler or fridge for up to 3 days. Reheat in a Dutch oven over low heat until warmed through. As the pasta sits, it will absorb the liquid, so you may need to add an extra splash of milk when reheating.

    Tips and Troubleshooting

    • Want to cut down on the number of ingredients you're using? Replace the canned mushrooms and milk with a can of mushroom soup thinned with one can of water.
    • The sauce will still be quite liquid-y at the end of cooking. This is normal. As the casserole cools, it will continue to absorb liquid, resulting in a creamy texture.
    • Since you're cooking in a Dutch oven outside, the cooking time can vary due to outside temperature and wind. If you're cooking on a very windy day, try to protect the Dutch oven with a barrier, such as a tarp.

    More Dutch Oven Recipes You'll Love

    A pot of cowboy stew and two bowls filled with the stew on a table.
    Texas Cowboy Stew
    A bowl of split pea soup with ham with a piece of flatbread inside.
    Dutch Oven Split Pea Soup

    Tried This Recipe?

    If you've tried this recipe, please leave a comment below. Follow me on Instagram, Facebook, or Pinterest for more great camping and grilling recipes.

    Recipe

    A Dutch oven filled with tuna noodle casserole.

    Dutch Oven Tuna Noodle Cassserole

    A woman's face.Angie Zoobkoff
    This creamy, comforting, classic tuna noodle casserole gets transformed into a camping-friendly one-pot meal that can be made without a cooler or refrigerator. Make it on your camp stove, stovetop, or over the campfire.
    No ratings yet
    Print Recipe Pin Recipe
    Prep Time 10 minutes mins
    Cook Time 25 minutes mins
    Total Time 35 minutes mins
    Course Main Course
    Cuisine American
    Servings 4 servings
    Calories 603 kcal

    Equipment

    • 4 quart (or larger) Dutch oven

    Ingredients
      

    • 2 tablespoons vegetable oil
    • 1 medium onion diced
    • 2 cloves garlic minced
    • 1 (10-oz) can sliced mushrooms drained
    • 3 cups chicken broth
    • 1 cup shelf-stable milk (regular or non-dairy)
    • 12 ounces (340 g) egg noodles
    • 2 (6-oz) cans tuna packed in water drained
    • Salt and freshly ground black pepper
    • 12 Ritz crackers crushed

    Instructions
     

    • In a Dutch oven set over medium heat on a stovetop, camp stove, or over the fire, warm the oil.
    • Stir in the onion and sauté until softened, but not browned, 7 to 8 minutes. Add the garlic and cook for 30 seconds.
    • Stir in the mushrooms.
    • Pour in the broth and milk and bring it to a simmer.
    • Add the noodles. Cover, and cook, stirring occasionally to prevent the noodles from sticking to the bottom of the pot, until the noodles are al dente and the liquid has thickened slightly, 7 to 8 minutes, or according to package directions.
    • Uncover and gently fold in the tuna. Simmer until heated through, 2 to 3 minutes. Season to taste with salt and pepper.
    • Top with crushed Ritz crackers and serve directly from the Dutch oven.

    Notes

    • Make a swap--Replace the canned mushrooms and milk with a can of mushroom soup thinned with one can of water.
    • It should be saucy--The sauce will still be quite liquid-y at the end of cooking. This is normal. As the casserole cools, it will continue to absorb liquid, resulting in a creamy texture.
    • Keep it warm--Since you're cooking in a Dutch oven outside, the cooking time can vary due to outside temperature and wind. If you're cooking on a very windy day, try to protect the Dutch oven with a barrier, such as a tarp.

    Nutrition

    Serving: 1 portionCalories: 603kcalCarbohydrates: 78gProtein: 42gFat: 14gCholesterol: 101mgSodium: 909mgFiber: 5gSugar: 15g
    Keyword camping dinner ideas, dutch oven cooking, no-cooler camping recipes, one pot cooking
    Tried this recipe?Let us know how it was!

    February 21, 2025 Grilling

    Grilled Stuffed Mushrooms

    These grilled stuffed mushrooms pack plenty of flavor, thanks to the rich cream cheese filling tucked inside juicy grilled mushrooms. Enjoy them as an easy appetizer or as a side dish alongside grilled striploin steak skewers.

    Six grilled stuffed mushrooms on a plate.

    Although stuffed mushrooms are often reserved for holiday parties and special occasions, with this easy vegetarian grilling recipe, you can enjoy them any time of the year. They're simple to make, can be prepped in advance, and are cooked on the grill, so you can make them at home or at camp.

    [feast_advanced_jump_to]

    Why You'll Love This Recipe

    • They're an easy appetizer, snack, or side dish that can be prepared in advance.
    • They're cooked on the grill, so you can make them at home, or at camp.

    Ingredients and Substitutions

    Ingredients for grilled stuffed mushrooms--white mushrooms, garlic, panko, cream cheese, Parmesan, cayenne, and oil.
    • Mushrooms--Regular white mushrooms are traditional here, but you could substitute brown (cremini) mushrooms, or another firm, sturdy mushroom. Don't use thin, shallow mushrooms, like shiitake, as they won't hold the filling well. Got extra mushrooms? Try one of these marvellous mushroom recipes.
    • Cream cheese--I recommend using full-fat cream cheese for the best flavor.
    • Panko--These are a crisp Japanese bread crumb, which is available at most supermarkets. You can also purchase panko online.
    • Cayenne pepper--The small amount of cayenne in this recipe adds a little warmth and spice to the cheese filling, but isn't spicy. Feel free to add a little extra if you want more kick, or omit it if you are very sensitive to pepper.

    How to Grill Stuffed Mushrooms

    Chopped mushrooms cooking in a skillet.
    A mixture of cooked mushrooms, cream cheese, and parmesan in a bowl.
    1. Sauté the mushroom stems in oil until they soften and release their liquid. Stir in the garlic and cook for 1 minute. Cool.
    2. Mix the cooked mushrooms and garlic with the cream cheese, Parmesan, panko, and cayenne.
    Uncooked stuffed mushrooms on a grill tray.
    Stuffed mushrooms cooking on a grill.
    1. Stuff each mushroom cap with about 1 tablespoon of the cheese mixture.
    2. Grill over medium heat until the mushrooms start to shrivel and are bubbling at the edges.

    FAQs

    How do you remove the stems from mushrooms?

    To remove the stems from your mushrooms without damaging the cap, flip the mushroom over. Use your thumb or finger to gently but firmly press against the bottom of the stem (where it attaches to the cap), pushing away from you. It should break away easily.

    Can I make stuffed mushrooms in advance?

    You can make the filling and stuff the mushrooms up to 24 hours before grilling. Keep them refrigerated in a sealed container or tightly covered with plastic wrap until you're ready to grill.

    Tips and Troubleshooting

    • I recommend using a grill tray for cooking the stuffed mushrooms on the grill. This will make it easy for transferring the mushrooms to and from the grill and will avoid having any fall between the grill grates.
    • Store leftover mushrooms, covered, in the fridge for up to 2 days. Reheat in a warm oven until heated through.
    • This recipe is suitable for vegetarian diets.
    Six grilled stuffed mushrooms on a plate.

    More Mushroom Recipes You'll Love

    A bowl of sautéed mushrooms with strips of meat in the background.
    Griddle Sautéed Mushrooms
    A jar filled with creamy mushroom sauce with some mushrooms next ot it.
    Cream Cheese Mushroom Sauce

    Recipe

    Six grilled stuffed mushrooms on a plate.

    Grilled Stuffed Mushrooms

    A woman's face.Angie Zoobkoff
    This easy appetizer features a rich garlic, cream cheese, and panko filling tucked inside juicy grilled mushrooms. Perfect for any time of the year.
    No ratings yet
    Print Recipe Pin Recipe
    Prep Time 15 minutes mins
    Cook Time 15 minutes mins
    Total Time 30 minutes mins
    Course Appetizer
    Cuisine American
    Servings 10 mushrooms
    Calories 74 kcal

    Equipment

    • Grill tray optional

    Ingredients
      

    • 8 ounces white mushrooms (about 10) stems removed and reserved
    • 2 teaspoons vegetable or olive oil
    • 2 cloves garlic minced
    • 4 ounces (113 g) cream cheese softened
    • ¼ cup grated Parmesan cheese
    • ¼ cup panko bread crumbs
    • â…› teaspoon cayenne pepper
    • Salt and freshly ground black pepper

    Instructions
     

    • Preheat the grill for medium heat (~400°F/200°C).
    • Finely chop the reserved mushroom stems.
    • Warm the oil in a small skillet over medium heat. You can do this on your stovetop, grill side burner, or directly on the grill. Add the mushrooms and cook, stirring frequently, until they soften and release their liquid, about 5 minutes.
    • Stir in the garlic and cook for 1 minute, reducing the heat if the garlic starts to brown. Remove from the heat and let cool while you prepare the filling.
    • In a medium bowl, mix the cream cheese, Parmesan, panko, cayenne, and cooked mushroom stems and garlic. Taste a little nibble and season the cheese mixture to taste with salt and pepper.
    • Working with one mushroom at a time, hold the mushroom cap upside down. Use a small spoon to press about 1 tablespoon of the cheese mixture into each mushroom. Pack it in firmly, but don't press too hard or you will break the mushroom.
    • Place the mushrooms, stuffing side up on a grill tray, if using. Transfer the grill tray to the grill and cook the mushrooms until they begin to shrivel and the edges are bubbling, about 8 minutes. Alternatively, you can use tongs to transfer each mushroom directly to the grill.
    • Remove from the heat and serve warm.

    Notes

    • Use a grill tray--I recommend using a grill tray for cooking the stuffed mushrooms on the grill. This will make it easy for transferring the mushrooms to and from the grill and will avoid having any fall between the grill grates.
    • Storage--Store leftover mushrooms, covered, in the fridge for up to 2 days. Reheat in a warm oven until heated through.
    • Dietary--This recipe is suitable for vegetarian diets.

    Nutrition

    Serving: 1 mushroomCalories: 74kcalCarbohydrates: 4gProtein: 3gFat: 6gCholesterol: 14mgSodium: 81mg
    Keyword grilled appetizers, grilling vegetables
    Tried this recipe?Let us know how it was!

    February 19, 2025 Collections

    12 Best Ways to Use Shredded Chicken

    Having cooked chicken on hand is a lifesaver when it comes to making quick meals. So, whether you grabbed a rotisserie chicken at the store, have leftover roast chicken from the weekend, or cooked up a batch of Dutch oven shredded chicken, these 12 ways to use shredded chicken will help you figure out the best recipes to make with it.

    1
    Recipe and photo credit: Cinnamon and Sage Co.
    Creamy Chicken Pasta
    This creamy chicken pasta is a simple dinner dish that will be an easy crowd pleaser you’ll want to make over and over again. It's a fantastic way to use leftover shredded or rotisserie chicken.
    Get the recipe: Creamy Chicken Pasta
    2
    A plate with two pieces of bbq chicken flatbread on it.
    BBQ Chicken Flatbread
    Made with tangy chicken and two types of cheese, these homemade flatbreads are a family favorite that can be prepared on your Blackstone or in your oven.
    Get the recipe: BBQ Chicken Flatbread
    3
    Recipe and photo credit: The Cookin Chicks
    French Onion Chicken Casserole
    Discover a new twist on classic comfort food with our recipe for French onion chicken casserole. Packed with flavor and easy to make!
    Get the recipe: French Onion Chicken Casserole
    4
    Recipe and photo credit: The Virtual Caterer
    Cheesy Italian Chicken Salad Sliders
    Try these tasty Italian chicken salad sliders for your next gathering. Perfect for parties, game days, or easy weeknight dinners.
    Get the recipe: Cheesy Italian Chicken Salad Sliders
    5
    A foil pan filled with buffalo chicken dip with carrots, crackers, and bread cubes nearby.
    Make-Ahead Buffalo Chicken Dip
    Everything you love about Buffalo chicken wings in a creamy, scoop-able dip.
    Get the recipe: Buffalo Chicken Dip
    6
    Recipe and photo credit: 100 Days of Real Food
    Chicken Spaghetti
    This homemade chicken spaghetti recipe is creamy, cozy, hearty, and savory! It is a great family friendly dinner.
    Get the recipe: Chicken Spaghetti
    7
    Recipe and photo credit: Style and Grace
    Stracciatella Soup with Chicken and Spring Vegetables
    This soup is a weeknight wonder that comes together in just 10 minutes. Serve it up generously and let each person top their own bowl with fresh basil, a drizzle of olive oil, a squeeze of lemon and additional cheese for a take on Stracciatella soup that’s high in protein, ready in no time flat, and perfect for spring!
    Get the recipe: Stracciatella Soup with Chicken
    8
    Recipe and photo credit: The Forked Spoon
    Shredded Chicken Tacos
    These shredded chicken tacos are a quick, easy, and flavorful weeknight dinner perfect for kids and adults alike. Warm tortillas are loaded with juicy, deliciously seasoned shredded chicken and topped with your favorite toppings, like homemade salsa, crunchy lettuce, and cheese.
    Get the recipe: Shredded Chicken Tacos
    9
    Recipe and photo credit: A Tasty Kitchen
    Leftover Chicken Pie
    Turn leftover chicken into a hearty, comforting pie packed with veg and a creamy sauce. This leftover chicken pie is easy and delicious, a great family dinner.
    Get the recipe: Chicken Pie
    10
    Recipe and photo credit: Chew Out Loud
    Chicken Enchilada Casserole
    This chicken enchilada casserole is a tasty Mexican-inspired dish with all the bold flavors you love in an enchilada without the fuss.
    Get the recipe: Chicken Enchilada Casserole
    11
    Recipe and photo credit: Haute and Healthy Living
    Buffalo Chicken Stuffed Peppers
    These healthy Buffalo chicken stuffed peppers are such a quick and flavourful meal for busy weeknights. Can be made in less than 30 minutes!
    Get the recipe: Buffalo Chicken Stuffed Peppers
    12
    Recipe and photo credit: Yummi Haus
    Shredded Chicken Nachos
    Shredded chicken nachos are so easy to make, loaded with all your favorite ingredients, and are perfect for game day! Done in just 15 minutes.
    Get the recipe: Shredded Chicken Nachos

    February 17, 2025 Camping

    Sweet and Sour Pork Skewers on the Grill

    These grilled sweet and sour pork skewers are an easy 30-minute meal featuring the sweet and tangy flavors of your favorite pork takeout dish. They're perfect for a quick weeknight meal at home or a simple camping meal.

    Four sweet and sour pork skewers with pork cubes, pineapple, pepper, and onion.

    Whether it's a busy weeknight at home or I'm chilling at camp, my favorite meals are the ones that require minimal time, ingredients, and effort. These grilled pork skewers do exactly that. Taking their cue from sweet and sour pork, these easy pork kabobs come together in the time it takes the grill to preheat and are a simple meal that kids and adults alike will devour.

    Why You'll Love This Recipe

    • They're a quick grilled dinner that's perfect for camping or at home.
    • It's an easy meal that requires only 5 ingredients and is ready in just 30 minutes!

    Ingredients and Substitutions

    Ingredients for sweet and sour pork skewers--pineapple, pepper, sweet and sour sauce, pork chops, red onion.
    • Pork chops--This recipe uses center cut pork chops to ensure a tender, juicy result. Choose good quality pork that has some fat on it. Be sure to cut your pork pieces into even cubes so that they'll all be cooked in the same amount of time.
    • Pineapple--I recommend using a pineapple that is ripe and juicy. The sugar in the ripe pineapple will caramelize beautifully on the grill. See the FAQ section below for tips on choosing a ripe pineapple.
    • Pepper--Any type of sweet pepper will work here, whether red, orange, or yellow. Don't cut your pieces smaller than 1-inch, as the pieces may break when you skewer them.
    • Sweet and sour sauce--To keep things quick and simple, I use store-bought sweet and sour sauce for this recipe. Feel free to use your favorite recipe to make your own.

    How to Make Grilled Pork Skewers

    Cubes of pork in a bowl with a dish of salt and pepper nearby.
    Four uncooked sweet and sour pork skewers on a baking sheet.
    1. Season the cubed pork with salt and pepper.
    2. Thread the pork, pepper, onion, and pineapple onto the skewers.
    Four uncooked sweet and sour pork skewers on a baking sheet.
    Four sweet and sour pork skewers cooking on a grill.
    1. Brush the skewers with sweet and sour sauce.
    2. Grill over medium heat, turning occasionally, and brushing with extra sauce, until cooked through.

    FAQs

    How do I choose a ripe pineapple?

    There are a couple of things to check when selecting your pineapple. Look for a fruit that feels heavy for its size and has some yellow color to it, particularly on the bottom. While you've got it flipped upside down, give it a sniff. It should smell fruity. Lastly, give one of the leaves a tug. If your pineapple is ripe, the leaf should be green and firm and release easily.

    What type of skewers should I use?

    You can use wooden or metal skewers for this recipe. My preference is for flat metal skewers, because they are reusable, don't require any soaking, and the flat surface prevents food from spinning, making them easier to turn and cook evenly.

    What to Serve with this Recipe

    Enjoy this easy weeknight meal with a bowl of steamed rice or buttered egg noodles.

    Tips and Troubleshooting

    • If you are using wooden skewers, soak them for an hour before threading and grilling the chicken. Metal skewers don't require any preparation.
    • Don't overcook the pork. Use an instant read thermometer to check the internal temperature and remove the kabobs from the grill when it reaches 145°F.
    • Remove any leftovers from the skewers and store in a sealed container in the fridge for up to 4 days.
    • This recipe is suitable for dairy-free diets and gluten-free diets, if made using gluten-free sweet and sour sauce.
    A plate with pork, pineapple, and pepper skewer on top of rice.

    More Grilled Pork Recipes You'll Love

    A grilled stuffed pork tenderloin on a platter with oranges, parsley, and cranberries.
    Stuffed Pork Tenderloin
    A partially sliced grilled bacon-wrapped pork tenderloin on a wooden cutting board with a dish of green beans on the side.
    Grilled Bacon-Wrapped Pork Tenderloin

    Tried This Recipe?

    If you've tried this recipe, please leave a comment below. Follow me on Instagram, Facebook, or Pinterest for more great camping and grilling recipes.

    Recipe

    Four sweet and sour pork skewers with pork cubes, pineapple, pepper, and onion.

    Sweet and Sour Pork Skewers on the Grill

    A woman's face.Angie Zoobkoff
    Transform your favorite pork takeout dish into an easy 30-minute grilled meal. These sweet and sour pork skewers are bursting with flavor from tender pork, pepper, onion, and pineapple.
    No ratings yet
    Print Recipe Pin Recipe
    Prep Time 17 minutes mins
    Cook Time 13 minutes mins
    Total Time 30 minutes mins
    Course Main Course
    Cuisine American, Chinese
    Servings 4 skewers
    Calories 372 kcal

    Equipment

    • 4 Long wooden or metal skewers

    Ingredients
      

    • 1 ½ pounds (680 g) boneless center cut pork chops cut into 1-inch cubes
    • Salt and freshly ground black pepper
    • 1 red pepper cut into 1-inch pieces
    • ¼ large red onion cut into 1-inch pieces
    • 2 cups cubed (1-inch) ripe pineapple
    • â…“ cup sweet and sour sauce plus more for serving

    Instructions
     

    • Preheat the grill for medium heat (375°F). Clean and oil the grill grate.
    • Season the pork generously with salt and pepper.
    • Thread the pork, pepper, onion, and pineapple onto the skewers, alternating between ingredients.
    • Brush the skewers with about half of the sauce. Season lightly with salt and pepper.
    • Cook the skewers, turning every 3 to 4 minutes, and brushing once more with the remaining sauce during cooking, until the vegetables have softened and the pork has reached an internal temperature of 145°F, 12 to 13 minutes.
    • Serve with extra sweet and sour sauce, for dipping, if desired.

    Notes

    • Skewers--If you are using wooden skewers, soak them for an hour before threading and grilling the chicken. Metal skewers don't require any preparation.
    • Don't overcook the pork--Use an instant read thermometer to check the internal temperature and remove the kabobs from the grill when it reaches 145°F.
    • Storage--Remove any leftovers from the skewers and store in a sealed container in the fridge for up to 4 days.
    • Dietary--This recipe is suitable for dairy-free diets and gluten-free diets, if made using gluten-free sweet and sour sauce.

    Nutrition

    Serving: 1 skewerCalories: 372kcalCarbohydrates: 31gProtein: 41gFat: 9gCholesterol: 117mgSodium: 220mgFiber: 2gSugar: 23g
    Keyword grilled pork, grilled skewers
    Tried this recipe?Let us know how it was!

    February 14, 2025 Blackstone Griddle Recipes

    BBQ Chicken Flatbread

    This easy BBQ chicken flatbread is a quick weeknight meal that comes together with only 6 ingredients and is ready in just 20 minutes. Topped with tangy bbq chicken and plenty of melted cheese, these chicken flatbreads are guaranteed to be a family favorite at camp or at home.

    A plate with two pieces of bbq chicken flatbread on it.

    The thing I love most about this recipe is that you get equally spectacular results whether you prepare this on your Blackstone griddle or in your oven. Which means you can enjoy this quick and easy Blackstone chicken recipe for lunch or dinner when you're at home and when you're at camp.

    Why You'll Love This Recipe

    • You can make the flatbreads on your Blackstone griddle or in the oven.
    • It's a fun way to use up leftover shredded or rotisserie chicken.
    • It's an easy meal that requires only 6 ingredients and is ready in just 20 minutes!

    Ingredients and Substitutions

    Ingredients for bbq chicken flatbread--chicken, onion, cheddar, bbq sauce, flatbread, and mozzarella.
    • Chicken--This bbq chicken flatbread recipe uses cooked shredded chicken. Leftover grilled chicken or shredded rotisserie chicken are both great options for this.
    • BBQ sauce--I recommend using a mustard-based bbq sauce, such as this homemade spicy mustard bbq sauce or a store-bought Carolina Gold mustard sauce to add plenty of flavor and tang to the chicken.
    • Flatbread--You can use store-bought or homemade flatbread for this recipe. I find that homemade flatbread will result in a crispier base, while store-bought tends to be softer.
    • Cheese--This recipe uses both cheddar and mozzarella. I recommend grating your own cheese. Pre-shredded cheese doesn't melt well.

    How to Make Barbecue Chicken Flatbread

    A bowl of shredded chicken with a small bowl of salt and pepper on the side.
    A bowl of shredded chicken tossed with bbq sauce.
    1. Season the shredded chicken with salt and pepper.
    2. Mix the bbq sauce into the chicken and stir until evenly coated.
    Two assembled chicken flatbreads on a baking sheet.
    Two flatbreads cooking on a griddle.
    1. Assemble the flatbreads with chicken, red onion, and cheese.
    2. Cook the flatbreads on a griddle over medium heat until the cheese is melted and the chicken is heated through.

    FAQs

    How do I cook chicken flatbread in my oven?

    Preheat the oven to 350°F. While the oven is preheating, assemble the bbq chicken flatbreads as directed in the recipe. Cook them on a baking sheet in the oven until the cheese is melted and the chicken is heated through, 10 to 15 minutes.

    Can I use naan bread?

    Yes. You can use store-bought or homemade naan instead of flatbread.

    What to Serve with this Recipe

    Enjoy this easy weeknight meal with a simple Greek salad or raw veggies and ranch or blue cheese dressing on the side.

    Tips and Troubleshooting

    • If you're cooking this on your covered outdoor griddle, don't be tempted to turn up the heat. They need to be cooked over medium heat, or they will burn on the bottom.
    • Store leftover flatbread in a sealed container in the fridge for up to 2 days. Reheat in a warm oven or in the microwave until heated through.
    Four pieces of bbq chicken flatbread on a wooden board.

    More Blackstone Griddle Recipes You'll Love

    Two Buffalo chicken tacos on a plate with romaine lettuce and blue cheese dressing on top.
    Blackstone Buffalo Chicken Tacos
    Four crab cakes on a platter with lemon and aioli.
    Blackstone Crab Cakes with Old Bay Aioli

    Tried This Recipe?

    If you've tried this recipe, please leave a comment below. Follow me on Instagram, Facebook, or Pinterest for more great camping and grilling recipes.

    Recipe

    A plate with two pieces of bbq chicken flatbread on it.

    BBQ Chicken Flatbread

    A woman's face.Angie Zoobkoff
    Made with tangy chicken and two types of cheese, these homemade flatbreads are a family favorite that can be prepared on your Blackstone or in your oven.
    No ratings yet
    Print Recipe Pin Recipe
    Prep Time 10 minutes mins
    Cook Time 10 minutes mins
    Total Time 20 minutes mins
    Course Main Course
    Cuisine American
    Servings 4 servings
    Calories 523 kcal

    Equipment

    • Blackstone griddle or other outdoor griddle (oven instructions in notes)

    Ingredients
      

    • 2 ½ cups shredded cooked chicken
    • ¼ teaspoon salt
    • ¼ teaspoon freshly ground black pepper
    • â…“ cup spicy mustard bbq sauce or substitute store-bought bbq sauce
    • 4 homemade skillet flatbreads or substitute store-bought
    • ¼ cup thinly sliced red onion
    • 1 cup shredded cheddar cheese
    • 1 cup shredded mozzarella cheese

    Instructions
     

    • Season the chicken with salt and pepper.
    • Pour the bbq sauce over the chicken and stir to evenly coat the chicken.
    • Arrange the flatbreads on a baking sheet. Top with the chicken, onion, and cheese, dividing them evenly among the flatbreads.
    • Heat a Blackstone (or other covered outdoor griddle) over medium heat. Place the flatbreads on the griddle and cook until the cheese is melted and the chicken is heated through, 10 to 12 minutes. Keep an eye on the bottoms of the flatbreads. If they are browning too quickly, move them to a cooler part of the griddle or reduce the heat.
    • Remove from the griddle, slice into wedges, and serve.

    Notes

    • Oven instructions--Bake the assembled flatbreads in a 350°F oven until the cheese is melted and the chicken is heated through, 10 to 15 minutes.
    • Don't burn it--If you're cooking this on your covered outdoor griddle, don't be tempted to turn up the heat. They need to be cooked over medium heat, or they will burn on the bottom.
    • Storage and reheating--Store leftover flatbread in a sealed container in the fridge for up to 2 days. Reheat in a warm oven or in the microwave until heated through.

    Nutrition

    Serving: 1 flatbreadCalories: 523kcalCarbohydrates: 45gProtein: 46gFat: 18gCholesterol: 115mgSodium: 1125mgFiber: 5gSugar: 7g
    Keyword 20 minute meals, bbq chicken, blackstone cooking, blackstone griddle, easy weeknight dinners, flatbread pizza, homemade flatbread
    Tried this recipe?Let us know how it was!

    February 12, 2025 Camping

    8 Easy Side Dish Recipes to Make in a Foil Packet

    Foil packet meals are a staple for camping and mess-free oven or grilled dinners, but the humble foil packet is a rockstar at turning out impressive side dishes, too. These 8 easy foil packet side dish recipes offer simple ways to transform carrots, potatoes, asparagus, corn, and more into show-stopping sides for any day of the week.

    1
    A bowl of cooked carrots with rosemary sprigs on the side.
    Grilled Carrots in Foil
    Infused with rosemary, garlic, and butter, these grilled carrots in foil are so delicious, everyone will be asking for seconds.
    Get the recipe: Grilled Carrots in Foil
    2
    Recipe and photo credit: Fresh Off the Grid
    Grilled Potatoes in Foil
    These rosemary and garlic grilled potatoes are one of the most delicious (and easiest!) sides dishes you can make the grill or over a campfire.
    Get the recipe: Grilled Potatoes in Foil
    3
    Recipe and photo credit: Planted in Arkansas
    Spicy Corn on the Cob Grilled in Foil
    This spicy corn on the cob grilled in foil could not be any easier! The sweet corn and the spicy grilled corn seasoning pair together nicely for a perfect flavor explosion!
    Get the recipe: Spicy Corn on the Cob
    4
    A foil packet filled with cheesy potatoes with a dish of sour cream on the side.
    Cheesy Foil Packet Potatoes
    These buttery, cheesy potatoes in foil can be made on the grill, over the campfire, or in your oven for an easy, oh-so-satisfying side dish.
    Get the recipe: Cheesy Foil Packet Potatoes
    5
    Recipe and photo credit: Fresh Off the Grid
    Grilled Asparagus in Foil
    This garlicy, lemony, Grilled Asparagus in foil is the perfect side dish to make for your next BBQ or camping trip. Get the recipe here!
    Get the recipe: Grilled Asparagus
    6
    A bowl of grilled beets with crumbled goat cheese and fresh mint.
    Grilled Beets with Goat Cheese
    An easy, healthy, side dish of tender grilled beets and creamy goat cheese with a bright and tangy lemon dressing.
    Get the recipe: Grilled Beets with Goat Cheese
    7
    Recipe and photo credit: Strength and Sunshine
    Grilled Plantains
    Baking plantains is fun, but grilling is the new way to go. This way you can achieve the ultimate smokey taste from the grill and smoked paprika.
    Get the recipe: Grilled Plantains
    8
    An open foil packet filled with gnocchi, corn, tomatoes, and basil on a wooden tree stump.
    Corn and Tomato Gnocchi Foil Packets
    These vegetarian campfire foil packets are made with tender gnocchi, sweet summer tomatoes and corn, all bathed in a buttery sauce. It's fun, easy camping food that requires minimal cooler space and uses only one bowl.
    Get the recipe: Corn and Tomato Gnocchi Foil Packets

    February 10, 2025 Everyday Staples

    Spicy Mustard BBQ Sauce

    Add this spicy mustard bbq sauce recipe to your collection of homemade bbq sauces. This easy 15-minute bbq sauce combines spicy mustard, vinegar, hot sauce, and brown sugar to make a tangy sauce that's perfect for slathering on your favorite grilled chicken and pork recipes.

    A spoon dripping into a jar of mustard bbq sauce.

    I almost never buy bbq sauce at the store anymore. It always seems too sweet and not tangy enough, and when you can whip up a batch of homemade sauce in under 15 minutes with a handful of pantry staples, why wouldn't you?

    Why You'll Love This Recipe

    • It's an easy homemade bbq sauce recipe that's perfect for grilled chicken and pork recipes. You could even try it on your homemade smokies!
    • It can be prepared in just 15 minutes.
    • You can scale the recipe to make as much as you need.

    Ingredients and Substitutions

    Ingredients for spicy mustard bbq sauce--brown sugar, apple cider vinegar, hot sauce, and mustard.
    • Spicy mustard--There's a lot of choice when it comes to spicy mustard. Use one that you like. The sugar in the sauce will soften the heat from the mustard, but the flavor of the mustard will be dominant, so be sure to sample it before using to make sure you enjoy the flavor and can tolerate the heat.
    • Brown sugar--I recommend using light brown sugar here so that the molasses flavor isn't dominant.
    • Hot sauce--Use a vinegar-based hot sauce, such as Frank's Red Hot Sauce.

    How to Make Mustard BBQ Sauce

    Ingredients being mixed together in a small pot.
    Mustard bbq sauce cooking on a stovetop.
    1. Combine the mustard, brown sugar, vinegar, hot sauce, and salt in a small saucepan.
    2. Simmer over low heat for 10 minutes.

    FAQs

    How long will this bbq sauce keep?

    If stored in a sealed container in the refrigerator, this sauce will keep for up to 2 weeks. For longer storage, pop it in the freezer.

    Can you freeze homemade mustard bbq sauce?

    Yes. Freeze the sauce in a freezer-safe container or jar for up to 3 months. When freezing, always leave some room in your container for expansion. Thaw in the refrigerator overnight before using.

    How should I use this sauce?

    Mustard-based bbq sauces are ideal for chicken and pork. Brush it onto crispy grilled chicken wings, toss it with shredded chicken and make BBQ chicken flatbread, or try it on these make-ahead ribs for camping.

    Tips and Troubleshooting

    • Don't let the sauce boil vigorously as it will become too thick. Adjust the heat as necessary to only maintain a very slow simmer.
    • This recipe is suitable for gluten-free, dairy-free, and vegan diets.
    A jar of spicy mustard bbq sauce with a spoon resting inside.

    More BBQ Sauce Recipes You'll Love

    A scalloped bowl filled with peach bbq sauce with two peaches and two serrano peppers next to it.
    Peach Bourbon BBQ Sauce
    A jar of hot honey bbq sauce.
    Hot Honey BBQ Sauce

    Tried This Recipe?

    If you've tried this recipe, please leave a comment below. Follow me on Instagram, Facebook, or Pinterest for more great camping and grilling recipes.

    Recipe

    A spoon dripping into a jar of mustard bbq sauce.

    Spicy Mustard BBQ Sauce

    A woman's face.Angie Zoobkoff
    You're only 15 minutes away from a tangy, spicy, mustard bbq sauce that's perfect for slathering on chicken and pork.
    No ratings yet
    Print Recipe Pin Recipe
    Prep Time 5 minutes mins
    Cook Time 10 minutes mins
    Total Time 15 minutes mins
    Course Condiment
    Cuisine American
    Servings 1 cup
    Calories 50 kcal

    Ingredients
      

    • ½ cup spicy mustard
    • â…“ cup light brown sugar
    • 2 tablespoons apple cider vinegar
    • 1 tablespoon hot sauce
    • ½ teaspoon salt

    Instructions
     

    • Combine the mustard, brown sugar, vinegar, hot sauce, and salt in a small saucepan.
    • Bring to a gentle simmer over medium heat, then immediately reduce heat to low so that the sauce is barely simmering. Let it cook gently for 10 minutes.
    • Remove from the heat and let cool before transferring to a lidded jar or container. The sauce will thicken slightly as it cools. Store in the fridge for up to 2 weeks.

    Notes

    • Don't let the sauce boil vigorously as it will become too thick. Adjust the heat as necessary to only maintain a very slow simmer.
    • This recipe is suitable for gluten-free, dairy-free, and vegan diets.

    Nutrition

    Serving: 2 tablespoonsCalories: 50kcalCarbohydrates: 12gSodium: 347mgSugar: 12g
    Keyword grilling condiments, homemade bbq sauce
    Tried this recipe?Let us know how it was!

    February 7, 2025 Camping

    Simple Greek Salad

    This fresh, crisp, simple Greek salad recipe, made with tomatoes, cucumber, pepper, onion, olives, and feta in a tangy vinaigrette, comes together in just 15 minutes and is the perfect side dish for barbecues, potlucks, picnics, camping, or any weeknight meal.

    A bowl of greek salad with dressing and oregano on the side.

    This recipe is proof that great food doesn't need to be complicated. I've tried lots of different Greek salad recipes, but this is the one my family and friends request over and over again. It comes together quickly, stores well, and is the perfect blend of crunchy and tangy. Try it alongside grilled bacon-wrapped steak or a grilled chicken gyro.

    Why You'll Love This Recipe

    • It's an easy make-ahead salad recipe that's perfect camping trips, potlucks, picnics, and barbecues.
    • It can be prepared in just 15 minutes.
    • You can scale the recipe to make as much as you need.

    Ingredients and Substitutions

    Ingredients for simple Greek salad--oil, vinegar, lemon, onion, cucumber, tomatoes, pepper, feta, olives, and oregano.
    • Cucumber--I recommend using a long English cucumber, or chopped mini or Persian cucumbers.
    • Pepper--Any type of sweet pepper (red, orange, or yellow) works well in this salad.
    • Tomatoes--I prefer to use grape or cherry tomatoes for Greek salad because they don't soften as much as diced plum tomatoes after sitting in the dressing.
    • Olives--Be sure to purchase pitted kalamata olives, or remove the stones yourself with a pitter.

    How to Make Simple Greek Salad

    A jar of salad dressing with the lid beside it.
    A bowl filled with tomato, cucumber, olives, onions, and feta with a jar of dressing on the side.
    1. Combine the oil, vinegar, lemon juice, oregano, and salt and pepper in a small lidded jar. Shake to combine.
    2. Mix the cucumber, tomato, pepper, onion, olives, and feta in a large bowl. Pour the dressing over the salad and mix well.

    FAQs

    Can I make this in advance?

    Yes. Actually this Greek salad recipe benefits from having a couple of hours to hang out in the fridge before serving and you can make it up to 3 days before serving. Store in a covered container in the refrigerator.

    Can I make the dressing more tangy?

    Definitely! Feel free to adjust the oil to vinegar ratio to suit your tastes. The recipe will give you a mildly tangy vinaigrette, but if you prefer a stronger vinegar flavor, add an extra 1 to 2 tablespoons of vinegar.

    Tips and Troubleshooting

    • The oil in the dressing may solidify after sitting in the fridge. If this happens, let the salad sit at room temperature for 15 minutes before serving, and give it a good stir after the oil melts to redistribute everything.
    • This recipe is suitable for gluten-free diets.
    A close view of a bowl of Greek salad.

    More Salad Recipes You'll Love

    A bowl filled with raw vegetable marinated salad.
    Marinated Vegetable Salad
    A bowl of Brussels sprouts salad with cranberries and silver tongs on the side.
    Brussels Sprouts Salad with Cranberries

    Tried This Recipe?

    If you've tried this recipe, please leave a comment below. Follow me on Instagram, Facebook, or Pinterest for more great camping and grilling recipes.

    Recipe

    A bowl of greek salad with dressing and oregano on the side.

    Simple Greek Salad

    A woman's face.Angie Zoobkoff
    This simple make-ahead salad is filled with crisp fresh vegetables, feta cheese, olives, and a tangy vinaigrette.
    No ratings yet
    Print Recipe Pin Recipe
    Prep Time 15 minutes mins
    Total Time 15 minutes mins
    Course Salad, Side Dish
    Cuisine Mediterranean
    Servings 4 servings
    Calories 210 kcal

    Ingredients
      

    For the dressing

    • ½ cup extra-virgin olive oil
    • ¼ cup red wine vinegar
    • 1 tablespoon fresh lemon juice
    • 2 teaspoons dried oregano
    • ½ teaspoon sea salt
    • ¼ teaspoon freshly ground black pepper

    For the salad

    • 1½ English cucumbers cut into ½-inch pieces
    • 1 red pepper cut into ½-inch pieces
    • 1 cup halved grape or cherry tomatoes
    • ½ cup crumbled feta cheese
    • â…“ cup diced red onion
    • â…“ cup pitted kalamata olives

    Instructions
     

    Make the dressing

    • In a small lidded jar, combine the olive oil, vinegar, lemon juice, oregano, salt, and pepper. Shake well to combine.

    Make the salad

    • Combine the cucumber, pepper, tomato, feta, onion, and olives in a large salad bowl. Pour the dressing over and mix to combine.
    • Cover and chill until you're ready to serve.

    Notes

    • If you prefer a more tangy dressing, add an extra 1 to 2 tablespoons vinegar to the dressing mixture.
    • The oil in the dressing may solidify after sitting in the fridge. If this happens, let the salad sit at room temperature for 15 minutes before serving, and give it a good stir after the oil melts to redistribute everything.
    • This recipe is suitable for gluten-free diets.

    Nutrition

    Serving: 1 portionCalories: 210kcalCarbohydrates: 12gProtein: 5gFat: 17gCholesterol: 17mgSodium: 618mgFiber: 3gSugar: 6g
    Keyword easy salad recipe, make-ahead side dishes
    Tried this recipe?Let us know how it was!

    February 5, 2025 Collections

    12 Easy Taco Recipes Ready in 45 Minutes or Less

    Tacos are basically the perfect food. They're easy to make, endlessly customizable, and loved by nearly everyone. They're so good, they've even got an entire day of the week dedicated to them! And whether it's Tuesday or not, you're going to love how fast these 12 easy taco recipes are on the table.

    1
    Recipe and photo credit: Quiche My Grits
    Baja Chicken Tacos
    Baja chicken tacos start with chicken tenders that are seasoned with Tajin spice and seared to perfection. Add fresh pico de gallo, avocado, cotija  cheese, and creamy Baja sauce to make the best tacos you've ever tasted in just 30 minutes!
    Get the recipe: Baja Chicken Tacos
    2
    Recipe and photo credit: Chocolates & Chai
    Big Mac Tacos
    A unique twist on one of the world’s favorite fast foods. This viral recipe for Big Mac Tacos has been taking the internet by storm!
    Get the recipe: Big Mac Tacos
    3
    Two Buffalo chicken tacos on a plate with romaine lettuce and blue cheese dressing on top.
    Blackstone Buffalo Chicken Tacos
    Enjoy your favorite wing flavor in taco form. This easy meal is ready in just 20 minutes!
    Get the recipe: Blackstone Buffalo Chicken Tacos
    4
    Recipe and photo credit: Mary's Whole Life
    Blackened Salmon Tacos with Pineapple Salsa
    These easy blackened salmon tacos are the ultimate fish tacos. Topped with pineapple salsa & lime aioli, it’s tacos and salsa for the win!
    Get the recipe: Blackened Salmon Tacos
    5
    Recipe and photo credit: xoxo Bella
    Easy Breakfast Tacos
    These are honestly the best breakfast tacos. They’re made with simple ingredients you know and love and adjustable enough to include all your desired toppings.
    Get the recipe: Easy Breakfast Tacos
    6
    A walking taco with Doritos and cheese with lettuce, sour cream, and tomato surrounding it.
    Walking Tacos
    An easy handheld camping meal made with spiced ground beef and all your favorite taco fixings piled into a bag of nacho chips. Easy, fast, and kid-friendly.
    Get the recipe: Walking Tacos
    7
    Recipe and photo credit: Simply Delicious
    Easy Pork Belly Tacos
    Juicy pork belly tacos served in corn tortillas with shredded cabbage, spicy sour cream sauce and jalapeños.
    Get the recipe: Easy Pork Belly Tacos
    8
    Recipe and photo credit: Cooking with Wine
    Marinated Skirt Steak Street Tacos
    Our marinated skirt steak street tacos are packed with flavor and are a must for your next taco night!
    Get the recipe: Marinated Skirt Steak Street Tacos
    9
    Three shredded chicken tacos on a blue platter with sour cream, avocado, and cilantro.
    Dutch Oven Shredded Chicken Tacos
    These smoky chicken tacos are prepared in your Dutch oven over the campfire. They're an easy camping meal that's perfect for your next trip.
    Get the recipe: Shredded Chicken Tacos
    10
    Recipe and photo credit: Home Cooking Collective
    Crispy Bean and Cheese Tacos with Chipotle Sauce
    These crispy and cheesy tacos are filled with homemade refried beans, pepper jack cheese, and a spicy chipotle sauce, perfect for your next weeknight dinner!
    Get the recipe: Crispy Bean and Cheese Tacos
    11
    Recipe and photo credit: Simply Delicious
    Grilled Shrimp Tacos with Chipotle Crema
    Grilled shrimp tacos with chipotle crema are absolutely delicious served with creamy avocado, cabbage and fresh cilantro.
    Get the recipe: Grilled Shrimp Tacos
    12
    Recipe and photo credit: Carrots & Cookies
    Easy Ground Turkey Tacos
    This ground turkey tacos recipe uses simple ingredients and takes just 15 minutes to make. They are just perfect for Taco Tuesday!
    Get the recipe: Ground Turkey Tacos

    February 3, 2025 Blackstone Griddle Recipes

    Blackstone Crab Cakes with Old Bay Aioli

    These easy, yet impressive Blackstone crab cakes come together quickly and feature plenty of crab with just enough binder and seasoning to hold it all together. Topped with a homemade Old Bay aioli, these tasty cakes make an excellent starter or light meal.

    Four crab cakes on a platter with lemon and aioli.

    I adore crab cakes, particularly fresh ones, but live too far from the ocean to satisfy my craving with any regularity. Thankfully, this quick and easy version packs plenty of crab flavor and the even heat of the griddle ensures that they have a crispy golden crust. Best of all, I can enjoy them any time I want.

    Why You'll Love This Recipe

    • Using a large outdoor griddle allows you to scale this recipe to make as many as you need.
    • The large surface area of a Blackstone griddle makes cooking and flipping the cakes easy.
    • This recipe only requires 20 minutes of hands-on time.

    Ingredients and Substitutions

    Ingredients for Blackstone crab cakes--Dijon, panko, lemon, mayo, Old Bay, crab, egg, and Worcestershire sauce.
    • Crab--Lump crab meat is ideal for making crab cakes, but you can use any variety of canned crab if lump meat isn't available to you.
    • Panko--This is a Japanese type of bread crumb that is very crispy. Panko is available online and at most large supermarkets.
    • Old Bay seasoning--This popular seafood spice blend is used to add flavor to the crab cakes and the Old Bay aioli. You can purchase Old Bay seasoning online or at large supermarkets. It's also fantastic on grilled shrimp skewers!

    How to Make Crab Cakes on the Blackstone

    Crab cake mixture in a bowl.
    Four uncooked crab cakes on a rimmed baking sheet.
    1. Mix the crab, panko, egg, mayonnaise, Dijon, Worcestershire sauce, Old Bay, salt, and pepper in a large bowl.
    2. Divide the mixture into four portions and shape each one into a cake. Place on a plate or baking sheet, cover with plastic, and chill for 1 hour.
    A mixture of mayo, lemon juice, and Old Bay seasoning in a small bowl.
    Four crab cakes cooking on a Blackstone griddle.
    1. Whisk the mayonnaise, lemon juice, and Old Bay seasoning together in a small bowl. Cover and chill until ready to serve.
    2. Cook the crab cakes on a griddle over medium-high heat until golden brown and cooked through.

    FAQs

    Do I have to chill the crab cakes before cooking?

    Yes. The panko in the crab filling acts as a binder and as the crab cakes chill, the moisture in them softens the panko and allows it to bind everything together. If you try to cook the cakes without chilling, they may fall apart.

    Can I make this recipe in my cast iron skillet?

    Yes. Follow the recipe, then coat a 12-inch cast iron skillet (or larger) with some cooking spray or oil and heat over medium-high heat. Cook the cakes until golden brown, 3 to 5 minutes per side.

    Can I serve them with a different sauce?

    Sure. Use tartar sauce or cocktail sauce for topping the cakes, if you prefer. Or go ahead and eat them plain!

    What to Serve with this Recipe

    You can serve this Blackstone crab cake recipe as a starter or as part of a main course. Try it alongside grilled striploin steak skewers or Blackstone steak bites for an impressive surf-and-turf meal. Round out your meal with a simple Greek salad or some bread on the side.

    Tips and Troubleshooting

    • If the mixture is sticky, use wet hands for shaping the cakes.
    • If your crab cakes begin to brown too quickly, reduce the heat to medium
    • This recipe is suitable for dairy-free diets.
    Two crab cakes on a plate, topped with aioli with a lemon wedge on the side.

    More Blackstone Griddle Recipes You'll Love

    Two Buffalo chicken tacos on a plate with romaine lettuce and blue cheese dressing on top.
    Blackstone Buffalo Chicken Tacos
    Two halves of a Monte Cristo sandwich stacked on to pof each other.
    Blackstone Monte Cristo

    Tried This Recipe?

    If you've tried this recipe, please leave a comment below. Follow me on Instagram, Facebook, or Pinterest for more great camping and grilling recipes.

    Recipe

    Four crab cakes on a platter with lemon and aioli.

    Blackstone Crab Cakes

    A woman's face.Angie Zoobkoff
    These tasty cakes are cooked until golden brown on your outdoor griddle and topped with a creamy, tangy Old Bay sauce that you'll want to drizzle over everything.
    No ratings yet
    Print Recipe Pin Recipe
    Prep Time 10 minutes mins
    Cook Time 10 minutes mins
    Chill Time 1 hour hr
    Total Time 1 hour hr 20 minutes mins
    Course Appetizer, Main Course
    Cuisine American
    Servings 4 cakes
    Calories 119 kcal

    Equipment

    • Blackstone (or other outdoor) griddle

    Ingredients
      

    For the crab cakes

    • 8 ounces (227 g) crabmeat preferably lump
    • â…“ cup panko breadcrumbs
    • 1 large egg lightly beaten
    • 1 tablespoon mayonnaise
    • 1½ teaspoons Dijon mustard
    • 1 teaspoon Worcestershire sauce
    • ½ teaspoon Old Bay seasoning
    • ¼ teaspoon salt
    • ¼ teaspoon freshly ground black pepper
    • Cooking spray or vegetable oil for the griddle

    For the Old Bay aioli

    • ¼ cup mayonnaise
    • 1 tablespoon lemon juice
    • ¼ teaspoon Old Bay seasoning

    Instructions
     

    Make the crab cakes

    • In a large bowl, mix the crab, panko, egg, mayonnaise, Dijon mustard, Worcestershire sauce, Old Bay seasoning, and salt and pepper together.
    • Use your hands to shape the mixture into four ½-inch-thick patties (each one should be a generous â…“ cup). Place the cakes on a plate or small baking sheet, cover, and chill for at least 1 hour and up to 8 hours.

    Make the Old Bay aioli

    • While the crab cakes are chilling, whisk the mayonnaise, lemon juice, and Old Bay seasoning together. Chill until you're ready to serve.

    Cook the crab cakes

    • Heat one side of a Blackstone griddle (or other large flat top griddle) to medium-high. Coat it with cooking spray or slick lightly with oil.
    • Cook the crab cakes, flipping once, until golden brown on both sides and hot throughout, 4 to 5 minutes per side. Serve warm with the Old Bay aioli.

    Notes

    • Wet hands--If the mixture is sticky, use wet hands for shaping the cakes.
    • Watch the heat--If your crab cakes begin to brown too quickly, reduce the heat to medium
    • Dietary--This recipe is suitable for dairy-free diets.

    Nutrition

    Serving: 1cake (+ 1 tablespoon aioli)Calories: 119kcalCarbohydrates: 4gProtein: 13gFat: 5gCholesterol: 105mgSodium: 469mgSugar: 1g
    Keyword blackstone cooking, blackstone griddle, seafood recipes, valentine's day dinner
    Tried this recipe?Let us know how it was!

    January 31, 2025 Beef Recipes

    Texas Cowboy Stew

    This Texas cowboy stew is the ultimate campfire cooking meal. Filled with three types of meat (yes, three!), corn, and potatoes in a spicy tomato broth, this hearty stew is a satisfying meal that can be prepared in your cast iron Dutch oven over the campfire.

    A pot of cowboy stew and two bowls filled with the stew on a table.

    If you're looking for a hearty, satisfying, one-pot meal that is ideal for campfire cooking, this is it. Cowboy stew is loaded with meat and vegetables, all married together in a spicy tomato broth. This recipe is the reason you haul your Dutch oven along on all your fall camping trips.

    Why This Recipe is Great for Camping

    • It's a one-pot camping meal that you can make in your Dutch oven that can be cooked over the campfire or camp stove.
    • It makes a large batch, perfect for feeding a big family.
    • It's hearty and satisfying, making it an ideal cool weather camping meal.

    Ingredients and Substitutions

    Ingredients for cowboy stew--corn, onion, flour, beef, potato, kielbasa, bacon, tomato, garlic, chili powder.
    • Beef--I recommend using lean ground beef (85/15), which will give you a little bit of fat for flavor.
    • Tomatoes--Many cowboy stew recipes call for canned tomatoes and canned chiles, but I used Rotel tomatoes with green chilies in order to minimize the number of ingredients you will need to pack along on your trip. Feel free to substitute another brand of diced tomatoes with chilies, or you can use plain diced tomatoes if you don't want the extra heat.
    • Corn--If you're camping, I recommend using canned corn. If you're at home or have access to a freezer, feel free to substitute frozen corn.
    • Chili powder--I used a mild chili powder for this recipe. If you know that your powder is very spicy or you are sensitive to heat, start with less and add more to taste.

    How to Make Cowboy Stew Over the Campfire

    Bacon cooking in a Dutch oven over the campfire.
    Kielbasa cooking in a Dutch oven over a campfire.
    1. Prepare a campfire and set your Dutch oven on a campfire grate over direct flame or suspend it from a cooking tripod. Add the bacon to the Dutch oven and cook until almost crisp. Remove with a slotted spoon and transfer to a bowl.
    2. Add the kielbasa to the bacon fat in the Dutch oven and cook until browned on each side. Remove with a slotted spoon and add it to the bowl with the bacon.
    Ground beef and onion cooking in a Dutch oven over the campfire.
    Flour and spices sprinkled on top of ground beef in a Dutch oven.
    1. Add the beef, onion, and garlic to the pot and cook until the beef is browned and the onion is softened.
    2. Sprinkle the flour, chili powder, salt, and pepper over the cooked beef mixture. Stir it in to evenly coat the beef and let it cook for 1 minute.
    A pot of cowboy stew cooking over the campfire.
    A covered cast iron Dutch oven suspended over the campfire.
    1. Add the tomatoes, corn, potato, and water to the stew and bring to a simmer.
    2. Cover and cook until the potatoes are tender. Stir the bacon and kielbasa back into the stew and warm through.

    FAQs

    What size Dutch oven do I need?

    This Texas cowboy stew recipe makes a large batch, so I recommend using a 5 quart Dutch oven or larger.

    Can I add beans to my cowboy stew?

    Absolutely. Feel free to make this stew heartier by adding a can of pinto or black beans, or even by stirring in a cup or two of Dutch oven baked beans.

    Storage & Reheating

    Store leftovers in a sealed container in your cooler or fridge for up to 4 days. Reheat in a Dutch oven over low heat until warmed through.

    Tips and Troubleshooting

    • Start cooking your bacon in a unheated (cold) Dutch oven. This will allow the bacon fat to render slowly, leaving plenty for the kielbasa to brown in.
    • For a more beefy flavor, use beef broth instead of water.
    • Since you're cooking in a Dutch oven outside, the cooking time can vary due to outside temperature and wind. If you're cooking on a very windy day, try to protect the Dutch oven with a barrier, such as a tarp.
    • I like cooking cowboy stew on a tripod, because I can adjust the distance from the heat depending on the outside conditions and the heat of the fire. You can make this on a campfire grate, but you may need to move the Dutch oven around a bit, or adjust the amount of heat from your fire.
    A Dutch oven filled with cowboy stew over a campfire.

    More Dutch Oven Recipes You'll Love

    A pot of Dutch oven turkey chili simmering over a fire.
    Dutch Oven Turkey Chili
    A bowl of split pea soup with ham with a piece of flatbread inside.
    Dutch Oven Split Pea Soup

    Tried This Recipe?

    If you've tried this recipe, please leave a comment below. Follow me on Instagram, Facebook, or Pinterest for more great camping and grilling recipes.

    Recipe

    A pot of cowboy stew and two bowls filled with the stew on a table.

    Texas Cowboy Stew

    A woman's face.Angie Zoobkoff
    This hearty stew, filled with ground beef, kielbasa, bacon, and vegetables is the perfect campfire Dutch oven meal.
    No ratings yet
    Print Recipe Pin Recipe
    Prep Time 15 minutes mins
    Cook Time 1 hour hr 15 minutes mins
    Total Time 1 hour hr 30 minutes mins
    Course Main Course
    Cuisine American
    Servings 6 servings
    Calories 548 kcal

    Equipment

    • 5 quart (or larger) Dutch oven

    Ingredients
      

    • 6 slices bacon cut into ½-inch matchsticks
    • 12 ounces (340 g) kielbasa sliced into ½-inch-thick half moons
    • 1 pound (454 g) lean ground beef
    • 1 small onion diced
    • 2 cloves garlic minced
    • 3 tablespoons all-purpose flour
    • 1 tablespoon chili powder plus more to taste
    • 1 teaspoon salt plus more to taste
    • ½ teaspoon freshly ground black pepper plus more to taste
    • Two (10-ounce ) cans Rotel tomatoes with green chilies
    • One (12-ounce) can whole kernel corn drained
    • 2 medium russet potatoes peeled and cut into ¾-inch cubes
    • 2 cups water

    Instructions
     

    • Prepare a campfire for cooking over medium heat.
    • Place the bacon in a cold Dutch oven and set the Dutch oven on a campfire grate or suspend it from a tripod over the fire. Cook until the bacon is almost crisp, 15 to 20 minutes. Remove the bacon with a slotted spoon and transfer to a bowl.
    • Add the kielbasa to the bacon drippings in the pot. Cook, stirring occasionally, until the sausage begins to brown on both sides, 5 to 8 minutes. Remove with a slotted spoon and add it to the bowl with the bacon.
    • Add the beef, onion, and garlic to the Dutch oven and cook until the beef is browned and the onion begins to soften, about 7 minutes.
    • Stir in the flour, chili powder, salt, and pepper and cook for 1 minute.
    • Add the tomatoes, corn, potatoes, and water. Bring to a simmer, cover the Dutch oven, and cook until the potatoes are tender, about 20 minutes.
    • Stir in the bacon and kielbasa, and let simmer until heated through about 5 minutes. Season to taste with additional chili powder, salt, and pepper, if desired.

    Notes

      • Add flavor--For a more beefy flavor, use beef broth instead of water.
      • Outdoor conditions--Since you're cooking in a Dutch oven outside, the cooking time can vary due to outside temperature and wind. If you're cooking on a very windy day, try to protect the Dutch oven with a barrier, such as a tarp.
      • Cooking tools--I like cooking this stew in my Dutch oven on a tripod, because I can adjust the distance from the heat depending on the outside conditions and the heat of the fire. You can make this on a campfire grate, but you may need to move the Dutch oven around a bit, or adjust the amount of heat from your fire.

    Nutrition

    Serving: 1 portionCalories: 548kcalCarbohydrates: 33gProtein: 38gFat: 29gCholesterol: 124mgFiber: 3gSugar: 3g
    Keyword campfire cooking, dutch oven cooking, ground beef recipes
    Tried this recipe?Let us know how it was!

    January 29, 2025 Collections

    15 Sweet and Spicy Ways to Use Hot Honey

    Whether you whipped up a batch or were gifted a bottle, if you're wondering how to use hot honey, you've come to the right place. You can slather the sweet and spicy condiment onto chicken, pizza, vegetables, and even add it to cocktails! Scroll through these 15 sweet and spicy recipes to discover the best uses for hot honey.

    1
    Recipe and photo credit: Vindulge
    Grilled Wings with Buffalo Hot Honey Wing Sauce
    This hot honey chicken wings recipe combines classic Buffalo style flavors with the tangy and sweet flavors of hot honey, cooked on a grill.
    Get the recipe: Hot Honey Chicken Wings
    2
    A bowl of assorted glazed nuts with a few scattered on a plate.
    Sweet and Spicy Smoked Nuts
    Sweet, salty, smoky, spicy, crunchy. What more could you ask for from a snack?
    Get the recipe: Sweet and Spicy Smoked Nuts
    3
    Recipe and photo credit: Quiche My Grits
    Hot Honey Chicken Sandwich
    You’ll love this hot honey chicken sandwich recipe that’s the perfect mix of sweet and spicy! Crispy fried chicken fingers are smothered in a sticky hot honey glaze with just the right amount of heat. Cool things down with creamy coleslaw, ranch dressing and tangy pickles!
    Get the recipe: Hot Honey Chicken Sandwich
    4
    A jar of hot honey bbq sauce with a spoon held above it.
    Hot Honey BBQ Sauce
    This homemade spicy honey bbq sauce is made with tomato sauce, hot honey, vinegar, and spices. It's easy to make and ready in just 15 minutes.
    Get the recipe: Hot Honey BBQ Sauce
    5
    Recipe and photo credit: The Jam Jar Kitchen
    Baked Feta Dip
    With tomatoes, pepperoncini, olive and garlic, this spicy baked feta dip is a simple but flavorful appetizer that’s perfect for entertaining!
    Get the recipe: Baked Feta Dip
    6
    Recipe and photo credit: Mary's Whole Life
    Hot Honey Shrimp and Sausage Stir Fry
    This hot honey shrimp and sausage stir fry is the perfect balance of sweet, spicy, and savory. An easy, flavor-packed gluten-free meal!
    Get the recipe: Hot Honey Shrimp and Sausage Stir Fry
    7
    A partially sliced grilled bacon-wrapped pork tenderloin on a wooden cutting board with a dish of green beans on the side.
    Grilled Bacon-Wrapped Pork Tenderloin
    This bacon-wrapped pork tenderloin is slathered with a bourbon hot honey glaze, then grilled until tender. The crispy bacon and juicy meat will have you firing up the grill on repeat.
    Get the recipe: Grilled Bacon-Wrapped Pork Tenderloin
    8
    Recipe and photo credit: The Heirloom Pantry
    Prosciutto Ricotta Pizza
    Prosciutto ricotta pizza is a sweet and salty white pizza packed with flavor! It takes 25 minutes to make and features a crust topped with mozzarella, ricotta, prosciutto, arugula, and hot honey.
    Get the recipe: Prosciutto Ricotta Pizza
    9
    Recipe and photo credit: Grits and Gouda
    Easy Mini Chicken and Waffles with Hot Honey
    This shortcut version of mini chicken and waffles appetizer starts with chicken nuggets and frozen mini waffles. Serve with hot honey!
    Get the recipe: Mini Chicken and Waffles
    10
    Recipe and photo credit: Cooking with Wine
    Tequila Bee Sting Cocktail
    The tequila bee sting is sweet and balanced with a little heat from the hot pepper honey at the end.
    Get the recipe: Tequila Bee Sting Cocktail
    11
    Recipe and photo credit: Simply Delicious
    Grilled Corn on the Cob with Hot Honey Butter
    Few things are as delicious as grilled corn on the cob but serve the corn with spicy hot honey butter and it’s a guaranteed crowd pleaser.
    Get the recipe: Grilled Corn on the Cob with Hot Honey Butter
    12
    Recipe and photo credit: Modern Honey
    Crispy Baked Hot Honey Chicken
    Tender, juicy chicken coated in a crispy cornflake crust that is baked to golden perfection, and then drizzled with sweet and spicy hot honey. These crispy crunchy hot honey chicken tenders deliver the perfect balance of crunch and heat, with a mouthwatering sticky glaze that keeps you coming back for more.
    Get the recipe: Crispy Hot Honey Chicken
    13
    Recipe and photo credit: Milk Glass Home & Kitchen
    Hot Honey Roasted Carrots
    Hot honey glazed carrots are the best veggie side yet are super simple to make! Sweet carrots are roasted until tender, then coated with a generous drizzle of hot honey for the perfect balance of flavors. 
    Get the recipe: Hot Honey Roasted Carrots
    14
    A whole grilled honey lime chicken on the grill.
    Grilled Honey Lime Chicken
    Give your BBQ chicken an upgrade with this tangy, buttery hot honey glaze that's brushed onto grilled spatchcocked chicken.
    Get the recipe: Grilled Honey Lime Chicken
    15
    Recipe and photo credit: Hey, Snickerdoodle!
    Hot Honey Spicy Mango Margarita
    This hot honey mango margarita is made with hot honey which adds the perfect amount of heat to the sweet mango puree.
    Get the recipe: Hot Honey Mango Margarita

    January 27, 2025 Blackstone Griddle Recipes

    Blackstone Buffalo Chicken Tacos

    If Buffalo sauce is your go-to wing flavor, then you'll love these easy Blackstone chicken tacos. This quick 20-minute Blackstone chicken dinner recipe is made with chicken breast, a simple homemade Buffalo sauce, romaine lettuce, and your favorite creamy topping.

    Two Buffalo chicken tacos on a plate with romaine lettuce and blue cheese dressing on top.

    If I'm making grilled chicken wings, more often than not, they're getting tossed with Buffalo sauce and dunked in chunky blue cheese dressing. When I'm craving those flavors but need something quick to make, these Buffalo chicken tacos are at the top of my list. They deliver everything I love about Buffalo wings, with the added bonus that they're ready in just 20 minutes.

    Why You'll Love This Recipe

    • It requires minimal ingredients, involves little cleanup, and is simple to prepare.
    • They taste like Buffalo chicken wings, but are faster to prepare.
    • You can customize the chicken tacos with your favorite toppings.

    Ingredients and Substitutions

    Ingredients for Buffalo chicken tacos--chicken, romaine, sour cream, butter, tortillas, hot sauce, and spices.
    • Chicken breast--I used boneless, skinless chicken breast for this easy taco recipe, but you could substitute boneless, skinless thighs, if you prefer.
    • Hot sauce--Use a vinegar based hot sauce, such as Frank's Red Hot Sauce. This is what gives the chicken its Buffalo flavor. I've offered a range for the amount to use depending on your heat tolerance. If you're unsure, start with less, then add more to taste.
    • Spices--This Blackstone chicken tacos recipe uses a combination of garlic powder and onion powder.
    • Tortillas--You can use flour or corn tortillas for this recipe.
    • Sour cream--The tacos do need some sort of creamy topping. Sour cream works well here, but you can also use store-bought or homemade blue cheese dressing, or ranch dressing for an authentic Buffalo chicken experience.

    How to Make Chicken Tacos on a Blackstone

    Cubed chicken breast in a bowl with spices on top.
    Cubed chicken breast cooking on a griddle.
    1. Season the cubed chicken breast with garlic powder, onion powder, salt, and pepper.
    2. Melt 2 tablespoons butter on one side of the Blackstone. Add the chicken and cook, tossing occasionally, until cooked through.
    Three tortillas on a griddle.
    Chicken being tossed with hot sauce.
    1. Warm the tortillas on the other side of the griddle.
    2. Scoop the hot chicken into a bowl. Stir in the remaining 2 tablespoons butter, followed by the hot sauce. Mix well. Let everyone assemble their own tacos with Buffalo chicken, lettuce, and sour cream, blue cheese dressing, or ranch.

    Storage & Reheating

    Leftover cooked chicken can be stored in a sealed container in the fridge for up to 4 days. Reheat in a skillet or on the griddle over low heat until warmed through.

    Tips and Troubleshooting

    • After warming your tortillas, wrap them in foil, plastic wrap, or a kitchen towel to keep them warm and pliable.
    • This recipe is suitable for gluten-free diets if made using corn tortillas.
    Two Buffalo chicken tacos on a plate with romaine lettuce and blue cheese dressing on top.

    More Blackstone Griddle Recipes You'll Love

    A stack of six latkes on a plate with a dollop of sour cream on top.
    Blackstone Potato Cakes
    Two halves of a Monte Cristo sandwich stacked on to pof each other.
    Blackstone Monte Cristo

    Tried This Recipe?

    If you've tried this recipe, please leave a comment below. Follow me on Instagram, Facebook, or Pinterest for more great camping and grilling recipes.

    Recipe

    Two Buffalo chicken tacos on a plate with romaine lettuce and blue cheese dressing on top.

    Blackstone Buffalo Chicken Tacos

    A woman's face.Angie Zoobkoff
    Enjoy your favorite wing flavor in taco form. This easy meal is ready in just 20 minutes!
    No ratings yet
    Print Recipe Pin Recipe
    Prep Time 15 minutes mins
    Cook Time 5 minutes mins
    Total Time 20 minutes mins
    Course Main Course
    Cuisine American
    Servings 4 servings
    Calories 579 kcal

    Equipment

    • Blackstone griddle or other large flat-top griddle

    Ingredients
      

    • 1½ pounds boneless, skinless chicken breast cut into ½-inch cubes
    • ¼ teaspoon garlic powder
    • ¼ teaspoon onion powder
    • ½ teaspoon salt
    • ¼ teaspoon freshly ground black pepper
    • 4 tablespoons butter divided
    • 12 small flour or corn tortillas
    • â…“ to ½ cup hot sauce such as Frank's
    • 3 cups torn romaine lettuce
    • 1 cup sour cream, blue cheese dressing, or ranch dressing

    Instructions
     

    • Heat one side of the Blackstone or outdoor griddle to medium.
    • Place the chicken in a large bowl and season with the garlic powder, onion powder, salt, and pepper. Toss well to combine.
    • Melt 2 tablespoons butter on the heated side of the Blackstone.
    • Once the butter has melted, add the chicken and spread it out into a single layer. Cook, stirring and tossing occasionally, until cooked through, 5 to 7 minutes.
    • While the chicken is cooking, heat the other side of the griddle to medium heat. Working with 3 or 4 tortillas at a time, add them to the griddle to warm through, about 15 seconds per side. Transfer to a plate.
    • Scoop the cooked chicken into a serving bowl. Stir in the remaining 2 tablespoons butter, then add the hot sauce and mix well to evenly coat the chicken.
    • Serve the chicken with the tortillas, lettuce, and sour cream or dressing and let everyone assemble their own tacos.

    Notes

    • Storage--Store leftover chicken in a sealed container in the fridge for up to 4 days. Reheat in a skillet or on the griddle over low heat until warmed through.
    • Tortillas--After warming your tortillas, wrap them in foil, plastic wrap, or a kitchen towel to keep them warm and pliable.
    • Dietary--This recipe is suitable for gluten-free diets if made using corn tortillas.

    Nutrition

    Serving: 3tacosCalories: 579kcalCarbohydrates: 36gProtein: 42gFat: 30gCholesterol: 163mgSodium: 740mgFiber: 5gSugar: 1g
    Keyword blackstone cooking, Buffalo chicken, easy weeknight dinners
    Tried this recipe?Let us know how it was!

    January 24, 2025 Camping

    Cheesy Foil Packet Potatoes

    These cheesy foil packet potatoes are a camping side dish staple. They're easy to prepare, require minimal ingredients, involve almost no cleanup, and can be cooked on your grill or over the campfire. What's not to love?

    A foil packet filled with cheesy potatoes with a dish of sour cream on the side.

    In our home, these cheesy potatoes in foil are nicknamed "jo-jo potatoes" for a reason that predates me, but I'm certainly thankful that I was introduced to them. Whatever you want to call buttery potatoes topped with melted cheese is up to you, but I can assure you that they will be delicious no matter the name. You could make them a meal in itself (I know I have!), but they are also excellent alongside make-ahead camping ribs or a grilled steak.

    [feast_advanced_jump_to]

    Why This Recipe is Great for Camping

    • It requires minimal ingredients, involves little cleanup, and is simple to prepare.
    • You can prepare it on the grill or over the campfire.
    • It's an easy camping recipe for two.

    Ingredients and Substitutions

    Ingredients for cheesy foil packet potatoes--yellow potatoes, onion, Cheddar, and butter.
    • Potatoes--Yellow or gold potatoes work best for these foil packet grilled potatoes. I don't recommend using Russet potatoes as they tend to fall apart. Slice your potatoes as thinly as possible, and try to keep the slices the same size so that everything cooks evenly.
    • Cheddar--I recommend using full-fat cheese and grating it yourself. Pre-shredded cheese doesn't melt well.

    How to Make Potatoes in a Foil Packet

    Thinly sliced potatoes on a double layer of aluminum foil.

    1. Place the sliced potatoes in an even layer in the center of your foil.

    Sliced potatoes on a double layer of foil topped with diced onion, butter, and pepper.

    2. Top with onion, butter, and season with salt and pepper. Fold up the sides to create a pouch.

    A foil packet on a grill.

    3. Grill the foil packet potatoes on the BBQ or over the campfire on low heat for 30 minutes.

    Cheese added to a partially opened foil packet.

    4. Remove from the heat, open the foil packet, and add the cheese. Close the foil packet to let the cheese melt, then serve immediately.

    FAQs

    Do I need to peel the potatoes?

    No, it's not necessary. Yellow potatoes are so thin-skinned that I don't find peeling them makes a difference.

    What's the best way to fold a foil packet?

    The best way to make a foil packet is to place your food in the center of the foil. Bring the long edges of the foil up to meet, and then fold them over a couple of times, creating a seam that runs over the top of your food. Then working with one end at a time, fold it over a few times to seal the end.

    I like this method because it's easy to open the seal on top to check them for doneness and then close, if necessary, and it also creates an easy pouch for eating when opened.

    Can I make this in the oven?

    Yes. Following the directions in the recipe, cook the potato foil packets in a 350°F oven until tender, about 30 minutes. Add the cheese and let it melt before serving.

    Tips and Troubleshooting

    • If you're making this over the campfire, the cooking time may vary due to the outside temperature, wind, and distance from the coals. Give the potatoes a quick poke with a fork before adding the cheese. If they're not soft, close up the foil packet and let it cook for a few more minutes.
    • Keep the foil packets over low heat or flame to avoid burning the potatoes.
    • Use a double layer of heavy-duty foil for your packets to prevent any leaks from flaring.
    • This foil packet side dish recipe is suitable for gluten-free diets.
    Cheesy potatoes in foil.

    More Potato Recipes You'll Love

    A stack of six latkes on a plate with a dollop of sour cream on top.
    Blackstone Potato Cakes
    A cast iron skillet filled with scalloped potatoes with sprigs of thyme on top.
    Scalloped Potatoes on the Grill

    Tried This Recipe?

    If you've tried this recipe, please leave a comment below. Follow me on Instagram, Facebook, or Pinterest for more great camping and grilling recipes.

    Recipe

    A foil packet filled with cheesy potatoes with a dish of sour cream on the side.

    Cheesy Foil Packet Potatoes

    A woman's face.Angie Zoobkoff
    These buttery, cheesy potatoes in foil can be made on the grill, over the campfire, or in your oven for an easy, oh-so-satisfying side dish.
    No ratings yet
    Print Recipe Pin Recipe
    Prep Time 10 minutes mins
    Cook Time 30 minutes mins
    Total Time 40 minutes mins
    Course Side Dish
    Cuisine American
    Servings 2 servings
    Calories 370 kcal

    Ingredients
      

    • Cooking spray
    • 2 medium yellow potatoes (about 12 ounces | 340 g) thinly sliced
    • ½ small onion diced
    • 2 tablespoons unsalted butter cut into small cubes
    • ¼ teaspoon salt
    • ¼ teaspoon freshly ground black pepper
    • ½ cup shredded cheddar cheese

    Instructions
     

    • Preheat the grill for medium-low heat (325°F) or prepare hot coals in a campfire. If you're making them on the grill, I prefer to have a couple burners on low.
    • Arrange a double layer of heavy-duty aluminum foil on a flat surface and spray with cooking spray.
    • Place the sliced potatoes in a single layer on the foil.
    • Top with the onion and butter cubes, distributing them as evenly as possible. Season with the salt and pepper.
    • Fold up the sides and ends of the foil to create a foil packet.
    • Place over low heat on the grill or over campfire coals and cook until the potatoes are tender, about 30 minutes.
    • Remove the foil packet from the heat, and carefully open the top to let the steam release. Sprinkle the cheese into the foil packet on top of the potatoes and then loosely close the foil. Let sit until the cheese melts, 1 to 2 minutes. Serve immediately.

    Notes

    • Check the potatoes--If you're making this over the campfire, the cooking time may vary due to the outside temperature, wind, and distance from the coals. Give the potatoes a quick poke with a fork before adding the cheese. If they're not soft, close up the foil packet and let it cook for a few more minutes.
    • Use low flame--Keep the foil packets over low heat or flame to avoid burning the potatoes.
    • Double up--Use a double layer of heavy-duty foil for your packets to prevent any leaks from flaring.
    • Dietary--This recipe is suitable for gluten-free diets.

    Nutrition

    Serving: 1 portionCalories: 370kcalCarbohydrates: 37gProtein: 11gFat: 21gCholesterol: 61mgSodium: 566mgFiber: 6gSugar: 4g
    Keyword camping side dishes, easy camping sides, foil pack cooking, foil packets
    Tried this recipe?Let us know how it was!

    January 22, 2025 Collections

    22 Marvelous Mushroom Recipes

    These 22 marvelous mushroom recipes offer you incredible ways to incorporate 'shrooms into your meals. Packed with flavor and good-for-you nutrients, mushrooms are a fantastic ingredient to add to your diet, whether you want to enjoy them as an appetizer or side dish, or let them do the heavy lifting and stand in for meat in a vegetarian main dish.

    1
    Recipe and photo credit: Kitchen Divas
    Cheesy Mushrooms Appetizer Toasts
    Mushroom appetizer toasts are cheesy, delicious, and easy to eat in just a bite or two! The perfect potluck appetizer to make everyone swoon!
    Get the recipe: Mushroom Appetizer Toasts
    2
    Three pork chops in a cast-iron skillet with mushroom gravy on top and around the pork chops.
    Skillet Pork Chops with Mushroom Gravy
    This easy camping meal of cast-iron skillet pork chops with make-ahead mushroom gravy can be made on your camp stove, grill, or over the fire and is ready in just 20 minutes.
    Get the recipe: Skillet Pork Chops with Mushroom Gravy
    3
    Recipe and photo credit: The Feathered Nester
    Vegetarian Mushroom Dumplings
    Mushroom dumplings are the perfect party appetizer or main dish! This vegetarian dumpling recipe can be pan-fried, steamed, boiled, or baked!
    Get the recipe: Mushroom Dumplings
    4
    Recipe and photo credit: The Sidesmith
    Quick Pickled Mushrooms
    This quick pickled mushrooms recipe is beautifully marinated to be had on its own as a side or as a moreish appetizer!
    Get the recipe: Quick Pickled Mushrooms
    5
    A skillet filled with ravioli in a creamy mushroom sauce.
    Creamy Mushroom Ravioli
    This easy pasta packs plenty of umami with a double dose of mushrooms in the pasta and in the creamy sauce.
    Get the recipe: Creamy Mushroom Ravioli
    6
    Recipe and photo credit: Three Olives Branch
    Creamy Mushroom Risotto
    Creamy mushroom risotto is a delicious Italian recipe! A vegetarian dinner made with lots of mushrooms in a creamy, cheesy rice. A classic that can be served as a side or main course.
    Get the recipe: Creamy Mushroom Risotto
    7
    A bowl of sautéed mushrooms with strips of meat in the background.
    Griddle Sautéed Mushrooms
    These rich, buttery sautéed mushrooms are prepared on your griddle and ready in less than 15 minutes.
    Get the recipe: Sautéed Mushrooms
    8
    Recipe and photo credit: Cook Eat Live Love
    Mushroom Enchiladas
    Meaty mushrooms shine in these mushroom enchiladas, paired with peppers, quinoa, and jalapeno, they make a satisfying vegetarian meal.
    Get the recipe: Mushroom Enchiladas
    9
    A serving of Salisbury steak on a pile of mashed potatoes.
    Skillet Salisbury Steak
    This one-pot meal of tender beef patties in rich mushroom gravy is inexpensive, hearty, and oh-so-satisfying.
    Get the recipe: Skillet Salisbury Steak
    10
    Recipe and photo credit: Saving Dollars and Sense
    Homemade Cream of Mushroom Soup
    Homemade cream of mushroom soup is a great recipe to have on hand anytime you have a recipe that calls for canned cream of mushroom soup.
    Get the recipe: Cream of Mushroom Soup
    11
    Green bean casserole in a cast iron skillet with fried onions on the side.
    Skillet Green Bean Casserole
    This easy green bean casserole is made in a skillet with homemade mushroom sauce, fresh green beans, and crispy fried onions. You can make it over your campfire, or on your camp stove, grill, or stovetop.
    Get the recipe: Skillet Green Bean Casserole
    12
    Recipe and photo credit: Living Chirpy
    Crab Stuffed Mushrooms
    Crab stuffed mushrooms are a delicious party appetizer or side dish with tons of amazing flavors. One of our favorite mushroom recipes, these crab-stuffed mushrooms are a delicious blend of lump crab meat stuffed in savory mushroom caps.
    Get the recipe: Crab Stuffed Mushrooms
    13
    Recipe and photo credit: Delightful Plate
    Mushroom Sweet Corn Pasta
    This delicious mushroom corn pasta features earthy mushrooms, charred sweet corn, and a light cream sauce. This quick, easy and satisfying vegetarian pasta comes together in half an hour.
    Get the recipe: Mushroom Sweet Corn Pasta
    14
    A jar filled with creamy mushroom sauce with some mushrooms next ot it.
    Cream Cheese Mushroom Sauce
    This classic creamy mushroom sauce is prepared in your skillet with fresh mushrooms, cream, cream cheese, and broth. It's easy to make, can be prepared in advance, and is freezer-friendly.
    Get the recipe: Cream Cheese Mushroom Sauce
    15
    Recipe and photo credit: My Quiet Kitchen
    Mushroom Veggie Burgers
    Our favorite homemade veggie burgers! With beans, mushrooms and walnuts. So hearty and satisfying with a meaty bite that won’t fall apart!
    Get the recipe: Mushroom Veggie Burgers
    16
    Recipe and photo credit: Carolyn's Cooking
    Cheesy Mushroom Sliders
    These vegetarian cheesy mushroom sliders are packed with flavorful mushrooms, shallots and plenty of gooey, melty cheese!
    Get the recipe: Cheesy Mushroom Sliders
    17
    Recipe and photo credit: The Virtual Caterer
    The Ultimate Mushroom Salad with Lemon Maple Vinaigrette
    If you’re a mushroom lover looking for a versatile dish, this mushroom salad with lemon maple vinaigrette is a fantastic choice.
    Get the recipe: Ultimate Mushroom Salad
    18
    Mushroom Prosciutto Ravioli with Garlic Rosemary Brown Butter
    Recipe and photo credit: Cooking with Wine
    Mushroom Prosciutto Ravioli with Garlic Rosemary Brown Butter
    A rich, earthy and delicious homemade mushroom prosciutto ravioli is irresistible with an easy to make garlic rosemary brown butter sauce!
    Get the recipe: Mushroom Prosciutto Ravioli
    19
    Recipe and photo credit: Amy Casey Cooks
    Mushroom Quiche with Puff Pastry Crust
    This rich and savory mushroom quiche recipe is made with a buttery, light and flaky puff pastry crust filled with a cheesy egg custard and lots of sauteed mushrooms and onions.
    Get the recipe: Mushroom Quiche
    20
    Recipe and photo credit: Simply Delicious
    Rotisserie Chicken Mushroom Soup
    This easy chicken mushroom soup recipe is pure comfort in a bowl. Using rotisserie chicken makes this a simple, 20 minute weeknight dinner.
    Get the recipe: Chicken Mushroom Soup
    21
    Recipe and photo credit: Mary's Whole Life
    Easy Sausage Stuffed Mushrooms with Cream Cheese
    These sausage stuffed mushrooms with cream cheese are the perfect appetizer to serve at your parties and gatherings this year!
    Get the recipe: Sausage Stuffed Mushrooms
    22
    Recipe and photo credit: Homemade Hooplah
    Roasted Garlic Mushrooms
    Quick and easy, these roasted garlic mushrooms combine baby bella mushrooms with garlic, thyme, and a savory, tangy sauce. A perfect side dish for any meal!
    Get the recipe: Roasted Garlic Mushrooms

    January 20, 2025 Everyday Staples

    Chunky Blue Cheese Dressing

    Made with large crumbles of pungent blue cheese, this creamy homemade blue cheese dressing is the perfect choice for dunking chicken wings, drizzling over salad, or dolloping onto your baked potato.

    A bowl of chunky blue cheese dressing.

    I have been a fan of blue cheese my entire life, and will happily try any variety that comes my way. (As an aside, if you feel the same way and happen upon a wedge of St. Agur, give it a try. It's seriously decadent!) So, it's no surprise that a bowl of creamy dip laden with chunks of funky, pungent cheese is my go-to for dipping, dunking, and spooning directly from the bowl. You might be surprised to discover just how quickly you begin to feel the same way.

    Why You'll Love This Recipe

    • It's an easy dressing recipe that can be used anywhere you need a boldly flavored dip or dressing.
    • It can be prepared in just 5 minutes and can be made in advance.
    • You can scale the recipe to make as much as you need.

    Ingredients and Substitutions

    Ingredients for blue cheese dressing--sour cream, mayo, buttermilk, garlic and onion powder, and blue cheese.
    • Sour cream--I recommend using full-fat sour cream for the creamiest, most flavorful dip.
    • Blue cheese--Use a firm or semi-firm blue cheese here. Very soft cheeses tend to clump and don't disperse well through the dip. See below for choosing the right type of blue cheese to suit your taste. Always give your cheese a sniff before purchasing. Good cheese should have a slightly nutty or meaty aroma. Avoid anything that smells of ammonia.
    • Buttermilk--You can use regular or low-fat buttermilk for this recipe. The higher the fat content, the thicker the dip will be.

    How to Make Chunky Blue Cheese Dressing

    A bowl of sour cream, mayo, and spices being mixed together.
    Blue cheese chunks being stirred into dressing.
    1. Combine the sour cream, mayonnaise, buttermilk, and spices in a bowl.
    2. Fold in the crumbled cheese. Cover and refrigerate until you're ready to serve.

    Choosing Your Blue Cheese

    There are many varieties of blue cheese to choose from and it can be a little overwhelming if you're not familiar with them. I do recommend using a semi-firm or firm cheese, but the strength of the cheese that you use is completely up to your preference. Here are some details to help you narrow it down:

    • Danish Blue--This is the one you'll likely find at your local supermarket, packaged into a triangle-shaped container. It has a mild nutty flavor and is a great choice if you prefer a mild blue.
    • Gorgonzola--This has a creamier flavor than Danish blue, but is still mild and the texture can range from soft to firm and crumbly. Aim for one that is more crumbly. Avoid using Cambozola, as it's very soft.
    • Stilton--This has a stronger flavor than the mild Danish or Gorgonzola varieties, and is a great choice for anyone who enjoys the pungent flavor of blue cheese. It also has a firm texture, making it great for crumbling.
    • Maytag--A strong, crumbly blue that has a sharp, tangy bite. A good choice if you want a strong blue cheese flavor.
    • Roquefort--The strongest of the blues, this one has a pungent flavor and aroma.

    Ways to Use Blue Cheese Dressing

    This simple dressing can be used anywhere you'd use a bottled salad dressing or dip. Some of my favorite uses include:

    • As a dipping sauce for grilled chicken wings, raw veggies, or pretzel chips
    • A topping for campfire baked potatoes
    • Drizzled over a tossed green salad or wedge salad
    • Used as a spread on your favorite sandwich recipe
    • Spooned over Buffalo chicken tacos

    FAQs

    Can I make this in advance?

    Yes. Actually, I think this chunky blue cheese dressing recipe benefits from having a couple of hours to hang out in the fridge before serving. You can make the dressing up to 5 days before serving and store it in the fridge in a sealed container.

    Can you freeze chunky blue cheese dip?

    I don't recommend freezing it. The texture can change when thawed and it may become watery or grainy.

    Tips and Troubleshooting

    • If you want the dressing to be runnier, thin with a little milk or buttermilk until you reach your desired consistency. If you prefer a tangier dressing, add a couple drops of lemon juice.
    • Store leftover dip in a sealed container in the fridge for up to 5 days. If the dip begins to separate, give it a stir before serving.
    • This recipe is suitable for gluten-free diets.

    More Sauce Recipes You'll Love

    A scalloped bowl filled with peach bbq sauce with two peaches and two serrano peppers next to it.
    Peach Bourbon BBQ Sauce
    A bowl of cranberry relish garnished with a mint sprig.
    Spicy Cranberry Relish

    Tried This Recipe?

    If you've tried this recipe, please leave a comment below. Follow me on Instagram, Facebook, or Pinterest for more great camping and grilling recipes.

    Recipe

    A bowl of chunky blue cheese dressing.

    Homemade Chunky Blue Cheese Dressing

    A woman's face.Angie Zoobkoff
    The perfect creamy, flavor packed choice for dunking chicken wings or drizzling over salad.
    No ratings yet
    Print Recipe Pin Recipe
    Prep Time 5 minutes mins
    Total Time 5 minutes mins
    Course Condiment
    Cuisine American
    Servings 8 servings (2 tbsp)
    Calories 86 kcal

    Ingredients
      

    • ½ cup sour cream
    • ¼ cup mayonnaise
    • 2 tablespoons buttermilk
    • ½ teaspoon garlic powder
    • ½ teaspoon onion powder
    • Salt to taste
    • 2 ounces blue cheese broken into large crumbles
    • Freshly cracked black pepper

    Instructions
     

    • In a medium bowl, stir together the sour cream, mayonnaise, and buttermilk. Add the garlic powder and onion powder and stir well. Season to taste with salt.
    • Fold in the crumbled blue cheese. Cover and refrigerate until serving.
    • Crack some black pepper over the top just before serving.

    Notes

    • Texture and flavor--If you want the dressing to be runnier, thin with a little milk or buttermilk until you reach your desired consistency. If you prefer a tangier dressing, add a couple drops of lemon juice.
    • Storage--Store leftover dip in a sealed container in the fridge for up to 5 days. If the dip begins to separate, give it a stir before serving.
    • Dietary--This recipe is suitable for gluten-free diets.

    Nutrition

    Serving: 2 tablespoonsCalories: 86kcalCarbohydrates: 3gProtein: 2gFat: 8gCholesterol: 14mgSugar: 1g
    Keyword homemade condiments, homemade dip, homemade dressing
    Tried this recipe?Let us know how it was!

    January 17, 2025 Camping

    Dutch Oven Chocolate Cake

    Your camping meal isn't complete without a sweet Dutch oven dessert to finish and this easy Dutch oven chocolate cake recipe delivers. Laced with ribbons of fudgy chocolate pudding, this classic cake will have everyone fighting over the last spoonful.

    Two bowls of chocolate pudding cake with whipped topping on top.

    I'm not generally a huge fan of cake, but this may actually be my favorite Dutch oven recipe. It's so simple to make and the finished cake has the most amazing soft, airy texture, subtle notes of cinnamon, and ribbons of fudgy chocolate pudding throughout. If you've ever had chocolate pudding cake, it's just like that. But better. Because you're camping, and you just made a chocolate cake in your Dutch oven.

    Why This Recipe is Great for Camping

    • You can make it in your Dutch oven in the fire pit.
    • The leftovers keep for a few days and don't require refrigeration.

    Ingredients and Substitutions

    Ingredients for Dutch oven chocolate cake--milk, flour, chocolate chips, baking powder, cinnamon, sugar, cocoa, vanilla, and butter.
    • Milk--You can use any type of milk here, including non-dairy. I've made it with oat milk with amazing results.
    • Chocolate chips--Stick with regular semi-sweet chocolate chips for best results. If you really like dark, bitter flavors, you can use dark chocolate chips, but don't make it with milk or white chips. Regular size or mini is fine.
    • Cocoa powder--Use Dutch process cocoa powder for best results. Don't substitute natural cocoa powder.

    How to Make Chocolate Cake in a Dutch Oven

    A small Dutch oven lined with parchment paper.
    Dry ingredients in a glass bowl with a whisk resting in it.
    1. Line the Dutch oven with parchment paper.
    2. Whisk together the flour, ⅓ cup sugar, ¼ cup cocoa powder, baking powder, cinnamon, and salt.
    Chocolate cake batter in a Dutch oven with an empty mixing bowl nearby.
    Chocolate chips on top of cake batter in a Dutch oven.
    1. Add the milk, melted butter, and vanilla, and stir just until no dry streaks remain. Scrape the batter into the Dutch oven.
    2. Sprinkle the remaining cocoa powder and sugar over the batter, and top with the chocolate chips.
    Water poured over cake batter in a Dutch oven.
    A Dutch oven with coals on it in a fire pit.
    1. Pour the boiling water over the batter. Do not stir.
    2. Place the covered Dutch oven in the fire pit on top of four coals and place 8 coals on the lid. Cook until the cake is puffed and beginning to pull away from the sides, with pudding-like streaks throughout.

    FAQs

    What size Dutch oven do I need?

    This recipe was specifically designed to be made in a 2-quart Dutch oven. The small size makes it perfect for dessert and the cake puffs up beautifully in it. I don't recommend making it in a larger Dutch oven as it may change the cooking time.

    This small Dutch oven is also the perfect size for reheating leftovers, like campfire chili, or soup, or for frying fish, chicken, or campfire doughnut holes, as it requires less oil to fill and the oil heats quickly.

    How should I serve this?

    Serve your Dutch oven chocolate pudding cake warm topped with a dollop of whipped cream. Canned whipped cream works great when you're camping!

    A chocolate cake in a Dutch oven.

    Storing Leftover Campfire Chocolate Cake

    Store leftover chocolate cake in a sealed container at room temperature for up to 3 days. You can rewarm it slightly in your Dutch oven or microwave before serving, if desired.

    Tips and Troubleshooting

    • To get ahead, mix the dry ingredients for the base layer and the topping before heading out to camp. Store them in separate resealable bags.
    • Ensure that you don't have any bits of parchment sticking out of the Dutch oven as it could ignite.
    • Since you're cooking in a Dutch oven outside, the cooking time can vary due to outside temperature and wind. If you're cooking on a very windy day, try to protect the Dutch oven with a barrier, such as a pile of rocks, or a tarp.
    A scoop of Dutch oven chocolate cake with a dollop of whipped topping on top.

    More Dutch Oven Dessert Recipes You'll Love

    A bowl full of cinnamon sugar doughnut holes with a half eaten one on the side.
    Campfire Doughnut Holes
    Two plates of cranberry cobbler on a wooden table with fir branches nearby.
    Dutch Oven Cranberry Cobbler

    Tried This Recipe?

    If you've tried this recipe, please leave a comment below. Follow me on Instagram, Facebook, or Pinterest for more great camping and grilling recipes.

    Recipe

    A chocolate cake in a Dutch oven.

    Dutch Oven Chocolate Cake

    A woman's face.Angie Zoobkoff
    Dotted with chocolate chips and laced with ribbons of fudgy chocolate pudding, this cake is the ultimate Dutch oven camping dessert.
    5 from 1 vote
    Print Recipe Pin Recipe
    Prep Time 20 minutes mins
    Cook Time 30 minutes mins
    Total Time 50 minutes mins
    Course Dessert
    Cuisine American
    Servings 4 servings
    Calories 327 kcal

    Equipment

    • 2-quart Dutch oven

    Ingredients
      

    For the base

    • â…” cup all-purpose flour
    • â…“ cup granulated sugar
    • ¼ cup Dutch process cocoa powder
    • 1½ teaspoons baking powder
    • 1 teaspoon cinnamon
    • ¼ teaspoon salt
    • â…“ cup milk (any kind)
    • 2 tablespoons butter melted
    • 1 teaspoon vanilla

    For the topping

    • ¼ cup chocolate chips
    • ¼ cup granulated sugar
    • 2 tablespoons Dutch process cocoa powder
    • â…” cup boiling water

    Instructions
     

    Make the base layer

    • Start a chimney of coals/briquettes (you'll need 12), or prepare hot embers in a campfire. It will take about 15 minutes for the coals to turn grey and be ready to use. Prepare the cake while the coals are heating.
    • Line a 2-quart Dutch oven with parchment paper.
    • In a large bowl, whisk the flour, â…“ cup sugar, ¼ cup cocoa powder, baking powder, cinnamon, and salt together.
    • Pour in the milk, melted butter, and vanilla, and mix just until no floury streaks remain. Don't over-mix the batter. Scrape it into the prepared Dutch oven.

    Add the topping

    • Sprinkle the chocolate chips, ¼ cup sugar, and 2 tablespoons cocoa powder over the base layer.
    • Pour the boiling water over the cake. Do not stir.
    • Cover the Dutch oven and place it in your fire pit with four coals on the bottom and eight coals on the lid. Cook until the cake is puffed and beginning to pull away from the edges, with ribbons of pudding-like chocolate running through the cake, about 30 minutes.
    • Remove from the fire and cool for 10 minutes. Serve warm.

    Notes

    • Get ahead--Mix the dry ingredients for the base layer and the topping before heading out to camp. Store them in separate resealable bags.
    • Tuck in the parchment--Ensure that you don't have any bits of parchment sticking out of the Dutch oven as it could ignite.
    • Protect your pot--Since you're cooking in a Dutch oven outside, the cooking time can vary due to outside temperature and wind. If you're cooking on a very windy day, try to protect the Dutch oven with a barrier, such as a pile of rocks, or a tarp.

    Nutrition

    Serving: 1 portionCalories: 327kcalCarbohydrates: 58gProtein: 5gFat: 11gCholesterol: 19mgSodium: 210mgFiber: 4gSugar: 36g
    Keyword chocolate cake, chocolate dessert, dutch oven cooking, dutch oven dessert
    Tried this recipe?Let us know how it was!

    January 15, 2025 Camping

    14 Hearty Dutch Oven Soups and Stews

    Whether you're at home or camping, nothing beats a big bowl of comforting soup or stew on a chilly day. Each of these 14 hearty Dutch oven soups and stews is simple to make, and requires no fancy equipment, so you can make them on the stovetop at home, or on your camp stove or campfire if you're cold-weather camping. Serve them with Dutch oven dinner rolls or mini skillet cornbread for an extra-satisfying meal!

    1
    Recipe and photo credit: xoxo Bella
    Hearty Cowboy Stew
    This one pot cowboy stew is so easy to make and the flavors are really rewarding. It tastes great and also reheats well to enjoy again and again.
    Get the recipe: Cowboy Stew
    2
    A bowl of chicken noodle soup with a spoon resting inside and a bun on the side.
    Dutch Oven Chicken Noodle Soup
    This comforting chicken noodle soup recipe is made in your Dutch oven and can be cooked over your campfire, camp stove, or on your stovetop at home. It's chock full of tender chicken thighs, vegetables, and egg noodles.
    Get the recipe: Dutch Oven Chicken Noodle Soup
    3
    Two bowls of sausage, kale, and potato soup.
    Recipe and photo credit: Finding Time to Fly
    Sausage, Kale, and Potato Soup
    This simple soup combines fresh kale, hearty potatoes, and savory sausage in a creamy broth, making it one of my favorite comforting soups. Enjoy a cozy meal tonight!
    Get the recipe: Sausage, Kale, and Potato Soup
    4
    Recipe and photo credit: Dutch Oven Daddy
    Ground Beef Stew
    Simple, rich, and hearty, this ground beef stew is an incredibly delicious complete meal made in your trusty Dutch oven.
    Get the recipe: Ground Beef Stew
    5
    A bowl of split pea soup with ham with a piece of flatbread inside.
    Dutch Oven Split Pea Soup
    This comforting Dutch oven soup is the most satisfying way to use up leftover ham whether you're camping or at home.
    Get the recipe: Split Pea Soup with Ham
    6
    Recipe and photo credit: Flavor Mosaic
    Chicken Pot Pie Soup
    Easy one-pot chicken pot pie soup is chicken pot pie without the crust. Use rotisserie chicken or leftover turkey in this simple comfort food recipe.
    Get the recipe: Chicken Pot Pie Soup
    7
    Recipe and photo credit: Cooking With Wine
    Hearty Vegetable Pasta Soup
    This hearty vegetable pasta soup is packed with vegetables and beans, along with some mini pasta shells to leave you happy and satisfied!
    Get the recipe: Hearty Vegetable Pasta Soup
    8
    A bowl of beef stew with carrots and potatoes on a wooden table.
    Campfire Dutch Oven Beef Stew
    This cool-weather camping stew is made with tender beef, potatoes, carrots, celery, and onions, gently simmered in a rich beef gravy.
    Get the recipe: Dutch Oven Beef Stew
    9
    Recipe and photo credit: Sungrown Kitchen
    Sausage Gnocchi Soup with White Beans
    Warm up with a cozy bowl of sausage gnocchi soup with white beans made with lots of veggies and pillowy gnocchi in an herby broth.
    Get the recipe: Sausage Gnocchi Soup
    10
    Recipe and photo credit: Bless This Meal
    Authentic Cuban Chicken Soup
    Cuban chicken soup is a comforting and hearty dish with tender chicken, a medley of vegetables, and aromatic spices simmered in a flavorful broth. It’s a soul-warming Cuban classic known for being rich and nourishing.
    Get the recipe: Cuban Chicken Soup
    11
    Recipe and photo credit: Little Black Skillet
    Shortcut Brunswick Stew
    Discover this easy Brunswick stew, packed with veggies, pulled pork, and chicken. Thanks to some shortcuts it’s ready in a jiffy.
    Get the recipe: Brunswick Stew
    12
    Chanterelle Mushroom Stew
    Recipe and photo credit: West Coast Kitchen Garden
    Chanterelle Mushroom Stew
    Chanterelle mushroom stew is one of my favorite fall meals. This stew is quick and easy to make and has deep, rich and delicious flavor.
    Get the recipe: Chanterelle Mushroom Stew
    13
    Recipe and photo credit: The Forked Spoon
    Beef Barley Soup
    This hearty beef barley soup is the ultimate comfort food! Easy to make and loved by the whole family, it’s filled with tender chunks of beef, nutritious veggies, and chewy barley in a comforting beef and tomato broth.
    Get the recipe: Beef Barley Soup
    14
    Recipe and photo credit: The Fruity Jem
    Pottage (Vegetable/Peasant Stew)
    Comforting pottage (medieval vegetable stew) that is both healthy and tasty! With affordable ingredients, this peasant stew is good for the wallet and body.
    Get the recipe: Pottage

    January 13, 2025 Camping

    Cast Iron Skillet Flatbread

    Yes, you can have warm homemade bread in just 30 minutes! This easy cast iron skillet flatbread requires only 5 ingredients, is fast and simple to make, and works beautifully as a side dish, snack, or base for your favorite toppings.

    Four pieces of flatbread inside a cloth napkin.

    Homemade bread is always welcome at our dinner table, but given the time and effort required to make traditional bread, it always seems like an arduous task, particularly if we're camping. However, this skillet flatbread recipe solves that problem quickly. With only 5 ingredients, no yeast, no rising time, and no need for a nice warm and cozy place for it to rest, I can whip up a batch of homemade flatbread for serving alongside Dutch oven chicken noodle soup, or for topping with our favorite pizza fixings and dinner is ready in a flash.

    Why This Recipe is Great for Camping

    • It requires minimal ingredients, only one bowl and one skillet, and is simple to prepare.
    • It's ready in just 30 minutes and can be used for a variety of meals.

    Ingredients and Substitutions

    Ingredients for cast iron skillet flatbread--flour, baking powder and soda, oil, and milk.
    • Flour--Regular all-purpose flour works well here, but you can substitute bread flour.
    • Milk--Any type of milk will work for this skillet flatbread recipe, including non-dairy. To make this as a no-cooler camping recipe, use shelf-stable non dairy milk.

    How to Make Flatbread in a Cast Iron Skillet

    Dry ingredients being whisked together in a bowl.
    Wet ingredients being mixed into dry in a bowl.
    1. Whisk the flour, baking powder, and salt together in a large bowl.
    2. Pour in the milk and oil, and stir just until no dry patches remain.
    A ball of dough in a bowl.
    A piece of flatbread cooking in a cast iron skillet.
    1. Gather the dough into a ball, then cover and let rest for 10 minutes.
    2. Divide the dough into four pieces, and roll each one into a flattened disc. Heat a little oil in a skillet over medium heat, then fry until golden brown, flipping once.

    FAQs

    Can I freeze flatbread?

    Yes. The cooled flatbread can be wrapped in plastic, or stored in a resealable bag in the freezer for up to 1 month. Thaw at room temperature, then wrap in foil and reheat over low heat on the fire, stovetop, or in the oven.

    How should I use it?

    The options for this homemade flatbread are almost endless. Here are a few of my favorite ways to use it.
    - Serve it as a side with Dutch oven split pea soup or campfire chili, for dunking.
    - Cut it into wedges and enjoy it as a snack, smeared with butter or grilled baked brie, or with hummus or skillet beer cheese dip for dipping.
    - Use it as a base for making homemade pizza flatbreads.

    Can I add spices to my flatbread?

    Definitely. On its own, this flatbread has a plain flavor, making it perfect for use as a base for topping or dipping, but if you'd like to jazz it up to give it a unique flavor, go for it. Try adding minced garlic, or fresh chopped herbs or dried spices to the dough when mixing it.

    Tips and Troubleshooting

    • It's ok if your dough still looks a little dry after mixing. It will hydrate as it rests.
    • If made with non-dairy milk, this recipe is suitable for dairy-free and vegan diets.
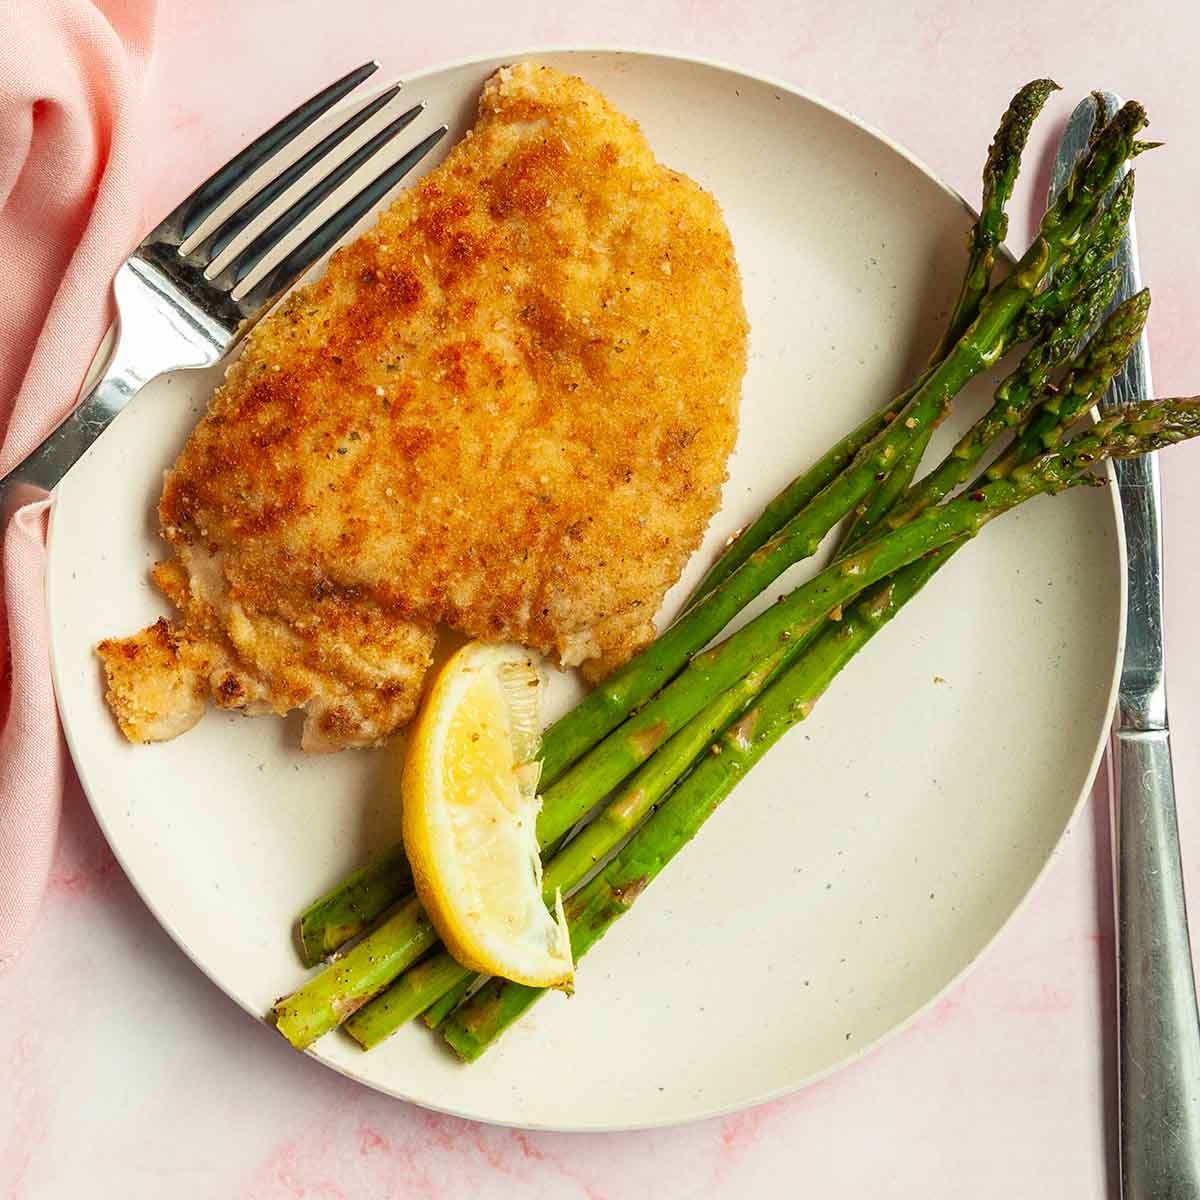
    More Camping Bread Recipes You'll Love

    A loaf of Irish soda bead with a couple of slices cut from it.
    Dutch Oven Irish Soda Bread
    Six cheese biscuits in a Dutch oven lined with parchment.
    Dutch Oven Biscuits

    Tried This Recipe?

    If you've tried this recipe, please leave a comment below. Follow me on Instagram, Facebook, or Pinterest for more great camping and grilling recipes.

    Recipe

    Four pieces of flatbread inside a cloth napkin.

    Cast Iron Skillet Flatbread

    A woman's face.Angie Zoobkoff
    You're only 5 ingredients and 30 minutes away from warm, fresh homemade bread. No yeast or rising time required!
    No ratings yet
    Print Recipe Pin Recipe
    Prep Time 5 minutes mins
    Cook Time 15 minutes mins
    Total Time 30 minutes mins
    Course Side Dish
    Cuisine American
    Servings 4 flatbreads
    Calories 365 kcal

    Equipment

    • Cast iron skillet

    Ingredients
      

    • 2 cups all-purpose flour
    • 1½ teaspoons baking powder
    • ¾ teaspoon table salt
    • ½ cup milk
    • 2 tablespoons olive or vegetable oil plus more for the skillet

    Instructions
     

    • Whisk the flour, baking powder, and salt together in a large bowl.
    • Pour in the milk and 2 tablespoons oil, and stir just until everything is combined and no large dry patches remain.
    • Use your hands to gather the dough into a ball, kneading lightly if necessary to get it to come together.
    • Cover with a damp towel or plastic wrap and let it rest for 10 minutes.
    • Divide the dough into 4 pieces and roll each piece into a disc. Don't stress too much about the shape, just aim for something that is sort of oval-shaped.
    • Heat 2 teaspoons of oil in a cast iron skillet over medium heat. Working with one flatbread at a time, add it to the skillet and cook, flipping once, until golden brown on each side, about 2 minutes per side. Repeat with the remaining pieces of dough, adding more oil to the skillet for each batch. Reduce the heat if the dough begins to burn or is too dark in spots.
    • Serve warm.

    Notes

    • It's ok if your dough still looks a little dry after mixing. It will hydrate as it rests.
    • If made with non-dairy milk, this recipe is suitable for dairy-free and vegan diets.

    Nutrition

    Serving: 1 flatbreadCalories: 365kcalCarbohydrates: 50gProtein: 8gFat: 15gCholesterol: 3mgSodium: 455mgFiber: 2gSugar: 2g
    Keyword camping bread, camping side dishes, easy side dish recipes, homemade bread
    Tried this recipe?Let us know how it was!
    • « Go to Previous Page
    • Page 1
    • Page 2
    • Page 3
    • Page 4
    • Page 5
    • Interim pages omitted …
    • Page 9
    • Go to Next Page »

    Primary Sidebar

    A woman's face.

    Hi, I'm Angie! I'm so glad you're here. I can't wait to share my favorite camping and grilling recipes with you.

    More about me →

    Summer Favorites

    • Skewers of grilled strawberries on a plate, drizzled with dark syrup.
      Grilled Strawberries
    • Four grilled shrimp skewers on a platter with lemon wedges and cocktail sauce on the side.
      Grilled Old Bay Shrimp
    • A whole skillet peach cobbler with two spoons resting on top.
      Grilled Skillet Peach Cobbler
    • Two Cajun chicken foil packets on plates with forks on the side.
      Cajun Chicken Foil Packets

    Popular Recipes

    • A small skillet filled with caramelized bananas.
      Campfire Bananas Foster
    • A mini cast iron skillet filled with cornbread.
      Mini Skillet Cornbread
    • A grilled cheese sandwich cut in half and a handful of potato chips.
      Campfire Grilled Cheese Two Ways
    • A skillet with three chicken breasts and a skillet filled with cheesy gnocchi.
      18 Easy Cast Iron Skillet Meals for Camping

    Footer

    ↑ back to top

    About

    • Privacy Policy

    Newsletter

    • Sign Up for Emails

    Let's Connect

    • Contact

    Copyright © 2025 Camp.Grill.Eat.

    Rate This Recipe

    Your vote:


    A rating is required
    A name is required
    An email is required