• Skip to main content
  • Skip to primary sidebar

Camp.Grill.Eat. logo

menu icon
go to homepage
  • Recipes
  • About
  • Subscribe
  • Contact
    • Facebook
    • Pinterest
    • YouTube
  • search icon
    Homepage link
    • Recipes
    • About
    • Subscribe
    • Contact
    • Facebook
    • Pinterest
    • YouTube
  • ×
    Home » Recipes

    Recipe Index

    October 21, 2025 Grilling

    Grilled Brussels Sprouts with Bacon

    These grilled Brussels sprouts with bacon are the perfect holiday side dish for anyone who wants to take their cooking outside (or doesn't have any more oven space). The heat of the grill transforms simple skewers of sprouts and bacon into an unforgettable side dish.

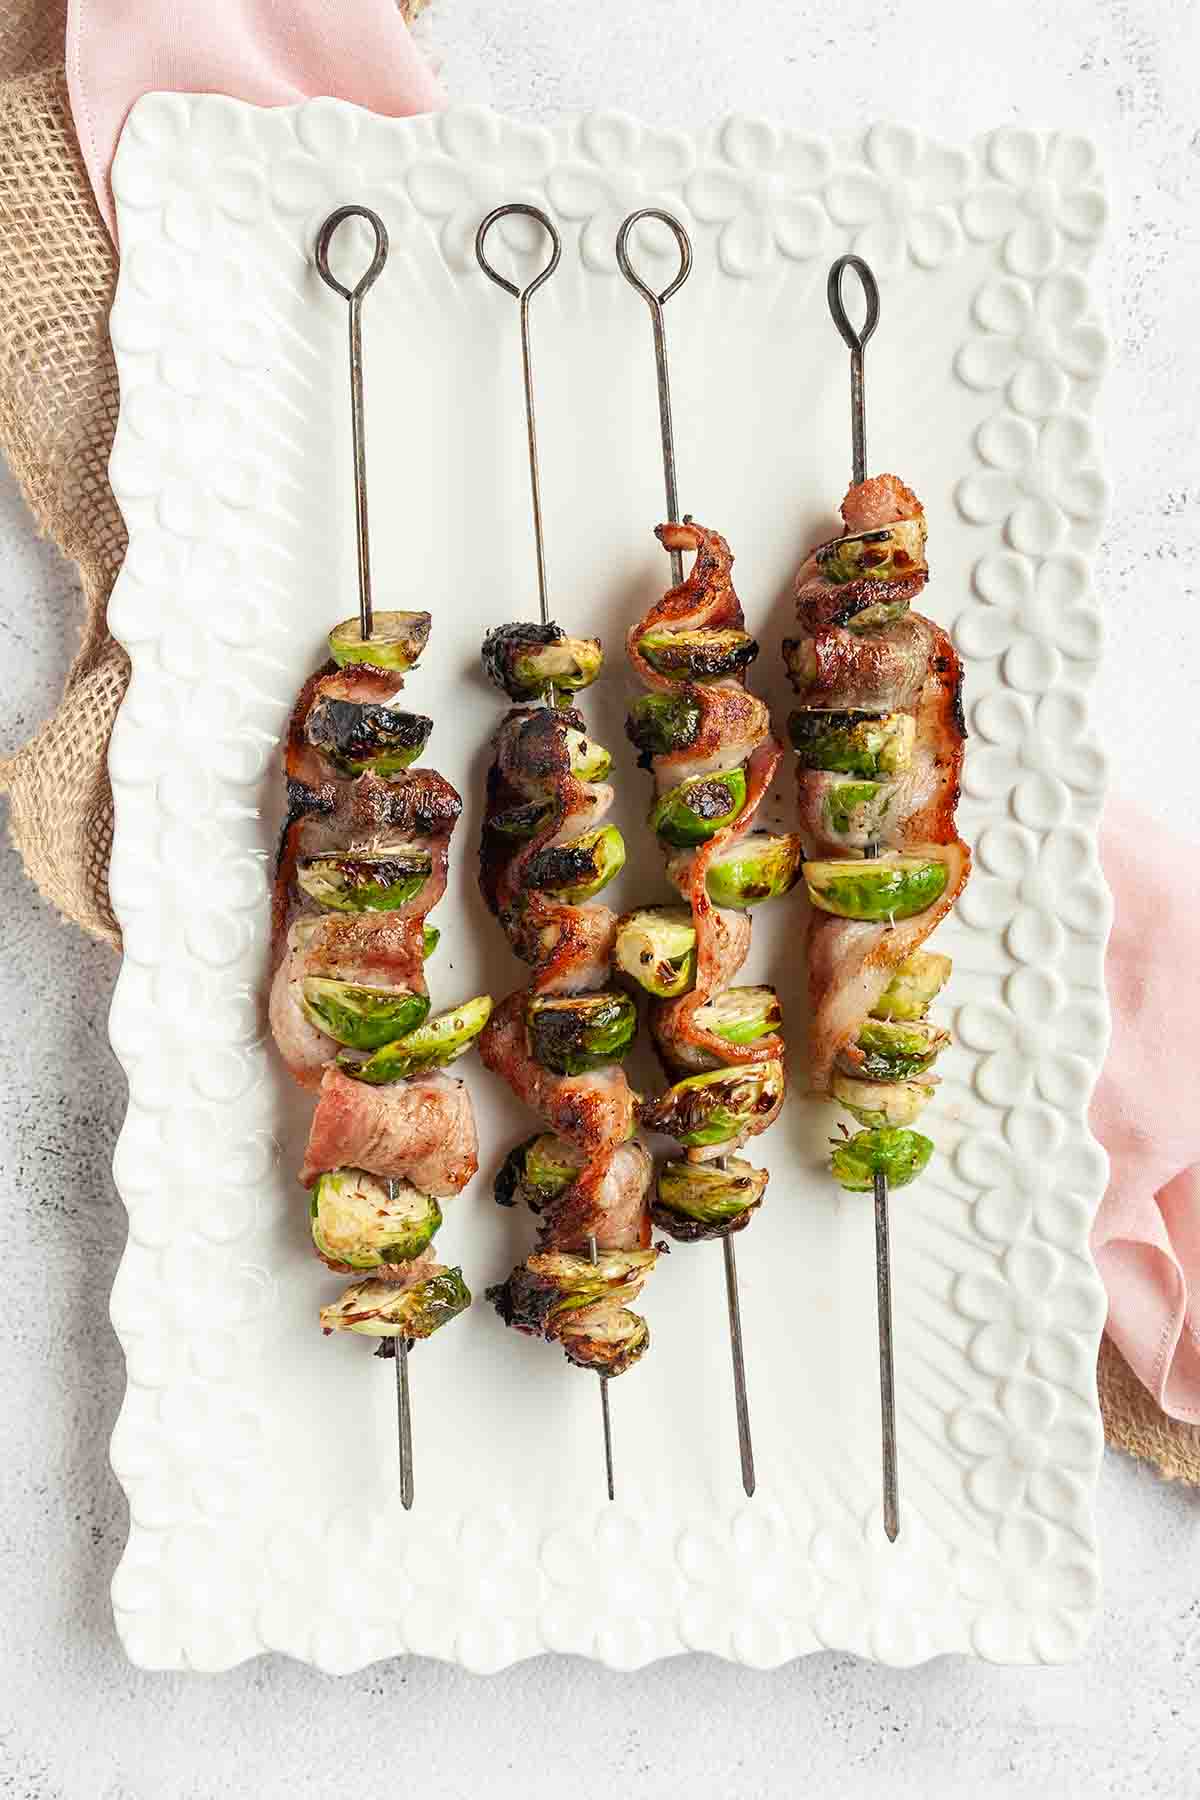
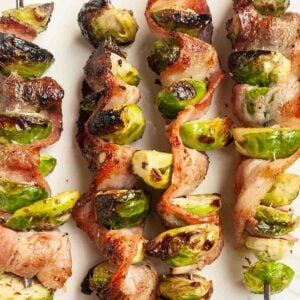
    Four grilled Brussels sprouts and bacon skewers on a platter.

    With your holiday oven stuffed to capacity with roast turkey, garlic mashed potatoes, stuffing, and more, you need as many recipes for Thanksgiving sides that don't require an oven as you can find. Which is why you'll love these Brussels sprouts skewers. They're easy to make, cook up quickly on the grill, and have plenty of bacon (which everyone knows is the key to a great Brussels sprouts recipe!)

    [feast_advanced_jump_to]

    Ingredients and Substitutions

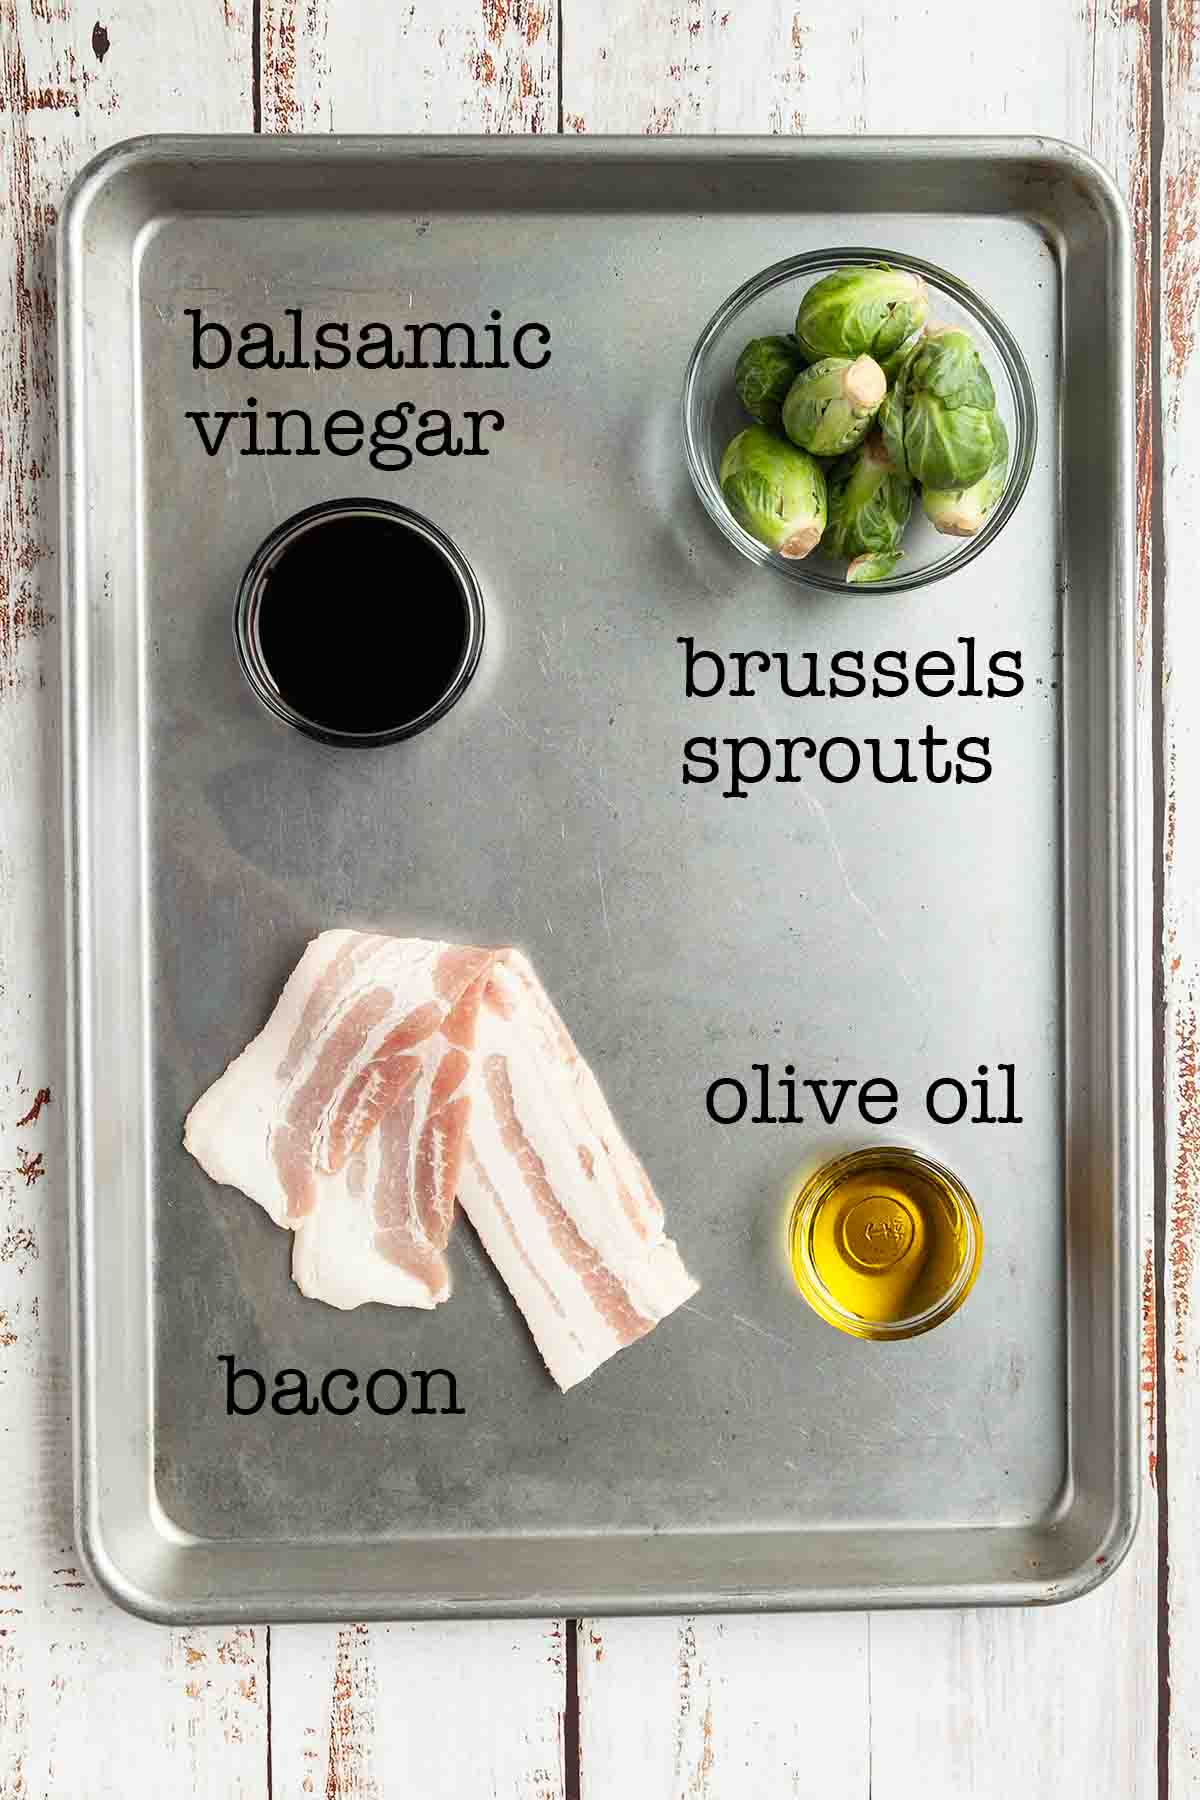
    Ingredients for grilled Brussels sprouts with bacon--balsamic vinegar, Brussels sprouts, olive oil, and bacon.
    • Brussels sprouts--Look for sprouts that are tightly closed without any visible scarring or wilted leaves. Larger sprouts will be easier to skewer, and less likely to split.
    • Bacon--Regular thin-cut bacon works best here. Thick cut bacon will take too long to cook and your sprouts may end up overdone. Got extra bacon? Try one of these indulgent bacon recipes!
    • Balsamic vinegar--Choose wisely. You'll be brushing this on at the very end, so the flavor of the vinegar will shine. A thicker, aged vinegar is lovely here.

    How to Grill Brussels Sprouts

    A bowl of halved Brussels sprouts tossed with oil, salt and pepper.

    1. Toss the Brussels sprouts with oil, salt, and pepper.

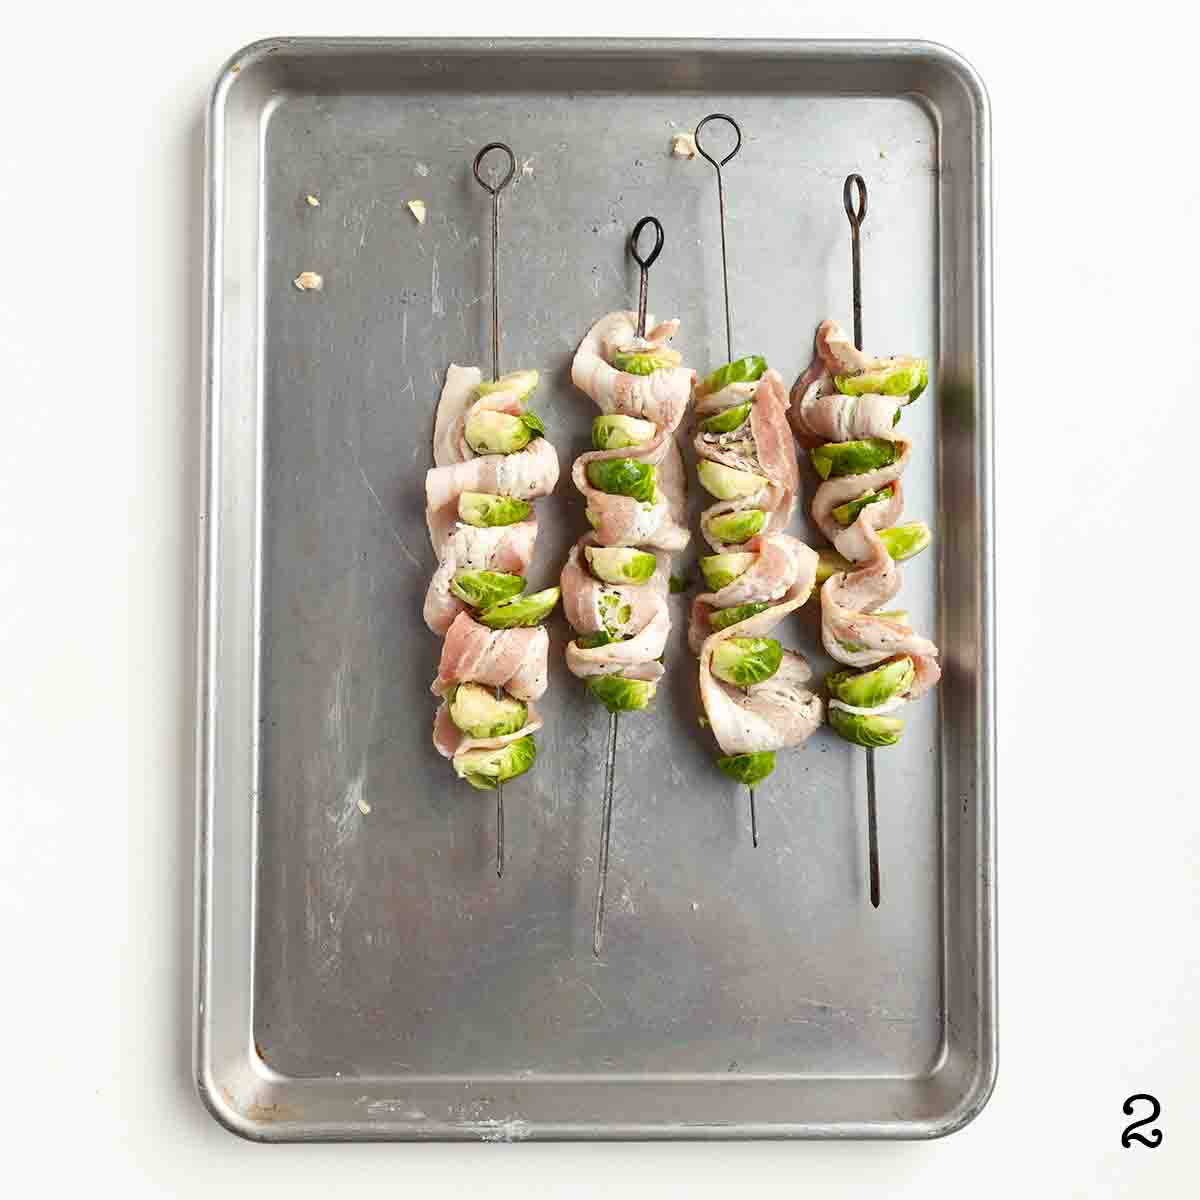
    Four uncooked skewers of Brussels sprouts and bacon.

    2. Slide the bacon and Brussels sprouts onto skewers, wrapping the bacon around one side of each sprout as you add it.

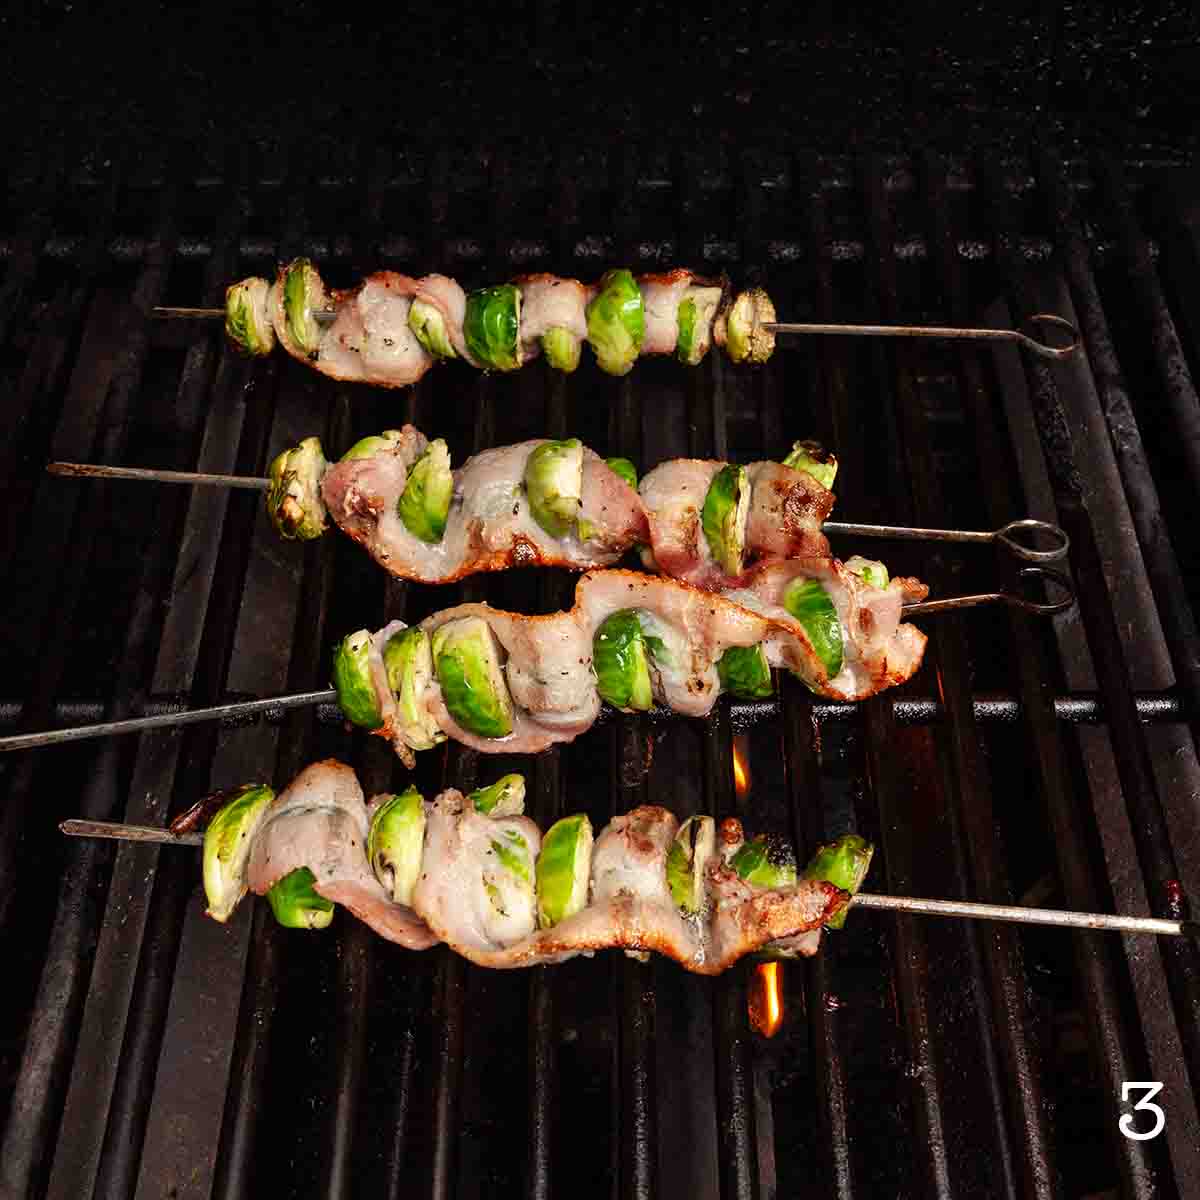
    Four Brussels sprouts and bacon skewers cooking on the grill.

    3. Grill the skewers, turning occasionally, until the bacon is crisp and the sprouts are just tender.

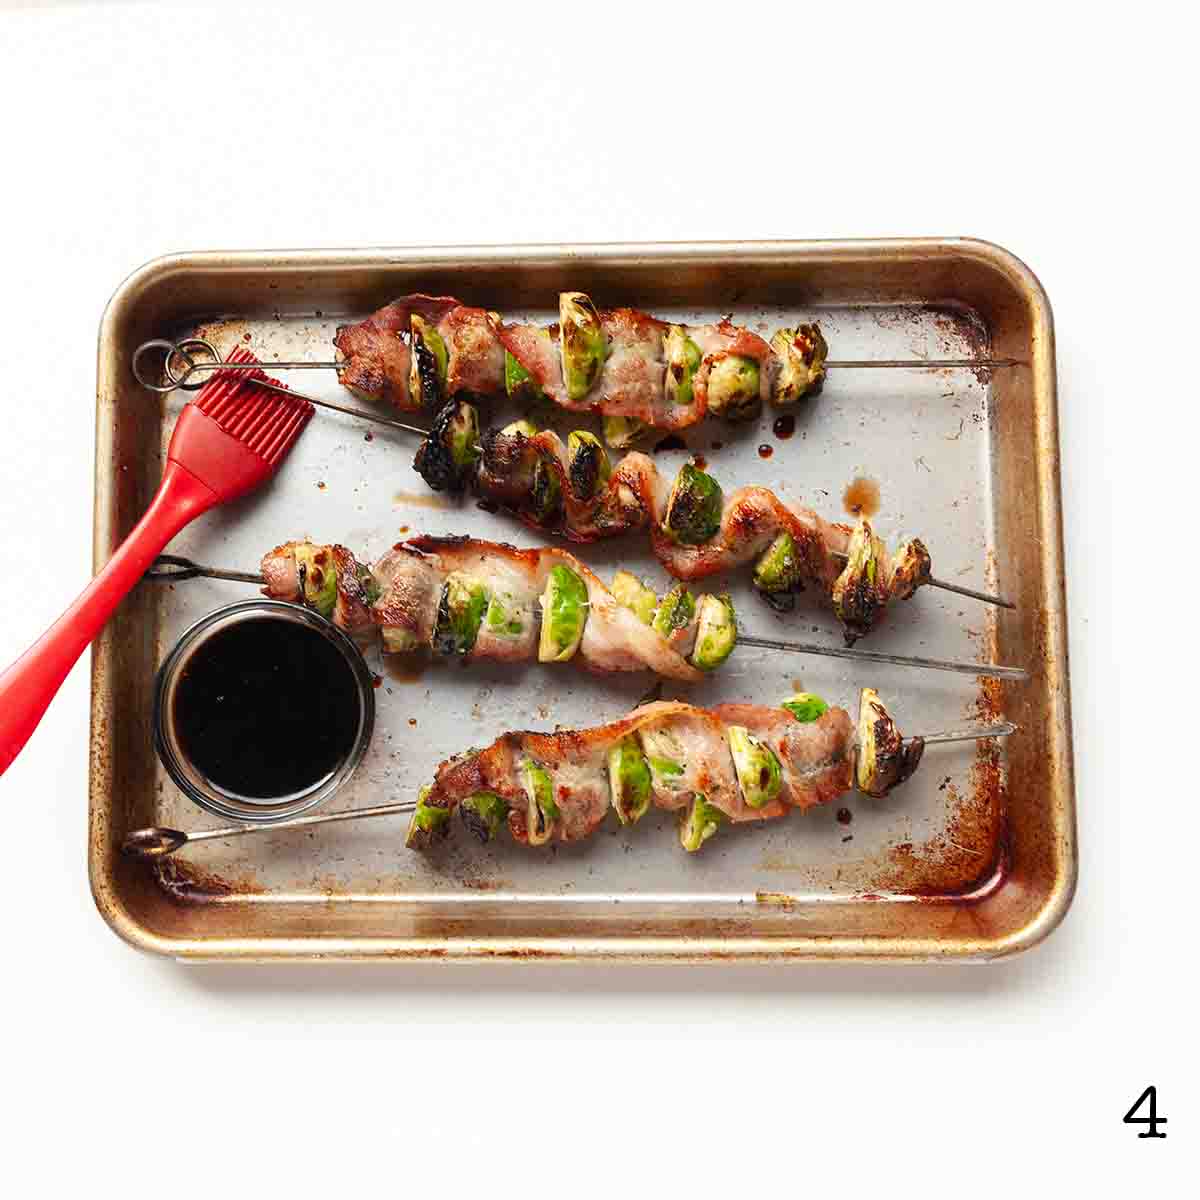
    Four Brussels sprouts and bacon skewers on a sheet pan with a dish of balsamic vinegar beside them.

    4. Brush the cooked skewers with balsamic vinegar and serve immediately.

    FAQs

    Should I par-boil the Brussels sprouts first?

    This is a matter of personal preference. The recipe, as written, will give you sprouts that are cooked, but still a little firm in the center, similar to roasted Brussels sprouts. If you prefer sprouts that are soft the whole way through, boil the sprouts whole in boiling water for 3 minutes. Drain and transfer them to an ice bath to cool, then pat dry before slicing in half.

    What type of skewers should I use?

    If you are making the recipe as written, use thin metal skewers. The raw Brussels sprouts are very firm and wooden skewers aren't strong enough to pierce them without breaking, while the flat metal skewers may cause the sprouts to split.

    If you don't have thin metal skewers, follow the directions above for parboiling the Brussels sprouts. This will make them soft enough to skewer with a wooden skewer. Wooden skewers do need to be soaked for an hour before grilling.

    Can I make this in advance?

    You can prepare the skewers, without cooking them, up to 3 hours before grilling. Cover and store them in the fridge until you're ready to grill.

    Tips and Troubleshooting

    • The bacon will cause some flaring. If it's excessive, move the skewers so that they sit between burners, and not over direct heat.
    • This recipe is suitable for gluten-free and dairy-free diets.
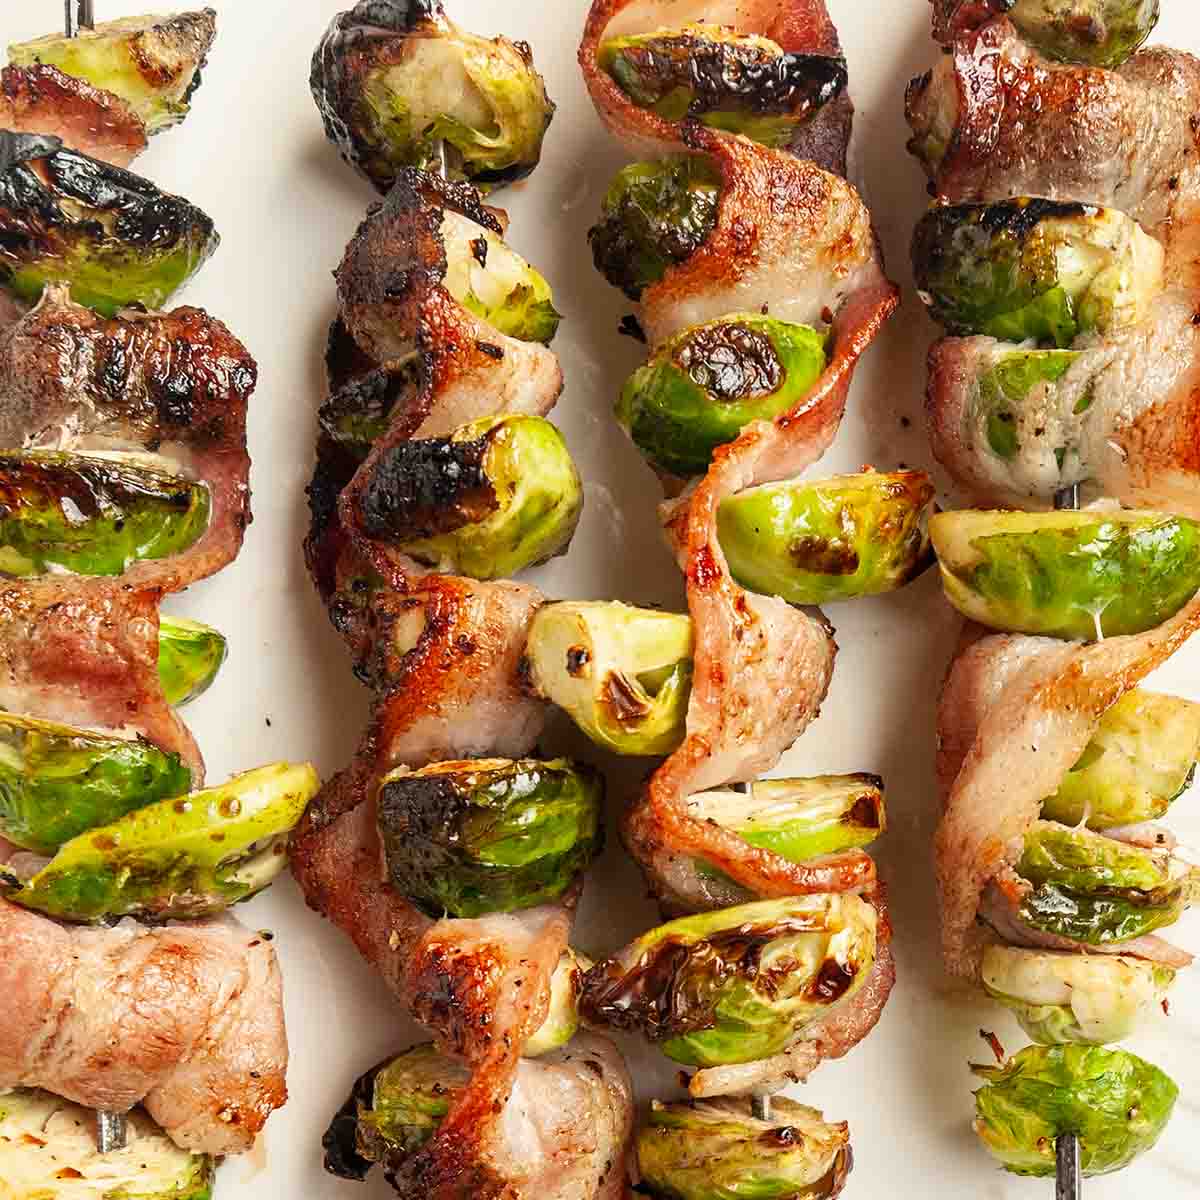
    Skewers of grilled Brussels sprouts and bacon.

    More Grilled Vegetable Recipes You'll Love

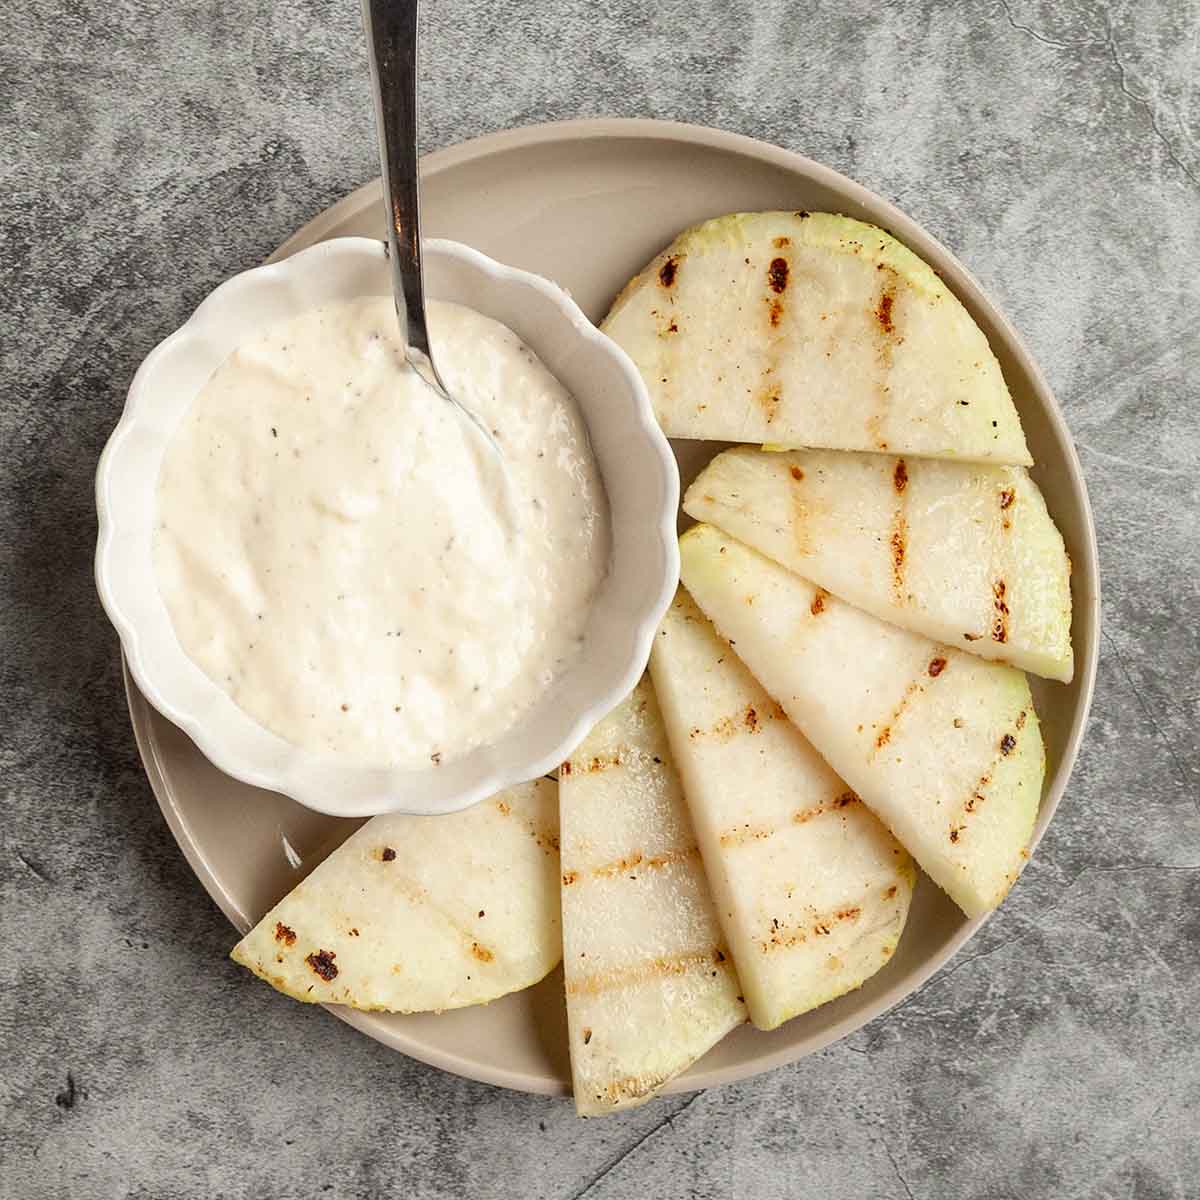
    Half-moon slices of kohlrabi with a bowl of dip on the side.
    Grilled Kohlrabi
    A bowl of cooked carrots with rosemary sprigs on the side.
    Grilled Carrots

    Tried This Recipe?

    If you've tried this recipe, please leave a comment below. Follow me on Instagram, Facebook, YouTube, or Pinterest for more great camping and grilling recipes.

    Recipe

    Skewers of grilled Brussels sprouts and bacon.

    Grilled Brussels Sprouts with Bacon

    A woman's face.Angie Zoobkoff
    Brussels sprouts and bacon are meant to be together. Grilling makes them even better.
    No ratings yet
    Print Recipe Pin Recipe
    Prep Time 15 minutes mins
    Cook Time 15 minutes mins
    Total Time 30 minutes mins
    Course Side Dish
    Cuisine American
    Servings 4 servings
    Calories 174 kcal

    Equipment

    • 4 thin metal skewers

    Ingredients
      

    • 12 ounces (340 g) Brussels sprouts trimmed and halved through the core
    • 1 tablespoon olive oil
    • ¼ teaspoon table salt
    • ¼ teaspoon freshly ground black pepper
    • 4 slices bacon
    • 2 teaspoons balsamic vinegar

    Instructions
     

    • Preheat the grill for medium heat (350°F | 180°C). Ideally you want several burners on low heat to avoid flaring.
    • Place the sprouts in a large bowl. Drizzle with the olive oil and toss to coat. Season with ¼ teaspoon each of salt and pepper and toss again.
    • Thread the bacon and sprouts onto 4 skewers. To do this, start by poking the skewer into one end of a bacon slice. Firmly push one Brussels sprout half onto the skewer (this does require a little effort), then wrap the bacon around the edge of the sprout and pierce it with the skewer. Continue layering the sprouts and bacon until you reach the end of your bacon strip. Repeat with the remaining skewers.
    • Grill the skewers, turning occasionally, until the bacon is cooked and the outer leaves of the sprouts are crisp, about 15 minutes.
    • Remove from the grill and brush with the balsamic vinegar. Serve immediately.

    Notes

    • Make softer sprouts--The cooked Brussels sprouts are slightly firm in the center. If you prefer softer sprouts, parboil them for 3 minutes before halving and skewering.
    • Avoid flare-ups--If you experience a lot of flaring from the bacon, move the skewers so that they sit between burners, and not over direct heat.
    • Dietary--This recipe is suitable for gluten-free and dairy-free diets.

    Nutrition

    Serving: 1 skewerCalories: 174kcalCarbohydrates: 9gProtein: 10gFat: 12gCholesterol: 21mgSodium: 608mgFiber: 3gSugar: 2g
    Keyword brussels sprouts, grilled Thanksgiving sides, grilled vegetables, vegetable skewers

    Tried this recipe?Let us know how it was!

    October 14, 2025 Camping

    Dutch Oven Butter Chicken

    This Dutch oven butter chicken, made with boneless chicken thighs in a creamy, spiced tomato sauce is the ultimate cozy comfort food. It's perfect for enjoying on those cool-weather camping trips or at home. Make it in your Dutch oven over the fire or on the stovetop.

    A Dutch oven filled with butter chicken and a bowl of it on the side with some naan bread nearby.

    When the weather turns cool, we crave cozy comfort food on our camping trips, including Dutch oven soups, stews, and chili. But when we're busy exploring, and don't have hours to tend to a slow-cooked beef stew, this Dutch oven butter chicken recipe is the one we turn to again and again. It's ready in less than an hour and the creamy spiced sauce is so comforting that we're licking every last drop from our bowls.

    [feast_advanced_jump_to]

    Ingredients and Substitutions

    Ingredients for Dutch oven butter chicken--onion, cream, chicken thighs, spices, oil, ginger, passata, garlic, and butter.
    • Chicken thighs--I use boneless chicken thighs here because they're a little fattier and more flavorful than breasts. They're also less likely to dry out if you end up simmering your stew for a few extra minutes. You can substitute boneless breasts, if you prefer.
    • Passata--This is a thick strained tomato sauce, which you can find at most large supermarkets. Alternatively, you can purchase passata online. If you can't find it, substitute tomato sauce, or puree a can of whole tomatoes in a blender.
    • Spices--This recipe uses a blend of kashmiri chili powder, ground cumin, ground coriander, and garam masala. These spices can be found at large supermarkets or Indian grocers. If you can't find kashmiri chili powder, substitute with paprika and a pinch of cayenne or use another mild chili powder.

    How to Make Butter Chicken in a Dutch Oven

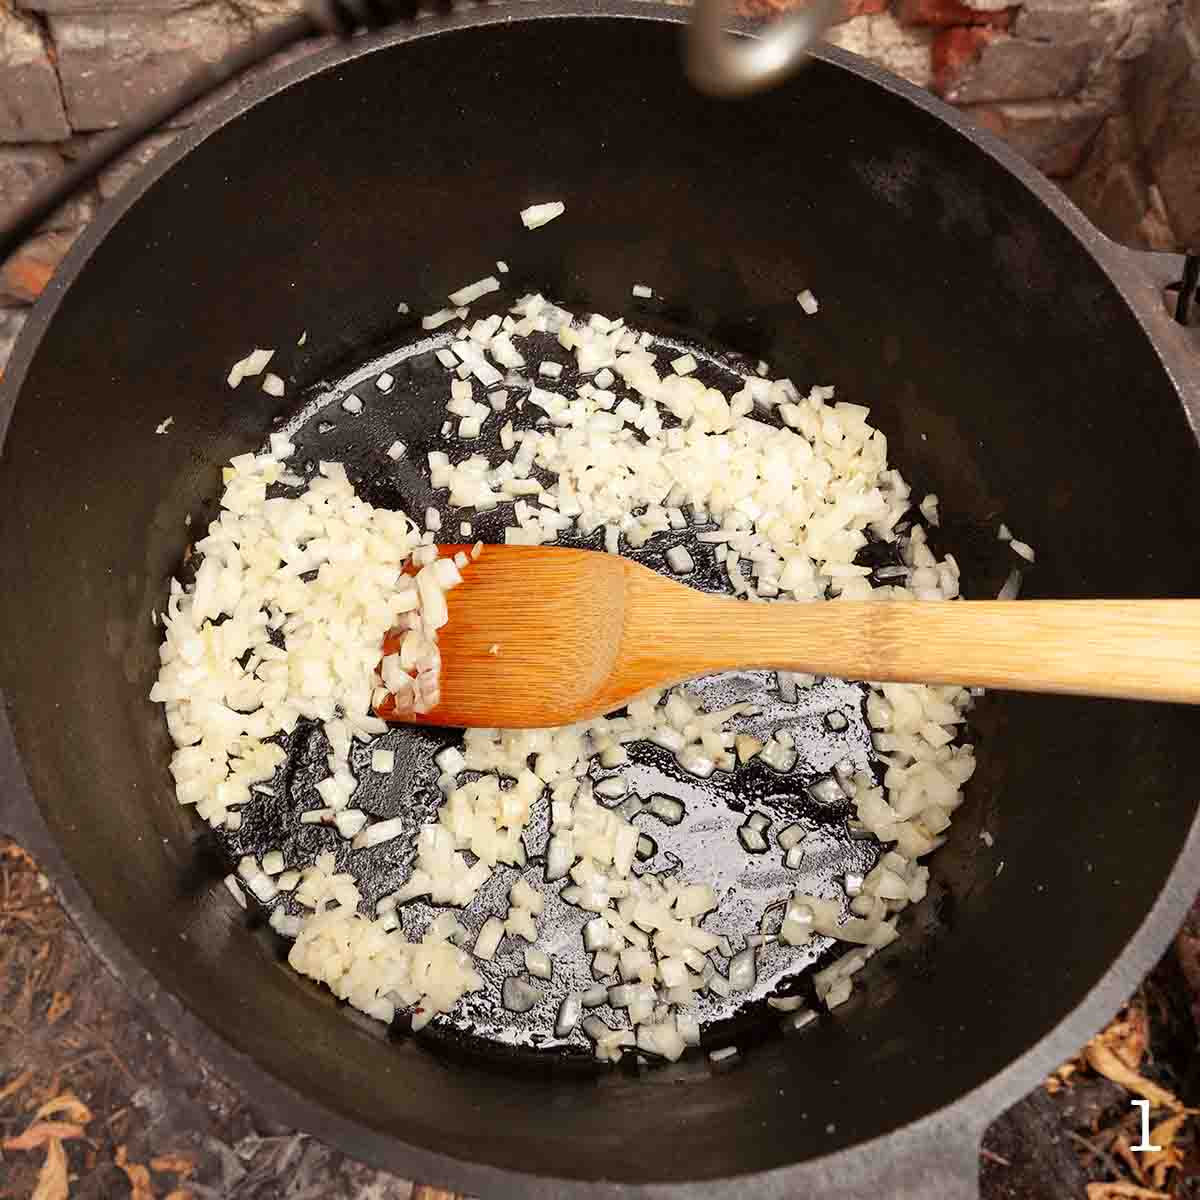
    Onion cooking in a Dutch oven.

    1. Sauté the onion in the butter and oil until softened.

    Onion, garlic, and ginger cooking in a Dutch oven.

    2. Add the garlic and ginger, and cook until fragrant.

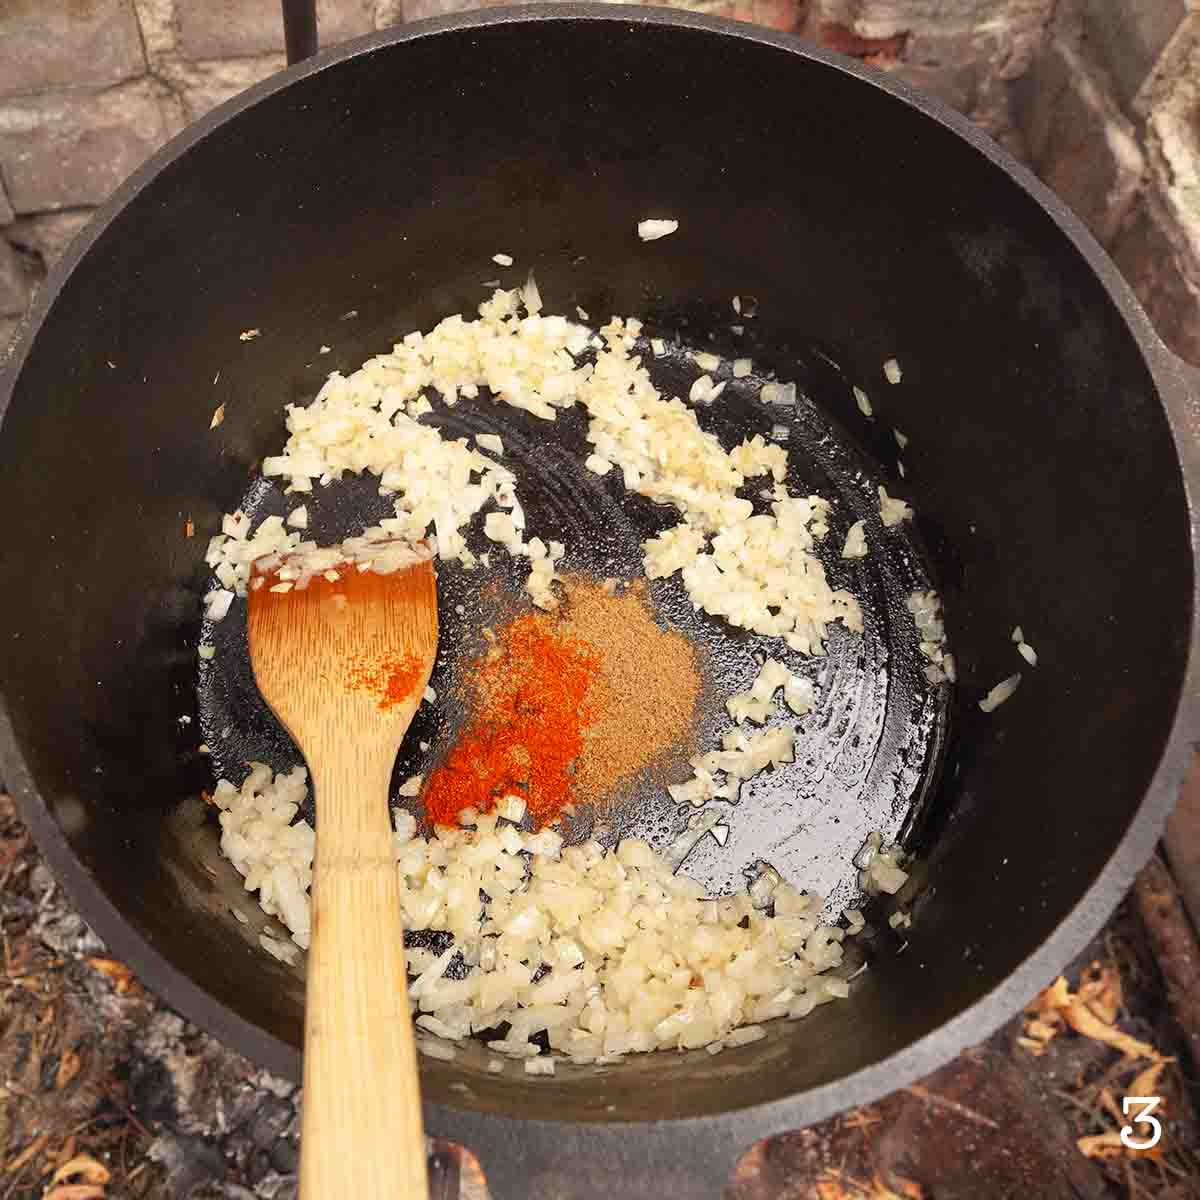
    Spices added to a Dutch oven with onion, ginger, and garlic.

    3. Stir in the spices and cook until toasted.

    A Dutch oven with creamy tomato liquid in it.

    4. Pour in the passata and whipping cream and bring to a simmer.

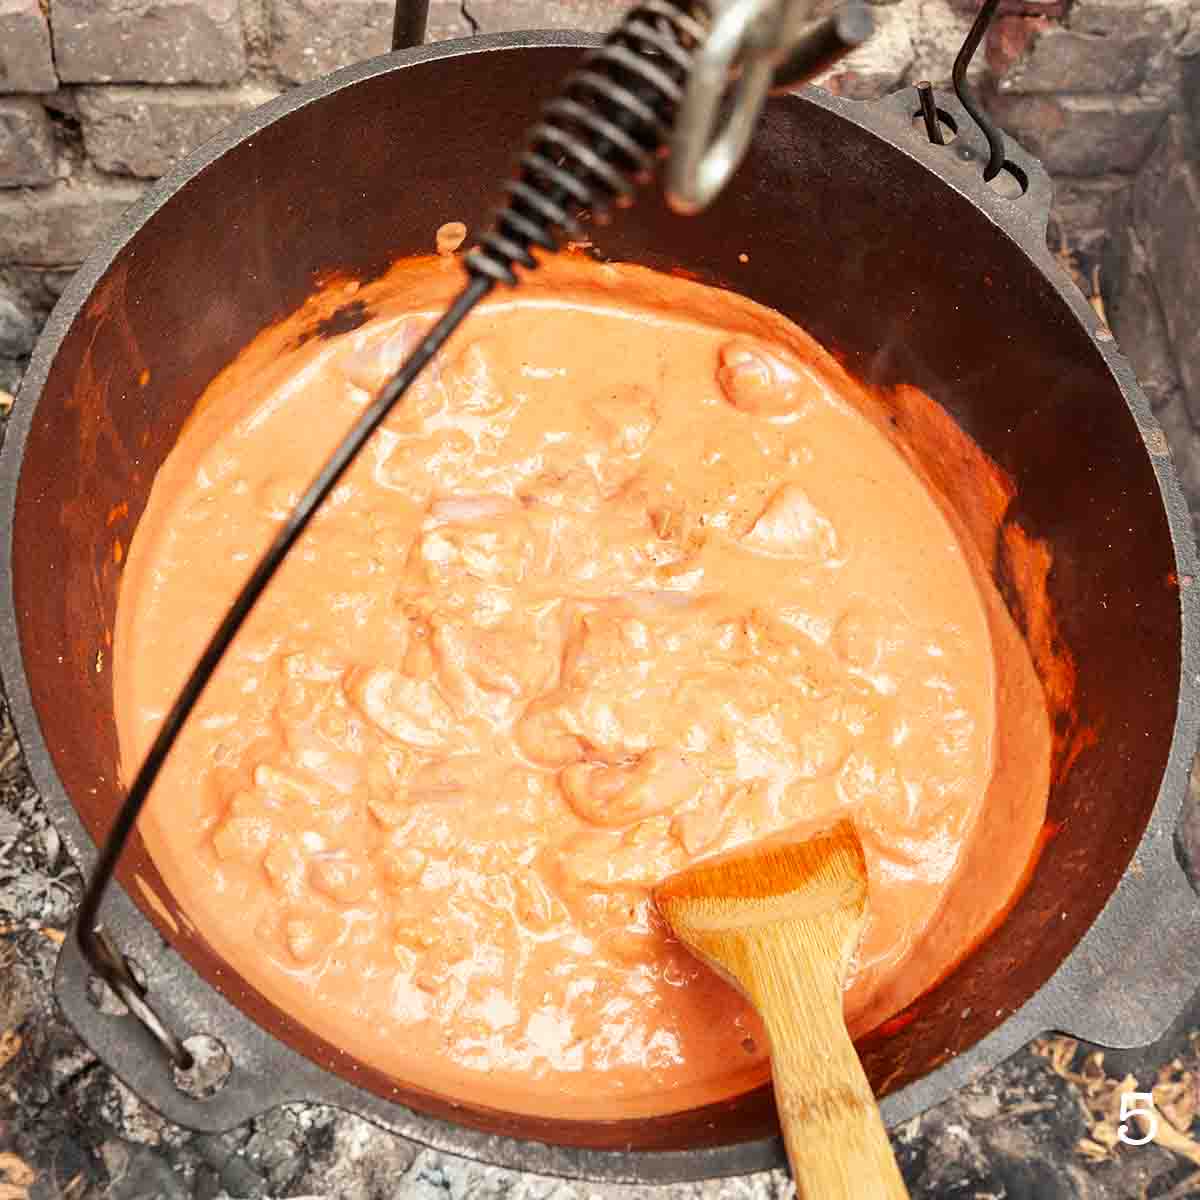
    Chicken pieces cooking in a creamy tomato sauce in a Dutch oven.

    5. Season the chicken and stir it into the sauce.

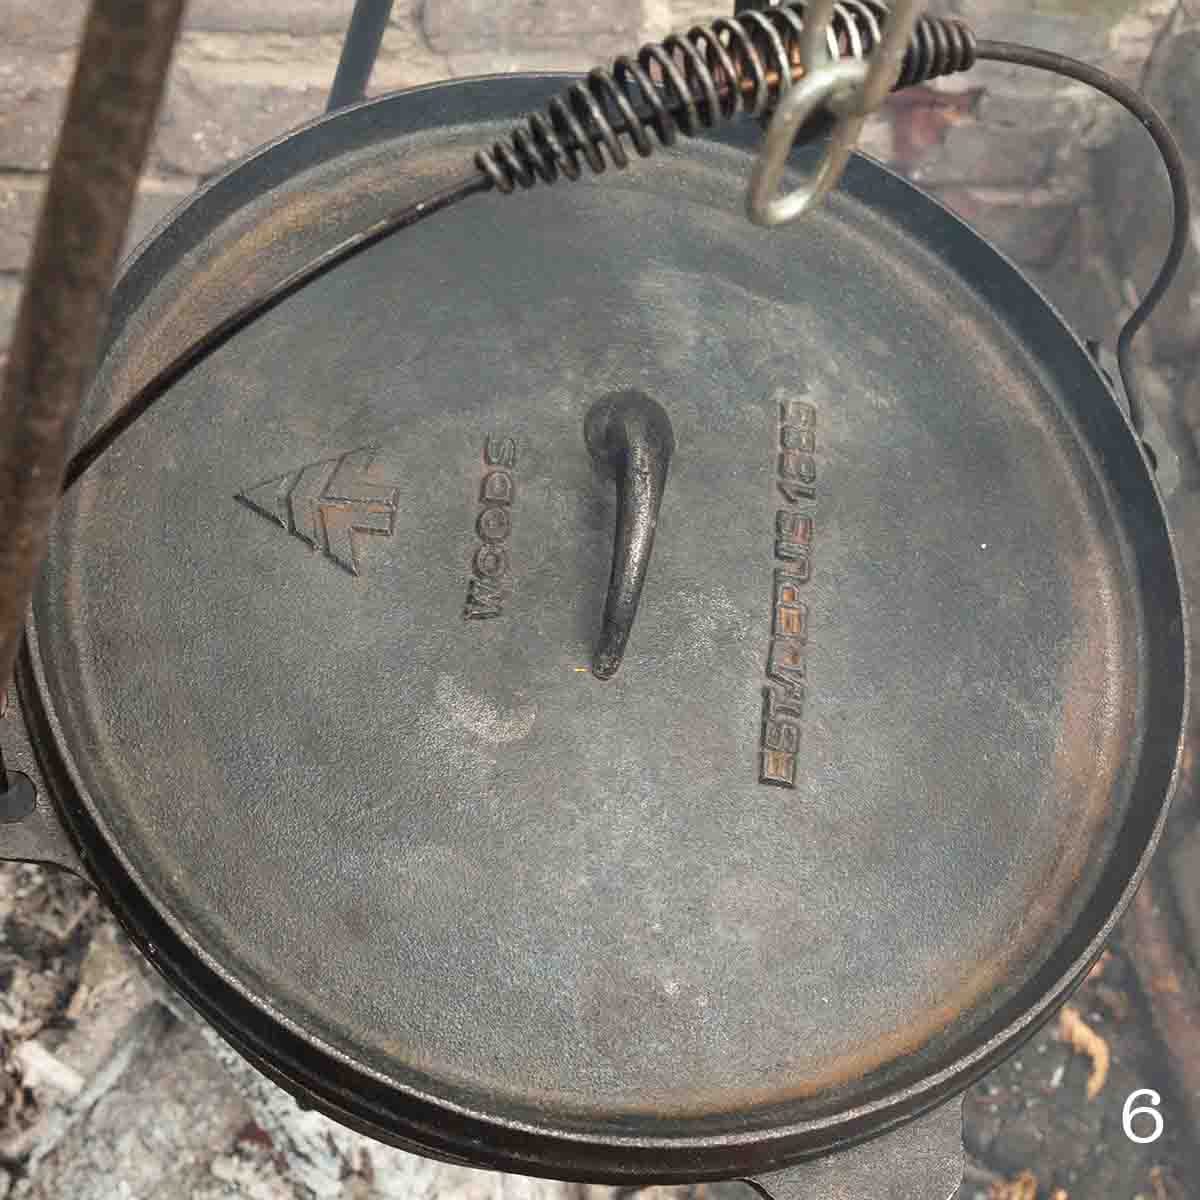
    A cast iron Dutch oven.

    6. Cover the Dutch oven and simmer until the chicken is cooked through. Season to taste.

    FAQs

    Can I cook it on the stove?

    Yes. You can cook it on your camp stove or your stovetop at home. Follow the directions, using medium heat to sauté the onions, garlic, and ginger.

    What should I serve with butter chicken?

    This comfort food meal needs some fluffy naan bread or homemade flatbread for dipping, or if you want to keep it gluten-free, serve it over rice. A drizzle of cream on top is always welcome.

    Tips and Troubleshooting

    • Since you're cooking in a Dutch oven outside, the cooking time can vary due to outside temperature and wind. If you're cooking on a very windy day, try to protect the Dutch oven with a barrier, such as a tarp.
    • Leftover butter chicken can be stored in an airtight container in your fridge or cooler for up to 4 days. Reheat in a pot or Dutch oven over medium low heat until warmed through.
    • This recipe is suitable for gluten-free diets.
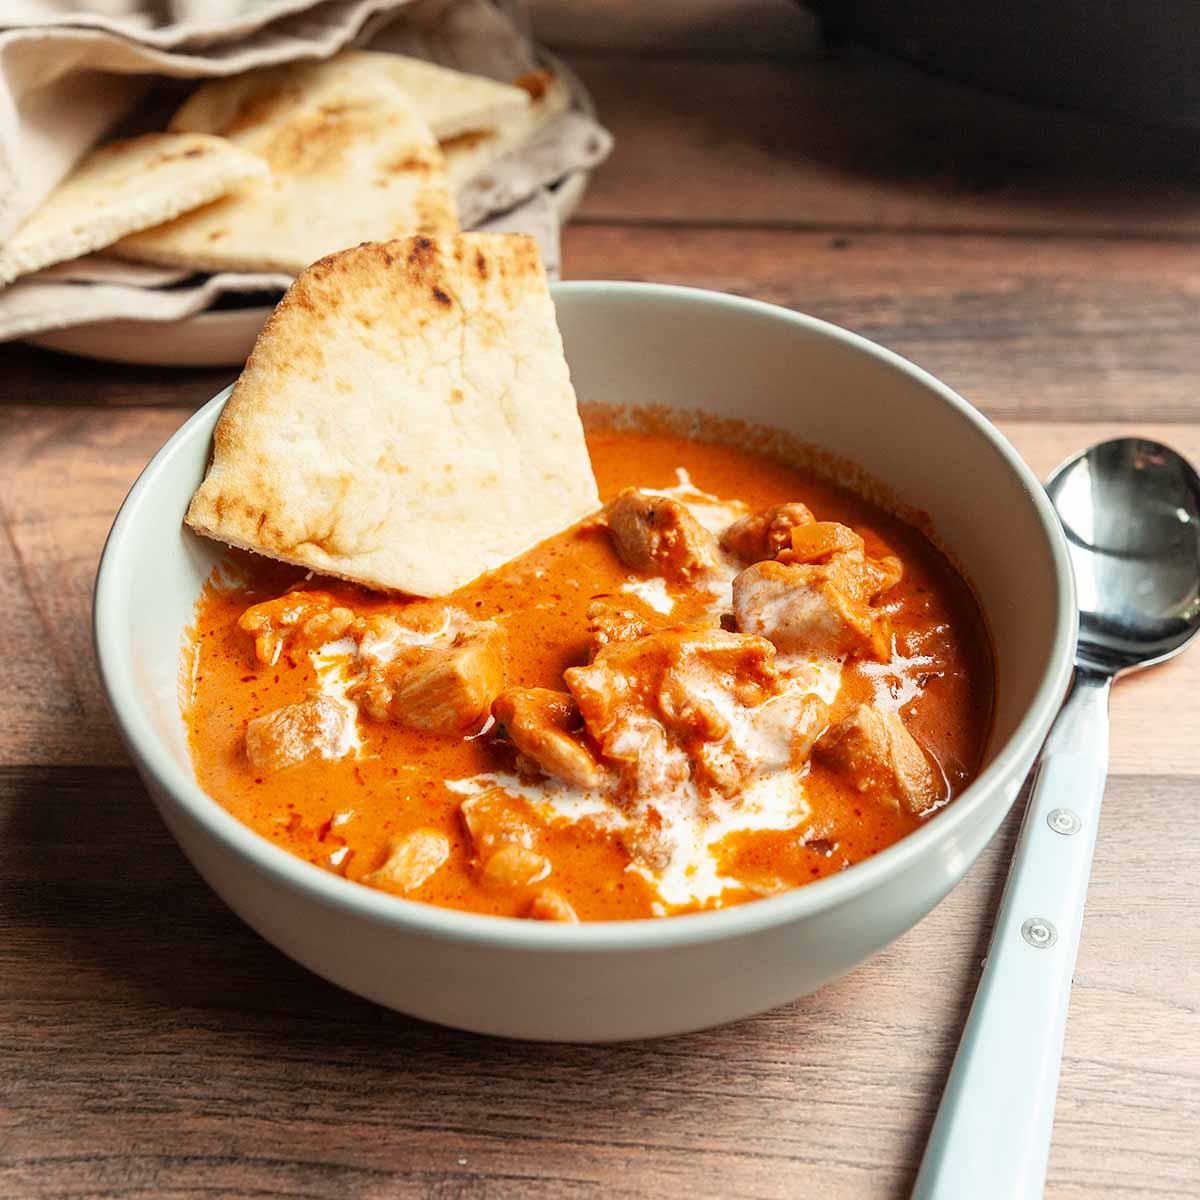
    A bowl of butter chicken with a wedge of naan bread in it.

    More Dutch Oven Chicken Recipes You'll Love

    A bowl of chicken noodle soup with a spoon resting inside and a bun on the side.
    Dutch Oven Chicken Noodle Soup
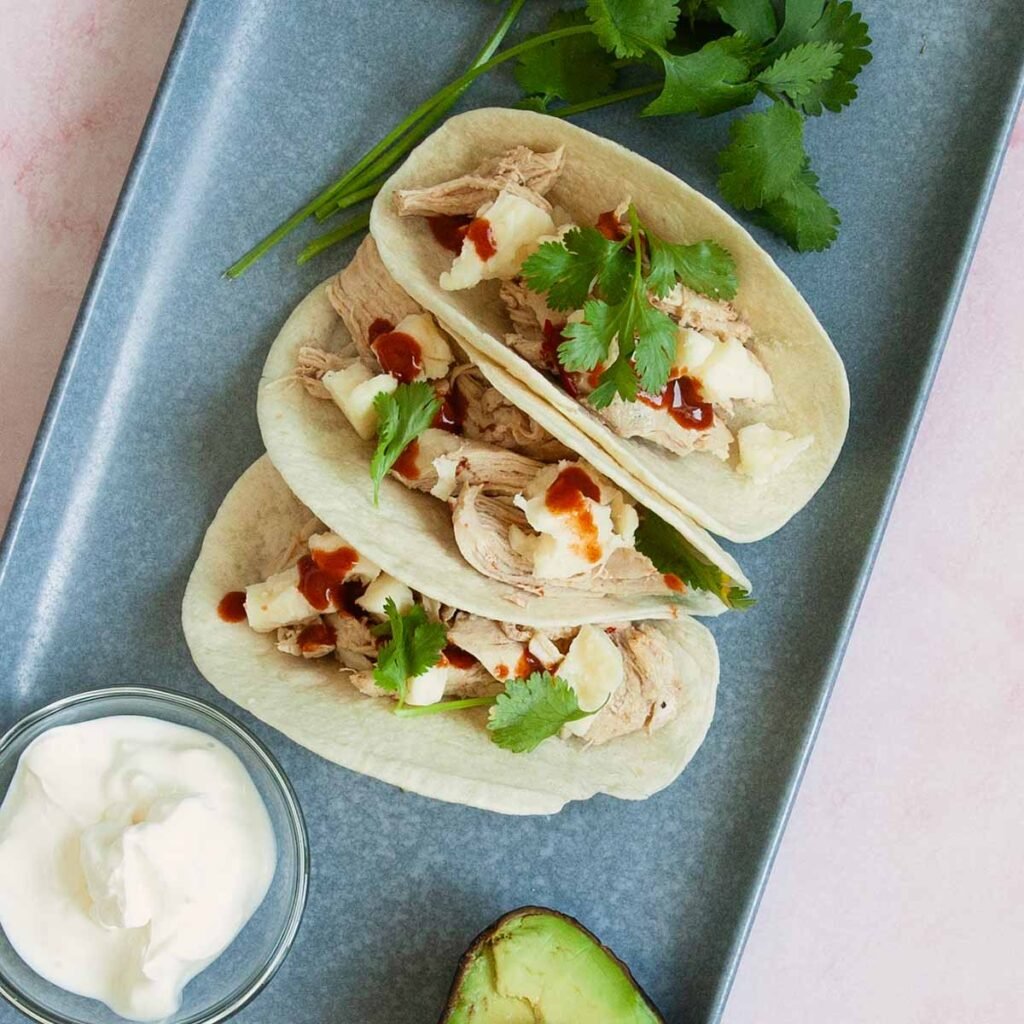
    Three shredded chicken tacos on a blue platter with sour cream, avocado, and cilantro.
    Dutch Oven Shredded Chicken Tacos

    Tried This Recipe?

    If you've tried this recipe, please leave a comment below. Follow me on Instagram, Facebook, YouTube, or Pinterest for more great camping and grilling recipes.

    Recipe

    A bowl of butter chicken with a wedge of naan bread in it.

    Dutch Oven Butter Chicken

    A woman's face.Angie Zoobkoff
    Take comfort food to the next level with this rich and creamy butter chicken recipe.
    No ratings yet
    Print Recipe Pin Recipe
    Prep Time 15 minutes mins
    Cook Time 30 minutes mins
    Total Time 45 minutes mins
    Course Main Course
    Cuisine Indian
    Servings 4 servings
    Calories 506 kcal

    Equipment

    • 6-to-8-quart cast iron Dutch oven

    Ingredients
      

    • 1 tablespoon butter
    • 1 tablespoon vegetable oil
    • 1 medium onion finely chopped
    • 2 cloves garlic minced
    • 2 teaspoons minced ginger
    • 2 teaspoons garam masala divided
    • ½ teaspoon Kashmiri chili powder
    • ½ teaspoon cumin
    • ½ teaspoon ground coriander
    • 3 cups passata
    • 1 cup whipping cream
    • 1 ½ pounds boneless chicken thighs (about 8) cut into bite-size pieces
    • Salt and pepper

    Instructions
     

    • Prepare a campfire for cooking or set your camp stove for medium heat.
    • Add the butter and oil to a large Dutch oven and set over the heat.
    • When the butter is melted, stir in the onion and sauté until softened, about 8 minutes.
    • Stir in the garlic and ginger, and cook until fragrant, about 30 seconds.
    • Add 1 teaspoon garam masala, the chili powder, cumin, and coriander, and cook for 30 seconds more, stirring constantly.
    • Pour in the passata and cream and bring the mixture to a simmer.
    • Season the chicken all over with salt, pepper, and the remaining 1 teaspoon garam masala.
    • Stir in the chicken, cover the Dutch oven and simmer until the chicken is cooked through and the flavors have come together, 15 to 20 minutes. Season to taste with salt and pepper and serve immediately.

    Notes

    • Protect your oven--Since you're cooking in a Dutch oven outside, the cooking time can vary due to outside temperature and wind. If you're cooking on a very windy day, try to protect the Dutch oven with a barrier, such as a tarp.
    • Storage and reheating--Leftover butter chicken can be stored in an airtight container in your fridge or cooler for up to 4 days. Reheat in a pot or Dutch oven over medium low heat until warmed through.
    • Dietary--This recipe is suitable for gluten-free diets.

    Nutrition

    Serving: 1 portionCalories: 506kcalCarbohydrates: 8gProtein: 31gFat: 39gCholesterol: 188mgSodium: 234mgFiber: 2gSugar: 3g
    Keyword campfire cooking, chicken dinner, comfort food, dutch oven cooking
    Tried this recipe?Let us know how it was!

    October 7, 2025 Beef Recipes

    8 Best Blackstone Beef Recipes

    From juicy smash burgers to perfectly seared steak, the Blackstone griddle is beef's best friend and these 8 Blackstone beef recipes are proof. Whether you're looking for an easy way to use that package of ground beef or you want to create some impressive food for your next camping trip, you'll find it here.

    1
    A burger with cheese, lettuce, and tomato on a plate.
    Blackstone Smash Burgers with Onions
    Your everyday smash burger just got a major upgrade, thanks to crispy fried onions and melted provolone cheese.
    Get the recipe: Blackstone Smash Burgers with Onions
    2
    Recipe and photo credit: Stef's Eats and Sweets
    Fiesta Taco Tortellini
    This fiesta taco tortellini on the Blackstone (or flat top) is an easy family favorite dinner that comes together quickly.
    Get the recipe: Fiesta Taco Tortellini
    3
    Four Blackstone cheesesteaks on a large plate on a picnic table.
    Blackstone Cheesesteaks
    These classic cheesesteaks, filled with tender ribeye, caramelized onion, and melted provolone, will satisfy even the hungriest of campers.
    Get the recipe: Blackstone Cheesesteaks
    4
    Recipe and photo credit: Aubrey's Kitchen
    Blackstone Fajitas
    These Blackstone fajitas are easy and delicious and perfect for a weeknight dinner. Blackstone fajitas are a top pick for Blackstone enthusiasts and it is no surprise why. Great for a crowd, sizzling flavors, vibrant colors and a touch of Mexican flair -yes please!
    Get the recipe: Blackstone Fajitas
    5
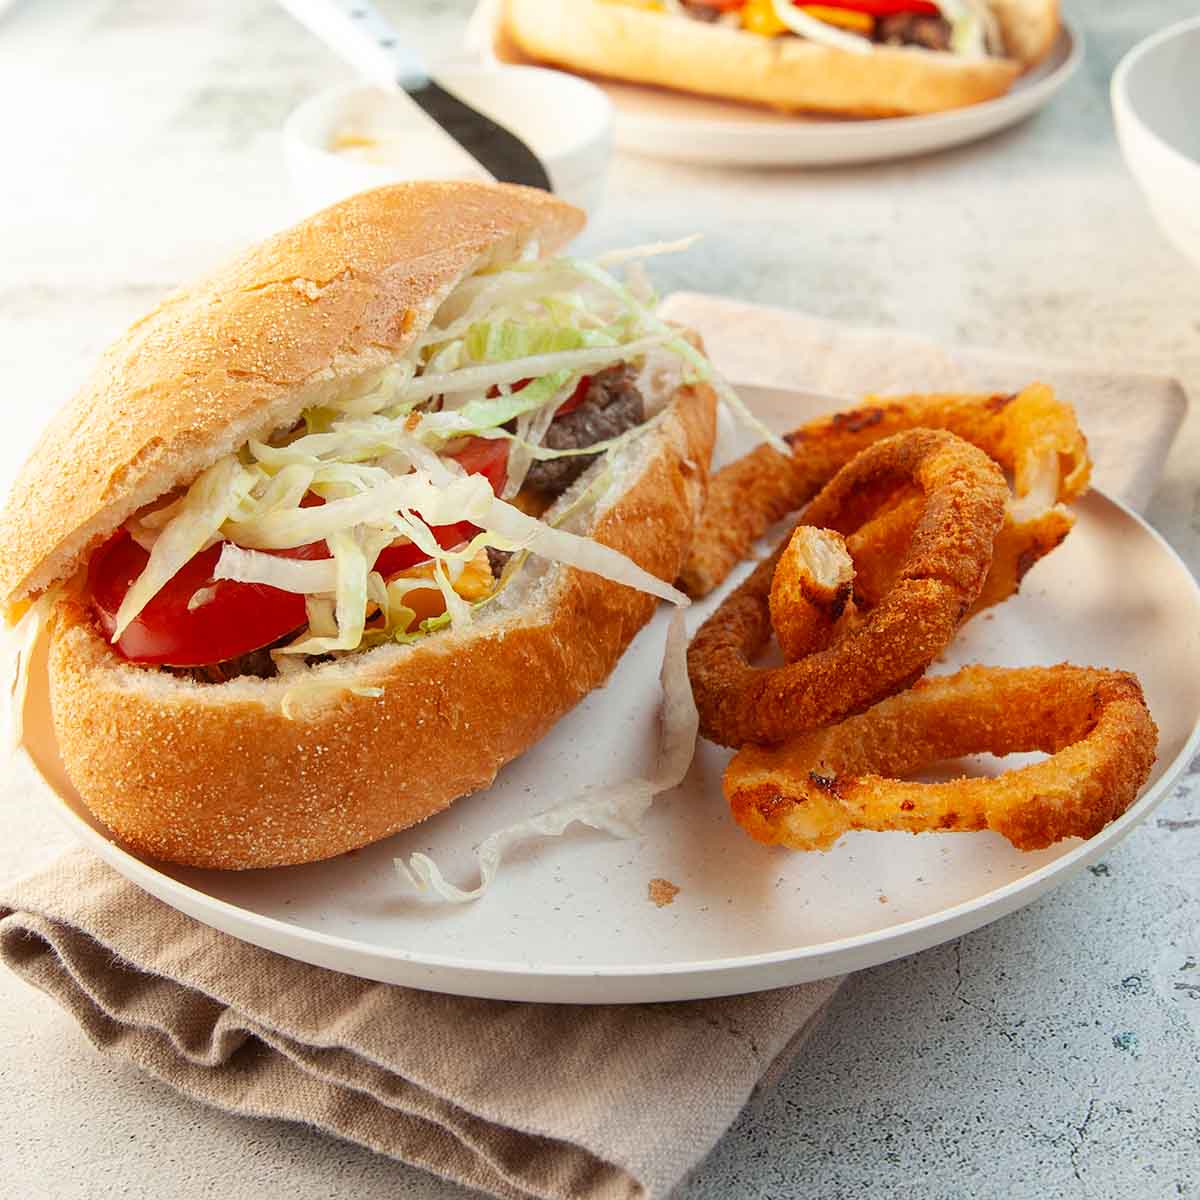
    A Blackstone chopped cheese sandwich with lettuce and tomato and onion rings on the side.
    Blackstone Chopped Cheese
    Loaded with crispy beef laced with melted cheese and topped with all your favorite fixings, the chopped cheese sandwich is an oh-so-satisfying meal.
    Get the recipe: Blackstone Chopped Cheese
    6
    Recipe and photo credit: The Buttered Gnocchi
    Grilled Steak Quesadilla with Pico de Gallo
    This quesadilla with steak recipe only requires 11 ingredients and 30 minutes of time. It is a great weeknight dinner recipe.
    Get the recipe: Grilled Steak Quesadilla with Pico de Gallo
    7
    A bowl filled with cubes of seared sirloin steak with parsley sprinkled on top.
    Blackstone Steak Bites
    For these buttery steak bites, sirloin steak is marinated then seared on your outdoor griddle and finished with butter to create completely irresistible morsels of juicy steak.
    Get the recipe: Blackstone Steak Bites
    8
    A halved patty melt in a basket lined with a checkered paper.
    Blackstone Patty Melt
    This quick camping meal made with seared ground beef patties, melted cheese, and toasted rye bread is easy to make and even easier to devour.
    Get the recipe: Blackstone Patty Melt

    September 30, 2025 Grilling

    Smoked Sweet Potato Casserole

    This smoked sweet potato casserole recipe elevates the Thanksgiving classic with the addition of spicy cheese, smoky bacon, and plenty of sour cream. It's the perfect holiday side dish to serve alongside your grilled turkey.

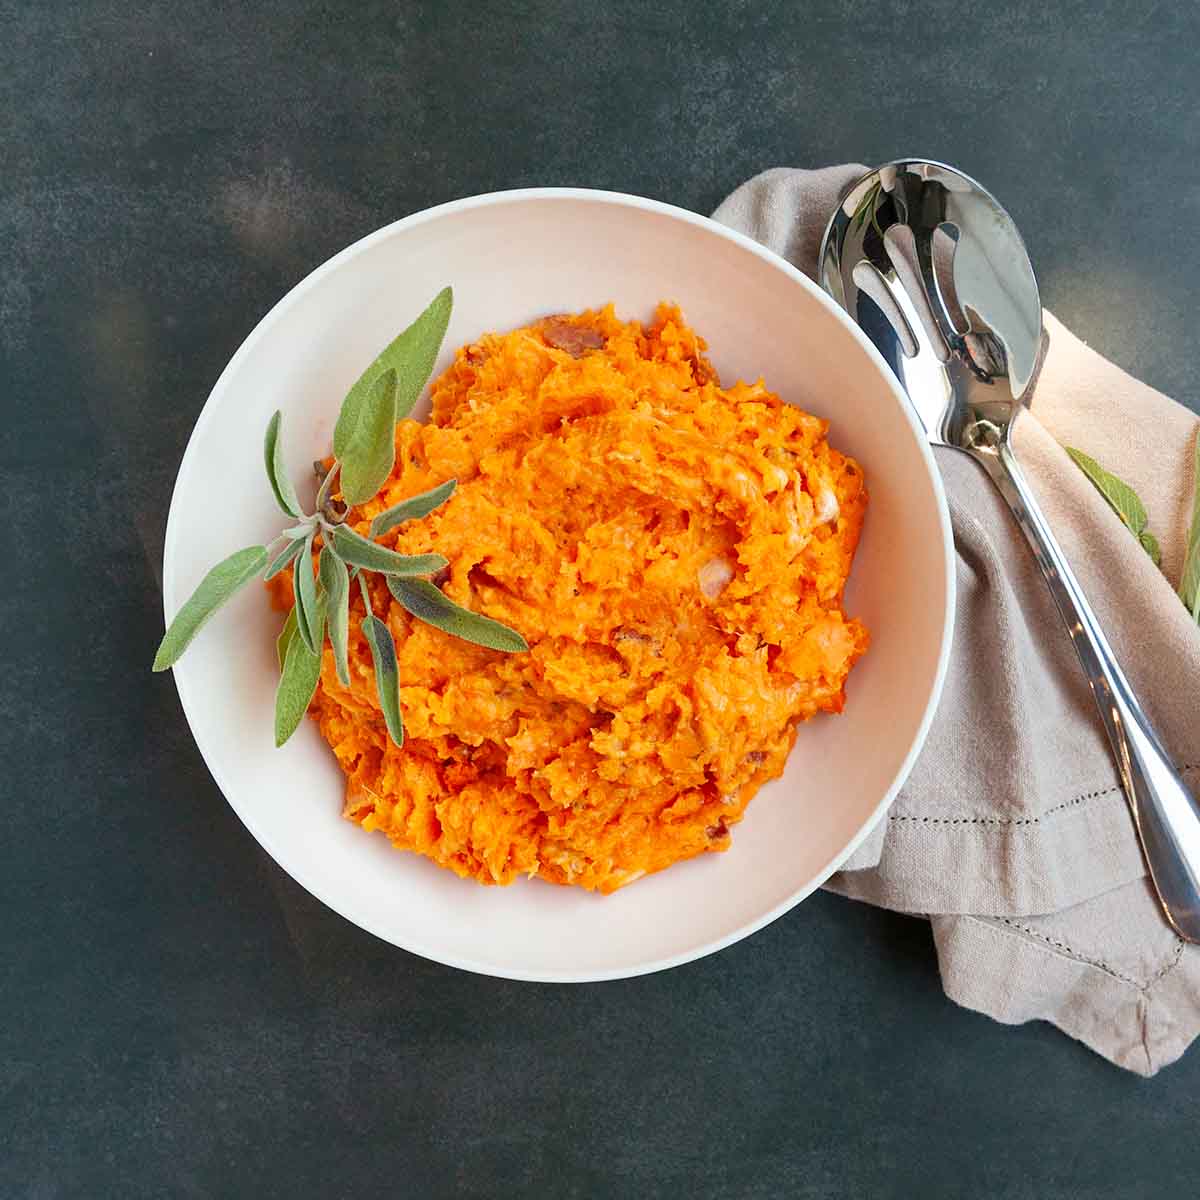
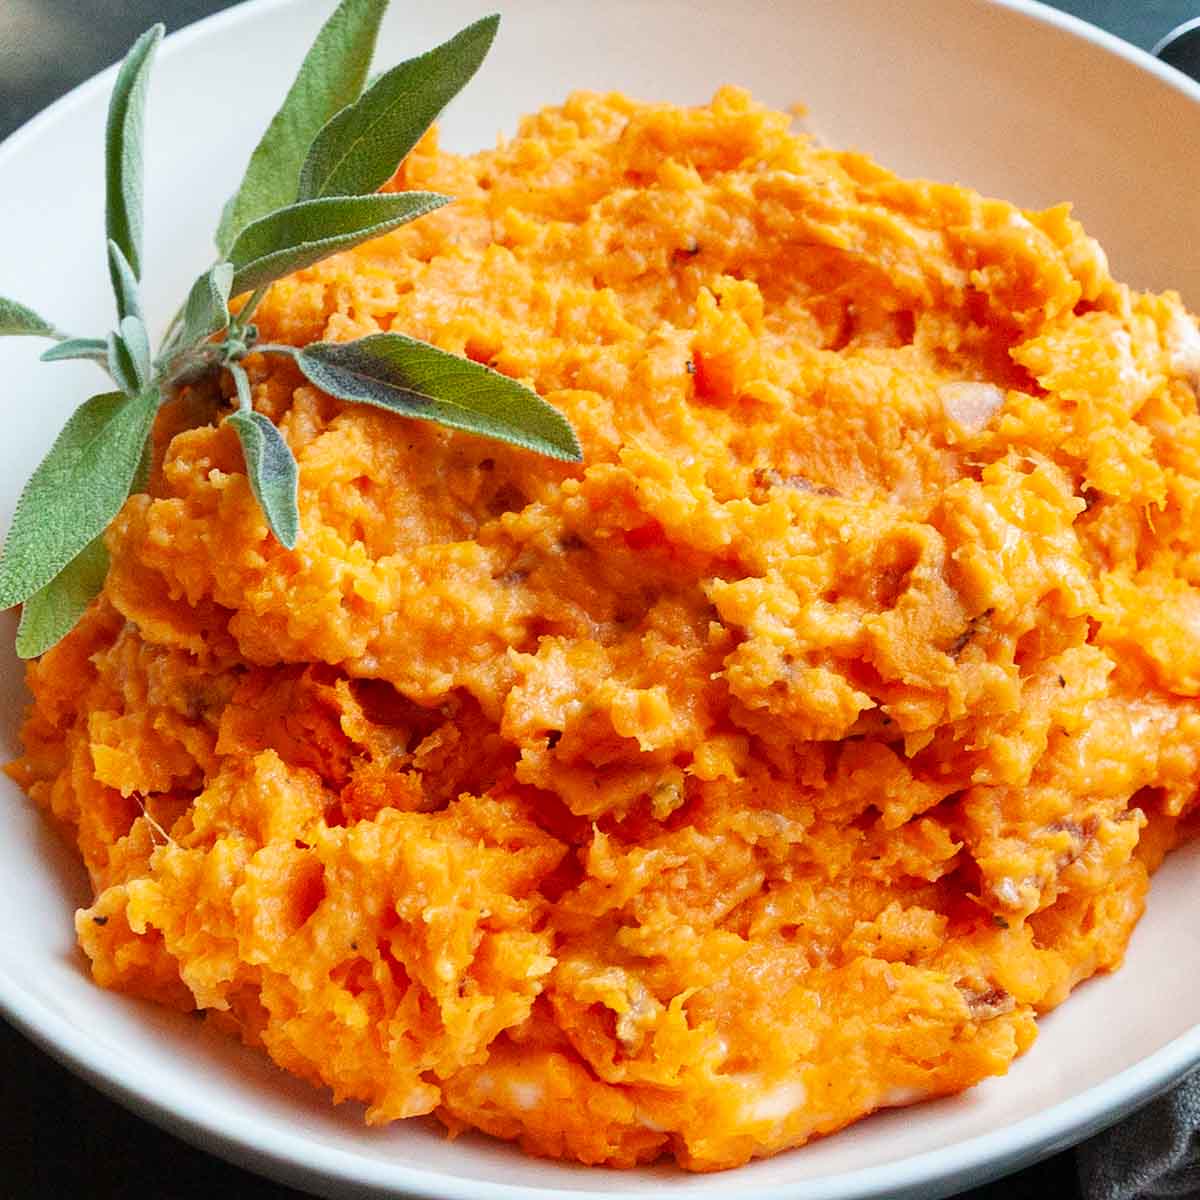
    A bowl of mashed sweet potatoes with sage on top.

    If you love sweet potatoes but can't bear the thought of a sweet-on-sweet marshmallow-topped sweet potato casserole, then this is for you. In this simple holiday side dish, the natural sweetness of the potatoes gets tempered by pepper jack cheese, smoky bacon, and rich sour cream.

    It's also a fantastic side dish to serve at the holidays as it can be prepared in advance and finshed just before serving, and it doesn't take up any oven space.

    [feast_advanced_jump_to]

    Ingredients and Substitutions

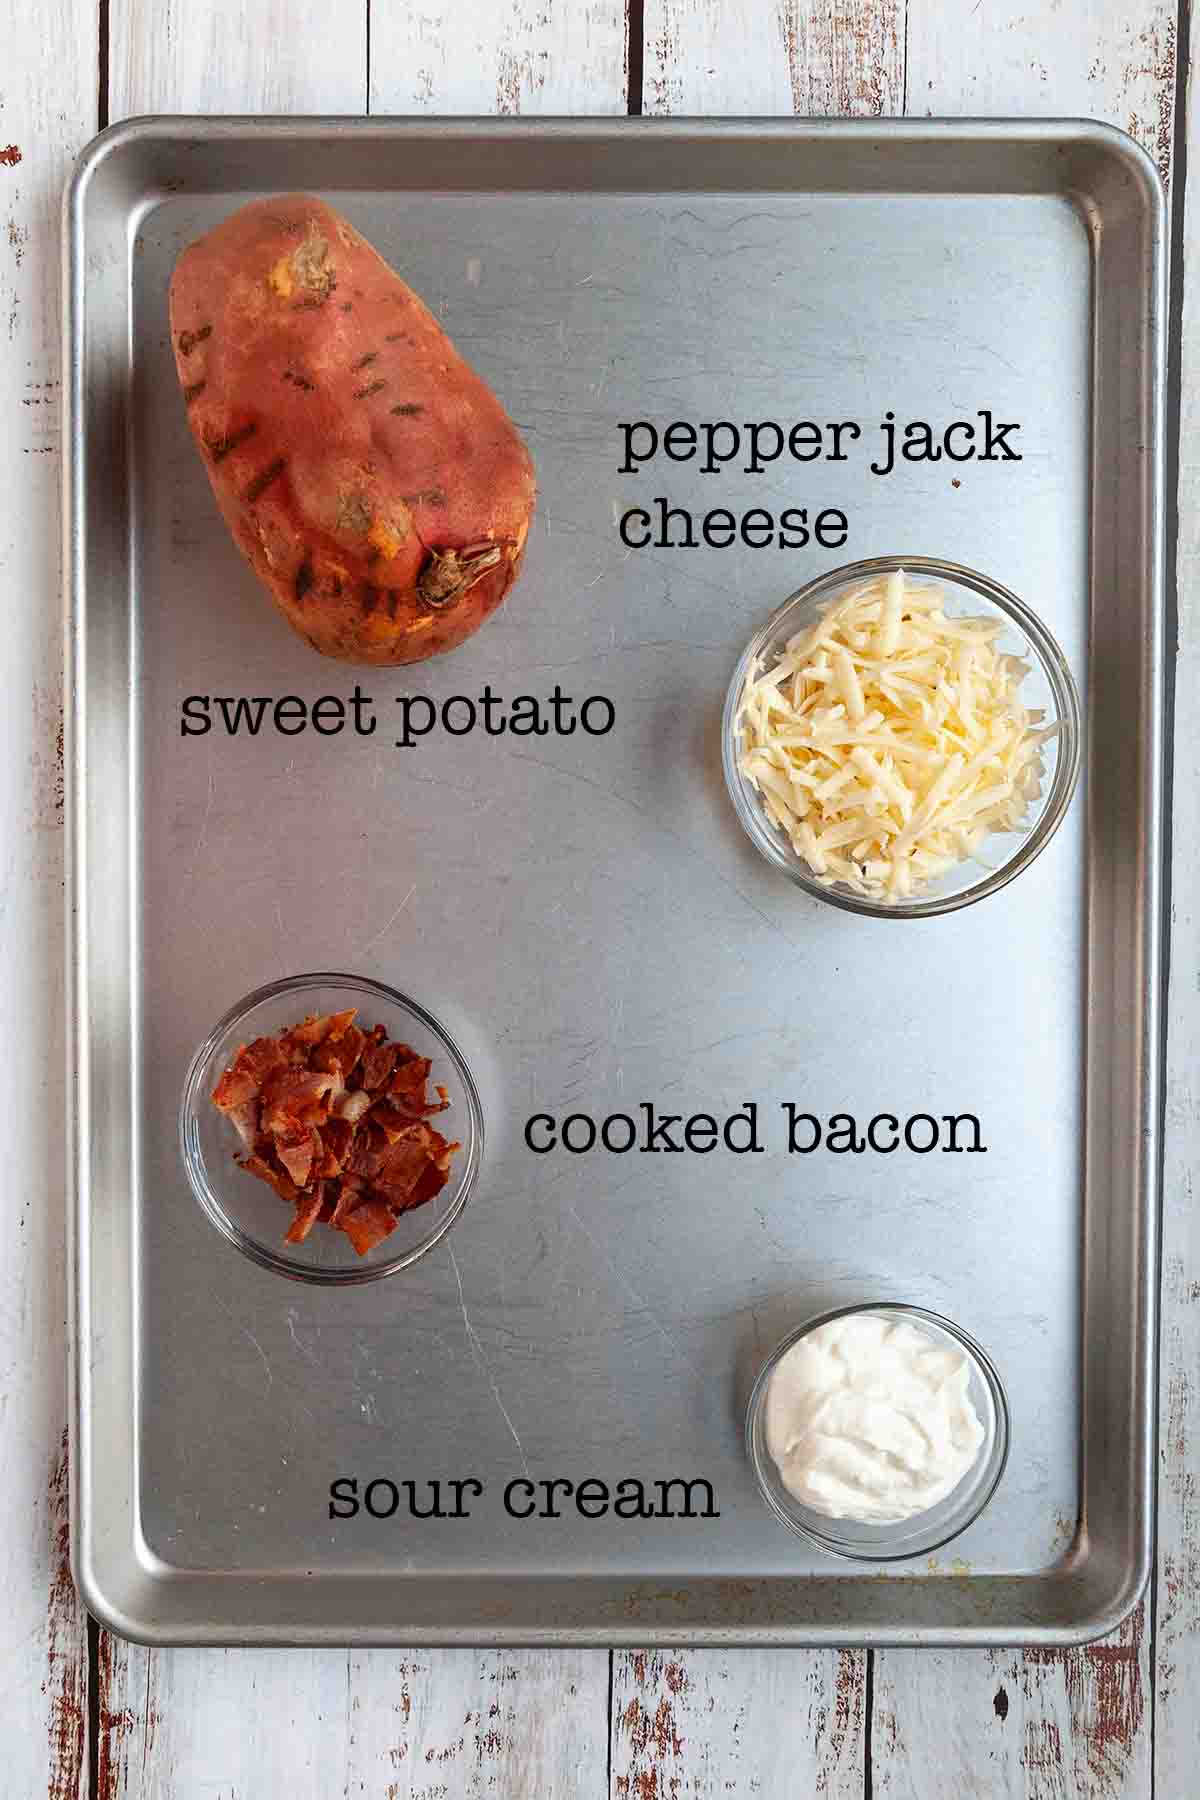
    Ingredients for smoked sweet potato casserole--sweet potato, pepper jack cheese, cooked bacon, and sour cream.
    • Sweet potato--These are the large orange-fleshed potatoes, which may be labeled as yams. They vary wildly in size, so choose a couple that are similar sized so that they will cook in the same amount of time.
    • Bacon--You can use thick or thin cut bacon here, but I recommend staying away from maple flavored bacon. Use regular or hickory smoked bacon for best results.
    • Cheese--The spice in pepper jack cheese really helps to balance the sweetness of the potatoes. If you are very sensitive to spice, you can substitute regular Monterey jack cheese.
    • Sour cream--Use full-fat for the creamiest sweet potato mash.

    How to Make Smoked Sweet Potato Casserole

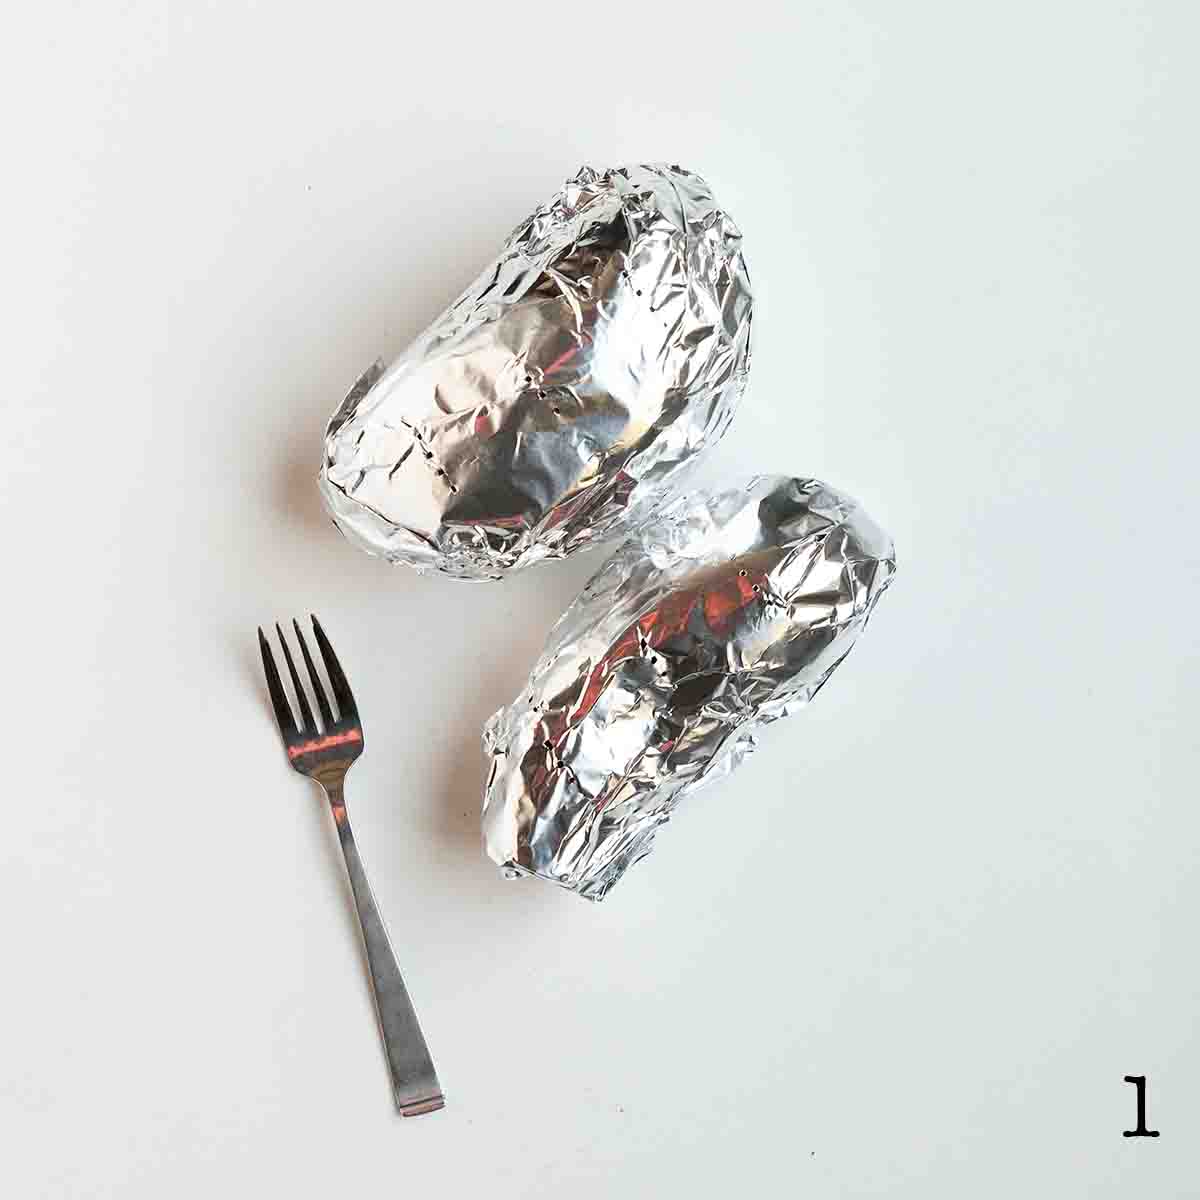
    Two sweet potatoes wrapped in foil.

    1. Wrap the potatoes in foil and poke a few holes all over with a fork.

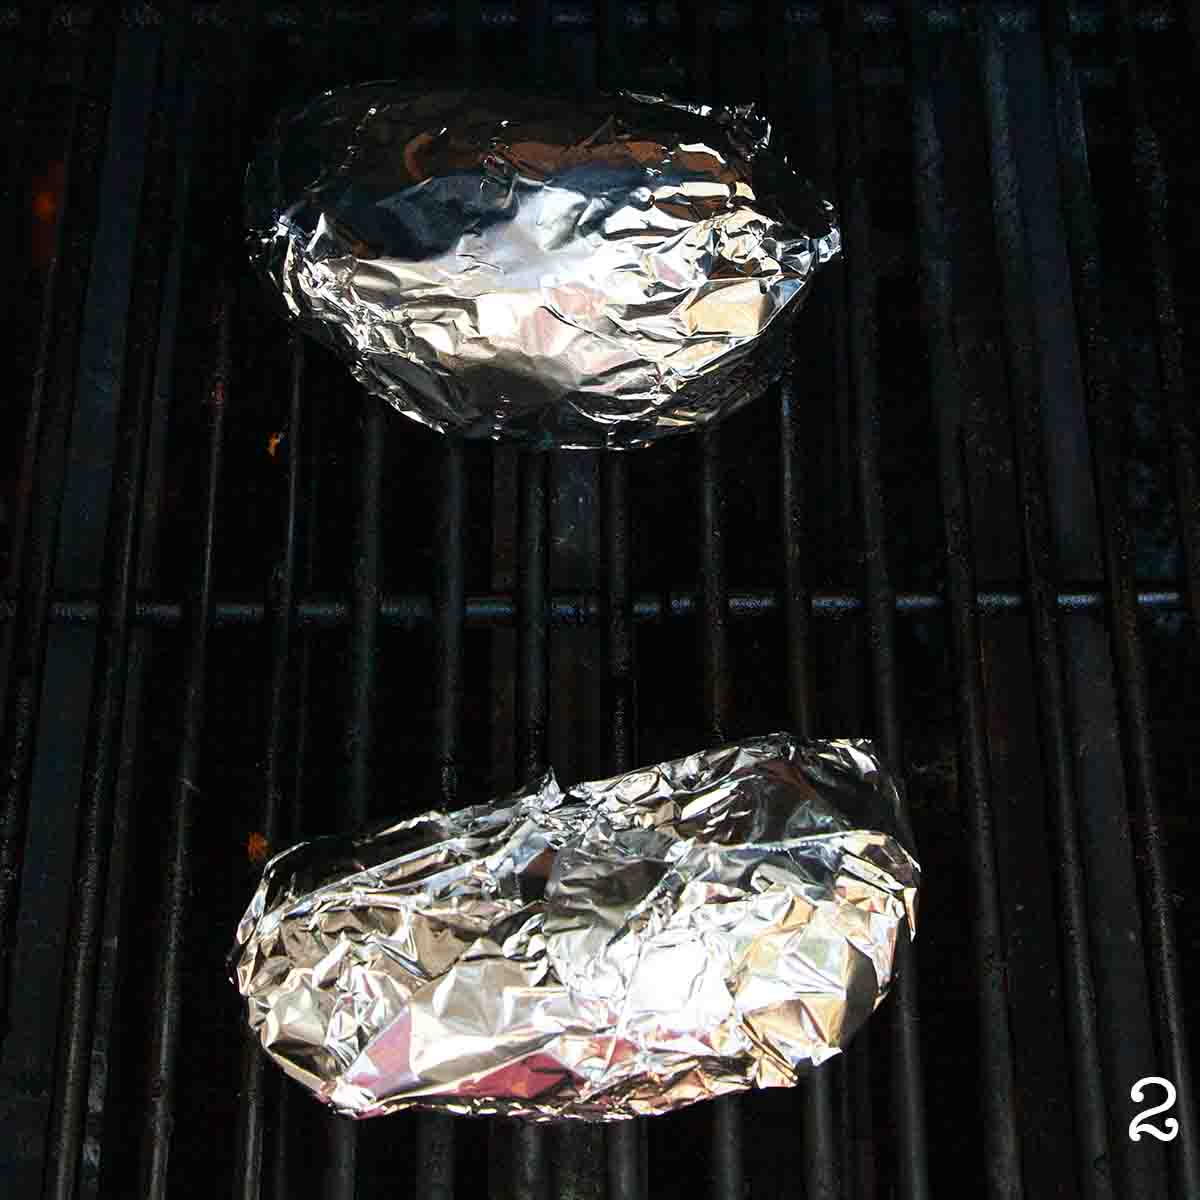
    Two sweet potatoes in foil on a bbq grill.

    2. Cook the potatoes on the grill over medium-high heat until tender. Remove from the heat and cool slightly.

    A bowl of mashed sweet potatoes.

    3. Remove the flesh from the sweet potatoes and mash until mostly smooth.

    Mashed sweet potatoes with grated cheese on top.

    4. Stir in the cheese, bacon, and sour cream. Season to taste with salt and pepper.

    Mashed sweet potato casserole in a foil pan.

    5. Scoop the mixture into a foil tray and smooth the top.

    Mashed sweet potato casserole in a foil pan on the grill.

    6. Cook on the grill with a smoke packet or on your smoker until heated through. Serve warm.

    FAQs

    What's the best type of wood to use for smoking sweet potatoes?

    I recommend using a mild wood, such as hickory for smoking your sweet potatoes. You want to give the dish a slightly smoky flavor, but not overwhelm it, so stay away from strong smoke flavors, such as mesquite.

    Can I cook it in the oven?

    Yes. Follow the directions, baking your potatoes in a 400°F (200°C) oven until tender, then finishing the assembled casserole in a 350°F (180°C) oven. It won't have the same smoke flavor, but will still be delicious. Note that if you are baking it in the oven, you can cook it in an oven-safe dish.

    Can I make this sweet potato casserole in advance?

    Definitely. You can cook the potatoes and assemble the casserole ahead of time. Store it in a tightly wrapped container in the fridge for up to 3 days before cooking or freeze for up to 1 month. If frozen, let it thaw in the fridge overnight before finishing on the grill.

    Tips and Troubleshooting

    • Store leftover smoked sweet potato casserole in a sealed container in the fridge for up to 3 days, or freeze for up to 1 month. Reheat in a 325°F oven until warmed through.
    • The cooking time for the sweet potatoes will be dependent on their size. Extra large ones may take up to 30 minutes longer to cook than large-sized sweet potatoes.
    • This recipe is suitable for gluten-free diets.
    A bowl of mashed sweet potatoes with sage on top.

    More Sweet Potato Recipes You'll Love

    A bowl of cubed smoked sweet potatoes with crispy edges, with several thyme sprigs on the side.
    Smoked Sweet Potatoes
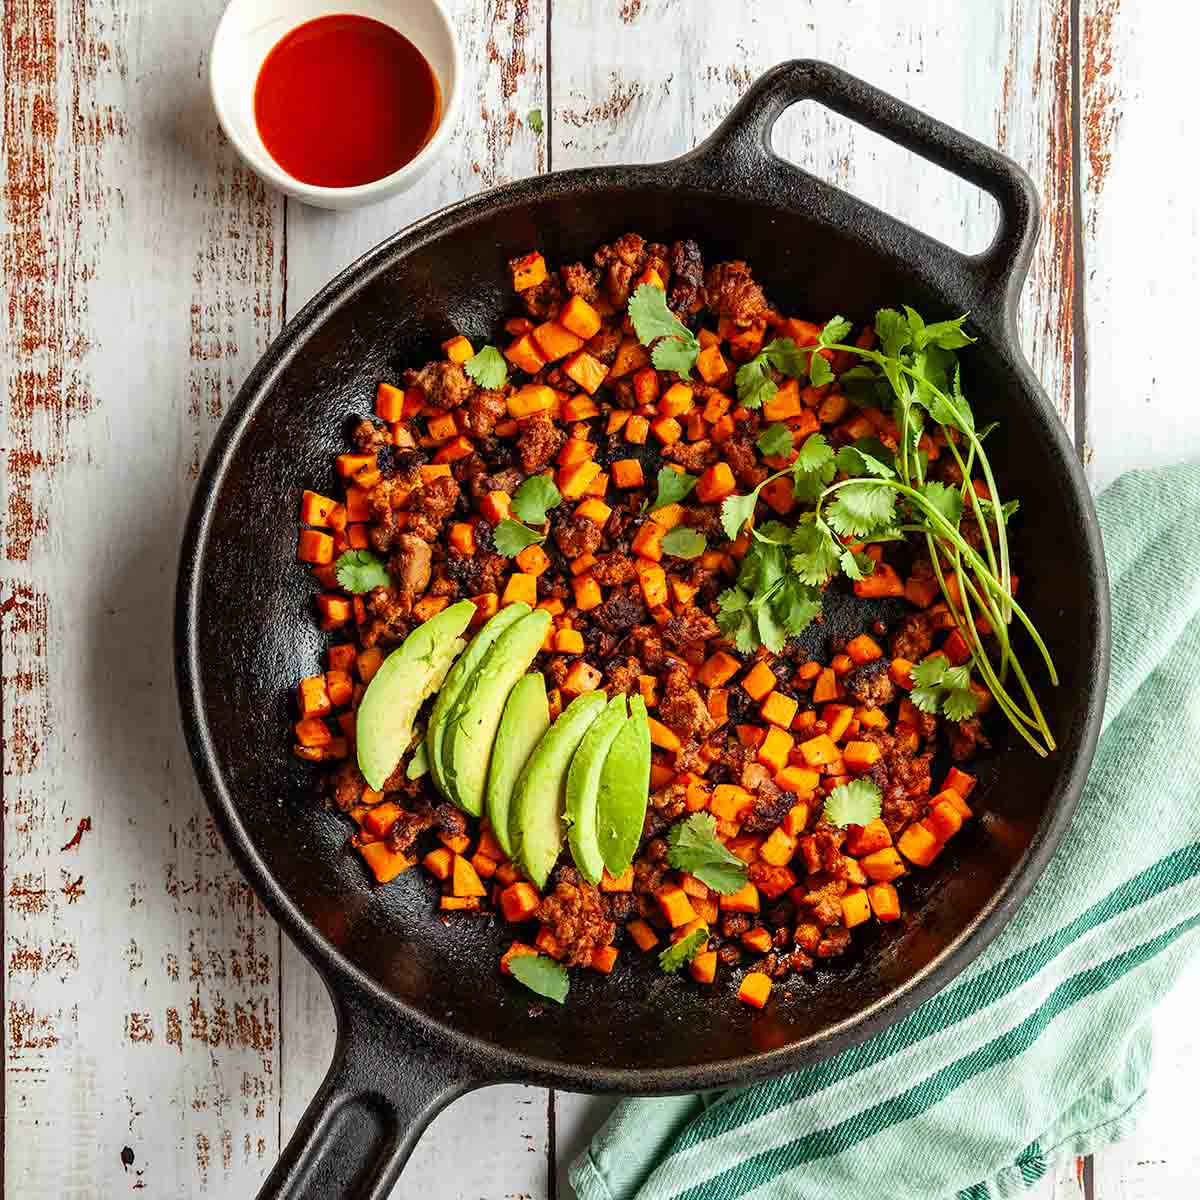
    A cast iron skillet filled with chorizo and sweet potato hash with sliced avocado and cilantro on top.
    Chorizo and Sweet Potato Hash

    Tried This Recipe?

    If you've tried this recipe, please leave a comment below. Follow me on Instagram, Facebook, YouTube, or Pinterest for more great camping and grilling recipes.

    Recipe

    A bowl of mashed sweet potatoes with sage on top.

    Smoked Sweet Potato Casserole

    A woman's face.Angie Zoobkoff
    Your sweet potato casserole just got a major upgrade thanks to spicy cheese, smoky bacon, and plenty of sour cream.
    No ratings yet
    Print Recipe Pin Recipe
    Prep Time 20 minutes mins
    Cook Time 1 hour hr 45 minutes mins
    Total Time 2 hours hrs 15 minutes mins
    Course Side Dish
    Cuisine American
    Servings 6 servings
    Calories 237 kcal

    Equipment

    • 8-by-8-inch or 8-by-6-inch foil pan
    • Hickory wood chips or chunks

    Ingredients
      

    • 2 large sweet potatoes (about 18 oz | 500 g total weight)
    • ¾ cup shredded pepper jack cheese
    • â…“ cup cooked chopped bacon (from 3 slices)
    • â…“ cup sour cream
    • Salt and freshly ground black pepper

    Instructions
     

    • Preheat the grill for medium-high indirect heat (about 400°F | 200°C).
    • Wrap each sweet potato in foil and pierce with a fork in a few spots around each potato.
    • Cook on the grill over indirect heat until the potatoes are very tender when pierced, 60 to 75 minutes. Remove from the heat and let cool slightly.
    • When the potatoes are cool enough to handle, slice them open and scoop the flesh into a large bowl. Mash until smooth.
    • Stir in the cheese, bacon, and sour cream. Season to taste with salt and pepper. Scoop the mixture into an 8-by-8-inch or 8-by-6-inch foil pan and smooth the top.
    • Prepare your smoker or grill with smoke box or smoke packet for smoking at 300°F using hickory wood chips, chunks, or pellets.
    • Smoke the sweet potato casserole until it's hot throughout and the cheese is melted, 30 to 40 minutes. Serve warm directly from the pan or transfer it to a serving dish.

    Notes

    • Get ahead--Cook the potatoes and prepare the casserole up to 3 days before serving. Store in a sealed container in the fridge. Finish on the smoker just before serving. Heating time will be longer if the casserole is chilled before smoking.
    • Storage--Store leftover smoked sweet potato casserole in a sealed container in the fridge for up to 3 days, or freeze for up to 1 month. Reheat in a 325°F oven until warmed through.
    • Size matters--The cooking time for the sweet potatoes will be dependent on their size. Extra large ones may take up to 30 minutes longer to cook than large-sized sweet potatoes.
    • Dietary--This recipe is suitable for gluten-free diets.

    Nutrition

    Serving: 1 portionCalories: 237kcalCarbohydrates: 25gProtein: 9gFat: 11gCholesterol: 31mgSodium: 319mgFiber: 4gSugar: 1g
    Keyword smoked side dishes, sweet potatoes, Thanksgiving sides
    Tried this recipe?Let us know how it was!

    September 23, 2025 Beef Recipes

    Beef and Broccoli Foil Packets

    These beef and broccoli foil packets reinvent your favorite take-out meal as a quick and easy dinner that you can make on the grill, over a campfire, or in the oven in just 20 minutes.

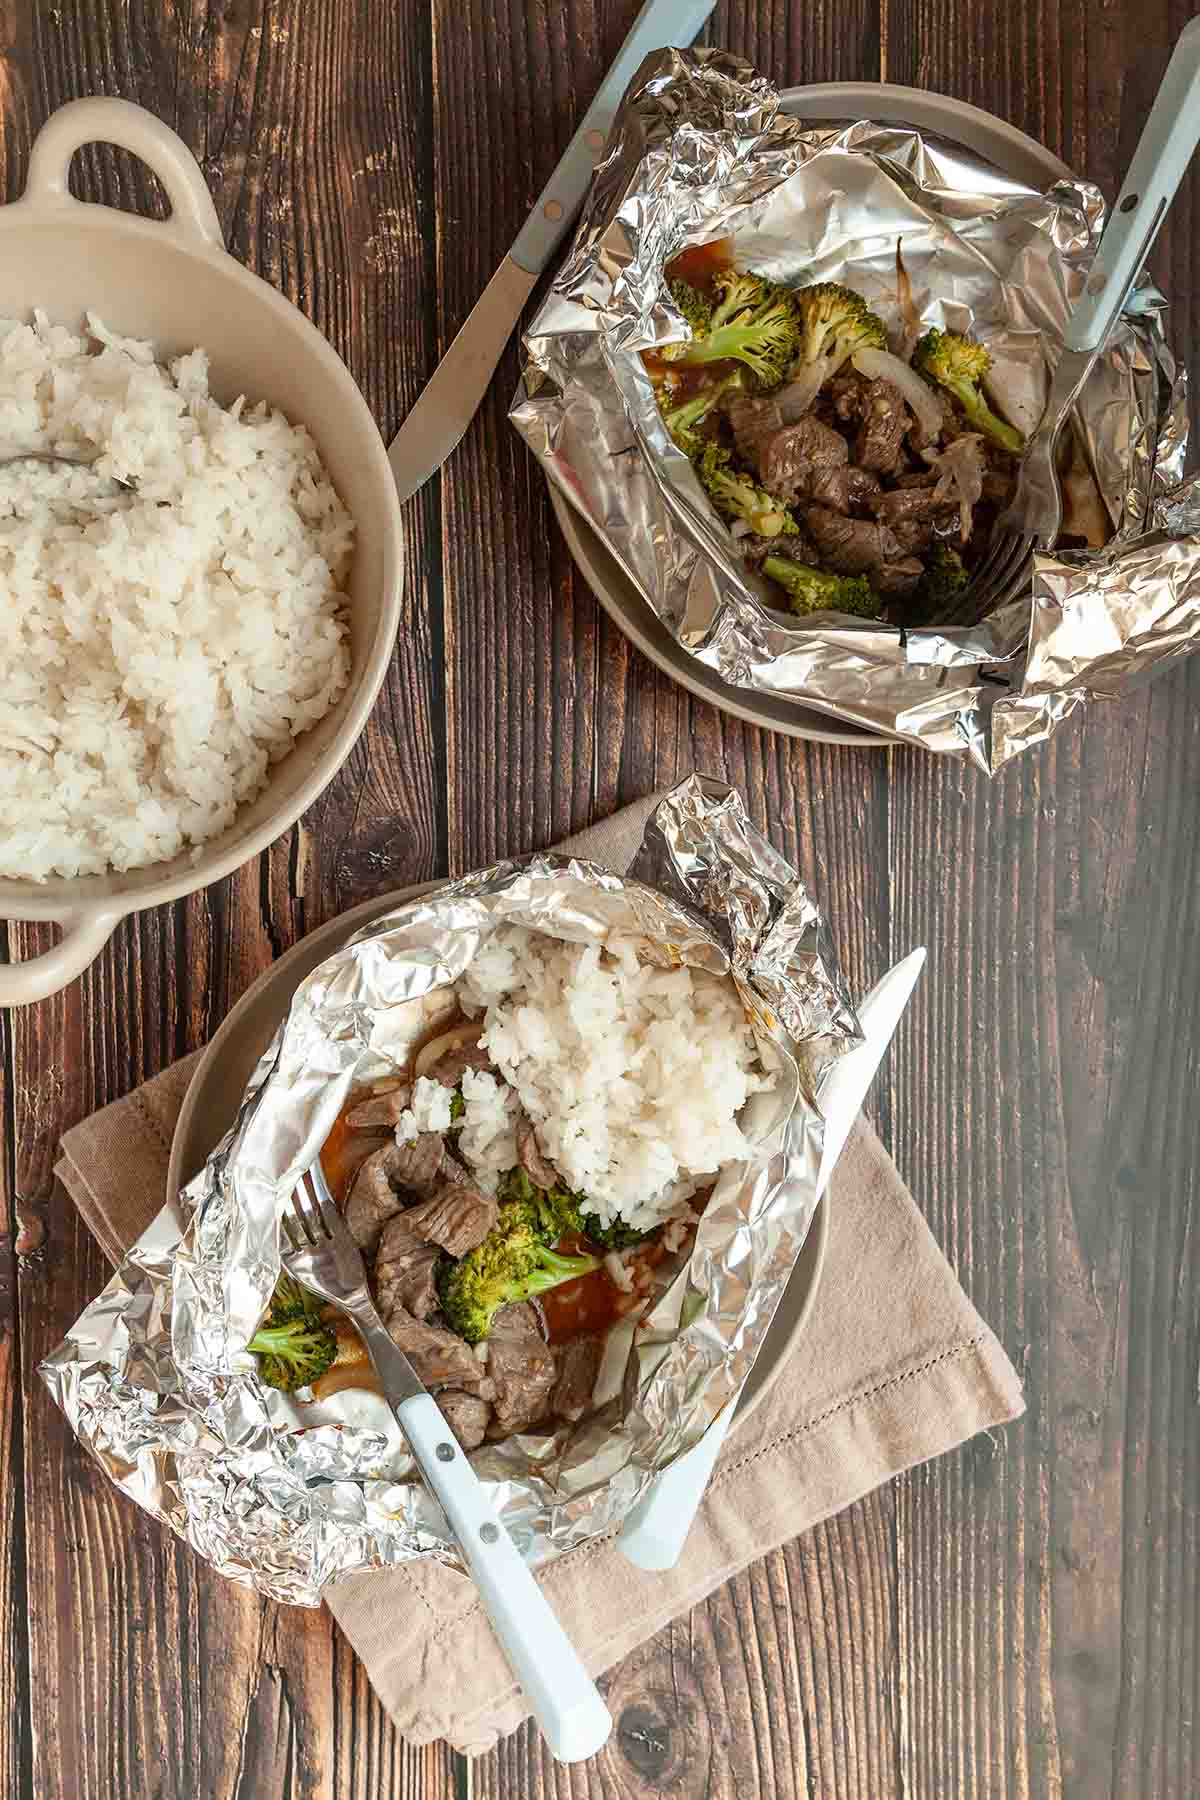
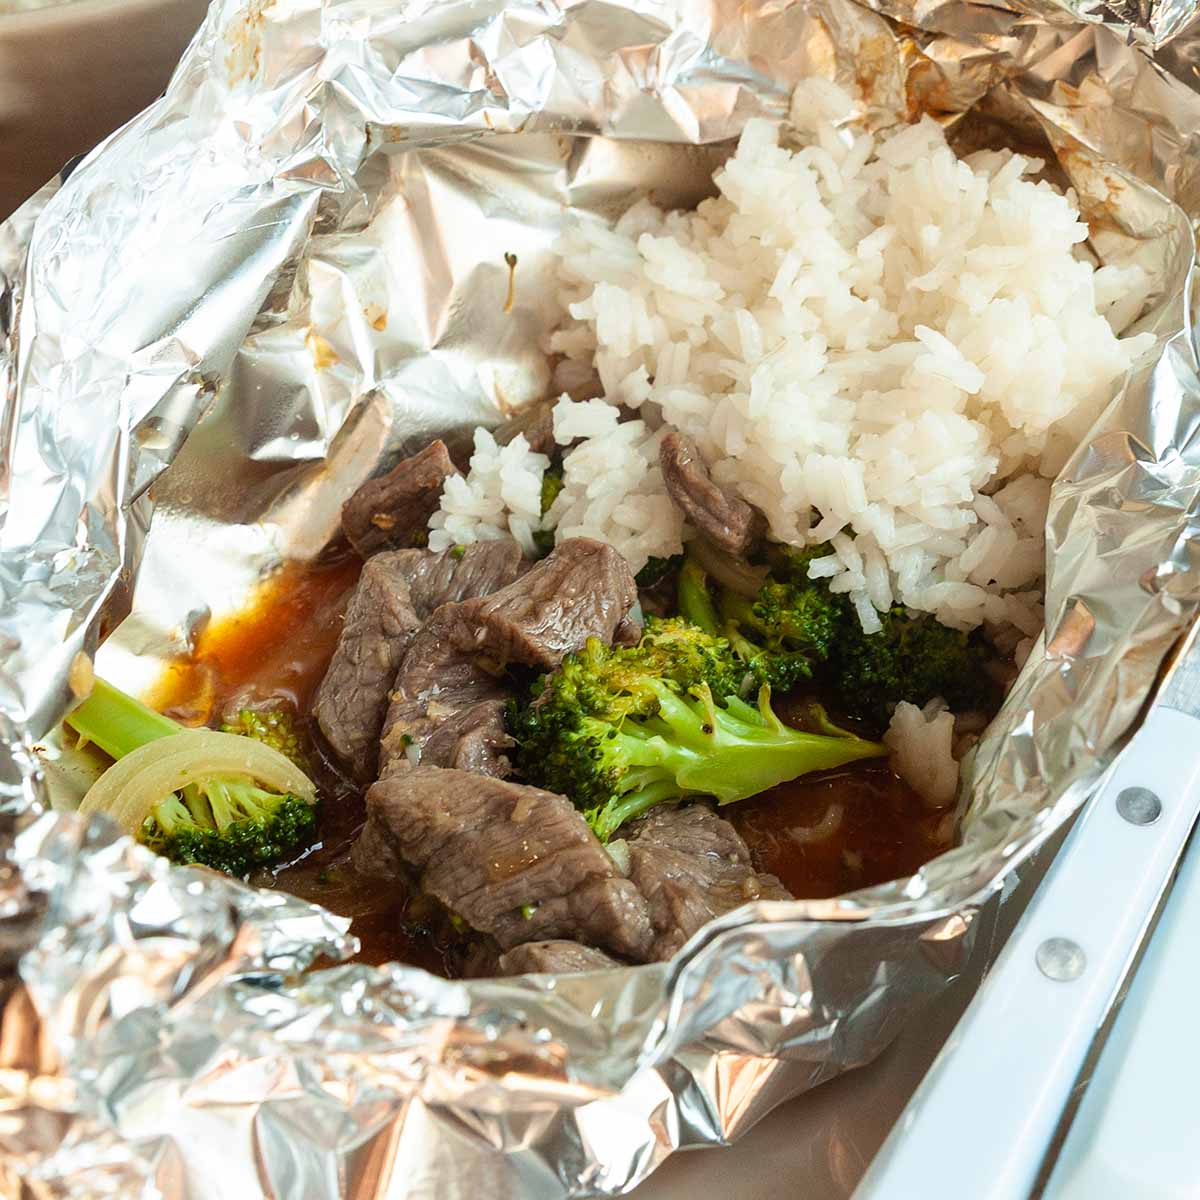
    Two beef and broccoli foil packets with a bowl of rice on the side.

    If you're a fan of beef and broccoli, these foil packets are for you. A quick trip across the grill or over your campfire transforms crisp broccoli, onion, and strips of tender sirloin steak into a flavor-packed meal that rivals any take-out version.

    [feast_advanced_jump_to]

    Ingredients and Substitutions

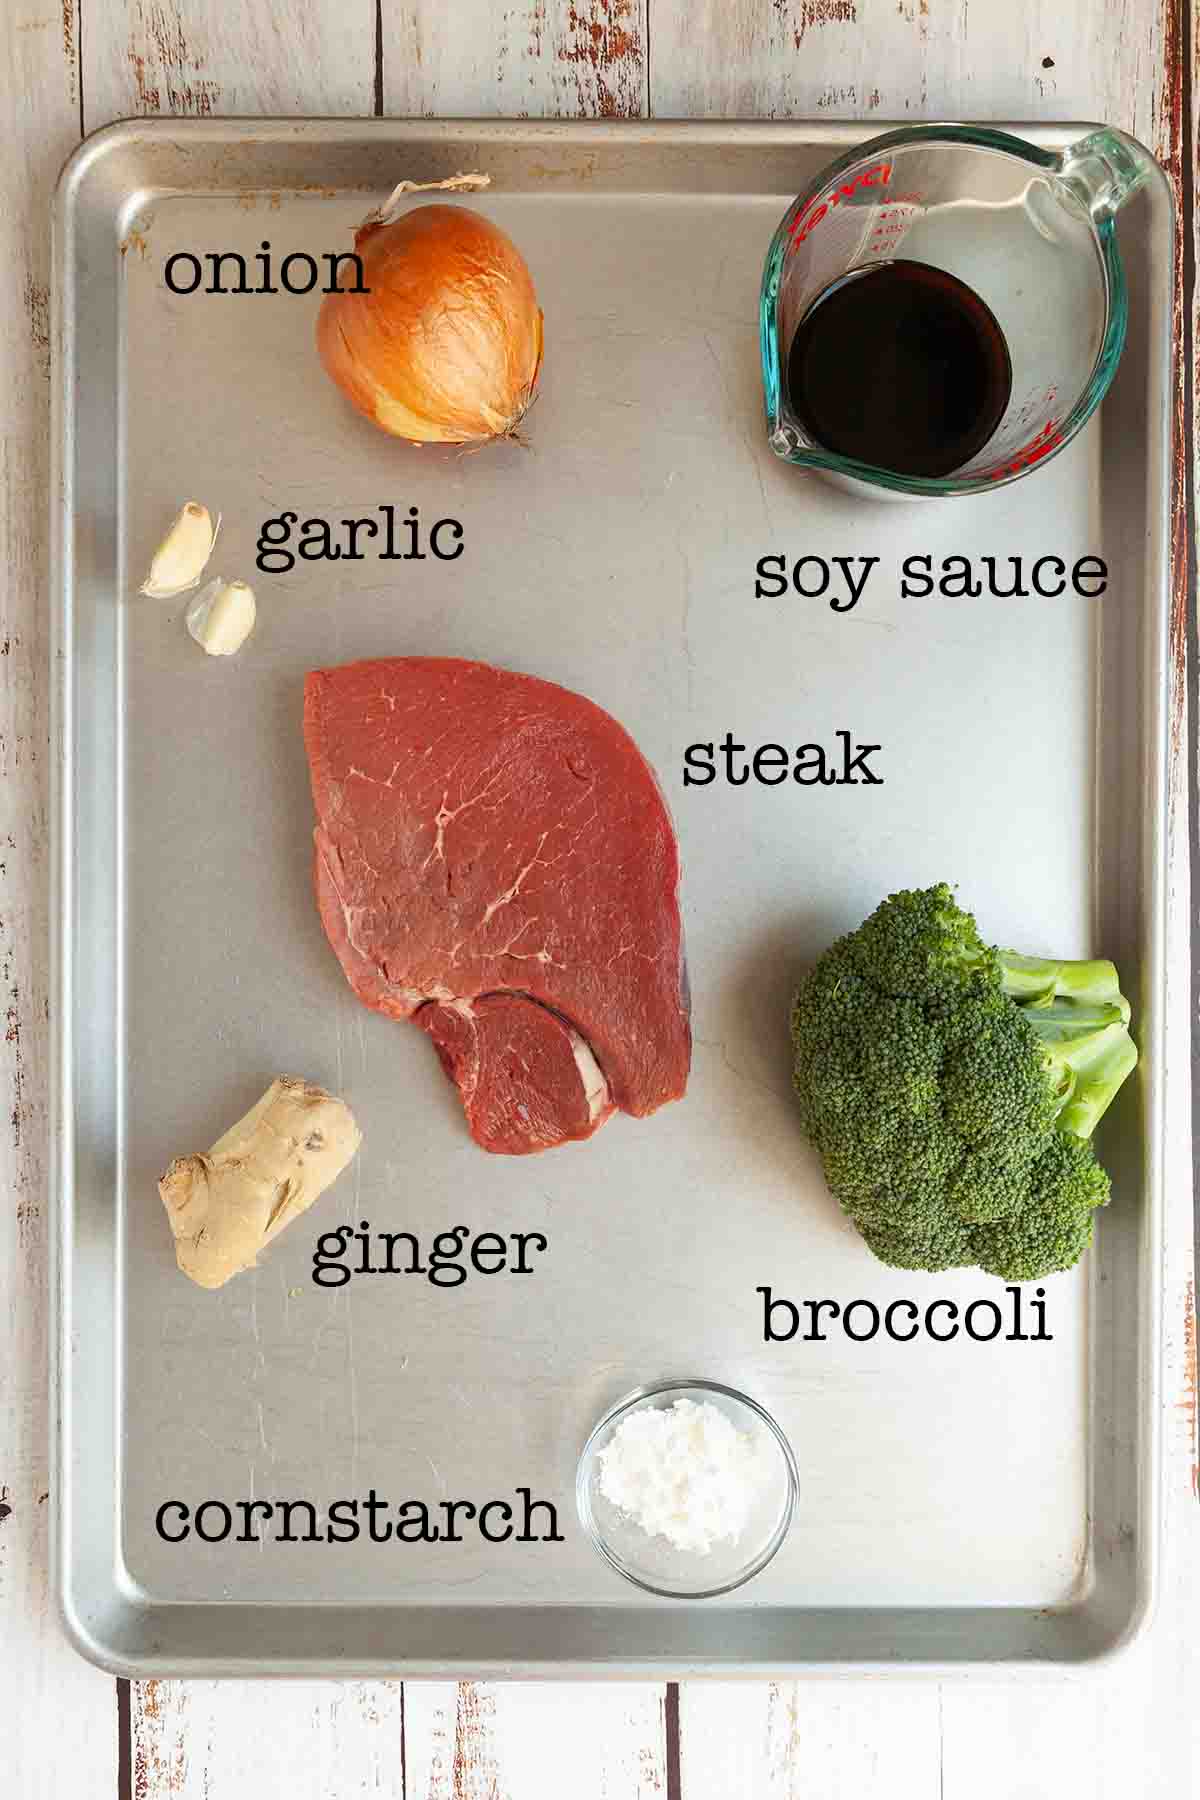
    Ingredients for beef and broccoli foil packets--beef, garlic, onion, ginger, broccoli, soy sauce, and steak.
    • Steak--I use sirloin steak for this beef and broccoli recipe because it has plenty of flavor, but isn't overly fatty, and is relatively inexpensive. You can splurge on a more expensive cut of meat, like striploin or tenderloin, but it isn't really necessary for this recipe. Cut the strips of steak as thin as you can to get the most tender result.
    • Broccoli--Choose broccoli that is bright green with firm stems. Cut the florets into equal-sized pieces so that they all cook evenly.
    • Soy sauce--Low sodium soy sauce works well here, but if you need to keep the recipe gluten-free, you can swap in tamari.

    How to Make Beef and Broccoli in a Foil Packet

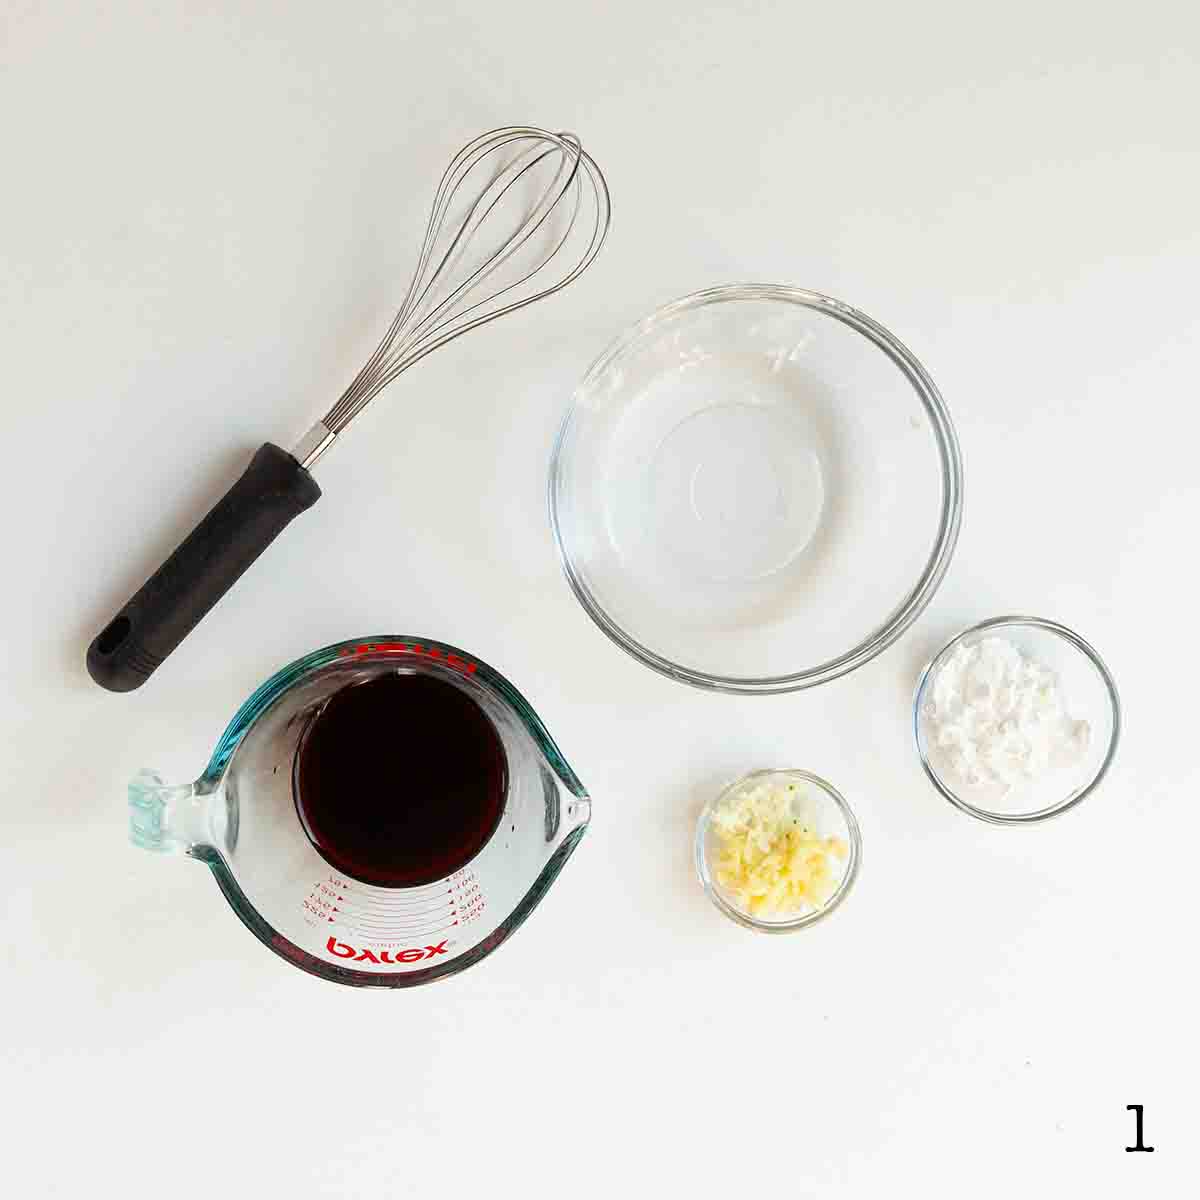
    A bowl of ginger and garlic, cornstarch, and soy sauce with a whisk on the side.

    1. In a medium bowl, whisk the soy sauce, water, cornstarch, ginger, garlic, and pepper together.

    A bowl with sliced steak, broccoli, and onion.

    2. Combine the steak, broccoli, and onion in a large bowl. Pour the sauce over and mix well.

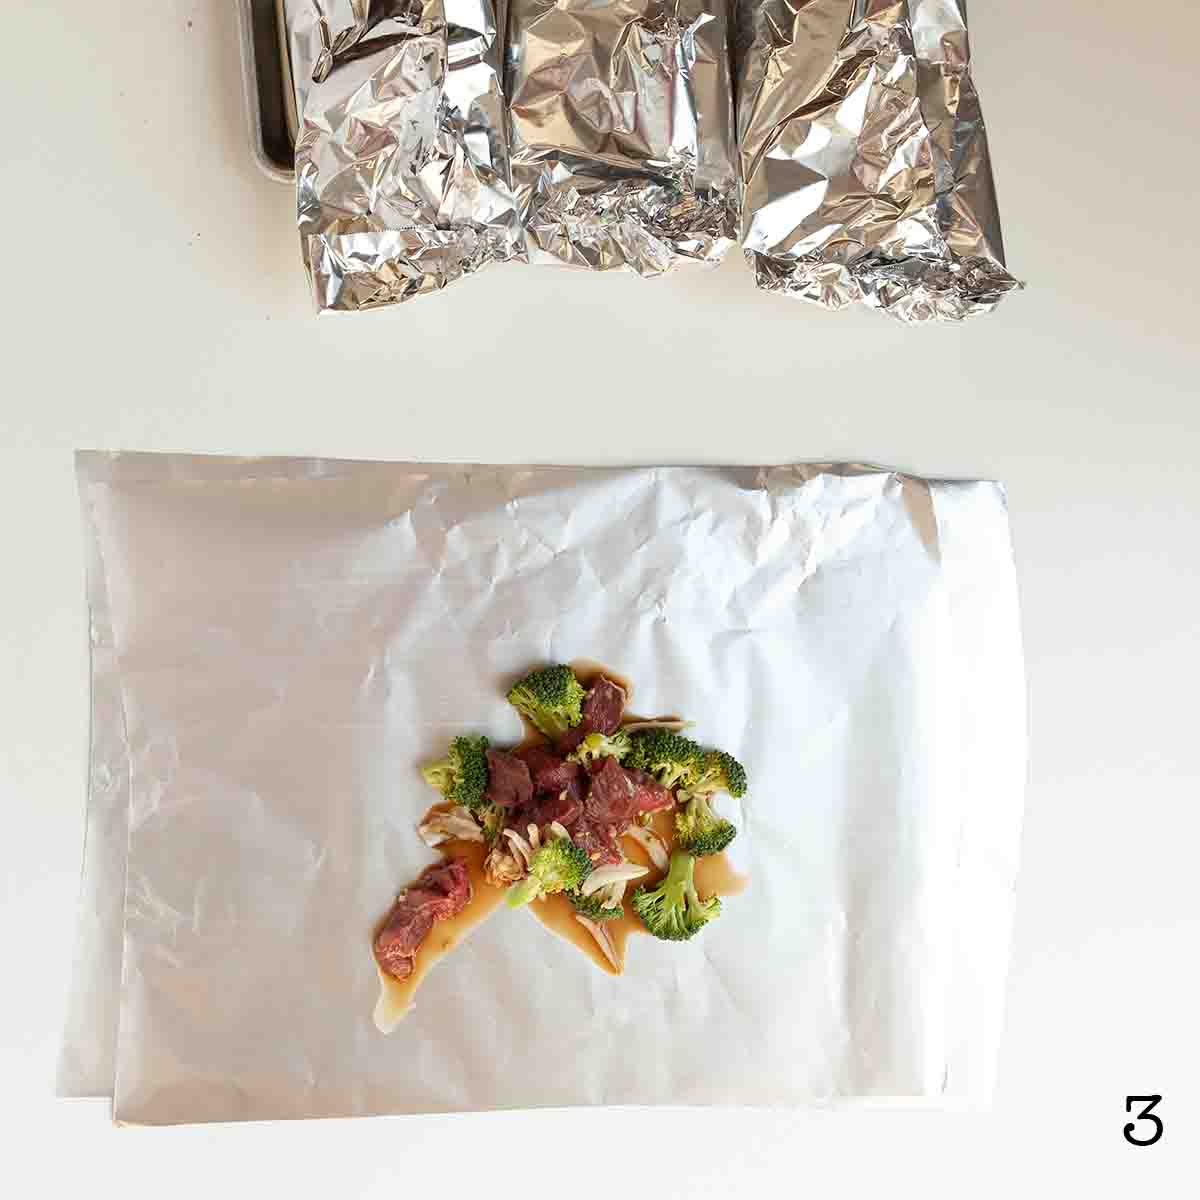
    A scoop of beef and broccoli mixture on a foil sheet.

    3. Divide the beef and broccoli mixture among four double layers of aluminum foil. Fold up the foil to create individual foil packets.

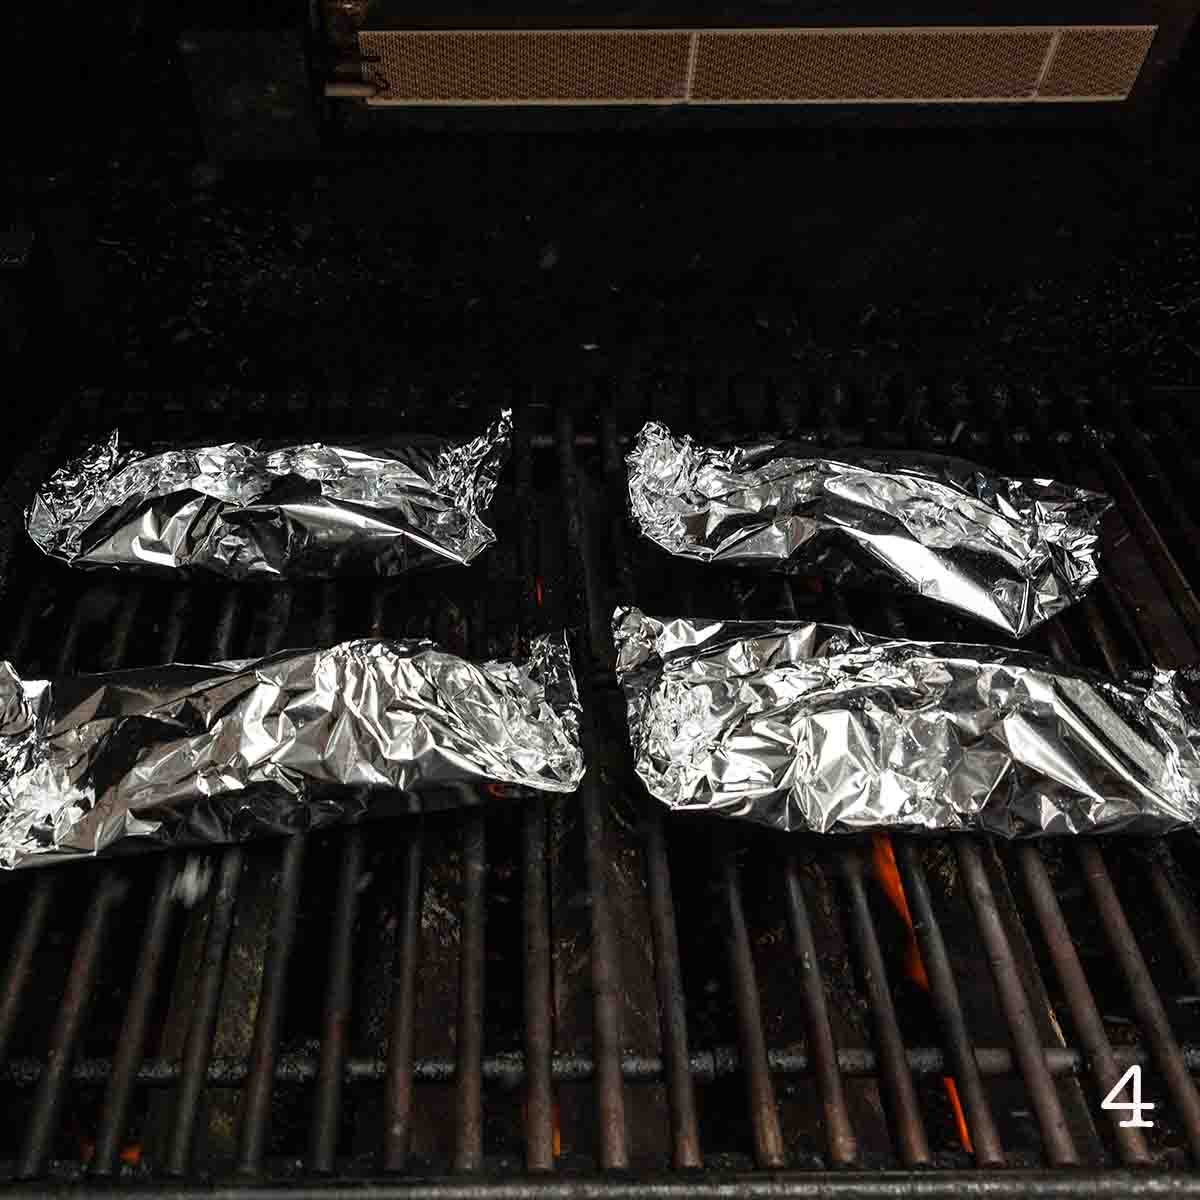
    Four foil packets cooking on the grill.

    4. Cook on a grill over medium-low heat, or over a campfire until the steak is cooked and the broccoli is just tender.

    FAQs

    Can I cook them in the oven?

    Yes. Prepare the foil packets following the instructions, then cook them in a 375°F (190°C) oven until the beef is cooked through and the broccoli is just tender, 8 to 10 minutes.

    What should I serve with these?

    Steamed rice on the side is a great choice for these Asian-inspired foil packets.

    What's the best way to fold a foil packet?

    Place your food in the center of the foil. Bring the long edges of the foil up to meet, and then fold them over a couple of times, creating a seam that runs over the top of your food. Then working with one end at a time, fold it over a few times to seal the end.

    I like this method for folding a foil packet because it's easy to open the seal on top to check them for doneness and then close, if necessary, and it also creates an easy pouch for eating when opened.

    Tips and Troubleshooting

    • For easier slicing, freeze the steak for 15 minutes before slicing.
    • This recipe is suitable for dairy-free diets. To make it gluten-free, use tamari instead of regular soy sauce.
    A foil packet with beef, broccoli, and rice.

    More Beefy Foil Packet Recipes You'll Love

    A steak fajita foil pack with strips of steak, red pepper, and onion.
    Steak Fajita Foil Packs
    A foil packet with shrimp, steak, corn, red onion and a piece of garlic bread on top.
    Surf and Turf Foil Packets

    Tried This Recipe?

    If you've tried this recipe, please leave a comment below. Follow me on Instagram, Facebook, YouTube, or Pinterest for more great camping and grilling recipes.

    Recipe

    A foil packet with beef, broccoli, and rice.

    Beef and Broccoli Foil Packets

    A woman's face.Angie Zoobkoff
    Your favorite take-out dish just got reinvented as an easy foil packet meal that's ready in just 20 minutes.
    No ratings yet
    Print Recipe Pin Recipe
    Prep Time 10 minutes mins
    Cook Time 10 minutes mins
    Total Time 20 minutes mins
    Course Main Course
    Cuisine American, Chinese
    Servings 4 servings
    Calories 207 kcal

    Equipment

    • Heavy duty aluminum foil

    Ingredients
      

    • ¼ cup low-sodium soy sauce
    • ¼ cup water
    • 2 tablespoons cornstarch
    • 2 teaspoons grated or minced ginger
    • 2 cloves garlic minced
    • ¼ teaspoon freshly ground black pepper
    • 1 pound sirloin steak thinly sliced
    • 3 cups broccoli florets
    • ½ medium onion thinly sliced

    Instructions
     

    • Preheat the grill for medium-low heat (375°F) or prepare a campfire and let it burn down to hot coals or low flame.
    • In a medium bowl, whisk the soy sauce, water, cornstarch, ginger, garlic, and pepper together.
    • Combine the steak, broccoli, and onion in a large bowl.
    • Pour the sauce over the steak and vegetables and mix well to combine.
    • Arrange four double layers of aluminum foil on a flat surface. Divide the beef and broccoli mixture equally among the foil sheets.
    • Fold up and seal each foil packet.
    • Cook over direct heat until the steak is cooked through and the broccoli is tender, 8 to 10 minutes.
    • Carefully open each foil packet to let the steam escape, then serve.

    Notes

    • Freeze your steak--For easier slicing, freeze the steak for 15 minutes before slicing.
    • Dietary--This recipe is suitable for dairy-free diets. To make it gluten-free, use tamari instead of regular soy sauce.

    Nutrition

    Serving: 1 foil packetCalories: 207kcalCarbohydrates: 12gProtein: 27gFat: 5gCholesterol: 70mgSodium: 625mgFiber: 2gSugar: 2g
    Keyword 20 minute meals, beef and broccoli, foil pack cooking, foil packets
    Tried this recipe?Let us know how it was!

    September 17, 2025 Camping

    Stuffed Pears

    These Dutch oven stuffed pears are an amazing autumn dessert that you can make at camp or in your oven at home. Filled with a just-sweet-enough mixture of oats, brown sugar, and dried cranberries, these juicy baked pears can easily double as breakfast the next morning.

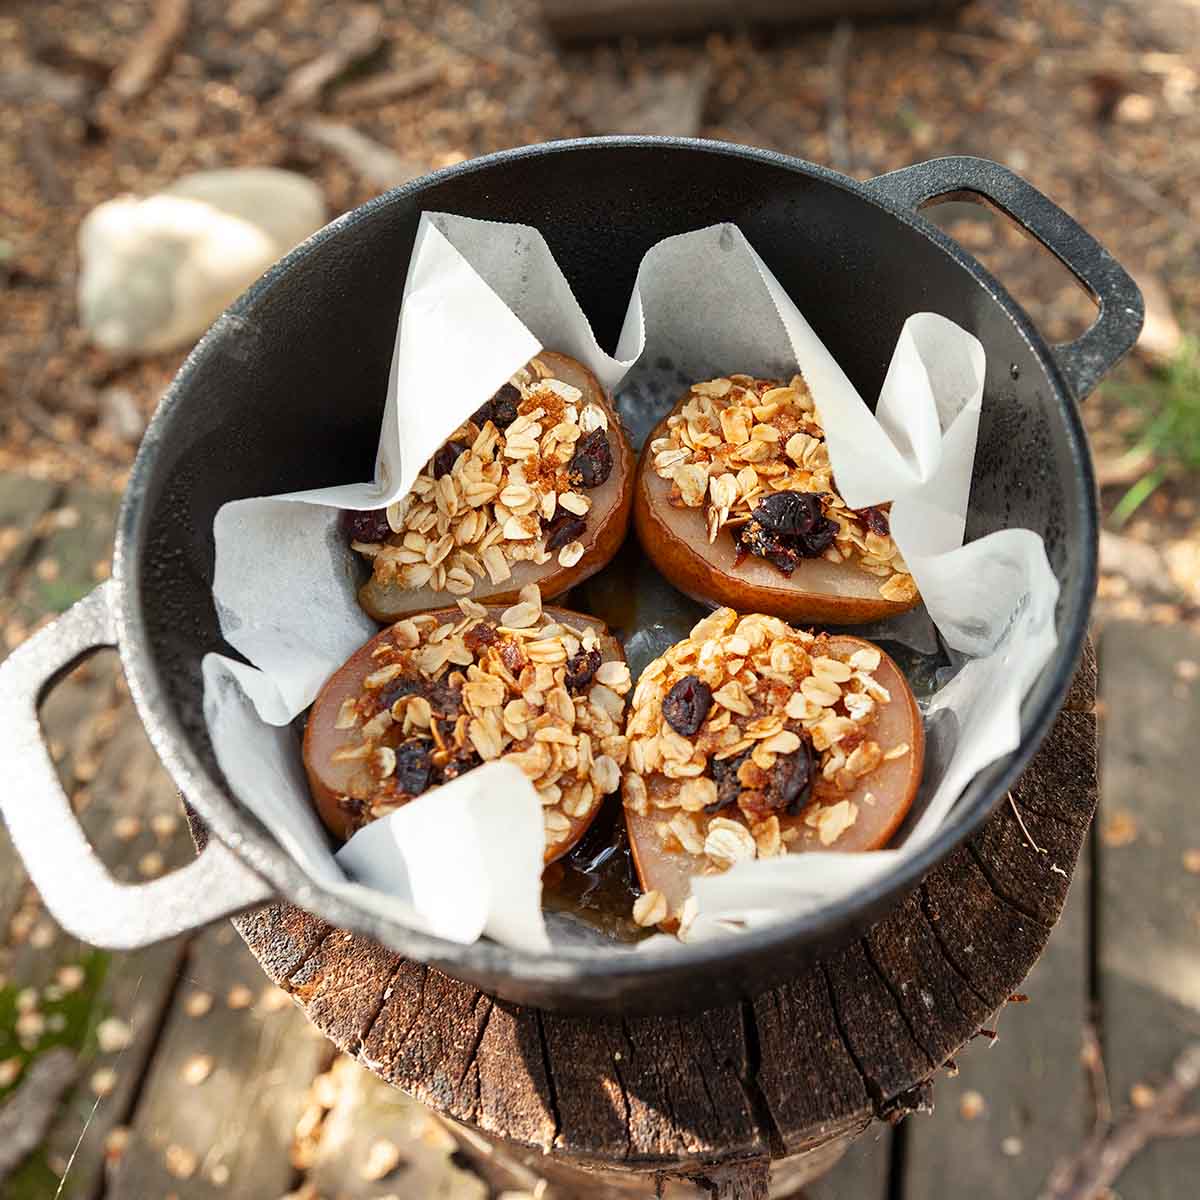
    Four stuffed pears in a cast iron Dutch oven.

    By the time we reach fall camping season, everyone in my house is a little tired of the s'more-inspired desserts, and are craving those cozy fall flavors and crisp fruit, so we lean heavily into apple and pear crisps, pumpkin cheesecake, and these oh-so-simple-yet-spectacular Dutch oven stuffed baked pears.

    [feast_advanced_jump_to]

    Ingredients and Substitutions

    Ingredients for stuffed pears--dried cranberries, pears, oats, brown sugar, butter, and ginger.
    • Pears--Use pears that hold their shape well during baking, such as Anjou or Bosc pears. Avoid using Bartlett as they tend to become mushy and fall apart. I like Anjou best for this stuffed pear recipe, as their round shape makes it easy to fit them into the Dutch oven. Look for pears that give slightly when gently pressed, but aren't mushy or bruised. Avoid overly soft fruit, which will fall apart, and very underripe fruit, which won't soften during baking.
    • Oats--Use regular or old-fashioned rolled oats for this recipe, not quick oats.
    • Butter--I used salted butter here for ease of preparation, but if you prefer unsalted, add a pinch of salt to the oat mixture before scooping it into the pears.
    • Dried cranberries--I recommend using sweetened dried cranberries as this isn't an overly sweet dessert.

    How to Bake Stuffed Pears in a Dutch Oven

    A small bowl with brown sugar, oats, ginger, and dried cranberries.

    1. Combine the oats, brown sugar, dried cranberries, and ginger in a medium bowl.

    Four pear halves with the cores scooped out.

    2. Slice the pears in half lengthwise, and scoop the core out of the center of each half.

    Four unbaked stuffed pears in a cast iron Dutch oven.

    3. Stuff each pear with a spoonful of the filling and top with a pat of butter. Arrange the pear halves in a parchment-lined Dutch oven.

    A small Dutch oven with coals on the lid.

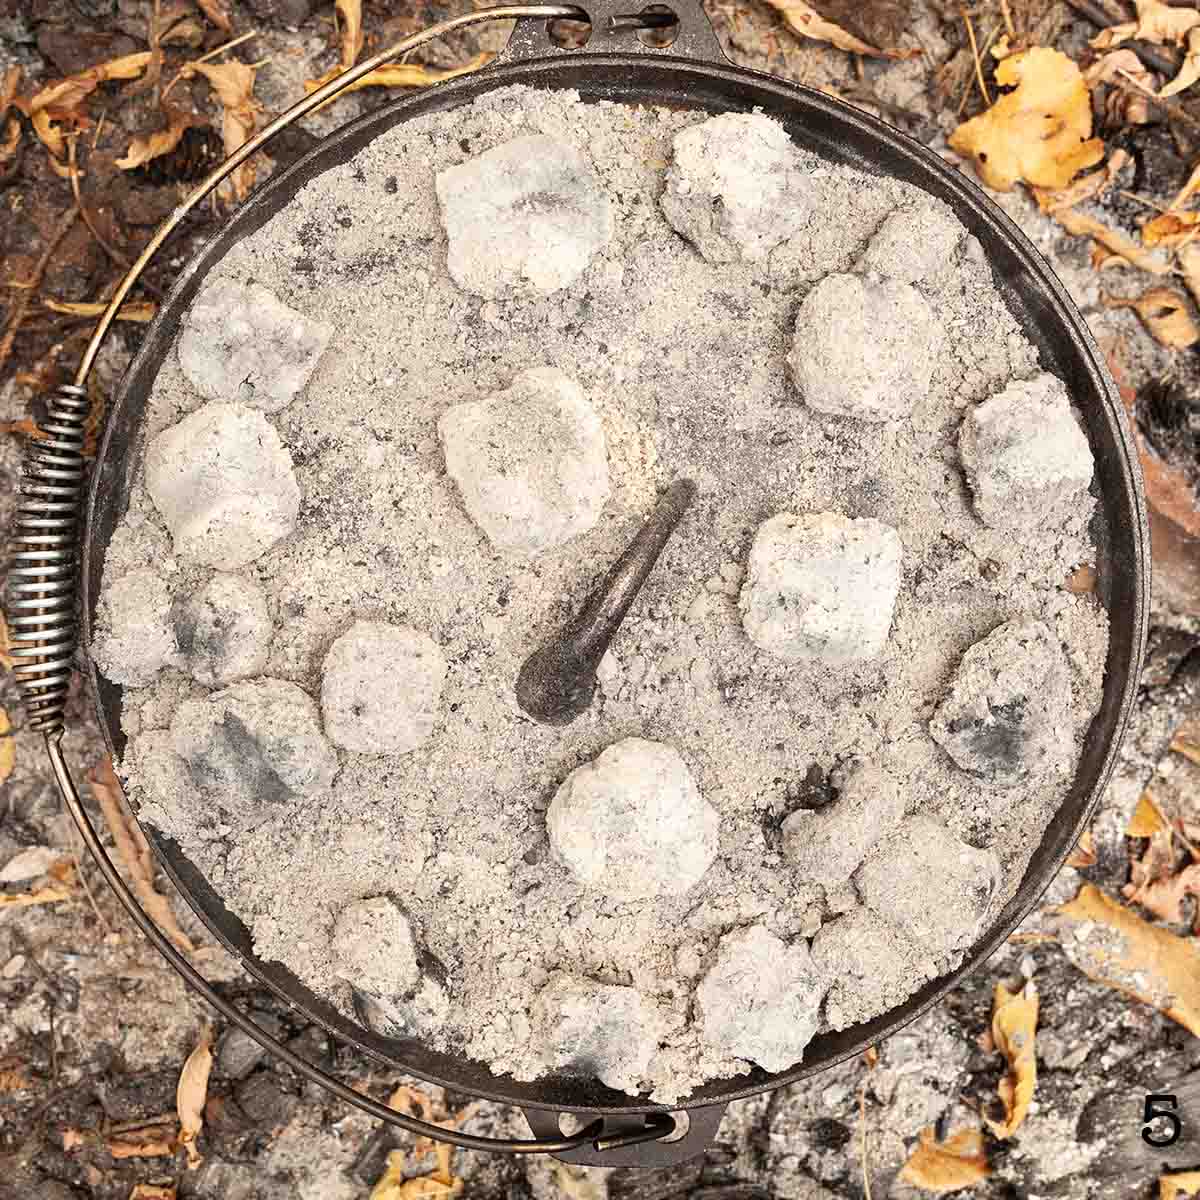
    4. Cook on a bed of hot coals or embers with coals on the lid, until the pears are soft.

    FAQs

    Can I cook them in the oven?

    Yes. Cook them in the Dutch oven, covered, at 350°F (180°C) until soft.

    What should I serve with these?

    If you're camping, I recommend serving these baked stuffed pears with some canned whipped cream. It's portable and doesn't take up much space in your cooler. If you're at home or have access to a freezer at camp, feel free to top with a scoop of vanilla ice cream.

    Can I double the recipe?

    If you want to double the recipe, use a 6 to 8 quart cast iron Dutch oven. You'll also need to increase the amount of coals to 8 on the bottom and 16 on top.

    Tips and Troubleshooting

    • To get ahead, mix up your stuffing and store in a resealable bag or airtight container before heading out to camp.
    • Ensure that you don't have any bits of parchment sticking out of the Dutch oven as it could ignite.
    • Since you're cooking in a Dutch oven outside, the cooking time can vary due to outside temperature and wind. If you're cooking on a very windy day, try to protect the Dutch oven with a barrier, such as a pile of rocks, or a tarp.
    A stuffed pear topped with whipped cream on a plate.

    More Dutch Oven Desserts You'll Love

    A chocolate cake in a Dutch oven.
    Dutch Oven Chocolate Cake
    Cranberry cobbler with biscuit topping in a Dutch oven.
    Dutch Oven Cranberry Cobbler

    Tried This Recipe?

    If you've tried this recipe, please leave a comment below. Follow me on Instagram, Facebook, YouTube, or Pinterest for more great camping and grilling recipes.

    Recipe

    Four stuffed pears in a cast iron Dutch oven.

    Stuffed Pears

    A woman's face.Angie Zoobkoff
    Just sweet enough to be called dessert, these spectacular Dutch oven stuffed pears can easily double as breakfast the next morning.
    No ratings yet
    Print Recipe Pin Recipe
    Prep Time 15 minutes mins
    Cook Time 1 hour hr
    Total Time 1 hour hr 15 minutes mins
    Course Breakfast, Dessert
    Cuisine American
    Servings 2 servings
    Calories 273 kcal

    Equipment

    • 2-quart Dutch oven
    • Parchment paper

    Ingredients
      

    • ¼ cup old-fashioned rolled oats
    • 2 tablespoons brown sugar
    • 2 tablespoons sweetened dried cranberries
    • ¼ teaspoon ground ginger
    • 2 ripe pears such as Anjou or Bosc
    • 2 tablespoons salted butter cut into 4 cubes
    • Whipped cream or ice cream for serving, optional

    Instructions
     

    • Prepare a chimney of coals or a bed of hot campfire embers. You'll need 12 coals to start cooking. Coals take about 15 minutes to heat and are ready to use when they turn white.
    • In a medium bowl, combine the oats, brown sugar, cranberries, and ginger. Stir to mix well.
    • Slice the pears lengthwise and use a sharp spoon or melon baller to scoop out the core from the center of each pear.
    • Scoop about ¼ of the oat mixture into the center of each pear where the core was removed. It's ok if it doesn't all fit in the hole where the core was. You can gently mound it on top of the pear.
    • Line a 2-quart Dutch oven with parchment paper and set each pear filling side up in the Dutch oven. They may be a little snug, but this is good as it helps to keep them from tipping over. Top each pear half with a square of butter.
    • Cover the Dutch oven and cook in your fire pit with 4 coals under the Dutch oven and 8 on the lid until the pears are tender, about 1 hour. You'll need to replace the coals after about 30 minutes of cooking.
    • Remove from the heat and let cool slightly before serving. Serve warm, with whipped cream or ice cream, if desired.

    Notes

      • Get ahead--Mix up your stuffing and store in a resealable bag or airtight container before heading out to camp.
      • Tuck in your parchment--Ensure that you don't have any bits of parchment sticking out of the Dutch oven as it could ignite.
      • Cook it in the oven--To make oven-baked stuffed pears, follow the recipe, baking in a 350°F oven until tender, about 1 hour.
    •  

    Nutrition

    Serving: 2 halvesCalories: 273kcalCarbohydrates: 44gProtein: 1gFat: 12gCholesterol: 31mgSodium: 88mgFiber: 6gSugar: 32g
    Keyword dutch oven cooking, dutch oven dessert, pear recipes
    Tried this recipe?Let us know how it was!

    September 11, 2025 Camping

    21 Cozy Fall Camping Recipes

    When you're heading out on your fall camping trip, you want hearty, nourishing foods that will keep you warm and satisfied. These 21 fall camping meals do exactly that, from breakfast through dessert.

    [feast_advanced_jump_to]

    Breakfast

    1
    A glazed cinnamon roll on a plate with an unglazed one in the background.
    Dutch Oven Cinnamon Rolls
    Swirled with cinnamon sugar and topped with sweet glaze, these campfire cinnamon rolls are the ultimate camping breakfast.
    Get the recipe: Dutch Oven Cinnamon Rolls
    2
    A cast iron skillet filled with chorizo and sweet potato hash with sliced avocado and cilantro on top.
    Chorizo Sweet Potato Hash
    This hearty and satisfying sweet potato chorizo hash is made in your cast iron skillet with fresh sausage, diced sweet potatoes, red onion, and is topped with avocado and cilantro.
    Get the recipe: Chorizo Sweet Potato Hash

    Drinks & Snacks

    3
    Two tall glass mugs filled with hot apple cider cocktail with a cinnamon stick resting on top.
    Hot Apple Cider Cocktail
    This combination of sweet mulled cider and spiced rum is the perfect way to stay warm on those cool autumn evenings.
    Get the recipe: Hot Apple Cider Cocktail
    4
    A small skillet filled with beer cheese dip, topped with shredded cheese, tomatoes, and scallions with chips on the side.
    Skillet Beer Cheese Dip
    This beer cheese dip with cream cheese, smoked Gouda, Cheddar, and beer is easy to make in your cast iron skillet. It can be made over the campfire, on your camp stove, or on a regular stove.
    Get the recipe: Skillet Beer Cheese Dip
    5
    Caramel being drizzled over a mug of hot chocolate and whipped cream.
    Salted Caramel Hot Chocolate
    A spoonful of salted caramel takes your favorite cool-weather drink to the next level.
    Get the recipe: Salted Caramel Hot Chocolate

    Stick-to-Your-Ribs Main Dishes

    6
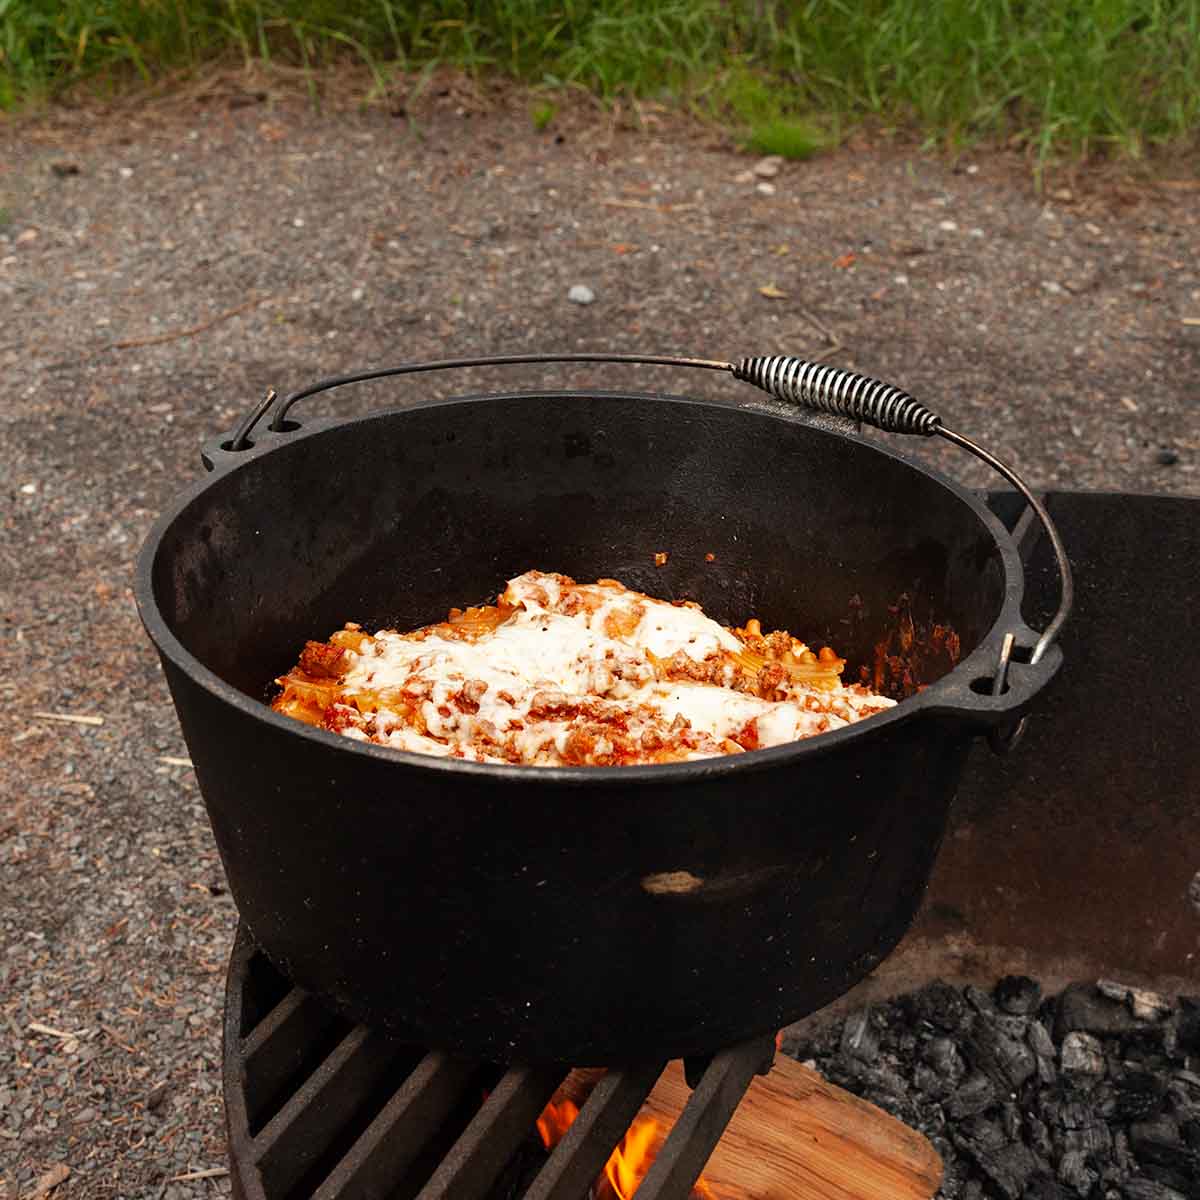
    A Dutch oven lasagna on a grate over a fire pit.
    Campfire Dutch Oven Lasagna
    With layers of beef, Italian sausage, noodles, and cheese, this Dutch oven lasagna is a camping recipe you'll have on repeat.
    Get the recipe: Dutch Oven Lasagna
    7
    A pot of cowboy stew and two bowls filled with the stew on a table.
    Texas Cowboy Stew
    This hearty stew, filled with ground beef, kielbasa, bacon, and vegetables is the perfect campfire Dutch oven meal.
    Get the recipe: Cowboy Stew
    8
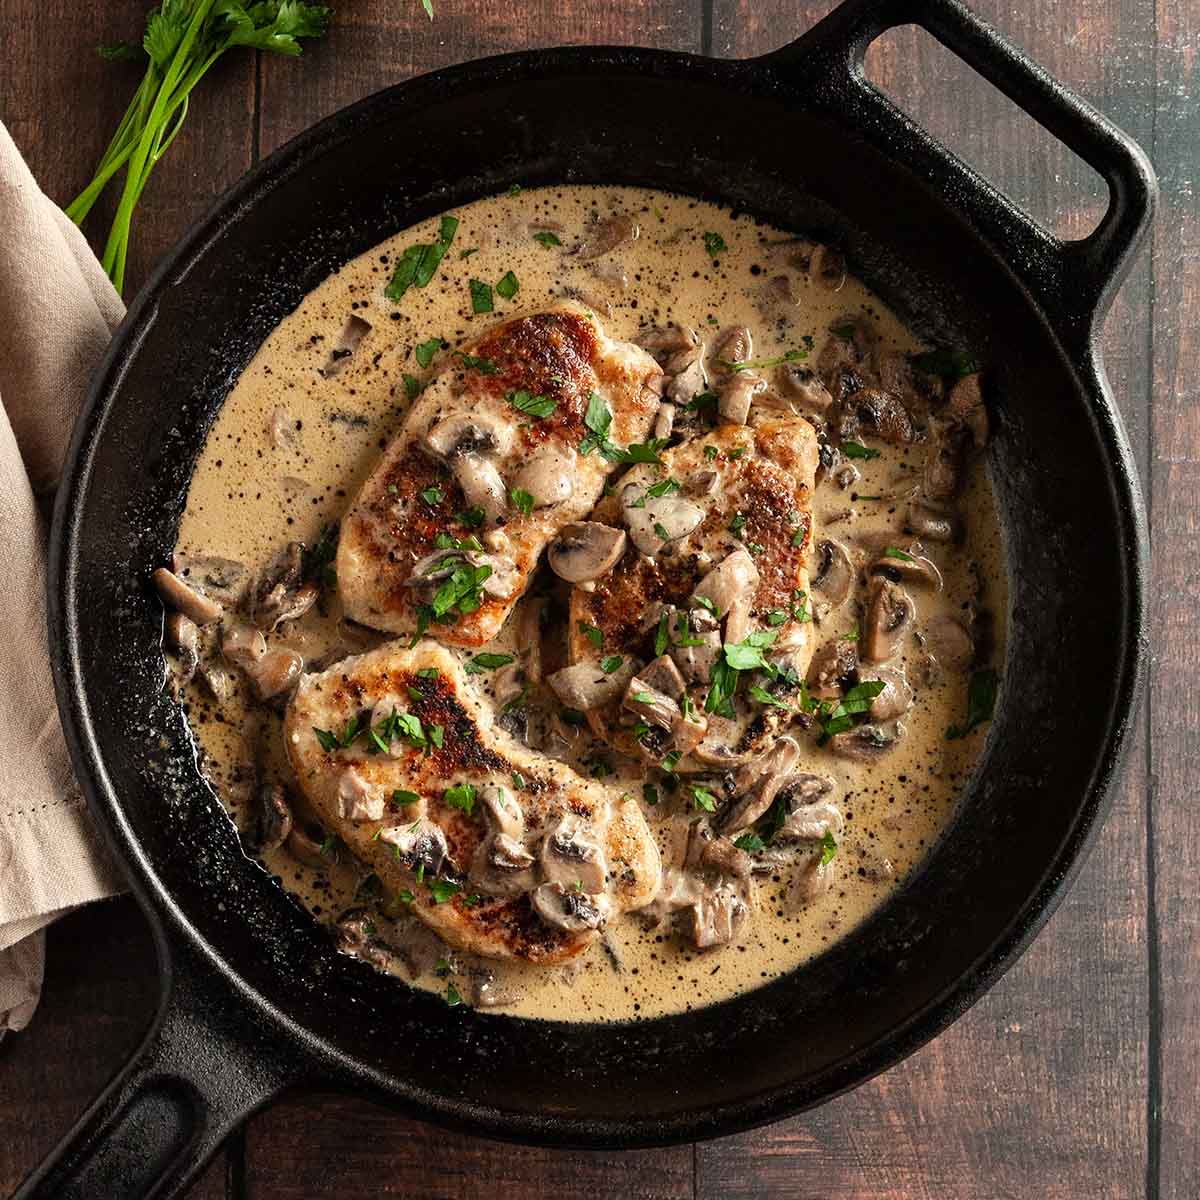
    Three pork chops in a cast-iron skillet with mushroom gravy on top and around the pork chops.
    Skillet Pork Chops with Mushroom Gravy
    This easy camping meal of cast-iron skillet pork chops with make-ahead mushroom gravy can be made on your camp stove, grill, or over the fire and is ready in just 20 minutes.
    Get the recipe: Skillet Pork Chops
    9
    A bowl of split pea soup with ham with a piece of flatbread inside.
    Dutch Oven Split Pea Soup
    This comforting Dutch oven soup is the most satisfying way to use up leftover ham whether you're camping or at home.
    Get the recipe: Split Pea Soup
    10
    A pot of campfire chili mac over a campfire.
    Campfire Chili Mac
    Homemade beef chili and creamy mac and cheese collide to create the ultimate camping comfort food.
    Get the recipe: Campfire Chili Mac
    11
    A skillet filled with seared chicken thighs and potatoes with lemon wedges nearby.
    Chicken and Potato Skillet
    This hearty and satisfying skillet chicken and potatoes requires only one pan, four ingredients, and 30 minutes of your time. It's the perfect for busy weeknight dinners or a relaxed camping meal.
    Get the recipe: Chicken and Potato Skillet
    12
    A bowl of mussels with two pieces of garlic bread on the side.
    Dutch Oven Mussels
    Gently steamed in a buttery beer broth, these Dutch oven mussels are the ultimate camping seafood dinner.
    Get the recipe: Dutch Oven Mussels
    13
    A partially sliced meatloaf on a platter with a bowl of peas and a bowl of mashed potatoes nearby.
    Dutch Oven Meatloaf
    Take your Dutch oven cooking to the next level with this simple classic beef meatloaf, topped with tangy glaze.
    Get the recipe: Dutch Oven Meatloaf
    14
    A Dutch oven filled with tuna noodle casserole.
    Dutch Oven Tuna Noodle Cassserole
    This creamy, comforting, classic tuna noodle casserole gets transformed into a camping-friendly one-pot meal that can be made without a cooler or refrigerator. Make it on your camp stove, stovetop, or over the campfire.
    Get the recipe: Tuna Noodle Casserole
    15
    Two bowls of Dutch oven turkey chili with cornbread and sour cream on the side.
    Dutch Oven Turkey Chili
    Smoky, spicy, rich, and hearty, this turkey chili has everything going for it!
    Get the recipe: Turkey Chili

    Satisfying Side Dishes

    16
    A foil packet filled with cheesy potatoes with a dish of sour cream on the side.
    Cheesy Foil Packet Potatoes
    These buttery, cheesy potatoes in foil can be made on the grill, over the campfire, or in your oven for an easy, oh-so-satisfying side dish.
    Get the recipe: Cheesy Foil Packet Potatoes
    17
    A Dutch oven filled with baked beans on a campfire grate.
    Dutch Oven Baked Beans
    Made with canned navy beans, bacon, onion, and a sweet and tangy sauce, this hearty crowd-pleasing dish will keep all of your campers happy.
    Get the recipe: Dutch Oven Baked Beans
    18
    Creamy mac and cheese in a pot with a wooden spoon resting in it.
    Camping Mac and Cheese
    This creamy one-pot macaroni and cheese is made in just one pot with a handful of pantry ingredients and requires only 20 minutes of your time.
    Get the recipe: Camping Mac and Cheese

    Drool-Worthy Desserts

    19
    A chocolate cake in a Dutch oven.
    Dutch Oven Chocolate Cake
    Dotted with chocolate chips and laced with ribbons of fudgy chocolate pudding, this cake is the ultimate Dutch oven camping dessert.
    Get the recipe: Dutch Oven Chocolate Cake
    20
    Two open foil packet pear crisps surrounded by pears.
    Foil Packet Pear Crisp
    This juicy foil packet pear crisp is a simple autumn dessert featuring tender spiced pears topped with a crispy oat mixture. Make it over the campfire, on your grill, or in the oven.
    Get the recipe: Foil Packet Pear Crisp
    21
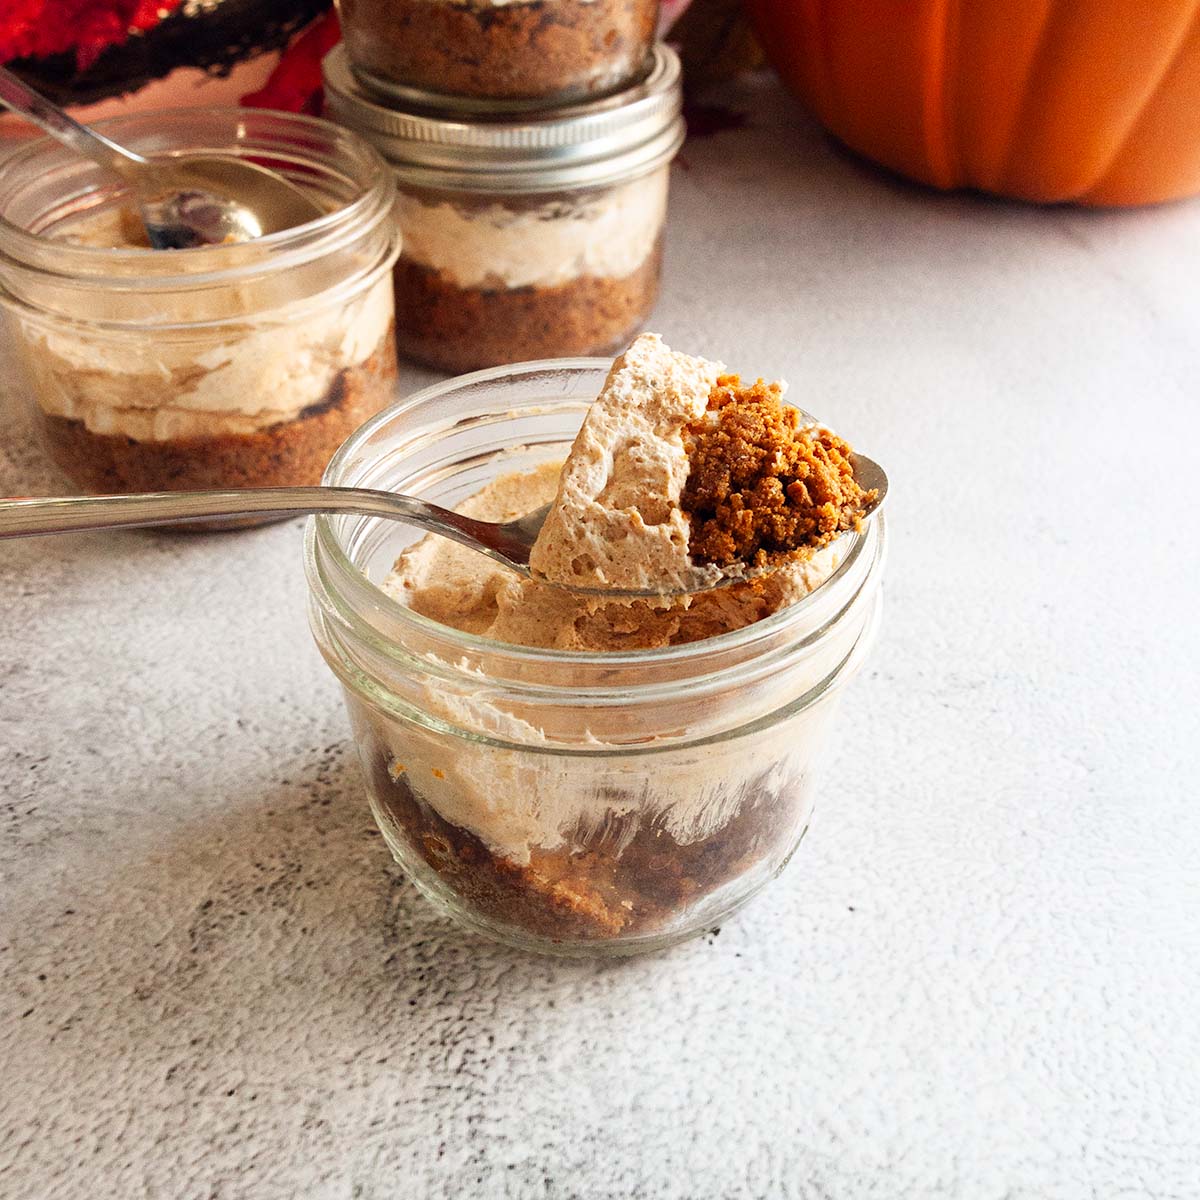
    A spoonful of no-bake mini pumpkin cheesecake resting on top of a mason jar filled with the cheesecake.
    Mini Pumpkin Cheesecake
    These no-bake mini pumpkin cheesecakes are perfect for packing along on your Thanksgiving camping trip. They're made in advance and can be stashed in your cooler or fridge for up to 4 days. They'll never last that long though as everyone will be fighting over these easy treats that are made with crunchy Biscoff cookie crust and creamy spiced whipped topping.
    Get the recipe: Mini Pumpkin Cheesecake

    September 2, 2025 Camping

    Foil Pack Chicken Nachos

    These foil pack chicken nachos combine crisp tortilla chips, leftover chicken, taco sauce, cheddar cheese, and all your favorite nacho fixings to create an easy, mess-free (no clean-up!) camping lunch or snack.

    A foil packet of chicken nachos with salsa and sour cream on the side.

    If you've got leftover chicken hanging around in your cooler or fridge, make these chicken nachos! They're super simple to toss together with your favorite nacho toppings and can be cooked on the grill or over the campfire in minutes, making this campfire chicken recipe a perfect camping meal for two.

    [feast_advanced_jump_to]

    Ingredients and Substitutions

    Ingredients for foil pack chicken nachos--chicken, chips, cheddar, and taco sauce.
    • Chicken--This chicken nacho recipe is a fantastic way to use up leftover cooked chicken, whether from a whole grilled chicken or shredded cooked chicken breasts or thighs. Feel free to swap in rotisserie chicken.
    • Chips--I like using the big restaurant-style tortilla chips for nacho recipes as the irregular edges prevent them from clumping together in the foil packet, but you can use your favorite or whatever you have on hand.
    • Cheddar cheese--I recommend using full-fat and to grate the cheese yourself. Pre-shredded cheese doesn't melt well.
    • Taco sauce--Use your favorite, whether medium, mild, or spicy!

    How to Make Chicken Nacho Foil Packets

    Chopped rotisserie chicken and taco sauce in a bowl.

    1. Combine the chicken and taco sauce in a medium bowl and mix to coat.

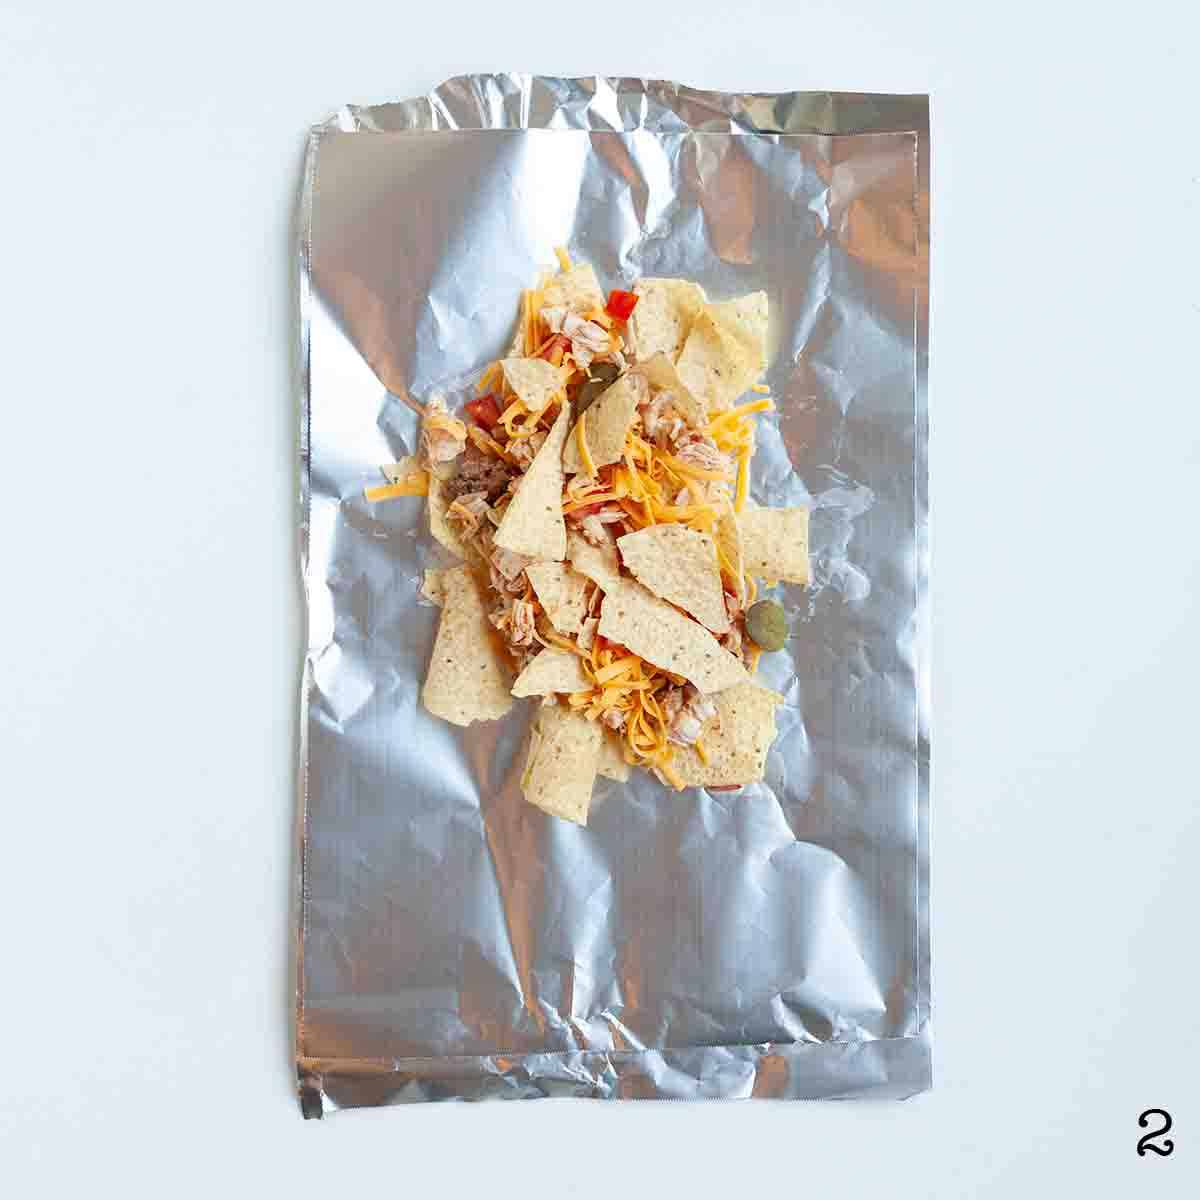
    Chicken nachos assembled on a foil packet.

    2. Layer the nacho ingredients on a double layer of aluminum foil. Repeat for a second foil pack.

    Two sealed foil packets.

    3. Fold up the foil to create two foil packets.

    Two foil packs on a grill.

    4. Cook over indirect heat on the grill or over the campfire until the cheese is melted and the chicken is warmed through.

    FAQs

    Can I cook them in the oven?

    You can, but if you're using the oven, I recommend just layering your nachos on a sheet pan and baking them in a 350°F (180°C) oven until the cheese is melted and the chicken is warmed through.

    What should I serve with these?

    Serve with any sauces that you like, such as salsa, pico de gallo, guacamole, or sour cream.

    Tips and Troubleshooting

    • Cook over indirect heat to avoid burning your chips. If you're cooking on a grill, try to have heat on either side of the indirect zone for even cooking. If that's not possible, rotate your foil packets 180° once during cooking.
    • This recipe is suitable for gluten-free diets, assuming you use a gluten-free taco sauce, such as Sky Valley Taco Sauce.
    Chicken nachos with avocado, cheese, chicken, refried beans, and chips.

    More Chicken Foil Pack Recipes You'll Love

    Two Cajun chicken foil packets on plates with forks on the side.
    Cajun Chicken Foil Packets
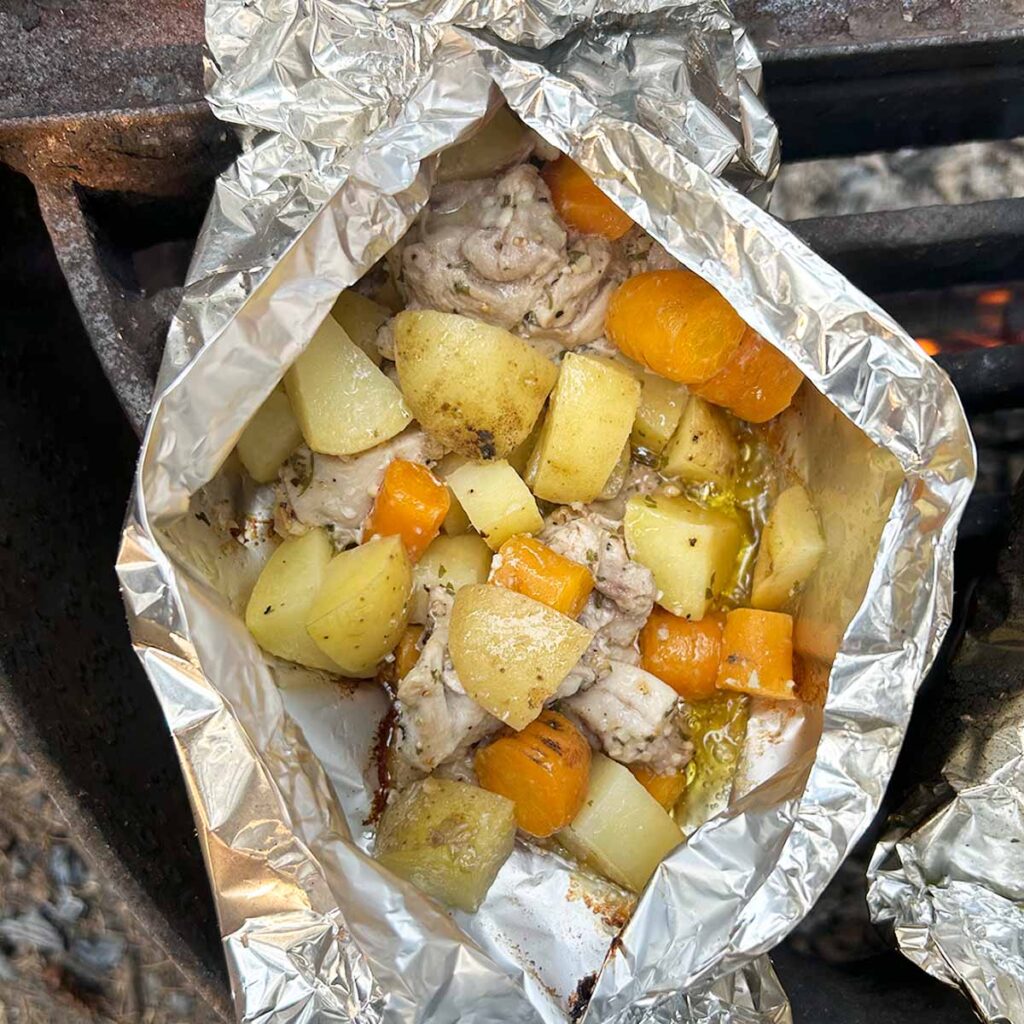
    Chicken, carrots, and potatoes in bite size pieces in a foil packet over the fire.
    Campfire Chicken Foil Packets

    Recipe

    A foil packet of chicken nachos with salsa and sour cream on the side.

    Foil Pack Chicken Nachos

    A woman's face.Angie Zoobkoff
    This easy camping lunch comes together in minutes and is the perfect way to use up leftover chicken.
    No ratings yet
    Print Recipe Pin Recipe
    Prep Time 10 minutes mins
    Cook Time 10 minutes mins
    Total Time 20 minutes mins
    Course Main Course, Snack
    Cuisine American
    Servings 2 servings
    Calories 614 kcal

    Ingredients
      

    • 1 cup chopped cooked chicken
    • 1 to 2 tablespoons taco sauce
    • 4 handfuls tortillas chips (about 4 oz | 113 g)
    • 1 cup shredded cheddar cheese
    • Optional toppings: refried beans, avocado, tomatoes, cilantro, pickled or fresh jalapeño slices, olives, and chopped onion
    • Salsa, sour cream, and guacamole for serving (optional)

    Instructions
     

    • Preheat the grill for indirect medium heat or prepare a bed of hot coals in your campfire.
    • In a medium bowl, combine the chicken and taco sauce. Mix well to evenly coat the chicken.
    • Arrange four large sheets of foil in two stacks (2 sheets each) to make two foil packets.
    • Place a large handful of chips in the center of each foil sheet and top with ¼ of the chicken and ¼ of the cheese, along with any other desired toppings.
    • Repeat the layering with another handful of chips, chicken, cheese, and any desired toppings.
    • Fold up each foil packet. Cook over indirect heat until the cheese is melted and the chicken is warmed through, 10 to 15 minutes.
    • Serve immediately with salsa, sour cream, and/or guacamole, if desired.

    Notes

    • Use indirect heat--Cook over indirect heat to avoid burning your chips. If you're cooking on a grill, try to have heat on either side of the indirect zone for even cooking. If that's not possible, rotate your foil packets 180° once during cooking.
    • Dietary--This recipe is suitable for gluten-free diets, assuming you use a gluten-free taco sauce, such as Sky Valley Taco Sauce.

    Nutrition

    Serving: 1 packetCalories: 614kcalCarbohydrates: 39gProtein: 39gFat: 34gCholesterol: 113mgSodium: 686mgFiber: 3gSugar: 1g
    Keyword campfire cooking, camping lunch ideas, chicken foil packets, foil pack cooking
    Tried this recipe?Let us know how it was!

    August 28, 2025 Cast Iron Skillet Recipes

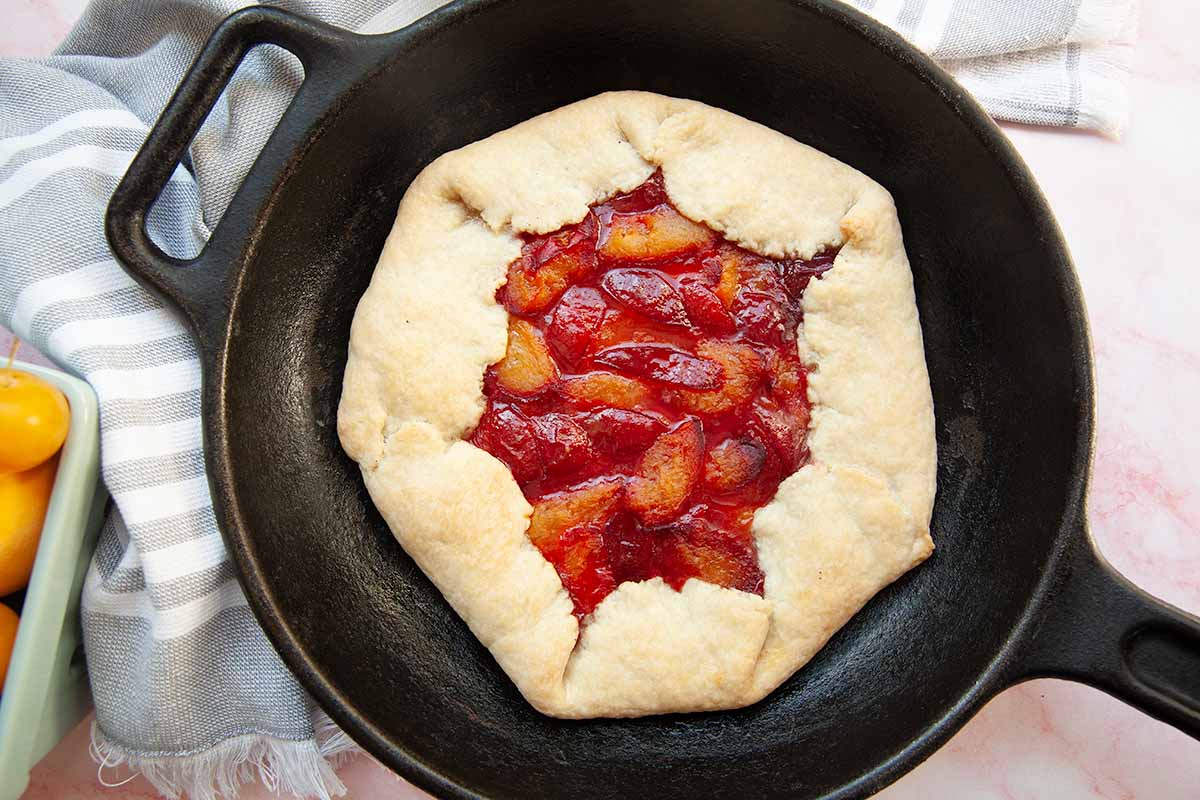
    Grilled Plum Galette

    If you love plums, make this grilled plum galette. This rustic summer dessert, starring juicy grilled plums in a crisp, buttery pie dough, is cooked in your cast iron skillet on the grill and is incredibly simple to make.

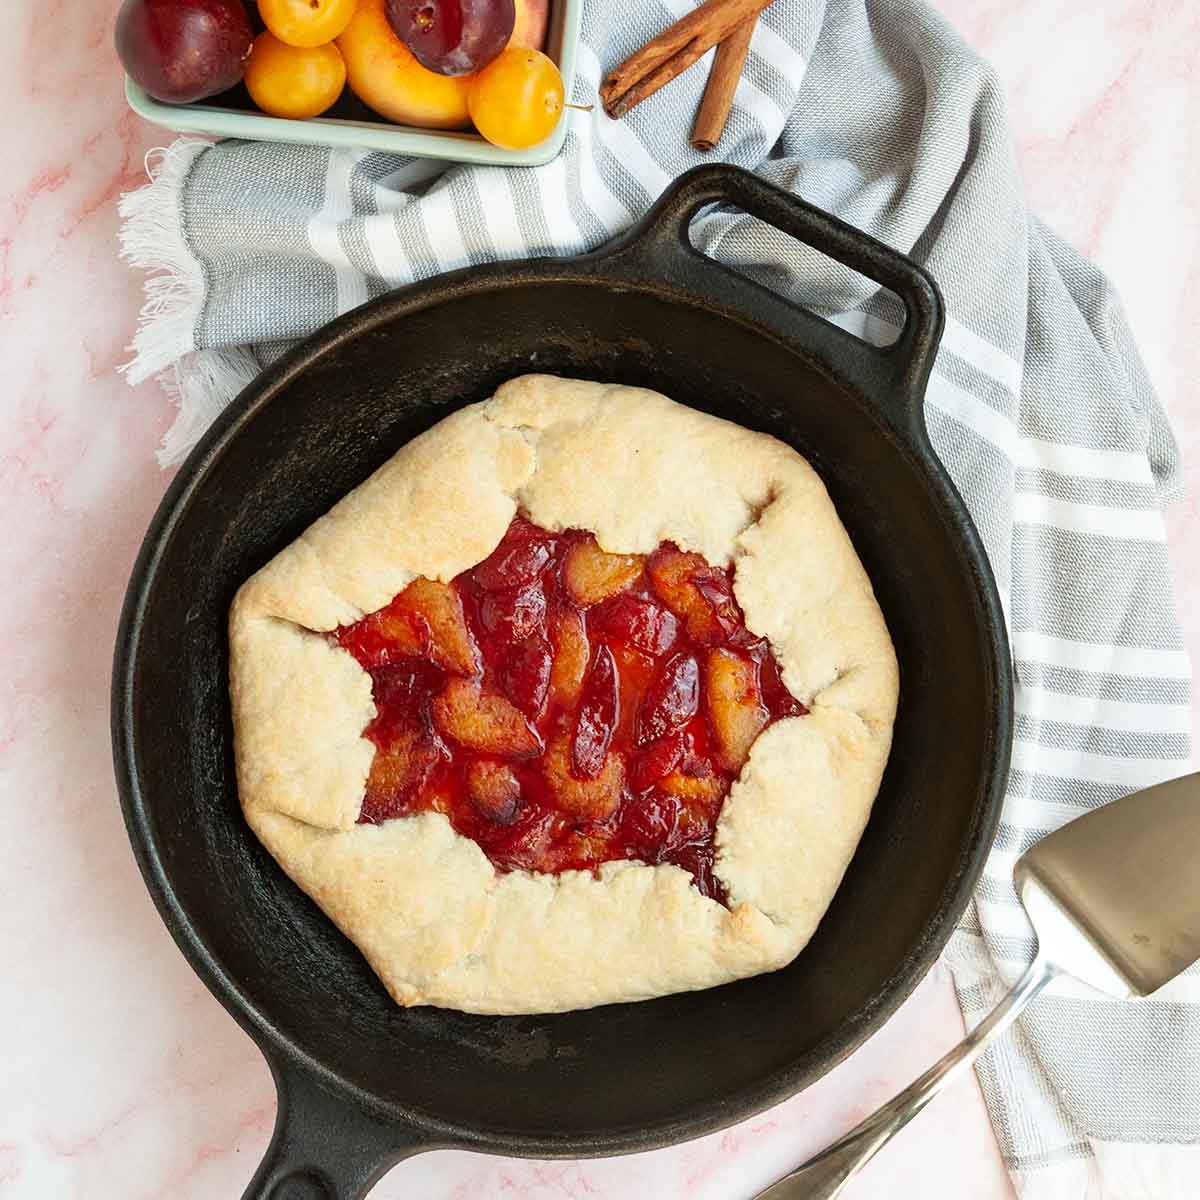
    A plum galette in a cast iron skillet.

    I'll be the first to admit that pie-making is not my strength. I struggle with getting the dough right and crimping the edges and avoiding shrinkage and the list goes on and on.

    So, for anyone who isn't a pie all-star, or just wants a simple rustic grilled dessert that lets the filling shine, this plum galette recipe is for you. The food processor dough is practically foolproof, and all you have to do is roll it out and fold it over the filling. After cooking on your grill, the sweet plums melt into a jammy filling so good that you'll be sneaking a second slice.

    [feast_advanced_jump_to]

    Ingredients and Substitutions

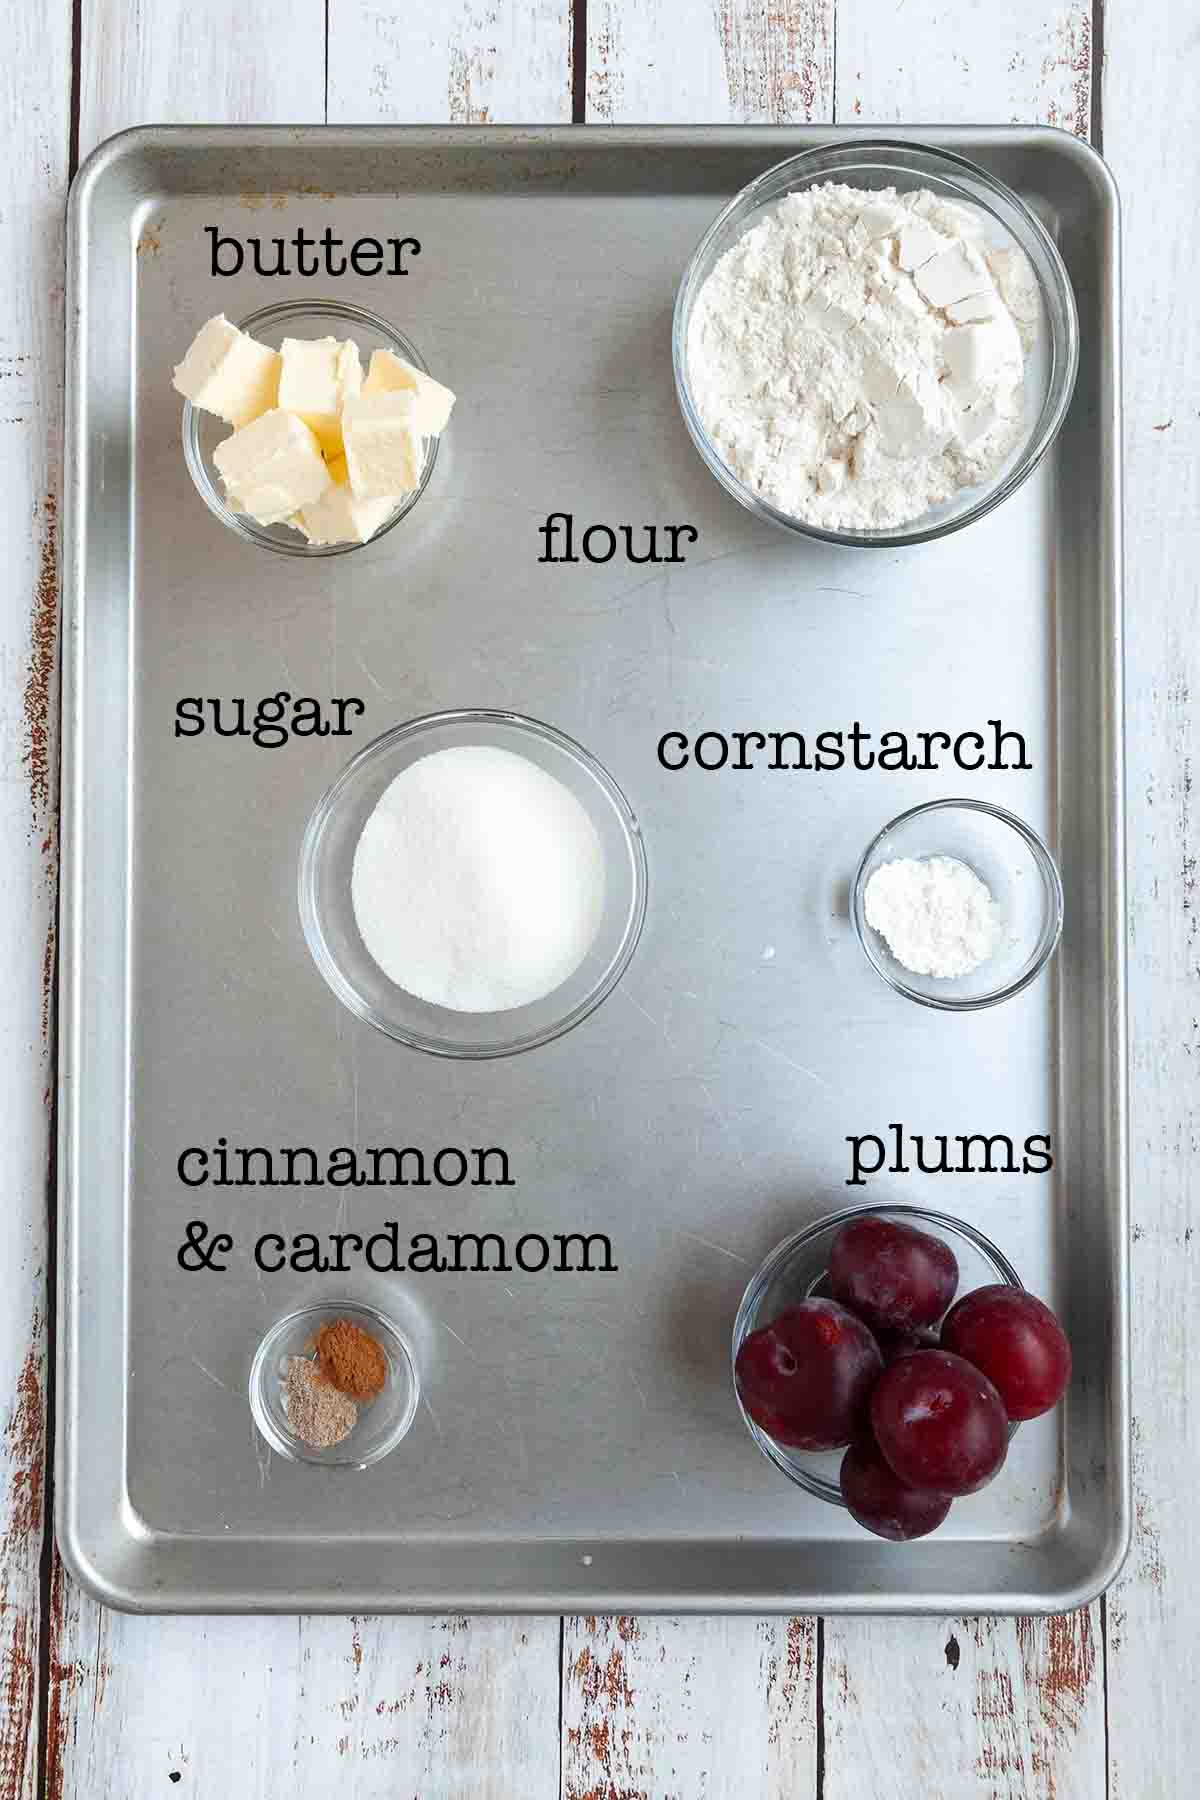
    Ingredients for plum galette--butter, flour, sugar, cornstarch, cinnamon, cardamom, and plums.
    • Butter--Use the best quality butter you can get, preferably unsalted. If you have to use salted, only add ¼ teaspoon of salt to the dough. Use cold butter for best results.
    • Plums--You can use any type of plum here. Fruit that is very ripe or overripe will be more difficult to slice and will also become very jammy in the finished galette. If you want to be able to arrange the plum slices decoratively, or you want firmer fruit pieces in the finished dessert, use slightly underripe fruit. Either way will be delicious.
    • Cornstarch--This is used for thickening the filling. You can also substitute tapioca starch.

    How to Make Plum Galette

    Flour in a food processor.

    1. Blitz the flour, 1 tablespoon sugar, and salt in a food processor.

    A food processor with flour and butter in it.

    2. Add the butter and pulse until the butter is coated in flour and is the size of small peas.

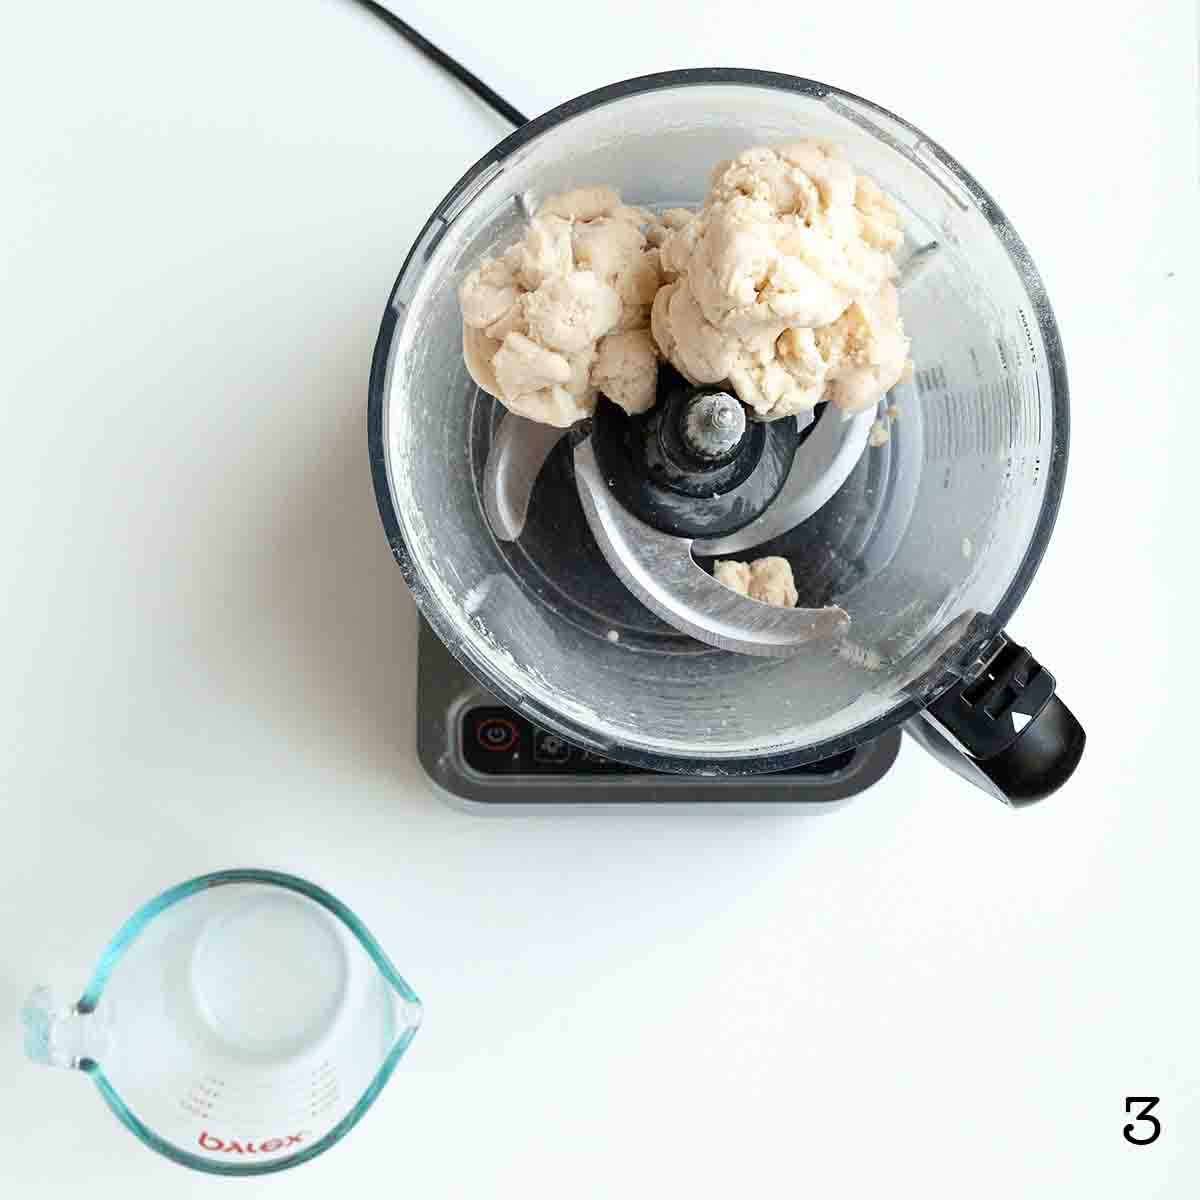
    Pie dough in a food processor.

    3. While the processor is running, pour in the water. Process until the dough comes together in a ball. Wrap the dough in plastic and chill for at least 1 hour.

    A bowl of sliced plums and a bowl of sugar.

    4. Combine the sliced plums with 2 tablespoons sugar. Let sit for 10 minutes.

    Rolled out dough with a rolling pin on top and a buttered cast iron skillet.

    5. Roll out the pie dough and place it in a buttered cast iron skillet.

    A bowl of plums, a bowl of sugar, a small bowl of cornstarch, and a bowl of spices.

    6. Drain the plum slices and combine them with the remaining sugar, spices, and cornstarch.

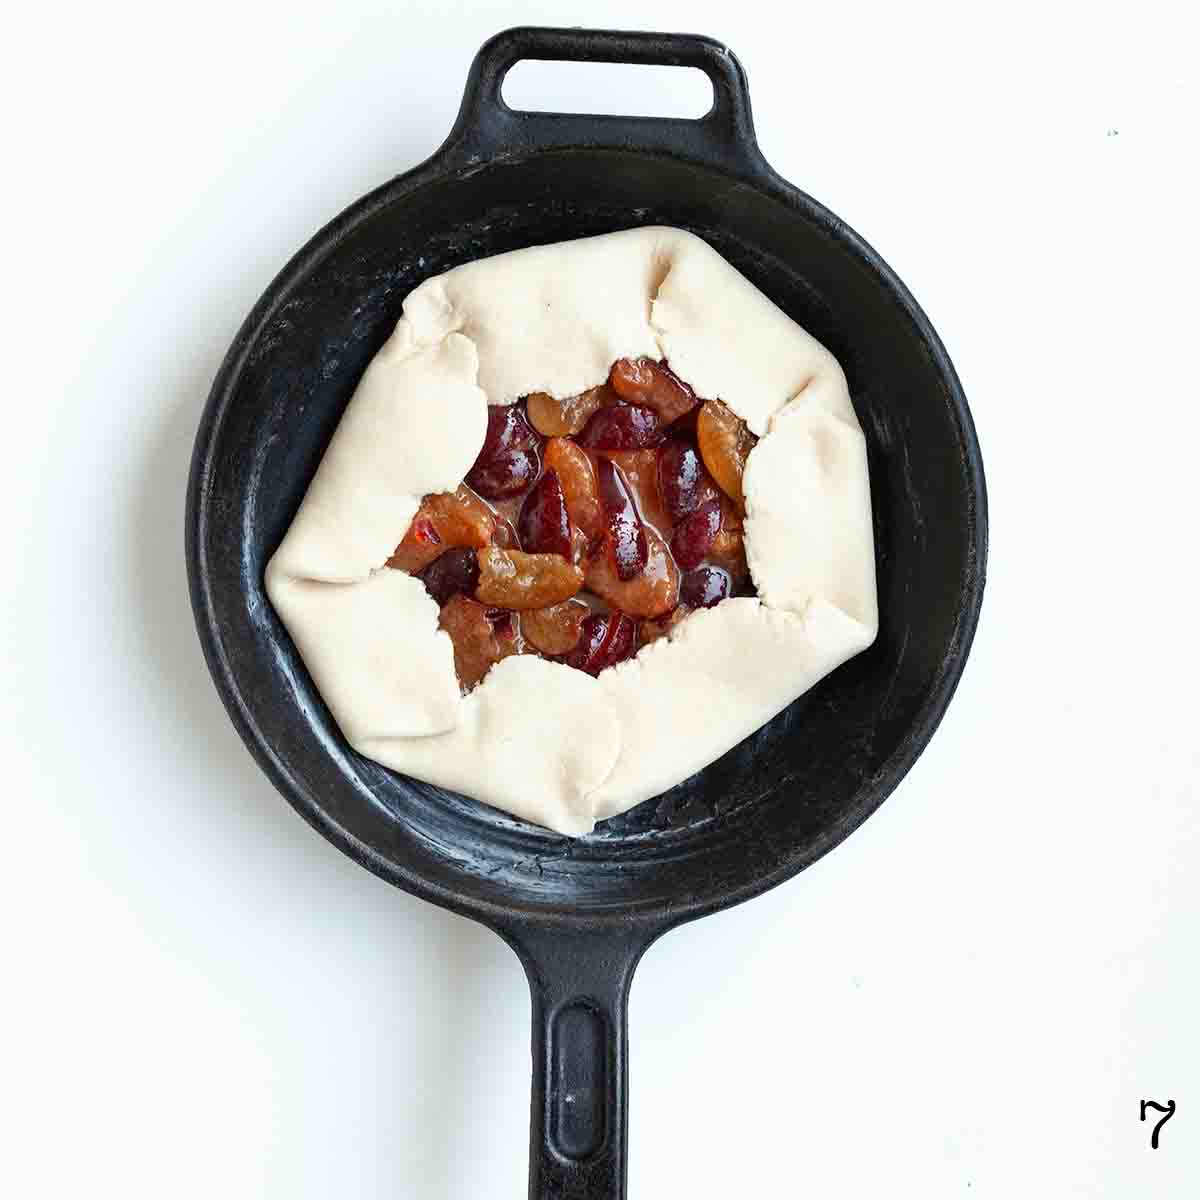
    An uncooked plum galette in a cast iron skillet.

    7. Place the plum filling in the center of the pie dough and fold in the edges around it, leaving an exposed layer in the center.

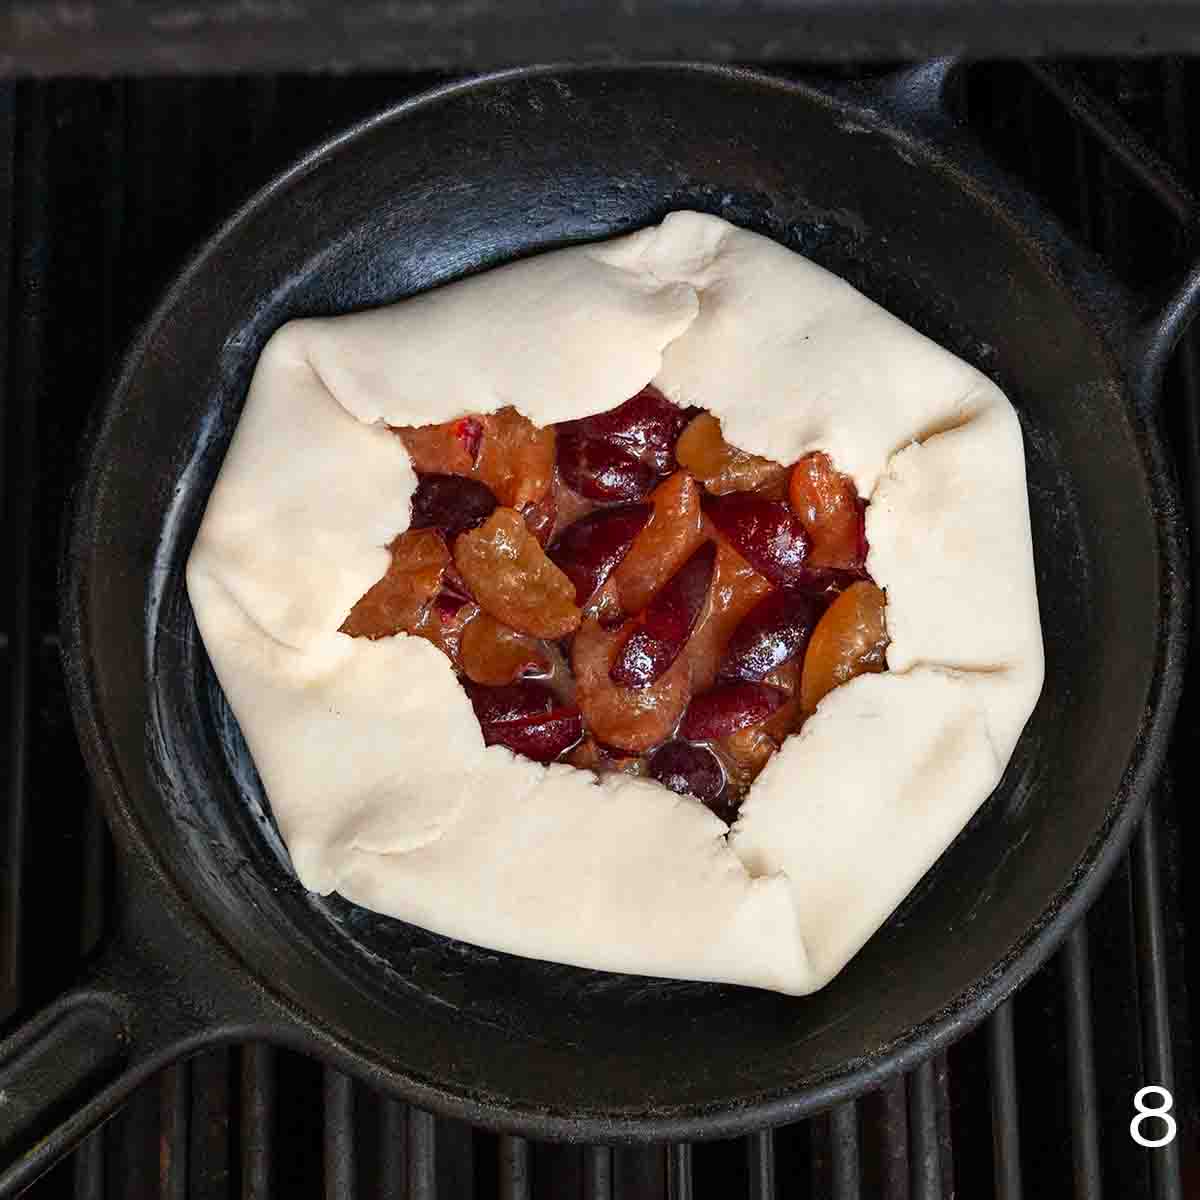
    A plum galette in a cast iron skillet on the grill.

    8. Grill over indirect heat until golden brown.

    FAQs

    What size of skillet do I need?

    Use a 12-inch cast iron skillet or larger for this recipe. If you use a larger skillet, the galette won't fill the entire pan.

    How can you tell when the galette is done?

    The crust should be a light golden brown and feel firm and dry when touched. The filling of your galette should be soft and jammy and bubbling around the edges.

    Can I cook it in the oven?

    Yes. Follow the directions, cooking it in a 375°F oven until the crust is golden brown and the filling is bubbling, about 45 minutes. Cool completely before slicing.

    Tips and Troubleshooting

    • Avoid lifting the lid on the grill as much as possible as the temperature will fluctuate each time it's opened.
    • Use thick oven mitts when removing the skillet from the grill. The handle will be extremely hot.
    • This is best enjoyed the day that it is made but you can store leftover galette loosely covered at room temperature for up to 24 hours.
    A plum galette in a cast iron skillet.

    More Grilled Dessert Recipes You'll Love

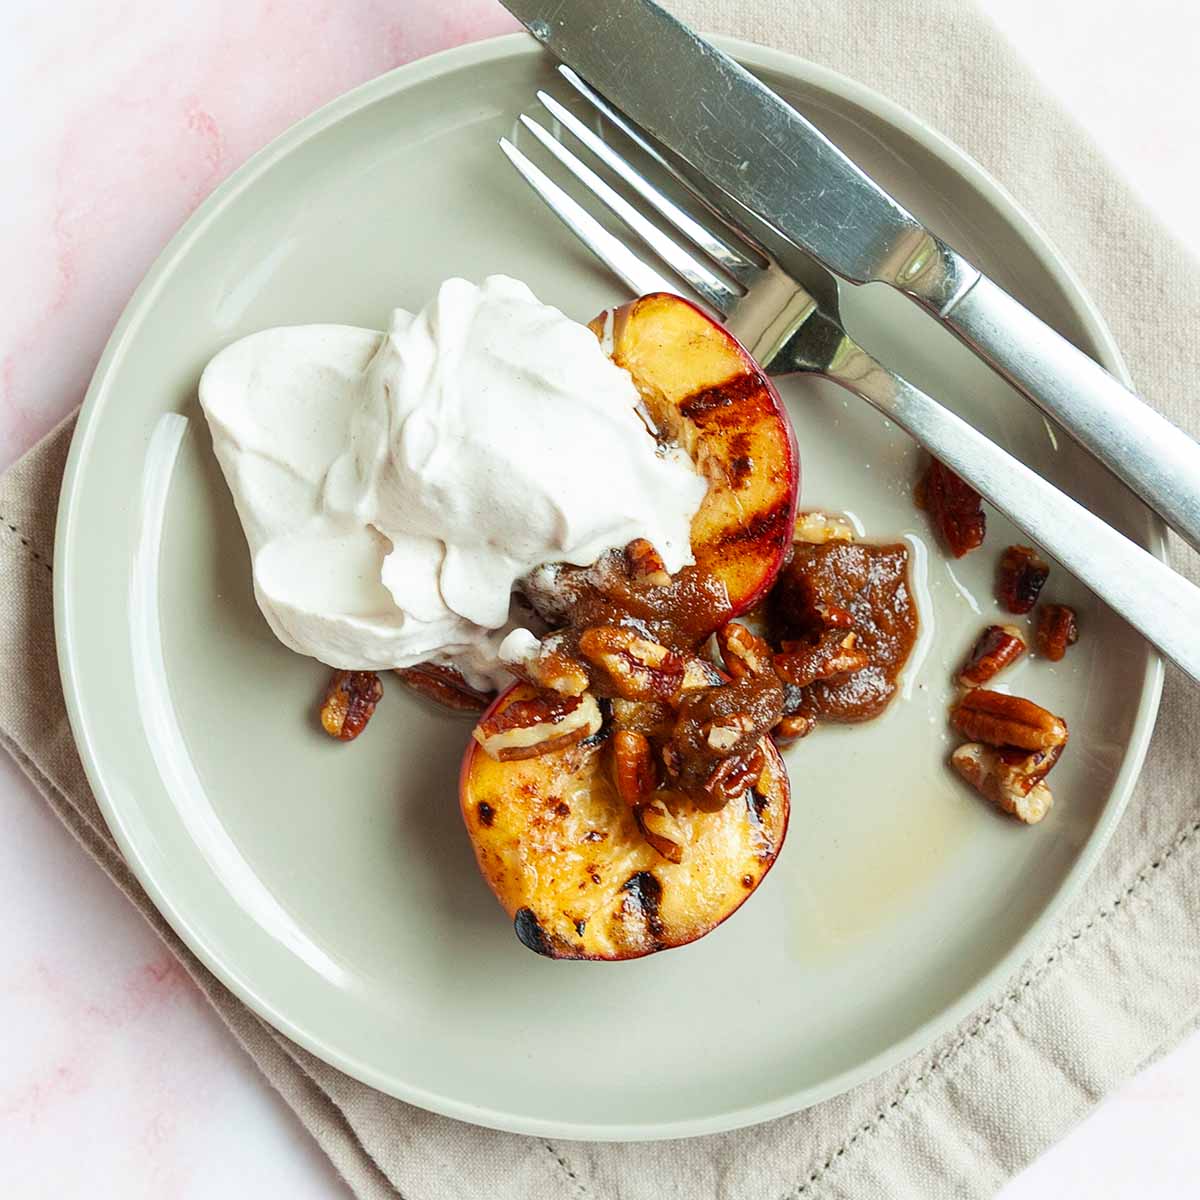
    Two plates topped with grilled nectarines, candied pecans, and whipped cream.
    Grilled Nectarines with Praline Crunch
    A whole skillet peach cobbler with two spoons resting on top.
    Grilled Skillet Peach Cobbler

    Recipe

    A plum galette in a cast iron skillet.

    Grilled Plum Galette

    A woman's face.Angie Zoobkoff
    This rustic plum dessert, cooked in your cast iron skillet on the grill, is so good you'll be sneaking a second slice.
    No ratings yet
    Print Recipe Pin Recipe
    Prep Time 20 minutes mins
    Cook Time 50 minutes mins
    Total Time 2 hours hrs 10 minutes mins
    Course Dessert
    Cuisine American
    Servings 8 servings
    Calories 282 kcal

    Equipment

    • 12-inch (or larger) cast-iron skillet

    Ingredients
      

    • 1½ cups all-purpose flour plus more for rolling
    • 8 tablespoons granulated sugar divided
    • ½ teaspoon table salt plus more for the filling
    • ½ cup (4 oz | 113 g) cold unsalted butter cut into cubes, plus more for the skillet
    • 4 to 5 tablespoons cold water
    • 14 to 16 ounces (400 to 450 g) ripe plums (5-6 medium) halved and sliced into ½-inch pieces
    • 2 tablespoons cornstarch
    • ¼ teaspoon ground cinnamon
    • ¼ teaspoon ground cardamom
    • Ice cream or whipped cream for serving (optional)

    Instructions
     

    • Combine the flour, 1 tablespoon sugar, and the salt in the bowl of a food processor fitted with the S-blade. Blitz until combined.
    • Add the butter and pulse until the butter is the size of small peas and is coated in flour.
    • With the processor running, slowly add the water, until the dough begins to clump and form a ball around the blade. You may not need all of the water. Wrap the dough in plastic and chill for at least 1 hour and up to 24 hours.
    • Preheat the grill for medium indirect heat (375 to 400°F | 190 to 200°C), ideally with heat on both sides of the indirect zone. Butter a 12-inch cast iron skillet well.
    • While the grill is preheating, combine the sliced plums and 2 tablespoons of sugar in a medium bowl. Let sit for 10 minutes.
    • While the plums are macerating, roll the dough out on a floured surface to a circle about 13-inches (33 cm) in diameter.
    • Use a slotted spoon to transfer the plums to a separate medium bowl, leaving any juices behind. Stir in the remaining 5 tablespoons sugar, cornstarch, cinnamon, cardamom, and a pinch of salt.
    • Spoon the plums into the center of the dough, arranging decoratively if desired. Fold the edges of the dough over the edge of the filling, leaving an open space in the center.
    • Place the skillet over indirect heat on the grill and cook, covered, until the filling is bubbling and the crust is golden brown, about 50 minutes. Cool completely before serving with ice cream or whipped cream, if desired.

    Notes

      • Keep it closed--Avoid lifting the lid on the grill as much as possible as the temperature will fluctuate each time it's opened.
      • It's hot!!--Use thick oven mitts when removing the skillet from the grill. 
      • Storage--This is best enjoyed the day that it is made but you can store leftover galette loosely covered at room temperature for up to 24 hours.

    Nutrition

    Serving: 1 sliceCalories: 282kcalCarbohydrates: 42gProtein: 3gFat: 12gCholesterol: 30mgSodium: 150mgFiber: 2gSugar: 18g
    Keyword cast iron cooking, cast iron grilling, grilled dessert, stone fruit recipes, summer desserts
    Tried this recipe?Let us know how it was!

    August 26, 2025 Breakfast

    7 Best Breakfast Hash Recipes to Start Your Day

    Whether you're camping or at home, there's something incredibly satisfying about starting your day with a hearty meal that comes together in one pan. These 7 easy breakfast hash recipes can be made in your skillet or on a griddle and are guaranteed to keep you full for whatever your morning holds.

    1
    A cast iron skillet filled with chorizo and sweet potato hash with sliced avocado and cilantro on top.
    Chorizo Sweet Potato Hash
    This hearty and satisfying sweet potato chorizo hash is made in your cast iron skillet with fresh sausage, diced sweet potatoes, red onion, and is topped with avocado and cilantro.
    Get the recipe: Chorizo Sweet Potato Hash
    2
    Recipe and photo credit: Living Chirpy
    Smoked Sausage Hash
    This smoked sausage hash is great with some fried eggs and a big glass of  of orange juice. It’s the perfect start to a lazy weekend morning.
    Get the recipe: Smoked Sausage Hash
    3
    A plate of loaded hash browns with sour cream and cheese and scallions on top.
    Loaded Hash Browns
    All your favorite potato toppings piled onto your breakfast hash browns. The perfect way to start the day.
    Get the recipe: Loaded Hash Browns
    4
    Recipe and photo credit: Life as a Strawberry
    Leek and Mushroom Breakfast Hash
    This cozy mushroom, leek, and potato breakfast hash is topped with poached eggs and a quick hollandaise sauce.
    Get the recipe: Leek and Mushroom Breakfast Hash
    5
    Recipe and photo credit: Carne Diem
    Breakfast Pastrami Hash
    This breakfast pastrami hash takes your breakfast to the next level by replacing the corned beef with smokey, flavorful, pastrami. This is a quick and easy recipe for your griddle or flat-top.
    Get the recipe: Breakfast Pastrami Hash
    6
    Hollandaise sauce being poured over a bowl of breakfast poutine.
    Breakfast Poutine
    Classic poutine gets a breakfast makeover with the addition of bacon, onion, and Hollandaise sauce.
    Get the recipe: Breakfast Poutine
    7
    Recipe and photo credit: The Wholesome Spoon
    Bacon Breakfast Skillet
    There’s nothing like an egg oozing yolk all over a bed of hash browns and veggies. This bacon breakfast skillet is smokey, cheesy, and delicious!
    Get the recipe: Bacon Breakfast Skillet

    August 22, 2025 Beef Recipes

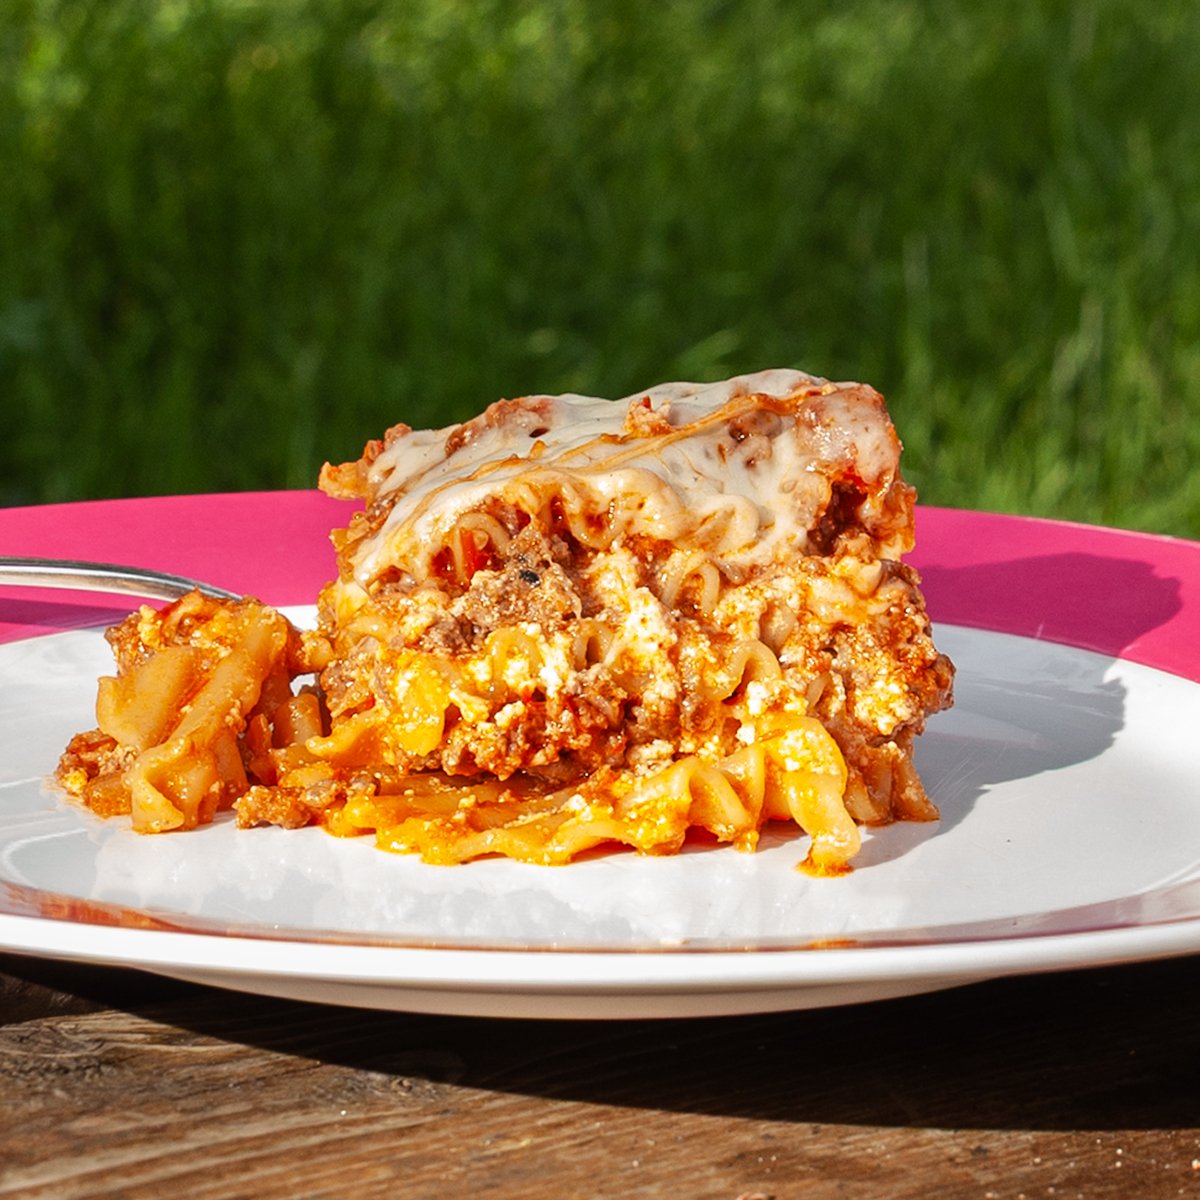
    Campfire Dutch Oven Lasagna

    Made in a single pot over the campfire, this cheesy beef and sausage Dutch oven lasagna is incredible cool weather camping food and ideal for feeding a crowd.

    A slice of lasagna on a plate.

    When the weather starts turning a little cooler, but camping season is still going strong, this hearty lasagna is the perfect meal to enjoy at the end of a busy day. Made with layers of beef, Italian sausage, noodles, and cheese, it's just like your favorite lasagna at home, but is made entirely in your cast iron Dutch oven over the fire. It's campfire cooking at its finest.

    [feast_advanced_jump_to]

    Ingredients and Substitutions

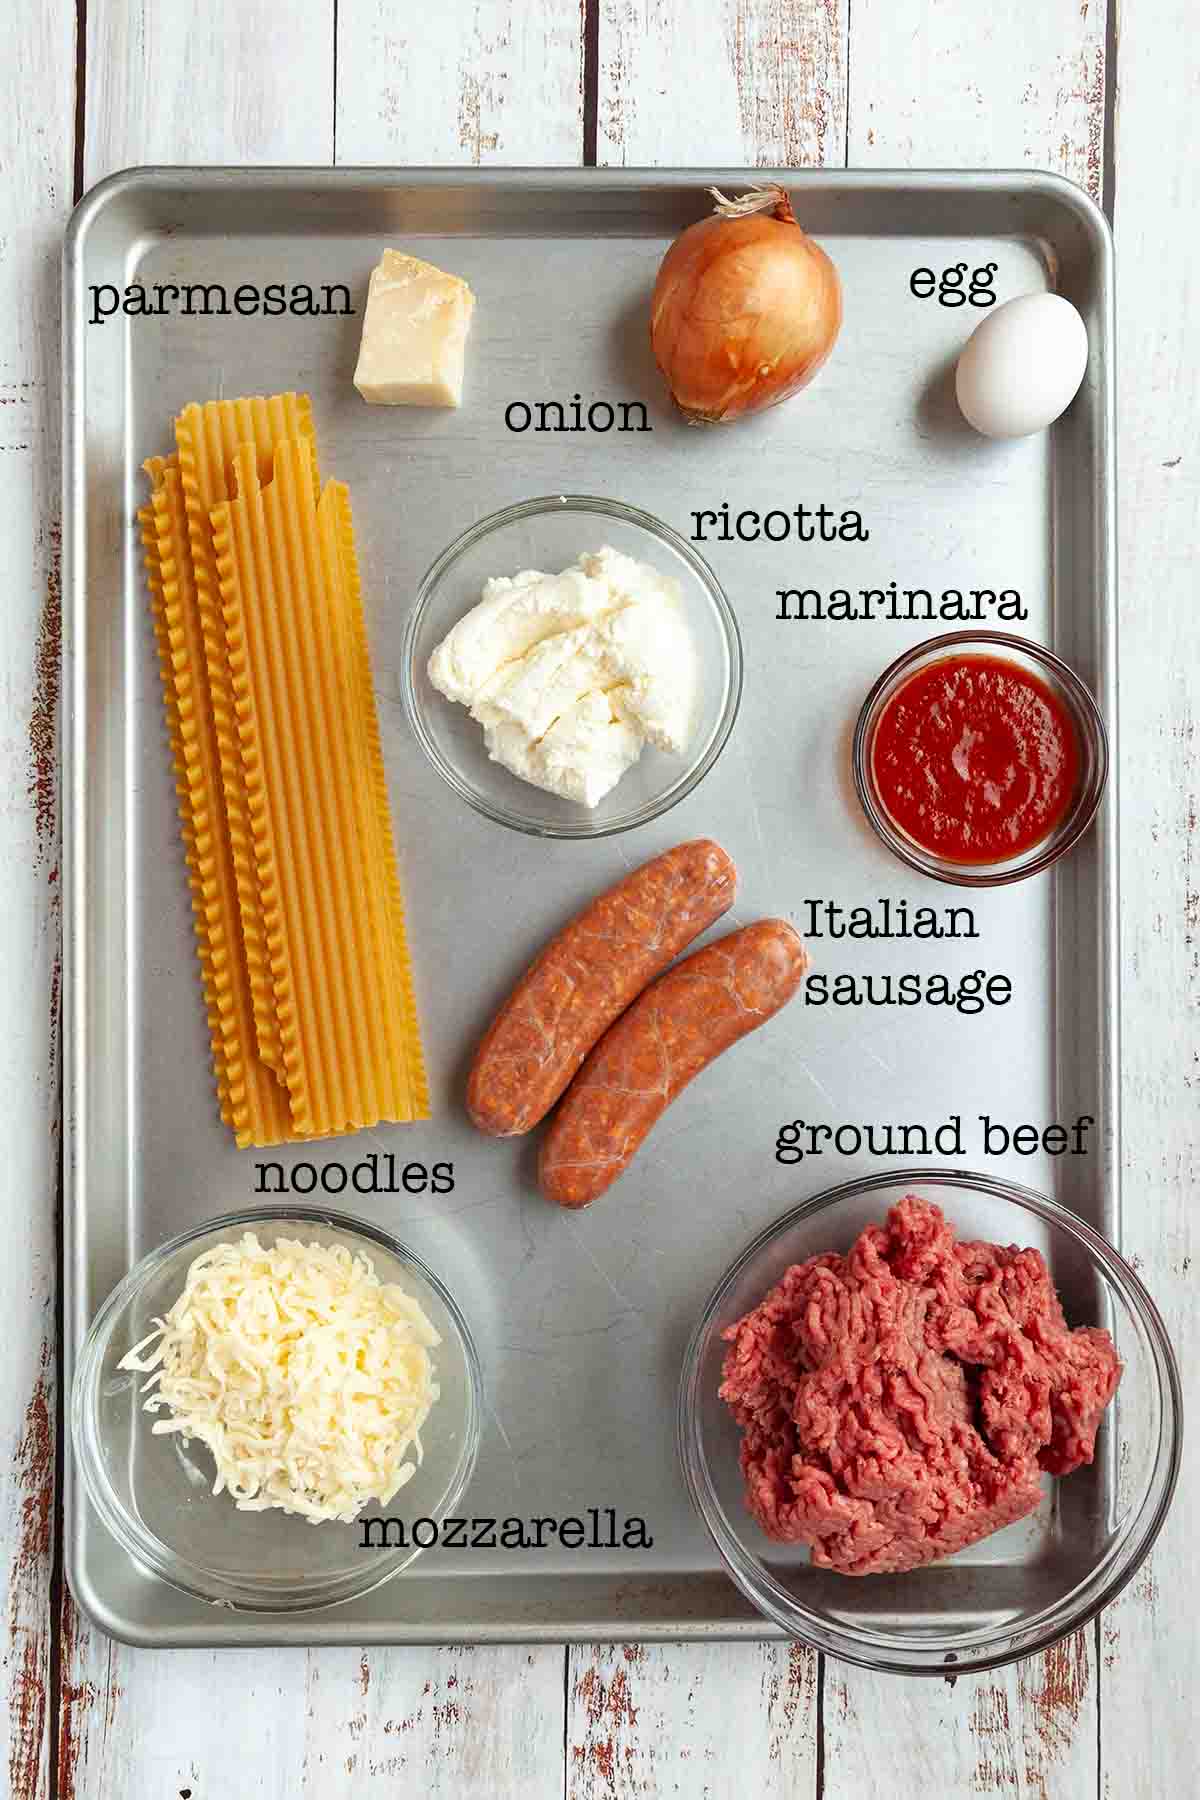
    Ingredients for Dutch oven lasagna--parmesan, onion, egg, ricotta, marinara, Italian sausage, ground beef, noodles, and mozzarella.
    • Lasagna noodles--You want oven-ready (no-boil) lasagna noodles for this recipe.
    • Italian sausage--I love the flavor of ground beef and sausage together in lasagna. The sausage adds some fat and spice to the dish. Depending on your preference, you can use mild or hot Italian sausage for the recipe.
    • Ground beef--I recommend using lean ground beef (85/15), which will give you a little bit of fat for flavor but won't leave the finished lasagna swimming in grease.
    • Marinara--Use your favorite store-bought or homemade marinara sauce here. We love Rao's Marinara, but any type will work.
    • Mozzarella--It's best if you can use freshly grated cheese for your lasagna, but I know you're camping, so if you want to use the pre-shredded stuff here, go for it. It doesn't melt quite as well as the block cheese, but you'll be too busy devouring the lasagna to notice. Do use full-fat cheese for the best flavor.

    How to Make Lasagna in a Dutch Oven

    Ground beef and sausage cooking in a Dutch oven over a fire.

    1. Brown the ground beef and sausage.

    Onion cooking in a ground beef mixture in a Dutch oven over a fire.

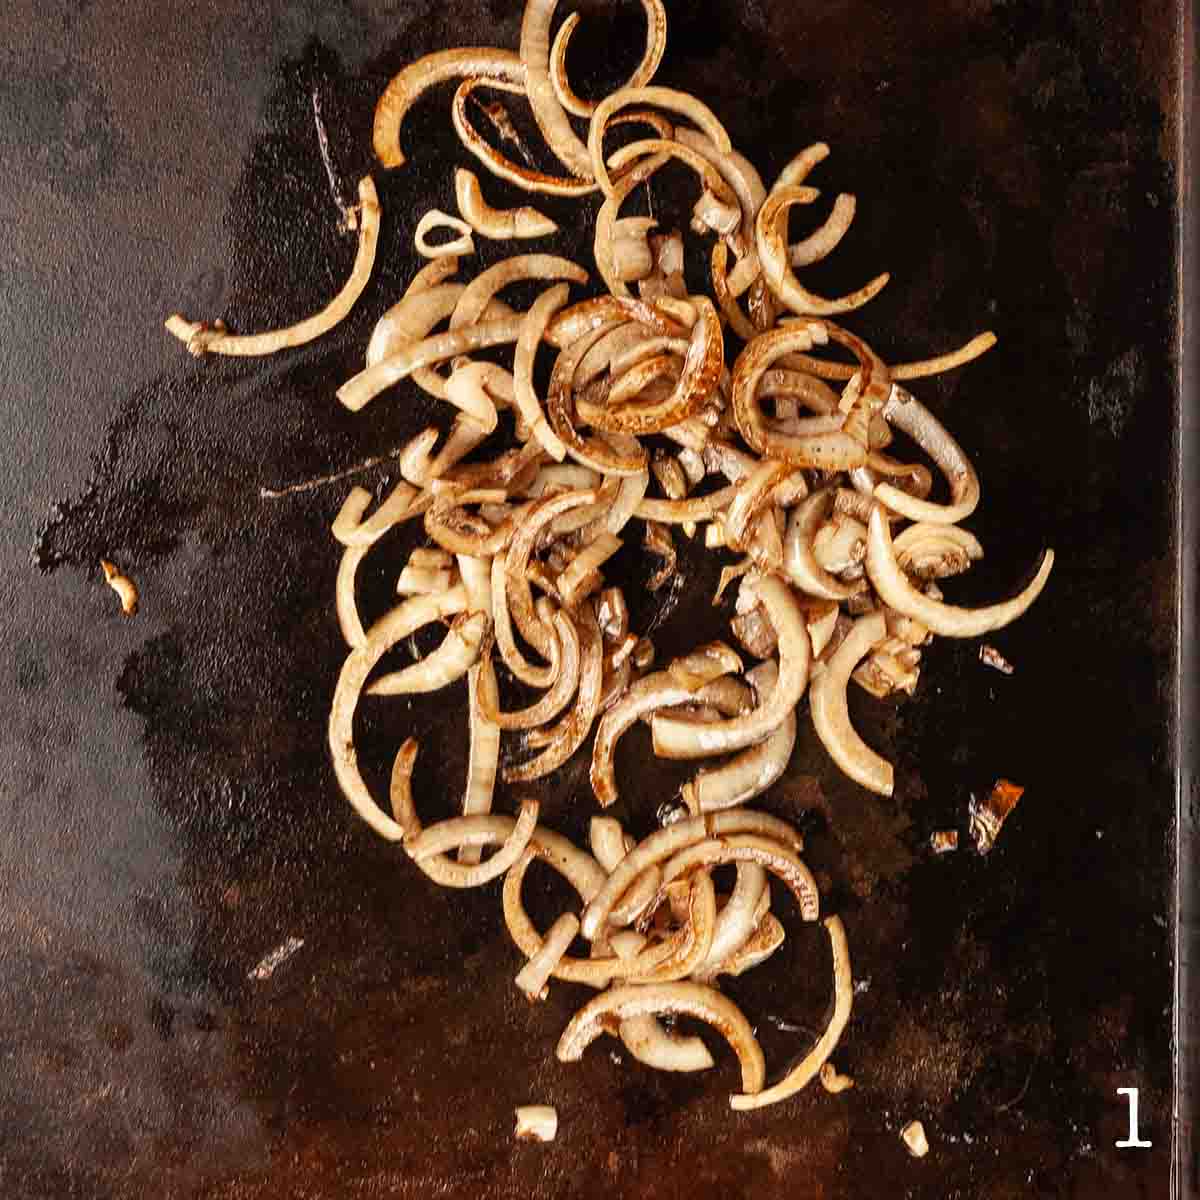
    2. Stir in the onion and cook until softened.

    A bowl with egg, ricotta, and parmesan cheese.

    3. Mix the ricotta, egg, and Parmesan cheese together and season with salt and pepper.

    Marinara on top of a ground beef mixture in a Dutch oven over the fire.

    4. Stir the marinara into the meat mixture. Scoop it into a large bowl.

    An assembled uncooked lasagna in a cast iron Dutch oven.

    5. Layer the sauce, noodles, ricotta mixture, and mozzarella in the Dutch oven, making 4 layers.

    A cast iron Dutch oven covered in coals.

    6. Cover the Dutch oven with coals and set it in a bed of coals. Cook until the lasagna is tender and the cheese is melted.

    FAQs

    What size of Dutch oven do I need?

    This recipe was written for a 6-to-8-quart Dutch oven, and it makes a large lasagna, which will feed 6 to 8 people.

    How can you tell when the lasagna is done?

    When your Dutch oven lasagna is cooked, the cheese should be melted on top and you should see some sauce bubbling around the side. Carefully remove the lid and stick a knife deep into the center of the lasagna. There should be no resistance from the noodles, and when you remove the knife, the blade should feel hot.

    What should I serve with this?

    This is a hearty meal all on its own, but feel free to add in a caesar salad and campfire garlic bread on the side.

    Tips and Troubleshooting

    • You will need to replace your coals or embers at least once during the cooking process. Coals will typically last for about 30 minutes. Be sure to have a new chimney of coals going, or more wood burning down to embers when you begin cooking.
    • Since you're cooking in a Dutch oven outside, the cooking time can vary due to outside temperature and wind. If you're cooking on a very windy day, try to protect the Dutch oven with a barrier, such as a tarp.
    • Let your campfire lasagna cool for at least 10 minutes after removing from the heat before cutting in to it. This will help it to set and will make slicing easier.
    • Remove leftovers from the Dutch oven and store in a sealed container in your cooler or fridge for up to 3 days.
    A Dutch oven lasagna on a grate over a fire pit.

    More Dutch Oven Recipes You'll Love

    A partially sliced meatloaf on a platter with a bowl of peas and a bowl of mashed potatoes nearby.
    Dutch Oven Meatloaf
    A Dutch oven filled with campfire chili with a metal spoon resting inside.
    Campfire Chili

    Recipe

    A Dutch oven lasagna on a grate over a fire pit.

    Campfire Dutch Oven Lasagna

    A woman's face.Angie Zoobkoff
    With layers of beef, Italian sausage, noodles, and cheese, this Dutch oven lasagna is a camping recipe you'll have on repeat.
    No ratings yet
    Print Recipe Pin Recipe
    Prep Time 15 minutes mins
    Cook Time 1 hour hr 10 minutes mins
    Total Time 1 hour hr 25 minutes mins
    Course Main Course
    Cuisine Italian
    Servings 6 to 8 servings
    Calories 764 kcal

    Equipment

    • 6-to-8-quart cast iron Dutch oven
    • Charcoal or hot embers
    • Chimney (if using charcoal)

    Ingredients
      

    • 1 pound (454 g) lean ground beef
    • 8 ounces (227 g) Italian sausage casings removed
    • 1 medium onion chopped
    • Salt and freshly ground black pepper
    • 1 (16-oz | 454-g) container ricotta cheese
    • 1 large egg
    • 1 cup grated Parmesan cheese
    • 1 (24-oz) jar marinara sauce
    • 16 oven-ready (no-boil) lasagna noodles
    • 2 cups shredded mozzarella cheese

    Instructions
     

    • Prepare a fire and let it cook down to hot coals. If you'll be using charcoal for the Dutch oven, start a chimney of 24 coals.
    • Set the Dutch oven over hot coals or low flame and add the ground beef and sausage. Cook, stirring frequently, using a wooden spoon to break up the meat into small pieces, until browned, about 10 minutes.
    • Add the onion and season with salt and pepper. Cook, stirring occasionally, until the onion is softened, about 10 minutes.
    • While the onion is cooking, stir the ricotta, egg, and Parmesan together in a medium bowl. Season with salt and pepper.
    • Stir the marinara sauce into the cooked meat mixture. Scoop out most of the sauce into a large bowl, leaving a thin layer on the bottom of the Dutch oven.
    • Arrange a layer of noodles over the sauce. You'll need to break some of the noodles to make everything fit, but it's fine to puzzle together small pieces as you go.
    • Spread â…“ of the ricotta mixture over the noodles, then dollop ¼ of the sauce on top of that. Cover with ½ cup of mozzarella cheese. Repeat the layering two more times.
    • Finish with a layer of noodles, the remaining sauce, and the remaining mozzarella cheese.
    • Cover the Dutch oven with its lid and set it on top of 8 coals. Place 16 coals on the lid and let it cook, replacing the coals as needed. Cook until the noodles are tender, the sauce is bubbling, and the cheese is melted, about 50 minutes.
    • Remove from the fire and let rest at least 10 minutes before cutting and serving.

    Notes

    • Replacing coals--You will need to replace your coals or embers at least once during the cooking process. Coals will typically last for about 30 minutes. Be sure to have a new chimney of coals going, or more wood burning down to embers when you begin cooking.
    • Let it rest--Let your campfire lasagna cool for at least 10 minutes after removing from the heat before cutting in to it. This will help it to set and will make slicing easier.
    • Storing leftovers--Remove leftovers from the Dutch oven and store in a sealed container in your cooler or fridge for up to 3 days.

    Nutrition

    Serving: 1 portionCalories: 764kcalCarbohydrates: 65gProtein: 43gFat: 35gCholesterol: 141mgSodium: 1086mgFiber: 6gSugar: 14g
    Keyword campfire cooking, camping dinner ideas, dutch oven cooking
    Tried this recipe?Let us know how it was!

    August 19, 2025 Beef Recipes

    Blackstone Cheesesteaks

    Filled with tender sliced ribeye, caramelized onions, and melted provolone cheese, these Blackstone cheesesteaks are an easy Blackstone griddle meal that's ready in just 25 minutes.

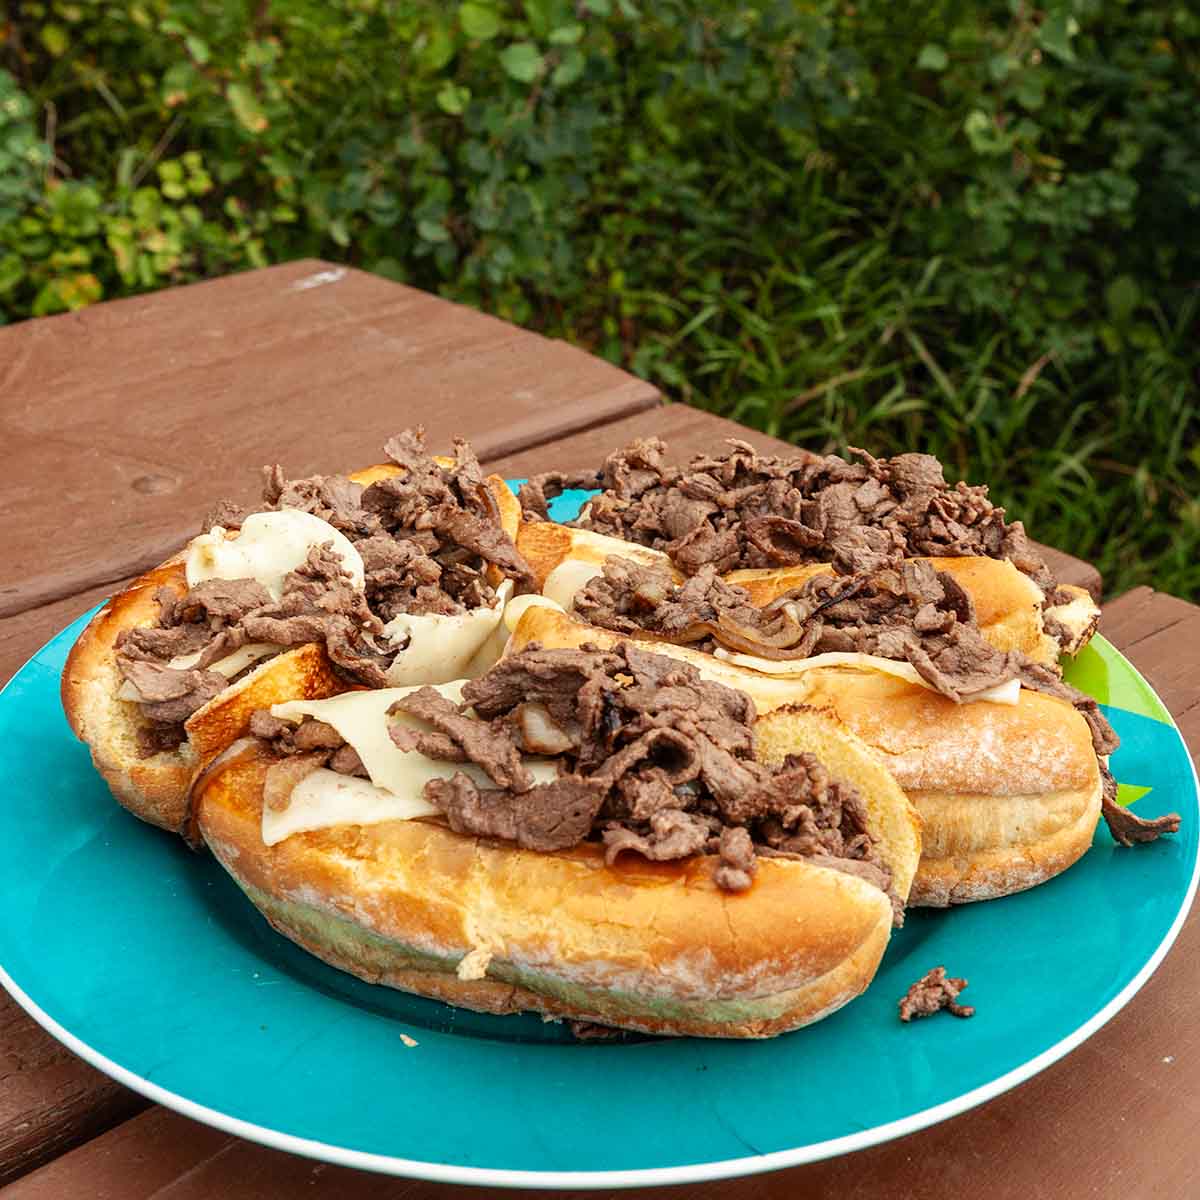
    Four Blackstone cheesesteaks on a large plate on a picnic table.

    Blackstone cooking while we're camping usually involves tossing some smash burgers on the flat top or whipping up a simple patty melt. But, when you want to splurge on a special beef recipe that doesn't require any extra effort, this Blackstone cheesesteak recipe is the way to go. It's juicy and tender, cooked entirely on your griddle, and will satisfy even the hungriest of campers.

    [feast_advanced_jump_to]

    Why You'll Love This Recipe

    • You can make the entire meal on your Blackstone griddle (or other flat top griddle).
    • It's ready in 25 minutes.

    Ingredients and Substitutions

    Ingredients for Blackstone cheesesteaks--onion, rib eye, buns, provolone cheese, oil, and garlic powder.
    • Ribeye--This will give you the most tender, melt-in-your-mouth beef, however, it does come with a higher price tag. If you want a more budget-conscious option, make it with thinly sliced sirloin. Slice your beef as thinly as possible, or ask your butcher to do it for you.
    • Buns--Use a sturdy hoagie-style roll here. Avoid buns that are overly soft as they'll soak up the juices and become soggy.
    • Provolone cheese--Use sliced provolone cheese to keep it simple, or grate it from a larger block. If you're grating it, you'll need about 1 ounce (28 g) per cheesesteak.
    • Oil--Any type of neutral oil will work here, like vegetable or sunflower oil. Olive oil is an ok choice, too.

    How to Make Cheesesteak on a Blackstone

    Sliced onions cooking on a Blackstone griddle.

    1. Cook the onion in oil over low heat until very soft and beginning to brown.

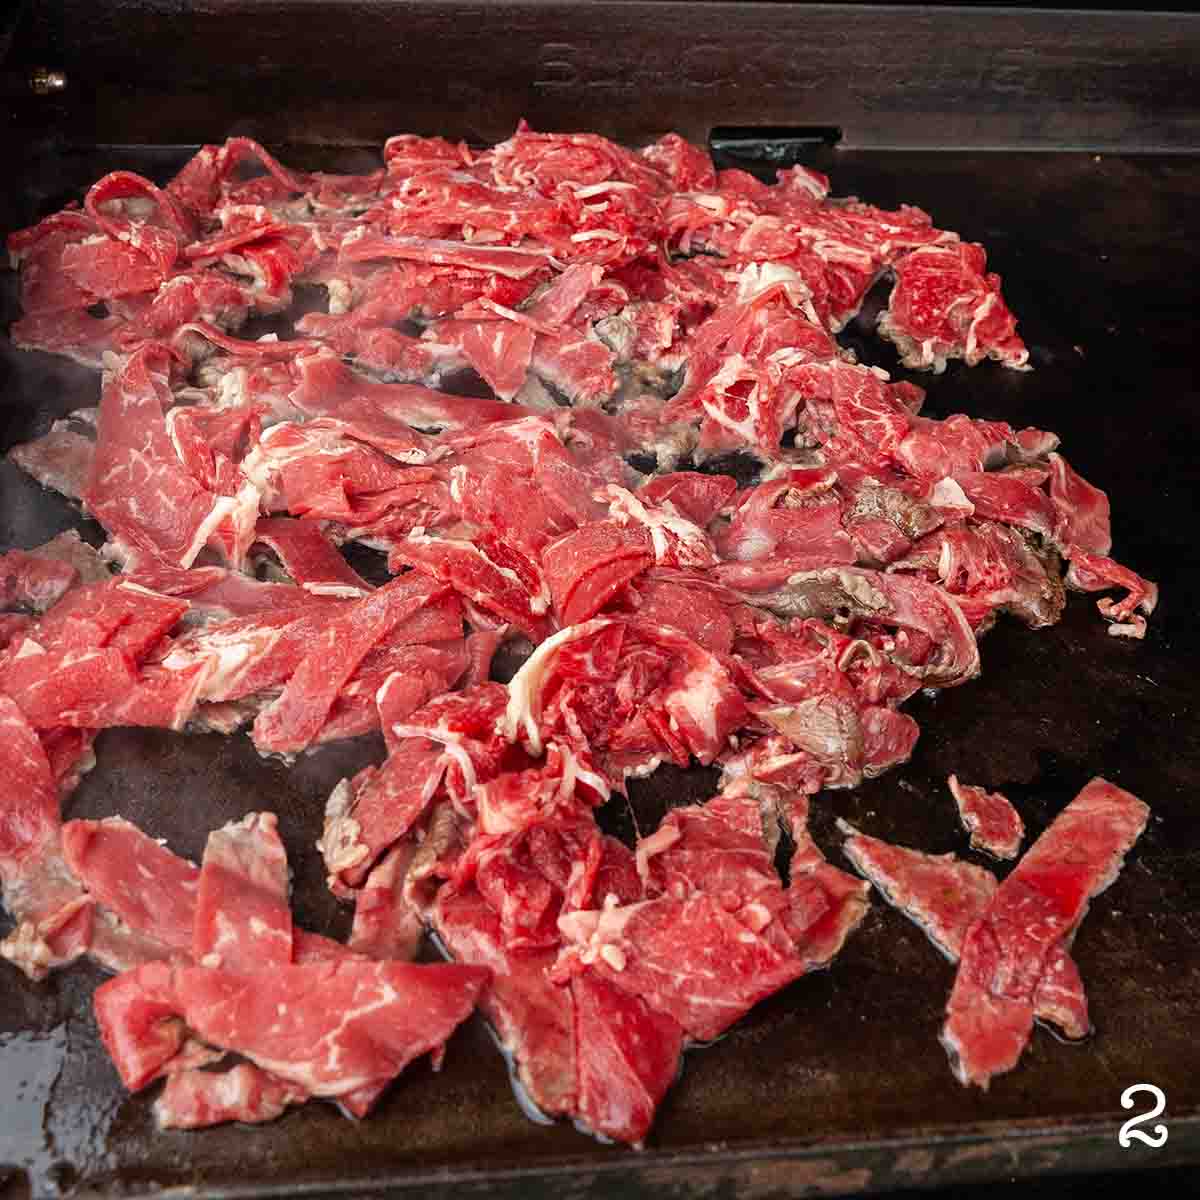
    Rib eye cooking on a Blackstone griddle.

    2. Cook the beef on the other side of the griddle over medium-high heat until browned.

    Cooked been and onion mixed together on an outdoor griddle.

    3. Mix the beef and onion together and season with salt, pepper, and garlic powder.

    Mounds of cooked beef topped with cheese and buns on the side.

    4. Divide the meat into 4 portions and top each one with a slice of provolone. Cook until melted, toasting the buns on the other side of the griddle.

    FAQs

    Can I add mushrooms and peppers?

    Definitely. This recipe was designed with camping in mind, so it uses minimal ingredients, but if you want to add in sliced bell peppers and/or sliced mushrooms, feel free. Sauté them with the onions in step one.

    What should I serve with these?

    A side salad is all you need to make this a complete meal. If you're camping, save yourself some work and choose a make-ahead salad that you can prep at home.

    Tips and Troubleshooting

    • If you have access to a Korean market, it's an excellent place to find pre-sliced ribeye at a reasonable price.
    • For the easiest slicing, cut your beef into strips when it is still slightly frozen.
    Rib eye pieces cooking on a Blackstone griddle.

    More Blackstone Beef Recipes You'll Love

    A Blackstone chopped cheese sandwich with lettuce and tomato.
    Blackstone Chopped Cheese
    A bowl filled with cubes of seared sirloin steak with parsley sprinkled on top.
    Blackstone Steak Bites

    Recipe

    Four Blackstone cheesesteaks on a large plate on a picnic table.

    Blackstone Cheesesteaks

    A woman's face.Angie Zoobkoff
    These classic cheesesteaks, filled with tender ribeye, caramelized onion, and melted provolone, will satisfy even the hungriest of campers.
    No ratings yet
    Print Recipe Pin Recipe
    Prep Time 5 minutes mins
    Cook Time 20 minutes mins
    Total Time 25 minutes mins
    Course Main Course
    Cuisine American
    Servings 4 sandwiches
    Calories 891 kcal

    Equipment

    • Blackstone (or other outdoor) griddle

    Ingredients
      

    • 4 tablespoons vegetable or olive oil divided
    • 1 medium onion halved and sliced
    • 1 ½ pounds (680 g) thinly sliced ribeye steak cut into ¾-inch wide strips
    • ½ teaspoon garlic powder
    • Salt and freshly ground black pepper
    • 4 (1-ounce | 28-g) slices provolone cheese
    • 4 hoagie rolls

    Instructions
     

    • Heat 2 tablespoons of the oil on one side of the griddle over low heat.
    • Add the onion and cook, covered, stirring occasionally, until soft and browned, about 15 minutes. Leave the heat on low.
    • Heat the remaining 2 tablespoons of oil on the other side of the griddle over medium-high heat. Add the ribeye in a single layer, and cook, stirring occasionally until no pink remains, about 3 minutes. Reduce heat to low.
    • Stir the onion into the beef and season generously with salt, pepper, and the garlic powder.
    • Divide the meat mixture into 4 portions on the griddle, and top each portion with 1 slice of cheese. Cover and let it melt, 1 to 2 minutes.
    • While the cheese is melting, slice open the rolls and place cut side down on the other side of the griddle. Toast until lightly browned, about 30 seconds.
    • Scoop the meat and cheese mixture into the buns and serve.

    Notes

    • Finding sliced ribeye--If you have access to a Korean market, it's an excellent place to find pre-sliced ribeye at a reasonable price.
    • Slice it frozen--For the easiest slicing, cut your beef into strips when it is still slightly frozen.

    Nutrition

    Serving: 1 sandwichCalories: 891kcalCarbohydrates: 50gProtein: 48gFat: 58gCholesterol: 129mgSodium: 1566mgFiber: 8gSugar: 7g
    Keyword blackstone cooking, camping dinner ideas, hot sandwich
    Tried this recipe?Let us know how it was!

    August 15, 2025 Blackstone Griddle Recipes

    Blackstone Breakfast Quesadillas

    These easy Blackstone breakfast quesadillas make a hearty breakfast to cook up at camp or at home. Stuffed with crispy bacon, creamy scrambled eggs, and plenty of melted cheese, these will be on repeat all year round.

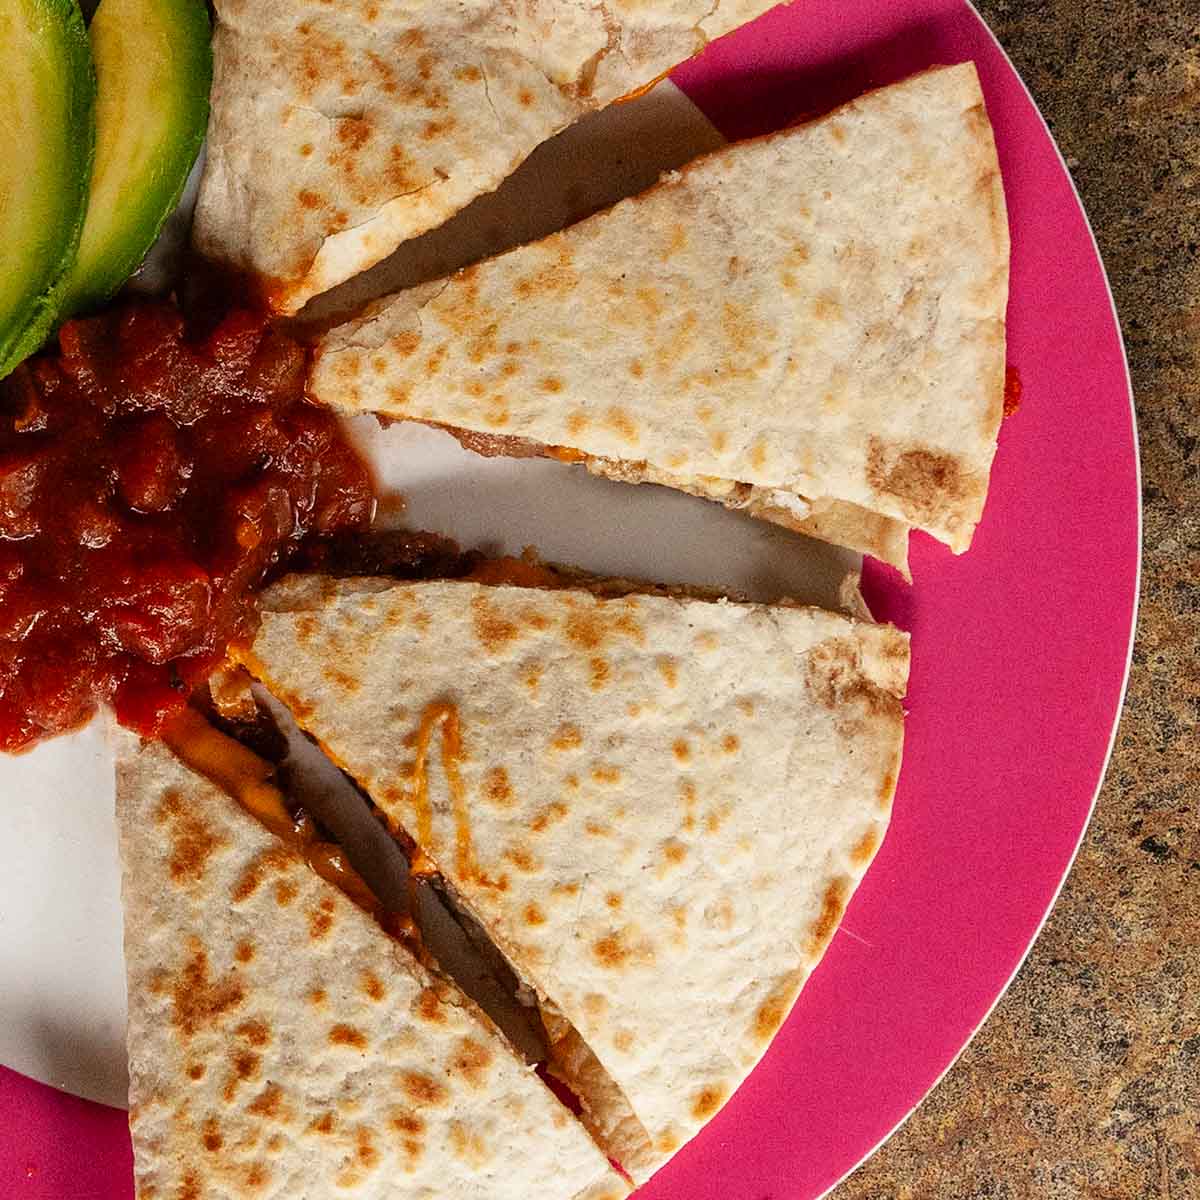
    A breakfast quesadilla cut into four pieces.

    This breakfast quesadilla recipe comes together pretty quickly and easily, but if you really want to get ahead, for busy mornings, or if you're feeding a crowd, chop and cook the bacon a day or two before and stash it in the fridge. If you do that, you'll have this on the table in under 15 minutes.

    [feast_advanced_jump_to]

    Why You'll Love This Recipe

    • You can make the entire meal on your Blackstone griddle (or other flat top griddle).
    • It's ready in 25 minutes.

    Ingredients and Substitutions

    Ingredients for breakfast quesadillas--eggs, tortillas, bacon, cheese, and salsa.
    • Bacon--You can use regular or thick-cut bacon, depending on your preference or what you have on hand. Note that it may take an extra couple of minutes to cook thick bacon.
    • Tortillas--Use the large, burrito size tortillas for this breakfast quesadilla recipe. Got extras? Whip up a batch of breakfast burritos for the freezer.
    • Cheese--Regular cheddar cheese works best here. I recommend grating it yourself as pre-shredded cheese doesn't melt well.
    • Salsa--Use your favorite store-bought or homemade salsa.

    How to Make Breakfast Quesadillas on a Blackstone

    Chopped bacon cooking on a griddle.

    1. Cook the bacon until crisp. Push it off to the side of the griddle to stay warm.

    Scrambled eggs on a griddle.

    2. Crack the eggs into a bowl and beat well. Season with salt and pepper. Scramble the eggs on the griddle until just set.

    Three assembled breakfast quesadillas on a Blackstone griddle.

    3. Arrange 3 large tortillas on a flat surface. Divide the bacon, eggs, and cheese evenly among one side of each tortilla. Fold them over.

    Two quesadillas cooking on a griddle.

    4. Cook the quesadillas, flipping once, until the cheese is melted.

    FAQs

    Can I make this in my cast iron skillet?

    Yes, but you'll need to work in batches. Over medium-low heat, cook the bacon first, then transfer to a bowl and wipe the skillet clean. Scramble the eggs in the same skillet (or use a non-stick one), then assemble the quesadillas and cook them two at a time.

    What should I serve with these?

    Like many other quesadilla recipes, these are fantastic when served with salsa and/or sour cream. If you like spicy food, feel free to drizzle a little hot sauce over the top, or add it to the quesadilla before cooking. Offer a mango smoothie on the side and make it a complete breakfast.

    Tips and Troubleshooting

    • If you've got leftover or precooked bacon on hand, skip the first step and add the cooked chopped bacon to the quesadilla in step 4.
    • Make sure that your griddle is level. The eggs will run if the surface isn't flat and level.
    Two quesadillas on a flat top griddle.

    More Blackstone Breakfast Recipes You'll Love

    Several slices of maple sriracha bacon on a plate with maple syrup and sriracha in the background.
    Maple Sriracha Griddle Bacon
    Four pieces of cinnamon roll French toast on a rectangular platter, dusted with powdered sugar and topped with fresh raspberries.
    Cinnamon Roll French Toast

    Recipe

    A breakfast quesadilla cut into four pieces.

    Blackstone Breakfast Quesadillas

    A woman's face.Angie Zoobkoff
    Stuffed with crisp bacon, scrambled eggs, and cheese, these breakfast quesadillas make a hearty and satisfying breakfast at camp or at home.
    No ratings yet
    Print Recipe Pin Recipe
    Prep Time 10 minutes mins
    Cook Time 15 minutes mins
    Total Time 25 minutes mins
    Course Breakfast
    Cuisine Tex-Mex
    Servings 3 quesadillas
    Calories 671 kcal

    Equipment

    • Blackstone (or other outdoor) griddle

    Ingredients
      

    • 6 slices bacon cut crosswise into 1-inch pieces
    • 4 large eggs
    • Salt and freshly ground black pepper
    • 3 large tortillas (burrito-size)
    • 1 cup grated cheddar cheese
    • Salsa for serving

    Instructions
     

    • Arrange the bacon in a single layer on one side of the Blackstone. Cook the bacon over medium heat until crisp, stirring frequently, about 10 minutes. Push the bacon off to one side of the griddle or scoop it into the bowl. Discard most of the bacon fat, leaving just a thin layer on the surface of the griddle.
    • While the bacon is cooking, crack the eggs into a medium bowl and whisk well. Season lightly with salt and pepper. The bacon will add plenty of salt, so don't over-season the eggs.
    • Reduce the heat on the griddle to medium-low. Add the eggs and quickly stir and fold to scramble the eggs. They'll want to run, so you need to work quickly. Cook until the eggs are just set, about 2 minutes. Push the eggs off to the side with the bacon, or transfer them to a small bowl.
    • Arrange the tortillas on a flat surface (or you can do this right on the surface of the griddle). Divide the bacon, eggs, and cheese evenly among the tortillas, mounding them on one side of each tortilla. Fold the side with no toppings over the ingredients.
    • Cook the quesadillas over medium heat, flipping once, until the cheese is melted and the tortillas develop brown spots, about 2 minutes per side.
    • Slice into wedges and serve immediately with salsa.

    Notes

    • Get ahead--If you've got leftover or precooked bacon on hand, skip the first step and add the cooked chopped bacon to the quesadilla in step 4.
    • Keep it level--Make sure that your griddle is level. The eggs will run if the surface isn't flat and level.

    Nutrition

    Serving: 1 quesadillaCalories: 671kcalCarbohydrates: 38gProtein: 38gFat: 40gCholesterol: 329mgSodium: 1650mgFiber: 2gSugar: 2g
    Keyword blackstone cooking, blackstone griddle, camping breakfast
    Tried this recipe?Let us know how it was!

    August 12, 2025 Collections

    17 Spectacular Stone Fruit Recipes

    If you got a little too enthusiastic at the farmer's market and are staring down a glut of stunning summer stone fruits, this collection of sweet and savory stone fruit recipes is a lifesaver. Discover the best ways to use peaches, plums, nectarines, apricots, and cherries and find some new favorites.

    1
    A jar of overnight oats topped with peaches and raspberries.
    Peach Melba Overnight Oats
    An easy make-ahead breakfast that combines fresh peaches and raspberries nestled into a bed of creamy jam-swirled oats.
    Get the recipe: Peach Melba Overnight Oats
    2
    Recipe and photo credit: Sofa Dinners
    Stone Fruit Salad with Root Veg and Blueberry Basil Vinaigrette
    For this stunning salad, stone fruits are mixed with lightly blanched sweet potatoes and beets then tossed with other veggies and a blueberry basil vinaigrette.
    Get the recipe: Stone Fruit Salad
    3
    Two plates topped with grilled nectarines, candied pecans, and whipped cream.
    Grilled Nectarines with Praline Crunch
    Topped with crunchy candied pecans and fluffy cinnamon whipped cream, sweet grilled nectarines become a spectacular summer dessert.
    Get the recipe: Grilled Nectarines with Praline Crunch
    4
    Recipe and photo credit: Peter's Food Adventures
    Apricot Fruit Leather
    Learn how to make homemade fruit leather with apricots or plums. Naturally sun dried and made with whole ingredients. A healthy and tasty snack for your family.
    Get the recipe: Homemade Fruit Leather
    5
    Spiced grilled plums in a bowl on a plate with a fork and checkered napkin on the side.
    Spiced Grilled Plums
    Sweet summer plums are gently cooked in a foil packet in a sweetly spiced orange butter sauce. An easy summer dessert.
    Get the recipe: Spiced Grilled Plums
    6
    Recipe and photo credit: Fox Farm Home
    Grilled Peach Salad with Burrata
    This peach burrata salad has rustic pesto croutons that you’ll want to gobble up before they even reach the table.
    Get the recipe: Grilled Peach Burrata Salad
    7
    A coconut yogurt parfait topped with macerated cherries in a jar with fresh cherries scattered around the jar.
    Coconut Yogurt Parfait
    These easy make-ahead coconut yogurt parfaits include layers of creamy coconut-flavored yogurt, crunchy granola, and juicy macerated cherries.
    Get the recipe: Coconut Yogurt Parfait with Cherries
    8
    Recipe and photo credit: Where Salty and Sweet Unite
    Sparkling Nectarine Sangria with Peaches and Plums
    Whether you’re hosting a party or relaxing, this is your new summer drink!
    Get the recipe: Sparkling Nectarine Sangria
    9
    Recipe and photo credit: A Weekend Cook
    Peach and Blackberry Brie Flatbread Pizza
    Layer summer’s juiciest peaches and blackberries with creamy Brie, caramelized onions, and a drizzle of honey on flatbread for a sweet-savory meal that’s ready in minutes.
    Get the recipe: Peach and Blackberry Brie Flatbread
    10
    A whole skillet peach cobbler with two spoons resting on top.
    Grilled Skillet Peach Cobbler
    Enjoy this easy cast iron skillet peach cobbler, topped with tender biscuit dough without heating up your kitchen.
    Get the recipe: Grilled Skillet Peach Cobbler
    11
    Recipe and photo credit: Chef's Pencil
    Pan-Fried Pork Chops with Plums & Rosemary
    If you’re looking for a quick and easy dinner that still feels special, this pork chop with plums and rosemary recipe is just the thing. The dish bursts with flavor, thanks to the combination of tender, juicy pork chops and sweet plums.
    Get the recipe: Pork Chops with Plums
    12
    Recipe and photo credit: Binky's Culinary Carnival
    Apricot Pie
    Apricot pie is bursting with summer flavors! Sweet, tart and so easy. If you don’t have time to make crust, just buy a refrigerated crust.
    Get the recipe: Apricot Pie
    13
    A small jar filled with peach bbq sauce with two peaches and two serrano peppers next to it.
    Peach Bourbon BBQ Sauce
    This easy homemade bbq sauce transforms sweet summer peaches into a grilling staple. A little bit of serrano pepper and bourbon give it a pleasant kick.
    Get the recipe: Peach Bourbon BBQ Sauce
    14
    Recipe and photo credit: Little Black Skillet
    Plum Upside Down Cake
    This secretly easy, impressive plum upside down cake is the perfect summertime dessert. Glossy super-ripe plums crown a tender cake.
    Get the recipe: Plum Upside Down Cake
    15
    Recipe and photo credit: Kim Schob
    Fresh Jalapeño Peach Salsa
    This peach salsa recipe is made without any tomatoes at all and tastes like summer in a bite! The perfect accompaniment for tortilla chips, fish, chicken, and rice.
    Get the recipe: Fresh Jalapeño Peach Salsa
    16
    Recipe and photo credit: Mae's Menu
    Nectarine Salad
    The most vibrant summer salad has made its debut: nectarine salad, tossed with a champagne dressing.
    Get the recipe: Nectarine Salad
    17
    Recipe and photo credit: For the Pleasure of Eating
    German Plum Streusel Cake
    For this buttery plum cake, sweet, juicy baked plums are perched on crisp shortcrust, topped with marzipan streusel and flaky almonds.
    Get the recipe: German Plum Streusel Cake

    August 8, 2025 Desserts

    Grilled Nectarines with Praline Crunch

    These grilled nectarines showcase summer stone fruit in the best possible way. Topped with crunchy candied pecans and fluffy cinnamon whipped cream, it's a grilled dessert that you'll have on repeat all summer long.

    Two plates topped with grilled nectarines, candied pecans, and whipped cream.

    You can't beat peaches, nectarines, and plums eaten out of hand with juice dripping down your arms, but when you want something special to share with friends, or you want to take that sweet stone fruit to the next level, try grilling it. A little smoke and char adds unexpected depth to the sweet stars of summer.

    [feast_advanced_jump_to]

    Ingredients and Substitutions

    Ingredients for grilled nectarines with praline crunch--nectarines, butter, sugar, cinnamon, pecans, and whipping cream.
    • Nectarines--Look for firm, unblemished fruits and give only slightly when squeezed. Avoid overripe or bruised fruit as it will turn mushy on the grill.
    • Salted butter--I use salted butter here to add a little salt to the dish. If you are using unsalted butter, add a big pinch of salt to your praline mixture when you add the butter and sugar.
    • Pecan pieces--You can purchase pecan pieces at the store, or give your whole pecans a rough chop before toasting.

    How to Grill Nectarines

    A bowl of whipped cream with beaters resting inside.

    1. Whip the cream until stiff peaks form. Beat in the cinnamon.

    Four peach halves on a baking sheet with a dish of melted butter nearby.

    2. Brush the nectarine halves with melted butter.

    Four peach halves on a baking sheet topped with melted butter and cinnamon.

    3. Sprinkle cinnamon over the nectarines.

    Four peach halves cooking on a grill.

    4. Grill the nectarines on both sides until softened.

    Pecans toasting in a skillet.

    5. Toast the pecans in a dry skillet.

    Butter and sugar melting in a dish of toasted pecans.

    6. Stir in the butter and brown sugar and cook until melted and bubbling.

    FAQs

    Can I make this ahead of time?

    You can make the cinnamon whipped cream a couple of hours before serving, and you can cook the praline crunch topping up to 3 hours before serving, but the nectarines are best cooked just before serving.

    Store the whipped cream in a covered bowl in the fridge. Scoop the praline mixture into a bowl and store at room temperature until you're ready to serve. If it clumps together, gently break the pieces apart with your fingers.

    How do you pit a nectarine?

    Use a sharp knife to cut around the nectarine from stem to bottom, following the ridge in the fruit. Using two hands, twist the two halves of the nectarine away from each other. One half should pull away from the pit. Use a sharp knife to gently pry the pit out of the other half of the fruit.

    Tips and Troubleshooting

    • Chill your bowl and beaters before whipping the cream to help it stay light and fluffy after beating.
    • If you prefer a sweetened whipped cream, beat in 1 to 2 tablespoons of powdered sugar when adding the cinnamon.
    • Cook time will depend on the ripeness of the nectarines. If your nectarines are very firm, allow for a couple extra minutes of grilling.
    • This grilled nectarine recipe is suitable for gluten-free and vegetarian diets.
    Two plates topped with grilled nectarines, candied pecans, and whipped cream.

    More Grilled Dessert Recipes You'll Love

    A portion of skillet peach cobbler in a bowl with ice cream and the remaining cobbler in the skillet.
    Grilled Skillet Peach Cobbler
    Spiced grilled plums in a bowl on a plate with a fork and checkered napkin on the side.
    Spiced Grilled Plums

    Recipe

    Two plates topped with grilled nectarines, candied pecans, and whipped cream.

    Grilled Nectarines with Praline Crunch

    A woman's face.Angie Zoobkoff
    Topped with crunchy candied pecans and fluffy cinnamon whipped cream, sweet grilled nectarines become a spectacular summer dessert.
    No ratings yet
    Print Recipe Pin Recipe
    Prep Time 15 minutes mins
    Cook Time 10 minutes mins
    Total Time 25 minutes mins
    Course Dessert
    Cuisine American
    Servings 4 servings
    Calories 435 kcal

    Equipment

    • Grill
    • Hand mixer or stand mixer

    Ingredients
      

    • 1 cup whipping cream
    • ¾ teaspoon cinnamon divided
    • 4 tablespoons salted butter divided
    • 4 medium nectarines halved and pitted
    • ½ cup pecan pieces
    • â…“ cup brown sugar

    Instructions
     

    • Pour the cream into a medium bowl. Use a hand mixer or stand mixer to beat the cream to stiff peaks, about 4 minutes. Beat in ½ teaspoon cinnamon.
    • Preheat the grill for medium-high heat (400°F | 200°C).
    • Melt 1 tablespoon of the butter and brush over the nectarine halves. Sprinkle with the remaining ¼ teaspoon cinnamon.
    • Grill the nectarines, flipping once until grill marks appear and they are slightly softened, about 3 minutes per side.
    • While the nectarines are grilling, place the pecans in a small skillet and set over medium-low heat. Cook, shaking and stirring occasionally, until the nuts are fragrant and beginning to darken, about 5 minutes. You can do this on a side burner or use a cast iron skillet and do it directly on the grill.
    • Add the remaining 3 tablespoons of butter and the brown sugar to the skillet. Cook, stirring constantly until the butter is melted and the sugar is dissolved. When the mixture starts to bubble and thicken, remove it from the heat.
    • Divide the grilled nectarine halves among 4 plates. Spoon some of the warm praline mixture over the nectarines, and top with a dollop of cinnamon whipped cream. Serve immediately.

    Notes

    • Keep it cold--Chill your bowl and beaters before whipping the cream to help it stay light and fluffy after beating.
    • Sweeten it--If you prefer a sweetened whipped cream, beat in 1 to 2 tablespoons of powdered sugar when adding the cinnamon.
    • Cooking time--Cook time will depend on the ripeness of the nectarines. If your nectarines are very firm, allow for a couple extra minutes of grilling.
    • Dietary--This grilled nectarine recipe is suitable for gluten-free and vegetarian diets.

    Nutrition

    Serving: 1 portionCalories: 435kcalCarbohydrates: 35gProtein: 3gFat: 33gCholesterol: 97mgSodium: 107mgFiber: 3gSugar: 29g
    Keyword grilled dessert, stone fruit recipes, summer grilling
    Tried this recipe?Let us know how it was!

    August 5, 2025 Camping

    Campfire Dutch Oven Pizza

    With a crisp, chewy crust, gooey melted cheese, and all your favorite toppings, this campfire Dutch oven pizza is a fantastic camping meal that comes together in 30 minutes and with just one pot.

    A cooked pizza in a Dutch oven.

    There's no reason to miss out on pizza night just because you're camping. Your Dutch oven is the ideal vessel for creating a pie with a crisp, chewy crust that can stand up to any combination of toppings. Save yourself some time and prep your toppings ahead of time and make (or buy) pizza dough before heading out.

    [feast_advanced_jump_to]

    Ingredients and Substitutions

    Ingredients for Dutch oven pizza--pizza sauce, dough, toppings, and cheese.
    • Pizza dough--Use your favorite store-bought or homemade pizza dough for this campfire pizza recipe. If you're using a large Dutch oven (with a base 12-inches or larger), you'll need about 1 pound (454 g) of pizza dough.
    • Toppings--Use your favorite combination of meats, cheese, vegetables, and sauce to create your pizza.

    How to Make Pizza in a Dutch Oven

    An uncooked pizza on a piece of parchment.

    1. Stretch the pizza dough to slightly less than the size of the Dutch oven. Spread the sauce over and add your toppings.

    A Dutch oven in a campfire, covered with embers.

    2. Transfer it to the Dutch oven and cover the lid with coals. Cook until the crust is golden and the cheese is melted.

    FAQs

    What size of Dutch oven do I need for pizza?

    I recommend using the largest Dutch oven you have. I tested the recipe using a 7-quart Dutch oven, which has a base about 12 inches in diameter. This will make a pizza large enough to feed 3 people. A 10 or 12-quart oven will have a diameter of about 14 inches.

    How many coals do I need?

    It's going to depend on the size of the Dutch oven that you're using. The goal is to keep the oven very hot without adding too much heat from the bottom, which will result in a burned crust. I recommend using twice as many coals or embers on the lid as underneath. If you've got a 7 or 8 quart Dutch oven, you'll use about 10 coals on the bottom and 20 on the lid. If you've got a 10 to 12-quart oven, you'll need a few extra.

    How can I tell when it's done?

    To check for doneness, remove the lid from the Dutch oven and carefully set aside. Don't remove the coals until you know your pizza is finished! Lift the crust of the pizza and peek underneath -- it should be golden brown in spots, crisp on the outside, but still be soft when squeezed. The cheese should be melted and bubbling, and the edges of your toppings should be slightly crisp.

    Tips and Troubleshooting

    • Don't skip the preheating step. It's critical for helping to develop a crispy crust.
    • Use parchment to make it easier to remove the pizza and minimize the amount of cleanup.
    • The cooking time is approximate and will depend on the thickness of your crust and the heat of your coals. Thicker crust will take longer to cook.
    • Since you're cooking in a Dutch oven outside, the cooking time can vary due to outside temperature and wind. If you're cooking on a very windy day, try to protect the Dutch oven with a barrier, such as a tarp.
    A cooked pizza on a picnic table.

    More Dutch Oven Recipes You'll Love

    A bowl of mussels with two pieces of garlic bread on the side.
    Dutch Oven Mussels
    A partially sliced meatloaf on a platter with a bowl of peas and a bowl of mashed potatoes nearby.
    Dutch Oven Meatloaf

    Recipe

    A cooked pizza in a Dutch oven.

    Campfire Dutch Oven Pizza

    A woman's face.Angie Zoobkoff
    With its crispy, chewy crust, gooey melted cheese, and all your favorite toppings, this Dutch oven pizza is a fantastic camping meal that will rival any homemade or takeout version.
    No ratings yet
    Print Recipe Pin Recipe
    Prep Time 10 minutes mins
    Cook Time 20 minutes mins
    Total Time 30 minutes mins
    Course Main Course
    Cuisine American
    Servings 3 servings
    Calories 453 kcal

    Equipment

    • 6-to-8-quart cast iron Dutch oven or larger
    • Parchment paper

    Ingredients
      

    • 1 pound (454 g) pizza dough
    • 4 tablespoons pizza sauce
    • Pizza toppings such as shredded mozzarella, pepperoni, bacon, mushrooms, onion, and peppers

    Instructions
     

    • Prepare a bed of hot coals in a campfire or prepare about 30 charcoal briquettes in a chimney. The coals are ready when they are white.
    • Place the Dutch oven on a bed of embers (or about 10 pieces of charcoal) with about twice as many embers (or 20 briquettes) on the lid. Let the oven preheat for 10 minutes while you assemble the pizza.
    • Lay a piece of parchment paper on a flat surface. Stretch or roll the dough to a circle slightly smaller than the Dutch oven and place it in the center of the parchment.
    • Spread the pizza sauce over the dough, leaving a ½-inch border on the edge. Arrange your favorite toppings over the sauce.
    • Carefully remove the lid from the Dutch oven. Using the parchment as a sling, carefully transfer the pizza with the parchment to the preheated Dutch oven. Replace the lid.
    • Cook until the crust is golden brown and the cheese is melted and toppings are beginning to crisp, about 20 minutes, replacing embers if needed. If using charcoal briquettes, one batch should be enough to preheat the oven and cook the pizza.
    • Remove the Dutch oven from the fire pit and carefully remove the lid. Use the parchment to lift the pizza from the oven and slide it onto a large plate. Let it cool for 5 minutes before slicing and serving.

    Notes

    • Preheat--Don't skip the preheating step. It's critical for helping to develop a crispy crust.
    • Make it easier--Use parchment to make it easier to remove the pizza and minimize the amount of cleanup.
    • Cooing time--The cooking time is approximate and will depend on the thickness of your crust and the heat of your coals. Thicker crust will take longer to cook.
    • Protect your oven--Since you're cooking in a Dutch oven outside, the cooking time can vary due to outside temperature and wind. If you're cooking on a very windy day, try to protect the Dutch oven with a barrier, such as a tarp.

    Nutrition

    Serving: 1 portionCalories: 453kcalCarbohydrates: 70gProtein: 16gFat: 11gSodium: 902mgFiber: 4gSugar: 3g
    Keyword camping pizza, dutch oven cooking, homemade pizza, kid-friendly camping meals
    Tried this recipe?Let us know how it was!

    August 1, 2025 Camping

    Potato Salad with Dill Pickles

    Ready in just 30 minutes, this make-ahead potato salad with dill pickles is a summer staple for camping trips, backyard BBQs, picnics, and more.

    A bowl of potato salad with parsley on top.

    Although I'm partial to tangy French-style potato salad, there's something irresistible about classic creamy potato salad. This version has all the necessary elements -- tender potatoes, a rich mayo dressing, plenty of crunch from celery and onion, egg, and a healthy dose of dill pickles. If you've never tried your potato salad with pickles, give this a try. The tangy flavor is the perfect counterpart to the creamy dressing.

    [feast_advanced_jump_to]

    Ingredients and Substitutions

    Ingredients for potato salad with dill pickles--potatoes, red onion, mayo, parsley, celery, Dijon mustard, eggs, pickles, and vinegar.
    • Potatoes--I recommend small yellow potatoes for this recipe. You can also use larger ones, and cut them into even pieces. I prefer yellow potatoes because they have enough starch to be soft and a little fluffy around the edges but won't fall apart on you. Avoid using russet potatoes, as they are too starchy and won't hold up in the salad, but if you prefer red potatoes, you can use them.
    • Mayonnaise--For the creamiest flavor, use full-fat mayo.
    • Pickles--Use your favorite dill pickles here, whether homemade or store-bought.
    • Parsley--This adds a herby note to the salad, but there's definitely some room for choice here. Want extra dill flavor? Use fresh dill instead. Want more onion flavor? Use chopped chives.

    How to Make Potato Salad with Pickles

    Two eggs in a saucepan of water.

    1. Steam the eggs in a saucepan of simmering water. Cool in a bath of ice water, then peel. Chop the eggs.

    Cut potatoes simmering in a saucepan of water.

    2. Simmer the potatoes until tender.

    Cut potatoes on a baking sheet.

    3. Drain the potatoes and cool in a single layer on a baking sheet.

    A bowl with mayo, onion, celery, and pickles, a tray of cut potatoes, and a bowl of chopped egg.

    4. Stir the celery, onion, mayo, parsley vinegar, mustard, and pickle juice together. Fold in the potatoes and egg. Season to taste.

    FAQs

    How long will this keep?

    When stored in a refrigerator or cooler, the salad will keep for up to 4 days.

    How do you safely store creamy potato salad?

    Because it's made with mayonnaise, it's important to keep the salad cool. Store it in the fridge or your cooler until you're ready to serve, and if it's a warm day, keep it in a cool spot out of direct sunlight or place the bowl of salad over a bowl of ice.

    Tips and Troubleshooting

    • If you find the flavor of onion to be overpowering, soak the chopped onion for 10 minutes in a bowl of cold water before draining and adding to the salad.
    • This recipe is suitable for dairy-free, gluten-free, and vegetarian diets.
    A bowl of potato salad with parsley on top.

    More Salad Recipes You'll Love

    A bowl of panzanella with a serving spoon on the side.
    Grilled Panzanella
    A bowl of marinated bean salad with cilantro and a lime on the side.
    Marinated Bean Salad

    Recipe

    A bowl of potato salad with parsley on top.

    Potato Salad with Dill Pickles

    A woman's face.Angie Zoobkoff
    This creamy potato salad has all the best parts of the classic salad, with the addition of a healthy dose of dill pickles to take it over the top.
    No ratings yet
    Print Recipe Pin Recipe
    Prep Time 15 minutes mins
    Cook Time 15 minutes mins
    Total Time 30 minutes mins
    Course Salad
    Cuisine American
    Servings 6 servings
    Calories 187 kcal

    Ingredients
      

    • 2 large eggs
    • 1½ pounds (680 g) baby yellow potatoes cut into quarters
    • ½ cup mayonnaise
    • â…“ cup chopped dill pickle
    • ¼ cup chopped red onion
    • ¼ cup chopped celery
    • 2 tablespoons chopped fresh parsley
    • 1 tablespoon Dijon mustard
    • 1 tablespoon white wine vinegar
    • 2 to 3 teaspoons dill pickle juice
    • Salt and freshly ground black pepper

    Instructions
     

    • Place the eggs in a small saucepan with ½ cup of water. Bring to a boil over medium-high heat, then cover and reduce the heat to low. Steam the eggs for 11 minutes.
    • Use a slotted spoon to transfer the eggs to a bowl of ice water to cool. Peel and chop.
    • While the eggs are cooking, place the potatoes in a large saucepan of cold salted water. Bring to a simmer over medium heat, then reduce the heat to maintain a simmer until the potatoes are tender but not falling apart, about 10 minutes.
    • Drain the potatoes and spread them in a single layer on a baking sheet to cool.
    • While the potatoes are cooling, mix the mayonnaise, pickles, onion, celery, parsley, mustard, vinegar, and pickle juice in a large serving bowl.
    • Fold in the cooled potatoes and egg. Taste and add salt and pepper to taste. Cover and chill until you're ready to serve.

    Notes

    • Soak the onion--If you find the flavor of onion to be overpowering, soak the chopped onion for 10 minutes in a bowl of cold water before draining and adding to the salad.
    • Dietary--This recipe is suitable for dairy-free, gluten-free, and vegetarian diets.

    Nutrition

    Serving: 1 portionCalories: 187kcalCarbohydrates: 26gProtein: 5gFat: 8gCholesterol: 67mgFiber: 2gSugar: 3g
    Keyword classic potato salad, easy salad recipe, easy side dish recipes, potato side dishes
    Tried this recipe?Let us know how it was!

    July 29, 2025 Collections

    8 Best Grilled Rib Recipes

    Unsure of the best way to grill your ribs? You've come to the right place. Whether you've got all day to slowly smoke pork ribs until meltingly tender, or you've got a quick half hour to toss together some amazing flanken-cut beef short ribs, there's the perfect BBQ rib recipe for you here.

    1
    Recipe and photo credit: Chew Out Loud
    Kalbi (Galbi) Korean BBQ Short Ribs
    These Kalbi Korean short ribs are winningly delicious and irresistibly tender. There IS a surprise simple secret to making super tender grilled short ribs.
    Get the recipe: Korean BBQ Short Ribs
    2
    A partially cut rack of grilled spare ribs on a platter with a knife.
    3-2-1 Spare Ribs
    This 3-2-1 spare ribs recipe uses the popular smoking technique to create tender, smoky side ribs so flavorful that everyone will be clamoring for seconds.
    Get the recipe: 3-2-1 Spare Ribs
    3
    Recipe and photo credit: Couple in the Kitchen
    Homemade McRib Sandwich
    Have a McRib sandwich whenever you want - our homemade McRib sandwich recipe features real, fall-off-the-bone pork rib meat.
    Get the recipe: Homemade McRib Sandwich
    4
    Recipe and photo credit: Grits and Pinecones
    Amazing Smoked Beef Short Ribs
    Whether you are a smoked meat aficionado or just a backyard griller, you will love this easy recipe for big, beefy, smoked beef short ribs.
    Get the recipe: Smoked Beef Short Ribs
    5
    Recipe and photo credit: Simple and Fraiche
    Smoked Traeger Baby Back Ribs
    These slow smoked ribs are fall-off-the-bone tender and coated in a hot honey glaze. An easy, flavor-packed recipe perfect for your Traeger grill.
    Get the recipe: Smoked Traeger Baby Back Ribs
    6
    Strips of grilled flanken short ribs on a wooden board.
    Grilled Flanken Short Ribs
    A simple marinade of adobo sauce, lime, and spices adds smoky heat and tenderness to this rich and flavorful cut of meat, which cooks up quickly on the grill.
    Get the recipe: Grilled Flanken Short Ribs
    7
    Recipe and photo credit: Food Meanderings
    Grilled Greek Ribs
    These grilled Greek ribs are a scrumptious combination of Mediterranean flavors like lemon, garlic and oregano on baby back ribs!
    Get the recipe: Grilled Greek Ribs
    8
    Three pieces of grilled baby back ribs on a blue plate with a jar of bbq sauce.
    Make-Ahead Camping Ribs
    Get a head start on your camping meals with these falling-off-the-bone back ribs that can be cooked at home and finished at camp.
    Get the recipe: Make-Ahead Ribs

    July 25, 2025 Breakfast

    Peach Melba Overnight Oats

    Peach Melba overnight oats are an easy make-ahead breakfast that's perfect for camping, road trips, or a busy morning on-the-go. Made with fresh peaches and raspberries in a jam-swirled oat mixture, it's a no-cook breakfast you'll happily jump out of bed for.

    A jar of overnight oats topped with peaches and raspberries.

    As far as make-ahead camping breakfasts go, you can't really beat a jar of creamy oats topped with fresh peaches and raspberries that requires no extra work in the morning beyond locating a spoon and removing the lid. Feel free to play around with other fruit and jam combinations that are in season, like rhubarb and apple or strawberry and blueberry. If warm oats are more your thing, give these make-ahead oatmeal jars a try.

    [feast_advanced_jump_to]

    Ingredients and Substitutions

    Ingredients for peach melba overnight oats--oat milk, peach, oats, raspberries, greek yogurt, and jam.
    • Oats--I recommend using regular whole rolled oats for this recipe. You may also see them labeled old-fashioned oats. Don't use steel-cut oats as they won't soften enough, and avoid quick oats as they'll become mushy after sitting overnight.
    • Oat milk--I like the flavor of oat milk here, but you can use any type of milk, whether dairy or non-dairy.
    • Greek yogurt--You can make this with low-fat or full-fat Greek yogurt. The higher the fat content of your yogurt, the thicker your finished overnight oats will be.
    • Peach--Choose a sweet-smelling peach that gives slightly when pressed but isn't mushy. Avoid any peaches that have cuts or bruises or that feel very soft or very hard.
    • Raspberries--Look for firm, plump raspberries. Avoid ones that are very soft or mushy.

    How to Make Overnight Oats

    A jar of overnight oats.

    1. Stir the oats, milk, Greek yogurt, and a pinch of salt together in a jar with lid.

    A jar of overnight oats, a bowl of diced peaches and raspberries, and a small dish with traces of jam.

    2. Dollop the jam over the oat mixture, then top with peaches and raspberries. Cover and chill overnight.

    FAQs

    What is peach melba?

    Originally a French dessert that combined peaches and raspberries with ice cream, Peach Melba was invented to honor Australian opera singer Nellie Melba. The classic pairing of the two fruits has endured since its conception in 1893, and can be found in dessert, jam, ice cream, and cocktail combinations today.

    How far in advance can you make overnight oats?

    You can make this overnight oats recipe up to 5 days in advance, but since raspberries soften quite quickly, I recommend enjoying it within 2 days of making it.

    Tips and Troubleshooting

    • The oat mixture will be very thin and liquid-y after stirring together. This is normal and the mixture will thicken overnight as it sits.
    • This recipe is suitable for gluten-free and vegetarian diets. Be sure to check that your oats are certified gluten-free, if this is a dietary concern.

    More Camping Breakfast Recipes You'll Love

    A glazed cinnamon roll on a plate with an unglazed one in the background.
    Dutch Oven Cinnamon Rolls
    A coconut yogurt parfait topped with macerated cherries in a jar with fresh cherries scattered around the jar.
    Coconut Yogurt Parfait

    Recipe

    A jar of overnight oats topped with peaches and raspberries.

    Peach Melba Overnight Oats

    A woman's face.Angie Zoobkoff
    An easy make-ahead breakfast that combines fresh peaches and raspberries nestled into a bed of creamy jam-swirled oats.
    No ratings yet
    Print Recipe Pin Recipe
    Prep Time 10 minutes mins
    Chill Time 8 hours hrs
    Total Time 8 hours hrs 10 minutes mins
    Course Breakfast, Snack
    Cuisine American
    Servings 1 serving
    Calories 252 kcal

    Equipment

    • 16-ounce jar with lid

    Ingredients
      

    • ½ cup old-fashioned rolled oats
    • ½ cup oat milk or other dairy or non-dairy milk
    • ¼ cup plain Greek yogurt low-fat or full-fat
    • 1 pinch salt
    • 1 tablespoon raspberry jam
    • ¼ cup diced peaches
    • ¼ cup fresh raspberries

    Instructions
     

    • In a lidded jar, combine the oats, milk, yogurt, and a pinch of salt. Stir well to combine.
    • Dollop the jam over the top. It will sink into the mixture and disappear. This is fine and completely normal.
    • Place the peaches and raspberries on top. Screw the lid onto the jar and chill in the fridge for 8 hours or overnight. The oats are best enjoyed within 2 days.

    Notes

    • Let it thicken--The oat mixture will be very thin and liquid-y after stirring together. This is normal and the mixture will thicken overnight as it sits.
    • Dietary--This recipe is suitable for gluten-free and vegetarian diets. Be sure to check that your oats are certified gluten-free, if this is a dietary concern.

    Nutrition

    Serving: 1 jarCalories: 252kcalCarbohydrates: 47gProtein: 14gFat: 2gSodium: 86mgFiber: 5gSugar: 28g
    Keyword camping breakfast, easy breakfast, make ahead breakfast
    Tried this recipe?Let us know how it was!

    July 22, 2025 Everyday Staples

    BBQ Rub for Pork

    This BBQ rub for pork is a unique blend of 9 spices that's ideal for coating smoked spare ribs, simple grilled pork chops, and more. With a homemade pork bbq rub this simple to make, there's no going back to store-bought.

    A spoonful of BBQ rub on a white surface.

    This homemade bbq rub recipe is a smoky, slightly spicy blend that pairs beautifully with pork. It imparts just enough flavor to enhance the char you get from the grill, but without overpowering the meat. To get the most flavor from this blend, really rub it into the meat before grilling to help it penetrate.

    [feast_advanced_jump_to]

    Why You'll Love This Recipe

    • You can easily scale the recipe to make as much as you need.
    • It's more cost-effective than store-bought versions.
    • It's ready in just 5 minutes.
    • It stores well for up to a year.

    Ingredients and Substitutions

    Ingredients for BBQ rub--cumin, brown sugar, onion powder, oregano, smoked paprika, salt, pepper, garlic powder, and ancho chile powder.
    • Smoked paprika--The smoky flavor adds great depth to the spice blend, and to your finished pork, but if you prefer the flavor of sweet paprika, feel free to substitute that. I don't recommend using hot paprika as the finished blend may be too spicy and overwhelm the meat.
    • Ancho chile powder--This adds smoky heat to the spice rub that pairs really well with pork. It's worth looking for at your local supermarket, or you can order ancho chile powder online. Alternatively, you can grind dried ancho chiles in a spice or coffee grinder until powdery.

    How to Make Pork Dry Rub

    A small dish of BBQ rub with a spoon resting inside.

    1. Combine the spices in a small bowl and mix well. Transfer to a sealed jar or container.

    FAQs

    How long do homemade dry rubs stay fresh?

    When made with fresh spices, homemade dry rubs are good for up to 1 year. They are still safe to use after that time, however, the flavor will diminish as they age.

    What's the best way to store homemade bbq rub?

    Store your rub in a sealed jar or container in a cool, dry place, away from light. It's not necessary to refrigerate it, but do keep it away from any humidity, which will cause it to clump.

    Tips and Troubleshooting

    • For best results, use fresh spices for making your spice blends.
    • Give your BBQ rub a good shake or stir before using as some of the spices may settle during storage.
    • This recipe is suitable for gluten-free and dairy-free diets.
    A small dish of BBQ rub with a spoon resting inside.

    More Everyday Staples You'll Love

    A spoon dripping into a jar of mustard bbq sauce.
    Spicy Mustard BBQ Sauce
    A spoonful of seasoning mixture.
    All-Purpose Seasoning Blend

    Recipe

    A spoonful of BBQ rub on a white surface.

    BBQ Rub for Pork

    A woman's face.Angie Zoobkoff
    This simple blend of 9 spices is the perfect coating for grilled pork ribs, roasts, chops, and more.
    No ratings yet
    Print Recipe Pin Recipe
    Prep Time 5 minutes mins
    Total Time 5 minutes mins
    Course Condiment
    Cuisine American
    Servings 3 tablespoons
    Calories 26 kcal

    Ingredients
      

    • 1 tablespoon brown sugar
    • 1 tablespoon smoked paprika
    • 1 teaspoon ancho chile powder
    • ½ teaspoon garlic powder
    • ½ teaspoon onion powder
    • ½ teaspoon dried oregano
    • ½ teaspoon ground cumin
    • ½ teaspoon kosher salt
    • ¼ teaspoon freshly ground black pepper

    Instructions
     

    • Combine all the ingredients in a jar or container and stir well. Cover and store in a cool, dark place for up to 1 year.

    Notes

    • Fresh is best--For best results, use fresh spices for making your spice blends.
    • Shake before using--Give your BBQ rub a good shake or stir before using as some of the spices may settle during storage.
    • Dietary--This recipe is suitable for gluten-free and dairy-free diets.

    Nutrition

    Serving: 1 tablespoonCalories: 26kcalCarbohydrates: 6gSodium: 400mgSugar: 4g
    Keyword bbq rub, grilled pork, homemade condiments, smoked pork
    Tried this recipe?Let us know how it was!

    July 18, 2025 Dinner

    Grilled Old Bay Shrimp

    Grilled Old Bay shrimp is a quick and easy seafood dinner that combines juicy grilled shrimp with a buttery coating of the classic seafood seasoning. It requires only 3 ingredients and is ready in just 25 minutes.

    Four grilled shrimp skewers on a platter.

    Shrimp skewers have always been a quick and easy meal, and my garlic butter shrimp skewer recipe is proof of that, but what I truly love about this Old Bay shrimp recipe is that it calls for only 3 ingredients. Which makes it a no-brainer for an ultra-simple weeknight meal, or to toss in the cooler for a stress-free weekend camping trip.

    [feast_advanced_jump_to]

    Why You'll Love This Recipe

    • It requires only 3 ingredients.
    • It's ready in less than 30 minutes.

    Ingredients and Substitutions

    Ingredients for Old Bay shrimp--shrimp, butter, and Old Bay seasoning.
    • Shrimp--I recommend using 16/20 count raw, deveined shrimp for this grilled shrimp recipe. Anything smaller may be difficult to skewer and may cook too quickly, resulting in a rubbery texture. If the shrimp are not already peeled, you will need to remove the peel before skewering.
    • Unsalted butter--Using unsalted butter will help to keep the sodium level in check as the Old Bay seasoning is quite salty.
    • Old Bay seasoning--This is available in the spice section of many supermarkets, or you can purchase Old Bay seasoning online.

    How to Grill Shrimp Skewers

    Four skewers of raw shrimp on a metal baking sheet.

    1. Thread the shrimp onto skewers.

    A bowl of melted butter mixed with Old Bay seasoning.

    2. Stir the melted butter and Old Bay seasoning together in a bowl.

    Shrimp skewers being brushed with seasoned melted butter.

    3. Brush the shrimp with the seasoned butter.

    Four shrimp skewers on the grill.

    4. Grill the shrimp skewers until cooked through.

    FAQs

    My shrimp are still frozen. How can I quickly defrost them?

    Place your shrimp in a sealed bag, fill a large bowl with cold water and submerge the bag in the bowl. Place a plate or heavy object on top to keep it submerged. They'll be thawed in about 20 minutes.

    How can I tell when the shrimp are cooked?

    As the shrimp cook, they'll change from grey in color to a bright pink. They will also become slightly firm. You'll know that they're ready when they are pink, opaque throughout, and firm to the touch when pressed. Take care not to overcook them though, as they become tough and rubbery.

    Serving Suggestions

    Offer lemon wedges for squeezing over the shrimp and cocktail sauce for dipping. Serve your grilled shrimp skewers with simple sides, like a make-ahead salad and a basket of cheddar biscuits or cornbread.

    Tips and Troubleshooting

    • I love these flat metal BBQ skewers as the flat surface prevents food from spinning, however, regular wooden or metal skewers will still work. If you're using wooden skewers, soak them in water for 1 hour before threading and cooking the shrimp. Metal skewers do not need to be soaked.
    • This recipe is suitable for gluten-free diets.
    Four grilled shrimp skewers on a platter with lemon wedges and cocktail sauce on the side.

    More Shrimp Recipes You'll Love

    Four garlic butter shrimp skewers on a rectangular platter, sprinkled with fresh parsley.
    Garlic Butter Shrimp Skewers
    A foil packet with shrimp, steak, corn, red onion and a piece of garlic bread on top.
    Surf and Turf Foil Packets

    Recipe

    Four grilled shrimp skewers on a platter with lemon wedges and cocktail sauce on the side.

    Grilled Old Bay Shrimp

    A woman's face.Angie Zoobkoff
    For this easy seafood dinner, juicy shrimp are slathered with Old Bay butter and finished on the grill.
    No ratings yet
    Print Recipe Pin Recipe
    Prep Time 20 minutes mins
    Cook Time 5 minutes mins
    Total Time 25 minutes mins
    Course Main Course
    Cuisine American
    Servings 4 servings
    Calories 201 kcal

    Equipment

    • Skewers for grilling

    Ingredients
      

    • 1 ½ pounds (680 g) large shrimp (16/20 count) peeled and deveined
    • 3 tablespoons unsalted butter melted
    • 2 teaspoons Old Bay seasoning
    • Lemon wedges for serving (optional)
    • Cocktail sauce for serving (optional)

    Instructions
     

    • Preheat the grill for medium heat (400°F | 200°C)).
    • Thread the shrimp onto 4 long skewers (you should have 7 to 8 shrimp per skewer).
    • In a small bowl, mix the melted butter and Old Bay seasoning.
    • Brush the seasoned butter over both sides of the shrimp.
    • Grill until the shrimp are pink and opaque throughout, flipping once, 2 to 3 minutes per side.
    • Serve warm with lemon wedges and cocktail sauce for dipping, if desired.

    Video

    Notes

    • Skewers--If you're using wooden skewers, soak them in water for 1 hour before threading and cooking the shrimp. Metal skewers do not need to be soaked.
    • Dietary--This recipe is suitable for gluten-free diets.

    Nutrition

    Serving: 1 skewerCalories: 201kcalCarbohydrates: 2gProtein: 24gFat: 10gCholesterol: 246mgSodium: 339mg
    Keyword 30 minute meals, grilled seafood, seafood recipes
    Tried this recipe?Let us know how it was!

    July 15, 2025 Collections

    17 Amazing Food Ideas for Every Summer Picnic

    We get pretty choosy around here about what constitutes "picnic food". Ideally, it should be easy to make ahead, portable, travel well in a cooler, and should be exceptionally tasty when served at room temperature. That's a lot to ask of a recipe, especially when we also want it to also be light and fresh, and, well, summery. Thankfully, all of these summer picnic food ideas check those boxes and then some. The hardest part will be choosing which ones to take along.

    1
    Recipe and photo credit: Craving Something Healthy
    Chopped Italian Sandwich
    This chopped Italian sandwich is easy to make ahead of time with your favorite meats, cheese, and jarred vegetables. It's perfect for a summer picnic.
    Get the recipe: Chopped Italian Sandwich
    2
    Recipe and photo credit: Like Mother Like Daughter
    Creamy Broccoli Salad
    This creamy broccoli salad is full of chopped broccoli, red onion, cranraisins, bacon and sunflower seeds all coated in a sweet creamy sauce!
    Get the recipe: Creamy Broccoli Salad
    3
    Two halves of a turkey ciabatta sandwich with tomatoes, pesto, and mozzarella, stacked on top of each other on a cutting board.
    Turkey Ciabatta Sandwich
    An easy handheld meal that's loaded with turkey, pesto, tomatoes, and cheese. Perfect for a casual camping meal or to take along on a hike or picnic.
    Get the recipe: Turkey Ciabatta Sandwich
    4
    Recipe and photo credit: Recipes From a Pantry
    Mezze Platter
    Mezze platters are easy to assemble, super versatile, and full of Mediterranean flavors. Mezze recipes are just the thing for entertaining and picnics!
    Get the recipe: Mezze Platter
    5
    Two pieces of fried chicken on a paper plate.
    Recipe and photo credit: Food Meanderings
    Shortcut Fried Chicken
    This shortcut fried chicken (without buttermilk), is quick and easy to make (using chicken thighs) and great for picnics, both hot and cold!
    Get the recipe: Shortcut Fried Chicken
    6
    A white bowl filled with pasta salad.
    Italian Pasta Salad
    This make-ahead tortellini salad with artichokes, tomatoes, olives, and creamy Italian dressing is a summer staple for camping, potlucks, and picnics.
    Get the recipe: Italian Pasta Salad
    7
    Recipe and photo credit: Little Sunny Kitchen
    Grilled Chicken Wraps
    These grilled chicken wraps are perfect for a quick summer lunch! They’re packed with flavor, easy and perfect for packed lunches and picnics.
    Get the recipe: Grilled Chicken Wraps
    8
    Recipe and photo credit: The Fresh Cooky
    Chicken Bacon Ranch Pasta Salad
    Savor the ultimate flavor medley in this chicken bacon ranch pasta salad. Tender chicken, crispy bacon, veggies, and cheese in creamy ranch dressing create a mouthwatering combination you’ll crave.
    Get the recipe: Chicken Bacon Ranch Pasta Salad
    9
    Recipe and photo credit: Peanut Butter & Julie
    Roasted Vegetable Sandwich
    The healthy, hearty roasted vegetable sandwich features layers of colorful roasted vegetables, fresh mozzarella, and homemade pesto.
    Get the recipe: Roasted Vegetable Sandwich
    10
    A bowl filled with raw vegetable marinated salad.
    Overnight Marinated Vegetable Salad
    This easy marinated salad is a colorful combination of crunchy raw vegetables tossed in a simple vinaigrette dressing. Healthy never tasted so good.
    Get the recipe: Marinated Vegetable Salad
    11
    Recipe and photo credit: Budget Delicious
    Grilled Watermelon Salad
    Grilled watermelon salad with feta and blueberries is the perfect summer salad! Easy, affordable and can be served alongside everything.
    Get the recipe: Grilled Watermelon Salad
    12
    A bowl of strawberry fruit dip with strawberries and cherries scattered around it.
    Strawberry Yogurt Fruit Dip
    This simple strawberry yogurt dip for fruit requires only 4 ingredients and 10 minutes of your time.
    Get the recipe: Strawberry Yogurt Fruit Dip
    13
    Recipe and photo credit: Homestead How-To
    Mason Jar Berry Fruit Salad with Citrus Mint Dressing
    This mason jar berry fruit salad is fresh, vibrant, and bursting with citrus mint flavor! It’s perfect for meal prep, picnics, or a refreshing snack.
    Get the recipe: Mason Jar Berry Fruit Salad
    14
    Four s'more jars with pudding, marshmallow fluff, and graham cracker topping.
    S'mores in a Jar
    For when you're craving s'mores, but don't have a campfire.
    Get the recipe: S'mores in a Jar
    15
    Recipe and photo credit: Baked Abundance
    Easy Key Lime Pie Bars
    These key lime pie bars are a delicious and refreshing dessert that combines the tangy taste of lime with a sweet, buttery cookie crust.
    Get the recipe: Key Lime Pie Bars
    16
    Recipe and photo credit: xoxo Bella
    Strawberry Shortcake in a Jar
    You don’t need many different ingredients for this mini dessert, and it’s a nice easy recipe to showcase fresh strawberries. Served in a mini mason jar or Weck jar, this individually sized dessert is perfect to pack in a picnic.
    Get the recipe: Strawberry Shortcake in a Jar
    17
    Recipe and photo credit: Living Chirpy
    Watermelon Sparklers
    Watermelon sparklers are a fun and great way to enjoy the juicy sweetness of watermelon. Pack them on your next picnic for a sweet, juicy treat!
    Get the recipe: Watermelon Sparklers

    July 11, 2025 Breakfast

    Strawberry Yogurt Fruit Dip

    Made with just four ingredients and ready in less than 15 minutes, this strawberry yogurt fruit dip is a great make-ahead snack for camping, potlucks, and more.

    A bowl of strawberry fruit dip with strawberries and cherries scattered around it.
    [feast_advanced_jump_to]

    I've never had a lot of difficulty getting my kids to eat fruit, however, if there's something nearby that's more convenient, they tend to reach for that first. But, if you have fruit washed and ready to go with a bowl of this creamy strawberry yogurt dip for fruit nearby, it becomes the first choice.

    This recipe uses Greek yogurt and a homemade strawberry purée to create dip that isn't overly sweet, but has tons of strawberry flavor. It's a great snack that you can feel good about eating.

    Why You'll Love This Recipe

    • It's a great make-ahead camping snack that everyone will enjoy (kids included).
    • It's ready in just 10 minutes.
    • It stores well for up to a week.

    Ingredients and Substitutions

    Ingredients for strawberry yogurt fruit dip--greek yogurt, vanilla, strawberries, and sugar.
    • Greek yogurt--Any type of plain Greek yogurt will work here. If you use fat-free, the consistency of the finished dip will be thin enough to drizzle. If you prefer a thicker dip, use full-fat yogurt.
    • Strawberries--This recipe works best with fresh summer strawberries. Look for berries that are bright red with firm bright greens on top. Cut away any bruised or very soft spots before using you berries.

    How to Make Strawberry Yogurt Fruit Dip

    Strawberry puree in a food processor.

    1. Combine the strawberries and sugar in a food processor and process until mostly smooth.

    Greek yogurt and strawberry puree being mixed together in a bowl.

    2. Stir the Greek yogurt and vanilla into the strawberry purée and mix well.

    FAQs

    Can you freeze fruit dip?

    It's safe to freeze it for up to 2 months, however, the texture may change after thawing. You may find that it is a little more grainy after freezing and thawing.

    Can I make this with frozen strawberries?

    Yes. Let the strawberries thaw before processing them with the sugar.

    Tips and Troubleshooting

    • Got vanilla Greek yogurt on hand? Use it and skip the extra vanilla.
    • The sweetness of your dip will depend on how ripe your strawberries are. The recipe is written based on using very ripe summer strawberries. If yours aren't quite as sweet, stir in extra sugar to taste once you've made the dip. Keep in mind that the fruit you use to dip will also be sweet.
    • Store the strawberry fruit dip in a sealed container or jar in the fridge for up to 1 week. Stir well before serving.
    • This recipe is suitable for gluten-free and vegetarian diets.
    A bowl of strawberry fruit dip with strawberries and cherries scattered around it.

    More Berry Recipes You'll Love

    A dish of blueberry sauce with a spoon resting inside.
    3-Ingredient Blueberry Sauce
    A bowl of cranberry relish garnished with a mint sprig.
    Spicy Cranberry Relish

    Recipe

    A bowl of strawberry fruit dip with strawberries and cherries scattered around it.

    Strawberry Yogurt Fruit Dip

    A woman's face.Angie Zoobkoff
    This simple strawberry yogurt dip for fruit requires only 4 ingredients and 10 minutes of your time.
    No ratings yet
    Print Recipe Pin Recipe
    Prep Time 10 minutes mins
    Total Time 10 minutes mins
    Course Snack
    Cuisine American
    Servings 8 servings (¼ cup)
    Calories 44 kcal

    Equipment

    • Food processor

    Ingredients
      

    • 1 cup fresh strawberries hulled and chopped
    • 2 tablespoons granulated sugar plus more to taste
    • 1 ½ cups Greek yogurt
    • ½ teaspoon vanilla extract
    • Fruit for dipping

    Instructions
     

    • Combine the strawberries and sugar in a food processor. Process until almost smooth, about 30 seconds.
    • Transfer the strawberry purée to a medium bowl. Stir in the Greek yogurt and vanilla. Taste and add more sugar, if desired.
    • Serve immediately with fruit for dipping or cover and chill for up to 1 week.

    Notes

    • Simple swap--Got vanilla Greek yogurt on hand? Use it and skip the extra vanilla.
    • Adding sugar--The sweetness of your dip will depend on how ripe your strawberries are. The recipe is written based on using very ripe summer strawberries. If yours aren't quite as sweet, stir in extra sugar to taste once you've made the dip. Keep in mind that the fruit you use to dip will also be sweet.
    • Storage--Store the strawberry fruit dip in a sealed container or jar in the fridge for up to 1 week. Stir well before serving.
    • Dietary--This recipe is suitable for gluten-free and vegetarian diets.

    Nutrition

    Serving: 0.25 cupCalories: 44kcalCarbohydrates: 7gProtein: 5gSodium: 16mgSugar: 6g
    Keyword camping snacks, fruit dip, healthy snacks
    Tried this recipe?Let us know how it was!

    July 8, 2025 Grilling

    Grilled Kohlrabi

    This grilled kohlrabi with garlic-parmesan dipping sauce is an easy summer side dish that will have you singing the praises of the crunchy vegetable. If you're new to kohlrabi, grilling is the way to go!

    Half-moon slices of kohlrabi with a bowl of dip on the side.

    Although it's probably not the first one that comes to mind when you think about grilled vegetarian dishes, kohlrabi are actually an awesome vegetable to cook over open flame. Their firm texture stands up to the heat of the grill, they cook quickly, and when served with a creamy garlic-parmesan dipping sauce, the crisp-tender slices will disappear faster than you can grill them.

    [feast_advanced_jump_to]

    Why You'll Love This Recipe

    • It's ready in just 20 minutes.
    • It's an excellent pre-dinner snack, or can be served as an easy grilled side dish. They're an excellent side to offer with grilled chicken gyros!
    • You can make the dipping sauce in advance.

    Ingredients and Substitutions

    Ingredients for grilled kohlrabi--lemon, mayo, kohlrabi, oil, parmesan, garlic powder, and garlic.
    • Kohlrabi--These are available at most large supermarkets and at farmer's markets when in season (spring and fall). Select kohlrabi that are firm and about the size of a baseball, with no browned or damaged areas. Avoid very large kohlrabi as they can be tough.
    • Parmesan cheese--Freshly grated cheese will give you the best flavor in your sauce, but in a pinch, you can use the pre-shredded.
    • Lemon--Freshly squeezed lemon juice is very nice here, but you can definitely use bottled if necessary.

    How to Grill Kohlrabi

    A creamy sauce mixture with Parmesan in a bowl.

    1. Make the dipping sauce. Mix the parmesan, mayonnaise, garlic, lemon juice, salt and pepper together in a small bowl.

    Sliced kohlrabi on a cutting board.

    2. Peel and slice the kohlrabi into ½-inch thick slices.

    Slices of kohlrabi tossed with seasoning in a bowl.

    3. Toss the kohlrabi with oil and season with garlic powder, salt, and pepper.

    Kohlrabi cooking on a grill.

    4. Grill the kohlrabi until slightly softened.

    FAQs

    What does kohlrabi taste like?

    Kohlrabi has a firm texture, similar to radish, with a flavor that is slightly sweet, like turnip. Cooking it on the grill adds a little bit of smoky flavor, and the cooking process enhances the slight sweetness.

    How do you peel kohlrabi?

    If your kohlrabi has greens attached, use a sharp knife to remove them. They are safe to eat and can be sautéed or cooked like any other sturdy green.

    Slice a thin layer off the top and bottom. To remove the skin, use a sharp knife or strong vegetable peeler. I prefer using a sharp knife as the surface has several bumps where the stems protrude, but a peeler will work. Place the kohlrabi on a firm surface and use one hand to hold it steady. With the other hand use the knife or peeler to remove the skin, working your way around the vegetable.

    Tips and Troubleshooting

    • You can prepare the garlic parmesan dipping sauce up to 1 day in advance. Store it in a sealed container or jar in the fridge until you're ready to serve.
    • Don't overcook! You want the kohlrabi slices to be slightly softened, but still have some crisp bite to them.
    • This recipe is suitable for gluten-free and vegetarian diets.

    More Grilled Vegetable Recipes You'll Love

    A bowl of cooked carrots with rosemary sprigs on the side.
    Grilled Carrots in Foil
    A bowl of grilled beets with crumbled goat cheese and fresh mint.
    Grilled Beets with Goat Cheese

    Recipe

    Half-moon slices of kohlrabi with a bowl of dip on the side.

    Grilled Kohlrabi

    A woman's face.Angie Zoobkoff
    These char-kissed slices of kohlrabi paired with creamy dipping sauce will have you happily devouring your daily dose of veggies.
    No ratings yet
    Print Recipe Pin Recipe
    Prep Time 12 minutes mins
    Cook Time 8 minutes mins
    Total Time 20 minutes mins
    Course Side Dish
    Cuisine American
    Servings 2 servings
    Calories 343 kcal

    Ingredients
      

    For the garlic-parmesan dipping sauce

    • ½ cup grated parmesan cheese
    • â…“ cup mayonnaise
    • 1 tablespoon lemon juice plus more if needed
    • 1 clove garlic minced
    • ¼ teaspoon salt plus more if needed
    • ¼ teaspoon freshly ground black pepper plus more if needed

    For the grilled kohlrabi

    • 1 large (18 oz | 500 g) kohlrabi
    • 2 teaspoons vegetable oil
    • ½ teaspoon garlic powder
    • Salt and freshly ground black pepper

    Instructions
     

    Make the dipping sauce

    • Preheat the grill for medium-high (400°F | 200°C).
    • In a medium bowl, mix the parmesan, mayonnaise, lemon juice, garlic, salt, and pepper together. Taste and add more lemon juice, salt, or pepper, if desired.

    Grill the kohlrabi

    • Peel and cut the kohlrabi into ½-inch-thick slices.
    • Place the kohlrabi slices in a large bowl. Drizzle with oil and toss to coat. Sprinkle the garlic powder over and season with salt and pepper to taste. Toss well to evenly coat each slice.
    • Grill until each slice is slightly softened, but still crisp, and grill marks have developed, about 4 minutes per side.
    • Serve warm with dipping sauce on the side.

    Notes

    • Get ahead--You can prepare the garlic parmesan dipping sauce up to 1 day in advance. Store it in a sealed container or jar in the fridge until you're ready to serve.
    • Don't overcook--You want the kohlrabi slices to be slightly softened, but still have some crisp bite to them.
    • Dietary--This recipe is suitable for gluten-free and vegetarian diets.

    Nutrition

    Serving: 1 portionCalories: 343kcalCarbohydrates: 24gProtein: 13gFat: 24gCholesterol: 30mgSodium: 869mgFiber: 8gSugar: 8g
    Keyword grilled side dishes, grilled vegetables
    Tried this recipe?Let us know how it was!

    July 3, 2025 Camping

    17 Fire Ban Camping Recipes

    Are you heading out on a summer camping trip in the middle of a fire ban? Don't let it put a damper on your camping meal plans! These 17 fire ban camping recipes focus on easy meals that can be prepared in advance or cooked on your camp stove or portable grill, which are generally permitted during fire restrictions.

    1
    A cast iron skillet filled with chorizo and sweet potato hash with sliced avocado and cilantro on top.
    Chorizo Sweet Potato Hash
    This hearty and satisfying sweet potato chorizo hash is made in your cast iron skillet with fresh sausage, diced sweet potatoes, red onion, and is topped with avocado and cilantro.
    Get the recipe: Chorizo Sweet Potato Hash
    2
    Muffuletta - An Easy Picnic Sandwich Recipe
    Recipe and photo credit: West Coast Kitchen Garden
    Muffuletta - An Easy Picnic Sandwich Recipe
    This Muffuletta is a pressed Italian American recipe with olive salad spread. Make-ahead, easy, delicious and known as a picnic sandwich.
    Get the recipe: Muffaletta
    3
    A white bowl filled with pasta salad.
    Camping Pasta Salad
    This make-ahead tortellini salad with artichokes, tomatoes, olives, and creamy Italian dressing is a summer staple for camping, potlucks, and picnics.
    Get the recipe: Camping Pasta Salad
    4
    A walking taco with Doritos and cheese with lettuce, sour cream, and tomato surrounding it.
    Camping Walking Tacos
    An easy handheld camping meal made with spiced ground beef and all your favorite taco fixings piled into a bag of nacho chips. Easy, fast, and kid-friendly.
    Get the recipe: Walking Tacos
    5
    Sloppy Joes
    Recipe and photo credit: Fresh Off the Grid
    Sloppy Joes
    These easy Sloppy Joes are fast, simple, and as tasty as you remember! Perfect for BBQ’s, camping, and weeknight dinners.
    Get the recipe: Sloppy Joes
    6
    Creamy mac and cheese in a pot with a wooden spoon resting in it.
    Camping Mac and Cheese
    This creamy one-pot macaroni and cheese is made in just one pot with a handful of pantry ingredients and requires only 20 minutes of your time.
    Get the recipe: Camping Mac and Cheese
    7
    Smoked Sausage Skillet with Baby Potatoes
    Recipe and photo credit: xoxo Bella
    Smoked Sausage Skillet with Baby Potatoes
    The savory, smoky and vibrant flavors in this easy smoked sausage and potato skillet recipe make it into the kind of dinner everyone will crave again and again.
    Get the recipe: Sausage and Potato Skillet
    8
    Two halves of a turkey ciabatta sandwich with tomatoes, pesto, and mozzarella, stacked on top of each other on a cutting board.
    Turkey Ciabatta Sandwich
    An easy handheld meal that's loaded with turkey, pesto, tomatoes, and cheese. Perfect for a casual camping meal or to take along on a hike or picnic.
    Get the recipe: Turkey Ciabatta Sandwich
    9
    Three pieces of grilled baby back ribs on a blue plate with a jar of bbq sauce.
    Make-Ahead Camping Ribs
    Get a head start on your camping meals with these falling-off-the-bone back ribs that can be cooked at home and finished at camp.
    Get the recipe: Make-Ahead Camping Ribs
    10
    Prep Ahead Camping Stir-Fry Recipe
    Recipe and photo credit: Let's Camp S'more
    Prep Ahead Camping Stir-Fry Recipe
    This camping stir-fry recipe that is prepped at home is the perfect first-night dinner for your next campout. Cook it up in about 20 mins.
    Get the recipe: Camping Stir-Fry
    11
    A Dutch oven filled with tuna noodle casserole.
    Dutch Oven Tuna Noodle Cassserole
    This creamy, comforting, classic tuna noodle casserole gets transformed into a camping-friendly one-pot meal that can be made without a cooler or refrigerator. Make it on your camp stove, stovetop, or over the campfire.
    Get the recipe: Tuna Noodle Casserole
    12
    Camp Stove Chickpea Curry
    Recipe and photo credit: Champagne Tastes
    Camp Stove Chickpea Curry
    This vegan camping recipe is a quick and easy chickpea curry. Make this healthy dinner in a cast iron pan on a camp stove.
    Get the recipe: Chickpea Curry
    13
    A skillet filled with seared chicken thighs and potatoes with lemon wedges nearby.
    Chicken and Potato Skillet
    This hearty and satisfying skillet chicken and potatoes requires only one pan, four ingredients, and 30 minutes of your time. It's the perfect for busy weeknight dinners or a relaxed camping meal.
    Get the recipe: Chicken and Potato Skillet
    14
    Ground Beef Stew
    Recipe and photo credit: Dutch Oven Daddy
    Ground Beef Stew
    Simple, rich, and hearty, this ground beef stew is an incredibly delicious complete meal made in your trusty Dutch oven.
    Get the recipe: Ground Beef Stew
    15
    A serving of Salisbury steak on a pile of mashed potatoes.
    Skillet Salisbury Steak
    This one-pot meal of tender beef patties in rich mushroom gravy is inexpensive, hearty, and oh-so-satisfying.
    Get the recipe: Skillet Salisbury Steak
    16
    Four s'more jars with pudding, marshmallow fluff, and graham cracker topping.
    S'mores in a Jar
    For when you're craving s'mores, but don't have a campfire.
    Get the recipe: S'mores in a Jar
    17
    A small skillet filled with caramel apple dip with chopped almonds on top and apples on the side.
    Caramel Apple Dip
    This sweet and creamy scoop-able dip is an easy make-ahead dessert for camping or for sharing with friends at home.
    Get the recipe: Caramel Apple Dip

    June 27, 2025 Dinner

    3-2-1 Spare Ribs

    This 3-2-1 spare ribs recipe uses the popular smoking and grilling technique to create tender, smoky side ribs so flavorful that everyone will be clamoring for seconds.

    A partially cut rack of grilled spare ribs on a platter with a knife.

    When we're camping, I almost always prep a batch of make-ahead ribs because they're quick and easy to finish at camp. But if I'm at home with an afternoon of outside work, where I'll be nearby the grill, then the 3-2-1 method is my go-to. It's basically foolproof, and always turns out amazingly tender, flavorful grilled ribs. I also love that it's a great opportunity to play around with different rub and BBQ sauce combinations.

    This method shows you how to prepare 3-2-1 ribs on a grill using a smokebox or smoke pouch. You can also do this on your wood or pellet smoker, following manufacturer's instructions for indirect cooking.

    [feast_advanced_jump_to]

    Ingredients and Substitutions

    • Oil--This helps the seasoning to stick to the meat, so you don't need anything fancy. Regular vegetable oil will do fine.
    • Spare ribs--You may see these sold as side ribs or St. Louis-style ribs. You will need to remove the membrane (or ask your butcher to do it) before cooking. The membrane is a thin layer that coats the back side of the ribs. Loosen the corner of it with the tip of a sharp knife, then use a paper towel to grab the membrane and pull firmly while using your other hand to hold the ribs steady.
    • Broth--You can use chicken broth, apple juice, or beer as a liquid here.
    • BBQ rub--Use your favorite store-bought or homemade pork BBQ rub.
    • BBQ sauce--There are no rules when it comes to which sauce to use and you can use your favorite store-bought or homemade BBQ sauce. I do recommend using something that will coat the ribs thickly, such as Stubb's Original. Avoid vinegar-style sauces as they may be too watery to coat the ribs.

    How to Cook 3-2-1 Ribs on the Grill

    A rack of spare ribs coated with rub.

    1. Rub both sides of the ribs with oil, then sprinkle the seasoning all over, patting to help it adhere.

    A rack of ribs cooking on a grill.

    2. Smoke the ribs over indirect heat for 3 hours at 250°F (120°C).

    A rack of ribs wrapped in foil on the grill.

    3. Wrap the rack of ribs in foil and pour in the broth. Seal and continue to cook for 2 hours.

    A rack of ribs coated with BBQ sauce on the grill.

    4. Unwrap the ribs and brush them all over with the BBQ sauce. Cook for 1 hour more, or until the sauce is tacky and the ribs are tender.

    FAQs

    What are 3-2-1 ribs?

    3-2-1 refers to the cooking method. The ribs are smoked for 3 hours, wrapped and cooked over low indirect heat with liquid for 2 hours, then unwrapped, coated with sauce, and cooked for 1 hour longer. This method ensures tender, flavorful ribs.

    Are these ribs "fall-off-the-bone tender"?

    3-2-1 spare ribs are very tender and will pull away from the bone, but it is unlikely that they'll be "falling off the bone". If you prefer meat that is very soft and falls away from the bone, use the 3-2-1 method with baby back ribs, which are leaner and will become extra tender.

    What's the best type of wood to use for smoking ribs?

    I recommend using hickory for a classic smoky flavor in your ribs. If you prefer a milder smoke flavor, use apple or cherry.

    What should I serve with this?

    If you're cooking for a crowd, choose classic rib side dishes like baked beans, cornbread, and coleslaw. Prefer to keep it simple? Try this grilled kohlrabi recipe on the side.

    Tips and Troubleshooting

    • You can coat the ribs in rub up to 1 day before cooking. Wrap in plastic and store in the fridge until you're ready to cook.
    • This recipe is suitable for gluten-free and dairy-free diets. Be sure to check that your rub, sauce, and broth are gluten-free.
    A partially cut rack of grilled spare ribs on a platter with a knife.

    More Rib Recipes You'll Love

    Three pieces of grilled baby back ribs on a blue plate with a jar of bbq sauce.
    Make-Ahead Camping Ribs
    Strips of grilled flanken short ribs on a wooden board.
    Grilled Flanken Short Ribs

    Recipe

    A partially cut rack of grilled spare ribs on a platter with a knife.

    3-2-1 Spare Ribs

    A woman's face.Angie Zoobkoff
    This 3-2-1 spare ribs recipe uses the popular smoking technique to create tender, smoky side ribs so flavorful that everyone will be clamoring for seconds.
    No ratings yet
    Print Recipe Pin Recipe
    Prep Time 15 minutes mins
    Cook Time 6 hours hrs
    Total Time 8 hours hrs 15 minutes mins
    Course Main Course
    Cuisine American
    Servings 3 to 4 servings
    Calories 836 kcal

    Equipment

    • Hickory wood chips or chunks or substitute apple or cherry

    Ingredients
      

    • One (3-to-4-pound | 1.4-to-1.8-kg) large rack spare ribs membrane removed
    • 2 tablespoons vegetable oil
    • ½ cup store-bought or homemade pork BBQ rub
    • ¾ cup chicken broth, apple juice, or beer
    • 1 cup store-bought or homemade BBQ sauce

    Instructions
     

    • Place the rack of ribs on a large rimmed baking sheet and rub all over with the oil. Sprinkle the seasoning on both sides, patting to help it adhere. Cover with plastic wrap and chill for 2 hours.
    • Prepare a grill with smoke box or smoke pouch or a smoker for indirect heat at 250°F (120°C). Get a steady stream of smoke going before you begin to cook your ribs.
    • Place the ribs on the grill and smoke for 3 hours, maintaining the temperature around 250°F, adding more wood chips or chunks as needed.
    • Remove the ribs from the grill and place them on a large sheet of foil. Crimp up the sides of the foil under the ribs and pour in the broth. Fold the foil over the ribs and seal the edges so that the ribs are tightly wrapped.
    • Return the ribs to the grill and cook over indirect heat at 250°F (120°C) for 2 hours more.
    • Uncover and discard the foil. Brush the ribs all over with BBQ sauce and continue to cook at 250°F until the sauce is tacky and the ribs are very tender, about 1 hour more.
    • Let rest for 10 minutes before slicing into individual ribs.

    Notes

      • Get ahead--You can coat the ribs in rub up to 1 day before cooking. Wrap in plastic and store in the fridge until you're ready to cook.
      • Adding liquid--Take care to pour the broth in along the edge of the foil and not over the ribs so that you don't wash away any seasoning.
      • Dietary--This recipe is suitable for gluten-free and dairy-free diets. Be sure to check that your rub, sauce, and broth are gluten-free.
    •  

    Nutrition

    Serving: 1 portionCalories: 836kcalCarbohydrates: 23gProtein: 71gFat: 49gCholesterol: 193mgSugar: 16g
    Keyword bbq ribs, smoked pork, summer grilling
    Tried this recipe?Let us know how it was!

    June 24, 2025 Beef Recipes

    Blackstone Chopped Cheese

    This Blackstone chopped cheese recipe makes excellent use of the large (and hot) surface of the Blackstone griddle, resulting in ground beef with perfectly crisped edges laced with melted cheese. Top it with your favorite fixings and you've got yourself an oh-so-satisfying meal.

    A Blackstone chopped cheese sandwich with lettuce and tomato and onion rings on the side.

    Some people think of chopped cheese as a burger and some would say it's a sandwich, or maybe even a humble version of a cheesesteak. I just say it's delicious. The combination of seasoned ground beef, melted cheese, and all your favorite fixings is a super-satisfying meal that's perfect for camp or at home.

    [feast_advanced_jump_to]

    Ingredients and Substitutions

    Ingredients for Blackstone chopped cheese--buns, worcestershire sauce, onion, ground beef, cheese, tomatoes, and lettuce.
    • Ground beef--I recommend using lean ground beef (85/15), which will give you a little bit of fat for flavor, but won't result in a greasy sandwich. Don't use extra-lean as the beef may be too dry after cooking.
    • Cheese--You can use sliced cheddar cheese or American cheese, depending on your preference and what you've got on hand.
    • Worcestershire sauce--This adds a nice flavor boost to the beef.
    • Buns--The bun is an important part of the chopped cheese experience! Choose buns that have a soft interior and chewy crust, like a hero or hoagie roll.

    How to Make Chopped Cheese on the Blackstone

    Ground beef mixed with chopped onion.

    1. Combine the beef, onion, Worcestershire, salt, and pepper in a bowl and mix thoroughly.

    Four ground beef patties on a baking sheet.

    2. Shape the beef mixture into 4 equal patties.

    Four ground beef patties cooking on a griddle.

    3. Cook the beef patties on the griddle until browned on one side.

    Ground beef patties being chopped into pieces.

    4. Flip and use the side of your spatula to chop the meat patties into pieces. Cook, chopping and stirring until cooked through.

    Cheese melting on chopped cheese.

    5. Top with cheese and let it melt.

    Ground beef and cheese on a bun.

    6. Scoop the chopped cheese into a split roll.

    FAQs

    Can I make this in my cast iron skillet?

    Yes. Unless you have a very large skillet, I recommend cooking the beef in two batches.

    What should I serve with chopped cheese?

    These Blackstone chopped cheese sandwiches are a hearty meal all on their own, but feel free to serve some French fries, onion rings, pickle spears, or a potato salad on the side.

    Tips and Troubleshooting

    • Want a toasted bun for your sandwich? Use the other side of the griddle to toast the cut sides of the buns while the meat is cooking.
    • It's ok if the cheese isn't fully melted when you scoop the meat off the Blackstone as it will continue to soften and melt in the bun.
    • If it's a very cool or very windy day, it may take longer for your meat to cook.
    A Blackstone chopped cheese sandwich with lettuce and tomato.

    More Blackstone Recipes You'll Love

    A burger with cheese, lettuce, and tomato on a plate.
    Blackstone Smash Burger with Onions
    A breaded chicken cutlet on a plate with some asparagus and a lemon wedge.
    Crispy Blackstone Chicken Cutlets

    Recipe

    A Blackstone chopped cheese sandwich with lettuce and tomato and onion rings on the side.

    Blackstone Chopped Cheese

    A woman's face.Angie Zoobkoff
    Loaded with crispy beef laced with melted cheese and topped with all your favorite fixings, the chopped cheese sandwich is an oh-so-satisfying meal.
    No ratings yet
    Print Recipe Pin Recipe
    Prep Time 15 minutes mins
    Cook Time 10 minutes mins
    Total Time 25 minutes mins
    Course Main Course
    Cuisine American
    Servings 4 servings
    Calories 543 kcal

    Equipment

    • Blackstone (or other outdoor) griddle
    • Sturdy metal spatula

    Ingredients
      

    • 1 pound (454 g) lean ground beef (85/15)
    • ½ small onion chopped (approx â…“ cup)
    • 2 teaspoons Worcestershire sauce
    • Salt and freshly ground black pepper
    • 4 slices cheddar cheese
    • 4 rolls split
    • 2 tablespoons mayonnaise for serving (optional)
    • 2 medium tomatoes sliced
    • 1 cup shredded iceberg lettuce

    Instructions
     

    • In a medium bowl, combine the beef, onion, and Worcestershire sauce. Season generously with salt and pepper.
    • Shape the beef mixture into 4 patties.
    • Heat the Blackstone (or other outdoor) griddle to medium-high.
    • Cook the patties, without flipping, until browned and beginning to crisp on the bottom, 4 to 5 minutes.
    • Flip and use the side of the spatula to break apart the beef patties into pieces. Continue chopping and stirring until the beef is cooked through, about 4 minutes more.
    • Place a slice of cheese on top of each mound of cooked beef. Cover and let the cheese melt, about 2 minutes.
    • Spread the mayonnaise, if using, on each side of the cut rolls. Use your spatula to scoop the meat mixture into each roll and top with tomato slices and lettuce. Serve immediately.

    Notes

    • Toast the bun--Want a toasted bun for your sandwich? Use the other side of the griddle to toast the cut sides of the buns while the meat is cooking.
    • Cheese--It's ok if the cheese isn't fully melted when you scoop the meat off the Blackstone as it will continue to soften and melt in the bun.
    • Timing--If it's a very cool or very windy day, it may take longer for your meat to cook.

    Nutrition

    Serving: 1 sandwichCalories: 543kcalCarbohydrates: 49gProtein: 38gFat: 24gCholesterol: 96mgSodium: 732mgFiber: 8gSugar: 7g
    Keyword blackstone cooking, hot sandwich
    Tried this recipe?Let us know how it was!

    June 20, 2025 Dinner

    Grilled Blackened Salmon Caesar Salad

    A seasoned and grilled salmon fillet elevates your classic caesar salad from everyday side dish to an all-star entree in this salmon caesar salad recipe. This simple summer meal is ready in just 30 minutes, making it perfect for any day of the week.

    A piece of blackened salmon on a Caesar salad.

    We eat a lot of fish in our home, and although halibut fish tacos are my all-time favorite, this blackened salmon caesar salad is my favorite way to prepare salmon. Like with pesto-crusted salmon, we use a foil tray to cook the fish. The high-heat grilling results in tender, flaky fish with a crisp crust that pairs beautifully with the creamy homemade caesar dressing and crunchy croutons. It's also a great choice for summer, since you don't need to turn on the oven.

    [feast_advanced_jump_to]

    Why You'll Love This Recipe

    • It's a simple grilled dinner that's ready in just 30 minutes.
    • You don't need to turn on the oven!
    • You can do most of the prep work in advance, including making the dressing and preparing the lettuce.

    Ingredients and Substitutions

    Ingredients for salmon Caesar salad--romaine, butter, lemon, mayo, Dijon, Worcestershire sauce, croutons, salmon, garlic powder, and seasoning.
    • Blackening seasoning--You can find blackening seasoning online or at some supermarkets. If it's not available to you, substitute an equal amount of Cajun seasoning.
    • Butter--This helps the seasoning to stick to the fish and also promotes browning. Don't skip it!
    • Croutons--Store-bought or homemade croutons will work here. To make homemade ones, toss cubes of day-old bread with olive oil and toast in the oven or on the stovetop until browned and crisped.
    • Salmon--You can use skinless or skin-on fillets for this recipe, depending on your preference.

    How to Make Grilled Salmon Caesar Salad

    A whisk resting in a bowl of Caesar dressing.

    1. Mix the mayo, Dijon mustard, Worcestershire sauce, lemon juice, and garlic powder in a bowl to make the dressing. Season with salt and pepper.

    Two pieces of salmon topped with blackening seasoning.

    2. Brush the salmon fillets with butter, then sprinkle the blackening seasoning over, patting to help it adhere.

    Two pieces of salmon cooking on the grill.

    3. Grill, flesh side down, until the seasoning is toasted, then flip and finish cooking skin side down.

    A bowl of romaine lettuce tossed in dressing.

    4. Toss the romaine with dressing and divide it between two bowls. Top with croutons and a piece of salmon.

    FAQs

    What's that white stuff coming out of my fish?

    That gunky white stuff you may see on the surface of your salmon when you cook it is called albumin. It's a liquid protein that solidifies when heated. It may not look particularly appetizing, but it is completely harmless and safe to eat.

    Albumin typically solidifies when the fish is cooked over high heat or cooked for too long. Since the salmon is cooked at a fairly high heat in this recipe, you may have some albumin leach out of the fish. You can scrape it away before serving, if you prefer.

    What should I serve with this?

    This grilled blackened salmon caesar salad is a meal in itself, but a side of grilled garlic bread would definitely be welcome alongside.

    Tips and Troubleshooting

    • You can prepare the dressing up to 1 day in advance. Store it in a sealed container or jar in the fridge until you're ready to serve. Lettuce can be washed and torn up to 3 days in advance. Store it in a container or bag lined with paper towel.
    • Want an extra creamy caesar salad? Double the dressing.
    • To check for doneness, gently prod the center of the salmon with a fork or knife. When it's done, it should flake apart easily.
    • Use a baking sheet or metal tray under the foil when transporting it to and from the grill. The foil can be pretty flimsy.
    A piece of blackened salmon on a Caesar salad.

    More Salmon Recipes You'll Love

    Two foil packets with salmon and bok choy.
    Honey Lime Salmon Foil Packets
    Pesto crusted salmon topped with lemon slices on a cutting board.
    Pesto-Crusted Salmon

    Recipe

    A piece of blackened salmon on a Caesar salad.

    Grilled Blackened Salmon Caesar Salad

    A woman's face.Angie Zoobkoff
    Your everyday caesar salad goes next-level with the addition of a spiced and grilled salmon fillet.
    No ratings yet
    Print Recipe Pin Recipe
    Prep Time 15 minutes mins
    Cook Time 15 minutes mins
    Total Time 30 minutes mins
    Course Main Course, Salad
    Cuisine American
    Servings 2 servings
    Calories 523 kcal

    Ingredients
      

    For the homemade caesar dressing

    • ¼ cup mayonnaise
    • 1 teaspoon lemon juice
    • ½ teaspoon Dijon mustard
    • ¼ teaspoon Worcestershire sauce
    • â…› teaspoon garlic powder
    • Salt and freshly ground black pepper

    For the salad

    • Cooking spray
    • 2 (6-ounce | 170-g) salmon fillets
    • 1 tablespoon butter melted
    • 1 tablespoon blackening seasoning
    • 1 small head romaine lettuce torn into bite-size pieces
    • ½ cup croutons

    Instructions
     

    Make the homemade caesar dressing

    • Preheat the grill for medium-high heat (425°F | 220°C).
    • Whisk the dressing ingredients together in a small bowl or jar. Season to taste with salt and pepper. Cover and store in the fridge until you're ready to serve.

    Make the grilled salmon caesar salad

    • Arrange two pieces of aluminum foil on a baking sheet and fold up the edges to create a tray. Coat with cooking spray.
    • Brush the tops of the salmon fillets with melted butter, then sprinkle the seasoning over, patting to help the seasoning stick.
    • Place the fish seasoning side down on the foil tray. Transfer the foil tray to the grill and cook until the seasoning is deeply browned, 8 to 10 minutes. Flip each fillet and continue cooking until they reach your desired doneness, 2 to 3 minutes more. Remove from the heat and let rest while you assemble the salad.
    • In a large bowl, toss the dressing and romaine lettuce until evenly coated. Divide the lettuce between two shallow bowls.
    • Top each salad with croutons and place a warm salmon fillet on top.

    Notes

      • Get ahead--Prepare the dressing up to 1 day in advance. Store it in a sealed container or jar in the fridge until you're ready to serve. Wash and tear lettuce up to 3 days in advance. Store it in a container or bag lined with paper towel.
      • Double the dressing--For an extra creamy caesar salad.
      • Check for doneness--Gently prod the center of the salmon with a fork or knife. When it's done, it should flake apart easily.
      • Transporting the fish--Use a baking sheet or metal tray under the foil when transporting it to and from the grill. The foil can be pretty flimsy.

    Nutrition

    Serving: 1 saladCalories: 523kcalCarbohydrates: 11gProtein: 36gFat: 38gCholesterol: 104mgSodium: 1063mgFiber: 1gSugar: 2g
    Keyword entree salad, grilled fish
    Tried this recipe?Let us know how it was!

    June 17, 2025 Camping

    5 Quick and Easy Campfire Pie Iron Recipes

    When it comes to quick and easy camping meals, the campfire pie iron is your friend. It's easy to use, and, as these 5 quick campfire pie iron recipes show, you can make everything from breakfast to dessert in it. These simple pudgy pie recipes are a great place to start, but feel free to get creative with your favorite fillings to create the perfect handheld meal in your camp cooker.

    1
    Recipe and photo credit: xoxo Bella
    Pie Iron Breakfast Crunchwrap
    It’s a quick and simple process to make a breakfast crunchwrap using a pie iron. This versatile gadget is your ideal campfire kitchen companion!
    Get the recipe: Pie Iron Breakfast Crunchwrap
    2
    A person holding a blueberry pudgy pie wrapped in a blue napkin.
    Blueberry Pudgy Pie
    Filled with a sweet and tangy blend of blueberry and cream cheese, this handheld pie is the ultimate campfire dessert.
    Get the recipe: Blueberry Pudgy Pie
    3
    Recipe and photo credit: xoxo Bella
    Pie Iron Tater Tots with Cheese
    Pie iron cheesy tots are easy to make and a great reason to invest in a pie iron or two. Tater tots, peppers, onion and shredded cheese unite to make this flavorful dish.
    Get the recipe: Pie Iron Tater Tots
    4
    A pie iron pizza cut in half on a plate with cheese oozing out.
    Pie Iron Pizza
    Filled with all your favorite pizza toppings, these campfire pizza pockets are ready in less than 15 minutes.
    Get the recipe: Pie Iron Pizza
    5
    Recipe and photo credit: Let's Camp S'more
    Campfire Reuben Sandwich
    Here’s a camping recipe inspired by the classic Reuben sandwich that is made in a pie iron. These individual sandwiches can be customized for each person.
    Get the recipe: Campfire Reuben Sandwich

    June 13, 2025 Blackstone Griddle Recipes

    The Ultimate BLAT Sandwich

    The ultimate BLAT sandwich is made with bacon, lettuce, avocado, tomato, and creamy mayo-mustard sauce, all stuffed between two slices of sturdy bread. It's a crave-worthy sandwich that's ideal for lunch or dinner any day of the week.

    Two sandwich halves with bacon, tomato, lettuce, and avocado, stacked on top of each other.

    Personally, I think sandwiches are the perfect food. You can get every food group in there, the variations are endless, and it's an incredibly satisfying meal. That said, it has to be a good sandwich. Plain old ham and cheese isn't going to make the cut, but this BLAT sandwich recipe definitely does. For this hearty handheld meal, creamy avocado, crisp bacon, fresh lettuce, and juicy tomato are sandwiched between two slices of toasted bread. A schmear of mustard mayo takes it over the top. Try it and see.

    [feast_advanced_jump_to]

    Ingredients and Substitutions

    Ingredients for a BLAT--mayo, bread, tomato, lettuce, bacon, avocado, and mustard.
    • Bread--Use a firm, sturdy bread that will stand up to the fillings. I recommend an artisan-style bread, like sourdough or Italian bread.
    • Bacon--I use thin cut bacon for these sandwiches. You can use thick-cut bacon if that's what you have on hand, but note that it will take longer to cook.
    • Avocado--Choose dark colored avocados that give slightly when squeezed. Avoid hard bright green (underripe) or mushy avocados (overripe). 

    How to Make a Bacon, Lettuce, Avocado, and Tomato Sandwich

    Mayo and mustard mixed together in a bowl.

    1. Mix the mayo and mustard together in a small bowl.

    Four slices of bacon cooking on a griddle.

    2. Cook the bacon until crisp.

    Four slices of bread toasting on a griddle.

    3. Toast the bread lightly.

    Two sandwiches being assembled with mayo spread on two slices of bread and two more slices of bread topped with bacon and tomato.

    4. Assemble the sandwiches.

    FAQs

    How do I avoid having soggy bread in my sandwich?

    Tomatoes are the biggest contributor to soggy sandwich bread, so I recommend keeping the tomato slices in the center of the sandwich, away from the bread. Salted tomatoes will also release liquid, so be sure to only salt your avocado layer lightly and not the tomato layer, or skip the salt altogether.

    What should I serve with this?

    For a simple meal, serve these bacon, lettuce, avocado, and tomato sandwiches with a handful of potato chips and some raw vegetables or a marinated bean salad.

    Tips and Troubleshooting

    • I like using my Blackstone griddle for cooking the bacon and toasting the bread since it's convenient to be able to cook them at the same time, but you can use a cast iron skillet for cooking the bacon. Pop the bread in a toaster or brown it over the grill for 30 to 60 seconds, if desired.
    • Use a sharp serrated knife for cutting your sandwich so that all of the fillings slice cleanly.
    • Store leftover sandwiches in your cooler or fridge, wrapped in foil or plastic wrap, and enjoy within 1 day.
    A sandwich on a plate with some potato chips.

    More Sandwich Recipes You'll Love

    Two halves of a turkey ciabatta sandwich with tomatoes, pesto, and mozzarella, stacked on top of each other on a cutting board.
    Turkey Ciabatta Sandwich
    A chicken and bacon sandwich on a brioche bun with lettuce and tomato.
    Chicken Bacon Sandwich

    Recipe

    Two sandwich halves with bacon, tomato, lettuce, and avocado, stacked on top of each other.

    The Ultimate BLAT Sandwich

    A woman's face.Angie Zoobkoff
    Packed with bacon, lettuce, avocado, and tomato, this satisfying sandwich has everything going for it.
    No ratings yet
    Print Recipe Pin Recipe
    Prep Time 10 minutes mins
    Cook Time 10 minutes mins
    Total Time 20 minutes mins
    Course Main Course
    Cuisine American
    Servings 2 sandwiches
    Calories 622 kcal

    Equipment

    • Blackstone (or other outdoor) griddle

    Ingredients
      

    • 2 tablespoons mayonnaise
    • 2 teaspoons whole grain mustard
    • 4 slices bacon
    • 4 slices sturdy bread such as sourdough
    • 1 small avocado halved, pitted, and sliced
    • Salt and pepper
    • 1 medium tomato sliced
    • 1 cup shredded iceberg lettuce

    Instructions
     

    • In a small bowl, mix the mayonnaise and mustard together.
    • Heat the griddle to medium. Arrange the bacon in a single layer on the griddle and cook, flipping occasionally, until crisp, 8 to 10 minutes. Transfer to a paper towel-lined plate to drain.
    • While the bacon is cooking, toast the bread on the other side of the griddle, until lightly browned, about 1 minute per side.
    • Spread about 2 teaspoons of the mayo mixture on one side of each slice of bread.
    • Top two of the bread slices with avocado, season lightly with salt and pepper, then add the bacon, tomato and lettuce, dividing everything evenly between the two sandwiches. Top with the second slice of bread, mayo side down.
    • Slice each sandwich in half and serve immediately.

    Notes

      • No griddle?--I like using my Blackstone griddle for cooking the bacon and toasting the bread since it's convenient to be able to cook them at the same time, but you can use a cast iron skillet for cooking the bacon. Pop the bread in a toaster or brown it over the grill for 30 to 60 seconds, if desired.
      • Slice it cleanly--Use a sharp serrated knife for cutting your sandwich so that all of the fillings slice cleanly.
      • Storage--Store leftover sandwiches in your cooler or fridge, wrapped in foil or plastic wrap, and enjoy within 1 day.

    Nutrition

    Serving: 1 sandwichCalories: 622kcalCarbohydrates: 51gProtein: 24gFat: 37gCholesterol: 46mgSodium: 1452mgFiber: 8gSugar: 5g
    Keyword 20 minute meals, sandwiches
    Tried this recipe?Let us know how it was!

    June 10, 2025 Camping

    Pie Iron Pizza

    This easy pie iron pizza recipe is filled with your favorite pizza toppings and ready in less than 15 minutes. With just a handful of ingredients and your trusty campfire pie iron, you can have homemade pizza pockets for a quick kid-friendly camping lunch or dinner.

    A pie iron pizza cut in half on a plate with cheese oozing out.

    I always find that we get in a bit of a rut when it comes to camping lunch recipes, cycling through hot dogs, campfire grilled cheese sandwiches, and skillet nachos, which eventually starts to feel a little boring. But when you add these campfire pie iron pizza pockets to the mix, lunch gets a lot more interesting. They can be customized to suit everyone's tastes and since they're much quicker to make than a Dutch oven pizza, and with minimal dishes, I guarantee they'll end up in your permanent camping rotation, too.

    [feast_advanced_jump_to]

    Why This Recipe is Great for Camping

    • You can customize them with your favorite fillings.
    • Kids love them!
    • It's a great camping lunch or dinner recipe that's ready in less than 15 minutes.

    Ingredients and Substitutions

    Ingredients for pie iron pizza--pizza dough, pepperoni, cheese, and sauce.
    • Pizza dough--To keep it simple, you can use store-bought refrigerated pizza dough here, but if you've got some homemade dough on hand, that will work great, too. One 14-ounce (400-g) tube of dough will make you about 3 pizza pockets.
    • Mozzarella--Use full-fat low-moisture mozzarella for best results (fresh mozzarella is too wet) and I recommend skipping the pre-shredded cheese and grating it yourself. Pre-shredded and low fat cheese doesn't melt as well. Want to use a different cheese? Swap in your favorite; just make sure that it's a good melting cheese. Cheddar, Swiss, and provolone will all work well.

    How to Make Pizza in a Pie Iron

    A piece of pizza dough cut into 3 rectangles.

    1. Roll out the dough and cut it into 3 rectangles that are approximately the length of the cooker and twice the width.

    An assembled pie iron pizza in a pie iron.

    2. Place one piece of dough into the pie iron and top half of it with sauce, pepperoni, and cheese.

    A sealed pie iron pizza.

    3. Fold the dough over and press around the edges to seal the pizza pocket.

    A pie iron cooking over an open fire.

    4. Cook over the fire, flipping once, until golden brown and cooked through.

    FAQs

    Can I use different fillings?

    Definitely. Use your favorite pizza topping combinations to create a pizza you love. Vegetables like onions, peppers, and mushrooms are a welcome addition, but note that they won't cook inside the pizza pocket, so you should pre-cook them if adding them to your pizza.

    Take care to not overfill your pie, or the filling will leak out and burn. The two sides of the camp cooker should close snugly around the sealed pizza pocket before cooking without any bulging or excess dough pushing out the sides.

    How can I tell when it's ready?

    To check your pizza pie, remove the pie iron from the fire and carefully open it. I find it helpful to do this on a picnic table so that you don't accidentally drop the pie. Each side should be golden brown and the crust should look crisp and flaky. If the dough still looks raw or is very pale, close it up and return it to the fire for a few extra minutes.

    What should I serve with this?

    For a simple meal, serve these pie iron pizzas with potato chips and some raw vegetables or a marinated veggie salad.

    Tips and Troubleshooting

    • Spray the inside of the pie iron well with cooking spray to avoid any sticking.
    • Trim away any excess dough from the closed pie iron before cooking. If any leaks out while cooking, it will burn, but that's ok. You can just trim it away once the pizza is cooked.
    • Hold the pie iron as flat as possible while cooking to avoid having the filling leak.
    • Your pie iron pizza pocket is going to be VERY hot after cooking. Let it cool for at least 5 minutes before eating.
    A cooked pie iron pizza in a open pie iron.

    More Classic Camping Recipes You'll Love

    A person holding a blueberry pudgy pie wrapped in a blue napkin.
    Blueberry Pudgy Pie
    A Dutch oven filled with baked beans on a campfire grate.
    Dutch Oven Baked Beans

    Recipe

    A pie iron pizza cut in half on a plate with cheese oozing out.

    Pie Iron Pizza

    A woman's face.Angie Zoobkoff
    Filled with all your favorite pizza toppings, these campfire pizza pockets are ready in less than 15 minutes.
    No ratings yet
    Print Recipe Pin Recipe
    Prep Time 5 minutes mins
    Cook Time 8 minutes mins
    Total Time 13 minutes mins
    Course Main Course
    Cuisine American
    Servings 3 pizza pockets
    Calories 479 kcal

    Equipment

    • Cast iron pie cooker

    Ingredients
      

    • Cooking spray
    • 1 roll (14 oz | 400 g) refrigerated pizza dough
    • 6 tablespoons pizza sauce
    • 24 small slices pepperoni
    • ¾ cup shredded pizza mozzarella

    Instructions
     

    • Prepare a campfire. Spray the inside (top and bottom) of the pie iron well with cooking spray.
    • Roll the dough into a rectangle approximately 3 times the length of the pie iron and twice the width. Slice it into 3 even rectangles so that each piece is approximately the length of the pie iron and twice the width.
    • Lay one half of the pie iron on a flat surface and place one piece of dough into it so that half of it fits snugly about half of it is hanging out.
    • Top the dough in the cooker with 2 tablespoons pizza sauce, 8 slices pepperoni, and ¼ cup cheese. Fold the excess dough over the filling and pinch the edges to seal it. Place the top half of the pie iron on top and close it. Trim away any excess dough sticking out from the cooker.
    • Cook over the fire, flipping once, until the pizza dough is golden brown and cooked through, and the cheese is fully melted, 4 to 5 minutes per side.
    • Remove the pizza pocket from the pie iron and let it cool for at least 5 minutes before eating.
    • Repeat with the remaining dough and toppings.

    Notes

      • Spray, spray, spray--Spray the inside of the pie iron well with cooking spray to avoid any sticking.
      • Trim the dough--Trim away any excess dough from the closed pie iron before cooking. If any leaks out while cooking, it will burn, but that's ok. You can just trim it away once the pizza is cooked. Don't attempt to trim it while it's cooking.
      • Keep it flat--Hold the pie iron as flat as possible while cooking to avoid having the filling leak.
      • Let it cool--Your pie iron pizza pocket is going to be VERY hot after cooking. Let it cool for at least 5 minutes before eating.

    Nutrition

    Serving: 1 pizzaCalories: 479kcalCarbohydrates: 63gProtein: 21gFat: 16gCholesterol: 36mg
    Keyword campfire cooking, camping lunch, homemade pizza pockets, pie iron recipes
    Tried this recipe?Let us know how it was!

    June 6, 2025 Blackstone Griddle Recipes

    Ground Turkey Breakfast Sausage

    Ready in just 15 minutes, these ground turkey breakfast sausage patties are a quick and easy breakfast that's perfect for any day of the week. They only require 4 ingredients and can be made in advance and frozen, too. Mornings just got a whole lot better.

    Eight pieces of turkey breakfast sausage on a plate.

    We go through a lot of breakfast sausage patties in our house, and breakfast sandwiches, made with English muffins, sausage, eggs, and cheese are a camping breakfast staple for us. While those frozen breakfast patties are super convenient, did you know that you can make your own sausage patties in just 15 minutes?

    I make these with ground turkey because I love the combination of turkey, apple, and sage, but you could try them with ground pork, if you prefer. If you've got a large outdoor griddle, such as a Blackstone, it's ideal because it will let you cook them all at once.

    [feast_advanced_jump_to]

    Why You'll Love This Recipe

    • It requires only 4 ingredients.
    • It's a great breakfast recipe that's ready in 15 minutes.

    Ingredients and Substitutions

    Ingredients for ground turkey breakfast sausage--turkey, applesauce, sage, and cayenne.
    • Ground turkey--Look for ground turkey that has some dark meat. This will help to keep your patties juicy after cooking.
    • Applesauce--The applesauce helps to keep the turkey sausage moist and also adds a subtle sweetness. Use unsweetened applesauce for best results.
    • Spices--This homemade turkey sausage recipe uses a combination of ground sage and cayenne. The sage pairs beautifully with the turkey and applesauce, while the cayenne adds some warmth. It doesn't make it spicy, but if you are very sensitive to spice, you can omit it.

    How to Make Turkey Breakfast Sausage Patties

    Ground turkey, applesauce, and spices in a bowl.

    1. Combine the turkey, applesauce, sage, cayenne, salt, and pepper in a bowl. Mix well.

    Nine balls of ground turkey.

    2. Roll the turkey mixture into golf ball-sized rounds and place on a parchment or plastic-lined baking sheet sprayed with cooking spray.

    Nine uncooked turkey breakfast sausage patties.

    3. Flatten each ball into a patty.

    Nine pieces of breakfast sausage cooking on a Blackstone.

    4. Cook on a griddle over medium heat until browned on each side and cooked through.

    FAQs

    Can you freeze turkey breakfast sausage?

    Yes. You can freeze these turkey breakfast sausage patties before or after cooking.

    Freeze uncooked patties in a container between sheets of parchment or plastic (sprayed with cooking spray) for up to 3 months. You can cook them directly from frozen, adding an extra 1 to 2 minutes to the cooking time.

    Place cooked and cooled patties in a resealable bag or container and freeze for up to 3 months. Reheat in a skillet or zap them in the microwave until warmed through.

    Can I make these in my cast iron skillet?

    Sure. Depending on the size of your skillet, you'll need to cook them in 3 or 4 batches.

    What should I serve with this?

    These breakfast sausage patties are terrific alongside scrambled eggs and toast, or tucked inside a breakfast sandwich.

    Tips and Troubleshooting

    • Use wet hands when rolling the turkey into balls as it is very sticky. Handle it as little as possible and re-wet your hands as needed.
    • Cooking spray is your friend here! Spray your parchment or plastic as well as the bottom of your spatula before flattening the patties. This will help to avoid sticking.
    • If you have time, freeze the turkey patties for 15 minutes before cooking. They'll be easier to transfer to the griddle.
    • This recipe is suitable for gluten-free and dairy-free diets.
    Nine turkey breakfast sausage patties cooking on a Blackstone griddle.

    More Ground Turkey Recipes You'll Love

    Two bowls of Dutch oven turkey chili with cornbread and sour cream on the side.
    Dutch Oven Turkey Chili
    A turkey smash burger on a plate with potato wedges and a beer and raw veggies in the background.
    Turkey Smash Burgers

    Recipe

    Eight pieces of turkey breakfast sausage on a plate.

    Ground Turkey Breakfast Sausage

    A woman's face.Angie Zoobkoff
    Ready in just 15 minutes, this homemade breakfast sausage is perfect for any day of the week.
    No ratings yet
    Print Recipe Pin Recipe
    Prep Time 5 minutes mins
    Cook Time 10 minutes mins
    Total Time 15 minutes mins
    Course Breakfast
    Cuisine American
    Servings 8 to 10 patties
    Calories 147 kcal

    Equipment

    • Blackstone (or other outdoor) griddle

    Ingredients
      

    • 1 pound (454 g) ground turkey
    • 2 tablespoons unsweetened applesauce
    • ¾ teaspoon ground sage
    • ½ teaspoon table salt
    • ¼ teaspoon freshly ground black pepper
    • â…› teaspoon cayenne pepper
    • Cooking spray

    Instructions
     

    • In a medium bowl, combine the turkey, applesauce, and spices together, stirring to mix well.
    • Line a rimmed baking sheet with parchment or plastic wrap and spray with cooking spray.
    • Using wet hands gently shape the sausage mixture into golf ball-sized rounds (about 2 ounces/57 g each). Place each ball on the prepared baking sheet, spacing them about 3 inches (8 cm) apart.
    • Use a spatula sprayed with cooking spray to firmly press each ball into a round patty about ¼-inch (8 mm) thick. If you've got time, pop the tray of uncooked sausage patties into the freezer for 15 minutes (or while you heat the griddle).
    • Heat the griddle to medium. Coat with cooking spray.
    • Use a spatula to transfer the patties to the hot griddle and cook, flipping once, until cooked through, 3 to 4 minutes per side. Transfer to a plate and serve.

    Notes

    • Wet your hands--Use wet hands when rolling the turkey into balls as it is very sticky. Handle it as little as possible and re-wet your hands as needed.
    • Spray, spray, spray--Cooking spray is your friend here! Spray your parchment or plastic as well as the bottom of your spatula before flattening the patties. This will help to avoid sticking.
    • Freeze it--If you have time, freeze the turkey patties for 15 minutes before cooking. They'll be easier to transfer to the griddle.
    • Dietary--This recipe is suitable for gluten-free and dairy-free diets.

    Nutrition

    Serving: 2 pattiesCalories: 147kcalCarbohydrates: 1gProtein: 23gFat: 6gSodium: 291mg
    Keyword blackstone cooking, camping breakfast, easy breakfast, homemade sausage stuffing
    Tried this recipe?Let us know how it was!

    June 3, 2025 Camping

    12 Easy Campfire Desserts

    Although s'mores (and the countless s'more-inspired desserts) are the quintessential camping treat, there are a multitude of other easy campfire desserts, including cakes, cobblers, crisps, and more. Find your new favorites in this collection of campfire dessert recipes.

    1
    Recipe and photo credit: xoxo Bella
    Campfire Strawberries
    These campfire strawberries with fresh strawberries, almonds, graham crackers, and marshmallow creme make a tasty camping dessert.
    Get the recipe: Campfire Strawberries
    2
    A chocolate cake in a Dutch oven.
    Dutch Oven Chocolate Cake
    Dotted with chocolate chips and laced with ribbons of fudgy chocolate pudding, this cake is the ultimate Dutch oven camping dessert.
    Get the recipe: Dutch Oven Chocolate Cake
    3
    Recipe and photo credit: Fresh Off the Grid
    Campfire Banana Boats
    Learn how to make campfire banana boats: a classic camping dessert and beloved campfire tradition. Plus 9 creative banana boat topping combinations!
    Get the recipe: Campfire Banana Boats
    4
    Two open foil packet pear crisps surrounded by pears.
    Foil Packet Pear Crisp
    This juicy foil packet pear crisp is a simple autumn dessert featuring tender spiced pears topped with a crispy oat mixture. Make it over the campfire, on your grill, or in the oven.
    Get the recipe: Foil Packet Pear Crisp
    5
    Apple Pie Spice Campfire Donuts
    Recipe and photo credit: Stef's Eats and Sweets
    Apple Pie Spice Campfire Donuts
    These apple pie spice campfire donuts can be made easily in your cast iron pan with just four ingredients!
    Get the recipe: Apple Pie Spice Campfire Donuts
    6
    Two campfire waffle cones filled with marshmallows, Rolo pieces, and Teddy Grahams.
    Campfire Cones
    Everything you love about s'mores, stuffed into a waffle cone and cooked over the campfire until melted and gooey.
    Get the recipe: Campfire Cones
    7
    Recipe and photo credit: xoxo Bella
    Pineapple Upside Down Cakes on the Campfire
    Pie iron pineapple upside down cakes are the perfect dessert if you’re cooking on a campfire. They are fruity, sweet and totally delicious!
    Get the recipe: Campfire Pineapple Upside Down Cakes
    8
    A scoop of strawberry rhubarb crisp on a blue plate with three strawberries.
    Strawberry Rhubarb Campfire Crisp
    This sweet-tart crisp is filled with fresh strawberries and rhubarb and topped with a buttery cinnamon-oat streusel.
    Get the recipe: Campfire Crisp
    9
    Recipe and photo credit: Champagne Tastes
    Campfire S’mores (4 ways!)
    Campfire s’mores are easy and quick to make. Go beyond the basics and try some other variations to make your s’more even tastier!
    Get the recipe: Campfire S'mores
    10
    A person holding a blueberry pudgy pie wrapped in a blue napkin.
    Blueberry Pudgy Pie
    Filled with a sweet and tangy blend of blueberry and cream cheese, this handheld pie is the ultimate campfire dessert.
    Get the recipe: Blueberry Pudgy Pie
    11
    A chocolate chip cookie in a campfire pie iron.
    Campfire Cookies
    Freshly baked chocolate chip cookies just became a camping reality.
    Get the recipe: Campfire Cookies
    12
    A person lifting a graham cracker from a tray of s'more nachos.
    S'more Nachos
    These easy s'more nachos have all the flavors of the classic campfire dessert layered in nacho form!
    Get the recipe: S'more Nachos

    May 30, 2025 Camping

    Blueberry Pudgy Pie (Campfire Pie)

    Your campfire pie iron isn't just for sandwiches or pie iron pizza and this blueberry pudgy pie recipe is proof. Filled with a sweet and tangy blend of blueberry sauce and cream cheese, this handheld pie is the ultimate campfire dessert.

    A person holding a blueberry pudgy pie wrapped in a blue napkin.

    Many years ago, on a trip down the Oregon coast, I ate a very memorable blueberry and cream cheese stuffed French toast at a little waterfront breakfast spot. It was over-the-top indulgent, and probably more suited to dessert than breakfast, but so incredibly good that I'm still thinking about it more than 20 years later.

    The combination of cream cheese and blueberry was the perfect blend of sweet, creamy, and tangy, and I knew that it would make the perfect filling for a hobo pie. This one is definitely intended to be dessert, but I won't tell if you want to indulge in it for breakfast. You are camping, after all.

    [feast_advanced_jump_to]

    Why This Recipe is Great for Camping

    • It's a pie iron recipe that requires only 3 ingredients.
    • It's an easy camping dessert that's ready in 15 minutes.

    Ingredients and Substitutions

    Ingredients for blueberry pudgy pie--pie crust, blueberry sauce, cream cheese.
    • Pie crust--You can use store-bought refrigerated pie crust or your own favorite homemade pie dough for this recipe. If you're using homemade dough, roll it to about â…›-inch thickness before cutting it into squares. One pie crust will provide you with enough dough to make 2 to 3 pies.
    • Blueberry sauce--This blueberry pudgy pie recipe uses my 3-ingredient blueberry sauce. Feel free to substitute another type of berry sauce, like this huckleberry sauce, or swap in your favorite homemade or store-bought preserves.
    • Cream cheese--Use full-fat cream cheese for the best results. Low fat cream cheese may not melt as smoothly as full fat. Let your cheese come to room temperature before using. This will make it easier to mix.

    How to Make Campfire Pie

    Cream cheese and blueberry sauce mixed in a bowl.

    1. Mix the blueberry sauce and cream cheese in a bowl.

    Blueberry cream cheese mixture on top of pie crust in a pie iron.

    2. Lay one square of pie dough on half of the pie iron, then spoon half of the filling over the dough.

    A sealed hand pie in a campfire pie iron.

    3. Top with the other half of the pie iron.

    A pie iron cooking over a campfire.

    4. Cook over a hot campfire, flipping once, until golden brown on both sides.

    FAQs

    What is a pudgy pie?

    In its simplest form, pudgy pie, or mountain pie, is a sandwich cooked in a pie iron over a campfire. Traditionally, it's made with two slices of white sandwich bread and any type of sweet or savory filling, although it can be made with pizza dough, pie dough, crescent rolls, or other dough products.

    Can I make pudgy pie with a different type of filling?

    Definitely. Swap in canned pie filling for a super easy version of this campfire pie, or get creative and mix up your own favorite pie fillings. Be sure to use a filling that isn't too thin though, as it may leak out and burn.

    How can you tell when your pudgy pie is ready?

    To check your pie, remove the pie iron from the fire and carefully open it. I find it helpful to do this on a picnic table so that you don't accidentally drop the pie. Each side should be golden brown and the crust should look slightly dry and flaky. If the dough still looks raw or is very pale, close it up and return it to the fire for a few extra minutes.

    Tips and Troubleshooting

    • Spray the inside of the pie iron well with cooking spray to avoid any sticking.
    • Trim away any pie dough sticking out from the pie iron before cooking so that it doesn't burn.
    • Hold the pie iron as flat as possible while cooking to avoid having the filling leak.
    • Let your campfire pie cool for at least 5 minutes before biting into it. The filling will be very hot after cooking!
    A blueberry hand pie in a campfire pie iron.

    More Campfire Dessert Recipes You'll Love

    A strawberry being dipped into chocolate fondue.
    Campfire Chocolate Fondue
    A cooked strawberry rhubarb crisp in a foil try on a campfire grate.
    Strawberry Rhubarb Campfire Crisp

    Recipe

    A person holding a blueberry pudgy pie wrapped in a blue napkin.

    Blueberry Pudgy Pie

    Filled with a sweet and tangy blend of blueberry and cream cheese, this handheld pie is the ultimate campfire dessert.
    No ratings yet
    Print Recipe Pin Recipe
    Prep Time 5 minutes mins
    Cook Time 10 minutes mins
    Total Time 15 minutes mins
    Course Dessert
    Cuisine American
    Servings 2 pies
    Calories 419 kcal

    Equipment

    • Cast iron pie cooker

    Ingredients
      

    • ¼ cup blueberry sauce or blueberry preserves
    • ¼ cup cream cheese room temperature
    • Cooking spray
    • 4 square pieces pie dough cut to fit the pie cooker

    Instructions
     

    • Prepare a campfire.
    • In a medium bowl, mix the blueberry sauce and cream cheese until well combined. It's ok if the mixture isn't completely smooth.
    • Lay the two pieces of the pie iron flat with the insides facing up and spray well with cooking spray. Lay one piece of pie dough into one side of the pie cooker.
    • Spoon half of the filling mixture in the center of the pie dough, then top with a second piece of dough. Press the edges of the dough together to seal.
    • Lay the other half of the pie cooker on top and close it together.
    • Cook over hot flame, keeping the pie iron level while cooking, for about 5 minutes. Flip and cook on the other side for 5 minutes more. Remove from the heat and open to check for doneness. The pie should be golden brown all over with no raw dough. If it's not fully cooked, close the pie iron and return it to the fire for a few extra minutes.
    • Use a knife to carefully remove the pie from the cooker. Let the pie iron cool for a few minutes before repeating with the remaining dough and filling.

    Notes

    • Trim away any pie dough sticking out from the pie iron before cooking so that it doesn't burn.
    • Hold the pie iron as flat as possible while cooking to avoid having the filling leak.
    • Let your campfire pie cool for at least 5 minutes before biting into it. The filling will be very hot after cooking!

    Nutrition

    Serving: 1 pieCalories: 419kcalCarbohydrates: 48gProtein: 4gFat: 24gCholesterol: 32mgSodium: 360mgSugar: 26g
    Keyword campfire cooking, campfire desserts, camping desserts, pie iron recipes
    Tried this recipe?Let us know how it was!

    May 27, 2025 Everyday Staples

    3-Ingredient Blueberry Sauce

    Made with just three ingredients and ready in less than 15 minutes, this 3-ingredient blueberry sauce is the perfect way to enjoy and preserve the sweet taste of summer blueberries. Use it for topping for ice cream, pancakes, yogurt parfaits, and more.

    A dish of blueberry sauce with a spoon resting inside.
    [feast_advanced_jump_to]

    My refrigerator is home to an abundance of homemade condiments at any given time, including BBQ sauce, quick pickles, and of course, at least one jar of something sweet, like huckleberry compote or this easy blueberry sauce. I love that it's ready in minutes, and keeps well for a couple of weeks, so it's ready to be stirred into Greek yogurt, drizzled over ice cream, or spooned over fluffy buttermilk pancakes at a moment's notice.

    Why You'll Love This Recipe

    • It's a versatile sauce recipe that can be used in both sweet and savory dishes.
    • It's ready in just 15 minutes.
    • You can make it in advance and it's a great gift for friends.

    Ingredients and Substitutions

    Ingredients for 3-ingredient blueberry sauce--blueberries, sugar, and lemon.
    • Blueberries--You can use fresh or frozen blueberries for this recipe. No need to thaw blueberries, if using frozen.
    • Lemon--You should get about 3 tablespoons of juice and 1 tablespoon of zest from an average-sized lemon.
    • Sugar--This blueberry sauce recipe uses just enough sugar to make the sauce lightly sweetened, but not overly sweet. If you prefer a sweeter sauce, stir in extra sugar, 1 teaspoon at a time.

    How to Make Lemon Blueberry Sauce

    A pot of blueberries, lemon zest, and sugar on a burner with a dish of blueberries on the side.

    1. Combine 2 cups of the blueberries with the lemon zest and juice, sugar, and water. Bring to a simmer and cook until slightly thickened.

    A pot of blueberry sauce with a wooden spoon resting inside.

    2. Remove from the heat and stir in the remaining blueberries.

    FAQs

    Can you freeze blueberry sauce?

    Yes, it will freeze well. Spoon the sauce into a resealable bag or freezer safe container and freeze for up to 3 months. Thaw overnight in the refrigerator and stir well before using.

    Can I make this with frozen blueberries?

    Yes. You can use frozen blueberries and there's no need to thaw them before adding them to the pot, however, the cooking time may be a couple minutes longer.

    How to Use Blueberry Lemon Sauce

    This sweet blueberry sauce has an abundance of uses. Feel free to get creative and try it in both sweet and savory dishes, and let me know in a comment below your favorite ways to enjoy it. Here are a few suggestions to get you started:

    • Drizzle it over cheesecake or ice cream
    • Layer it with Greek yogurt and granola to create a breakfast (or dessert) parfait
    • Mix it into overnight oats for an easy breakfast
    • Spoon it over grilled salmon
    • Use it as a dip for your Blackstone Monte Cristo
    • Spoon it over pancakes or waffles
    • Stuff it into a blueberry pudgy pie

    Tips and Troubleshooting

    • Use a microplane for zesting your lemon so that you don't have any large pieces of lemon zest in the finished sauce.
    • The blueberries will stain wooden spoons, so if you prefer to keep everything stain-free, use a silicone spatula or metal spoon for stirring.
    • The lemon blueberry sauce will thicken slightly as it cools, however, it is a fairly thin sauce, with a consistency similar to syrup.
    • Store the sauce in a sealed container or jar in the fridge for up to 2 weeks.
    • This recipe is suitable for gluten-free, dairy-free, and vegan diets.
    A parfait glass filled with Greek yogurt, blueberry sauce, and a granola topping.

    More Berry Recipes You'll Love

    A jar filled with huckleberry sauce, with oranges and huckleberries in the background.
    Huckleberry Sauce
    A bowl of cranberry relish garnished with a mint sprig.
    Spicy Cranberry Relish

    Recipe

    A dish of blueberry sauce with a spoon resting inside.

    3-Ingredient Blueberry Sauce

    A woman's face.Angie Zoobkoff
    Only 3 ingredients and 15 minutes stands between you and a jar of sweet lemon blueberry sauce.
    No ratings yet
    Print Recipe Pin Recipe
    Prep Time 5 minutes mins
    Cook Time 10 minutes mins
    Course Condiment
    Cuisine American
    Servings 1.5 cups
    Calories 43 kcal

    Equipment

    • Microplane zester

    Ingredients
      

    • 3 cups blueberries divided
    • â…“ cup granulated sugar
    • â…“ cup water
    • Zest and juice of 1 lemon

    Instructions
     

    • In a medium saucepan, combine 2 cups of blueberries, sugar, water, and the lemon zest and juice.
    • Bring to a boil over medium heat, then reduce the heat to maintain a steady simmer. Cook until the berries have burst and the sauce begins to thicken, 8 to 10 minutes.
    • Remove from the heat and stir in the remaining 1 cup of blueberries. Cool before using.

    Notes

    • Zesting--Use a microplane for zesting your lemon so that you don't have any large pieces of lemon zest in the finished sauce.
    • Avoid stains--The blueberries will stain wooden spoons, so if you prefer to keep everything stain-free, use a silicone spatula or metal spoon for stirring.
    • Consistency--The lemon blueberry sauce will thicken slightly as it cools, however, it is a fairly thin sauce, with a consistency similar to syrup.
    • Storage--Store the sauce in a sealed container or jar in the fridge for up to 2 weeks.
    • Dietary--This recipe is suitable for gluten-free, dairy-free, and vegan diets.

    Nutrition

    Serving: 2 tablespoonsCalories: 43kcalCarbohydrates: 11gFiber: 1gSugar: 9g
    Keyword berry sauce, homemade condiments
    Tried this recipe?Let us know how it was!

    May 23, 2025 Beef Recipes

    Campfire Chili Mac

    This campfire chili mac is a classic one pot camping meal that combines homemade beef chili and creamy mac and cheese to create the ultimate comfort food. Make it over the campfire or on your camp stove.

    A pot of campfire chili mac over a campfire.
    [feast_advanced_jump_to]

    Campfire chili, and Dutch oven mac and cheese are camping staples. They're easy to make, can feed a crowd, only require one pot, and are perfect for those days when your camping weather is less than stellar. Since they're both so awesome on their own, it's no surprise that a combination of the two is incredible. Try it for yourself and see.

    Why This Recipe is Great for Camping

    • Like Dutch oven spaghetti, it's made entirely in one pot, so there are minimal dishes involved.
    • You can cook it over the campfire or on your camp stove.

    Ingredients and Substitutions

    Ingredients for chili mac--tomato paste, oil, Rotel tomatoes, Worcestershire sauce, ground beef, onion, spices, beans, and macaroni.
    • Ground beef--I recommend using lean ground beef (85/15) for this one pot chili mac recipe. It will give off a little bit of fat that will add plenty of flavor to the dish.
    • Worcestershire sauce--This adds some umami to the dish and packing it along is well worth the flavor boost.
    • Beans--I use red kidney beans, but feel free to swap in black beans or another type of sturdy canned bean. Be sure to drain and rinse your beans before using.
    • Tomatoes--Using canned tomatoes with chilies added, such as Rotel, saves you packing along extra vegetables. If you prefer a milder flavor, use regular diced tomatoes. Don't drain the tomatoes as the pasta will cook in the liquid.
    • Spices--I use a combination of chili powder, cumin, and oregano. Be sure to use a chili powder that you're familiar with. If you're not sure of the heat level, start with less and add to taste.

    How to Make Dutch Oven Chili Mac

    Oil heating in a Dutch oven over a campfire.

    1. Prepare a bed of hot coals or campfire with low flame. Add the oil to the Dutch oven and place over the heat.

    Ground beef and onion cooking in a pot over a campfire.

    2. Stir in the beef and onion and sauté until the onion is softened and the beef is cooked through.

    Spices cooking into a ground beef mixture in a Dutch oven.

    3. Add the tomato paste and spices and cook, stirring, until fragrant.

    Chili mac in a Dutch oven over a campfire.

    4. Stir in the tomatoes, beans, macaroni, water, and Worcestershire sauce.

    A covered Dutch oven over a campfire.

    5. Bring to a simmer, cover, and cook, stirring occasionally, until the pasta is tender.

    Cheese piled on top of chili mac.

    6. Remove from the heat and add the cheese. Stir until the cheese is melted and the sauce is creamy.

    FAQs

    Can I make this on the stovetop or camp stove?

    Definitely. Follow the directions, using a Dutch oven or large pot to cook the chili mac on a camp stove or a regular stovetop.

    Can you freeze chili mac?

    I don't recommend it. The texture of the pasta will change after thawing and may become mushy.

    Tips and Troubleshooting

    • To get ahead, combine your spices in a small jar or bag and rinse and drain your beans before heading out to camp.
    • After adding the macaroni, be sure to stir it a few times while cooking to ensure that the pasta doesn't stick to the pot.
    • Leftover chili mac can be stored in a sealed container in your cooler or fridge for up to 3 days. The pasta will continue to absorb liquid as it sits, so you may need to add a splash of broth or water when reheating it.
    A pot of campfire chili mac over a campfire.

    More Dutch Oven Recipes You'll Love

    A bowl of mussels with two pieces of garlic bread on the side.
    Dutch Oven Mussels
    A pot of Dutch oven turkey chili simmering over a fire.
    Dutch Oven Turkey Chili

    Recipe

    A pot of campfire chili mac over a campfire.

    Campfire Chili Mac

    A woman's face.Angie Zoobkoff
    Homemade beef chili and creamy mac and cheese collide to create the ultimate camping comfort food.
    No ratings yet
    Print Recipe Pin Recipe
    Prep Time 15 minutes mins
    Cook Time 30 minutes mins
    Total Time 45 minutes mins
    Course Main Course
    Cuisine American
    Servings 4 servings
    Calories 722 kcal

    Equipment

    • Cast iron Dutch oven with lid

    Ingredients
      

    • 2 tablespoons vegetable oil
    • 1 pound lean ground beef
    • 1 medium onion chopped
    • 1 tablespoon tomato paste
    • 1 tablespoon chili powder
    • ¾ teaspoon ground cumin
    • ¾ teaspoon oregano
    • 1 teaspoon table salt plus more to taste
    • ½ teaspoon freshly ground black pepper plus more to taste
    • 1 (10-ounce) can diced tomatoes with chilies such as Rotel
    • 1 (15-ounce) can red kidney beans rinsed and drained
    • 2 cups macaroni
    • 1 ½ cups water or chicken broth plus more, if needed
    • 1 tablespoon Worcestershire sauce
    • 1 cup shredded Cheddar cheese plus more for serving
    • Sour cream, sliced scallions, hot sauce, and sliced jalapeño for serving (optional)

    Instructions
     

    • Prepare a bed of hot coals or a campfire with low flame.
    • Pour the oil into the Dutch oven and set on a grate over the fire.
    • When the oil is hot, stir in the ground beef and onion, and cook, stirring frequently, until the beef is cooked through and the onion is softened, about 8 minutes.
    • Add the tomato paste, chili powder, cumin, oregano, salt, and pepper and cook, stirring constantly, until fragrant, about 1 minute.
    • Stir in the tomatoes, beans, macaroni, water, and Worcestershire sauce. Bring to a simmer, cover, and cook until the pasta is al dente, 12 to 15 minutes.
    • Remove from the heat and add the cheese. Stir constantly until the cheese is melted and the sauce is creamy. If the sauce is too thick, add a splash of water or broth. Season to taste.
    • Ladle into bowls and serve immediately with extra cheese, sour cream, scallions, hot sauce, and sliced jalapeños, if desired.

    Notes

    • Get ahead--Combine your spices in a small jar or bag and rinse and drain your beans before heading out to camp.
    • Stir, stir, stir--After adding the macaroni, be sure to stir it a few times while cooking to ensure that the pasta doesn't stick to the bottom of the pot.
    • Storage--Leftover chili mac can be stored in a sealed container in your cooler or fridge for up to 3 days. The pasta will continue to absorb liquid as it sits, so you may need to add a splash of broth or water when reheating it.

    Nutrition

    Serving: 1portionCalories: 722kcalCarbohydrates: 64gProtein: 45gFat: 31gCholesterol: 113mgSodium: 1450mgFiber: 10gSugar: 8g
    Keyword chili mac, dutch oven cooking, ground beef recipes
    Tried this recipe?Let us know how it was!

    May 20, 2025 Camping

    10 No Cooler Camping Meals

    Cooking on a camping trip can be incredibly fun and rewarding, but if you're limited to a small cooler (or no cooler at all) it can definitely present some challenges. If you're a tenter or car camper with limited cooler space, these 10 no refrigeration camping meals are for you!

    From hearty mains to simple side dishes and indulgent desserts, each of these no cooler camping meals are made with shelf-stable ingredients, and are simple to prepare.

    1
    Recipe and photo credit: Champagne Tastes
    Campfire Pasta Marinara
    This campfire pasta marinara is a one-pot Dutch oven camping meal made with veggies, sauce, broth, and short-grain pasta.
    Get the recipe: Campfire Pasta Marinara
    2
    A Dutch oven filled with tuna noodle casserole.
    Dutch Oven Tuna Noodle Cassserole
    This creamy, comforting, classic tuna noodle casserole gets transformed into a camping-friendly one-pot meal that can be made without a cooler or refrigerator. Make it on your camp stove, stovetop, or over the campfire.
    Get the recipe: Dutch Oven Tuna Noodle Casserole
    3
    Recipe and photo credit: Campfire Red Lentil Stew
    Campfire Red Lentil Stew
    This easy vegan campfire Dutch oven recipe features an easy take on Indian dal. These spiced red lentils are cooked in a Dutch oven right on the campfire!
    Get the recipe: Campfire Red Lentil Stew
    4
    Four pieces of toasted garlic bread on a wooden cutting board.
    Campfire Garlic Bread
    This easy camping garlic bread recipe is made with homemade garlic butter that's schmeared over bread, and the whole shebang is wrapped in foil and toasted over the campfire. It's an easy camping side dish that goes well with pasta, stew, chili, and soup.
    Get the recipe: Campfire Garlic Bread
    5
    Recipe and photo credit: Happy Foods Tube
    Easy Campfire Potatoes
    Looking for easy camping recipes? Try these easy campfire potatoes! They can be cooked in the ashes, on a grill or in the oven.
    Get the recipe: Easy Campfire Potatoes
    6
    Four pieces of flatbread inside a cloth napkin.
    Cast Iron Skillet Flatbread
    You're only 5 ingredients and 30 minutes away from warm, fresh homemade bread. No yeast or rising time required!
    Get the recipe: Cast Iron Skillet Flatbread
    7
    A bowl of nut free grail mix.
    Homemade Nut-Free Trail Mix
    This trail mix without nuts is easy to make in just 5 minutes with only a handful of everyday ingredients. It's perfect for camping, hiking, snacking, or kids lunch boxes.
    Get the recipe: Nut-Free Trail Mix
    8
    Two campfire waffle cones filled with marshmallows, Rolo pieces, and Teddy Grahams.
    Campfire Cones
    Everything you love about s'mores, stuffed into a waffle cone and cooked over the campfire until melted and gooey.
    Get the recipe: Campfire Cones
    9
    Two open foil packet pear crisps surrounded by pears.
    Foil Packet Pear Crisp
    This juicy foil packet pear crisp is a simple autumn dessert featuring tender spiced pears topped with a crispy oat mixture. Make it over the campfire, on your grill, or in the oven.
    Get the recipe: Foil Packet Pear Crisp
    10
    A person lifting a graham cracker from a tray of s'more nachos.
    S'more Nachos
    These easy s'more nachos have all the flavors of the classic campfire dessert layered in nacho form!
    Get the recipe: S'more Nachos

    May 16, 2025 Blackstone Griddle Recipes

    Crispy Blackstone Chicken Cutlets

    These crispy Blackstone chicken cutlets are juicy and tender with a golden brown crust that's perfect for topping with your favorite dipping sauce. Since they're ready in less than 30 minutes and can be cooked in a single batch, they're destined for a permanent spot in the weeknight dinner rotation.

    A breaded chicken cutlet on a plate with some asparagus and a lemon wedge.
    [feast_advanced_jump_to]

    I love cooking crispy chicken cutlets. They're so quick to make, flavorful, and don't dry out as easily as other chicken breast recipes. What I don't love is the messy indoor pan-frying and the multiple skillets or having to cook in batches to make enough for everyone.

    This Blackstone chicken recipe solves both of those problems. The large surface area lets you cook them all at once and all the messy frying splatters stay outside!

    Why You'll Love This Recipe

    • It's a quick and easy dinner recipe that's ready in less than 30 minutes.
    • You can easily scale it to make as much (or little) as you need.

    Ingredients and Substitutions

    Ingredients for Blackstone chicken cutlets--flour, bread crumbs, egg, chicken, seasoning, oil, and Parmesan.
    • Chicken--This recipe uses boneless, skinless breasts that are halved and pounded thin to create cutlets. Be sure to pound them to an even thickness all over so that they cook evenly. If your store has chicken cutlets ready to go, feel free to swap those in.
    • Bread crumbs--Use dried bread crumbs (not fresh), but feel free to swap in panko if you prefer an extra-crunchy coating.
    • All-purpose seasoning--This all-purpose seasoning recipe adds a little extra flavor to the chicken without overwhelming it. When making it, be sure to check the label on your lemon pepper. If it doesn't have salt, add an extra pinch.
    • Oil--You're going to be using a decent amount of oil to cook the chicken in order to get that beautiful golden brown crust. Skip the olive oil and use a mild oil with a high smoke point, such as vegetable or sunflower oil.

    How to Cook Chicken Cutlets on the Blackstone

    Two chicken cutlets pounded between sheets of plastic.

    1. Slice each chicken breast horizontally to create two thinner cutlets. Pound them between two pieces of plastic wrap until they are about ¼-inch thick. Season the chicken lightly.

    A bowl of flour, a bowl of beaten egg, and a bowl of bread crumbs with Parmesan.

    2. Set up a breading station--one bowl with flour, one with beaten eggs, and one with bread crumbs mixed with the seasoning and Parmesan.

    A breaded chicken cutlet on a baking sheet with breading bowls nearby.

    3. Dip each cutlet into the flour, then the egg, and then the bread crumb mixture, fully coating each one.

    Four chicken cutlets cooking on a griddle.

    4. Heat the oil on the Blackstone, then cook the chicken, flipping once until golden brown and cooked through.

    FAQs

    What should I serve with my chicken cutlets?

    You can serve the crispy chicken cutlet with your favorite dipping sauce, such as BBQ sauce, or honey mustard, if desired. Blackstone asparagus, potato salad with pickles, or smashed potatoes are great side dishes for this easy chicken dinner.

    Can I make this on the stovetop?

    Definitely. You can make this in your cast iron skillet on the stovetop or on your camp stove, however, you may need to work in batches to cook all of the chicken.

    Follow the directions for breading, and then heat the oil in your skillet over medium high heat. Only add as many cutlets as will fit comfortably without crowding them in the pan. Repeat with remaining batches of chicken, if needed, adding extra oil, if required.

    Tips and Troubleshooting

    • You can bread the chicken up to 30 minutes before cooking. Keep it in the fridge on a wire rack set over a baking sheet. This will help to prevent the coating from becoming soggy.
    • Want to take your chicken cutlet to the next level? Turn it into Blackstone chicken Parmesan!
    A breaded chicken cutlet on a plate with some asparagus and a lemon wedge.

    More Blackstone Recipes You'll Love

    Pancakes cooking on a griddle.
    Sausage Pancakes
    A chicken and bacon sandwich on a brioche bun with lettuce and tomato.
    Chicken and Bacon Sandwich

    Recipe

    A breaded chicken cutlet on a plate with some asparagus and a lemon wedge.

    Crispy Blackstone Chicken Cutlets

    A woman's face.Angie Zoobkoff
    These golden brown chicken cutlets are juicy and tender and ready in just 25 minutes, making them ideal for a quick weeknight dinner.
    No ratings yet
    Print Recipe Pin Recipe
    Prep Time 15 minutes mins
    Cook Time 10 minutes mins
    Total Time 25 minutes mins
    Course Main Course
    Cuisine American
    Servings 4 servings
    Calories 507 kcal

    Equipment

    • Blackstone (or other outdoor) griddle

    Ingredients
      

    • 2 large (about 1 lb | 454 g) boneless, skinless chicken breasts
    • Salt and freshly ground black pepper
    • ½ cup all-purpose flour
    • 2 large eggs lightly beaten
    • 1 ¼ cups dried bread crumbs
    • ¼ cup grated Parmesan cheese
    • 2 teaspoons all-purpose seasoning
    • ½ cup neutral vegetable oil

    Instructions
     

    • Slice each chicken breast in half horizontally to create two thin cutlets. Place the cutlets between two slices of plastic wrap and pound to a ¼-inch thickness. Season lightly with salt and pepper.
    • Create a breading station with three medium bowls. Place the flour in one bowl, the beaten eggs in a second bowl, and then combine the bread crumbs, Parmesan, and seasoning in a third bowl.
    • Working with one cutlet at a time, use a fork to dip it in the flour, and then into the egg, letting any excess drip off into the bowl. Finally, dip the chicken into the bread crumb mixture, turning to coat it completely. Place it on a baking sheet and repeat with the remaining cutlets.
    • Heat one side of the Blackstone (or other outdoor griddle) to medium-high. Pour the oil in an even layer, then add the chicken cutlets and cook, flipping once, until golden brown and cooked through, 4 to 5 minutes per side.

    Notes

    • Get ahead--You can bread the chicken up to 30 minutes before cooking. Keep it in the fridge on a wire rack set over a baking sheet. This will help to prevent the coating from becoming soggy.

    Nutrition

    Serving: 1 cutletCalories: 507kcalCarbohydrates: 39gProtein: 30gFat: 26gCholesterol: 138mgFiber: 2gSugar: 2g
    Keyword 30 minute meals, blackstone cooking, blackstone griddle, chicken dinner, easy chicken dinners
    Tried this recipe?Let us know how it was!

    May 13, 2025 Camping

    Dutch Oven Mussels

    These Dutch oven mussels are a fantastic Dutch oven camping meal that's ready in just 20 minutes. After gently steaming in beer, the mussels are tender and flavorful, and there's plenty of broth left for dipping and dunking wedges of campfire garlic bread.

    A bowl of mussels with two pieces of garlic bread on the side.
    [feast_advanced_jump_to]

    If you're fortunate enough to be camping near the ocean and have access to fresh mussels, this is the perfect camping recipe to enjoy directly from your Dutch oven. It's a simple camping meal that requires few ingredients and minimal effort for outstanding flavor.

    Even if you're not near water, I highly recommend finding the best-quality mussels you can, stash them in your cooler, and plan for an amazing seafood dinner on your first night at camp.

    Why This Recipe is Great for Camping

    • It's a simple camping meal that can be prepared entirely in your Dutch oven over the campfire.
    • It's ready in less than 30 minutes.

    Ingredients and Substitutions

    Ingredient for Dutch oven mussels--parsley, oil, garlic, butter, shallots, mussels, and beer.
    • Mussels--You want to use fresh mussels that have been scrubbed clean and de-bearded (see the FAQ below for help with that!) Fresh mussels should be closed (or close when you tap them) and have a mild odor. Toss any mussels that are won't close or that smell fishy.
    • Beer--You can use your favorite beer here, but I recommend sticking with something that has a mild flavor, like a pale lager or mild ale. Avoid very strong or specialty-flavored beers as these will overpower the flavor of the seafood.

    How to Cook Mussels in a Dutch Oven

    Butter melting in a Dutch oven over a fire.

    1. Heat the oil and butter in a Dutch oven set over hot coals or low flame until the butter is melted.

    Shallots cooking in a Dutch oven.

    2. Add the garlic and shallot and sauté until softened.

    Beer being poured into a Dutch oven.

    3. Pour in the beer and bring to a simmer.

    Mussels in liquid in a Dutch oven.

    4. Add the mussels, cover, and steam until the mussels have opened. Garnish with parsley before serving.

    FAQs

    How should I store my mussels before cooking?

    Shellfish can spoil easily, so I recommend cooking your mussels as soon as possible, particularly if you're camping, where temperature control may not be as good as in your home refrigerator.

    Store the mussels in a bowl, covered with a damp cloth or paper towel in the coldest part of your cooler or refrigerator, and use within one day.

    Can I make this on the stovetop?

    Definitely. You can make this steamed mussels recipe using a regular Dutch oven on your stovetop at home or on your camp stove. Follow the recipe directions, sautéing the shallots and garlic over medium heat, before adding the beer and mussels.

    How do you debeard mussels?

    The beard is a clump of fibers protruding from where the two shells of the mussel meet. To remove it, hold the mussel in one hand and grab the beard with your other hand. Pull firmly away from the mussel to remove it. If you find it too slippery to work with, try using a paper towel to improve your grip.

    Tips and Troubleshooting

    • It's possible that a few of your mussels won't open during cooking. Don't overcook the rest of them by holding out for those last few to open. Once most of them are open, toss the unopened ones and dig in.
    A bowl of mussels with two pieces of garlic bread on the side.

    More Dutch Oven Recipes You'll Love

    A partially sliced meatloaf on a platter with a bowl of peas and a bowl of mashed potatoes nearby.
    Dutch Oven Meatloaf
    A chocolate cake in a Dutch oven.
    Dutch Oven Chocolate Cake

    Recipe

    A bowl of mussels with two pieces of garlic bread on the side.

    Dutch Oven Mussels

    A woman's face.Angie Zoobkoff
    Gently steamed in a buttery beer broth, these Dutch oven mussels are the ultimate camping seafood dinner.
    No ratings yet
    Print Recipe Pin Recipe
    Prep Time 10 minutes mins
    Cook Time 10 minutes mins
    Total Time 20 minutes mins
    Course Main Course
    Cuisine American
    Servings 2 servings
    Calories 460 kcal

    Equipment

    • 6-to-8-quart cast iron Dutch oven with lid

    Ingredients
      

    • 2 tablespoons olive oil
    • 2 tablespoons salted butter
    • 2 large shallots finely chopped
    • 2 cloves garlic minced
    • One (12-oz | 355-ml) bottle beer
    • 2 pounds (900 g) fresh mussels scrubbed and de-bearded
    • ¼ cup chopped Italian parsley
    • Bread for serving (optional)

    Instructions
     

    • Prepare a campfire and let it burn down to hot embers or low flame.
    • Place a large cast iron Dutch oven over the heat and add the oil and butter.
    • When the butter is melted, stir in the shallots and garlic, sautéing until softened and fragrant, 1 to 2 minutes.
    • Pour in the beer and bring to a simmer.
    • Add the mussels and cover the Dutch oven. Cook until most of the mussels have opened, 5 to 7 minutes.
    • Carefully remove the Dutch oven from the heat and sprinkle with parsley. Serve with campfire garlic bread or crusty bread, if desired.

    Notes

    • Don't overcook--It's possible that a few of your mussels won't open during cooking. Don't overcook the rest of them by holding out for those last few to open. Once most of them are open, toss the unopened ones and dig in.

    Nutrition

    Serving: 1 portionCalories: 460kcalCarbohydrates: 14gProtein: 24gFat: 29gCholesterol: 31mgSodium: 98mgFiber: 1g
    Keyword campfire cooking, dutch oven cooking, seafood recipes
    Tried this recipe?Let us know how it was!

    May 9, 2025 Collections

    20 Must-Make Recipes for Your Long Weekend Cookout

    Whether it's the unofficial kickoff to summer on May long weekend, the final hurrah on Labour day, or a relaxed long weekend in between, there are plenty of excuses to call a few friends and neighbors and fire up the grill this summer. Here, the 20 best cookout recipes you'll want to make over and over again all season long.

    1
    Recipe and photo credit: Athlete Lunchbox
    Grilled Peri Peri Chicken
    Spicy and flavourful, this grilled Peri Peri chicken is a marinated BBQ butterflied chicken cooked perfectly on the grill.
    Get the recipe: Grilled Peri Peri Chicken
    2
    Recipe and photo credit: One Carefree Cook
    Elote Pasta Salad (Mexican Street Corn Pasta Salad)
    Elote pasta is a fun twist on everything you love about pasta salads and street corn salads — in one cool, refreshing bowl!
    Get the recipe: Mexican Street Corn Pasta Salad
    3
    A Dutch oven filled with baked beans on a campfire grate.
    Dutch Oven Baked Beans
    Made with canned navy beans, bacon, onion, and a sweet and tangy sauce, this hearty crowd-pleasing dish will keep all of your campers happy.
    Get the recipe: Dutch Oven Baked Beans
    4
    A steak cut in half on a plate with some salad.
    Grilled Bacon-Wrapped Steak
    With only 3 ingredients and 20 minutes from start to finish, this is the perfect grilled main dish for easy summer entertaining.
    Get the recipe: Grilled Bacon-Wrapped Steak
    5
    Recipe and photo credit: The Cookin Chicks
    Ultimate Potato Salad
    Ultimate potato salad includes hard-boiled eggs, celery, onion, and flavor that is sure to be the hit of any BBQ, picnic, and potluck!
    Get the recipe: Ultimate Potato Salad
    6
    Six chicken skewers on a rectangular platter with a dish of sauce on the side.
    Grilled Bang Bang Chicken Skewers
    This bang bang grilled chicken is an easy meal of grilled boneless chicken breast that's finished with a creamy, tangy, slightly spicy sauce.
    Grilled Bang Bang Chicken Skewers
    7
    A bowl of bean salad with corn.
    Marinated Bean Salad
    Made with several types of beans, corn, and a tangy lime dressing, this make-ahead salad is perfect for camping trips, potlucks, backyard cookouts, and more.
    Get the recipe: Marinated Bean Salad
    8
    Recipe and photo credit: The Forked Spoon
    Easy Grilled Veggie Skewers
    Veggie Skewers, grilled to perfection and drizzled with tangy balsamic vinegar and brushed with a fresh garlic herb sauce.
    Get the recipe: Easy Grilled Veggie Skewers
    9
    Recipe and photo credit: The Kitchen Bucket List
    Chuck Roast Burnt Ends
    Tender and crispy, these chuck roast burnt ends are an easy smoking recipe. They're so tasty, your family and friends will be begging for more!
    Get the recipe: Chuck Roast Burnt Ends
    10
    Recipe and photo credit: Mary's Whole Life
    Honey Lime Poppyseed Fruit Salad
    This honey lime poppyseed fruit salad is a delicious and easy side dish! Perfect for a summer BBQ.
    Get the recipe: Honey Lime Poppyseed Fruit Salad
    11
    A burger with cheese, lettuce, and tomato on a plate.
    Blackstone Smash Burgers with Onions
    Your everyday smash burger just got a major upgrade, thanks to crispy fried onions and melted provolone cheese.
    Get the recipe: Smash Burgers with Onions
    12
    Recipe and photo credit: Simply Scratch Made
    Traditional Coleslaw
    This traditional coleslaw recipe is fresh, creamy, and made from scratch with a tangy homemade dressing—perfect for barbecues!
    Get the recipe: Traditional Coleslaw
    13
    A sausage in a bun topped with mustard and sauerkraut.
    Smoked Bratwurst
    Discover how easy it is to make your own smoked brats with this simple method. They're perfect for camping, backyard BBQs, and more.
    Get the recipe: Smoked Bratwurst
    14
    Four s'more jars with pudding, marshmallow fluff, and graham cracker topping.
    S'mores in a Jar
    For when you're craving s'mores, but don't have a campfire.
    Get the recipe: S'mores in a Jar
    15
    A bowl filled with raw vegetable marinated salad.
    Overnight Marinated Vegetable Salad
    This easy marinated salad is a colorful combination of crunchy raw vegetables tossed in a simple vinaigrette dressing. Healthy never tasted so good.
    Get the recipe: Overnight Marinated Vegetable Salad
    16
    Recipe and photo credit: Fresh Off the Grid
    Grilled Asparagus in Foil
    This garlicy, lemony, grilled asparagus in foil is the perfect side dish to make for your next BBQ or camping trip.
    Get the recipe: Grilled Asparagus
    17
    Recipe and photo credit: Carne Diem
    Grilled Peaches with Amaretto Whipped Cream
    These grilled peaches with Amaretto whipped cream make for the perfect dessert for your summer BBQ. Sweet, caramelized peaches are topped with an Amaretto infused whip cream.
    Get the recipe: Grilled Peaches with Amaretto Whipped Cream
    18
    Recipe and photo credit: The Jam Jar Kitchen
    German Potato Salad
    This warm German potato salad combines potatoes with bacon, onions and fresh herbs in a tangy-sweet mustard dressing you are going to love!
    Get the recipe: German Potato Salad
    19
    Recipe and photo credit: Food Meanderings
    No-Bake Drumstick Dessert
    This Drumstick dessert is an easy way to get your drumstick fix in the form of a no bake dessert! It’s also a great last minute dish to take to a BBQ or cookout.
    Get the recipe: Drumstick Dessert
    20
    Skewers of grilled strawberries on a plate, drizzled with dark syrup.
    Grilled Strawberries
    Sweet summer strawberries star in this easy 3-ingredient grilled dessert. Perfect for Mother's Day, cookouts, and more.
    Get the recipe: Grilled Strawberry Skewers
    • « Go to Previous Page
    • Page 1
    • Page 2
    • Page 3
    • Page 4
    • Interim pages omitted …
    • Page 9
    • Go to Next Page »

    Primary Sidebar

    A woman's face.

    Hi, I'm Angie! I'm so glad you're here. I can't wait to share my favorite camping and grilling recipes with you.

    More about me →

    Summer Favorites

    • Skewers of grilled strawberries on a plate, drizzled with dark syrup.
      Grilled Strawberries
    • Four grilled shrimp skewers on a platter with lemon wedges and cocktail sauce on the side.
      Grilled Old Bay Shrimp
    • A whole skillet peach cobbler with two spoons resting on top.
      Grilled Skillet Peach Cobbler
    • Two Cajun chicken foil packets on plates with forks on the side.
      Cajun Chicken Foil Packets

    Popular Recipes

    • A small skillet filled with caramelized bananas.
      Campfire Bananas Foster
    • A mini cast iron skillet filled with cornbread.
      Mini Skillet Cornbread
    • A grilled cheese sandwich cut in half and a handful of potato chips.
      Campfire Grilled Cheese Two Ways
    • A skillet with three chicken breasts and a skillet filled with cheesy gnocchi.
      18 Easy Cast Iron Skillet Meals for Camping

    Footer

    ↑ back to top

    About

    • Privacy Policy

    Newsletter

    • Sign Up for Emails

    Let's Connect

    • Contact

    Copyright © 2025 Camp.Grill.Eat.

    Rate This Recipe

    Your vote:


    A rating is required
    A name is required
    An email is required