• Skip to main content
  • Skip to primary sidebar

Camp.Grill.Eat. logo

menu icon
go to homepage
  • Recipes
  • About
  • Subscribe
  • Contact
    • Facebook
    • Pinterest
    • YouTube
  • search icon
    Homepage link
    • Recipes
    • About
    • Subscribe
    • Contact
    • Facebook
    • Pinterest
    • YouTube
  • ×
    Home » Recipes

    Recipe Index

    January 10, 2025 Camping

    Honey Lime Salmon Foil Packets

    These honey lime salmon foil packets are a simple 20-minute meal made with tender glazed salmon fillets and crisp baby bok choy that are cooked in foil on your grill, over the campfire, or in your oven.

    Two foil packets with salmon and bok choy.

    We have a seemingly endless supply of salmon at our house, thanks to plenty of family members who love to fish. During the summer, my go-to is any of these mouthwatering grilled salmon recipes or even a simple blackened salmon caesar salad, but when we're camping, or I need a simple, fuss-free meal that's ready in less than half an hour, these honey chipotle salmon foil packets truly shine. Cooking the fish in foil ensures that it stays juicy, and the crisp-tender bok choy and sweet and tangy glaze are the perfect accompaniments.

    Why This Recipe is Great for Camping

    • The whole meal is cooked in a foil packet, so there are very few dishes to clean up.
    • They're ready in just 20 minutes and can be made over the campfire or on your portable grill.

    Ingredients and Substitutions

    Ingredients for honey lime salmon foil packets--salmon, soy sauce, honey, baby bok choy, lime, and adobo sauce.
    • Salmon--You can use fresh or frozen salmon fillets for this recipe, but if using frozen, be sure to thaw them fully before cooking. Choose fillets that have an even thickness, if possible, so that they cook evenly.
    • Baby bok choy--Trim away any large floppy leaves, or any wilted leaves before adding the bok choy to your packets.
    • Adobo--This is the sauce that is found in a can of chipotle chiles. It adds a subtle smokiness and heat to the honey lime salmon glaze, but doesn't make the dish overly spicy.
    • Lime--Your lime should yield 1 ½ to 2 tablespoons of juice. To help extract as much juice as possible, roll it firmly against a firm surface before juicing. If it's a little stingy, grab a second lime half and squeeze that in.

    How to Make Salmon Foil Packets

    A bowl of red sauce with two lime halves nearby.
    A piece of salmon and four wedges of bok choy on two sheets of foil.
    1. Whisk the honey, lime, soy sauce, and adobo sauce together in a small bowl.
    2. Place each salmon fillet and four bok choy quarters on a double layer of aluminum foil.
    Salmon and bok choy topped with a red glaze on two sheets of foil.
    Four foil packets on a grill.
    1. Spoon the sauce over the salmon and bok choy and fold up the foil to create four foil packets.
    2. Cook over medium heat on the grill or campfire until the salmon is cooked through.

    FAQs

    What's that white stuff coming out of my fish?

    That gunky white stuff you may see on the surface of your salmon when you cook it is called albumin. It's a liquid protein that solidifies when heated. It may not look particularly appetizing, but it is completely harmless and safe to eat.

    Albumin typically solidifies when the fish is cooked over high heat or cooked for too long. To prevent it from forming, cook your salmon over medium or medium-low heat, and take care not to overcook it.

    Can I cook these in the oven?

    Yes. Place the sealed foil packets on a baking sheet and cook in a 375°F oven until cooked through, about 10 minutes.

    How can I tell when salmon is cooked?

    Although many people enjoy eating salmon slightly undercooked, fully cooked salmon should register 145°F on a digital thermometer inserted into the thickest part of the fish. Cooked salmon will have an opaque pink color, while undercooked salmon is translucent.

    What should I serve with these salmon foil packets?

    These salmon foil packs are a meal in themselves, but feel free to serve some steamed rice or campfire garlic bread on the side to make a heartier dinner.

    Tips and Troubleshooting

    • The cooking times for this recipe are based on salmon fillets that are 1 to 1 ½ inches thick. Significantly thicker pieces will require 4 to 5 extra minutes, and very thin fillets will require only 7 to 8 minutes of cooking.
    • This honey chipotle salmon foil packet recipe is suitable for dairy-free diets, and gluten-free diets, if made using tamari.
    A glazed piece of salmon and bok choy in a foil packet.

    More Salmon Recipes You'll Love

    Pesto crusted salmon topped with lemon slices on a cutting board.
    Pesto-Crusted Salmon
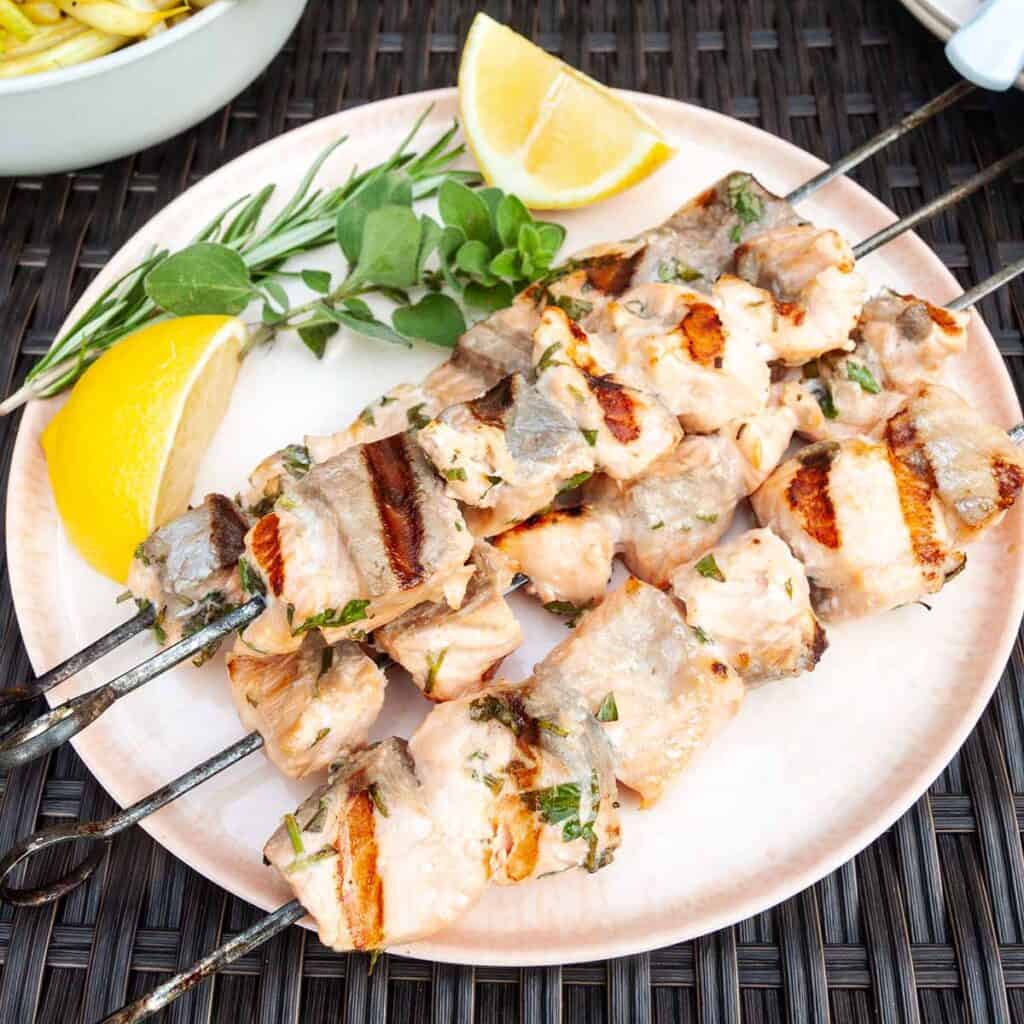
    Four grilled salmon kabobs on a pink plate with lemon wedges and fresh herbs next to them.
    Grilled Salmon Kabobs

    Tried This Recipe?

    If you've tried this recipe, please leave a comment below. Follow me on Instagram, Facebook, or Pinterest for more great camping and grilling recipes.

    Recipe

    Two foil packets with salmon and bok choy.

    Honey Lime Salmon Foil Packets

    A woman's face.Angie Zoobkoff
    This 20-minute foil pack meal is made with tender honey lime glazed salmon fillets, crisp baby bok choy, and a sweet and tangy glaze. A simple meal for camping or the grill.
    No ratings yet
    Print Recipe Pin Recipe
    Prep Time 10 minutes mins
    Cook Time 10 minutes mins
    Course Main Course
    Cuisine American
    Servings 4 servings
    Calories 295 kcal

    Ingredients
      

    • 2 tablespoons honey
    • Juice of 1 lime (about 2 tablespoons)
    • 1 tablespoon soy sauce (or tamari)
    • 1 tablespoon adobo sauce
    • 4 (6-ounce) salmon fillets
    • 4 baby bok choy quartered lengthwise
    • Salt and freshly ground black pepper

    Instructions
     

    • Preheat the grill for medium (375°F) or prepare a bed of hot campfire coals.
    • In a small bowl, mix the honey, lime juice, soy sauce, and adobo sauce.
    • Arrange four double layers of aluminum foil on a flat surface. Place one salmon fillet and four baby bok choy quarters on each piece. Season with salt and pepper.
    • Drizzle the sauce over the salmon and bok choy, dividing it evenly among the packets.
    • Fold up and seal each packet. Place foil packs on a grate over hot coals or on the grill grate.
    • Cook until the salmon is pink and opaque throughout and the bok choy leaves are wilted, 8 to 10 minutes. If it's not quite cooked to your liking, seal up the foil packet and cook for a few extra minutes. If you're cooking over the campfire, your cooking time will be very dependent on the heat of your coals and the distance the foil packs are from the heat.
    • Open each packet and let the steam escape. Spoon any juices collected in the bottom of each foil packet over the fish and serve immediately.

    Notes

    • The cooking times for this recipe are based on salmon fillets that are 1 to 1 ½ inches thick. Significantly thicker pieces will require 4 to 5 extra minutes, and very thin fillets will require only 7 to 8 minutes of cooking.
    • This honey chipotle salmon foil packet recipe is suitable for dairy-free diets, and gluten-free diets, if made using tamari.

    Nutrition

    Serving: 1 packetCalories: 295kcalCarbohydrates: 15gProtein: 36gFat: 11gCholesterol: 78mgSodium: 430mgFiber: 2gSugar: 12g
    Keyword foil pack cooking, foil packets, grilled fish
    Tried this recipe?Let us know how it was!

    January 8, 2025 Collections

    16 Guilt-Free Snack Recipes

    Homemade snacks should be simple to make, flavorful, and satisfying. After all, you're going to the trouble of making your snack instead of reaching for a box of crackers or chips. These 16 guilt-free snack recipes deliver on all counts.

    1
    Recipe and photo credit: In the Kitch
    Basil Hummus
    This fresh basil hummus sprinkled with pine nuts and olive oil is a quick and easy snack for any occasion.
    Get the recipe: Basil Hummus
    2
    Three homemade granola bars in a box.
    Apricot and White Chocolate Granola Bars
    Filled with oats, nuts, and dried fruit, these chewy apricot, almond, and white chocolate granola bars make the perfect hiking or lunchbox snack.
    Get the recipe: Apricot and White Chocolate Granola Bars
    3
    Recipe and photo credit: Two Sisters Mix It Up
    Easy Homemade Ranch Tortilla Chips
    Perfectly seasoned with a zesty blend of herbs and spices, easy homemade ranch tortilla chips are light, fresh, and crispy.
    Get the recipe: Ranch Tortilla Chips
    4
    A bowl of assorted glazed nuts with a few scattered on a plate.
    Sweet and Spicy Smoked Nuts
    Sweet, salty, smoky, spicy, crunchy. What more could you ask for from a snack?
    Get the recipe: Smoked Nuts
    5
    Recipe and photo credit: Cottage Cheese Recipes
    Berry Cottage Cheese Bark
    This cottage cheese protein bark is an easy-to-make snack that sneaks some protein into your day. It tastes like white chocolate and berries!
    Get the recipe: Berry Cottage Cheese Bark
    6
    A stack of pear chips with a pear in the background.
    Pear Chips
    These homemade pear chips are easy to make with only one ingredient, and are a healthy snack that's perfect for camping or hiking.
    Get the recipe: Pear Chips
    7
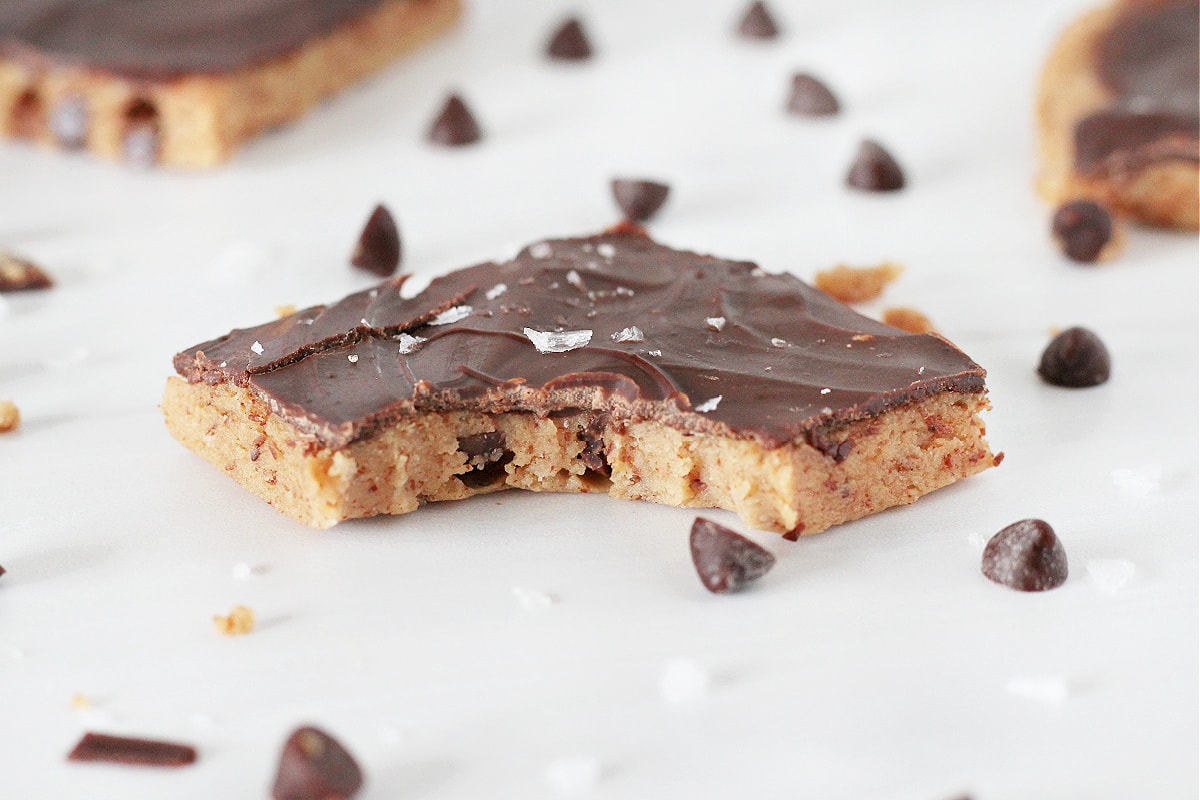
    High Protein Cookie Dough Bark
    Recipe and photo credit: Happi Homemade
    High Protein Cookie Dough Bark
    Make this high-protein cookie dough bark with just five ingredients for a sweet, no-bake treat full of fiber and protein to keep you full!
    Get the recipe: Cookie Dough Bark
    8
    A jar filled with chunky granola bites and fresh cherries scattered around the jar.
    Chunky Chocolate Cherry Granola
    These crispy crunchy granola bites are laden with dried fruit, coconut, and chocolate chips. They're perfect for an easy breakfast or portable hiking snack.
    Get the recipe: Chocolate Cherry Granola
    9
    Recipe and photo credit: Three Kids, Three Cats, and a Husband
    Loaded Avocado Deviled Eggs
    Avocado deviled eggs are a fresh twist on the classic recipe. By replacing the usual mayo with creamy avocado, you get a vibrant, flavorful bite that’s not just delicious but also packed with nutrients. Whether
    Get the recipe: Avocado Deviled Eggs
    10
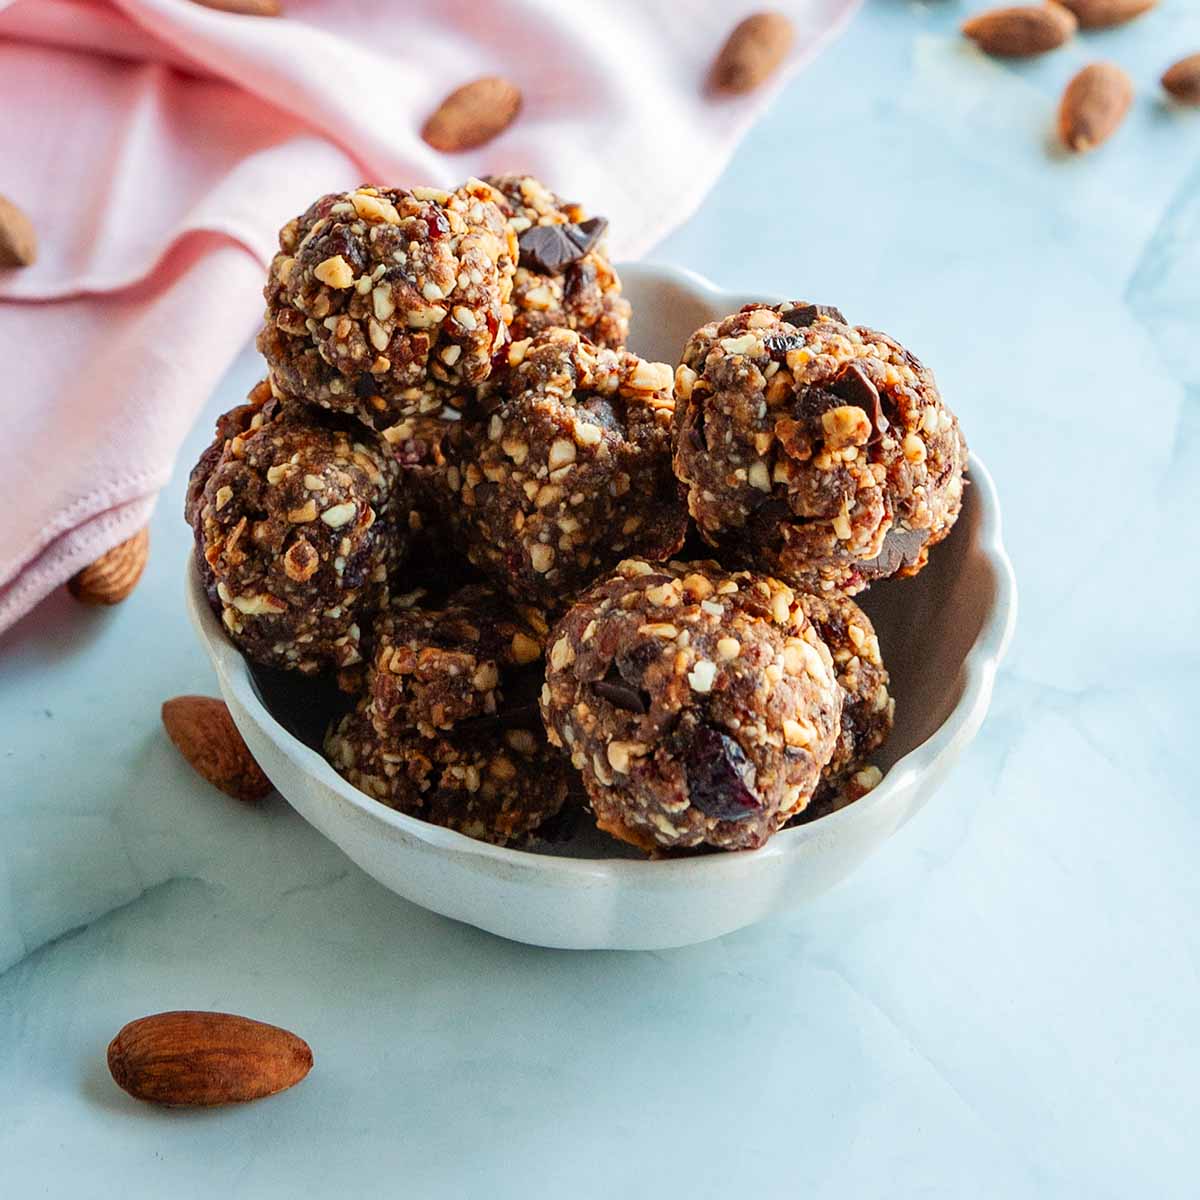
    A bowl of cranberry energy balls with almonds scattered around.
    Cranberry Energy Balls
    These sweet and nutty energy bites are quick and easy to make and loaded with plenty of nutritious ingredients (plus a little chocolate).
    Get the recipe: Cranberry Energy Balls
    11
    Recipe and photo credit: Moderately Messy RD
    S’mores Protein Pudding with Greek Yogurt
    A healthy s’mores protein pudding made with Greek yogurt (no protein powder) to provide 18 grams of protein per serving.
    Get the recipe: S'mores Protein Pudding
    12
    A bowl of nut free grail mix.
    Homemade Nut-Free Trail Mix
    This trail mix without nuts is easy to make in just 5 minutes with only a handful of everyday ingredients. It's perfect for camping, hiking, snacking, or kids lunch boxes.
    Get the recipe: Nut-Free Trail Mix
    13
    Recipe and photo credit: The Cooking Foodie
    Oatmeal Raspberry Cups
    Healthy oatmeal cups filled with delicious raspberry filling. This treat is healthy, easy to make and super delicious!
    Recipe and photo credit: Oatmeal Raspberry Cups
    14
    Recipe and photo credit: Simple & Fraiche
    Snickers Stuffed Dates
    Snickers stuffed dates are a healthy twist on the classic candy bar. They are made with only six natural ingredients and are chewy and sweet, with just a hint of saltiness.
    Get the recipe: Snickers Stuffed Dates
    15
    Recipe and photo credit: The Art of Food and Wine
    Oven Roasted Chickpeas with Spices
    Spicy roasted chickpeas (garbanzo beans) are a great healthy snack but also make a great garnish. Add any spices that appeal to you!
    Get the recipe: Roasted Chickpeas
    16
    Recipe and photo credit: Tessie's Table
    Flavor-Packed Spiced Peanuts
    Crunchy spiced peanuts with a bold flavor! Perfect for snacking or as a party treat.
    Get the recipe: Spiced Peanuts

    January 6, 2025 Camping

    Dutch Oven Split Pea Soup

    This Dutch oven split pea soup with ham is a comforting one-pot meal that's perfect for camping or a cozy meal at home, and is a great way to use up leftover ham. Make it in your Dutch oven over the fire, camp stove, or on the stovetop.

    Two bowls of Dutch oven split pea soup, with a pot of soup and some homemade flatbread nearby.

    Split pea soup might not be the first thing you think of when looking for a Dutch oven camping recipe, but it's actually perfect for it, particularly for cold weather camping. It's hearty and filling, requires minimal ingredients (several of which don't even require a cooler) and is a great way to use up leftover ham from your campfire Dutch oven ham.

    Why This Recipe is Great for Camping

    • It's hearty and satisfying and makes a large pot that will feed plenty of people or last you for several days.
    • The recipe requires minimal ingredients, and minimal cooler space.

    Ingredients and Substitutions

    Ingredients for Dutch oven split pea soup--ham, onion, bay leaf, celery, split peas, oil, and carrots.
    • Split peas--Like red lentils, as dried split peas are cooked, they break down completely and become thick and creamy. Dried peas will last for up to 2 years, but if your peas are soft, sticky, or have white or yellow spots, toss them out and buy a fresh bag.
    • Ham (and ham bone)--Leftover ham (and its bone) are ideal for this recipe, but if you don't have a ham bone, ask your butcher for any extra or purchase a ham hock and use that.
    • Water--The recipe was designed to use minimal ingredients so that it was easy to make while camping so I use water as the base, which gets plenty of flavor from simmering with the ham bone. Feel free to substitute chicken stock for extra flavor, if you prefer. If you do, I recommend using low-sodium stock, as the ham bone and meat adds saltiness to the soup.

    How to Make a Split Pea Soup with Ham

    Oli heating in a large Dutch oven over an induction burner.
    Onion, carrot, and celery cooking in oil in a large Dutch oven.
    1. Heat the oil in a large Dutch oven over medium heat.
    2. Stir in the onion, carrot, and celery, and cook until softened.
    A large ham bone in a Dutch oven of split pea soup.
    A pot of split pea soup on a burner.
    1. Add the split peas, ham bone, and bay leaf and pour in the water. Bring to a simmer and cook, partially covered, until the peas break down.
    2. Remove the ham bone and bay leaf and pull any meat from the bone. Stir this meat, along with the chopped ham back into the soup. Simmer until heated through.

    FAQs

    Why are my split peas taking so long to cook?

    Fresh split peas should break down almost completely in about 90 minutes. If you are using older peas, they may take up to an hour longer to cook and break down.

    Can you freeze split pea soup?

    Yes. Transfer the cooled soup to freezer safe containers or bags and freeze for up to 3 months. Thaw in the fridge before reheating on the stovetop. You may need to add more water or stock to thin the thawed soup when reheating.

    What should I serve with it?

    I love this cozy soup with some Dutch oven Irish soda bread or skillet flatbread on the side for dipping, but the soup itself is hearty enough to be a complete meal.

    Tips and Troubleshooting

    • Store leftover split pea soup in a sealed container in your fridge or cooler for up to 4 days. Reheat in a pot or Dutch oven over low heat until warmed through. The soup will thicken as it sits, so you may need to add water or stock to thin it when reheating.
    • This Dutch oven split pea soup recipe is suitable for gluten-free and dairy-free diets.
    A bowl of split pea soup with ham with a piece of flatbread inside.

    More Dutch Oven Recipes You'll Love

    A bowl of chicken noodle soup with a spoon resting inside and a bun on the side.
    Dutch Oven Chicken Noodle Soup
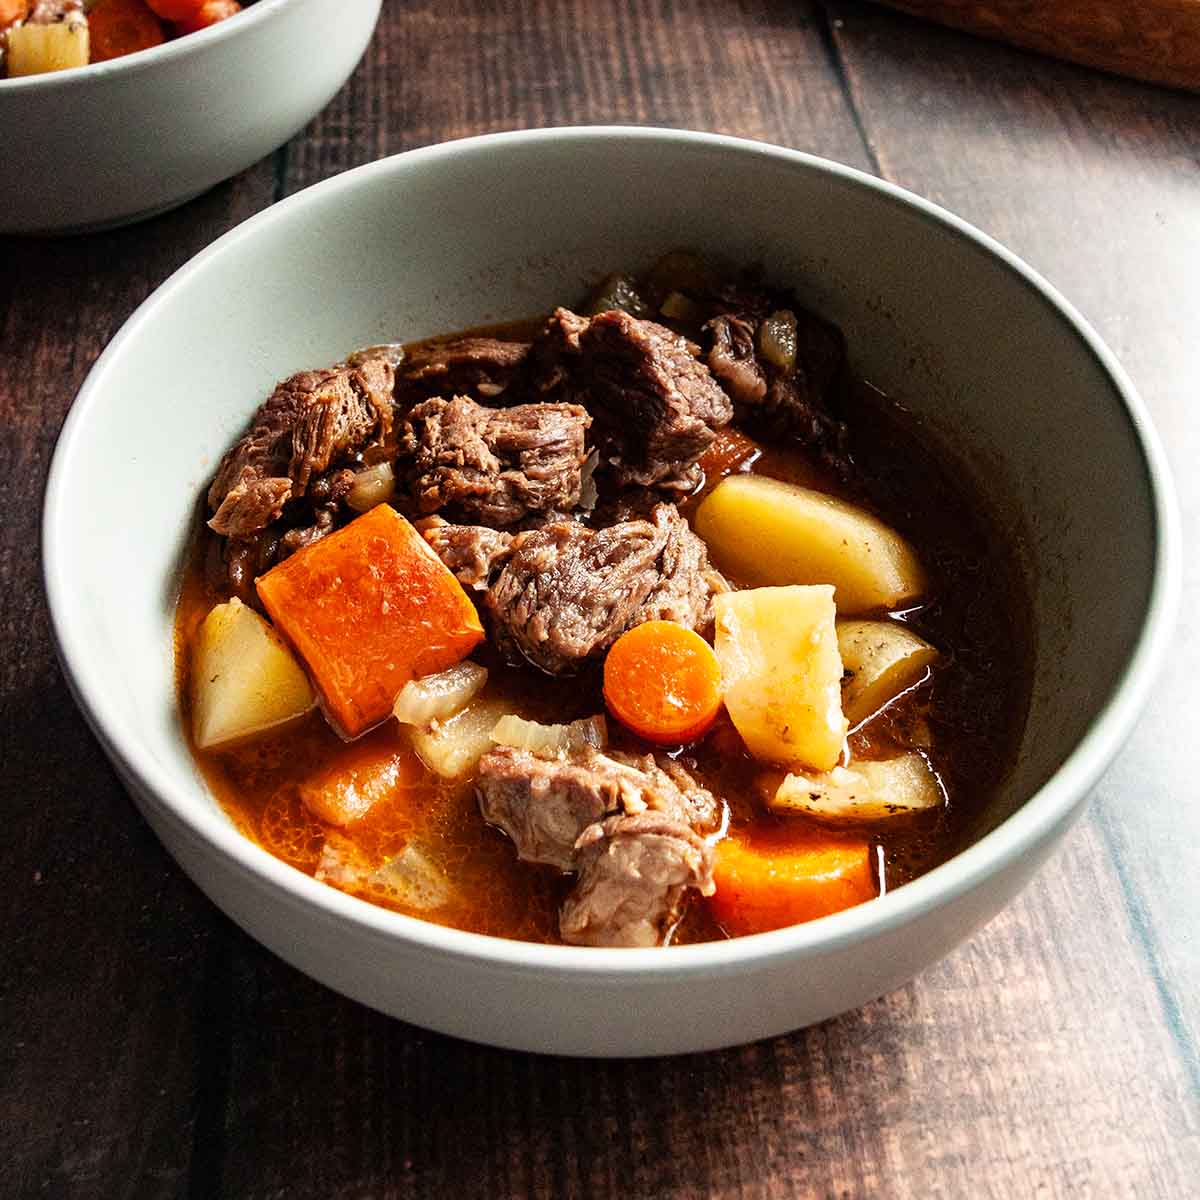
    A bowl of beef stew with carrots and potatoes on a wooden table.
    Campfire Dutch Oven Beef Stew

    Tried This Recipe?

    If you've tried this recipe, please leave a comment below. Follow me on Instagram, Facebook, or Pinterest for more great camping and grilling recipes.

    Recipe

    A bowl of split pea soup with ham with a piece of flatbread inside.

    Dutch Oven Split Pea Soup

    A woman's face.Angie Zoobkoff
    This comforting Dutch oven soup is the most satisfying way to use up leftover ham whether you're camping or at home.
    No ratings yet
    Print Recipe Pin Recipe
    Prep Time 10 minutes mins
    Cook Time 1 hour hr 50 minutes mins
    Total Time 2 hours hrs
    Course Main Course, Soup
    Cuisine American
    Servings 6 servings
    Calories 392 kcal

    Equipment

    • 4 quart (or preferably larger) Dutch oven

    Ingredients
      

    • 2 tablespoons olive oil
    • 2 medium carrots cut into ¼-inch dice
    • 2 medium celery stalks cut into ¼-inch dice
    • 1 medium onion cut into ¼-inch dice
    • 2 cups split peas
    • 1 bay leaf
    • 1 large meaty ham bone or ham hock
    • 6 cups water plus more, if needed
    • 2 cups chopped cooked ham
    • Salt and freshly ground pepper

    Instructions
     

    • Over direct medium heat on the campfire or over medium heat on a camp stove or stovetop, heat the oil in a large Dutch oven.
    • Add the carrots, celery, and onion and sauté until softened, about 10 minutes.
    • Add the split peas and bay leaf, then nestle the ham bone in the pot. Pour the water over. It's ok if the ham bone is not fully covered.
    • Bring to a boil and skim off any scum that accumulates on top. Simmer gently, partially covered, until the peas have broken down and the soup is thick, about 1½ hours.
    • Remove the bay leaf and ham bone. Remove and shred or chop any meat from the ham bone. This should be easy to pull off with a fork.
    • Stir the meat from the bone along with the chopped ham into the soup. Simmer until heated through, 5 to 10 minutes. Thin with additional water, if needed. Season to taste with salt and pepper.

    Notes

    • Store leftover split pea soup in a sealed container in your fridge or cooler for up to 4 days. Reheat in a pot or Dutch oven over low heat until warmed through. The soup will thicken as it sits, so you may need to add water or stock to thin it when reheating.
    • This Dutch oven split pea soup recipe is suitable for gluten-free and dairy-free diets.

    Nutrition

    Serving: 1 bowlCalories: 392kcalCarbohydrates: 46gProtein: 28gFat: 11gCholesterol: 38mgFiber: 19gSugar: 7g
    Keyword cold weather camping, dutch oven cooking, dutch oven soup, leftover ham
    Tried this recipe?Let us know how it was!

    January 3, 2025 Camping

    Apricot and White Chocolate Granola Bars

    These chewy apricot and white chocolate granola bars are an easy homemade snack that's perfect for camping, hiking, lunchboxes and more. Not only are these homemade snack bars simple to make, they won't fall apart on you, making them ideal for packing along on all your outdoor adventures.

    Three homemade granola bars in a box.

    Have you ever tried to make homemade granola bars only to have them completely fall apart when you sliced into them? I have. It's incredibly frustrating. I'm not opposed to eating a crumbly snack, but if I'm packing it along on a hike, it needs to hold together.

    After several iterations of these apricot oat granola bars, I stumbled onto the secret of how to make granola bars that don't fall apart. Brown rice syrup. It's incredibly sticky and you'll get an arm workout putting these bars together, but you'll be rewarded with a crisp, chewy, portable snack that's perfect for hiking, lunch boxes, post-workout and more.

    Why This Recipe is Great for Camping

    • You can prepare them in advance and pack them along for snacking on at camp or enjoying on a hike or picnic.
    • They don't require any cooler space.

    Ingredients and Substitutions

    Ingredients for apricot and white chocolate granola bars--white chocolate chips, almonds, brown rice syrup, apricots, almond butter, and oats.
    • Brown rice syrup--This is the secret ingredient that ensures your granola bars hold together. Don't try substituting a different sweetener. You can find brown rice syrup online or at whole food or natural food stores.
    • Oats--Regular rolled oats work best for these bars.
    • Almond butter--I make my granola bars with almond butter due to a peanut allergy in my home, but feel free to substitute your favorite nut butter. I find that smooth varieties work best. If your nut butter is unsalted, add an extra pinch of salt to the recipe.

    How to Make a Homemade Granola Bars

    A sheet pan with oats and chopped almonds.
    A Pyrex jar with brown rice syrup and almond butter mixed together.
    1. Toast the oats and almonds in a 350°F oven for 5 minutes.
    2. Mix the brown rice syrup and almond butter together until smooth.
    The ingredients for homemade granola bars being mixed in a large bowl.
    A tray of homemade granola bars.
    1. Combine the oats, almonds, apricots and chocolate chips in a bowl. Pour the syrup mixture over and stir to combine.
    2. Press the mixture into a parchment-lined 8-by-8-inch baking pan. Freeze for 15 minutes. Cut into bars.

    FAQs

    Can I use a different type of sweetener?

    Brown rice syrup is critical for holding the bars together. If you want to make them sweeter, you can add another sweetener like honey or maple syrup in addition to the ½ cup of brown rice syrup, but don't replace it.

    How long do homemade granola bars keep?

    These will keep for up to 2 weeks.

    What's the best way to store these bars?

    These will store fine at room temperature if you're travelling or camping, but I prefer to keep them in a container or resealable plastic bag in the fridge. If you don't have access to a fridge or cooler, keep them in a cool spot out of direct sunlight to avoid melting the chocolate chips.

    Tips and Troubleshooting

    • If you find it difficult to get the brown rice syrup and almond butter to mix together, set it in a saucepan over low heat for a couple of minutes to warm the mixture. Alternatively, pop it in the microwave and zap it in 15 second increments to soften it.
    • A pizza cutter works well for slicing through the bars.
    • These white chocolate granola bars are suitable for gluten-free diets.
    Ten homemade granola bars on a piece of parchment.

    More Snack Recipes You'll Love

    A bowl of assorted glazed nuts with a few scattered on a plate.
    Sweet and Spicy Smoked Nuts
    A jar filled with chunky granola bites and fresh cherries scattered around the jar.
    Chunky Chocolate Cherry Granola

    Tried This Recipe?

    If you've tried this recipe, please leave a comment below. Follow me on Instagram, Facebook, or Pinterest for more great camping and grilling recipes.

    Recipe

    Three homemade granola bars in a box.

    Apricot and White Chocolate Granola Bars

    A woman's face.Angie Zoobkoff
    Filled with oats, nuts, and dried fruit, these chewy apricot, almond, and white chocolate granola bars make the perfect hiking or lunchbox snack.
    No ratings yet
    Print Recipe Pin Recipe
    Prep Time 10 minutes mins
    Cook Time 5 minutes mins
    Total Time 30 minutes mins
    Course Snack
    Cuisine American
    Servings 10 bars
    Calories 196 kcal

    Equipment

    • 8-by-8-inch baking dish or cake pan

    Ingredients
      

    • 2 cups rolled oats
    • ½ cup raw almonds coarsely chopped
    • ½ cup dried apricots chopped
    • ⅓ cup white chocolate chips
    • ½ cup brown rice syrup
    • ¼ cup smooth almond butter
    • Pinch salt

    Instructions
     

    • Preheat the oven to 350°F.
    • Spread the oats and almonds on a large baking sheet. Toast in the oven for 5 minutes. Let cool slightly.
    • Combine the oats, almonds, apricots, and white chocolate chips in a large bowl.
    • In a liquid measuring cup, mix the brown rice syrup, almond butter, and a pinch of salt. Stir until smooth.
    • Scrape the syrup mixture into the bowl with the oats and use a spatula to mix thoroughly. The mixture should be extremely stiff, sticky, and difficult to work with. Spend 2 to 3 minutes stirring to evenly coat everything.
    • Line a 8-by-8-inch baking pan with parchment. Scrape the granola mixture onto the parchment and press into an even layer, spreading right to the edge of the dish. Use your fingers to firmly press everything into an even layer. This may take a few minutes as you want to really pack it in.
    • Chill the granola bars in the freezer for 15 minutes.
    • Using the edges of the parchment, remove the square from the pan and use a sharp knife or pizza cutter to slice it into 10 even bars. Store in a sealed container or bag in the fridge for up to 2 weeks.

    Notes

    • If you find it difficult to get the brown rice syrup and almond butter to mix together, set it in a saucepan over low heat for a couple of minutes to warm the mixture. Alternatively, pop it in the microwave and zap it in 15 second increments to soften it.
    • A pizza cutter works well for slicing through the bars.
    • These white chocolate granola bars are suitable for gluten-free diets.

    Nutrition

    Serving: 1 barCalories: 196kcalCarbohydrates: 25gProtein: 4gFat: 9gCholesterol: 1mgSodium: 34mgFiber: 2gSugar: 14g
    Keyword hiking food, homemade snacks
    Tried this recipe?Let us know how it was!

    January 1, 2025 Cast Iron Skillet Recipes

    8 Simple Skillet Chicken Dinners

    Each of these 8 simple skillet chicken dinners can be prepared entirely in one skillet on your stovetop, making them perfect for easy weeknight meals at home or satisfying camping meals when you need a change from your usual fare. The hardest part about these one-pan chicken recipes is deciding which one to make first.

    1
    Recipe and photo credit: Foodess
    Cashew Chicken with Bok Choy
    This combination of tender bites of boneless chicken thighs, crisp bok choy, and crunchy cashews in an Asian-inspired sauce is on the table in minutes.
    Get the recipe: Cashew Chicken with Bok Choy
    2
    A skillet filled with seared chicken thighs and potatoes with lemon wedges nearby.
    Chicken and Potato Skillet
    This hearty and satisfying skillet chicken and potatoes requires only one pan, four ingredients, and 30 minutes of your time. It's the perfect for busy weeknight dinners or a relaxed camping meal.
    Get the recipe: Chicken and Potato Skillet
    3
    Recipe and photo credit: Rebecca Taig
    Creamy Tuscan Skillet Chicken
    Indulge in the delicious flavors of Tuscan skillet chicken made with juicy chicken breast in a rich garlic parmesan cream sauce with sun-dried tomatoes, spinach, and fresh basil.
    Get the recipe: Creamy Tuscan Skillet Chicken
    4
    Recipe and photo credit: 100 Days of Real Food
    Sweet and Sour Chicken
    For this easy to make weeknight dinner of sweet and sour chicken, crispy, golden-brown chicken bites are smothered in a tangy, sweet sauce.
    Get the recipe: Sweet and Sour Chicken
    5
    Recipe and photo credit: The Forked Spoon
    Creamy Coconut Milk Chicken
    This creamy coconut milk chicken recipe is made with fresh lime juice, creamy coconut cream, and tender, juicy chicken breasts. Easy and delicious, have this one-pan, dairy-free, and low-carb chicken dinner on the table in just about 30 minutes!
    Get the recipe: Creamy Coconut Milk Chicken
    6
    Recipe and photo credit: Spend with Pennies
    Chicken Cacciatore
    Chicken cacciatore is a hearty Italian dish made with chicken thighs that are braised in a flavorful tomato sauce with bell peppers, mushrooms, and onions.
    Get the recipe: Chicken Cacciatore
    7
    Recipe and photo credit: Nest & Nosh
    Quick Skillet Chicken Fajitas
    These delicious, easy seasoned chicken fajitas with onions and bell peppers are made in a skillet on the stove with homemade marinade.
    Get the recipe: Quick Skillet Chicken Fajitas
    8
    Recipe and photo credit: Simple and Fraiche
    Marry Me Chicken Tortellini
    This deliciously creamy, flavorful marry me chicken tortellini recipe is made with tender chicken, perfectly cooked tortellini, and a rich, cheesy sauce.
    Get the recipe: Marry Me Chicken Tortellini

    December 30, 2024 Camping

    Easy Chicken and Potato Skillet Dinner

    This easy chicken and potato skillet dinner is a 30-minute cast iron skillet meal of crispy chicken thighs and tender baby potatoes. With only 4 ingredients and one dish to clean, it's guaranteed to be a dinnertime staple at home and at camp.

    A skillet filled with seared chicken thighs and potatoes with lemon wedges nearby.

    Whether it's a busy weeknight at home or a relaxing afternoon at camp, if I can make a satisfying chicken skillet dinner that everyone loves with just one pan, four ingredients, and in only 30 minutes, I'm in. Which is exactly why this skillet chicken and potatoes recipe has earned a spot on our permanent rotation.

    Why This Recipe is Great for Camping

    • The recipe uses minimal ingredients and is prepared entirely in a single skillet, which means clean up is a breeze.
    • You can prepare it on your camp stove, grill, or over the campfire. If you're at home, you can use your stovetop.

    Ingredients and Substitutions

    Ingredients for chicken and potato skillet--chicken thighs, all-purpose seasoning, oil, and potatoes.
    • Chicken thighs--You'll be using bone-in, skin-on chicken thighs for this recipe. They're inexpensive, and they'll stay juicy and moist even if the potatoes need a few extra minutes to cook. Choose thighs that are approximately all the same size so that they'll all be ready at the same time. Don't use skinless thighs for this recipe as the fat rendered from the skin is needed for cooking the potatoes.
    • Potatoes--I like baby potatoes best here, but you can use yellow potatoes, if you prefer. Cut your potatoes into pieces no larger than 1 inch.
    • All-purpose seasoning--My all-purpose seasoning recipe is a blend of lemon pepper, garlic, and onion, and works beautifully here. You can substitute a different seasoning mix, if you prefer. Check the label of your seasoning (or lemon pepper) to ensure it has salt in it. If not, season the chicken and potatoes with salt in addition to the seasoning.

    How to Make a Chicken Skillet Dinner

    Chicken thighs on a sheet pan, sprinkled with seasoning.
    Quartered baby potatoes in a bowl.
    1. Season the chicken thighs with 1 ½ teaspoons all-purpose seasoning.
    2. Toss the potatoes with the oil and the remaining 1 ½ teaspoons seasoning.
    Chicken thighs skin side down in a cast iron skillet.
    Chicken and potatoes in a cast iron skillet.
    1. Place the chicken thighs skin side down in a skillet and set over medium heat. Cook until the chicken thighs release.
    2. Flip the chicken thighs, then tuck the potatoes around the chicken. Cook over medium heat, stirring the potatoes occasionally, until everything is cooked through.

    FAQs

    What size of skillet do I need?

    To make the recipe you will need a large cast iron skillet that is at least 12 inches in diameter. Using a small skillet will result in uneven cooking.

    Do I need to preheat the skillet?

    No. Starting the chicken in a cold cast iron skillet allows the fat to slowly render and the skin to crisp as it heats.

    What should I serve with this?

    This skillet chicken and potatoes is a hearty meal in itself, but you can add a shredded Brussels sprouts salad or a loaf of campfire garlic bread to make it a heartier dinner.

    Tips and Troubleshooting

    • If the chicken sticks to the skillet when you try to flip it, give it a couple extra minutes. The skin will release when it's ready and forcing it will cause the skin to tear.
    • If your chicken thighs are very small, they may be done before the potatoes. If this happens, remove them from the skillet, let the potatoes finish cooking, then return the chicken to the skillet to warm through before serving.
    • Leftovers can be stored in a sealed container in your fridge or cooler for up to 4 days. Reheat in a skillet over medium-low heat until warmed through.
    • This chicken and potatoes skillet recipe is suitable for gluten-free and dairy-free diets.
    A skillet filled with seared chicken thighs and potatoes with lemon wedges nearby.

    More Chicken Recipes You'll Love

    Six chicken skewers on a rectangular platter with a dish of sauce on the side.
    Grilled Bang Bang Chicken Skewers
    A chicken and bacon sandwich on a brioche bun with lettuce and tomato.
    Chicken and Bacon Sandwich

    Tried This Recipe?

    If you've tried this recipe, please leave a comment below. Follow me on Instagram, Facebook, or Pinterest for more great camping and grilling recipes.

    Recipe

    A skillet filled with seared chicken thighs and potatoes with lemon wedges nearby.

    Chicken and Potato Skillet

    A woman's face.Angie Zoobkoff
    This hearty and satisfying skillet chicken and potatoes requires only one pan, four ingredients, and 30 minutes of your time. It's the perfect for busy weeknight dinners or a relaxed camping meal.
    No ratings yet
    Print Recipe Pin Recipe
    Prep Time 5 minutes mins
    Cook Time 25 minutes mins
    Total Time 30 minutes mins
    Course Main Course
    Cuisine American
    Servings 3 to 4 servings
    Calories 369 kcal

    Equipment

    • 12-inch (or larger) cast-iron skillet

    Ingredients
      

    • 1 ½ pounds bone-in skin-on chicken thighs (4 to 5 thighs)
    • 1 tablespoon all-purpose seasoning blend divided
    • 12 ounces (340 g) baby potatoes quartered or cut into 1-inch pieces
    • 1 tablespoon vegetable oil
    • Salt and freshly ground pepper
    • Lemon wedges for serving (optional)

    Instructions
     

    • Season the chicken thighs with 1 ½ teaspoons of the seasoning blend.
    • Place the potatoes in a bowl (or a resealable bag if you really want to avoid dishes) and toss with the oil and the remaining 1 ½ teaspoons of the seasoning blend. It won't seem like a lot of oil, but there will be enough fat rendered from the chicken to cook the potatoes.
    • Place the chicken thighs skin side down in the skillet. Set it over medium heat (on a stovetop, camp stove, campfire, or grill) and cook without moving the chicken until golden brown and the chicken releases easily, about 5 minutes.
    • Flip the chicken over then nestle the potatoes around the chicken. Cook over medium heat, stirring the potatoes occasionally to ensure they cook evenly, until the chicken reaches an internal temperature of 165°F (74°C) and the potatoes are tender, 20 to 25 minutes. Season to taste with salt and pepper.
    • Serve directly from the skillet, with lemon wedges for squeezing over, if desired.

    Notes

    • If the chicken sticks to the skillet when you try to flip it, give it a couple extra minutes. The skin will release when it's ready and forcing it will cause the skin to tear.
    • If your chicken thighs are very small, they may be done before the potatoes. If this happens, remove them from the skillet, let the potatoes finish cooking, then return the chicken to the skillet to warm through before serving.
    • Leftovers can be stored in a sealed container in your fridge or cooler for up to 4 days. Reheat in a skillet over medium-low heat until warmed through.
    • This chicken and potatoes skillet recipe is suitable for gluten-free and dairy-free diets.

    Nutrition

    Serving: 1 portionCalories: 369kcalCarbohydrates: 19gProtein: 29gFat: 21gCholesterol: 96mgFiber: 2gSugar: 2g
    Keyword 30 minute meals, campfire cooking, cast iron cooking, chicken dinner, skillet meals
    Tried this recipe?Let us know how it was!

    December 27, 2024 Breakfast

    Mulled Pomegranate Juice

    This mug of mulled pomegranate juice is a hot drink that's perfect for everything from holiday parties to outdoor winter activities to cozying up with a good book. Made with fresh juice, warm spices, and orange, it's like mulled wine without alcohol.

    Two mugs of mulled pomegranate juice topped with orange slices.

    I love the flavor and mouthfeel of mulled wine, but it can be too easy to overindulge and regret it the next day. Which is why I find myself reaching for this spiced, warm pomegranate juice all winter long. The tartness of the juice combined with warm spices mimics red wine, making it perfect for holiday celebrations or for when the general health-mindedness of January calls.

    This spiced pomegranate juice is perfect for all winter occasions, and suitable for all ages, but if you want something more celebratory and have pomegranate juice on hand, this pomegranate Prosecco cocktail also works perfectly.

    Why You'll Love This Recipe

    • It's an easy drink recipe that's perfect for holiday gatherings, winter outdoor events, or to enjoy as a cozy drink.
    • It's suitable for all ages.
    • You can scale the recipe to make as much as you need.

    Ingredients and Substitutions

    Ingredients for mulled pomegranate juice--pomegranate juice, cinnamon, orange, cloves, and star anise.
    • Pomegranate juice--For best results, use 100% pomegranate juice instead of a blend.
    • Orange--Any type of orange will work, but for the most flavor, choose a large juicy orange, such as navel, that feels heavy for its size.

    How to Make Mulled Pomegranate Juice

    Pomegranate juice and spices simmering in a pot.
    A mug of spiced pomegranate juice with a pot of the juice nearby.
    1. Combine the juice, halved orange, and spices in a pot and simmer for 30 minutes.
    2. Pour through a strainer and divide the mixture between two mugs. Serve immediately.

    FAQs

    What can I do with extra pomegranate juice?

    If you've got more juice than you need for the recipe, extra can be whisked into salad dressings, or simmer it until it's reduced to a syrup and use it as a glaze for roasted meat, stir into sparkling water, or in these pomegranate cheesecake jars for an easy make-ahead dessert.

    Can I make this into a warm pomegranate cocktail?

    Sure. To turn this non-alcoholic mulled wine into a cocktail, add a shot of spiced rum or bourbon to each mug before serving.

    Tips and Troubleshooting

    • If you don't have a strainer, tie the spices together in a piece of cheesecloth for easy removal.
    • Leftover mulled juice can be stored in a sealed container in the fridge for up to 1 week. Strain the juice before storing.
    • This recipe is suitable for gluten-free, dairy-free, and vegan diets.
    Two mugs of mulled pomegranate juice topped with orange slices.

    More Warm Drink Recipes You'll Love

    Two tall glass mugs filled with hot apple cider cocktail with a cinnamon stick resting on top.
    Hot Apple Cider Cocktail
    A mug of hot chocolate with caramel drizzled over the top and two cookies on the side.
    Salted Caramel Hot Chocolate

    Tried This Recipe?

    If you've tried this recipe, please leave a comment below. Follow me on Instagram, Facebook, or Pinterest for more great camping and grilling recipes.

    Recipe

    Two mugs of mulled pomegranate juice topped with orange slices.

    Mulled Pomegranate Juice

    A woman's face.Angie Zoobkoff
    Warm, cozy, and good-for-you, this spiced pomegranate juice is a like a hug in a mug.
    No ratings yet
    Print Recipe Pin Recipe
    Prep Time 5 minutes mins
    Cook Time 30 minutes mins
    Total Time 35 minutes mins
    Course Drinks
    Cuisine American
    Servings 2 drinks
    Calories 249 kcal

    Ingredients
      

    • 3 cups pomegranate juice
    • 1 large orange halved
    • 10 cloves
    • 6 star anise
    • 2 cinnamon sticks

    Instructions
     

    • Combine the juice, halved orange, and spices in a medium saucepan. Bring to a simmer over medium heat, then reduce the heat to maintain a simmer.
    • Simmer, partially covered, for 30 minutes. Strain the mixture into two mugs, discarding the orange and spices. Serve hot.

    Notes

    • If you don't have a strainer, tie the spices together in a piece of cheesecloth for easy removal.
    • Leftover mulled juice can be stored in a sealed container in the fridge for up to 1 week. Strain the juice before storing.
    • This recipe is suitable for gluten-free, dairy-free, and vegan diets.

    Nutrition

    Serving: 1drinkCalories: 249kcalCarbohydrates: 61gProtein: 1gSodium: 15mgSugar: 53g
    Keyword winter drinks, winter holiday drinks
    Tried this recipe?Let us know how it was!

    December 25, 2024 Collections

    21 Celebratory New Year's Eve Snacks

    It's almost time to watch the ball drop and welcome in another year. Whether you're gathering with a crowd or just a few friends, these 21 celebratory New Year's Eve snacks and nibbles are the perfect, easy-to-make bites for your party.

    1
    Recipe and photo credit: Frozen Bananas
    Whipped Goat Cheese
    This whipped cheese dip is filled with cranberries, almonds and rosemary. Top the dip with honey and serve it with crostini, veggies or crackers.
    Get the recipe: Whipped Goat Cheese
    2
    Recipe and photo credit: Haute and Healthy Living
    Cheese and Grape Skewers
    These cheese and grape skewers make the perfect appetizers and are almost too pretty to eat! Plus, they can be made in 15 minutes!
    Get the recipe: Cheese and Grape Skewers
    3
    A bowl of assorted glazed nuts with a few scattered on a plate.
    Sweet and Spicy Smoked Nuts
    Sweet, salty, smoky, spicy, crunchy. What more could you ask for from a snack?
    Get the recipe: Sweet and Spicy Smoked Nuts
    4
    Recipe and photo credit: Living Chirpy
    Crab Stuffed Mushrooms
    Crab stuffed mushrooms are a delicious party appetizer or side dish with tons of amazing flavors. These bite-sized snacks are a delicious blend of lump crab meat stuffed in savory mushroom caps.
    Get the recipe: Crab Stuffed Mushrooms
    5
    Recipe and photo credit: The Littlest Crumb
    Goat Cheese Croquettes
    These crispy goat cheese croquettes are an appetizer that everyone will love! Drizzled with honey, and sprinkled with walnuts and almonds.
    Get the recipe: Goat Cheese Croquettes
    6
    A bowl of pomegranate salsa with chips.
    Pomegranate Salsa
    This classic dip gets a festive upgrade, thanks to crunchy pomegranate seeds, fresh mint, and lime.
    Get the recipe: Pomegranate Salsa
    7
    Recipe and photo credit: Smart Savvy Food
    Everything Bagel Mini Pigs in a Blanket
    A classic appetizer for parties, this everything bagel mini pigs in a blanket recipe brings an extra punch of flavor and crunch by adding a favorite seasoning.
    Get the recipe: Everything Bagel Mini Pigs in a Blanket
    8
    Recipe and photo credit: Living Chirpy
    Cranberry Pecan Cheeseball
    Cranberry pecan cheeseball is an easy snack or appetizer that’s great for any party, especially around the holidays. It’s so easy to make with only 7 easy ingredients, too!
    Get the recipe: Cranberry Pecan Cheeseball
    9
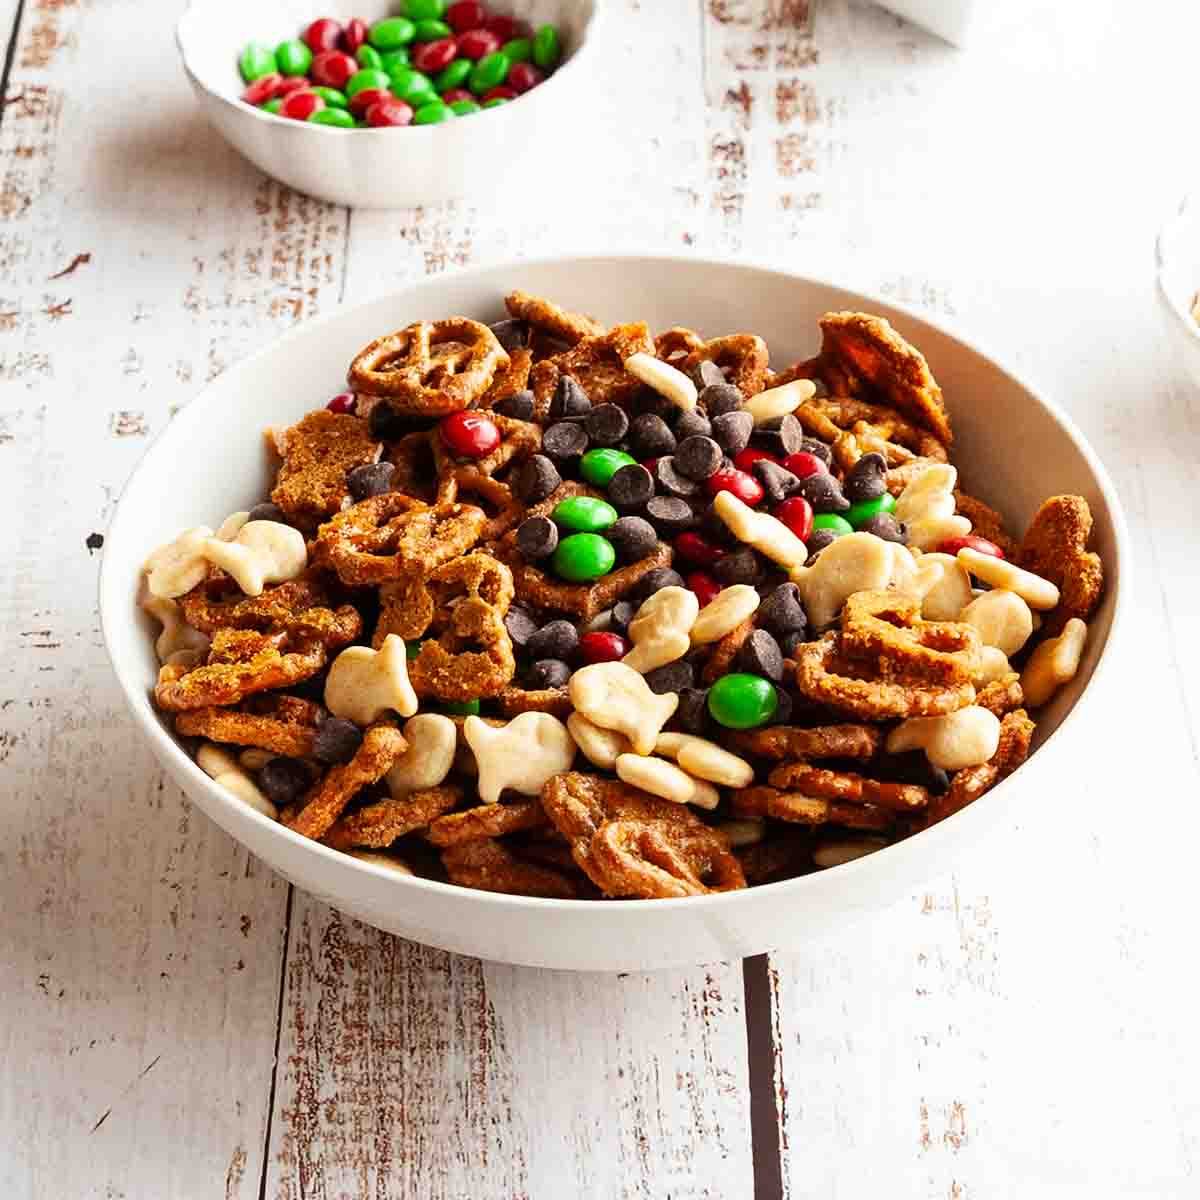
    A bowl of pretzel rail mix with small bowls of M&Ms and fish crackers nearby.
    Butter Toffee Pretzel Snack Mix
    This easy homemade holiday trail mix includes butter toffee pretzels, crackers, chocolate chips, and M&Ms. It's a festive snack perfect for your holiday camping trip or Christmas parties.
    Get the recipe: Butter Toffee Pretzel Snack Mix
    10
    Recipe and photo credit: Style and Grace
    Crunchy Dill Pickle Dip
    Easy to make with just a handful of ingredients, this briny dill pickle dip is just the snack you need for your next game day, movie night, or holiday party.
    Get the recipe: Crunchy Pickle Dip
    11
    Recipe and photo credit: Pure and Simple Nourishment
    Honey Lemon Pepper Wings
    These honey lemon pepper wings are the best! Sticky, flavourful, and melt in your mouth tender with perfectly crispy skin they are also so easy to make.
    Get the recipe: Honey Lemon Pepper Wings
    12
    A round of brie in a cast iron skillet with toasted breat on the side.
    Baked Brie on the Grill
    Topped with balsamic glaze and spicy cranberry relish, this grilled Brie is a perfect appetizer or snack.
    Get the recipe: Baked Brie on the Grill
    13
    Recipe and photo credit: xoxo Bella
    Dirty Martini Shrimp
    Succulent shrimp pair with a variety of dirty martini cocktail inspired ingredients to make a versatile dish everyone is sure to enjoy.
    Get the recipe: Dirty Martini Shrimp
    14
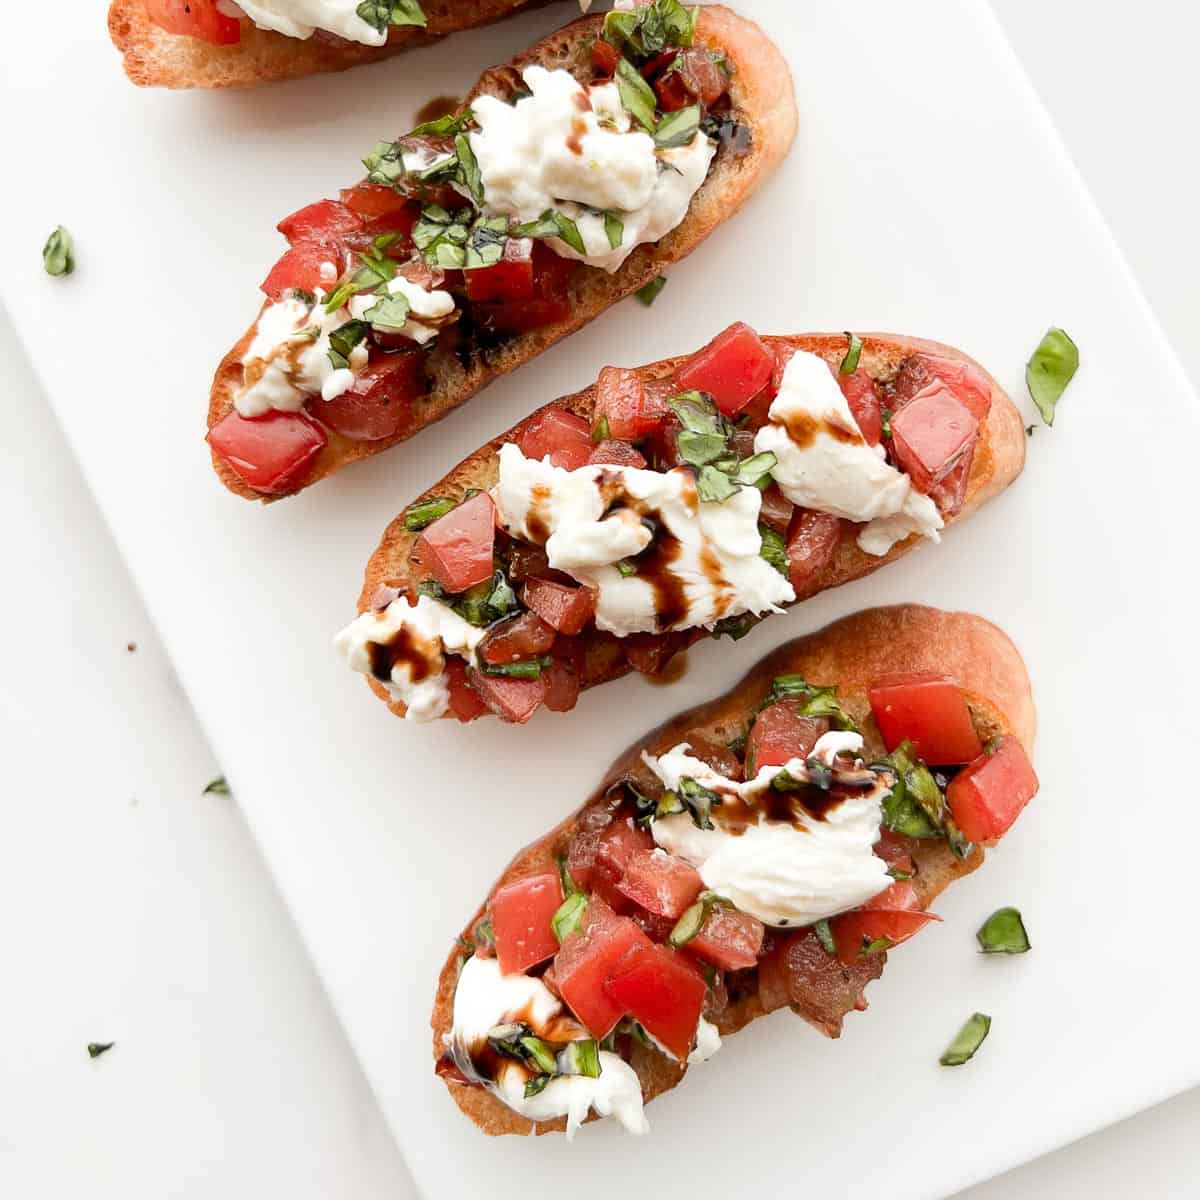
    Burrata Bruschetta
    Recipe and photo credit: Little Nonni
    Burrata Bruschetta
    Burrata bruschetta is made with creamy burrata, sweet tomatoes, and a crusty bread toasted to perfection. It only takes 15 minutes to make!
    Get the recipe: Burrata Bruschetta
    15
    A foil pan filled with buffalo chicken dip with carrots, crackers, and bread cubes nearby.
    Make-Ahead Buffalo Chicken Dip
    Everything you love about Buffalo chicken wings in a creamy, scoop-able dip.
    Get the recipe: Make Ahead Buffalo Chicken Dip
    16
    Recipe and photo credit: Cinnamon and Sage Co.
    Pizza Pinwheels
    Pizza pinwheels are a fun appetizer or party dish that has all the fun of pizza in a handheld snack! Best of all, it takes only 6 ingredients to make this easy appetizer. 
    Get the recipe: Pizza Pinwheels
    17
    Recipe and photo credit: Rose Bakes
    Sugared Champagne Grapes (Prosecco Grapes)
    Sugared Champagne Grapes are a sweet treat—grapes lightly coated in a shimmering layer of sugar. Their thin skin and natural sweetness make them perfect for garnishing desserts, cocktails, or serving as an elegant snack. Also called Prosecco grapes, they are perfect for a bridal shower, New Year’s Eve, and other special occasions.
    Get the recipe: Prosecco Grapes
    18
    A small skillet filled with beer cheese dip, topped with shredded cheese, tomatoes, and scallions with chips on the side.
    Skillet Beer Cheese Dip
    This beer cheese dip with cream cheese, smoked Gouda, Cheddar, and beer is easy to make in your cast iron skillet. It can be made over the campfire, on your camp stove, or on a regular stove.
    Get the recipe: Skillet Beer Cheese Dip
    19
    Recipe and photo credit: Life Around the Table
    Mushroom and Sundried Tomato Puffed Pastry Tart
    Quick and fancy! This appetizer features flaky puff pastry topped with creamy Boursin, sautéed mushrooms, and sundried tomatoes—finished with fresh basil and balsamic drizzle. Perfect for entertaining!
    Get the recipe: Mushrooms and Sundried Tomato Tart
    20
    Recipe and photo credit: Flavorful Eats
    Marinated Cheese & Olive Antipasto
    Cubes of cheese, green and black olives, crunchy red bell pepper, and pepperoncini peppers all marinated in a flavorful, herbaceous dressing make this antipasto recipe the perfect addition to your parties, potlucks, and holiday get togethers.
    Get the recipe: Marinated Cheese and Olive Antipasto
    21
    Recipe and photo credit: Lauren Kelly Nutrition
    Buffalo Chicken Meatballs
    Juicy and spicy Buffalo chicken meatballs are the perfect appetizer for parties or a snack for a game day. Easy to make and super delicious!
    Get the recipe: Buffalo Chicken Meatballs

    December 23, 2024 Blackstone Griddle Recipes

    Blackstone Monte Cristo

    This Blackstone Monte Cristo is a cheesy, gooey, and crispy treat perfect for breakfast, lunch, or a late-night snack. The sourdough sandwich is filled with ham, turkey, and Gruyère cheese, then dipped in a rich batter and fried to golden perfection on your outdoor griddle.

    Two halves of a Monte Cristo sandwich stacked on to pof each other.

    This hearty and satisfying meal is perfect for any time of day, whether you're at camp or at home. The sourdough bread adds a bit of tanginess to the sandwich, while the Gruyère cheese provides a rich, nutty flavor. The buttery crisp exterior creates a delicious contrast to the savory filling.

    Why You'll Love This Recipe

    • The recipe can be scaled to make as many sandwiches as you like.
    • They can be made on your outdoor griddle or in a cast iron skillet.
    • It's a great way to use up leftover holiday turkey and ham.

    Ingredients and Substitutions

    Ingredients for a Blackstone Monte Cristo--Bread, milk, butter, Gruyère, mayo, ham and turkey, Dijon, and egg.
    • Bread--Use a sturdy bread that will soak up the egg custard without becoming soggy or falling apart. I like sliced sourdough best for this, but other sturdy sandwich bread will work, too.
    • Ham and turkey--This is a great way to use up your leftover Dutch oven ham or Dutch oven turkey breast, but if you don't have any to use up, thinly sliced deli meat works well.
    • Milk--Whole or reduced fat milk will work well here; if you want a richer custard, use half and half.
    • Gruyère cheese--This adds a wonderful nutty flavor to the Monte Cristo sandwich. It's a bit pricey, and not available at all stores, so feel free to substitute shredded Swiss cheese or another alpine cheese variety that you enjoy.

    How to Make a Monte Cristo Sandwich

    Egg and milk in a bowl with a fork.
    Two partially assembled sandwiches on a baking sheet.
    1. Whisk the egg and milk together in a large bowl.
    2. Assemble the sandwiches by spreading two slices of bread with mustard, and top them with turkey and shredded cheese. Spread the remaining two slices of bread with mayo and top with sliced ham. Place the ham side down on top of the cheese.
    A sandwich being dipped into egg custard.
    Two Monte Cristo sandwiches cooking on a Blackstone griddle.
    1. Dip each sandwich into the egg mixture, turning to coat completely.
    2. Melt the butter on the griddle, then cook the sandwiches until golden brown on each side, flipping once.

    FAQs

    What is a Monte Cristo sandwich?

    A variation on the French croque monsieur, it's essentially a ham and cheese sandwich that's coated in a French toast batter and fried in butter until the cheese is melted and the sandwich has formed a golden crust.

    It's often made with multiple types of meat, and occasionally has a third slice of bread in the center. Sweet versions of the sandwich are also popular, which have a powdered sugar topping and jam added or served alongside for dipping.

    What should I serve with this?

    These sandwiches make an easy breakfast, lunch, or dinner on their own, but for a heartier meal, serve them with a platter of veggies, marinated vegetable salad, or fruit salad.

    If you enjoy a sweet and savory combination, you can also serve some raspberry jam or huckleberry sauce on the side for dipping your sandwich.

    Tips and Troubleshooting

    • This recipe can be scaled to make as many sandwiches as you like. Use 1 egg and ¼ cup of milk for every 2 sandwiches.
    • Serve immediately after cooking. This type of sandwich doesn't store or reheat well.
    A Monte Cristo sandwich cooking on a Blackstone griddle.

    More Sandwich Recipes You'll Love

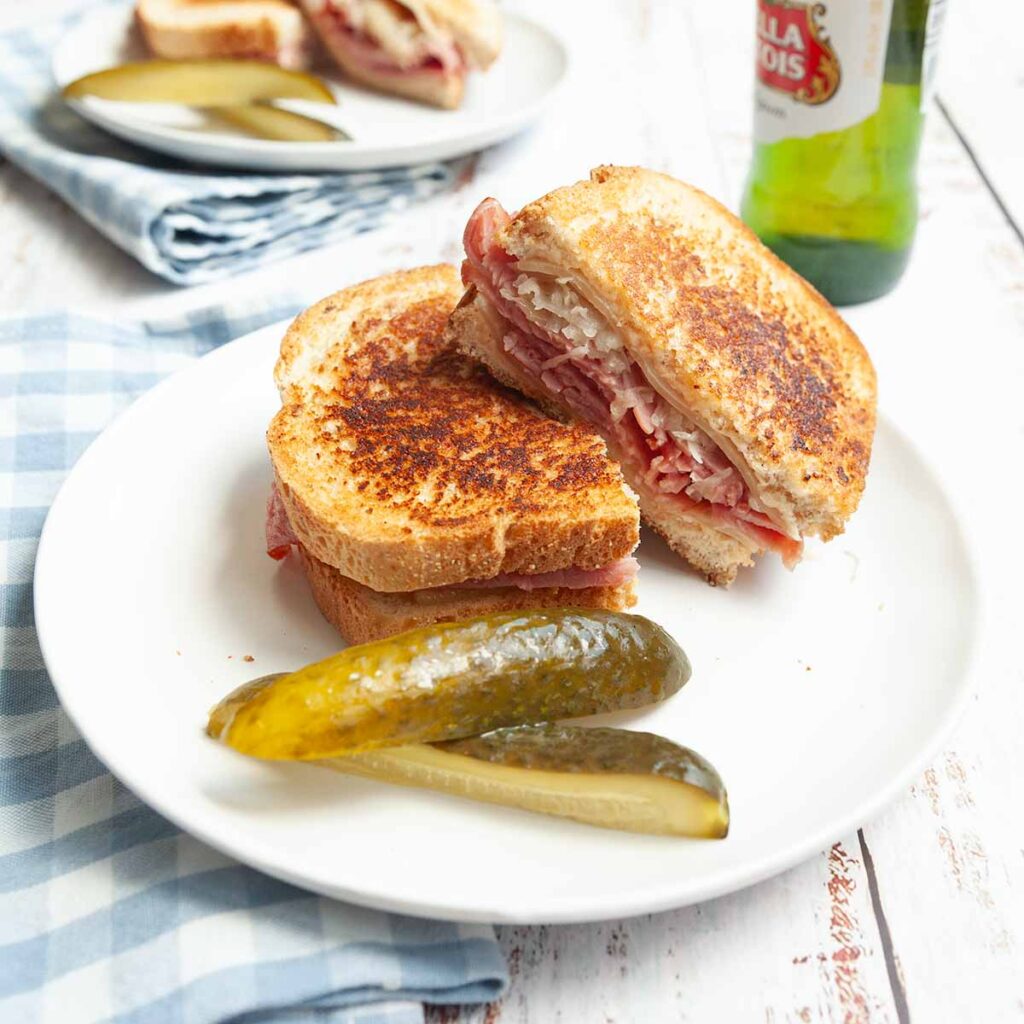
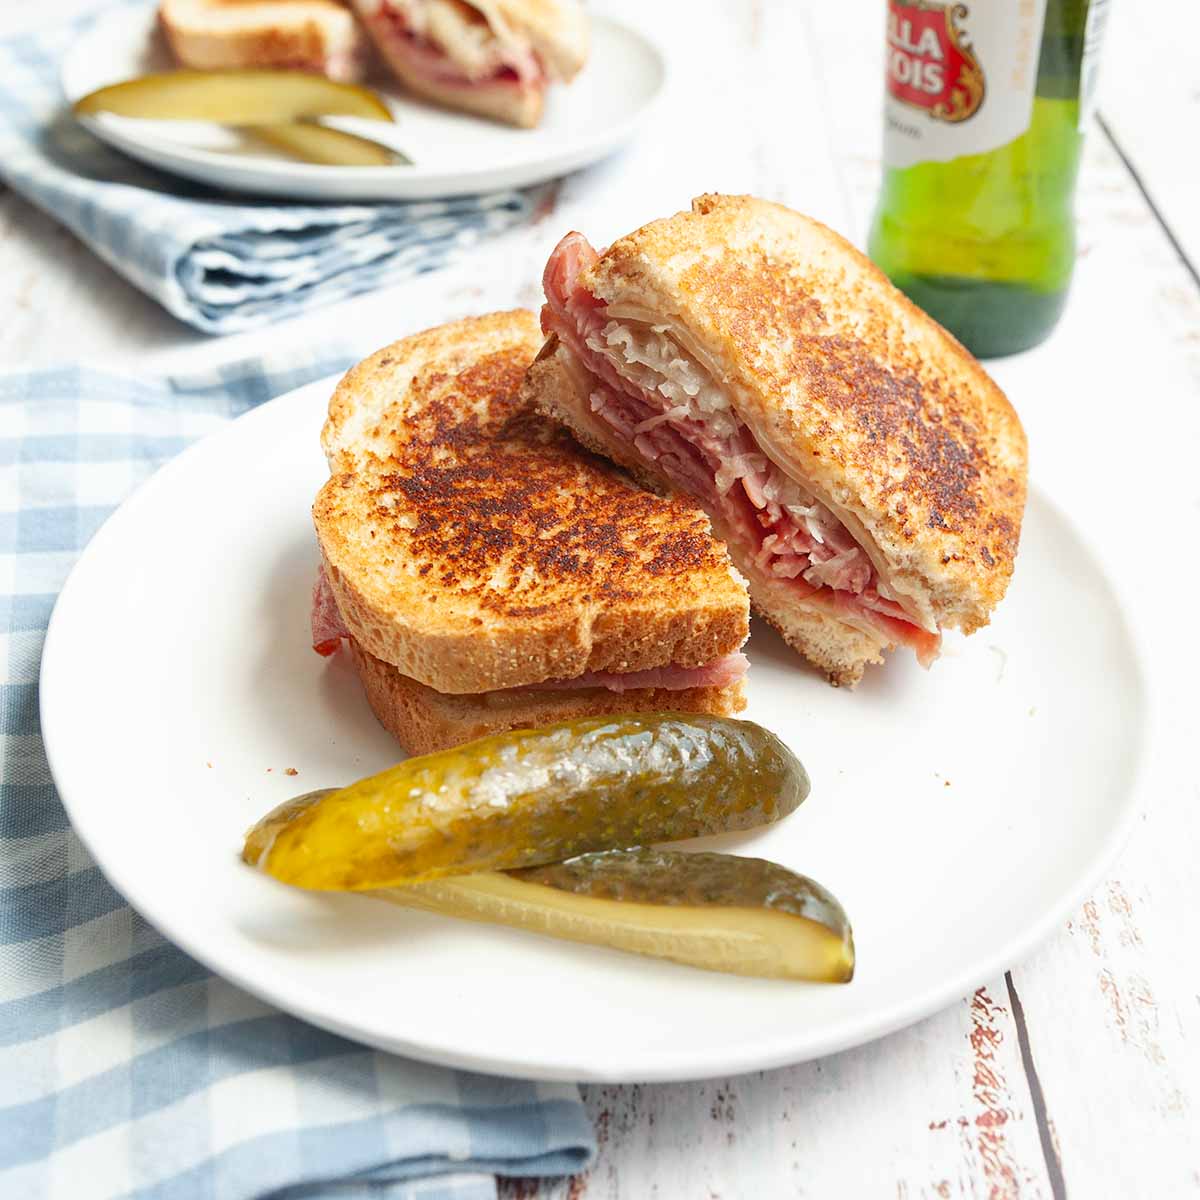
    A grilled reuben sandwich on a plate with two pickle spears.
    Grilled Reuben Sandwich
    A chicken and bacon sandwich on a brioche bun with lettuce and tomato.
    Chicken and Bacon Sandwich

    Tried This Recipe?

    If you've tried this recipe, please leave a comment below. Follow me on Instagram, Facebook, or Pinterest for more great camping and grilling recipes.

    Recipe

    Two halves of a Monte Cristo sandwich stacked on to pof each other.

    Blackstone Monte Cristo

    A woman's face.Angie Zoobkoff
    When your favorite ham, turkey, and cheese sandwich gets dipped in egg custard and fried on the Blackstone, the results are marvelous. See for yourself.
    No ratings yet
    Print Recipe Pin Recipe
    Prep Time 10 minutes mins
    Cook Time 10 minutes mins
    Total Time 20 minutes mins
    Course Main Course
    Cuisine American
    Servings 2 servings
    Calories 688 kcal

    Equipment

    • Blackstone (or other outdoor) griddle

    Ingredients
      

    • 1 large egg
    • ¼ cup milk
    • 4 slices sourdough bread or other sturdy sandwich bread
    • 1 tablespoon mayonnaise
    • 1 tablespoon Dijon mustard
    • 4 slices turkey
    • ½ cup shredded Gruyère cheese
    • 4 slices ham
    • 2 tablespoons butter

    Instructions
     

    • Whisk the egg and milk together in a large bowl.
    • Spread two slices of bread with mayonnaise on one side. Spread the remaining two slices of bread with Dijon mustard on one side.
    • Place two slices of turkey on the mustard-coated bread slices. Top with shredded cheese, dividing it evenly. Add two slices of ham to each sandwich, then top with the remaining bread slices, mayo side down.
    • Working with one sandwich at a time, dip it into the egg batter, turning to coat it completely. Let any excess drip back into the bowl. Transfer it to a plate and repeat with the remaining sandwich.
    • Heat the griddle to medium. Add the butter and let it melt.
    • Fry the sandwiches in the butter, flipping once, until the cheese is melted and they are golden brown on both sides, 4 to 5 minutes per side. Serve immediately.

    Notes

      • Scaling--This recipe can be scaled to make as many sandwiches as you like. Use 1 egg and ¼ cup of milk for every 2 sandwiches.
      • Storage--Serve immediately after cooking. This type of sandwich doesn't store or reheat well.
      • Equipment options--Staying indoors? You can use your indoor electric griddle or your cast iron skillet on your stove over medium heat to make the sandwich.

    Nutrition

    Serving: 1 sandwichCalories: 688kcalCarbohydrates: 47gProtein: 53gFat: 32gCholesterol: 245mgFiber: 2gSugar: 11g
    Keyword blackstone cooking, blackstone griddle, easy camping lunch, hot sandwich
    Tried this recipe?Let us know how it was!

    December 20, 2024 Holiday Recipes

    Pomegranate Salsa

    Give your chips and salsa some festive flair with this easy pomegranate salsa recipe. Made with fresh pomegranate arils, mint, lime, and jalapeño, this sweet and spicy dip is perfect for holiday party food, snacking, or for packing along to your Christmas potluck.

    A bowl of pomegranate salsa with chips.

    To me, salsa is pretty much the perfect snack. It's fresh, healthy, and perfect for almost any occasion. In the middle of winter, when tomatoes are lackluster but crisp, juicy pomegranates are at their peak, I combine them with fresh mint, jalapeño, red onion, and lime for a Christmas version of my favorite nibble.

    Why You'll Love This Recipe

    • It's an easy snack recipe that's perfect for holiday gatherings.
    • It requires only 10 minutes of effort and can be made in advance.
    • It's suitable for most diets.

    Ingredients and Substitutions

    Ingredients for pomegranate salsa--red onion, jalapeno, lime, mint, and pomegranate.
    • Pomegranate--To select the ripest pomegranate, choose one that feels heavy for its size and has smooth, firm skin. When working with the fruit, wear an apron as the juice from the seeds will stain.
    • Lime--You'll be using the zest and juice of 1 lime for this recipe. You should get about 2 tablespoons of juice and 2 teaspoons of zest. If your lime is a little stingy, taste the finished salsa and squeeze in an extra ½ lime, if needed.
    • Jalapeño--If you prefer a milder flavor, remove the seeds and white pith inside the pepper. If you prefer a spicier bite, leave them in.
    • Mint--This adds freshness to the salsa. If you can't get fresh mint, cilantro will also work well here.

    How to Make Pomegranate Salsa

    A bowl of pomegranate seeds, chopped red onion, and mint.
    A bow of pomegranate salsa with a microplane zester and halved lime nearby.
    1. Combine the pomegranate seeds, jalapeño, red onion, and mint in a large bowl.
    2. Stir in the zest and juice of 1 lime and ½ teaspoon salt. Chill for at least 1 hour before serving.

    FAQs

    How do you seed a pomegranate?

    Make a shallow cut around the equator (the middle) of the pomegranate. Use your fingers to pry the two halves apart. Holding one half of the pomegranate upside down over a bowl, give it several gentle but firm taps with the back of a spoon. Tap the fruit all over to loosen all of the seeds. The seeds will fall out into the bowl. Remove and discard any pieces of membrane and repeat with the other half of the fruit.

    How should I serve this?

    This versatile pomegranate condiment is perfect for scooping up with tortilla chips, but also works well as a flavorful topping for roast or grilled chicken or fish.

    Tips and Troubleshooting

    • Let the salsa chill for at least an hour before serving. This will give the flavors a chance to mingle and will draw out a little bit of liquid.
    • Extra salsa can be stored in an airtight container in the fridge for up to 4 days. Stir well before serving.
    • This recipe is suitable for gluten-free, dairy-free, and vegan diets.
    A pomegranate, red onion, and mint mixture.

    More Holiday Snack Recipes You'll Love

    A bowl of assorted glazed nuts with a few scattered on a plate.
    Sweet and Spicy Smoked Nuts
    A round of brie in a cast iron skillet with toasted breat on the side.
    Baked Brie on the Grill

    Tried This Recipe?

    If you've tried this recipe, please leave a comment below. Follow me on Instagram, Facebook, or Pinterest for more great camping and grilling recipes.

    Recipe

    A bowl of pomegranate salsa with chips.

    Pomegranate Salsa

    A woman's face.Angie Zoobkoff
    This classic dip gets a festive upgrade, thanks to crunchy pomegranate seeds, fresh mint, and lime.
    No ratings yet
    Print Recipe Pin Recipe
    Prep Time 10 minutes mins
    Chill Time 1 hour hr
    Total Time 1 hour hr 10 minutes mins
    Course Condiment, Snack
    Cuisine American
    Servings 8 servings
    Calories 33 kcal

    Ingredients
      

    • 2 to 2½ cups pomegranate arils from 2 large pomegrantes
    • 1 jalapeño finely chopped
    • ⅓ cup finely chopped red onion
    • ¼ cup chopped fresh mint
    • Zest and juice of 1 lime
    • ½ teaspoon salt

    Instructions
     

    • In a large bowl, combine the pomegranate seeds, jalapeño, red onion, and mint.
    • Stir in the lime zest and juice and season with salt.
    • Cover and chill for at least 1 hour before serving. Stir well before serving.

    Notes

    • Storage--Extra salsa can be stored in an airtight container in the fridge for up to 4 days. Stir well before serving.
    • Dietary--This recipe is suitable for gluten-free, dairy-free, and vegan diets.

    Nutrition

    Serving: 0.3cupCalories: 33kcalCarbohydrates: 8gProtein: 1gSodium: 149mgFiber: 1gSugar: 4g
    Keyword holiday snacks
    Tried this recipe?Let us know how it was!

    December 18, 2024 Collections

    12 Christmas Dinner Recipes for a Small Gathering

    If you've got a crowd coming for Christmas dinner, it makes sense to grill a turkey or cook a spiral-cut ham, but for those gathering with a couple of friends, or small families of four to six people, that volume of food can be overwhelming. These 12 Christmas dinner recipes are designed to make a show-stopping meal for a small gathering, but can be scaled up if you've got more people celebrating with you.

    1
    Recipe and photo credit: Grits and Pinecones
    Stuffed Cornish Hens Recipe with Cornbread Stuffing
    This stunning recipes features roasted, juicy Cornish game hens filled with perfectly seasoned stuffing with dried cranberries and roasted pecans.
    Get the recipe: Stuffed Cornish Hens
    2
    A grilled stuffed pork tenderloin on a platter with oranges, parsley, and cranberries.
    Stuffed Pork Tenderloin with Orange Butter Sauce
    A panko, rosemary, and cranberry stuffing, along with a buttery citrus sauce elevates your everyday grilled pork tenderloin into a holiday-worthy meal.
    Get the recipe: Stuffed Pork Tenderloin
    3
    Recipe and photo credit: Cucina by Elena
    Stuffed Mushrooms
    Stuffed mushrooms are the ultimate easy holiday appetizer recipe. They are creamy, cheesy with a crunchy topping!
    Get the recipe: Stuffed Mushrooms
    4
    Recipe and photo credit: Flavorful Eats
    Slow Cooker Beef Braciole
    Slow cooker beef braciole is made with flank steak that’s been stuffed with a delectable, garlicky filling, then rolled up and browned in a pan, before being slow cooked in marinara sauce until super tender. Serve slices of the braciole with your favorite pasta or veggies for the ultimate slow cooker Italian meal!
    Get the recipe: Beef Braciole
    5
    A pot of mashed potatoes with a wooden spoon resting inside.
    Cheesy Garlic Mashed Potatoes Recipe
    These creamy mashed potatoes are loaded with garlic, two types of cheese, and tangy sour cream. They're the perfect holiday (or anytime!) side dish and can be prepared ahead of time.
    Get the recipe: Cheesy Garlic Mashed Potatoes
    6
    Recipe and photo credit: Cinnamon and Sage Co.
    Cranberry Chicken
    Add some color to tonight’s dinner with this simple, tasty cranberry chicken. This tangy, creamy chicken has only a few main ingredients. This makes it a perfect holiday meal for a small family.
    Get the recipe: Cranberry Chicken
    7
    A bowl of Brussels sprouts salad with cranberries and silver tongs on the side.
    Brussels Sprouts Salad with Cranberries
    Crisp raw Brussels sprouts, crunchy apple, chewy cranberries, and a tart vinaigrette combine to make an unforgettable salad.
    Get the recipe: Brussels Sprouts Salad
    8
    Recipe and photo credit: Chocolates & Chai
    Pastilla (Moroccan Chicken Pie)
    Pastilla/bastilla (Moroccan chicken pie) fuses sweet and savoury flavours together to create a memorable dish that’s aromatic and full of flavour.
    Get the recipe: Pastilla
    9
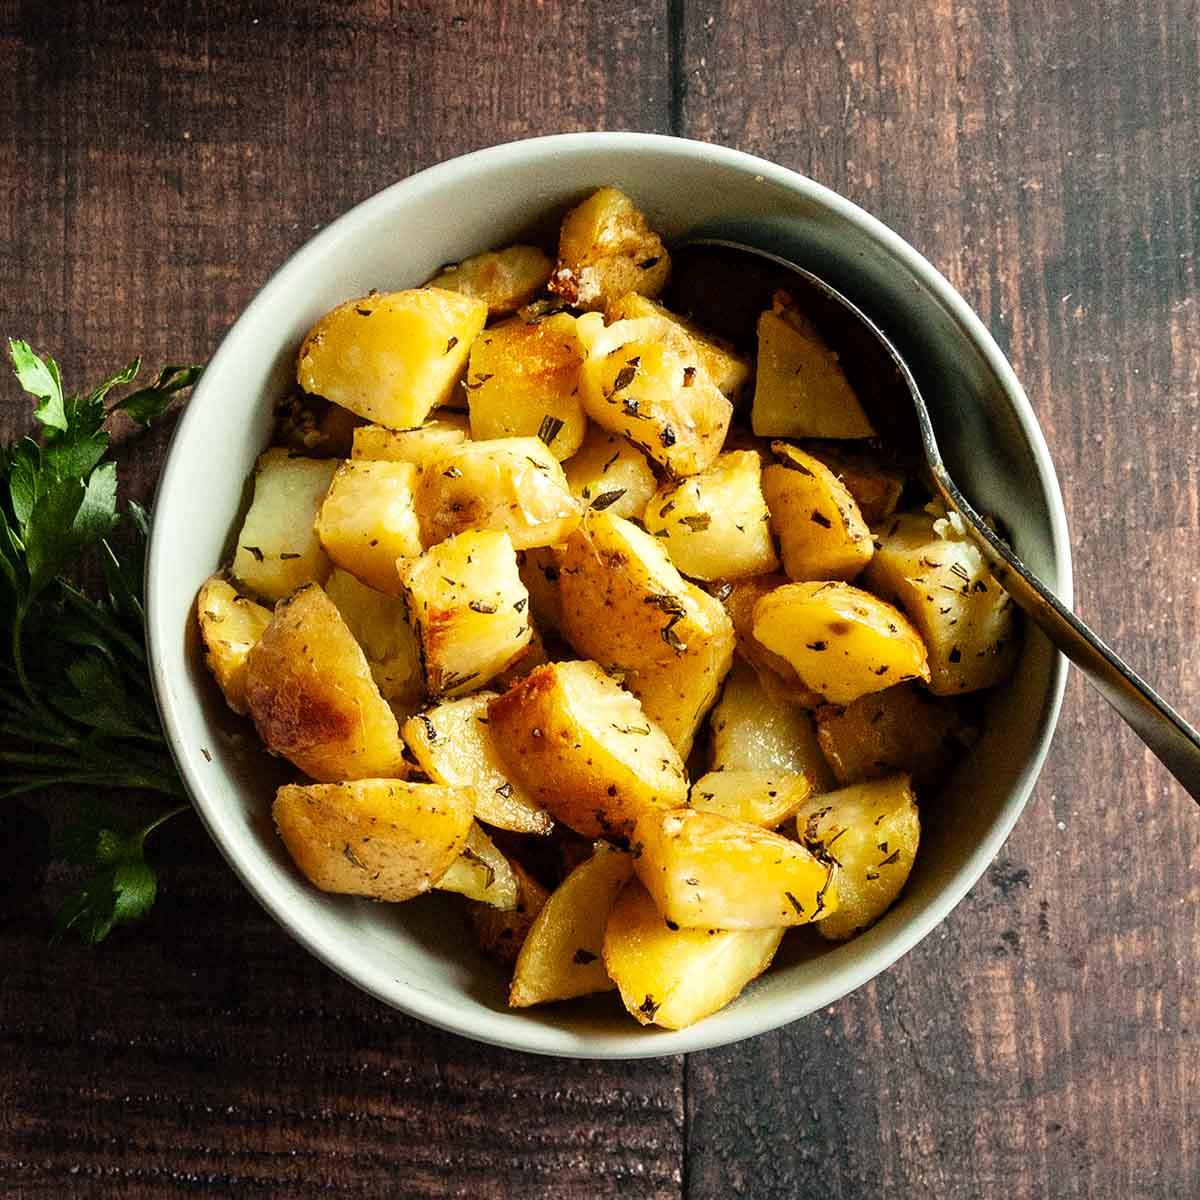
    A bowl of make ahead roasted potatoes with fresh herbs and some parsley on the side.
    Make-Ahead Roasted Potatoes
    These crispy roasted potatoes can be parboiled and stored in your fridge, cooler, or freezer until you're ready to roast them. The soft, creamy centres and crispy edges will make them a favorite all year round.
    Get the recipe: Roasted Potatoes
    10
    Recipe and photo credit: Sunglow Kitchen
    Fall Roasted Sweet Potato Beet Salad with Feta
    This sweet potato beet salad is full of color, flavor, and texture! It has salty feta cheese, crunchy walnuts, and a honey balsamic dressing!
    Get the recipe: Roasted Sweet Potato Beet Salad
    11
    Three jars of individual pomegranate cheesecake.
    Pomegranate Cheesecake Jars
    Whip up a batch of these easy pomegranate-infused mini cheesecakes and let the accolades roll in.
    Get the recipe: Pomegranate Cheesecake Jars
    12
    A skillet gingerbread cake with frosting being spread on it.
    Skillet Gingerbread Cake
    Topped with swoops of tangy cream cheese frosting, this skillet gingerbread cake is a holiday favorite. Make it on the grill and leave your oven free for all the other holiday faves.
    Get the recipe: Skillet Gingerbread Cake

    December 16, 2024 Grilling

    Baked Brie on the Grill

    Baked Brie just got a major upgrade, thanks to the smoky heat of the grill. Cooked in your cast iron skillet on the grill, this easy, cheesy snack goes from BBQ to table with almost no effort.

    A round of brie in a cast iron skillet with toasted breat on the side.

    The concept of baked Brie isn't new, and if you're like me, you've indulged in it on many occasions. Cooking it on the grill, however, is a game-changer. The heat from the grill transforms the creamy interior into a soft, velvety texture, while the outside develops a plump crust. Topped with balsamic glaze and spicy cranberry relish, this grilled Brie is a perfect appetizer or snack.

    Why You'll Love This Recipe

    • It's an easy snack recipe that's perfect for holiday gatherings, camping, tailgating, and more. Make it anywhere you can take your portable grill!
    • You can serve it directly from the skillet you cook it in.
    • The toppings are completely customizable.

    Ingredients and Substitutions

    Ingredients for baked Brie -- Brie, cranberry relish, balsamic syrup, bread
    • Brie--When heated, Brie softens to a perfectly spreadable consistency, and the rind contains the melted cheese. You can substitute Camembert, but the flavor won't be as creamy as Brie because it contains less milk fat. Don't trim the rind before grilling.
    • Balsamic syrup--Also known as balsamic glaze, this can be purchased online, at many supermarkets, or specialty grocers, and comes in a variety of flavors. Use one that you like the taste of. You can also make your own by simmering balsamic vinegar until reduced to a thick glaze. If you do this, be sure to have your hood fan running or simmer it outside!
    • Cranberry relish--This is a holiday-inspired festive topping for the grilled Brie, but you can swap in something different if you prefer. See some great options for variations below.
    • Bread--Use a sturdy bread that will toast well and hold up when spread with melted cheese. I recommend an artisan style bread, baguette, sourdough, or French bread.

    How to Cook Brie on the Grill

    A round of Brie in a cast iron skillet on a grill.
    Four slices of bread on a grill.
    1. Place the Brie in a small cast iron skillet and set over indirect heat on the grill. Cook for 15 to 20 minutes. Remove from the heat and drizzle with balsamic glaze and top with cranberry relish.
    2. Toast the sliced bread over direct heat on the grill for about 1 minute per side.

    FAQs

    Can I cook the cheese directly on the grill?

    If you don't have a cast iron skillet, you can cook it directly on the grill over indirect heat for about 10 minutes, carefully flipping it once during cooking.

    Be sure that your grill is cleaned and oiled before placing the cheese on the grate. When the cheese is plump and feels very soft, use a metal spatula to carefully transfer it to a serving platter before topping and serving it.

    What size of skillet should I use?

    You can use any size of cast iron skillet here, as long as it's larger than your wheel of cheese. I prefer to use my smallest skillet (6 inch) as it looks great for serving and also helps to contain the oozing cheese once you cut into it.

    If you only have a large skillet, you can grill the cheese in it and transfer it to a smaller platter for serving, if you prefer.

    Baked Brie Topping Variations

    Topping the Brie with cranberry relish or cranberry sauce gives this easy appetizer a festive feel, but there are plenty of ways to change up the topping depending on the occasion, personal preference, or what you have on hand. A few suggestions include:

    • Spoon some huckleberry sauce over the top
    • Add a dollop of your favorite jam or preserves
    • If you prefer a crunchy element, sprinkle sweet and spicy smoked nuts on top or around the cheese after cooking.
    • To keep it savory, skip the balsamic and garnish with a sprinkling of fresh thyme leaves.

    Tips and Troubleshooting

    • Serve this immediately after grilling as the cheese will begin to firm up as it cools.
    • This recipe is suitable for gluten-free and vegetarian diets.
    A slice of bread topped with melted brie.

    More Cheese Recipes You'll Love

    A small skillet filled with beer cheese dip, topped with shredded cheese, tomatoes, and scallions with chips on the side.
    Skillet Beer Cheese
    A cube of bread on a fondue fork, covered in Swiss cheese dip.
    Swiss Cheese Dip

    Tried This Recipe?

    If you've tried this recipe, please leave a comment below. Follow me on Instagram, Facebook, or Pinterest for more great camping and grilling recipes.

    Recipe

    A round of brie in a cast iron skillet with toasted breat on the side.

    Baked Brie on the Grill

    A woman's face.Angie Zoobkoff
    Topped with balsamic glaze and spicy cranberry relish, this grilled Brie is a perfect appetizer or snack.
    No ratings yet
    Print Recipe Pin Recipe
    Prep Time 5 minutes mins
    Cook Time 15 minutes mins
    Total Time 20 minutes mins
    Course Appetizer, Snack
    Cuisine French
    Servings 8 servings
    Calories 175 kcal

    Equipment

    • Cast iron skillet

    Ingredients
      

    • 1 round Brie cheese (about 7 ounces | 200 g)
    • 1 tablespoon balsamic glaze
    • 2 tablespoons spicy cranberry relish
    • 16 small bread or baguette slices

    Instructions
     

    • Prepare a grill for indirect medium heat (400°F to 425°F). If possible, have heat on either side of the cool zone. If this isn't possible, rotate the skillet once during grilling so that the cheese melts evenly.
    • Place the Brie round in a small cast iron skillet and set over indirect heat. Grill until the cheese is slightly puffed and very soft, 15 to 20 minutes.
    • During the last 2 minutes of cooking, place the bread slices over direct heat and toast for 1 to 2 minutes on each side.
    • Remove the cheese and bread from the grill. Drizzle the balsamic glaze over the cheese and top with cranberry relish. Serve immediately with toasted bread.

    Video

    Notes

    • Serve this immediately after grilling as the cheese will begin to firm up as it cools.
    • This recipe is suitable for gluten-free and vegetarian diets.

    Nutrition

    Serving: 1 portionCalories: 175kcalCarbohydrates: 18gProtein: 9gFat: 7gCholesterol: 25mgSodium: 364mgFiber: 1gSugar: 1g
    Keyword baked brie, grilled appetizers, grilled snacks, holiday snacks
    Tried this recipe?Let us know how it was!

    December 13, 2024 Everyday Staples

    Sweet and Spicy Smoked Nuts

    Perfect for party snacks, gifting, and everyday munchies, these sweet and spicy smoked nuts are easy to make on your smoker or grill. So easy, in fact, you'll probably have them on permanent rotation year round. We certainly do.

    A bowl of assorted glazed nuts with a few scattered on a plate.

    If you try to limit your daily nut intake to "just a handful", it's probably best to not have these lying around. These sweet, salty, spicy, crunchy nuts are so tempting that they'll disappear much faster than you intended! Thankfully, they're great for parties and make a great edible gift, so you can share the love and avoid over-indulging.

    [feast_advanced_jump_to]

    Why You'll Love This Recipe

    • It's an easy snack recipe that's perfect for holiday gatherings, camping, hiking, and more. It also makes a great gift!
    • You can customize it to suit your tastes.
    • They can be made on a smoker or regular grill.
    • You can prepare them ahead of time.

    Ingredients and Substitutions

    Ingredients for sweet and spicy smoked nuts--hot honey, butter, and mixed nuts.
    • Mixed nuts--I like a combination of pecans, cashews, and almonds, but other nuts like walnuts, pistachios, or macadamia nuts would also work well. Be sure to purchase raw, unseasoned nuts.
    • Hot honey--This delivers the sweet and spicy flavor to the roasted nuts. Hot honey is available online and at many stores. If necessary, you can substitute with ¼ cup of honey and ¼ teaspoon red pepper flakes. If you prefer only sweet nuts, you can use regular honey. Use your leftovers to create these amazing recipes that use hot honey.

    How to Make Smoked Nuts

    A bowl of hot honey, melted butter, and salt.
    A bowl of mixed nuts with hot honey glaze being mixed into it.
    1. Combine the hot honey, melted butter, and salt in a small bowl. Mix well.
    2. Pour the honey over the nuts and stir to evenly coat the nuts.
    A foil tray of unroasted mixed nuts.
    A foil tray of nuts on the grill.
    1. Arrange the nuts in an even layer in a foil pan.
    2. Smoke at 225 to 250°F for 1 ¼ hours. Cool completely.

    FAQs

    How long can I store these?

    Store the honey smoked nuts in a sealed container at room temperature for up to 1 week. For longer storage, freeze them for up to 2 months. Thaw at room temperature before enjoying.

    What's the best type of smoke to use for smoking nuts?

    I recommend using hickory or pecan for making smoked nuts. Avoid very strong types of wood, like mesquite or oak, as they can overpower the flavor of the nuts.

    Using Your Grill as a Smoker

    Don't have a traditional smoker? No worries! If your grill has a smoke box on the side, like mine does, pop your wood chips into the box and turn the burner on below it. The heat from the burner and burning chips should be enough to maintain the temperature around 225°F. If it's too low, turn on another burner (but not directly beneath your nuts).

    If your grill doesn't have a smoke box, wrap your wood chips up in foil to create a pouch. Poke holes all over the pouch, then set it directly over the burner.

    Tips and Troubleshooting

    • Let the nuts cool completely in the foil pan before storing. If they stick together, gently break them apart with your hands.
    • This recipe is suitable for gluten-free and vegetarian diets.
    Assorted roasted nuts.

    More Snack Recipes You'll Love

    Two jars filled with Golden Grahams, chocolate cookies, mini marshmallows, and chocolate chips.
    S'mores Trail Mix
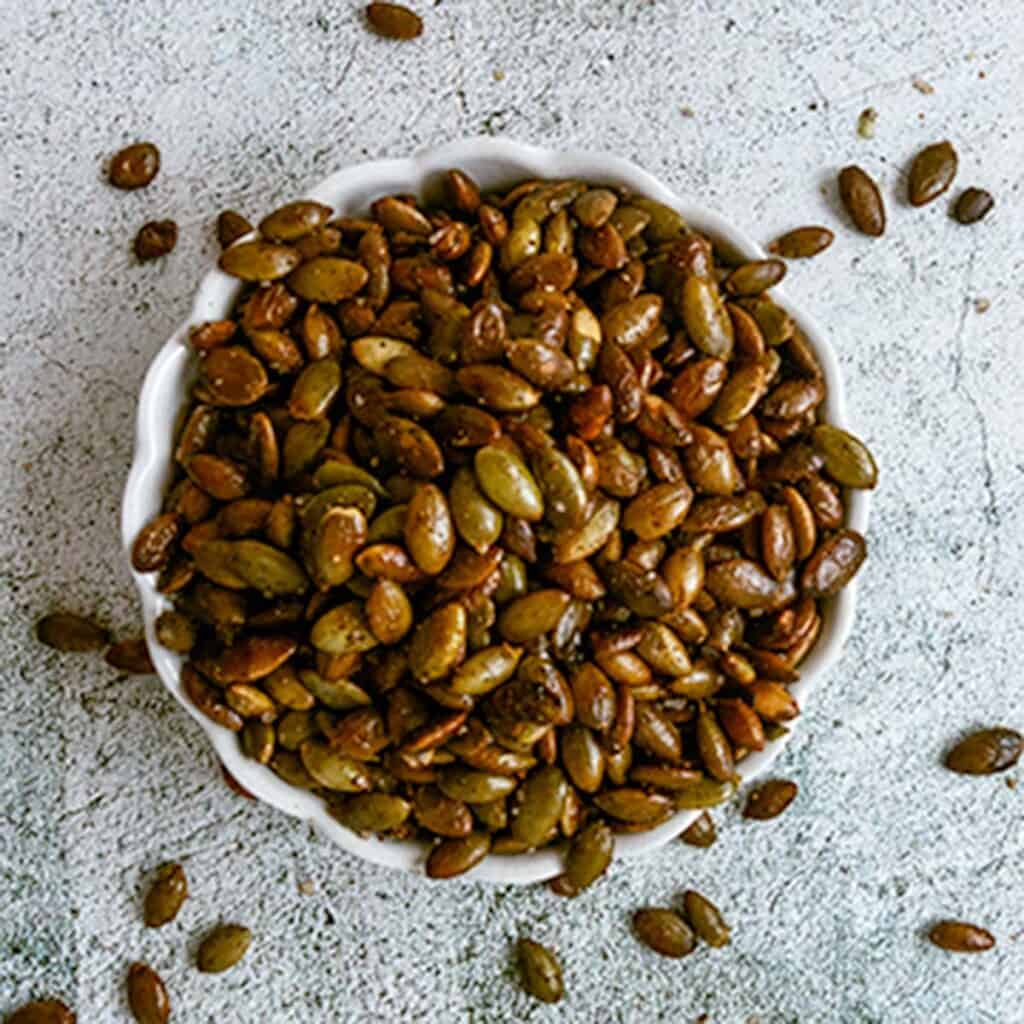
    A bowl of spiced pepitas with some spilling over the top.
    Spiced Pepitas

    Tried This Recipe?

    If you've tried this recipe, please leave a comment below. Follow me on Instagram, Facebook, or Pinterest for more great camping and grilling recipes.

    Recipe

    A bowl of assorted glazed nuts with a few scattered on a plate.

    Sweet and Spicy Smoked Nuts

    A woman's face.Angie Zoobkoff
    Sweet, salty, smoky, spicy, crunchy. What more could you ask for from a snack?
    No ratings yet
    Print Recipe Pin Recipe
    Prep Time 10 minutes mins
    Cook Time 1 hour hr 15 minutes mins
    Total Time 1 hour hr 25 minutes mins
    Course Snack
    Cuisine American
    Servings 16 servings
    Calories 244 kcal

    Equipment

    • Grill or smoker
    • Hickory or pecan wood chips, chunks, or pellets
    • 9 by 13-inch foil pan

    Ingredients
      

    • 4 cups raw mixed nuts
    • ¼ cup hot honey
    • 1 tablespoon butter melted
    • 1 teaspoon table salt

    Instructions
     

    • Prepare a smoker or grill with a smoke box or smoke pouch using hickory or pecan for cooking at 225°F to 250°F.
    • In a small bowl, stir together the hot honey, melted butter, and salt.
    • Place the nuts in a large bowl and pour the honey mixture over it. Use a silicone spatula to stir well, so that each nut is coated.
    • Dump the nuts into a 9-by-13-inch foil pan and spread in a single layer.
    • Place the foil tray on the smoker or grill and smoke at 225°F to 250°F until golden and fragrant, about 1 ¼ hours. Replace wood chips or pellets as needed to maintain a steady stream of smoke.
    • Cool completely before serving.

    Notes

    •  
    • Let the nuts cool completely in the foil pan before storing. If they stick together, gently break them apart with your hands.
    • Store the nuts in an airtight container at room temperature for up to 1 week or freeze for up to 2 months.
    • This recipe is suitable for gluten-free and vegetarian diets.
    •  

    Nutrition

    Serving: 0.25 cupCalories: 244kcalCarbohydrates: 12gProtein: 6gFat: 21gCholesterol: 2mgSodium: 157mgFiber: 2gSugar: 4g
    Keyword camping snacks, grilled snacks, holiday snacks, smoking
    Tried this recipe?Let us know how it was!

    December 11, 2024 Camping

    5 Sweet Dutch Oven Desserts for Camping

    If you're an avid camper, you likely already know that the Dutch oven is an essential cooking tool. Dutch oven camping meals are incredibly popular on this site, particularly chili recipes and beef stew. There's no need to limit its use to savory foods, though. These 5 Dutch oven camping desserts are proof that it can be used to make incredible sweet treats, too.

    1
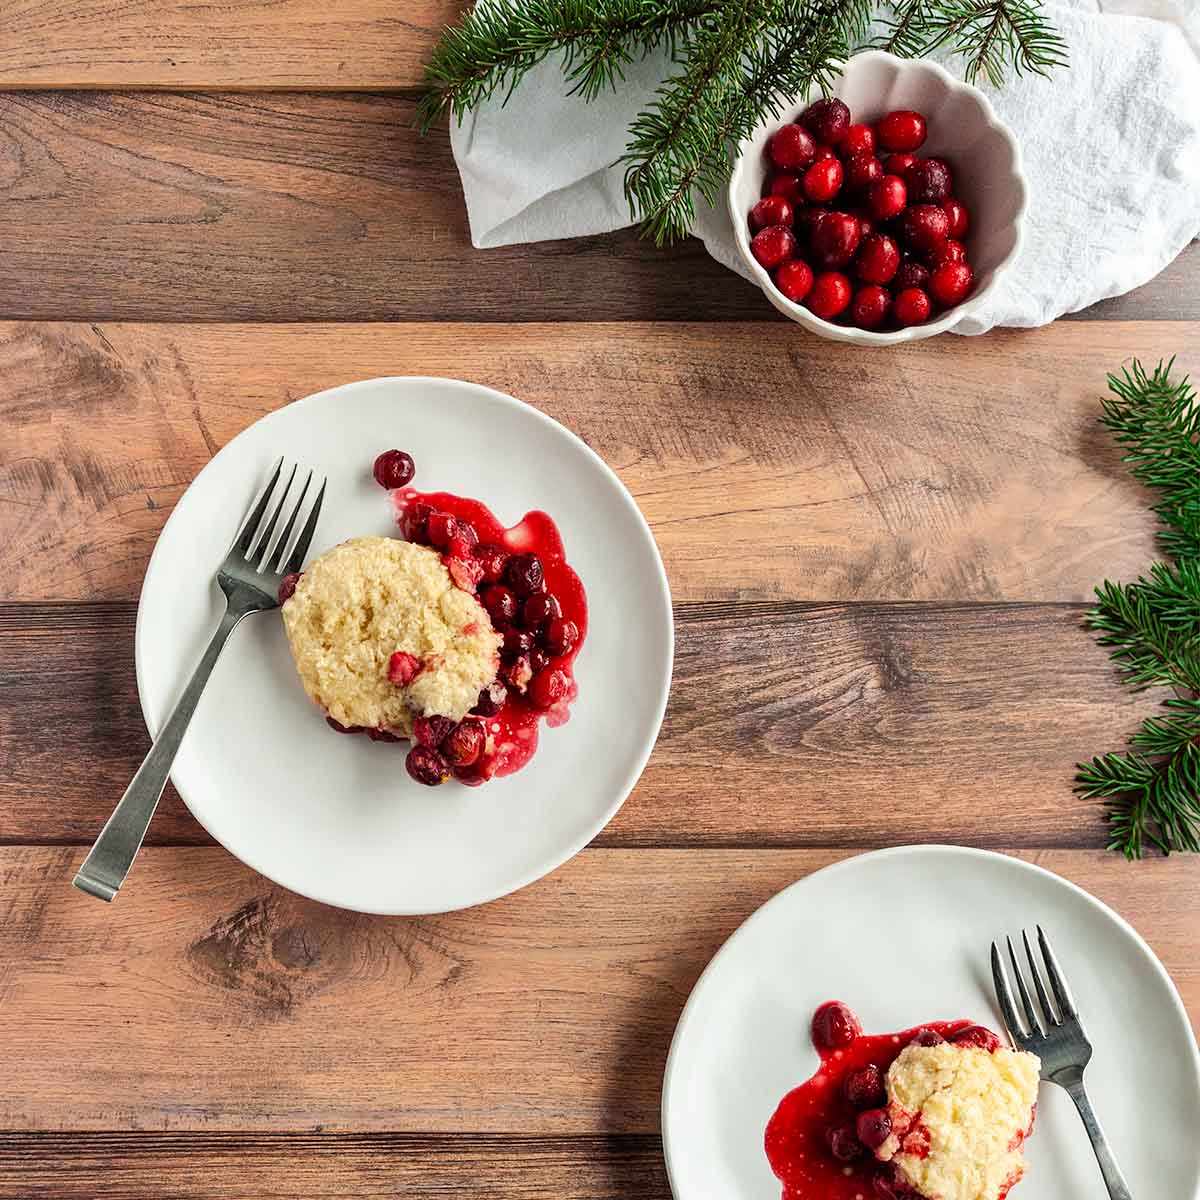
    Two plates of cranberry cobbler on a wooden table with fir branches nearby.
    Dutch Oven Cranberry Cobbler
    This festive Dutch oven cobbler has tender spiced cranberries topped with sweet biscuit dough. It's perfect for your holiday camping trip, or any time you're craving an easy dessert.
    Get the recipe: Dutch Oven Cranberry Cobbler
    2
    Recipe and photo credit: The Feathered Nester
    Dutch Oven Apple Cobbler
    Apple cobbler with cake mix is a delicious and moist fall treat! Bake this Dutch oven delight in under an hour for a cozy dessert.
    Get the recipe: Dutch Oven Apple Cobbler
    3
    A bowl full of cinnamon sugar doughnut holes with a half eaten one on the side.
    Campfire Doughnut Holes
    A sweet breakfast or dessert treat that's perfect for enjoying around the campfire.
    Get the recipe: Campfire Doughnut Holes
    4
    A chocolate cake in a Dutch oven.
    Dutch Oven Chocolate Cake
    Dotted with chocolate chips and laced with ribbons of fudgy chocolate pudding, this cake is the ultimate Dutch oven camping dessert.
    Get the recipe: Dutch Oven Chocolate Cake
    5
    A glazed cinnamon roll on a plate with an unglazed one in the background.
    Dutch Oven Cinnamon Rolls
    Swirled with cinnamon sugar and topped with sweet glaze, these campfire cinnamon rolls are the ultimate camping breakfast.
    Get the recipe: Dutch Oven Cinnamon Rolls

    December 9, 2024 Camping

    Pomegranate Cheesecake Jars

    With a crunchy gingersnap crust, sweet, creamy pomegranate-infused cheesecake filling, and fresh pomegranate arils on top, these cheesecake jars are the perfect make-ahead Christmas dessert, whether you're at camp or at home.

    Three jars of individual pomegranate cheesecake.

    Like my no-bake mini pumpkin cheesecakes and my cranberry bliss dip, the beauty of these individual pomegranate cheesecakes is that they can be made ahead of time, making them perfect for packing along on a winter camping trip, taking to a potluck, or for serving at Christmas dinner. They also happen to be pretty darn delicious and are certain to earn you some rave reviews.

    Why You'll Love This Recipe

    • It's a no-bake dessert that doesn't need to be frozen.
    • They're portioned into individual servings, so you don't have to worry about eating it all at once or figuring out how to store leftovers.
    • These easy no-bake pomegranate desserts in a jar will keep for up to 4 days, so you can enjoy them at your leisure.

    Ingredients and Substitutions

    Ingredients for pomegranate cheesecake jars--cream cheese, cinnamon, gingersnaps, sugar, powdered sugar, butter, cream, and pomegranate and its juice.
    • Gingersnaps--Look for old-fashioned or authentic gingersnaps that have a prominent ginger flavor. You can easily crush the cookies in a food processor, or toss them into a resealable bag and use a rolling pin to grind them up.
    • Cream cheese--Use full-fat cream cheese for best results.
    • Pomegranate juice--You can usually find this in the refrigerated section of a large supermarket with the other fresh juices. Use leftover pomegranate juice to make this mulled pomegranate juice recipe.
    • Pomegranate--To select the ripest pomegranate, choose one that feels heavy for its size and has smooth, firm skin. When working with the fruit, wear an apron as the juice from the seeds will stain. Extra seeds can be used to make pomegranate salsa.

    How to Make Pomegranate Cheesecake

    A pot of pomegranate juice on an induction burner.
    A person pouring butter into a bowl with crushed gingersnaps and sugar.
    1. Boil the pomegranate juice until reduced by half. Let it cool completely.
    2. Combine the crushed gingersnaps, sugar, and melted butter and mix well.
    A person pressing gingersnap crust into the bottom of small Mason jars.
    A bowl of whipped cream with an electric hand mixer nearby.
    1. Divide the crust mixture among six Mason jars and press the crust into the bottom of each jar.
    2. Whip the cream until it holds firm peaks.
    An electric hand mixer beating cream cheese.
    A bow of cream cheese, pomegranate juice, and cinnamon with an electric hand mixer resting inside.
    1. Beat the cream cheese and powdered sugar together.
    2. Mix in the cooled pomegranate juice and cinnamon.
    A bowl of cheesecake filling with whipped cream being folded into it.
    Individual jars of pomegranate cheesecake.
    1. Gently fold the whipped cream into the cream cheese filling.
    2. Divide the cream cheese filling among the jars and top with fresh pomegranate arils. Chill until serving.

    FAQs

    How do you seed a pomegranate?

    Make a shallow cut around the equator (the middle) of the pomegranate. Use your fingers to pry the two halves apart. Holding one half of the pomegranate upside down over a bowl, give it several gentle but firm taps with the back of a spoon. Tap the fruit all over to loosen all of the seeds. The seeds will fall out into the bowl. Remove and discard any pieces of membrane and repeat with the other half of the fruit.

    Can I make this as a single large cheesecake?

    Yes. You can prepare this as one large no-bake pomegranate cheesecake in a 9-inch springform pan. The filling is softer and more mousse-like than traditional cheesecake filling so, in order to get clean slices, wipe your knife blade between each cut.

    How should I serve them?

    These work best in ½-pint (8-ounce) wide mouth mason jars if you're travelling since they seal and stack well, but you can use any small lidded containers or ramekins.

    Can I freeze them?

    Yes. They can be frozen without the pomegranate seed topping. Let the cheesecakes set in the fridge overnight, then store them in the freezer in their containers for up to 3 months. Thaw in the refrigerator overnight and top with the seeds before serving.

    Tips and Troubleshooting

    • Use the bottom of a small jar to press the crust layer into your jar or serving dishes. The butter in the crust should prevent it from sticking to the glass, but if it does, spray the bottom of the glass with cooking spray.
    • Make your cheesecake jars at least 8 hours before serving, but ideally a day before. The chilling time will allow the filling to firm up and will let the flavors develop.
    • Keep your cheesecakes covered with a lid or plastic wrap until you serve them.
    • Store the mini cheesecake in your cooler or refrigerator for up to 4 days.
    Three pomegranate cheesecake jars with spoons sticking out of them.

    More Holiday Dessert Recipes You'll Love

    A skillet gingerbread cake with frosting being spread on it.
    Skillet Gingerbread Cake
    Two plates of cranberry cobbler on a wooden table with fir branches nearby.
    Dutch Oven Cranberry Cobbler

    Tried This Recipe?

    If you've tried this recipe, please leave a comment below. Follow me on Instagram, Facebook, or Pinterest for more great camping and grilling recipes.

    Recipe

    Three jars of individual pomegranate cheesecake.

    Pomegranate Cheesecake Jars

    A woman's face.Angie Zoobkoff
    Whip up a batch of these easy pomegranate-infused mini cheesecakes and let the accolades roll in.
    No ratings yet
    Print Recipe Pin Recipe
    Prep Time 30 minutes mins
    Chill Time 8 hours hrs
    Course Dessert
    Cuisine American
    Servings 6 servings
    Calories 367 kcal

    Equipment

    • 6 half-pint wide mouth jars or ramekins

    Ingredients
      

    • ½ cup pomegranate juice
    • 1 cup crushed gingersnaps (3 ½ oz | 100 g)
    • 4 tablespoons unsalted butter melted
    • 2 tablespoons granulated sugar
    • 1 pinch salt
    • ½ cup whipping cream
    • One (8-ounce) package cream cheese
    • ¼ cup powdered sugar
    • 1 teaspoon ground cinnamon
    • ¼ cup fresh pomegranate arils

    Instructions
     

    • In a small saucepan over medium-high heat, boil the pomegranate juice until reduced to ¼ cup, about 6 minutes. Remove from the heat and let it cool to room temperature.
    • In a medium bowl, combine the gingersnaps, melted butter, granulated sugar, and a pinch of salt. Mix well.
    • Divide the gingersnap mixture among six jars and use a small glass to firmly press the crust into the bottom of each jar.
    • Using a stand mixer or electric hand mixer, beat the whipping cream until it holds stiff peaks, about 3 minutes.
    • In a large bowl, beat the cream cheese and powdered sugar together until smooth. With the mixer on low, carefully beat in the pomegranate juice and cinnamon.
    • Working in two batches, gently fold the whipped cream into the cream cheese mixture.
    • Divide the cream cheese mixture among the jars, using the back of a spoon to smooth the top. Sprinkle the pomegranate seeds over the top.
    • Cover and chill for at least 8 hours before serving.

    Notes

    • Pressing the crust--Use the bottom of a small jar to press the crust layer into your jar or serving dishes. The butter in the crust should prevent it from sticking to the glass, but if it does, spray the bottom of the glass with cooking spray.
    • Let it chill--Make your cheesecake jars at least 8 hours before serving, but ideally a day before. The chilling time will allow the filling to firm up and will let the flavors develop.
    • Keep them covered--Keep your cheesecakes covered with a lid or plastic wrap until you serve them.
    • Storage--Store the mini cheesecake in your cooler or refrigerator for up to 4 days.

    Nutrition

    Serving: 1jarCalories: 367kcalCarbohydrates: 26gProtein: 3gFat: 28gCholesterol: 73mgSodium: 170mgSugar: 19g
    Keyword camping desserts, christmas recipes, make-ahead desserts
    Tried this recipe?Let us know how it was!

    December 6, 2024 Beef Recipes

    Skillet Salisbury Steak

    Whether you're looking for a comforting one-pot meal for camping, or a cozy weeknight dinner at home, this skillet Salisbury steak is the answer. It comes together entirely in your trusty cast iron skillet and is oh-so-satisfying.

    A serving of Salisbury steak on a pile of mashed potatoes.

    Ever notice that anything smothered in rich mushroom gravy is instantly better? Mashed potatoes, pork chops with mushroom gravy, seared steak . . . I could go on, but you get the idea, and this meal is no different. The Salisbury steak patties are tender and very tasty on their own, but when you serve them with gravy, you've got yourself a winning meal.

    Why You'll Love This Recipe

    • It' comes together in a single skillet's a one-pan cast iron skillet meal, making it ideal for camping or a simple meal at home.
    • You can prepare the meat patties ahead of time.
    • It's hearty and satisfying comfort food.

    Ingredients and Substitutions

    Ingredients for salisbury steak--beef, egg, broth, flour, onion, Dijon, Worcestershire sauce, mushrooms, bread crumbs, and oil.
    • Ground beef--I recommend using lean ground beef (85/15), which will give you a little bit of fat for flavor, but not so much that your gravy ends up greasy.
    • Flour--Regular all-purpose flour works best here.
    • Breadcrumbs--You can use plain or seasoned dried bread crumbs, depending on your preference or what you have on hand.
    • Worcestershire sauce--This adds flavor to the meat. If you don't have any, you can substitute soy sauce.
    • Mushrooms--I used cremini mushrooms for this recipe, but white mushrooms will work well, too.

    How to Make Salisbury Steak in a Cast Iron Skillet

    A bowl with raw ground beef, egg, bread crumbs, and seasoning.
    Four large meatballs on a baking sheet.
    1. Combine the beef, egg, breadcrumbs, Worcestershire sauce, and salt and pepper in a large bowl. Mix well.
    2. Shape the meat mixture into four even balls.
    Four meatballs in a skillet with one being pressed down with a spatula.
    Onions cooking in a skillet.
    1. Heat 2 tablespoons of oil in a large cast iron skillet. Add the meat balls and press with a spatula to flatten slightly. Cook until browned on each side. Transfer to a plate.
    2. Add the remaining oil to the skillet, then stir in the onions. Cook until softened.
    Mushrooms cooking in a cast iron skillet.
    Flour added to a skillet with cooked onions and mushrooms.
    1. Stir in the mushrooms and cook until they begin to release their liquid.
    2. Sprinkle flour over the mushroom mixture. Cook for a couple of minutes.
    A person pouring broth into a skillet with mushrooms.
    Salisbury steak cooking in a skillet with mushroom gravy.
    1. Pour in the stock and stir in the Dijon. Bring the mixture to a simmer.
    2. Nestle the meat patties in the gravy and cook until the meat reaches an internal temperature of 160°F.

    FAQs

    What is Salisbury steak?

    It's a popular dish that originated in the US, named after Dr. James Salisbury, who was an early promoter of meat-centered diets. The recipe has changed over time, and now is usually made with meat patties containing ground beef and other ingredients, such as binders (egg, breadcrumbs) and flavoring. They are served in a brown gravy which may or may not contain mushrooms and/or onions.

    What should I serve with this?

    Creamy mashed potatoes are a classic pairing with this comfort food meal, but egg noodles would also work well here.

    How can I tell if it's done?

    The best way to determine doneness is to insert a thermometer into the thickest part of your beef patties. When they register 160°F (71°C), they're ready.

    Tips and Troubleshooting

    • To get ahead, mix and shape the meat patties and freeze in an airtight container or resealable bag for up to 3 months. Thaw completely in the refrigerator before cooking.
    • To prevent your spatula from sticking to the meat when pressing it, spray the bottom side of your spatula with cooking spray.
    • This recipe is suitable for dairy-free diets.
    A skillet filled with salisbury steak in mushroom gravy with a bowl of mashed potatoes on the side.

    More Ground Beef Recipes You'll Love

    A serving of shepherd's pie on a plate.
    Dutch Oven Shepherd's Pie
    Nachos topped with beef, cheese, avocado, tomato, and pickled peppers in a cast iron skillet.
    Skillet Nachos

    Tried This Recipe?

    If you've tried this recipe, please leave a comment below. Follow me on Instagram, Facebook, or Pinterest for more great camping and grilling recipes.

    Recipe

    A serving of Salisbury steak on a pile of mashed potatoes.

    Skillet Salisbury Steak

    A woman's face.Angie Zoobkoff
    This one-pot meal of tender beef patties in rich mushroom gravy is inexpensive, hearty, and oh-so-satisfying.
    No ratings yet
    Print Recipe Pin Recipe
    Prep Time 15 minutes mins
    Cook Time 45 minutes mins
    Total Time 1 hour hr
    Course Main Course
    Cuisine American
    Servings 4 servings
    Calories 439 kcal

    Ingredients
      

    • 1 pound lean ground beef
    • 1 large egg
    • ⅓ cup breadcrumbs
    • 1 tablespoon Worcestershire sauce
    • ½ teaspoon salt plus more to taste
    • ½ teaspoon freshly ground black pepper plus more to taste
    • 3 tablespoons vegetable or olive oil divided
    • 1 medium onion thinly sliced
    • 8 ounces cremini mushrooms sliced
    • 2 tablespoons all-purpose flour
    • 2 cups beef broth
    • 1 teaspoon Dijon mustard

    Instructions
     

    • In a large bowl, combine the beef, egg, breadcrumbs, Worcestershire sauce, and ½ teaspoon each salt and pepper. Mix well.
    • Shape the meat mixture into 4 even balls.
    • Heat 2 tablespoons oil in a large skillet over medium-high heat. Add the meat balls to the skillet and use a spatula to flatten each one slightly. Cook, flipping once, until browned on each side, about 5 minutes per side. Transfer to a plate. (The meat will still be raw inside. That's ok.)
    • Reduce the heat to medium low and add the remaining 1 tablespoon oil to the skillet. Stir in the onion and cook, stirring occasionally, until softened, 8 to 10 minutes.
    • Add the mushrooms and cook until they begin to release their liquid, 5 to 6 minutes.
    • Sprinkle the flour over the mushrooms and cook, stirring constantly, for 1 to 2 minutes.
    • Slowly pour in the broth, stirring constantly. Stir in the Dijon mustard.
    • Bring the gravy to a simmer, then nestle the beef patties in the gravy. Simmer gently, turning the patties once, until cooked through to an internal temperature of 160°F, 15 to 20 minutes.
    • Season to taste with salt and pepper and serve hot.

    Notes

    • Get ahead--To get ahead, mix and shape the meat patties and freeze in an airtight container or resealable bag for up to 3 months. Thaw completely in the refrigerator before cooking.
    • Stop it from sticking--To prevent your spatula from sticking to the meat when pressing it, spray the bottom side of your spatula with cooking spray.
    • Dietary--This recipe is suitable for dairy-free diets.

    Nutrition

    Serving: 1 portionCalories: 439kcalCarbohydrates: 15gProtein: 32gFat: 28gCholesterol: 176mgSodium: 904mgFiber: 2gSugar: 4g
    Keyword cast iron cooking, ground beef recipes, one pan meals
    Tried this recipe?Let us know how it was!

    December 4, 2024 Collections

    20 Crowd-Pleasing Christmas Potluck Recipes

    The holiday season brings plenty of opportunities to gather with friends and family, and more often than not, you need to bring a dish along. These 20 crowd-pleasing potluck recipes include nibbles, dips, mains, sides, and desserts so you'll have the perfect dish ready no matter what the host requests.

    Small Bites & Nibbles

    1
    Recipe and photo credit: Chef Savvy
    Mini Cheese Balls
    Mini cheese balls are the perfect holiday party appetizer! The bite-sized cheese balls are coated in cranberries, nuts and herbs!
    Get the recipe: Mini Cheese Balls
    2
    Recipe and photo credit: Spabettie
    Deviled Egg Potatoes
    Deviled egg potato bites are the kinder, gentler cousin to the deviled egg. Rich and crispy, these make a great appetizer recipe!
    Get the recipe: Deviled Egg Potato Bites
    3
    Christmas Guacamole Wreath
    Recipe and photo credit: Veggies Save the Day
    Christmas Guacamole Wreath
    Wow your guests this holiday season by serving Christmas guacamole in the shape of a wreath. An easy appetizer that’s ready in 15 minutes.
    Get the recipe: Christmas Guacamole Wreath

    Dips

    4
    A small skillet filled with beer cheese dip, topped with shredded cheese, tomatoes, and scallions with chips on the side.
    Skillet Beer Cheese Dip
    This beer cheese dip with cream cheese, smoked Gouda, Cheddar, and beer is easy to make in your cast iron skillet. It can be made over the campfire, on your camp stove, or on a regular stove.
    Get the recipe: Beer Cheese Dip
    5
    Recipe and photo credit: Small Town Woman
    Taco Dip
    This incredibly easy yet scrumptious taco dip with a sour cream and cream cheese base comes together in less than ten minutes complete with all of your favorite toppings.
    Get the recipe: Taco Dip
    6
    A foil pan filled with buffalo chicken dip with carrots, crackers, and bread cubes nearby.
    Make-Ahead Buffalo Chicken Dip
    Everything you love about Buffalo chicken wings in a creamy, scoop-able dip.
    Get the recipe: Make-Ahead Buffalo Chicken Dip

    Mains

    7
    Recipe and photo credit: Semi Homemade Kitchen
    3-Ingredient Cranberry Meatballs
    3-ingredient cranberry meatballs made easily in the crockpot. Perfect for holidays, potlucks, or a quick dinner with minimal prep.
    Get the recipe: 3-Ingredient Cranberry Meatballs
    8
    A spiral cut ham on a rectangular platter with orange slices, pomegranate wedges, and parsley sprigs.
    Dutch Oven Ham
    This Dutch oven ham is coated in a brown sugar, orange, and mustard glaze and can be made over your campfire or on your stovetop or camp stove. It's perfect for your holiday camping trip.
    Get the recipe: Dutch Oven Ham
    9
    Recipe and photo credit: A Latin Flair
    Pan de Jamon (Venezuelan Ham Bread)
    This delicious Pan de Jamon is a must-have in Venezuela during the Christmas holiday and will be a star on your holiday table!
    Get the recipe: Venezuelan Ham Bread
    10
    Recipe and photo credit: The Feathered Nester
    Chicken Stuffing Casserole
    Need a quick 30 minute crowd pleaser? Everyone will love this chicken stuffing casserole bake recipe with creamy mushroom sauce and savory stuffing.
    Get the recipe: Chicken Stuffing Casserole
    11
    Recipe and photo credit: xoxo Bella
    Loaded Mac and Cheese
    Indulge in the ultimate comfort food experience with this 35-minute loaded mac and cheese recipe! This dish takes the classic macaroni and cheese we all know and love, and elevates it to new heights with the addition of crispy bacon and panko breadcrumbs.
    Get the recipe: Loaded Mac and Cheese
    12
    Recipe and photo credit: Little Sunny Kitchen
    Easy Taco Ring
    Make this taco crescent ring, a beautiful presentation of a classic tex-mex favorite. Perfect for potlucks, parties, or weeknight dinners.
    Get the recipe: Easy Taco Ring

    Salads

    13
    Recipe and photo credit: Haute and Healthy Living
    Christmas Wreath Salad with Pomegranate and Pear
    This Christmas wreath salad with pomegranate and pear is a stunning and tasty side that’s perfect for holiday entertaining!
    Get the recipe: Christmas Wreath Salad
    14
    A bowl of Brussels sprouts salad with cranberries and silver tongs on the side.
    Brussels Sprouts Salad with Cranberries
    Crisp raw Brussels sprouts, crunchy apple, chewy cranberries, and a tart vinaigrette combine to make an unforgettable salad.
    Get the recipe: Brussels Sprouts Salad with Cranberries

    Sweet Treats

    15
    Recipe and photo credit: Recipes From a Pantry
    Grinch Christmas Dip
    This easy Grinch dip is a classic Christmas dip for the holiday season. It requires only 6 ingredients and a few minutes prep. Great to serve as a dessert dip or as part of a Christmas dessert board.
    Get the recipe: Grinch Dip
    16
    Recipe and photo credit: The Fruity Jem
    Chocolate Mousse Tartlets
    Easy, healthy-ish, and irresistible dark chocolate mousse tartlet! Serve these mini tarts at parties, or make one big chocolate mousse tart to simplify!
    Get the recipe: Chocolate Mousse Tartlets
    17
    A bowl of pretzel rail mix with small bowls of M&Ms and fish crackers nearby.
    Butter Toffee Trail Mix
    This easy homemade holiday trail mix includes butter toffee pretzels, crackers, chocolate chips, and M&Ms. It's a festive snack perfect for your holiday camping trip or Christmas parties.
    Get the recipe: Butter Toffee Trail Mix
    18
    Recipe and photo credit: In the Kids Kitchen
    Santa Belly Oreos
    These festive chocolate covered OREO cookies are decorated to look like Santa’s red coat!
    Get the recipe: Santa Belly Oreos
    19
    Sugar Cookie Truffles
    Recipe and photo credit: Chef Denise
    Sugar Cookie Truffles
    With only four ingredients and no baking or messy chocolate dipping, these truffles are super simple! They’re super delicious too, combining the classic flavors of sugar cookies and white chocolate with the creaminess of truffles.
    Get the recipe: Sugar Cookie Truffles
    20
    Recipe and photo credit: Binky's Culinary Carnival
    Vanillekipferl - Crescent Cookies
    Vanillekipferl, the delicate, crescent-shaped cookies dusted with a light sprinkle of powdered sugar, are a classic European baking tradition
    Get the recipe: Crescent Cookies

    December 2, 2024 Cast Iron Skillet Recipes

    Skillet Gingerbread Cake

    This skillet gingerbread cake has everything going for it. Plenty of warm spices, beautifully crispy edges and a soft center (thanks, cast iron!), and swirls of tangy cream cheese frosting. If that wasn't enough, you can whip up this easy holiday dessert on your grill, leaving the oven free for the rest of your meal.

    A skillet gingerbread cake with frosting being spread on it.

    Every year, my daughter requests the same meal for her birthday, and always asks for gingerbread cake with cream cheese frosting for dessert. Although it doesn't really fall within the realm of a traditional birthday cake, it's perfectly suited to Christmas, and once you try it, I'm guessing you'll be happy to indulge in it any time of the year.

    Why You'll Love This Recipe

    • You can cook it on the grill, leaving your oven free for other holiday dishes.
    • Baking in cast iron gives the gingerbread cake perfectly crispy edges while still keeping the center moist and tender.

    Ingredients and Substitutions

    Ingredients for skillet gingerbread cake--flour, brown sugar, butter, egg, spices, molasses, and baking soda.
    • Molasses--You want to use unsulfured molasses for this recipe. This is what you'll generally find in the baking aisle of your supermarket. You may see it labeled as 'fancy molasses'. Do NOT use blackstrap molasses!
    • Flour--Regular all-purpose flour works best here.
    • Spices--A combination of ginger, cinnamon, and cloves gives this cake its classic gingerbread flavor.
    • Butter--I recommend using unsalted butter in baking because the salt content in salted butter can vary. If you need to use salted butter, reduce the amount of salt in the dry ingredients to ¼ teaspoon.

    How to Make Gingerbread Cake

    A buttered cast iron skillet.
    Dry ingredients in a bowl with a whisk.
    1. Butter a 12-inch cast iron skillet generously.
    2. Whisk the flour, spices, baking soda, and salt together in a medium bowl.
    Brown sugar and butter creamed together in a bowl.
    Molasses and egg added to a bowl with creamed butter and brown sugar.
    1. Beat the butter and brown sugar together with a hand mixer or stand mixer until fluffy.
    2. Stir in the egg and molasses.
    Dry ingredients being folded into wet ones in a glass bowl.
    Water being poured into a bowl of cake batter.
    1. Fold the dry ingredients into the wet just until no white streaks remain.
    2. Pour in the boiling water and stir until the batter is uniform.
    Unbaked gingerbread cake in a cast iron skillet.
    A skillet gingerbread cake cooking on a grill.
    1. Pour the batter into the prepared skillet and smooth the top.
    2. Bake in a 350°F grill over indirect heat until a toothpick inserted in the center comes out clean.

    Baking a Cake on the Grill

    Using a grill to bake a cake isn't complicated, as long as you remember a few key things. We're treating the grill like an oven, so it needs to remain covered as much as possible. That means no peeking! Only open the lid to check on it when it's getting close to the 30 minute mark.

    The other critical thing to remember is that the skillet needs to be over indirect heat. Any direct flame under your skillet is going to result in a burned cake. Ideally, you want low heat on either side of your skillet, but if your grill isn't large enough to accommodate this, heat the burner on one side of the grill, place the skillet on the other side, and turn it once during baking.

    FAQs

    Can I bake it in the oven?

    Yes. Follow the instructions, baking it in a 350°F oven for about 30 minutes.

    Can I freeze the cake?

    The gingerbread cake can be frozen, unfrosted, for up to 3 months. If you're planning to freeze the cake, I recommend lining the skillet with parchment fore easy removal. Once the cake is baked and cooled, remove it from the skillet and wrap it in a double layer of plastic wrap. Freeze for up to 3 months. Thaw before frosting.

    Can I use a different size skillet?

    You can, but be aware that the baking time will be different. If you use a smaller (10-inch) skillet, take care to not overfill it. The cooking time will be a little longer. If you use a larger skillet, you'll get a thinner cake, which will cook faster.

    Tips and Troubleshooting

    • To help molasses easily slide out of your measuring cup, spray the cup with baking spray before adding the molasses.
    • If you're concerned about the cake sticking to the skillet, you can line it with parchment. If you're baking the cake on the grill, make sure there is no paper hanging over the edges as it could ignite.
    • Avoid lifting the lid on the grill as much as possible as the temperature will fluctuate each time it's opened.
    • I find that it typically takes a little longer to bake the cake on the grill than in the oven.

    Storage Instructions

    The unfrosted cake can be stored at room temperature, covered with plastic wrap or foil for up to 3 days. The cake will lose its crispiness along the edges as it sits, but it will still be delicious. After frosting, the cake should be stored in the fridge, covered loosely with plastic wrap.

    A slice of gingerbread cake with cream cheese frosting on a plate.

    More Grilled Dessert Recipes You'll Love

    A whole skillet peach cobbler with two spoons resting on top.
    Skillet Peach Cobbler
    A whole cast iron skillet blueberry cake, dusted with powdered sugar, with a sieve full of powdered sugar on the side.
    Skillet Blueberry Cake

    Tried This Recipe?

    If you've tried this recipe, please leave a comment below. Follow me on Instagram, Facebook, or Pinterest for more great camping and grilling recipes.

    Recipe

    A skillet gingerbread cake with frosting being spread on it.

    Skillet Gingerbread Cake

    A woman's face.Angie Zoobkoff
    Topped with swoops of tangy cream cheese frosting, this skillet gingerbread cake is a holiday favorite. Make it on the grill and leave your oven free for all the other holiday faves.
    No ratings yet
    Print Recipe Pin Recipe
    Prep Time 30 minutes mins
    Cook Time 30 minutes mins
    Total Time 1 hour hr
    Course Dessert
    Cuisine American
    Servings 10 servings
    Calories 531 kcal

    Equipment

    • 12-inch cast iron skillet

    Ingredients
      

    For the gingerbread cake

    • ½ cup unsalted butter plus more for the pan
    • 2 ½ cups all-purpose flour
    • 1 ½ teaspoons baking soda
    • 1 ½ teaspoons ground ginger
    • 1 teaspoon ground cinnamon
    • ½ teaspoon ground cloves
    • ½ teaspoon salt
    • ½ cup brown sugar
    • ¾ cup unsulfured molasses
    • 1 large egg
    • 1 cup boiling water

    For the cream cheese frosting (optional)

    • 4 ounces cream cheese (full-fat) softened
    • ¼ cup butter softened
    • ½ teaspoon vanilla
    • 2 cups powdered sugar
    • Pinch salt

    Instructions
     

    • Generously butter a 12-inch cast iron skillet. Preheat the grill for medium (350°F) indirect heat. If possible, set it up so that the cool zone is in the center with heat on either side.
    • In a medium bowl, whisk the flour, baking soda, ginger, cinnamon, cloves, and salt together.
    • In a large bowl, use a hand mixer or stand mixer to beat the butter and brown sugar together until light and fluffy, 2 to 3 minutes.
    • Stir in the egg and molasses.
    • Add the flour mixture to the butter mixture and stir just until everything is combined and no streaks of flour remain.
    • Pour in the boiling water and stir until the batter is mostly smooth.
    • Scrape the batter into the prepared skillet and smooth the top.
    • Place over indirect heat on the grill, close the lid, and cook until a skewer inserted in the center comes out clean, 30 to 35 minutes. Cool completely before frosting.

    Make the cream cheese frosting (optional)

    • Beat the cream cheese and butter together in a medium bowl with a hand mixer or stand mixer until smooth, about 2 minutes.
    • Add the vanilla, powdered sugar, and salt and beat until the frosting is soft and fluffy, about 2 minutes more. Spread over the cooled cake and serve.

    Notes

    • Spray your cup--To help molasses easily slide out of your measuring cup, spray the cup with baking spray before adding the molasses.
    • Using parchment--If you're concerned about the cake sticking to the skillet, you can line it with parchment. If you're baking the cake on the grill, make sure there is no paper hanging over the edges as it could ignite.
    • Don't peek--Avoid lifting the lid on the grill as much as possible as the temperature will fluctuate each time it's opened.
    • Oven instructions--Follow the recipe and bake the cake in a 350°F oven for about 30 minutes. I find that it typically takes a little longer to bake the cake on the grill than in the oven.

    Nutrition

    Serving: 1sliceCalories: 531kcalCarbohydrates: 78gProtein: 5gFat: 23gCholesterol: 80mgFiber: 1gSugar: 48g
    Keyword cast iron cooking, cast iron grilling, grilled dessert
    Tried this recipe?Let us know how it was!

    November 29, 2024 Blackstone Griddle Recipes

    Blackstone Potato Cakes

    Cooking up your favorite crispy fried potato patties just became a whole lot faster, thanks to this Blackstone potato cakes recipe. The large outdoor griddle gives you plenty of space to cook a whole batch at once, which means less time cooking and more time eating!

    A stack of six latkes on a plate with a dollop of sour cream on top.

    I love potato cakes. (Well, actually, I love anything potato.) But, c'mon. How can you not love a crispy fried patty of shredded potato? Topped with sour cream and a sprinkling of chives, they're perfect any time of the day. Since you can make them on your outdoor griddle, you can enjoy them at home or at camp.

    Why You'll Love This Recipe

    • You can cook many more potato patties at a time than in a skillet, making the process much faster.
    • No messy splatter inside!

    Ingredients and Substitutions

    Ingredients for Blackstone latkes--flour, baking powder, potatoes, onion, egg, and salt and pepper.
    • Potatoes--Russet potatoes work best here as their high starch content helps to hold everything together.
    • Flour--Regular all-purpose flour works best here.
    • Baking powder--The addition of baking powder gives your potato cakes a lighter, more airy texture with a crispy exterior.
    • Egg--This helps to bind the potato mixture. Don't even think about skipping it.
    • Oil (not pictured)--Use a neutral oil for frying that has a high smoke point, such as vegetable, peanut, or sunflower oil. The amount you'll need will depend on the size of your griddle.

    How to Make Griddle Potato Cakes

    A person grating potatoes on a box grater.
    A person squeezing shredded potato in a kitchen towel over a bowl.
    1. Shred the potatoes and onion on the large holes of a box grater.
    2. Wrap the shredded potatoes and onion in a piece of cheesecloth or thin kitchen towel and squeeze as much liquid out as you can.
    A bowl of shredded potato, egg, flour, and spices.
    A Blackstone griddle coated with oil.
    1. Combine the shredded potatoes and onion, flour, baking powder, egg, and salt and pepper in a large bowl and mix well.
    2. Heat a large outdoor griddle to medium-high and slick with a thin layer of oil.
    Latkes cooking on a Blackstone griddle.
    A baking sheet with cooked latkes on it.
    1. Scoop heaping spoonfuls of batter onto the griddle and press lightly with a spatula to flatten slightly. Cook until golden brown, then flip and cook on the other side, adding more oil if needed.
    2. Drain on paper towels before serving.

    FAQs

    What should I serve with these?

    Similar to a latke, these should be served hot with sour cream or applesauce on the side. They're a great side dish alongside grilled chicken or your favorite steak recipe.

    Can I make them in advance?

    I think that these taste best when served immediately after cooking, but they can be made up to 2 hours in advance. Cook them and let them cool completely. Refrigerate until you're ready to serve them, then rewarm them in a 375°F oven or in an air fryer until heated through and crispy on the outside, about 5 minutes.

    Can I make them in my cast iron skillet?

    Definitely. Follow the recipe instructions, cooking them in batches in a hot cast iron skillet on your stovetop, camp stove, or campfire.

    Tips and Troubleshooting

    • Assemble and cook your patties as quickly as possible after grating the potato as it will begin to discolor quickly.
    • Take time to really squeeze as much liquid as you can out of your potato mixture. Wet potato cakes will fall apart!
    • Make sure that your outdoor griddle is level so that the oil evenly coats the surface.
    • This recipe is suitable for dairy-free and vegetarian diets.
    Six latkes on a plate with a dish of sour cream and chives.

    More Potato Recipes You'll Love

    A large plate filled with smashed potatoes.
    Blackstone Smashed Potatoes
    A bowl of make ahead roasted potatoes with fresh herbs and some parsley on the side.
    Make-Ahead Roasted Potatoes

    Tried This Recipe?

    If you've tried this recipe, please leave a comment below. Follow me on Instagram, Facebook, or Pinterest for more great camping and grilling recipes.

    Recipe

    A stack of six latkes on a plate with a dollop of sour cream on top.

    Blackstone Potato Cakes

    A woman's face.Angie Zoobkoff
    The crispy exterior and creamy interior make these quick-cooking Blackstone potato patties truly irresistible.
    No ratings yet
    Print Recipe Pin Recipe
    Prep Time 15 minutes mins
    Cook Time 10 minutes mins
    Total Time 25 minutes mins
    Course Side Dish
    Cuisine American
    Servings 12 patties
    Calories 90 kcal

    Equipment

    • Blackstone griddle (or other large surface griddle)

    Ingredients
      

    • 1 ¼ pounds (568 g) Russet potatoes (about 3 medium) peeled
    • 1 small onion halved
    • 1 large egg lightly beaten
    • ¼ cup all-purpose flour
    • 1 teaspoon baking powder
    • 1 teaspoon kosher salt
    • ¼ teaspoon freshly ground black pepper
    • Oil, for frying
    • Sour cream and chives or applesauce for serving (optional)

    Instructions
     

    • Grate the potatoes and onion halves on the large holes of a box grater.
    • Gather the grated potatoes and onion in a kitchen towel or cheesecloth and twist both ends to squeeze out as much water as possible. There will be lots!
    • Combine the grated potato and onion, egg, flour, baking powder, salt, and pepper in a large bowl and mix well.
    • Heat a large outdoor griddle (Blackstone) to medium high. Pour enough oil on the surface to coat it with a thin layer of oil. You can use a silicone brush to spread it evenly over the surface.
    • Drop scoops (2 to 3 tablespoons) of batter onto the griddle and press lightly with the back of a spatula to flatten them to about ¼-inch thick.
    • Cook until golden brown on the bottom, about 5 minutes. Flip the patties, adding more oil if needed and cook until the other side is golden brown, about 5 minutes more.
    • Transfer to paper towels to drain and serve warm with sour cream and chives or applesauce, if desired.

    Notes

    • Work quickly--Assemble and cook your latkes as quickly as possible after grating the potato as it will begin to discolor quickly.
    • Squeeze, squeeze, squeeze--Take time to really squeeze as much liquid as you can out of your potato mixture. Wet potato cakes will fall apart!
    • Keep it level--Make sure that your outdoor griddle is level so that the oil evenly coats the surface.
    • Dietary--This recipe is suitable for dairy-free and vegetarian diets.

    Nutrition

    Serving: 1pattyCalories: 90kcalCarbohydrates: 12gProtein: 2gFat: 4gCholesterol: 16mgSodium: 203mgFiber: 1gSugar: 1g
    Keyword blackstone cooking, blackstone griddle, camping side dishes
    Tried this recipe?Let us know how it was!

    November 27, 2024 Breakfast

    19 Indulgent Holiday Breakfasts

    The holiday season is filled with plenty of treats, and there's no reason for breakfast to be left out of the party. Whether you prefer sweet or savory, these 19 indulgent holiday breakfasts will make your mouth water and have you dreaming of Christmas morning for more than one reason.

    1
    Four pieces of cinnamon roll French toast on a rectangular platter, dusted with powdered sugar and topped with fresh raspberries.
    Cinnamon Roll French Toast
    This easy recipe combines two breakfast classics--French toast and cinnamon buns--to create an unforgettable breakfast treat.
    Get the recipe: Cinnamon Roll French Toast
    2
    Recipe and photo credit: The Cookin Chicks
    Biscuits and Gravy Breakfast Casserole
    Biscuits and gravy breakfast casserole is packed with flavor and a “stick to your ribs” kind of meal! Hearty, tasty, and a family favorite!
    Get the recipe: Biscuits and Gravy Breakfast Casserole
    3
    Recipe and photo credit: The Peasant's Daughter
    German Apple Filled Pancakes
    These German apple-filled pancakes, known as apfelpfannkuchen, are a delicious and easy-to-make sweet breakfast, brunch, or dessert option.
    Get the recipe: German Apple-Filled Pancakes
    4
    A glazed cinnamon roll on a plate with an unglazed one in the background.
    Dutch Oven Cinnamon Rolls
    Swirled with cinnamon sugar and topped with sweet glaze, these campfire cinnamon rolls are the ultimate camping breakfast.
    Get the recipe: Dutch Oven Cinnamon Rolls
    5
    Recipe and photo credit: Maple and Mango
    Rosti Eggs Benny
    This rosti eggs Benedict recipe is brunch heaven! Crispy potato rosti are used as the base for this delicious eggs benny variation.
    Get the recipe: Rosti Eggs Benedict
    6
    A bowl full of cinnamon sugar doughnut holes with a half eaten one on the side.
    Homemade Doughnut Holes
    A sweet breakfast or dessert treat that's perfect for enjoying around the campfire.
    Get the recipe: Homemade Doughnut Holes
    7
    Recipe and photo credit: Chocolates & Chai
    Nutella & Dark Chocolate Stuffed French Toast
    This Nutella and dark chocolate stuffed French toast recipe is what dreams are made of! A berry compote takes it from heavenly to a whole new level.
    Get the recipe: Nutella and Dark Chocolate Stuffed French Toast
    8
    Recipe and photo credit: The Casual Foodist
    Swedish Cinnamon Buns (Kanelbullar)
    Soft, pillowy and lightly sweet traditional Swedish cinnamon buns known as kanelbullar are a delicious treat any time of day. Discover the best recipe for making Swedish cinnamon buns at home.
    Get the recipe: Swedish Cinnamon Buns
    9
    Recipe and photo credit: Chili Pepper Madness
    Chilaquiles
    This chilaquiles recipe is the ultimate Mexican breakfast with crispy tortillas tossed with zesty red sauce, topped with fried eggs and more.
    Get the recipe: Chilaquiles
    10
    Caramel being drizzled over a mug of hot chocolate and whipped cream.
    Salted Caramel Hot Chocolate
    A spoonful of salted caramel takes your favorite cool-weather drink to the next level.
    Get the recipe: Salted Caramel Hot Chocolate
    11
    Recipe and photo credit: Recipes From a Pantry
    Baked Apple French Toast
    This baked apple French toast casserole is the best dish for your next Thanksgiving breakfast, brunch, or Christmas breakfast spread!
    Get the recipe: Baked Apple French Toast
    12
    Recipe and photo credit: The Simple Sweet Life
    Peppermint Mocha Doughnuts
    Looking for a treat that’s equal parts festive and easy? Then add these peppermint mocha doughnuts to your to-bake list!
    Get the recipe: Peppermint Mocha Doughnuts
    13
    Recipe and photo credit: Primavera Kitchen
    Sausage and Potato Breakfast Casserole
    Super easy to make and full of flavour, this sausage and potato breakfast casserole is a crowd pleasing breakfast!
    Get the recipe: Sausage and Potato Breakfast Casserole
    14
    Recipe and photo credit: Budget Delicious
    Stuffed Croissants Breakfast Boats
    Make stuffed croissant breakfast boats with 3 ingredients and just 15 minutes! Serve a delicious s’mores treat for breakfast or dessert.
    Get the recipe: Stuffed Croissants Breakfast Boats
    15
    Recipe and photo credit: Elle & Pear
    Dutch Baby with Cinnamon Sugar Blueberries
    A Dutch baby is a simple but elegant breakfast with an egg batter that cooks in melted butter, topped with cinnamon sugar coated blueberries.
    Get the recipe: Dutch Baby
    16
    Recipe and photo credit: Recipes From a Pantry
    Ham Breakfast Casserole
    Cheesy waffle and ham breakfast casserole is everything you love about breakfast tucked into one delicious and easy to make casserole.
    Get the recipe: Ham Breakfast Casserole
    17
    Recipe and photo credit: The Healthful Ideas
    Bananas Foster Pancakes
    These bananas foster pancakes are extra fluffy and topped with caramelized bananas with rum and pecans.
    Get the recipe: Bananas Foster Pancakes
    18
    Recipe and photo credit: Spend with Pennies
    Monkey Bread
    This easy monkey bread recipe is made with six simple ingredients. Using prepared biscuit dough makes it an easy and impressive recipe!
    Get the recipe: Monkey Bread
    19
    A stack of gingerbread pancakes on a plate with a pitcher of maple syrup and a plate of bacon in the background.
    Gingerbread Pancake Mix
    This easy gingerbread pancake mix recipe is perfect for the holidays. Made with rye flour, dark brown sugar, and warm spices, it's ideal for gifting or mixing up for Christmas breakfast.
    Get the recipe: Gingerbread Pancakes

    November 25, 2024 Breakfast

    Campfire Doughnut Holes

    These no-yeast campfire doughnut holes are a camping breakfast or dessert treat that you can make in your Dutch oven over the campfire or camp stove. They're dusted with cinnamon sugar after frying and are perfect alongside a hot cup of coffee or salted caramel hot chocolate.

    A bowl full of cinnamon sugar doughnut holes with a half eaten one on the side.

    I'm calling these cinnamon sugar spiced doughnut holes dessert, but let's be real for a second. Is there anything better alongside your morning coffee than a warm sugary doughnut hole? I think not (except for mayyyybe a few bites of Dutch oven monkey bread). So, that also makes them a perfectly acceptable breakfast in my mind. I mean, it's camping, right?

    Why This Recipe is Great for Camping

    • You can make the dough ahead of time, so all you have to do is fry it at camp. No yeast or rising time required!
    • They're a great treat for breakfast or dessert. Serve them with make-ahead breakfast burritos for a heartier meal.

    Ingredients and Substitutions

    Ingredients for campfire doughnut holes--butter, cinnamon, milk, sugar, flour, and baking powder.
    • Flour--Regular all-purpose flour works best here.
    • Milk--Any type of milk will work here, including non-dairy.
    • Baking powder--These doughnuts don't use yeast, so the baking powder helps to create an airy texture.
    • Cinnamon--This is used in both the dough and cinnamon sugar to add a little extra spice.
    • Oil (not pictured)--Use a neutral oil for frying that has a high smoke point, such as vegetable, peanut, or sunflower oil. The amount you'll need will depend on the size of your Dutch oven.

    How to Make Dutch Oven Doughnut Holes

    Flour, sugar, and cinnamon being whisked together in a bowl.
    Butter being worked into dough with a pastry cutter.
    1. Whisk the flour, sugar, baking powder, cinnamon, and salt together in a large bowl.
    2. Use a pastry cutter, two knives, or your fingers to work the butter into the flour mixture until it's the size of small peas.
    Milk being mixed into doughnut batter.
    A ball of doughnut dough in a bowl.
    1. Pour in the milk and mix until everything is just combined.
    2. Gently knead the dough until it comes together in a ball. It should be just sticky enough to hold together.
    Four doughnut holes frying in a pot of oil over a campfire.
    Two doughnut holes in a bag of cinnamon sugar.
    1. Heat the oil in a small Dutch oven over the campfire, camp stove, or stovetop to 350°F. Pinch off golf ball-sized rounds of dough and drop them into the oil. Fry until golden brow.
    2. Combine the cinnamon and sugar together in a resealable bag or bowl. Remove the doughnuts from the hot oil, drain on paper towels briefly, then shake or roll in the cinnamon sugar to coat.

    FAQs

    Can I make this in advance?

    Yes. You can prepare the dough and shape it into a ball up to 2 days before cooking the doughnut bites. Wrap it in plastic, pop it into a resealable plastic bag, and stash in the fridge or your cooler until you're ready to fry.

    Can I use a different coating?

    Definitely. Try dipping the doughnut balls into melted chocolate (or use them for a campfire chocolate fondue!), roll them in powdered sugar, or mix powdered sugar with a little milk to create a simple glaze and drizzle that over the cooked doughnuts.

    Tips and Troubleshooting

    • I prefer to use my smallest Dutch oven (about 1 quart). Using a small size will allow the oil to heat quickly, and won't require as much oil for frying as a large Dutch oven.
    • Only cook 3 or 4 doughnut holes at a time. Adding too many can cause the oil temperature to drop too much and doesn't give enough room for the doughnuts to cook evenly.
    • Let the oil return to 350°F between batches.
    • Use caution when adding and removing the balls from hot oil to avoid drips. Remember, you're cooking over open flame and oil is flammable!
    • These are best enjoyed fresh and warm.
    A doughnut hole in a bowl of cinnamon sugar.

    More Campfire Dessert Recipes You'll Love

    A strawberry being dipped into chocolate fondue.
    Campfire Chocolate Fondue
    An open foil packet pear crisp with pears in the background.
    Foil Packet Pear Crisp

    Tried This Recipe?

    If you've tried this recipe, please leave a comment below. Follow me on Instagram, Facebook, or Pinterest for more great camping and grilling recipes.

    Recipe

    A bowl full of cinnamon sugar doughnut holes with a half eaten one on the side.

    Campfire Doughnut Holes

    A woman's face.Angie Zoobkoff
    A sweet breakfast or dessert treat that's perfect for enjoying around the campfire.
    No ratings yet
    Print Recipe Pin Recipe
    Prep Time 30 minutes mins
    Cook Time 15 minutes mins
    Total Time 45 minutes mins
    Course Breakfast, Dessert, Snack
    Cuisine American
    Servings 12 balls
    Calories 189 kcal

    Equipment

    • Small Dutch oven or pot (1 to 2 quarts)
    • Deep-fry thermometer

    Ingredients
      

    For the dough

    • 2 cups all-purpose flour
    • 3 tablespoons granulated sugar
    • 1 tablespoon baking powder
    • 1 teaspoon salt
    • ½ teaspoon ground cinnamon
    • 5 tablespoons cold unsalted butter cut into small pieces
    • ¾ cup milk

    For the cinnamon sugar

    • ¼ cup granulated sugar
    • 1 teaspoon ground cinnamon

    Instructions
     

    • In a large bowl, whisk the flour, sugar, baking powder, salt, and cinnamon together.
    • Add the butter and use a pastry cutter, two knives, or your fingers to work in the butter until it's the size of small peas.
    • Pour in the milk and stir until everything is combined.
    • Gently knead the dough until it comes together. It should be just sticky enough to hold together. Cover and refrigerate until you're ready to fry.
    • If cooking over a campfire, prepare a hot fire. Pour enough oil into a small Dutch oven or pot to reach a depth of 2 inches. Attach a deep-fry thermometer to the side of the pot.
    • Set it over the hot fire, or on a camp stove or stovetop over high, and heat to a temperature of 350°F.
    • Pinch off rounds of dough and shape them into golf ball-sized balls. Work with the dough just long enough to create a ball; don't overwork it or your doughnut will be tough.
    • Working with 3 or 4 at a time, add them to the oil and cook until golden brown all over, 3 to 3 ½ minutes. Check one after the first batch to determine the optimal cooking time for your dough. Use a slotted spoon or spider to carefully remove the doughnuts from the hot oil and transfer them to paper towels to drain.
    • Repeat with the remaining dough, letting your oil return to temperature between batches.

    Make the cinnamon sugar

    • While the doughnuts are cooking, combine the sugar and cinnamon in a resealable bag or small bowl.
    • Working with a couple at a time, add the warm cooked doughnuts to the cinnamon sugar and shake or roll to coat.
    • Serve warm.

    Notes

    • I prefer to use my smallest Dutch oven (about 1 quart). Using a small size will allow the oil to heat quickly, and won't require as much oil for frying as a large Dutch oven.
    • Only cook 3 or 4 doughnut holes at a time. Adding too many can cause the oil temperature to drop too much and doesn't give enough room for the doughnuts to cook evenly.
    • Let the oil return to 350°F between batches.
    • Use caution when adding and removing the balls from hot oil to avoid drips. Remember, you're cooking over open flame and oil is flammable!
    • These are best enjoyed fresh and warm.

    Nutrition

    Serving: 1 doughnut holeCalories: 189kcalCarbohydrates: 26gProtein: 3gFat: 9gCholesterol: 14mgFiber: 1gSugar: 9g
    Keyword campfire cooking, camping desserts, camping snacks, homemade doughnut holes
    Tried this recipe?Let us know how it was!

    November 22, 2024 Camping

    Turkey Cranberry Sliders

    These turkey cranberry sliders are an easy camping lunch, dinner, or snack made with cooked turkey, melted Brie, and cranberry relish. If you're enjoying the great outdoors over Thanksgiving or Christmas, they're a great way to use up your holiday leftovers!

    Three turkey cranberry sliders on a wooden board.

    Not only are these mini sandwiches a great way to use up Thanksgiving or holiday leftovers, they are satisfying, endlessly customizable, and require minimal effort or cleanup. Sounds like a perfect meal to me!

    Why This Recipe is Great for Camping

    • You can prepare them in advance before heading out on your trip.
    • They can be cooked over the campfire and there are no dishes to clean up!
    • They make a great camping snack, lunch, or dinner.

    Ingredients and Substitutions

    Ingredients for turkey cranberry sliders--slider rolls, butter, Brie, turkey, and cranberry relish.
    • Slider rolls--For best results use a soft slider roll, like King's. I prefer the more savory King's butter rolls over the Hawaiian ones, but either will work here. To slice them horizontally, use a serrated knife and gently cut through the entire slab of rolls at once, keeping the knife level and parallel to your surface as you cut. Don't separate the rolls before cutting. They are easiest to assemble as one slab.
    • Turkey--This is an excellent use for your sliced or shredded leftover grilled turkey. You can substitute chicken if you don't have turkey on hand.
    • Brie--I like to trim away some of the rind before slicing, but it's not required. This creamy cheese is excellent with cranberry and turkey, but you can substitute another soft cheese, like Camembert.
    • Cranberry relish--The heat from my homemade spicy cranberry relish plays well against the richness of the cheese, but if you prefer a milder relish, you can use store-bought or swap in cranberry sauce instead.

    How to Make Campfire Turkey Sliders

    Slider buns topped with turkey, sliced Brie, and cranberry relish.
    A tray of assembled turkey cranberry sliders.
    1. Place the bottom half of the slider rolls in a foil tray. Top with turkey, sliced Brie, and cranberry relish.
    2. Place the top half of the rolls on top of the relish.
    A person brushing butter onto turkey cranberry sliders.
    A covered foil pan over a campfire.
    1. Brush the tops of the rolls with melted butter.
    2. Cover with foil and cook over hot coals until the bottoms of the buns are toasted and the cheese is melted, 20 to 25 minutes.

    FAQs

    Can I make this in advance?

    If you want to get ahead, assemble the sliders and wrap them with foil up to 1 day before cooking. Store them in your cooler or fridge until you're ready to cook.

    What should I serve with these?

    They make a great snack all on their own, but if you want to enjoy them as a meal, add in some potato chips for an easy camping lunch, or serve it with camping pasta salad or marinated vegetable salad to make a more substantial dinner.

    Can I make these in the oven?

    Yes. Assemble them as directed, then slide the covered foil pan (or you can use a baking dish) into a 350°F oven and heat until the cheese is melted and everything is hot, 15 to 20 minutes.

    Tips and Troubleshooting

    • Use hot coals or low flame when heating your turkey sliders. A very hot fire or high flames can cause the bottoms of the buns to burn.
    • Very cool or windy weather may result in a longer cooking time.
    • Rotate your pan on the fire every 5 minutes or so to help them heat evenly.
    • Want to make them extra saucy? Drizzle some smoked turkey gravy over the top!
    Two turkey sliders on a plate with potato chips.

    More Leftover Turkey Recipes You'll Love

    Two halves of a turkey ciabatta sandwich with tomatoes, pesto, and mozzarella, stacked on top of each other on a cutting board.
    Turkey Ciabatta Sandwich
    A turkey quesadilla cut into 4 pieces on a plate with a dish of cranberry relish and a mint sprig.
    Turkey Quesadilla

    Tried This Recipe?

    If you've tried this recipe, please leave a comment below. Follow me on Instagram, Facebook, or Pinterest for more great camping and grilling recipes.

    Recipe

    Two turkey sliders on a plate with potato chips.

    Turkey Cranberry Sliders

    A woman's face.Angie Zoobkoff
    Turkey, melted Brie, and zippy cranberry relish, sandwiched between warm toasted rolls, make these Thanksgiving-inspired sliders your new favorite easy camping meal.
    No ratings yet
    Print Recipe Pin Recipe
    Prep Time 10 minutes mins
    Cook Time 25 minutes mins
    Total Time 35 minutes mins
    Course Main Course, Snack
    Cuisine American
    Servings 4 servings
    Calories 561 kcal

    Equipment

    • Disposable foil tray (8-by-12-inches or 9-by-13-inches)

    Ingredients
      

    • Cooking spray
    • 1 package slider rolls, such as King's sliced horizontally
    • 2 cups shredded or sliced cooked turkey
    • 1 small wheel Brie (6 oz) thinly sliced
    • ½ cup cranberry relish
    • 1 tablespoon butter melted

    Instructions
     

    • Prepare a campfire and let it burn down to hot coals or low flame.
    • Coat the bottom of a disposable foil pan with cooking spray.
    • Place the bottom half of the rolls in the pan. Top with turkey, then arrange the sliced Brie in a single layer on top of the turkey. Spread the cranberry relish over the Brie.
    • Place the top half of the rolls on top and brush with melted butter.
    • Cover the pan tightly with foil.
    • Cook over hot coal, rotating occasionally, until the bottoms of the buns are toasted, the cheese is melted, and everything is warm, 20 to 25 minutes.
    • Use a spatula or knife to cut between the rolls to create individual sliders. Serve warm.

    Notes

    • Get ahead--Assemble the sliders up to 1 day before cooking.
    • Don't burn it--Use hot coals or low flame when heating your turkey sliders. A very hot fire or high flames can cause the bottoms of the buns to burn.
    • Cooking time--Very cool or windy weather may result in a longer cooking time.

    Nutrition

    Serving: 3slidersCalories: 561kcalCarbohydrates: 51gProtein: 39gFat: 22gCholesterol: 103mgSodium: 801mgFiber: 2g
    Keyword sandwiches, thanksgiving camping, thanksgiving leftovers
    Tried this recipe?Let us know how it was!

    November 20, 2024 Collections

    9 Outstanding Holiday Recipes to Make on the Grill

    If you're making a big holiday meal, chances are, your oven is going to be crammed. Why not take some of the cooking outside and make use of your grill to create an amazing holiday meal? These 9 outstanding holiday recipes include impressive main dishes, sides, and desserts that can be cooked on your grill or smoker, freeing up some precious oven space.

    1
    A carved grilled turkey on a wooden board with gravy and salad nearby.
    Grilled Spatchcock Turkey
    This grilled turkey recipe uses a simple apple cider brine to infuse the bird with plenty of flavor and keep it juicy while grilling.
    Get the recipe: Grilled Turkey
    2
    Recipe and photo credit: What's Smoking
    Grilled Prime Rib Roast
    When it comes to indulgence and culinary excellence, few dishes can rival the succulent tenderness of a perfectly grilled prime rib roast. Whether you’re celebrating the Christmas or New Year’s holiday with friends and family or simply craving a mouthwatering feast, this classic cut of beef never fails to impress.
    Get the recipe: Grilled Prime Rib Roast
    3
    A grilled stuffed pork tenderloin on a platter with oranges, parsley, and cranberries.
    Stuffed Pork Tenderloin with Orange Butter Sauce
    A panko, rosemary, and cranberry stuffing, along with a buttery citrus sauce elevates your everyday grilled pork tenderloin into a holiday-worthy meal.
    Get the recipe: Stuffed Pork Tenderloin
    4
    Recipe and photo credit: Carne Diem
    Twice Smoked Spiral Ham with Cajun Fruit Glaze
    This Southern inspired, double smoked spiral ham is glazed with a sweet and slightly spicy habanero-peach glaze and is the perfect holiday ham recipe for your smoker.
    Get the recipe: Twice Smoked Spiral Ham
    5
    A cast iron skillet filled with sausage stuffing, garnished with parsley.
    Skillet Sausage Stuffing
    Yes, you can make stuffing on the grill. It has all the classic Thanksgiving flavors, but requires none of your oven space.
    Get the recipe: Skillet Sausage Stuffing
    6
    Green bean casserole in a cast iron skillet with fried onions on the side.
    Skillet Green Bean Casserole
    This easy green bean casserole is made in a skillet with homemade mushroom sauce, fresh green beans, and crispy fried onions. You can make it over your campfire, or on your camp stove, grill, or stovetop.
    Get the recipe: Skillet Green Bean Casserole
    7
    A cast iron skillet filled with scalloped potatoes with sprigs of thyme on top.
    Scalloped Potatoes on the Grill
    These grilled scalloped potatoes are creamy and tender, with slightly smoky caramelized edges. They're an easy side dish with just 5 ingredients.
    Get the recipe: Scalloped Potatoes on the Grill
    8
    Recipe and photo credit: Stef's Eats and Sweets
    Smoked Butterscotch Pumpkin Bars
    These smoked butterscotch pumpkin bars are moist, flavorful, and easy to make. A fun treat to make on the pellet grill.
    Get the recipe: Smoked Butterscotch Pumpkin Bars
    9
    A cast iron skillet. filled with apple crisp and two scoops of ice cream on top.
    Skillet Bourbon Apple Crisp
    This cast-iron skillet apple crisp is made on the grill with sweetly spiced apples and the crispiest oat topping imaginable. An ample splash of bourbon makes it extra special.
    Get the recipe: Skillet Bourbon Apple Crisp

    November 18, 2024 Grilling

    Stuffed Pork Tenderloin with Orange Butter Sauce

    This stuffed pork tenderloin with orange butter sauce is an elegant holiday meal that can be prepared entirely on your grill. A panko, rosemary, and cranberry stuffing elevates this simple main dish to something truly special.

    A grilled stuffed pork tenderloin on a platter with oranges, parsley, and cranberries.

    The star of big holiday meals is often a grilled turkey or Dutch oven spiral ham, but when you're having a small gathering, it's not always practical (or enjoyable) to cook a large piece of meat. This simple grilled stuffed pork tenderloin feels festive, thanks to a cranberry stuffing and buttery orange sauce, but is simple enough to make any time of the year and is the perfect size for feeding just a few.

    Ingredients and Substitutions

    Ingredients for stuffed pork tenderloin--pork, panko, oil, Dijon, rosemary, butter, orange, and dried cranberries.
    • Pork tenderloin--Look for one that is about 1 pound or slightly larger. Avoid very small tenderloins, as they will be too small to stuff.
    • Orange--Use 2 large, juicy oranges, like navel. You should get about ¼ cup of juice from each orange. If they're a little stingy, squeeze in an extra orange half or add a splash of bottled orange juice.
    • Panko--These are Japanese-style bread crumbs and are available in most large supermarkets.
    • Dried cranberries--You can use sweetened or unsweetened dried cranberries for the stuffing, depending on your preference or what you have on hand.

    How to Make Grilled Stuffed Pork Tenderloin

    A bowl of panko and chopped dried cranberries.
    A pork tenderloin sliced open with panko stuffing inside.
    1. Mix the panko, dried cranberries, rosemary, and olive oil in a small bowl. Season with salt and pepper.
    2. Cut a deep slit the length of the pork, and spoon the panko mixture into the opening.
    A tied stuffed pork tenderloin on a baking sheet.
    A stuffed pork tenderloin on the grill.
    1. Tie the pork tenderloin in several places.
    2. Grill the pork over indirect heat until it reaches an internal temperature of 145°F.
    Dijon mustard being whisked into an orange sauce in a small skillet on the grill.
    Butter being whisked into an orange sauce.
    1. Heat the orange juice over direct heat on the grill or side burner. Whisk in the Dijon mustard.
    2. Remove from the heat and whisk in the butter, one cube and a time. Season with salt and pepper.

    FAQs

    Can I make it in my oven?

    Yes. To cook it inside, sear the pork tenderloin on 3 sides in a cast iron skillet, with a little bit of oil, then transfer the skillet with the pork in it to a 375°F oven and cook until it reaches an internal temperature of 145°F.

    What should I serve with this?

    Pair this simple holiday meal with a few easy side dishes, such as skillet green bean casserole or Brussels sprouts salad with cranberries.

    Tips and Troubleshooting

    • The recipe can be doubled or tripled, as long as your grill has ample space.
    • Check the internal temperature of the pork in several places to ensure it is fully cooked. The stuffing and meat must both reach 145°F.
    • To ensure that your butter sauce is smooth and emulsified, whisk the butter in one piece at a time, waiting to make sure each piece is melted before adding another.
    • Store leftover pork in a sealed container in the fridge for up to 3 days.
    • To reheat, place leftover pork in a baking dish, cover with foil, and heat in a 300°F oven until warmed through.
    Three slices of stuffed pork tenderloin on a plate with parsley and cranberries.

    More Pork Recipes You'll Love

    A platter of seared pork chops topped with apples and onions.
    Blackstone Pork Chops with Apples and Onions
    A partially sliced grilled bacon-wrapped pork tenderloin on a wooden cutting board with a dish of green beans on the side.
    Bacon-Wrapped Pork Tenderloin

    Tried This Recipe?

    If you've tried this recipe, please leave a comment below. Follow me on Instagram, Facebook, or Pinterest for more great camping and grilling recipes.

    Recipe

    A grilled stuffed pork tenderloin on a platter with oranges, parsley, and cranberries.

    Stuffed Pork Tenderloin with Orange Butter Sauce

    A woman's face.Angie Zoobkoff
    A panko, rosemary, and cranberry stuffing, along with a buttery citrus sauce elevates your everyday grilled pork tenderloin into a holiday-worthy meal.
    No ratings yet
    Print Recipe Pin Recipe
    Prep Time 20 minutes mins
    Cook Time 40 minutes mins
    Total Time 1 hour hr
    Course Main Course
    Cuisine American
    Servings 3 servings
    Calories 403 kcal

    Equipment

    • Butcher's twine

    Ingredients
      

    • ⅓ cup panko
    • 2 tablespoons chopped dried cranberries
    • 1 tablespoon olive oil
    • 1 teaspoon chopped fresh rosemary
    • Salt and freshly ground black pepper
    • 1 pork tenderloin (1 to 1 ¼ pounds)
    • ½ cup freshly squeezed orange juice from 2 oranges
    • 1 tablespoon Dijon mustard
    • 2 tablespoons butter cut into small cubes

    Instructions
     

    • Preheat the grill for indirect medium heat (~375°F).
    • In a small bowl, mix the panko, cranberries, olive oil, and rosemary. Season with salt and pepper.
    • Season the pork with salt and pepper. Cut a slit about 2 inches deep the length of the tenderloin. You want to cut a slit deep enough to hold the stuffing, but not all the way through the meat.
    • Spoon the stuffing into the slit, then tie the pork at 2 to 3 inch intervals using butcher's twine.
    • Brown the pork over direct heat on all sides except the side filled with the stuffing, about 2 minutes per side.
    • Transfer to indirect heat and cook until the pork and stuffing reaches an internal temperature of 145°F, 23 to 25 minutes longer. Transfer to a cutting board and let it rest for 5 to 10 minutes.
    • While the pork is resting, pour the orange juice into a small cast iron skillet. Set it over direct heat on the grill (or on a side burner or stovetop). Heat to a simmer, then whisk in the Dijon mustard until smooth.
    • Remove from the heat and whisk in the butter, one cube at a time, letting each one melt before adding the next one. Whisk until the sauce is smooth and emulsified. Season to taste with salt and pepper.
    • Slice the pork into 1-inch thick medallions and serve with the sauce.

    Notes

    • Scaling--The recipe can be doubled or tripled, as long as your grill has ample space.
    • Internal temperature--Check the internal temperature of the pork in several places to ensure it is fully cooked. The stuffing and meat must both reach 145°F.
    • Storage--Store leftover pork in a sealed container in the fridge for up to 3 days.
    • Reheating--To reheat, place leftover pork in a baking dish, cover with foil, and heat in a 300°F oven until warmed through.

    Nutrition

    Serving: 1portionCalories: 403kcalCarbohydrates: 15gProtein: 43gFat: 19gCholesterol: 134mgFiber: 1gSugar: 6g
    Keyword grilled pork tenderloin, holiday main course, stuffed pork tenderloin
    Tried this recipe?Let us know how it was!

    November 16, 2024 Collections

    12 Warm Winter Drinks to Keep You Toasty

    Looking for some festive sippers to warm you up after your outdoor holiday adventures, or something cozy to indulge in around the fire? Try one of these 12 warm winter drinks that include non-alcoholic hot beverages that are suitable for any time of the day as well as a few celebratory tipples.

    1
    Recipe and photo credit: Living Chirpy
    Gingerbread Latte
    Curl up on a cold day with this delicious gingerbread latte. There is nothing more festive and reminiscent of the great holiday season than this sweet drink, best served warm. Best of all, you only need 5 easy ingredients, milk, cinnamon, ginger, molasses, and of course, espresso.
    Get the recipe: Gingerbread Latte
    2
    Caramel being drizzled over a mug of hot chocolate and whipped cream.
    Salted Caramel Hot Chocolate
    A spoonful of salted caramel takes your favorite cool-weather drink to the next level.
    Get the recipe: Salted Caramel Hot Chocolate
    3
    Recipe and photo credit: The Forked Spoon
    Mulled Wine
    Mulled wine is a traditional holiday beverage made with red wine, brandy, and mulling spices like cloves, star anise, and cinnamon. It’s delicious, cozy, and guaranteed to warm you from the inside out.
    Get the recipe: Mulled Wine
    4
    Recipe and photo credit: Muy Bueno
    Café de Olla (Mexican Spiced Coffee)
    Try this Café de Olla recipe for a traditional Mexican coffee. Lightly sweetened and scented with spices, it is a great way to start the day!
    Get the recipe: Mexican Spiced Coffee
    5
    Recipe and photo credit: Emily Leary
    Bailey's Hot Chocolate
    Cold weather is the perfect excuse to stay inside and whip up this velvety, rich Bailey's hot chocolate recipe.
    Get the recipe: Bailey's Hot Chocolate
    6
    Two tall glass mugs filled with hot apple cider cocktail with a cinnamon stick resting on top.
    Hot Apple Cider Cocktail
    This combination of sweet mulled cider and spiced rum is the perfect way to stay warm on those cool autumn evenings.
    Get the recipe: Hot Apple Cider Cocktail
    7
    Recipe and photo credit: Style and Grace
    London Fog
    Made with Earl Grey tea, honey, vanilla and lots of frothy milk, a London Fog is a warming treat on a cold afternoon!
    Get the recipe: London Fog
    8
    Recipe and photo credit: Little Sunny Kitchen
    Peppermint Hot Chocolate
    Peppermint hot chocolate is a decadent homemade hot chocolate pumped up with festive peppermint flavor and an optional shot of peppermint schnapps.
    Get the recipe: Peppermint Hot Chocolate
    9
    Recipe and photo credit: Coley Cooks
    Hot Buttered Rum
    This hot buttered rum is the classic winter cocktail recipe you need to have! It’s warm, sweet and totally decadent.
    Get the recipe: Hot Buttered Rum
    10
    Spiced Bourbon Black Tea Hot Toddy
    Recipe and photo credit: Little Black Skillet
    Spiced Bourbon Black Tea Hot Toddy
    Black tea, bourbon, cinnamon, bright citrus, zesty ginger, and soothing honey come together in this classic bourbon tea hot toddy recipe.
    Get the recipe: Bourbon Tea Hot Toddy
    11
    Two mugs of dark hot chocolate with cinnamon sticks in them, sitting in the snow.
    Dark Hot Chocolate
    This rich and creamy dark hot chocolate, made with milk, dark chocolate, sugar, vanilla, and cinnamon is so easy to make that you'll never go back to the packaged mix.
    Get the recipe: Dark Hot Chocolate
    12
    Recipe and photo credit: Cooking with Curls
    Caribbean Coffee and Rum Cocktail
    Caribbean coffee and rum cocktail blends rich coffee with tropical spirits to deliver a drink that feels like a relaxing island vacation!
    Get the recipe: Caribbean Coffee and Rum Cocktail

    November 15, 2024 Breakfast

    Salted Caramel Hot Chocolate

    What's better than a steaming mug of creamy homemade hot chocolate? One infused with sweet salted caramel, of course! This salted caramel hot chocolate is an indulgent winter drink, perfect for skating parties, cool-weather camping trips, cozying up at home, and more.

    Caramel being drizzled over a mug of hot chocolate and whipped cream.

    So long, plain hot chocolate. The addition of a spoonful of salted caramel (and an extra drizzle on top) takes everyone's favorite cool-weather drink to the next level.

    Ingredients and Substitutions

    Ingredients for salted caramel hot chocolate--brown sugar, cream, chocolate, butter, milk, and vanilla.
    • Chocolate--You can use dark or milk chocolate for this drink, depending on your preference. Dark chocolate will give it a slightly bitter taste, and is perfect if you don't have a sweet tooth. If you prefer a creamier, sweeter version, use milk chocolate.
    • Milk--I recommend using whole milk, but reduced fat will work, too.
    • Brown sugar, cream, butter, vanilla--This is cooked together to make your caramel (technically butterscotch sauce). You'll have extra, but it's terrific spooned over ice cream, stirred into lattes, drizzled over cheesecake . . . you get the idea.

    How to Make Salted Caramel Hot Chocolate

    A person stirring a pot of bubbling caramel.
    Milk heating in a saucepan.
    1. Combine the sugar, cream, butter, vanilla, and salt in a saucepan and set over low heat. Cook, stirring constantly until thickened. Remove from the heat.
    2. Heat the milk in a small saucepan over low heat until bubbles appear on the edges of the milk. Don't let the milk boil. Remove from the heat.
    A pot of chocolate and milk with a whisk resting inside.
    A pot of hot chocolate and a mug with caramel sauce in the bottom.
    1. Stir in the chopped chocolate and whisk until smooth.
    2. Pour 2 tablespoons caramel into the bottom of each mug. Pour the warm hot chocolate over and stir well. Top with whipped cream and extra caramel sauce.

    FAQs

    Can I make this in advance?

    If you want to get ahead, prepare the salted caramel sauce up to 1 week before using. Store it in a sealed jar or container in the fridge. Warm it over low heat before pouring into your mug.

    Can I freeze the salted caramel sauce?

    Yes! Freeze it in an airtight container for up to 3 months. Thaw in the refrigerator overnight before reheating.

    Tips and Troubleshooting

    • Extra caramel sauce is terrific for drizzling over ice cream, or use it to make caramel apple dip.
    • Chop your chocolate very finely so that it melts quickly and easily.
    • This recipe is suitable for gluten-free diets.
    A mug of hot chocolate with caramel drizzled over the top and two cookies on the side.

    More Hot Drink Recipes You'll Love

    Two mugs of dark hot chocolate with cinnamon sticks in them, sitting in the snow.
    Dark Hot Chocolate
    Two tall glass mugs filled with hot apple cider cocktail with a cinnamon stick resting on top.
    Hot Apple Cider Cocktail

    Tried This Recipe?

    If you've tried this recipe, please leave a comment below. Follow me on Instagram, Facebook, or Pinterest for more great camping and grilling recipes.

    Recipe

    Caramel being drizzled over a mug of hot chocolate and whipped cream.

    Salted Caramel Hot Chocolate

    A woman's face.Angie Zoobkoff
    A spoonful of salted caramel takes your favorite cool-weather drink to the next level.
    No ratings yet
    Print Recipe Pin Recipe
    Prep Time 10 minutes mins
    Cook Time 15 minutes mins
    Total Time 25 minutes mins
    Course Drinks
    Cuisine American
    Servings 2 drinks
    Calories 614 kcal

    Ingredients
      

    For the salted caramel sauce

    • ½ cup light brown sugar
    • ¼ cup whipping cream
    • 2 tablespoons unsalted butter
    • ½ teaspoon vanilla
    • ¼ teaspoon salt

    For the hot chocolate

    • 2 cups milk preferably whole
    • 4 ounces dark or milk chocolate finely chopped
    • Whipped topping for serving (optional)

    Instructions
     

    Make the salted caramel sauce

    • Combine the sugar, whipping cream, butter, vanilla, and salt in a medium saucepan.
    • Bring to a simmer and cook, stirring constantly, until the sauce begins to thicken and coats the back of a spoon, about 5 minutes. Remove from the heat. The sauce will thicken more as it cools.

    Make the hot chocolate

    • In a small saucepan over low heat, warm the milk until hot but not boiling, stirring occasionally. You should see steam coming off the top and small bubbles forming around the edges of the pot.
    • Remove from the heat and immediately whisk in the chopped chocolate until melted and smooth.
    • Pour 2 tablespoons of caramel sauce into the bottom of each mug. Pour the hot chocolate over the caramel and stir well to combine.
    • Serve immediately, topped with whipped topping, if using, and an extra drizzle of salted caramel.

    Notes

    • Prepare the caramel sauce up to 1 week before using. Store it in the fridge in a sealed container.
    • Extra caramel sauce is terrific for drizzling over ice cream, or use it to make caramel apple dip.
    • Chop your chocolate very finely so that it melts quickly and easily.
    • This recipe is suitable for gluten-free diets.

    Nutrition

    Serving: 1mugCalories: 614kcalCarbohydrates: 70gProtein: 13gFat: 33gCholesterol: 61mgFiber: 1gSugar: 69g
    Keyword drinks for camping, hot chocolate, hot drinks, winter holiday drinks
    Tried this recipe?Let us know how it was!

    November 13, 2024 Collections

    21 Stunning Ways to Use Cranberries

    I'm a little smitten with cranberries because they work beautifully in both sweet and savory dishes. From stunning cranberry cake, to indulgent cheese balls and baked brie, to satisfying salads and main courses, these 21 stunning ways to use cranberries will have you swooning over them, too.

    1
    Recipe and photo credit: Maple Vine Kitchen
    Cranberry Tartlets with Whipped Feta
    Enjoy these cranberry tartlets with whipped feta—a perfect combo of creamy, tart, and festive flavors in an elegant, bite-sized treat for any celebration.
    Get the recipe: Cranberry Tartlets with Whipped Feta
    2
    A bowl of cranberry relish garnished with a mint sprig.
    Spicy Cranberry Relish
    Move over canned cranberry sauce. This bright, fresh, zippy relish is exactly what your holiday meal needs.
    Get the recipe: Spicy Cranberry Relish
    3
    Recipe and photo credit: Coffee Copycat
    Cran-Merry Orange Refresher (Starbucks Copycat)
    Add a sprinkle of holiday joy to your day with my DIY Starbucks Cran-Merry Refresher recipe. Cranberry and blood orange deliciousness!
    Get the recipe: Cran-Merry Orange Refresher
    4
    Recipe and photo credit: Cinnamon and Sage Co.
    Cranberry Chicken
    Add some color to tonight’s dinner with this simple, tasty cranberry chicken. This tangy, creamy chicken has only a few ingredients and it makes a perfect holiday or weeknight main course.
    Get the recipe: Cranberry Chicken
    5
    A bowl of Brussels sprouts salad with cranberries and silver tongs on the side.
    Brussels Sprouts Salad with Cranberries
    Crisp raw Brussels sprouts, crunchy apple, chewy cranberries, and a tart vinaigrette combine to make an unforgettable salad.
    Get the recipe: Brussels Sprouts Salad with Cranberries
    6
    Recipe and photo credit: Foxes Love Lemons
    Cranberry Stuffing
    Dried cranberries are the seasonal ingredient you didn’t know your stuffing was missing. Try buttery, herby cranberry stuffing this year!
    Get the recipe: Cranberry Stuffing
    7
    Recipe and photo credit: Chenée Today
    Slice and Bake Christmas Cookies with Cranberries
    Simple and easy slice and bake Christmas cookies! Buttery shortbread cookies filled with dried cranberries and coated in white chocolate!
    Get the recipe: Cranberry Christmas Cookies
    8
    Recipe and photo credit: In the Kitch
    Cranberry Ginger Moscow Mule
    This festive cranberry ginger Moscow mule is a blend of red cranberry juice, green lime, some golden ginger beer and vodka for a little kick!
    Get the recipe: Cranberry Ginger Moscow Mule
    9
    Recipe and photo credit: xoxo Bella
    Spiced Cranberry Orange Jam
    The sweet tart flavor of cranberries and oranges pair with the sweetness of sugar and the earthy warmth of cinnamon to make this gorgeous Christmas jam recipe.
    Get the recipe: Spiced Cranberry Orange Jam
    10
    Two plates of cranberry cobbler on a wooden table with fir branches nearby.
    Dutch Oven Cranberry Cobbler
    This festive Dutch oven cobbler has tender spiced cranberries topped with sweet biscuit dough. It's perfect for your holiday camping trip, or any time you're craving an easy dessert.
    Get the recipe: Dutch Oven Cranberry Cobbler
    11
    Recipe and photo credit: A Dash of Megnut
    Sugared Cranberries
    Making sugared cranberries for the holiday is so simple with just two ingredients and look so impressive, too! They are beautiful as toppers on desserts, to dress up a cocktail or just for a festive snack! Naturally gluten-free and dairy-free, everyone can enjoy these sweet and tart sugared cranberries.
    Get the recipe: Sugared Cranberries
    12
    Recipe and photo credit: Homemade in the Kitchen
    Cranberry Baked Brie
    Cranberry baked brie you can make in 10 minutes and uses leftover cranberry sauce. Make it for entertaining Thanksgiving and Christmas guests.
    Get the recipe: Cranberry Baked Brie
    13
    Recipe and photo credit: I Heart Eating
    Cranberry Orange Pound Cake
    This cranberry orange pound cake is a moist cake with a cranberry filling and topped with an orange glaze. Ultimate holiday dessert!
    Get the recipe: Cranberry Orange Pound Cake
    14
    Two glasses of cranberry pomegranate cocktail with orange twists on the rims.
    Cranberry Pomegranate Cocktail
    This festive ruby-hued cocktail is made with sweet-tart cranberry syrup, pomegranate juice, orange liqueur, and sparkling wine. Perfect for celebrations all year round.
    Get the recipe: Cranberry Pomegranate Cocktail
    15
    Recipe and photo credit: Recipes From a Pantry
    Cranberry Pecan Cheese Ball
    This irresistible cranberry pecan cheese ball is quick, easy and bursting with flavor. It is perfect for serving a crowd.
    Get the recipe: Cranberry Pecan Cheese Ball
    16
    Cranberry Turkey Sliders
    Recipe and photo credit: Quiche My Grits
    Cranberry Turkey Sliders
    Cranberry turkey sliders are a great way to use holiday leftovers the next day! Simply layer leftover turkey, cheese and cranberry sauce on sweet Hawaiian rolls, then top with poppyseed butter and bake until golden brown.
    Get the recipe: Cranberry Turkey Sliders
    17
    Recipe and photo credit: Rebecca Taig
    Cranberry Bliss Bars
    These Starbucks-inspired cranberry bliss bars are made with cranberry white chocolate blondies, cream cheese frosting, and are topped with cranberries and white chocolate drizzle!
    Get the recipe: Cranberry Bliss Bars
    18
    Recipe and photo credit: Dish in the Kitchen
    Cranberry Pomegranate Christmas Trifle
    Serve up individual servings of this no fuss, no bake cranberry pomegranate Christmas trifle at your next holiday gathering.
    Get the recipe: Cranberry Pomegranate Christmas Trifle
    19
    Recipe and photo credit: Scoops & Savor
    Cranberry Orange Gelato
    This beautiful, vibrant cranberry orange gelato is made with easy cranberry sauce you make in minutes. Then, we will mix the sweet, tangy cranberry sauce with a quick gelato sweet cream base and churn in the ice cream machine. The result is a festive, silky, and refreshing gelato you can’t resist!
    Get the recipe: Cranberry Orange Gelato
    20
    Recipe and photo credit: Happy Foods Tube
    Cranberry Panna Cotta
    A simple cranberry panna cotta served in individual glasses and topped with cranberry coulis is a tasty holiday dessert you must try!
    Recipe and photo credit: Cranberry Panna Cotta
    21
    Recipe and photo credit: Baking Capture
    Cranberry Cake
    This cranberry cake is pretty and delicious! This layer cake features moist vanilla cakes, a homemade cranberry filling, and an ermine buttercream.
    Get the recipe: Cranberry Cake

    November 11, 2024 Everyday Staples

    Spicy Cranberry Relish

    Move over canned cranberry sauce. This spicy cranberry relish is exactly what your holiday dinner needs. Pair it with your Dutch oven turkey breast or grilled spatchcock turkey for a perfect meal.

    A bowl of cranberry relish garnished with a mint sprig.

    If canned cranberry sauce has been a staple on your holiday table for ever, it may be time to spice things up. This easy cranberry relish comes together almost as quickly as you can open a can, and is a bright, fresh accompaniment to your meal. One bite, and you may never go back to canned.

    Why You'll Love This Recipe

    • You can make it in advance, so it's one less thing you have to do on the day of your big holiday meal.
    • It requires only 10 minutes of effort to make.

    Ingredients and Substitutions

    Ingredients for cranberry relish--cranberries, jalapeno, lime, and agave syrup.
    • Cranberries--You can use fresh or frozen cranberries for this sauce. If frozen, let them thaw for about 15 minutes before processing. Got extra cranberries? Make one of these amazing cranberry recipes.
    • Lime--You'll be using the zest and juice of 1 lime for this recipe. You should get about 2 tablespoons of juice and 2 teaspoons of zest. If your lime is a little stingy, taste the finished relish and squeeze in an extra ½ lime, if needed.
    • Agave nectar--I use agave here because it dissolves well into the sauce. You could also use honey.
    • Jalapeño--If you prefer a milder relish, remove the seeds and white membrane from inside the pepper before blitzing it.

    How to Make Cranberry Relish

    Cranberries, jalapeno, and lime in a food processor.
    Chopped cranberry relish in a food processor.
    1. Combine the cranberries, jalapeño, lime juice and zest, and agave syrup in a food processor.
    2. Pulse until finely chopped, stopping and scraping down the sides a couple times to make sure everything is uniform.

    FAQs

    Can I make this in advance?

    Make the spicy relish up to 5 days before serving. Store it in an airtight container in the fridge.

    Can you freeze cranberry relish?

    Absolutely. Spoon the relish into a freezer safe container or resealable bag and store in the freezer for up to 2 months. Thaw in the fridge before serving.

    Tips and Troubleshooting

    • Give the relish a good stir before serving to reincorporate any juices that have settled at the bottom.
    • Serve extra relish alongside turkey quesadillas for an easy way to use up leftovers.
    • This recipe is suitable for gluten-free, dairy-free, and vegan diets.

    More Cranberry Recipes You'll Love

    A glass bottle filled with cranberry simple syrup.
    Cranberry Simple Syrup
    A serving of cranberry cobbler on a white plate.
    Dutch Oven Cranberry Cobbler

    Tried This Recipe?

    If you've tried this recipe, please leave a comment below. Follow me on Instagram, Facebook, or Pinterest for more great camping and grilling recipes.

    Recipe

    A bowl of cranberry relish garnished with a mint sprig.

    Spicy Cranberry Relish

    A woman's face.Angie Zoobkoff
    Move over canned cranberry sauce. This bright, fresh, zippy relish is exactly what your holiday meal needs.
    No ratings yet
    Print Recipe Pin Recipe
    Prep Time 5 minutes mins
    Total Time 5 minutes mins
    Course Condiment
    Cuisine American
    Servings 8 servings
    Calories 68 kcal

    Ingredients
      

    • 1 bag (12 oz | 340 g) fresh or frozen cranberries
    • ⅓ cup agave syrup plus more to taste
    • 1 jalapeño coarsely chopped
    • Zest and juice of 1 lime
    • 1 big pinch kosher salt

    Instructions
     

    • Combine the cranberries, agave syrup, jalapeño, lime zest and juice, and salt in a food processor.
    • Process until everything is finely chopped, stopping to scrape the sides once or twice, 30 to 60 seconds total.
    • Scrape into a bowl. Taste and add more agave syrup, if needed. Cover and chill until you're ready to serve. The relish is best if made at least 30 minutes before serving.

    Video

    Notes

    • Stir it--Give the relish a good stir before serving to reincorporate any juices that have settled at the bottom.
    • Storage--Leftover relish can be stored in an airtight container in the fridge for up to 5 days or frozen for up to 2 months.
    • Serving ideas--Serve extra relish alongside turkey quesadillas for an easy way to use up leftovers.
    • Dietary--This recipe is suitable for gluten-free, dairy-free, and vegan diets.

    Nutrition

    Serving: 2 tbspCalories: 68kcalCarbohydrates: 16gSodium: 10mgFiber: 2gSugar: 2g
    Keyword cranberry sauce, holiday condiments, homemade relish
    Tried this recipe?Let us know how it was!

    November 9, 2024 Camping

    10 Hearty Dutch Oven Chili Recipes

    A pot of hearty Dutch oven chili is a glorious thing. It feeds plenty, is filling and satisfying, and freezes well. Here, 10 amazing chili recipes to make on repeat all winter (and camping season) long.

    1
    Two bowls of Dutch oven turkey chili with cornbread and sour cream on the side.
    Dutch Oven Turkey Chili
    Smoky, spicy, rich, and hearty, this turkey chili has everything going for it!
    Get the recipe: Dutch Oven Turkey Chili
    2
    Recipe and photo credit: Valerie's Kitchen
    Ground Beef Chili
    This homemade ground beef chili is loaded with classic flavor. It’s an easy, comforting meal that’s perfect for game day entertaining.
    Get the recipe: Ground Beef Chili
    3
    Recipe and photo credit: Spoonful of Flavor
    Three Bean Chili
    The best three bean vegetarian chili is loaded with plenty of beans and hearty vegetables. The chili simmers on the stove to allow the flavors to meld to create the perfect meatless meal!
    Get the recipe: Three Bean Chili
    4
    A Dutch oven filled with campfire chili with a metal spoon resting inside.
    Dutch Oven Campfire Chili
    This ground beef chili for camping is made in your cast iron Dutch oven over the campfire. It's hearty and satisfying and easily the best chili recipe I've ever tried.
    Get the recipe: Dutch Oven Campfire Chili
    5
    Recipe and photo credit: Grandbaby Cakes
    Brisket Chili
    My brisket chili brings the flavor! With three different kinds of chili powder, Mexican oregano and my secret ingredient (Mexican beer!). If you like tender, flavor packed chili, I got you!
    Get the recipe: Brisket Chili
    6
    Recipe and photo credit: Haute and Healthy Living
    One Pot Quinoa Chili
    One pot quinoa chili makes a delicious and healthy meal that can be made in less than 30 minutes. Perfect dinner for busy weeknights!
    Get the recipe: One Pot Quinoa Chili
    7
    Recipe and photo credit: 100 Days of Real Food
    Chicken Chili
    This hearty and delicious one-pot meal is perfect for a cold day. Made with chicken, beans, and spices, it’s sure to satisfy.
    Get the recipe: Chicken Chili
    8
    Recipe and photo credit: Organically Addison
    Beanless Chili
    This no bean chili is hearty, flavorful and savory. It is easy to make, healthy and delicious. Great for leftovers and meal prep too!
    Get the recipe: Beanless Chili
    9
    Recipe and photo credit: xoxo Bella
    Venison Chili
    Ground venison pairs up with beans, spices, vegetables, and carefully chosen seasonings to make this exquisite and unusual deer meat chili recipe.
    Get the recipe: Venison Chili
    10
    Recipe and photo credit: Casual Foodist
    Beef and Chorizo Chili
    This beef and chorizo chili is a delicious one pot meal that comes together in just 30 minutes. This easy chili recipe is perfect for weeknight dinners, potlucks, game day parties and more.
    Get the recipe: Beef and Chorizo Chili

    November 8, 2024 Dinner

    Brussels Sprouts Salad with Cranberries

    This Brussels sprouts salad with cranberries is a fresh and easy side dish that's perfect for offering at any holiday meal. The combination of crisp sprouts, crunchy apple, and sweet-tart cranberries will have everyone asking for seconds.

    A bowl of Brussels sprouts salad with cranberries and silver tongs on the side.

    In their cooked form, Brussels sprouts aren't my favorite. I tolerate them as long as they've been roasted until crispy and tossed with plenty of bacon, but they're rarely my veggie of choice. Raw Brussels sprouts, however, I love. This salad combines the crisp fresh sprouts with crunchy apple, chewy dried cranberries, and a tart vinaigrette that's easy to toss together for any occasion.

    This Brussels sprouts and cranberry salad is a nice side dish to balance out heavy holiday main courses like grilled turkey or Dutch oven ham, but it's also a great weeknight side dish. And since it's ready in just 20 minutes, it's doable any day of the week.

    Why You'll Love This Recipe

    • It's an easy, festive holiday salad that can be prepared ahead of time.
    • It's suitable for all diets, so is perfect for taking along to a potluck or small holiday gathering.

    Ingredients and Substitutions

    Ingredients for Brussels sprouts salad--apple, Brussels sprouts, dried cranberries, apple cider vinegar, mustard, and oil.
    • Brussels sprouts--Look for bright green sprouts with firm closed leaves. Cut away and discard any yellowed or wilted leaves before shredding. If you've got any extra, get out your metal skewers and thread them on and make grilled Brussels sprouts!
    • Apple--Use a good eating apple that's crunchy. I like Honeycrisp or Cosmic crisp best for this salad.
    • Dried cranberries--You can use unsweetened or sweetened, depending on your preference. Got extra? Make this easy cranberry bliss dip for dessert!
    • Vinegar--Apple cider vinegar works best here, but you can substitute white wine vinegar, if necessary.
    • Oil--Use a good quality olive oil for the dressing.

    How to Make Brussels Sprouts Salad

    A jar of dressing.
    A person pouring dressing over a bowl of Brussels sprouts salad.
    1. Whisk the dressing ingredients together in a small bowl.
    2. Combine the shredded sprouts, apple, and dried cranberries in a serving bowl. Pour the dressing over and toss to combine.

    FAQs

    Can you make this salad ahead of time?

    The salad does benefit from being prepared up to 3 hours before serving, as this will give the sprouts a little time to soften. If you want to get ahead, the dressing can be mixed and refrigerated up to 3 days before using.

    How do you shred Brussels sprouts?

    There are a couple of options. You can use a mandoline, if you have one, or slice them by hand. I find it easiest to halve them through the core, place the flat side on the cutting surface and then slice them thinly using a very sharp knife.

    Slicing the sprouts is a time-consuming task, so if you've got a houseguest that's eager to help in the kitchen, this is the perfect job!

    Tips and Troubleshooting

    • Leftover salad can be stored for up to 1 day in a sealed container in the fridge. The sprouts will soften as they sit.
    • This recipe is suitable for gluten-free, dairy-free, and vegan diets.
    A bowl of Brussels sprouts salad with silver tongs resting on top.

    More Salad Recipes You'll Love

    A bowl of cilantro lime coleslaw with lime wedges and cilantro next to it.
    Cilantro Lime Coleslaw
    A salad of potatoes and asparagus on a white platter with lemon wedges and dill on the side.
    Potato Salad with Asparagus

    Tried This Recipe?

    If you've tried this recipe, please leave a comment below. Follow me on Instagram, Facebook, or Pinterest for more great camping and grilling recipes.

    Recipe

    A bowl of Brussels sprouts salad with cranberries and silver tongs on the side.

    Brussels Sprouts Salad with Cranberries

    A woman's face.Angie Zoobkoff
    Crisp raw Brussels sprouts, crunchy apple, chewy cranberries, and a tart vinaigrette combine to make an unforgettable salad.
    No ratings yet
    Print Recipe Pin Recipe
    Prep Time 20 minutes mins
    Total Time 20 minutes mins
    Course Salad, Side Dish
    Cuisine American
    Servings 4 servings
    Calories 177 kcal

    Ingredients
      

    • 3 tablespoons olive oil
    • 2 tablespoons apple cider vinegar
    • 2 teaspoons whole grain mustard
    • Salt and freshly ground black pepper
    • 12 ounces Brussels sprouts trimmed and shredded
    • 1 medium apple chopped
    • ¼ cup dried cranberries

    Instructions
     

    • In a small bowl, whisk together the olive oil, vinegar, and mustard. Season to taste with salt and pepper.
    • In a serving bowl, toss the Brussels sprouts, apple, and cranberries together.
    • Drizzle the dressing over the salad, and toss to combine. Cover and refrigerate for at least 20 minutes and up to 3 hours before serving.

    Notes

    • Storage--Leftover salad can be stored for up to 1 day in a sealed container in the fridge. The sprouts will soften as they sit.
    • Dietary--This recipe is suitable for gluten-free, dairy-free, and vegan diets.

    Nutrition

    Serving: 1 portionCalories: 177kcalCarbohydrates: 19gProtein: 3gFat: 11gSodium: 90mgFiber: 5gSugar: 10g
    Keyword easy salad recipe, holiday side dishes
    Tried this recipe?Let us know how it was!

    November 6, 2024 Beef Recipes

    13 Best Ways to Enjoy Steak

    Given the rising cost of beef, a steak dinner is a luxury, but when cooked right, it's worth every penny. These recipes for the 13 best ways to enjoy steak offer you foolproof methods for preparing your favorite cuts of beef so that they become melt-in-your-mouth tender. Bon appétit!

    1
    Recipe and photo credit: Little Sunny Kitchen
    Perfect Pan Seared Steak
    The most delicious steak is a pan seared steak with garlic and herbs. It’s ready in minutes using this simple cooking method.
    Get the recipe: Perfect Pan Seared Steak
    2
    Six steak skewers piled on a wooden serving board.
    Grilled Striploin Steak Skewers
    These grilled steak skewers are an easy meal of tender marinated beef that cooks up quickly. No forks or knives required!
    Get the recipe: Grilled Striploin Steak Skewers
    3
    Recipe and photo credit: Cooking with Wine
    Chicken Fried Steak
    This version of chicken fried steak with ancho poblano gravy is packed full of flavor and is the ultimate Southern comforting meal!
    Get the recipe: Chicken Fried Steak
    4
    Recipe and photo credit: Maple and Mango
    Easy Steak Nachos
    If you’re a fan of nachos (who isn’t?), you won’t be able to resist these steak nachos! Have leftover steak? Slice it up and make this!
    Get the recipe: Easy Steak Nachos
    5
    A bowl filled with cubes of seared sirloin steak with parsley sprinkled on top.
    Blackstone Steak Bites
    For these buttery steak bites, sirloin steak is marinated then seared on your outdoor griddle and finished with butter to create completely irresistible morsels of juicy steak.
    Get the recipe: Blackstone Steak Bites
    6
    Recipe and photo credit: Modern Honey
    Grilled Steak Tacos
    Juicy marinated grilled steak tacos with fresh cilantro, avocado, and salsa. This is the most flavorful and tender steak tacos recipe!
    Get the recipe: Grilled Steak Tacos
    7
    Recipe and photo credit: Cooking with Lei
    Asian Steak Salad
    This delightful Asian steak salad recipe offers a perfect blend of succulent steak, fresh herbs, and a tangy dressing. It's guaranteed to have you savouring every bite.
    Get the recipe: Asian Steak Salad
    8
    A foil packet with shrimp, steak, corn, red onion and a piece of garlic bread on top.
    Surf and Turf Foil Packets
    Enjoy all your favorite steakhouse flavors cooked over the campfire or grill with these easy steak and shrimp foil packets.
    Get the recipe: Surf and Turf Foil Packets
    9
    Recipe and photo credit: Get Inspired Everyday!
    Tuscan Steak
    Easy to make and so flavorful, this Tuscan steak is made on the grill but has a stove-top option as well. It’s perfect for easy entertaining.
    Get the recipe: Tuscan Steak
    10
    Recipe and photo credit: Krumpli
    Steak Sandwich with Stilton and Caramelised Onions
    This steak and stilton sandwich is made with seared sirloin, blue cheese, and caramelized onions, served on ciabatta bread crisped up in the beef pan.
    Get the recipe: Steak Sandwich with Stilton
    11
    Recipe and photo credit: Living Chirpy
    Sheet Pan Steak Fajitas
    Looking to add a pop of color and flavor to dinner tonight? Try these incredibly tasty steak fajitas made with perfectly seasoned steak, peppers, onions, and avocados.
    Get the recipe: Sheet Pan Steak Fajitas
    12
    Recipe and photo credit: Carne Diem
    Grilled Hawaiian Ribeye Steak
    These Hawaiian style grilled steaks are marinated with soy, pineapple, garlic, ginger and rum and then topped with grilled pineapple. Give your steak a tropical twist!
    Get the recipe: Grilled Hawaiian Ribeye Steak
    13
    Recipe and photo credit: Quiche My Grits
    Beef Tenderloin Tips
    Beef tenderloin tips are so juicy and tender they melt in your mouth! You’ll love this delicious steak tips recipe that’s great for a special occasion, or on weeknights when you're craving an easy dinner.
    Get the recipe: Beef Tenderloin Tips

    November 4, 2024 Beef Recipes

    Skillet Nachos

    These grilled skillet nachos are loaded with all your favorite toppings and cooked on the grill in your cast iron skillet until toasted and cheesy. Serve them for an easy camping lunch or an epic game-day snack.

    Nachos topped with beef, cheese, avocado, tomato, and pickled peppers in a cast iron skillet.

    Nachos seem to have a magnetic quality at my house (or campsite). Whenever I yell that "nachos are ready", people magically appear, ready to dive into that pile of toasted, smothered chips. Not that I'm surprised. Loaded with beef, cheese, beans, tomatoes, and avocados, with all my favorite sauces and dips on the side, I'm right there in line with the rest of them.

    Why You'll Love This Recipe

    • You can make it entirely in your cast iron skillet and cook it on the grill.
    • You can prepare the meat ahead of time, so it comes together quickly if you're making it for a camping lunch or snack.

    Ingredients and Substitutions

    Ingredients for skillet nachos--beef, cheese, spices, refried beans, tomatoes, avocado, and oil.
    • Ground beef--I recommend using lean ground beef (85/15), which will give you a little bit of fat for flavor, but not enough to make the nachos soggy. If you use regular ground beef, drain most of the fat from the cooked beef before adding the spices.
    • Spices--I use a mixture of chili powder, cumin, garlic powder, and onion powder. I recommend using a mild chili powder. If you know that yours is hot, reduce the amount to 1 tablespoon and adjust to taste.
    • Cheddar cheese--I recommend using full-fat and to grate the cheese yourself. Pre-shredded cheese doesn't melt well.
    • Refried beans--These add a creamy element to your nachos, but if you don't enjoy them, you can omit them. If they are very thick and hard to scoop, warm them over low heat, or in the microwave in 15-second blasts to soften them.
    • Tortilla chips--You can use your favorite brand and shape. I find that the smaller round ones are easier to fit into a skillet.

    How to Make Grilled Nachos

    Ground beef browning in a skillet on a grill.
    Spiceds added to browned ground beef.
    1. Heat the oil in a skillet over medium heat on the grill or stove. Add the beef and cook, stirring frequently until browned.
    2. Stir in the spices and cook for 1 to 2 minutes. Scoop the meat into a bowl and wipe out the skillet.
    Nachos being assembled in a skillet with meat, cheese, and beans around the skillet.
    Cooked nachos in a skillet on a grill.
    1. Assemble the nachos with layers of chips, beef, refried beans, and cheese.
    2. Cook on a covered grill over indirect heat until hot and the cheese is melted.

    FAQs

    Can you reheat nachos?

    I don't recommend it. As soon as your chips come into contact with any moisture, whether from the fat in the cheese and meat, or the juices from the tomatoes, they will start to lose their crunch. Reheating won't return them to their original crispiness.

    If you don't think you'll be able to eat a full batch, scale the recipe down, or save some of the meat and make a fresh batch of nachos the next day.

    Can I make these in the oven?

    Definitely. Follow the directions, cooking your ground beef on the stovetop. Assemble the nachos and bake them in a 350°F oven until hot and the cheese is melted, about 15 minutes.

    What should I serve with this?

    The nachos are hearty enough to be a meal in themselves, but be sure to serve them with all your favorite toppings. I recommend sour cream, salsa, pickled jalapeños, and queso.

    Tips and Troubleshooting

    • To get ahead, cook the ground beef mixture up to 3 days before assembling the nachos. Make a double batch and use it for burritos or walking tacos. Want to make a smaller batch? Use this recipe for foil pack nachos and create individual servings.
    • This recipe is suitable for gluten-free diets.
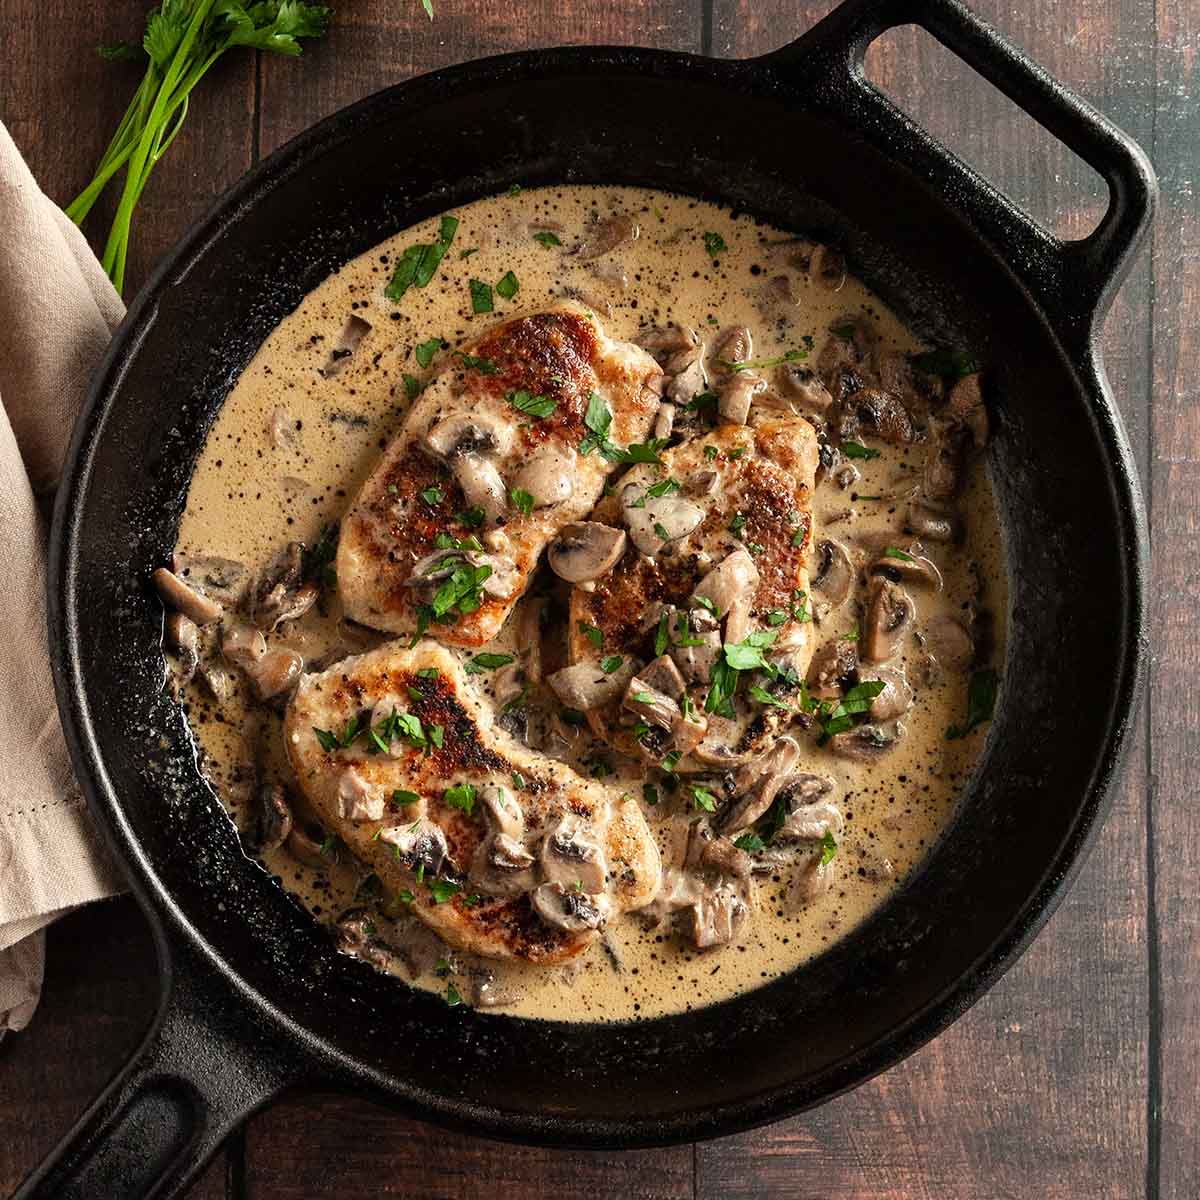
    More Skillet Recipes You'll Love

    A skillet filled with ravioli in a creamy mushroom sauce.
    Creamy Mushroom Ravioli
    A small skillet filled with beer cheese dip, topped with shredded cheese, tomatoes, and scallions with chips on the side.
    Skillet Beer Cheese

    Tried This Recipe?

    If you've tried this recipe, please leave a comment below. Follow me on Instagram, Facebook, or Pinterest for more great camping and grilling recipes.

    Recipe

    Nachos topped with beef, cheese, avocado, tomato, and pickled peppers in a cast iron skillet.

    Skillet Nachos

    A woman's face.Angie Zoobkoff
    Make these loaded grilled nachos in your cast iron skillet and cook them on the grill for an easy camping lunch, dinner, or epic game-day snack.
    No ratings yet
    Print Recipe Pin Recipe
    Prep Time 10 minutes mins
    Cook Time 25 minutes mins
    Total Time 35 minutes mins
    Course Main Course, Snack
    Cuisine American
    Servings 4 to 6 servings
    Calories 875 kcal

    Ingredients
      

    • 1 tablespoon vegetable oil
    • 12 ounces (340 g) lean ground beef
    • 1 ½ tablespoons mild chili powder
    • ¼ teaspoon ground cumin
    • ¼ teaspoon garlic powder
    • ¼ teaspoon onion powder
    • Salt and pepper
    • 10 ounce bag tortilla chips
    • ½ cup refried beans
    • 1 ½ cups shredded cheddar cheese
    • 1 to 2 medium tomatoes diced
    • 1 medium avocado diced
    • Sour cream, salsa, and pickled jalapeños for serving (optional)

    Instructions
     

    • Heat the oil in a large cast iron skillet over medium heat on the grill (or stovetop). Add the beef and cook, stirring frequently, until browned, about 5 minutes.
    • Stir in the chili powder, ground cumin, garlic powder, and onion powder. Cook for 2 minutes, stirring frequently. Remove from the heat and season to taste with salt and pepper.
    • Scoop the ground meat into a bowl and wipe out the skillet with a paper towel.
    • Prepare the grill for indirect medium heat (350°F).
    • While the grill is preheating, assemble the nachos in the skillet. Create 2 or 3 layers of chips, refried beans, meat, and cheese, finishing with cheese on top.
    • Place the skillet on the cool side of the grill and cook until the chips, beans, and meat are hot, and the cheese is melted, about 15 minutes.
    • Remove from the grill and top with tomatoes and avocado. Serve immediately, with your favorite toppings on the side.

    Notes

    • Get ahead--Cook the ground beef mixture up to 3 days before assembling the nachos. Make a double batch and use it for burritos or walking tacos.
    • Dietary--This recipe is suitable for gluten-free diets.

    Nutrition

    Serving: 1 portionCalories: 875kcalCarbohydrates: 55gProtein: 42gFat: 55gCholesterol: 124mgSodium: 738mgFiber: 7gSugar: 1g
    Keyword camping lunch ideas, game day snacks
    Tried this recipe?Let us know how it was!

    November 2, 2024 Collections

    20 Crave-Worthy Sandwich Recipes

    No need for a boring lunch with these 20 crave-worthy sandwich recipes. With a variety of unique and classic flavor combinations, you'll look forward to enjoying one of these satisfying handheld meals for your lunch or dinner.

    1
    A grilled reuben sandwich on a plate with two pickle spears.
    Grilled Reuben Sandwich
    Toasted bread, melted Swiss, tangy sauerkraut, and corned beef make this spectacular sandwich crave-worthy.
    Get the recipe: Grilled Reuben Sandwich
    2
    A chicken and bacon sandwich on a brioche bun with lettuce and tomato.
    Chicken and Bacon Sandwich
    This chicken bacon sandwich is anything but boring. Topped with crispy bacon, garlic and mustard aioli, lettuce, and tomato, it's a handheld meal that you'll return to again and again.
    Get the recipe: Chicken and Bacon Sandwich
    3
    Recipe and photo credit: xoxo Bella
    Chopped Italian Sandwich
    A chopped Italian sub is sure to satisfy even the strongest hunger pangs. This Italian bread sub with deli meats, cheese, pepperoncini peppers, red onion, and more make a great lunch.
    Get the recipe: Chopped Italian Sandwich
    4
    Recipe and photo credit: Table Nutrition
    Chicken Tikka Sandwiches
    Delicious chicken tikka masala in sandwich form--Indian spiced tomato sauce, chicken, and naan topped with garlic ginger sauce, mozzarella, and cilantro.
    Get the recipe: Chicken Tikka Sandwiches
    5
    Recipe and photo credit: Recipes From a Pantry
    Shrimp Po Boy Sandwich
    This shrimp po boy sandwich recipe is full of authentic New Orleans flavor! It’s quick and easy to make a classic shrimp po boy at home.
    Get the recipe: Shrimp Po' Boy
    6
    Recipe and photo credit: Sweet Tea and Thyme
    The Ultimate Turkey Avocado Sandwich
    Made with simple ingredients that create sumptuous textures and flavors, elevate your typical lunch routine with the ultimate turkey avocado sandwich recipe.
    Get the recipe: Ultimate Turkey Avocado Sandwich
    7
    A person pulling an English muffin grilled cheese sandwich apart.
    English Muffin Grilled Cheese
    Your favorite grilled cheese sandwich just got even better thanks to two(!) types of cheese and a crispy toasted English muffin.
    Get the recipe: English Muffin Grilled Cheese
    8
    Recipe and photo credit: The Peasant's Daughter
    Philly Cheesesteak Sliders​
    Philly cheesesteak sliders with tender beef, melted provolone, and sautéed veggies. Perfect for parties, game days, or easy family dinners!
    Get the recipe: Philly Cheesesteak Sliders
    9
    Recipe and photo credit: The Healthful Ideas
    Apple Brie Grilled Cheese
    This Apple Brie Grilled Cheese is crispy, extra cheesy, savory, and a little sweet! It’s simple, easy, and perfect for fall and winter.
    Get the recipe: Apple Brie Grilled Cheese
    10
    Recipe and photo credit: Little Sunny Kitchen
    Prime Rib Sandwich
    To make the perfect prime rib sandwich, layer leftover prime rib, caramelized onions, and a tangy horseradish sauce on a fresh baguette.
    Get the recipe: Prime Rib Sandwich
    11
    Recipe and photo credit: Emily Leary
    Ultimate Deli-Style Corned Beef on Rye Sandwich
    Corned beef piled high on rye bread with English mustard, pickles and smoked cheese for deli-style deliciousness make for a wonderful deli-style corned beef on rye sandwich.
    Get the recipe: Corned Beef on Rye
    12
    Two halves of a turkey ciabatta sandwich with tomatoes, pesto, and mozzarella, stacked on top of each other on a cutting board.
    Turkey Ciabatta Sandwich
    An easy handheld meal that's loaded with turkey, pesto, tomatoes, and cheese. Perfect for a casual camping meal or to take along on a hike or picnic.
    Get the recipe: Turkey Ciabatta Sandwich
    13
    Two sandwich halves with bacon, tomato, lettuce, and avocado, stacked on top of each other.
    The Ultimate BLAT Sandwich
    Packed with bacon, lettuce, avocado, and tomato, this satisfying sandwich has everything going for it.
    Get the recipe: Ultimate BLAT Sandwich
    14
    Recipe and photo credit: Krumpli
    Choripan ~ Argentinian Chorizo Sandwich
    Choripan is an Argentinian sausage sandwich, my version uses Spanish cooking chorizo and is served with chimichurri sauce and a quick salsa.
    Get the recipe: Choripan ~ Argentinian Chorizo Sandwich
    15
    Recipe and photo credit: Flavorful Eats
    Cajun Egg Salad
    Elevate your sandwich routine with a new take on a lunchtime favorite - Cajun egg Salad! This recipe features the creamy egg salad you know and love, with the flavorful addition of bold Cajun spices! A fun twist on an old classic!
    Get the recipe: Cajun Egg Salad
    16
    Bánh Mì Thịt Nướng (Grilled Pork Sandwich)
    Recipe and photo credit: Savory Sweet Spoon
    Bánh Mì Thịt Nướng (Grilled Pork Sandwich)
    Banh Mi Thit Nuong is a Vietnamese sandwich that combines smoky lemongrass grilled pork, tangy pickled veggies, and fresh herbs, all nestled within a soft, airy baguette. Grill or bake the meat to perfection.
    Get the recipe: Bánh Mì Thịt Nướng
    17
    Falafel Pita Sandwich
    Recipe and photo credit: Six Hungry Feet
    Falafel Pita Sandwich
    Falafels are our middle-Eastern favourite food and this flavorful falafel pita sandwich is a delicious way to enjoy them!
    Get the recipe: Falafel Pita Sandwich
    18
    Recipe and photo credit: In the Kitch
    Grilled PBJ Sandwiches
    Grilled peanut butter and jelly sandwiches are a quick and fun way to turn a classic sandwich into a new dish.
    Get the recipe: Grilled PBJ Sandwiches
    19
    Recipe and photo credit: Cucina by Elena
    Italian Mortadella Sandwich
    With each bite, you’ll experience a delightful contrast of textures, from the rich slices of mortadella and smooth creaminess of the burrata cheese and pistachio pesto to the crunchy freshness of the chopped pistachios. It’s a next-level sandwich you’ll crave!
    Get the recipe: Italian Mortadella Sandwich
    20
    Recipe and photo credit: Quiche My Grits
    Hot Honey Chicken Sandwich
    You’ll love this hot honey chicken sandwich recipe that’s the perfect mix of sweet and spicy!
    Get the recipe: Hot Honey Chicken Sandwich

    November 1, 2024 Camping

    Creamy Mushroom Ravioli

    For an easy lunch or dinner, you can't beat this creamy mushroom ravioli recipe. Store-bought fresh ravioli gets smothered in homemade mushroom sauce and topped with a sprinkle of Parmesan cheese. It's quick and easy comfort food at its finest.

    A skillet filled with ravioli in a creamy mushroom sauce.

    If you've tried my make-ahead mushroom sauce on pan-fried pork chops or in creamy green bean casserole, then you already know how versatile the creamy sauce is. This easy mushroom ravioli is one more great way to use it to create a simple meal for camping or at home. Prep the sauce in advance and you've got yourself a 15 minute meal!

    Why You'll Love This Recipe

    • It can be prepared in your cast iron skillet or Dutch oven over the campfire, camp stove, or regular stove, making it perfect for cooking at camp or at home.
    • You can prepare the sauce ahead of time so it comes together very quickly.

    Ingredients and Substitutions

    Ingredients for creamy mushroom ravioli--mushroom ravioli, Parmesan, and mushroom sauce.
    • Ravioli--I use mushroom ravioli to really amp up the mushroom flavor in this dish, but feel free to swap in your favorite type of store-bought ravioli. I don't recommend using frozen pasta as it will change the cooking time.
    • Cream cheese mushroom sauce--The sauce can be prepared in advance and stored in the fridge or your cooler for up to 4 days or in the freezer for 3 months. If frozen, thaw it in the fridge before using in the dish.

    How to Make Ravioli with Creamy Mushroom Sauce

    A skillet with water on a burner.
    Mushroom ravioli in a skillet on a burner.
    1. Heat ½ cup water in a skillet until it reaches a boil.
    2. Add the ravioli to the skillet.
    A covered skillet on a burner.
    Mushroom sauce added to ravioli in a skillet.
    1. Cover with a lid and let the ravioli steam until tender.
    2. Stir in the mushroom sauce and cook until thickened. Serve with Parmesan.

    FAQs

    My skillet doesn't have a lid. What can I use?

    Anything that traps the steam in the skillet will work. Try your pot or Dutch oven lids to see if they fit, but if not, an upside-down baking sheet will work fine.

    What should I serve with this?

    A make-ahead salad is the perfect side dish for this easy meal.

    Tips and Troubleshooting

    • If your pasta sticks to the bottom of the skillet or pot, use a spatula to gently loosen it.
    • Store leftover ravioli in a sealed container in your fridge or cooler for up to 2 days. Reheat in a skillet over low heat, adding a splash of water or cream to loosen the sauce, if needed.
    Two bowls of creamy mushroom ravioli.

    More Pasta Recipes You'll Love

    A pot of cheeseburger pasta with plates, napkins, and forks on the side.
    One-Pot Cheeseburger Pasta
    A blue Dutch oven filled with mac and cheese and a wooden spoon resting inside.
    Dutch Oven Mac and Cheese

    Tried This Recipe?

    If you've tried this recipe, please leave a comment below. Follow me on Instagram, Facebook, or Pinterest for more great camping and grilling recipes.

    Recipe

    A skillet filled with ravioli in a creamy mushroom sauce.

    Creamy Mushroom Ravioli

    A woman's face.Angie Zoobkoff
    This easy pasta packs plenty of umami with a double dose of mushrooms in the pasta and in the creamy sauce.
    No ratings yet
    Print Recipe Pin Recipe
    Prep Time 5 minutes mins
    Cook Time 10 minutes mins
    Total Time 15 minutes mins
    Course Main Course
    Cuisine American
    Servings 2 servings
    Calories 550 kcal

    Ingredients
      

    • ½ cup water
    • 12 ounces fresh mushroom ravioli
    • 1 ¼ cups cream cheese mushroom sauce
    • Grated Parmesan cheese for serving

    Instructions
     

    • Set a cast iron or nonstick skillet over medium-high heat and add the water. Bring to a boil.
    • Add the ravioli and immediately cover with a lid. Steam until the pasta is tender, 5 to 6 minutes. It's ok if there's still some water in the skillet after steaming.
    • Pour in the mushroom sauce, and cook, stirring frequently until the sauce is thickened and coats the pasta, about 2 minutes.
    • Serve immediately, topped with Parmesan.

    Notes

    • If it sticks--If your pasta sticks to the bottom of the skillet or pot, use a spatula to gently loosen it.
    • Storage & reheating--Store leftover ravioli in a sealed container in your fridge or cooler for up to 2 days. Reheat in a skillet over low heat, adding a splash of water or cream to loosen the sauce, if needed.

    Nutrition

    Serving: 1portionCalories: 550kcalCarbohydrates: 57gProtein: 21gFat: 27gCholesterol: 130mgSodium: 566mgFiber: 5gSugar: 5g
    Keyword 15 minute meals, cast iron cooking, one pot pasta
    Tried this recipe?Let us know how it was!

    October 30, 2024 Blackstone Griddle Recipes

    16 Weeknight Recipes for Your Blackstone

    The Blackstone (or any flat top) griddle is a versatile cooking tool. You can pack it on a camping trip, take it tailgating, and feed a crowd. It serves up everything from juicy smash burgers to outstanding griddle breakfasts, so it should come as no surprise that it's a weeknight superstar as well. Feast on these 16 weeknight recipes for your Blackstone that come together and cook up quickly.

    1
    A bowl filled with cubes of seared sirloin steak with parsley sprinkled on top.
    Blackstone Steak Bites
    For these buttery steak bites, sirloin steak is marinated then seared on your outdoor griddle and finished with butter to create completely irresistible morsels of juicy steak.
    Get the recipe: Blackstone Steak Bites
    2
    Recipe and photo credit: Hilda's Kitchen Blog
    Blackstone Smash Burgers
    These Blackstone smash burgers are thin, greasy (in a good way), and have crispy edges. They’re packed with flavor and really easy to prepare with these detailed instructions!
    Check out this recipe
    3
    A chicken and bacon sandwich on a brioche bun with lettuce and tomato.
    Chicken and Bacon Sandwich
    This chicken bacon sandwich is anything but boring. Topped with crispy bacon, garlic and mustard aioli, lettuce, and tomato, it's a handheld meal that you'll return to again and again.
    Get the recipe: Chicken and Bacon Sandwich
    4
    Egg Roll in a Bowl
    Recipe and photo credit: Erica's Recipes
    Egg Roll in a Bowl
    Egg roll in a bowl with coleslaw has a Szechuan sauce for incredible flavor. Cook this easy dinner on your Blackstone. It's ready in just 20 minutes and busting with delicious Asian flavor.
    Get the recipe: Egg Roll in a Bowl
    5
    A bowl of pierogies and a bowl of kielbasa with onions with a salad and a dish of sour cream on the side.
    Blackstone Pierogies and Kielbasa
    The Blackstone griddle (or any large griddle) is perfect for cooking frozen pierogies, smoked sausage, and tender caramelized onions all in one go.
    Get the recipe: Blackstone Pierogies and Kielbasa
    6
    Recipe and photo credit: The Kitchen Bucket List
    Street Tacos
    If you're looking for an easy weeknight dinner, street tacos on the Blackstone are your solution. Homemade taco seasoning takes them over the top.
    Get the recipe: Street Tacos
    7
    Four garlic butter shrimp skewers on a rectangular platter, sprinkled with fresh parsley.
    Garlic Butter Shrimp Skewers
    These garlic butter shrimp skewers are quickly cooked on your griddle until sweet and buttery. They're an easy camping or weeknight meal that's ready in just 20 minutes.
    Get the recipe: Garlic Butter Shrimp Skewers
    8
    Recipe and photo credit: The Virtual Caterer
    Perfect Blackened Steak
    Learn how to cook a delicious blackened steak in a cast iron skillet or on an outdoor griddle, topped with garlic butter for amazing flavor.
    Get the recipe: Perfect Blackened Steak
    9
    Two turkey smash burgers with melted cheese and caramelized red onion on plates with potato wedges.
    Turkey Smash Burgers with Caramelized Onions
    These juicy turkey burgers are a perfect griddle meal. They're tucked inside a toasted bun and topped with melted cheese, sweet caramelized onions, and spicy mayo.
    Get the recipe: Turkey Smash Burgers
    10
    Recipe and photo credit: The Feathered Nester
    Blackstone Crunchwrap
    Love the double Crunchwrap Supreme? Then you’ll love this homemade crunchwrap recipe made on the Blackstone griddle!
    Get the recipe: Blackstone Crunchwrap
    11
    Four citrus scallop skewers on a slate board.
    Citrus Scallop Skewers
    A quick bath in an orange, oil, and Aleppo pepper marinade turns these easy scallop skewers into a restaurant-quality meal.
    Get the recipe: Citrus Scallop Skewers
    12
    Recipe and photo credit: Get Inspired Everyday!
    Easy Hibachi at Home
    Easy to make hibachi at home, this recipe includes hibachi chicken, vegetables, and fried rice with a side of tasty yum yum sauce too.
    Get the recipe: Hibachi at Home
    13
    Blackstone Griddle Philly Cheesesteaks
    Recipe and photo credit: Simply Made Eats
    Blackstone Griddle Philly Cheesesteaks
    These Blackstone griddle Philly cheesesteaks are so easy to make! They’re grilled to perfection in minutes and loaded with onions, peppers and cheesy goodness.
    Get the recipe: Blackstone Griddle Philly Cheesesteaks
    14
    A halved patty melt in a basket lined with a checkered paper.
    Blackstone Patty Melt
    This quick camping meal made with seared ground beef patties, melted cheese, and toasted rye bread is easy to make and even easier to devour.
    Get the recipe: Blackstone Patty Melt
    15
    Recipe and photo credit: Homemade on a Weeknight
    Blackstone Chicken Fajita Quesadillas
    Fantastic and fast quesadillas on the flat top griddle loaded with the flavors of chicken fajitas. You don't want to miss these!
    Get the recipe: Blackstone Chicken Fajita Quesadillas
    16
    Recipe and photo credit: Carne Diem
    New York Chopped Cheese Sandwich
    A New York chopped cheese sandwich is quick and easy recipe to make on your Blackstone or griddle consisting of chopped ground beef, cheese, and toppings.
    Get the recipe: New York Chopped Cheese Sandwich

    October 28, 2024 Blackstone Griddle Recipes

    Cinnamon Roll French Toast

    This cinnamon roll French toast combines the rich, eggy goodness of traditional French toast with sweet cinnamon buns to create an unforgettable breakfast. With minimal ingredients and a short cooking time, it's easy enough to make at camp but special enough to serve for an indulgent holiday breakfast at home.

    Four pieces of cinnamon roll French toast on a rectangular platter, dusted with powdered sugar and topped with fresh raspberries.

    What's better than French toast for breakfast? French toast made with cinnamon rolls, of course! The sweetly spiced buns soak up a rich cinnamon-spiced custard and a quick trip across your griddle delivers crispy-edged, tender slices of breakfast perfection. Make them at home or at camp for a special occasion treat.

    Why You'll Love This Recipe

    • It can be prepared on your outdoor griddle (Blackstone) or your cast iron skillet, making it perfect for cooking at home or at camp.
    • You can scale it to feed as many or as few as you need.
    • It's a fantastic way to use up extra cinnamon buns.

    Ingredients and Substitutions

    Ingredients for cinnamon roll French toast--eggs, cinnamon rolls, vanilla, cinnamon, sugar, butter, and milk.
    • Cinnamon rolls--You can use your favorite homemade cinnamon rolls, or store-bought. You need to slice them in half horizontally before soaking and cooking so that they can fully soak up the custard.
    • Milk--Any type of milk will work, including non-dairy. The higher the fat content, the richer your cinnamon bun French toast will be, however, I don't recommend using anything richer than half and half. Whipping cream tends to make it too fatty.
    • Vanilla--Only the real stuff, please!

    How to Make Cinnamon Bun French Toast

    Egg, sugar, cinnamon, and milk whisked together in a glass measuring jug.
    Cinnamon rolls soaking in a egg mixture.
    1. Whisk the eggs, milk, sugar, cinnamon, vanilla, and salt together.
    2. Place the halved cinnamon rolls in a single layer in a baking dish and pour the egg mixture over. Let it soak for 15 minutes.
    Butter melting on a griddle.
    Four pieces of cinnamon roll French toast cooking on a griddle.
    1. Melt the butter on a griddle (or in a skillet) over medium heat.
    2. Cook the French toast, flipping once, until golden brown.

    FAQs

    Can I make it in my cast iron skillet?

    Sure. Follow the directions, using your cast iron skillet over your stovetop or camp stove. Depending on the size of your skillet, you may need to cook in batches. If cooking in batches, divide the butter, adding a little extra with each batch.

    What should I serve with this?

    Serve this sweet breakfast treat with a savory side, like breakfast sausages or griddle bacon, and some fresh berries on the side.

    Tips and Troubleshooting

    • Very large cinnamon rolls (more than 3 inches tall) may take longer to cook.
    • These are best enjoyed as soon as they are made. I don't recommend storing or reheating them.
    Four pieces of cinnamon roll French toast on a rectangular platter, dusted with powdered sugar and topped with fresh raspberries.

    More Breakfast Recipes You'll Love

    A stack of pancakes, maple syrup, and blueberries on a plate with blueberries and bacon in the background.
    Cast Iron Skillet Pancakes
    A jar filled with chunky granola bites and fresh cherries scattered around the jar.
    Chocolate Cherry Granola

    Tried This Recipe?

    If you've tried this recipe, please leave a comment below. Follow me on Instagram, Facebook, or Pinterest for more great camping and grilling recipes.

    Recipe

    Four pieces of cinnamon roll French toast on a rectangular platter, dusted with powdered sugar and topped with fresh raspberries.

    Cinnamon Roll French Toast

    A woman's face.Angie Zoobkoff
    This easy recipe combines two breakfast classics--French toast and cinnamon buns--to create an unforgettable breakfast treat.
    No ratings yet
    Print Recipe Pin Recipe
    Prep Time 20 minutes mins
    Cook Time 7 minutes mins
    Total Time 27 minutes mins
    Course Breakfast
    Cuisine French
    Servings 2 servings
    Calories 481 kcal

    Equipment

    • Griddle

    Ingredients
      

    • 2 large eggs
    • 1 cup milk
    • 1 tablespoon granulated sugar
    • 1 teaspoon ground cinnamon
    • 1 teaspoon vanilla extract
    • Pinch salt
    • 2 cinnamon rolls sliced in half horizontally
    • 2 tablespoons butter
    • Powdered sugar and maple syrup for serving (optional)

    Instructions
     

    • Whisk the eggs, milk, sugar, cinnamon, vanilla, and salt together in a measuring jug.
    • Place the sliced cinnamon rolls in a single layer in a baking dish and pour the egg custard over the top. Flip the rolls to make sure they're fully coated, then let them soak for 15 minutes.
    • Heat your griddle to medium. Add the butter and let it melt.
    • Remove each piece of roll from the custard, letting any excess drip back into the dish and place it on the griddle. Cook, flipping once, until golden and crispy on the outside, about 4 minutes per side.
    • Dust with powdered sugar, if desired, and serve with maple syrup, if using.

    Notes

    • Cooking time--Very large cinnamon rolls (more than 3 inches tall) may take longer to cook.
    • Storage--These are best enjoyed as soon as they are made. I don't recommend storing or reheating them.

    Nutrition

    Serving: 2piecesCalories: 481kcalCarbohydrates: 40gProtein: 11gFat: 31gCholesterol: 231mgSodium: 346mgFiber: 2gSugar: 25g
    Keyword blackstone cooking, camping breakfast, christmas breakfast, griddle cooking
    Tried this recipe?Let us know how it was!

    October 26, 2024 Collections

    18 Comforting Potato Side Dish Recipes

    Is there anything more comforting than a big bowl of creamy spuds? I think not. Whether they're roasted, fried, grilled, smoked, or mashed, they're hearty and oh-so-satisfying. With these 18 comforting potato side dish recipes, you're guaranteed to find the perfect side for whatever you're cooking, or even a recipe to enjoy all on its own.

    1
    A large plate filled with smashed potatoes.
    Blackstone Smashed Potatoes
    These smashed potatoes are smothered in herb butter and cooked on your griddle to crispy, golden perfection.
    Get the recipe: Blackstone Smashed Potatoes
    2
    Recipe and photo credit: Craving Something Healthy
    Boursin Mashed Potatoes
    Boursin mashed potatoes are full of creamy, cheesy, herb flavors from Boursin cheese, Greek yogurt, and a crunchy Parmesan breadcrumb topping
    Get the recipe: Boursin Mashed Potatoes
    3
    Recipe and photo credit: Simply Delicious
    Hasselback Potatoes
    Crispy on the outside, creamy on the inside, these Hasselback potatoes served with delectable sage bacon butter is a showstopping side dish.
    Get the recipe: Hasselback Potatoes
    4
    A bowl of make ahead roasted potatoes with fresh herbs and some parsley on the side.
    Make-Ahead Roasted Potatoes
    These crispy roasted potatoes can be parboiled and stored in your fridge, cooler, or freezer until you're ready to roast them. The soft, creamy centres and crispy edges will make them a favorite all year round.
    Get the recipe: Make-Ahead Roasted Potatoes
    5
    Recipe and photo credit: Confetti & Bliss
    Loaded Baked Potato Casserole
    Loaded baked potato casserole is savory and decadent. These twice-baked mashed potatoes feature sour cream, cheddar cheese, and bacon.
    Get the recipe: Loaded Baked Potato Casserole
    6
    Recipe and photo credit: Maple Vine Kitchen
    Buttered New Potatoes with Dill, Lemon, and Garlic
    These buttery new potatoes with dill, lemon, and garlic are the ultimate side! Bright, herby, and totally delicious – you’ll want them at every meal.
    Get the recipe: Buttered New Potatoes
    7
    A cast iron skillet filled with scalloped potatoes with sprigs of thyme on top.
    Scalloped Potatoes on the Grill
    These grilled scalloped potatoes are creamy and tender, with slightly smoky caramelized edges. They're an easy side dish with just 5 ingredients.
    Get the recipe: Scalloped Potatoes on the Grill
    8
    Crispy Chipotle Herb Muffin Tin Potato Stacks
    These crispy chipotle herb muffin tin potato stacks are made with layers of thinly sliced potatoes, baked to perfection with a spicy herb kick. A simple, flavorful side dish!
    Get the recipe: Muffin Tin Potato Stacks
    9
    Easy Potato Salad
    Recipe and photo credit: Fresh Off the Grid
    Easy Potato Salad
    Featuring tender potatoes, crisp celery, and a creamy dressing, this easy potato salad recipe is the perfect side for all kinds of meals!
    Get the recipe: Easy Potato Salad
    10
    A pot of mashed potatoes with a wooden spoon resting inside.
    Cheesy Garlic Mashed Potatoes Recipe
    These creamy mashed potatoes are loaded with garlic, two types of cheese, and tangy sour cream. They're the perfect holiday (or anytime!) side dish and can be prepared ahead of time.
    Get the recipe: Cheesy Garlic Mashed Potatoes
    11
    Recipe and photo credit: Jerkyholic
    Traeger Baked Potatoes
    Let’s load up some smoked baked potatoes with delicious toppings to pair with your favorite main course or AS a main course.
    Get the recipe: Smoked Baked Potatoes
    12
    Recipe and photo credit: Art of Natural Living
    Elegant Potato Pommes Duchesse
    An elegant dish of mashed and flavored potatoes piped into rosettes, pommes duchesse can turn the humble potato into a beautiful and impressive side.
    Get the recipe: Duchess Potatoes
    13
    A stack of six latkes on a plate with a dollop of sour cream on top.
    Blackstone Potato Cakes
    The crispy exterior and creamy interior make these quick-cooking Blackstone potato patties truly irresistible.
    Get the recipe: Blackstone Potato Cakes
    14
    Recipe and photo credit: Living Chirpy
    Garlic Roasted Potatoes
    These garlic roasted potatoes are a classic side dish that is so easy to make. With just 5 ingredients, you can easily prepare these without taking too much of your focus away from your main dish. Some garlic, salt & pepper, and olive oil drizzled over baby gold potatoes are simple, and so delicious!
    Get the recipe: Garlic Roasted Potatoes
    15
    A foil packet filled with cheesy potatoes with a dish of sour cream on the side.
    Cheesy Foil Packet Potatoes
    These buttery, cheesy potatoes in foil can be made on the grill, over the campfire, or in your oven for an easy, oh-so-satisfying side dish.
    Get the recipe: Cheesy Foil Packet Potatoes
    16
    Baked potatoes topped with sour cream and scallions.
    Campfire Baked Potatoes
    A campfire classic made with Russet potatoes that are wrapped in foil and buried in coals. They come out with crispy skin and soft, fluffy interiors. Load them up with your favorite toppings and enjoy!
    Get the recipe: Campfire Baked Potatoes
    17
    Recipe and photo credit: Cooking with Lei
    Chinese Spicy Potatoes
    Turn plain potatoes into a spicy flavor bomb with a fine blend of Asian ingredients. They're exceptionally delicious!
    Get the recipe: Chinese Spicy Potatoes
    18
    Recipe and photo credit: The Forked Spoon
    Best Ever Fried Potatoes and Onions
    These easy fried potatoes and onions come together in less than 25 minutes for an irresistible breakfast or a simple dinnertime side dish. Bursting with flavor, they’re a true family favorite!
    Get the recipe: Fried Potatoes and Onions

    October 25, 2024 Camping

    Dutch Oven Turkey Chili

    This Dutch oven turkey chili has everything going for it. It's smoky, spicy, and so incredibly satisfying that you'll be making it on repeat all season long.

    Two bowls of Dutch oven turkey chili with cornbread and sour cream on the side.

    When I make campfire chili, whether it's beef, bison, or this turkey version, there's a few things it has to have. It needs to pack some heat, and it has to have beans (sorry, my Texan friends). Beyond that, there are so many amazing variations. This one is a little leaner since it's made with ground turkey, but with the combination of smoky ancho chili powder, zippy green chiles, and creamy white beans, you'll be too busy devouring it to even notice.

    Why This Recipe is Great for Camping

    • It's prepared in one pot and cooked in your Dutch oven over the fire so you've got minimal clean up and don't need any special equipment.
    • It can be customized to suit your tastes. Make this ground turkey chili as spicy or mild as you like.
    • Any leftovers will store well in your cooler or RV fridge for several days.
    • It's a great option for cool weather camping or those late season fall camping trip menu plans.

    Ingredients and Substitutions

    Ingredients for Dutch oven turkey chili--ground turkey, onion, garlic, spices, beans, broth, oil, and chiles.
    • Ground turkey--Look for ground turkey that contains some dark meat. This will add fat and flavor to the chili.
    • Oil--Any neutral flavored oil will work here, like vegetable or sunflower or olive oil. Use whatever you've got on hand.
    • Ancho chili powder--This packs plenty of smoky heat, particularly if your chili powder is fresh. Using the full 2 tablespoons will give you a very spicy chili. If you prefer a milder heat, start with 1 tablespoon, and adjust to taste, or swap in a mild chili powder.
    • Broth--Chicken or turkey broth will work well for this recipe.
    • Green chiles--These are sold canned and are often found in the Mexican section of the supermarket.

    How to Make Turkey Chili in a Dutch Oven

    Onion sautéing in a Dutch oven over a campfire.
    Ground turkey and spices cooking in a Dutch oven over the fire.
    1. Heat the oil in a cast iron Dutch oven set over hot coals or low flame. Sauté the onion until softened, then add the garlic and cook for 30 seconds.
    2. Stir in the turkey and spices and cook until the turkey is browned and cooked through.
    A pot of turkey chili simmering over a fire.
    A lidded Dutch oven on a grilled grate over a fire.
    1. Pour in the broth, then stir in the chiles and beans and bring to a simmer.
    2. Cover and cook, stirring occasionally until the chili thickens and the flavors meld.

    FAQs

    Can I freeze this?

    Yes. Chili can be frozen for up to 3 months. Thaw overnight in your fridge or cooler before reheating. If you make it before heading out on your trip, it works great as an ice block for the cooler!

    Can I make it on my stovetop at home or on my camp stove?

    Sure. Follow the directions, adjusting the heat as needed. You can use a regular (enamelled) Dutch oven or large pot, if you prefer.

    What should I serve with this?

    Top this hearty Dutch oven chili with your favorite chili fixings, including shredded cheese, sour cream, and sliced scallions. Cornbread or campfire garlic bread is excellent on the side.

    Tips and Troubleshooting

    • Get ahead by chopping up your onion and draining and rinsing your beans before heading out to camp.
    • Store your leftover chili in a sealed container in your fridge or cooler for up to 4 days. Reheat it in a pot over low heat on your camp stove or over the fire until warmed through. Spoon it on top of hot dogs or smokies, pile it on campfire nachos, or mix it into pasta.
    • This recipe is suitable for gluten-free and dairy-free diets.
    A pot of Dutch oven turkey chili simmering over a fire.

    More Dutch Oven Recipes You'll Love

    A Dutch oven filled with campfire chili with a metal spoon resting inside.
    Campfire Chili
    A bowl of beef stew with carrots and potatoes on a wooden table.
    Campfire Dutch Oven Beef Stew

    Tried This Recipe?

    If you've tried this recipe, please leave a comment below. Follow me on Instagram, Facebook, or Pinterest for more great camping and grilling recipes.

    Recipe

    Two bowls of Dutch oven turkey chili with cornbread and sour cream on the side.

    Dutch Oven Turkey Chili

    A woman's face.Angie Zoobkoff
    Smoky, spicy, rich, and hearty, this turkey chili has everything going for it!
    No ratings yet
    Print Recipe Pin Recipe
    Prep Time 15 minutes mins
    Cook Time 45 minutes mins
    Total Time 1 hour hr
    Course Main Course
    Cuisine American
    Servings 4 servings
    Calories 364 kcal

    Equipment

    • Dutch oven

    Ingredients
      

    • 2 tablespoons oil
    • 1 medium onion diced
    • Salt and freshly ground black pepper
    • 2 cloves garlic minced
    • 1 pound ground turkey
    • 1 to 2 tablespoons ancho chile powder
    • 1 teaspoon ground cumin
    • 1 teaspoon dried oregano
    • 2 ½ to 3 cups chicken or turkey broth
    • 1 (4-ounce) can diced green chiles
    • 1 (15-ounce) can white kidney beans (cannellini beans) drained and rinsed

    Instructions
     

    • Prepare a campfire for cooking with hot coals or a low flame.
    • Place the Dutch oven over direct heat and add the oil. Stir in the onion, season with salt and pepper, and sauté until softened, about 8 minutes.
    • Add the garlic and cook until fragrant, about 30 seconds.
    • Stir in the turkey, chili powder, cumin, and oregano, and season with salt and pepper. Cook until the turkey is browned and cooked through, about 5 minutes.
    • Pour in the stock, then stir in the chiles and beans. Bring to a simmer.
    • Cover and cook, stirring occasionally, until the chili is thick and the flavors have melded, 15 to 30 minutes. Season to taste with salt and pepper, and additional spices, if needed.

    Notes

    • Get ahead--Chop up your onion and drain and rinse your beans before heading out to camp.
    • Storage and reheating--Store your leftover chili in a sealed container in your fridge or cooler for up to 4 days. Reheat it in a pot over low heat on your camp stove or over the fire until warmed through. Spoon it on top of hot dogs or smokies, pile it on campfire nachos, or mix it into pasta.
    • Dietary--This recipe is suitable for gluten-free and dairy-free diets.

    Nutrition

    Serving: 1portionCalories: 364kcalCarbohydrates: 21gProtein: 32gFat: 18gCholesterol: 84mgFiber: 6gSugar: 3g
    Keyword campfire cooking, chili, dutch oven cooking
    Tried this recipe?Let us know how it was!

    October 23, 2024 Articles

    How to Cook with a Cast Iron Dutch Oven

    Ready to add a cast iron Dutch oven to your campfire cooking arsenal? Read on to discover how to cook with it and why it's the ideal addition to your collection.

    A cast iron Dutch oven suspended over a fire.

    Photo credit: Valeriia Yevchinets

    How it Works

    The humble Dutch oven has been around for centuries. In recent years, it has become a stovetop fixture in a stunning range of hues, but the original, uncoated cast iron pot is a simple and effective tool for cooking in a variety of ways.

    Put simply, a Dutch oven is a heavy lidded pot made from cast iron. It retains heat well and the tight seal of the lid creates a moist cooking environment that can easily mimic a regular oven or a slow cooker.

    Ways to Cook

    Because a Dutch oven allows you to cook almost anything, it's the ideal piece of equipment for your camping arsenal.

    A Dutch oven filled with campfire chili with a metal spoon resting inside.

    Sear, sauté, simmer

    Use your Dutch oven (without its lid) just like you would use your cast iron skillet. It's perfect for searing steaks, sautéing vegetables, or simmering meatballs in sauce. The high sides of the oven are ideal for avoiding hot oil splatters as well.

    Boil and braise

    A covered Dutch oven is excellent for making one-pot pasta recipes, as well as for braising everything from beef roasts to turkey breast. The tight seal of the lid prevents steam from escaping, creating a moist cooking environment, which is perfect for slow cooking tough cuts of meat.

    Baking

    Yes, you absolutely can bake in your cast iron Dutch oven. Make cinnamon rolls, Irish soda bread, desserts, and more. When baking, you will need to use coals on top and below the pot to create an even heat that mimics your regular oven.

    Choosing Your Heat Source

    You have a couple options when it comes to using your cast iron Dutch oven at camp.

    Open flame

    You can place your Dutch oven over open flame on the campfire grate, on a BBQ grill grate, or over your camp stove. This will provide heat only to the bottom of the pot, so is ideal for things that require simmering, such as chili, baked beans, or chicken noodle soup.

    A cast iron Dutch oven suspended over a fire.

    Photo credit: Ignat Kushanrevoyz

    When cooking over direct flame, use a low flame or very hot coals as this will provide an even heat. Large flames can cause the food to burn.

    Hot embers, briquettes, or charcoal

    When you want to create an oven effect for long braises or baked goods, you'll want to use a heat source that delivers consistent, even heat both below and on the lid of the Dutch oven. By using pieces of hot embers, briquettes, or pieces of lump charcoal, you can control the amount of heat being added to the oven.

    Charcoal briquettes are ideal because they are all the same size, and are easy to distribute evenly below and on top of the oven. Lump hardwood charcoal also works well because it burns slowly. You can use hot embers from your fire, but you may need to replace them much more frequently than coals.

    Dutch Oven FAQs

    What's the difference between a cast iron Dutch oven and an enamelled Dutch oven?

    Both types of Dutch oven are made from cast iron, and both work the same way. That said, enamel-coated Dutch ovens have a smooth non-porous surface that is easy to clean, and pretty to look at. They're not recommended for use on the grill or over open flame or coals as it can ruin the coating. They require less care than traditional Dutch ovens, but the surface can chip, and they tend to be more expensive than an uncoated one.

    Traditional cast iron Dutch ovens require the same care as your cast iron skillet, meaning that they must be seasoned regularly, and kept dry when not in use, as they are prone to rust. Ones specifically designed for open flame cooking or cooking over coals usually come with legs to elevate them off the ground slightly, as well as a handle for easy lifting in and out of the fire pit or for suspending from a tripod over the fire.

    Where can I use it?

    Although cast iron Dutch ovens are specifically designed for campfire cooking, you can place them on your camp stove or set them on your grill. You could even place them inside your oven at home. If you're using it for any of these applications, be sure that the legs are resting between the slats of the grill or oven rack, or are sitting inside the burner recess on your camp stove.

    What size should I buy?

    Dutch ovens come in a variety of sizes, from 8 inches (20 cm) in diameter, all the way up to large 14 inch vessels, with a capacity ranging from 1 quart to 7 quarts. If you do a lot of campfire cooking, it's a good idea to purchase a few in different sizes.

    Small or shallow Dutch ovens are great for baking breads, while larger ones are ideal for cooking large batches of soups, stews, and Dutch oven turkey chili, or larger pieces of meat.

    How many coals do I need?

    A good rule of thumb is to use twice as many coals on top as underneath the Dutch oven. I find that for a large 6 to 7-quart oven, using 8 coals on the bottom and 16 on the lid will give you a steady heat that mimics a 350°F oven. Smaller ovens or lower temperatures will require less coals, but you should always maintain a ratio of 2:1 for coals on top to coals on bottom. This will keep even heat in the oven, without burning the bottom or top of your food.

    Charcoal briquettes on the lid of a cast iron Dutch oven.

    How often should I replace my coals or embers?

    If you're using charcoal briquettes or lump charcoal, you should plan to replace the coals about every 30 minutes. Briquettes take 15 to 20 minutes to burn to grey before they're ready to use, so plan accordingly.

    Why is my food taking so long to cook?

    External factors are going to play a big role in your outdoor cooking experience. With the same amount of coals, your food is going to cook much faster on a hot, calm day than on a cold, windy one. Give yourself extra time, or add extra coals if you're cooking in cool, wet, or windy weather.

    Camper Tip

    Be careful when removing the lid to check your food, particularly on a breezy day. Lift and move it away from the pot quickly to avoid any ash from the top of the lid blowing into your food.

    Ready to get cooking? Explore our collection of Dutch oven recipes and discover its potential!

    October 22, 2024 Collections

    13 Super-Satisfying Quesadilla Recipes

    Need a hearty lunch or dinner? What about an epic game-night snack? These 13 super-satisfying quesadilla recipes check all those boxes and will get devoured as fast as you can whip them up. Choose from beef, chicken, shrimp, vegetarian, and more.

    1
    Recipe and photo credit: Three Olives Branch
    Birria Quesadilla
    A Mexican recipe made with shredded beef seasoned with smoked dried peppers and cheese in a tortilla. This spicy and delicious chuck roast recipe is perfect for an appetizer, game day, or main course.
    Get the recipe: Birria Quesadilla
    2
    Pieces of Italian sausage quesadilla stacked on top of each other.
    Italian Sausage Quesadilla
    These quick and easy quesadillas are made with melted mozzarella cheese, spiced Italian sausage, and red onion, all sandwiched inside a crispy flour tortilla.
    Get the recipe: Italian Sausage Quesadilla
    3
    Recipe and photo credit: Haute and Healthy Living
    Classic Chicken Quesadillas
    This authentic chicken quesadilla recipe is the perfect quick dinner to make on those busy weeknights! It’s so easy and incredibly flavorful!
    Get the recipe: Classic Chicken Quesadillas
    4
    Recipe and photo credit: Healthy Fitness Meals
    Easy Shrimp Quesadilla
    This easy and healthy shrimp quesadilla recipe is the best and so full of flavor. You will love the melted cheese, cooked shrimp, onion, and bell pepper in this Mexican-style recipe!
    Get the recipe: Easy Shrimp Quesadilla
    5
    Recipe and photo credit: Simply Delicious
    Steak Quesadillas
    These cheesy steak quesadillas with fried peppers and onions are absolutely delicious. Served with easy salsa for dipping, the is the kind of easy dinner the entire family will love.
    Get the recipe: Steak Quesadillas
    6
    A turkey quesadilla cut into 4 pieces on a plate with a dish of cranberry relish and a mint sprig.
    Turkey Quesadilla
    Laden with roast turkey, two types of cheese, and cranberry relish, this quesadilla is the perfect way to enjoy leftover turkey.
    Get the recipe: Turkey Quesadilla
    7
    Recipe and photo credit: Picnic Lifestyle
    Easy Mushroom Quesadilla
    Mushroom quesadillas make a great main dish or can be cut up for a finger food snack platter. Whip them up in under an hour.
    Get the recipe: Easy Mushroom Quesadilla
    8
    Recipe and photo credit: A Latin Flair
    Pulled Pork Quesadillas
    Make these pulled pork quesadillas for a quick, cheesy, and flavorful meal that’s perfect for lunch or dinner!
    Get the recipe: Pulled Pork Quesadillas
    9
    Recipe and photo credit: Slow the Cook Down
    Buffalo Chicken Quesadillas
    When the craving for buffalo chicken hits, whip up a batch of these quesadillas in minutes with just a few simple ingredients.
    Get the recipe: Buffalo Chicken Quesadillas
    10
    Recipe and photo credit: Learning to Smoke
    Brisket Quesadillas
    Got leftover brisket? This brisket quesadilla recipe combines meat, cheeses, and warm flour tortillas for the perfect smoky, cheesy bite.
    Get the recipe: Brisket Quesadillas
    11
    A breakfast quesadilla cut into four pieces.
    Breakfast Quesadillas
    Stuffed with crisp bacon, scrambled eggs, and cheese, these breakfast quesadillas make a hearty and satisfying breakfast at camp or at home.
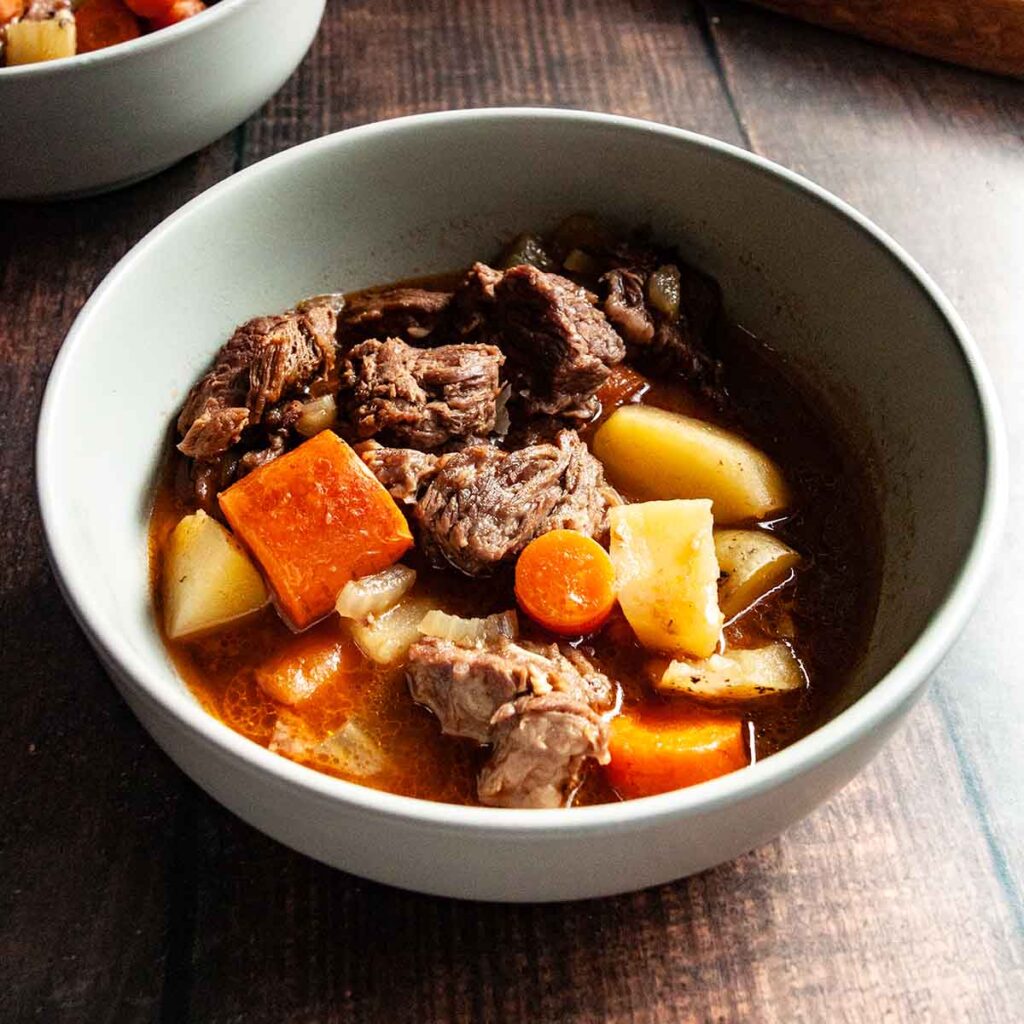
    Get the recipe: Breakfast Quesadillas
    12
    Recipe and photo credit: In the Kitch
    Kimchi Quesadillas
    Kimchi quesadillas are a great fusion of Asian and Mexican cuisine with a mix of sour, savory, and salty flavors plus creamy, melted cheese.
    Get the recipe: Kimchi Quesadillas
    13
    Recipe and photo credit: Simple and Fraiche
    Barbacoa Quesadillas
    These barbacoa quesadillas are so easy to make and incredibly delicious. Tender, slow-cooked barbacoa meat and melted sharp white cheddar cheese are folded between golden tortillas.
    Get the recipe: Barbacoa Quesadillas
    • « Go to Previous Page
    • Page 1
    • Page 2
    • Page 3
    • Page 4
    • Page 5
    • Page 6
    • Interim pages omitted …
    • Page 9
    • Go to Next Page »

    Primary Sidebar

    A woman's face.

    Hi, I'm Angie! I'm so glad you're here. I can't wait to share my favorite camping and grilling recipes with you.

    More about me →

    Summer Favorites

    • Skewers of grilled strawberries on a plate, drizzled with dark syrup.
      Grilled Strawberries
    • Four grilled shrimp skewers on a platter with lemon wedges and cocktail sauce on the side.
      Grilled Old Bay Shrimp
    • A whole skillet peach cobbler with two spoons resting on top.
      Grilled Skillet Peach Cobbler
    • Two Cajun chicken foil packets on plates with forks on the side.
      Cajun Chicken Foil Packets

    Popular Recipes

    • A small skillet filled with caramelized bananas.
      Campfire Bananas Foster
    • A mini cast iron skillet filled with cornbread.
      Mini Skillet Cornbread
    • A grilled cheese sandwich cut in half and a handful of potato chips.
      Campfire Grilled Cheese Two Ways
    • A skillet with three chicken breasts and a skillet filled with cheesy gnocchi.
      18 Easy Cast Iron Skillet Meals for Camping

    Footer

    ↑ back to top

    About

    • Privacy Policy

    Newsletter

    • Sign Up for Emails

    Let's Connect

    • Contact

    Copyright © 2025 Camp.Grill.Eat.

    Rate This Recipe

    Your vote:


    A rating is required
    A name is required
    An email is required