• Skip to main content
  • Skip to primary sidebar

Camp.Grill.Eat. logo

menu icon
go to homepage
  • Recipes
  • About
  • Subscribe
  • Contact
    • Facebook
    • Pinterest
    • YouTube
  • search icon
    Homepage link
    • Recipes
    • About
    • Subscribe
    • Contact
    • Facebook
    • Pinterest
    • YouTube
  • ×
    Home » Recipes

    Recipe Index

    May 20, 2024 Beef Recipes

    Grilled Flanken Short Ribs

    These marinated grilled flanken short ribs are a great alternative to your average seared steak and a great option when you're craving BBQ ribs, but don't have hours to make them. A simple marinade of adobo sauce, lime, and spices adds smoky heat and tenderness to this rich and flavorful cut of meat.

    Although many short rib recipes require hours of gentle braising to coax the richly marbled meat into falling-apart tenderness, thin cut flanken-style beef ribs are ideal for grilling and cook up very quickly. A smoky, spicy marinade ensures that these ribs are as tender as can be after a quick trip across the grill.

    [feast_advanced_jump_to]

    Ingredients and Substitutions

    Ingredients for grilled flanken short ribs--short ribs, cumin, coriander, lime, and adobo.
    • Adobo sauce--This is the sauce that's found in the can of chipotle chiles. It has a spicy, smoky flavor, and is fantastic for marinating meat.
    • Lime--You should get about 2 tablespoons of lime juice from one lime. If your lime isn't very juicy, add a splash of the bottled stuff, or juice a second lime. Remember to zest your lime before you juice it!
    • Flanken-style ribs--You can find these in most supermarkets, but for the best quality, go to a Korean market, if one is available to you. You'll find these labeled as galbi-cut or galbi-style ribs, and they are the perfect thickness for marinating and grilling.

    Important Steps

    Marinade ingredients in a bowl with a halved squeezed lime next to it.
    Short ribs in a plastic bag, with marinade added to them.
    1. Mix the adobo sauce, lime juice and zest, and spices in a small bowl.
    2. Place the short ribs in a resealable bag and pour the marinade over them.
    Flanken short ribs coated in marinade in a plastic bag.
    Flanken short ribs on a grill.
    1. Seal the bag and massage thoroughly to evenly coat the short ribs. Marinate for 8 to 24 hours, flipping and massaging the bag occasionally.
    2. Grill the ribs over medium-high heat until just cooked through about 3 minutes per side.

    FAQs

    What are flanken short ribs?

    They are beef short ribs that are cut across the bone, resulting in long strips of meat that are studded with small rounds of bone. The meat is well marbled with fat, making it very flavorful and tender, when cooked properly. Like English-style short ribs, they can be cooked slowly in a braise, but they're also well suited to marinating and grilling, thanks to their thin cut.

    How long should I marinate?

    The longer you can marinate the ribs, the more flavor you'll get. Marinate them for at least 8 hours, but for the best flavor and most tender meat, I recommend letting them marinate for 24 hours.

    What should I serve with these?

    Side dishes that you can toss onto the grill alongside these ribs are perfect. Try it with grilled garlic bread, grilled tomato and avocado salad, or grilled beets with goat cheese. If you want to keep it really simple, toss together a simple lime coleslaw or marinated bean salad to serve alongside.

    Tips and Troubleshooting

    • These cook very quickly, so don't step away from the grill while you're making them. They can become overcooked and tough if cooked too long.
    • This grilled rib recipe is suitable for gluten-free and dairy-free diets.

    More Grilling Recipes You'll Love

    A platter of crispy grilled chicken wings with salad and bbq sauce in the background.
    Crispy Grilled Chicken Wings
    A partially sliced grilled bacon-wrapped pork tenderloin on a wooden cutting board with a dish of green beans on the side.
    Grilled Bacon-Wrapped Pork Tenderloin

    Tried This Recipe?

    If you've tried this recipe, please leave a comment below. Follow me on Instagram, Facebook, YouTube, or Pinterest for more great camping and grilling recipes.

    Recipe

    Strips of grilled flanken short ribs on a wooden board.

    Grilled Flanken Short Ribs

    A woman's face.Angie Zoobkoff
    A simple marinade of adobo sauce, lime, and spices adds smoky heat and tenderness to this rich and flavorful cut of meat, which cooks up quickly on the grill.
    No ratings yet
    Print Recipe Pin Recipe
    Prep Time 5 minutes mins
    Cook Time 5 minutes mins
    Marinating 1 day d
    Total Time 1 day d 10 minutes mins
    Course Main Course
    Cuisine Mexican
    Servings 3 servings
    Calories 448 kcal

    Ingredients
      

    • 2 tablespoons adobo sauce
    • Zest and juice from 1 lime
    • 1 teaspoon ground coriander
    • ½ teaspoon ground cumin
    • Salt and freshly ground black pepper
    • 1 ½ pounds (680 g) flanken-style short ribs

    Instructions
     

    • In a small bowl, mix the adobo sauce, lime zest and juice, coriander, and cumin. Season well with salt and pepper.
    • Place the ribs in a resealable plastic bag. Pour the marinade over and seal the bag. Massage well to thoroughly coat the ribs.
    • Marinate for at least 8 and up to 24 hours. Flip and massage the bag occasionally.
    • Preheat the grill for medium-high (400°F).
    • Place the ribs in a single layer on the grill and cook, flipping once, until seared on the outside and just cooked through, 2 to 3 minutes per side. Serve immediately.

    Notes

    • Don't overcook--These cook very quickly, so don't step away from the grill while you're making them. They can become overcooked and tough if cooked too long.
    • Dietary--This recipe is suitable for gluten-free and dairy-free diets.

    Nutrition

    Serving: 1portionCalories: 448kcalCarbohydrates: 8.5gProtein: 25.5gFat: 34.8gCholesterol: 100mgFiber: 0.7gSugar: 5.1g
    Keyword flanken short ribs, grilled beef, grilled short ribs
    Tried this recipe?Let us know how it was!

    May 18, 2024 Collections

    11 Crispy Toasted Sandwich Recipes

    There's something incredibly comforting about a warm toasted sandwich straight off the griddle, grill, or frying pan. The combination of crispy bread, gooey melted cheese, and warm savory fillings makes for an excellent meal. Whether you're looking for some inventive new ideas to elevate your grilled-cheese game, or you want a surefire way to please everyone at the table, you'll find it in these 11 crispy toasted sandwich recipes.

    1
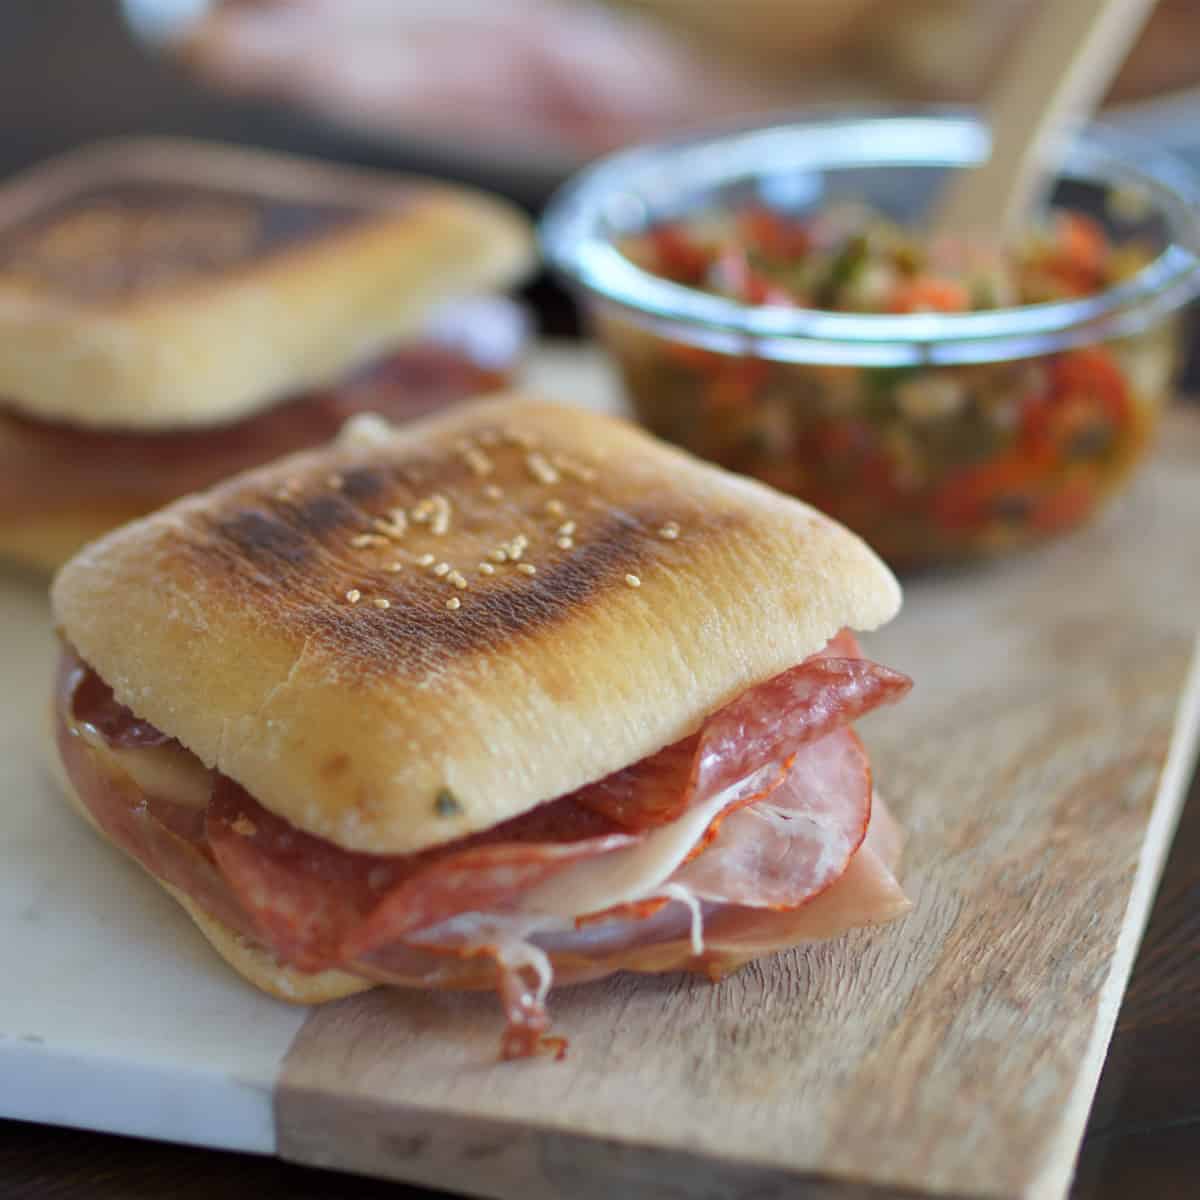
    Grilled Muffaletta: New Orleans Deli Sandwich
    Recipe and photo credit: Carne Diem
    Grilled Muffaletta: New Orleans Deli Sandwich
    This grilled muffaletta is loaded with cured and smoked meats and a homemade olive tapenade. We take this New Orleans deli sandwich to the next level by grilling in up panini style on a griddle like a Blackstone.
    Get the recipe: Grilled Muffaletta
    2
    A person pulling an English muffin grilled cheese sandwich apart.
    English Muffin Grilled Cheese
    Your favorite grilled cheese sandwich just got even better thanks to two(!) types of cheese and a crispy toasted English muffin.
    Get the recipe: English Muffin Grilled Cheese
    3
    Recipe and photo credit: Mission Food Adventure
    BLT with Egg and Cheese
    The World’s Greatest Sandwich aka the Spanglish Sandwich is the ultimate crossbreed of a BLT, grilled cheese, and breakfast sandwich in one!
    Get the recipe: BLT with Egg and Cheese
    4
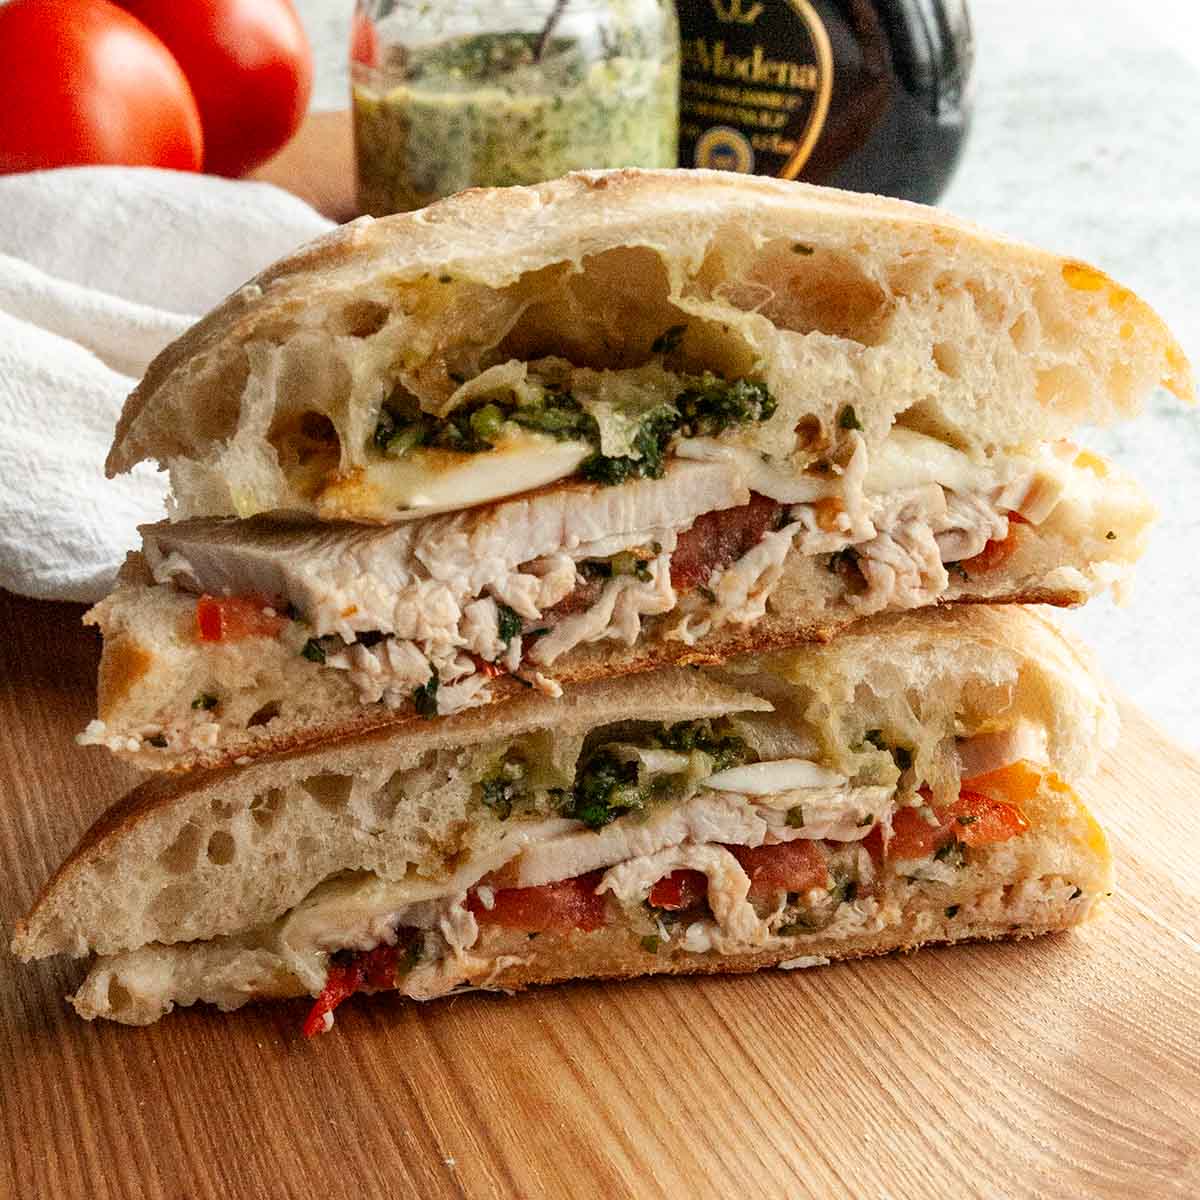
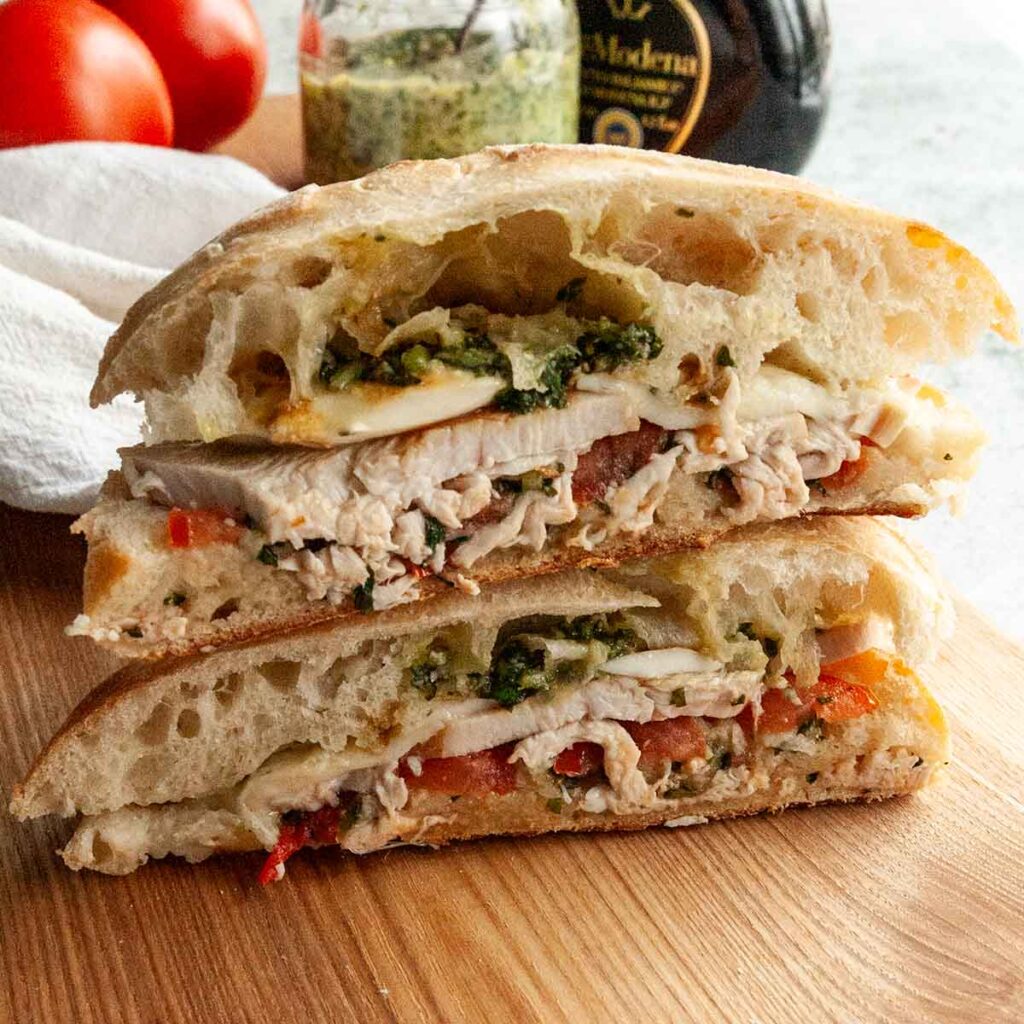
    Two halves of a turkey ciabatta sandwich with tomatoes, pesto, and mozzarella, stacked on top of each other on a cutting board.
    Turkey Ciabatta Sandwich
    An easy handheld meal that's loaded with turkey, pesto, tomatoes, and cheese. Perfect for a casual camping meal or to take along on a hike or picnic.
    Get the recipe: Turkey Ciabatta Sandwich
    5
    Recipe and photo credit: The Sassy Foodie
    Greek Spanakopita Grilled Cheese
    This Greek spanakopita grilled cheese brings together all the flavours of the classic Greek phyllo packet, into a quick sandwich.
    Get the recipe: Greek Spanakopita Grilled Cheese
    6
    Recipe and photo credit: The Forked Spoon
    French Dip Sandwich
    This easy French Dip Sandwich is made with perfectly cooked, melt-in-your-mouth chuck roast served on crusty bread with melty cheese, and cooked onions. Dipped in leftover cooking gravy (au jus), it’s a simple, comforting classic loaded with amazing flavor!
    Get the recipe: French Dip Sandwich
    7
    Recipe and photo credit: The Forked Spoon
    Philly Cheesesteak Recipe
    Delicious Philly Cheesesteak Sandwiches made with tender ribeye steak, sauteed onions and green bell peppers, and gooey melted provolone cheese on a delicious toasted hoagie roll. This iconic American comfort food is super easy to make and perfect for weeknight dinners and game days.
    Get the recipe: Philly Cheesesteak
    8
    Recipe and photo credit: Sunglow Kitchen
    Provolone Grilled Cheese with Honey
    Provolone Grilled Cheese with Honey tastes like a gourmet meal, but comes together in just 10 minutes! It’s cheesy, melty, and so stretchy!
    Get the recipe: Provolone Grilled Cheese with Honey
    9
    Recipe and photo credit: Kitchen at Hoskins
    Mushroom Sandwich
    Mushroom Sandwich features mega flavorful sautéed mushrooms, juicy tomato and glorious cheesy gooeyness. It is ready in under 16 minutes!
    Get the recipe: Mushroom Sandwich
    10
    Recipe and photo credit: Air Fryer Yum.
    Air Fryer Bacon Grilled Cheese
    Air fryer bacon grilled cheese is a grilled cheese with bacon sandwich. Easy to make and probably worth the calories if taken in moderation.
    Get the recipe: Air Fryer Bacon Grilled Cheese
    11
    Recipe and photo credit: Somebody Feed Seb
    Ultimate Tuna Melt Wrap
    If you’re stuck in a rut with your lunch meals, look no further! Here’s a recipe for an ultimate Tuna Melt Wrap that’ll blow your socks off!
    Get the recipe: Ultimate Tuna Melt Wrap

    May 17, 2024 Camping

    Campfire Baked Potatoes

    Campfire baked potatoes are a classic camping favorite made with Russet potatoes that are wrapped in foil and buried in campfire coals. They come out with crispy skin and a perfectly fluffy, tender interior. Top them with campfire chili and call it a meal, or load them up with your favorite toppings and enjoy alongside your camping ribs.

    Baked potatoes topped with sour cream and scallions.

    You may be wondering if baked potatoes in a campfire are just like the ones you make in your oven at home. Not exactly. The skin does get crispier, and sometimes even a little burned. However, the interior is also so much fluffier and creamier than oven-baked potatoes, and is perfect for topping with plenty of butter and sour cream (or you could take them to the next level and turn them into stuffed potatoes). Plus, you get to enjoy them in the great outdoors, around a campfire. What's better than that?!

    [feast_advanced_jump_to]

    Why This Recipe is Great for Camping

    • They only require 3 ingredients, and don't take up any cooler space.
    • They cook directly in the fire, so there's no dishes to do or special equipment needed.

    Ingredients and Substitutions

    Ingredients for campfire baked potatoes--Russet potatoes, salt, and oil.
    • Potatoes--You want to use a good baking potato for this recipe. I recommend Russets because their thicker skin will protect the flesh of the potato. Choose potatoes that are a similar size so that they'll all be finished cooking at the same time.
    • Oil--This helps to crisp up the skin. Any neutral oil or olive oil will work here.

    Important Steps

    Four large potatoes coated with oil and sprinkled with salt on a baking sheet.
    Foil-wrapped potatoes buried in coals in a campfire.
    1. Rub the outside of each potato with oil and sprinkle with salt. Poke a few holes in each potato with a fork. Wrap each potato in foil.
    2. Prepare a fire and let it burn until there are plenty of hot coals. Bury the potatoes in the coals and cook until tender.

    FAQs

    Can I make campfire baked potatoes without foil?

    Yes, you can. Skip the oil and salt and simply bury your potatoes in the hot coals. The skins will be too charred to eat but the interior of the potato will be soft and fluffy after 30 to 60 minutes. Simply scoop out the center of the potato and enjoy.

    How do I know when my baked potato is ready?

    To check your potatoes without unwrapping them, insert a long skewer into the center of the potato. It should slide in easily. If there is any resistance, give it another 10 minutes and check again.

    Why do you rub salt on the outside of the potato?

    This helps to draw some of the moisture out of the potato when baking, resulting in a fluffy, tender baked potato.

    Tips and Troubleshooting

    • Use a double layer of aluminum foil to help prevent the skins from burning.
    • The potatoes get very hot during cooking. Use long handled tongs to remove them from the coals and let them sit for a few minutes before opening them.
    • This recipe is suitable for gluten-free diets. Without the toppings, it is also suitable for dairy-free and vegan diets.

    More Camping Recipes You'll Love

    Two Cajun chicken foil packets on plates with forks on the side.
    Cajun Chicken Foil Packets
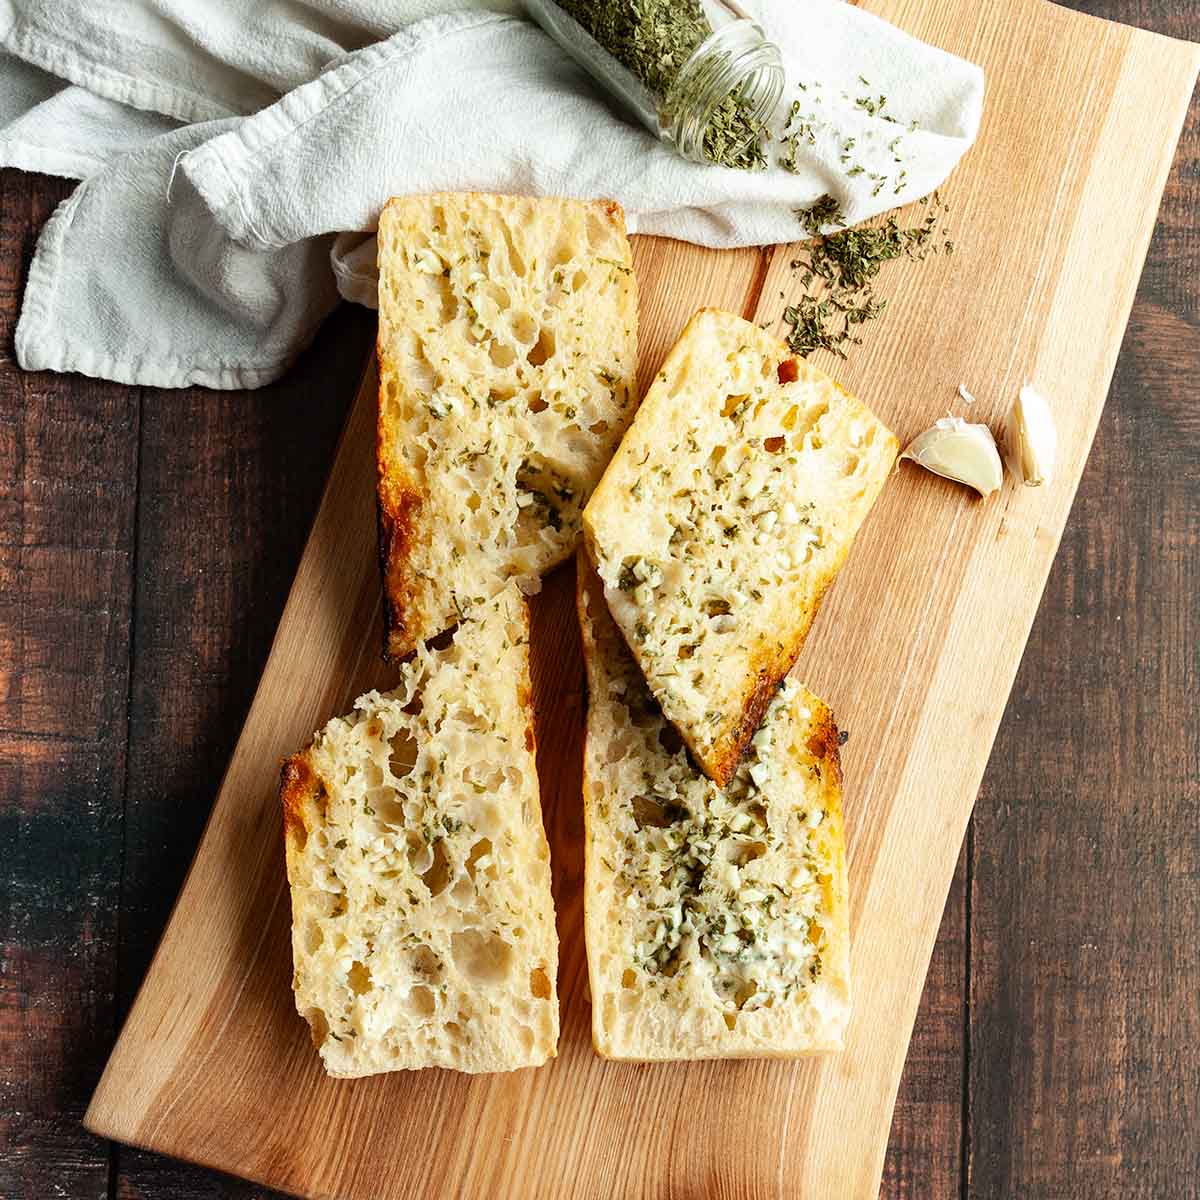
    Four pieces of toasted garlic bread on a wooden cutting board.
    Campfire Garlic Bread

    Tried This Recipe?

    If you've tried this recipe, please leave a comment below. Follow me on Instagram, Facebook, YouTube, or Pinterest for more great camping and grilling recipes.

    Recipe

    Baked potatoes topped with sour cream and scallions.

    Campfire Baked Potatoes

    A woman's face.Angie Zoobkoff
    A campfire classic made with Russet potatoes that are wrapped in foil and buried in coals. They come out with crispy skin and soft, fluffy interiors. Load them up with your favorite toppings and enjoy!
    No ratings yet
    Print Recipe Pin Recipe
    Prep Time 5 minutes mins
    Cook Time 45 minutes mins
    Total Time 50 minutes mins
    Course Side Dish
    Cuisine American
    Servings 4 potatoes
    Calories 350 kcal

    Ingredients
      

    • 4 large Russet potatoes
    • 2 tablespoons oil
    • Kosher salt
    • Butter, sour cream, bacon bits, chives for serving (optional)

    Instructions
     

    • Build a campfire and let it burn until you have a bed of hot coals.
    • Rub each potato with oil and poke a few holes in it with a fork. Sprinkle with salt.
    • Wrap each potato individually with two layers of foil and bury them in the coals. Cook until the center is soft, turning occasionally, 45 to 60 minutes.
    • Let cool for a few minutes before unwrapping. Top with butter, sour cream, bacon, chives, or any other favorite potato toppings.

    Notes

    • Potato size--Choose potatoes that are a similar size so that they're finished cooking at the same time.
    • Avoid direct flame--Always cook the potatoes in hot coals, not direct flame to prevent burning.
    • Use tongs--The potatoes get very hot during cooking. Use long handled tongs to remove them from the coals and let them sit for a few minutes before opening them.
    • Dietary--This recipe is suitable for gluten-free diets. Without the toppings, it is also suitable for dairy-free and vegan diets.

    Nutrition

    Serving: 1potatoCalories: 350kcalCarbohydrates: 64.1gProtein: 7.9gFat: 7.2gSodium: 42mgFiber: 6.9gSugar: 3.2g
    Keyword baked potatoes in foil, campfire potatoes
    Tried this recipe?Let us know how it was!

    May 15, 2024 Collections

    11 Incredible Ways to Use Italian Sausage

    Whether you prefer sweet, mild, or hot, a package of Italian sausage is a protein and flavor packed addition to your meal. This collection of Italian sausage recipes offer you 11 unique ways to make it the star of your dinner plate. Choose from classics like sausage and peppers or pasta alla Norcina, or try something new and inventive, like Italian sausage nachos!

    1
    Recipe and photo credit: Get Inspired Everyday!
    Easy Sausage and Peppers with Onions
    This easy oven baked Sausage and Peppers with Onions takes just a few minutes of prep for a tasty sheet pan dinner in less than 30 mins!
    Get the recipe: Easy Sausage and Peppers with Onions
    2
    Pieces of Italian sausage quesadilla stacked on top of each other.
    Italian Sausage Quesadilla
    These quick and easy quesadillas are made with melted mozzarella cheese, spiced Italian sausage, and red onion, all sandwiched inside a crispy flour tortilla.
    Get the recipe: Italian Sausage Quesadilla
    3
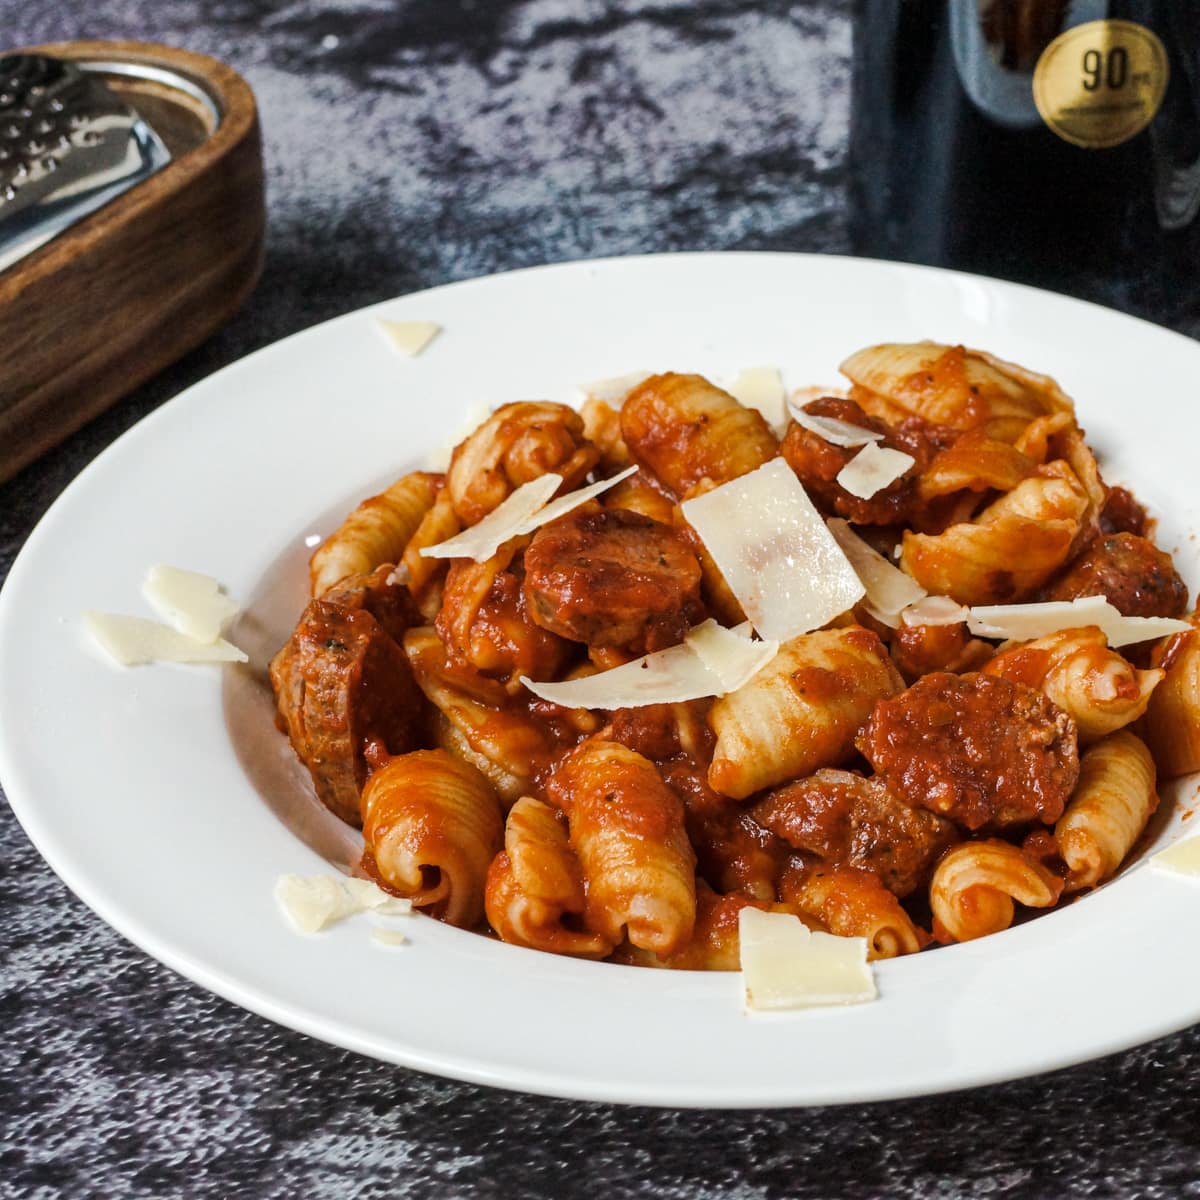
    Grilled Italian Sausage Pasta with Arrabbiata Sauce
    Recipe and photo credit: Carne Diem
    Grilled Italian Sausage Pasta with Arrabbiata Sauce
    This Grilled Italian Sausage Pasta with Arrabbiata Sauce is perfect for spice lovers. Hot grilled sausage pairs perfectly with the spicy pasta sauce and al dente pasta.
    Get the recipe: Grilled Italian Sausage Pasta
    4
    Recipe and photo credit: Cooking with Curls
    Sausage Pinwheels
    This delicious sausage pinwheels recipe is made with flaky puff pastry wrapped around savory Italian sausage, parmesan and mozzarella cheese.
    Get the recipe: Sausage Pinwheels
    5
    Recipe and photo credit: Carolyn's Cooking
    Italian Sausage and Pepper Nachos
    These Sausage and Pepper Nachos are a spin off of the Italian American classic, sausage and peppers, bringing all that delicious flavor to you in nacho form!
    Get the recipe: Italian Sausage and Pepper Nachos
    6
    Recipe and photo credit: Cooking with Curls
    Italian Stuffed Zucchini Boats
    Italian Stuffed Zucchini Boats are filled with Italian sausage, onion, bell pepper, and sauce then topped with melty mozzarella cheese.
    Get the recipe: Italian Stuffed Zucchini Boats
    7
    Recipe and photo credit: Cook Dinner Tonight
    Baked Gnocchi
    Easy baked gnocchi recipe is a simple one-pan recipe that’s packed with flavor! This gnocchi is made with 8 ingredients in about 30 minutes.
    Get the recipe: Baked Gnocchi
    8
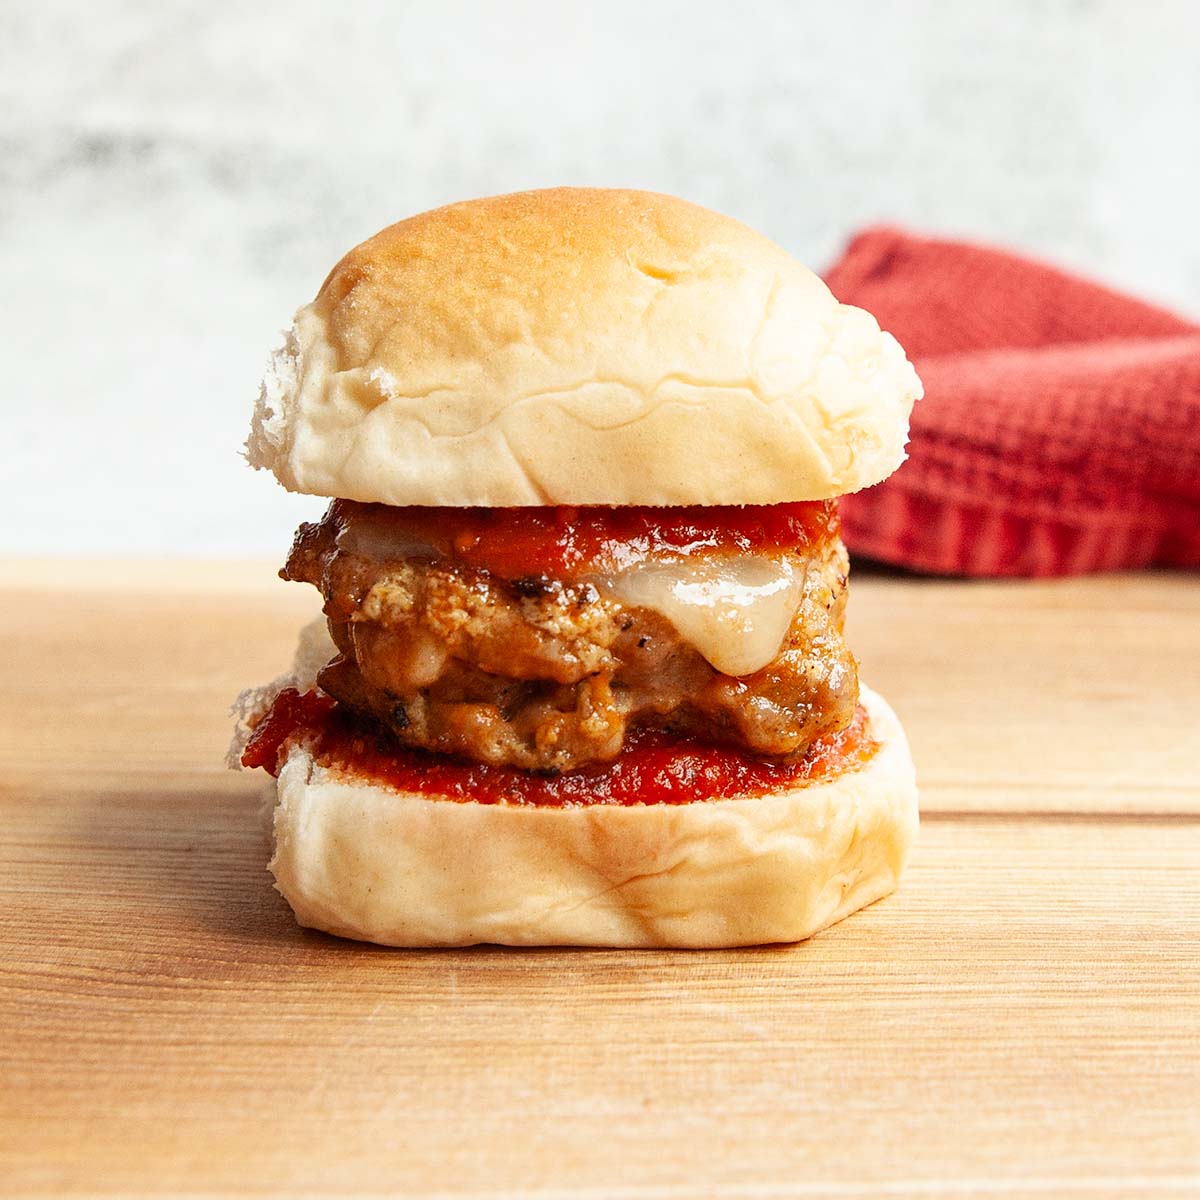
    A sausage slider topped with cheese and marinara sauce.
    Italian Sausage Sliders
    These easy Italian sliders are made with ground sausage patties and topped with melted provolone cheese and marinara sauce. They're an easy skillet meal that's ready in just 20 minutes.
    Get the recipe: Italian Sausage Sliders
    9
    Recipe and photo credit: Fresh Off The Grid
    Easy Sausage and Tortellini Soup
    Plump tortellini and spicy Italian sausage floating in a rich, luxurious broth, this quick and easy tortellini soup is a super cozy meal!
    Get the recipe: Easy Sausage and Tortellini Soup
    10
    Recipe and photo credit: Little Black Skillet
    Ultimate Meat Lovers’ Lasagna
    This meat lovers’ lasagna is comfort food to the max with layers of sausage, ground beef, marinara sauce, tender noodles, and gooey cheese.
    Get the recipe: Ultimate Meat Lovers' Lasagna
    11
    Pasta alla Norcina (Creamy Pasta with Sausage)
    Recipe and photo credit: Mission Food Adventure
    Pasta alla Norcina (Creamy Pasta with Sausage)
    Pasta alla Norcina is an easy, creamy pasta dish originating from an Umbrian town famous for its pork. It features crumbled sausage and pecorino Romano cheese.
    Get the recipe: Pasta alla Norcina

    Still have sausage to use up? Add it to beef and sausage burgers for an easy meal.

    May 13, 2024 Blackstone Griddle Recipes

    Citrus Scallop Skewers

    These sweet citrus scallop skewers are an easy seafood dinner that can be prepared on your Blackstone griddle (or any griddle) and are ready in just 30 minutes. A quick bath in an orange, oil, and Aleppo pepper marinade turns this simple seafood into a superstar.

    Four citrus scallop skewers on a slate board.

    If your seafood skewer game is limited to shrimp skewers, I highly recommend giving these griddle scallops with citrus marinade a try. They're so quick to make and have a wonderfully sweet citrusy flavor. Serve them with easy Blackstone zucchini fritters, or a quick cilantro lime coleslaw and some steamed rice for an exceptionally easy meal.

    [feast_advanced_jump_to]

    Why You'll Love This Recipe

    • It's easy to make and ready in just 30 minutes.
    • It can be prepared on your Blackstone griddle, electric griddle, or on your cast iron griddle over the grill or campfire.

    Ingredients and Substitutions

    Ingredients for citrus scallop skewers--orange, Aleppo pepper, scallops, and oil.
    • Scallops--Use sea scallops for these griddle scallop skewers. Although they aren't as sweet as bay scallops, they're less expensive, widely available, and will be much easier to thread onto skewers.
    • Orange--Use a big juicy orange, like a navel orange here so that you get plenty of orange juice and zest to flavor the scallops. One orange should give you about ¼ cup juice and 1 ½ tablespoons zest.
    • Oil--Any neutral vegetable oil or olive oil will work here.
    • Aleppo pepper--This has a mild fruity flavor which is hard to replicate with any other pepper. I highly recommend seeking it out online or at a specialty spice shop. If it's not available to you, mix ⅜ teaspoon paprika and a pinch of cayenne pepper to use as a substitute.

    Important Steps

    A bowl of citrus marinade next to a bowl of scallops.
    A person patting scallops dry.
    1. Whisk the orange zest and juice, oil, and Aleppo pepper in a large bowl. Add the scallops, cover, and marinate in the fridge for 15 minutes.
    2. Drain the scallops and gently pat dry.
    A skewer with five scallops on it and more scallops on a baking sheet.
    Four scallop skewers on a griddle.
    1. Thread the scallops onto skewers and season with salt and pepper.
    2. Cook the scallops on a griddle until opaque throughout, flipping once.

    FAQs

    What's the difference between bay and sea scallops?

    There are a few differences between the two types of scallops. One, as indicated by their names, is where they're found. Bay scallops are usually found in shallow water, like bays or estuaries, while sea scallops live in deeper waters.

    Bay scallops are generally sweeter and more delicate than their deep water counterpart, and often more expensive.

    The most noticeable difference between the two is their size. Bay scallops are small, with a diameter of about 1 inch, while sea scallops are significantly larger, often measuring 2 inches in diameter.

    How do you remove the scallop muscle?

    Scallops often come with a muscle attached to the side, which looks like a small white lump. These should be removed before cooking, and are easy to pull off by pinching the muscle and pulling it away from the scallop.

    How can you tell when scallops are cooked?

    Uncooked scallops will appear slightly translucent with a pinkish hue, and feel a little mushy when prodded. When scallops are cooked through they turn white throughout, and the texture becomes firmer. When poked with your finger, a cooked scallop should feel mostly firm.

    Tips and Troubleshooting

    • Don't marinate for longer than 1 hour or they can become mushy when cooked. Also, take care not to overcook your scallops, as they can become tough and rubbery.
    • Some types of skewers may prevent all of the scallops from having direct contact with the surface of the griddle. If they don't have direct contact with the griddle surface while they're cooking, press on them gently.
    • This seafood dinner recipe is suitable for gluten-free and dairy-free diets.
    Four citrus scallop skewers on a slate board.

    More Skewer Recipes You'll Love

    Four garlic butter shrimp skewers on a rectangular platter, sprinkled with fresh parsley.
    Garlic Butter Shrimp Skewers
    Six chicken skewers on a rectangular platter with a dish of sauce on the side.
    Grilled Bang Bang Chicken Skewers

    Tried This Recipe?

    If you've tried this recipe, please leave a comment below. Follow me on Instagram, Facebook, YouTube, or Pinterest for more great camping and grilling recipes.

    Recipe

    Four citrus scallop skewers on a slate board.

    Citrus Scallop Skewers

    A woman's face.Angie Zoobkoff
    A quick bath in an orange, oil, and Aleppo pepper marinade turns these easy scallop skewers into a restaurant-quality meal.
    No ratings yet
    Print Recipe Pin Recipe
    Prep Time 10 minutes mins
    Cook Time 5 minutes mins
    Marinade 15 minutes mins
    Total Time 30 minutes mins
    Course Main Course
    Cuisine American
    Servings 4 skewers
    Calories 171 kcal

    Equipment

    • Griddle (Blackstone, Camp Chef, Electric)

    Ingredients
      

    • 2 tablespoons olive oil
    • Zest and juice of 1 large orange
    • ½ teaspoon Aleppo pepper
    • 14 ounces (400 g) sea scallops side muscle removed
    • Salt and freshly ground black pepper

    Instructions
     

    • In a large bowl, whisk the oil, orange zest and juice, and Aleppo pepper together.
    • Add the scallops and give everything a good stir so that all of the scallops are coated in the marinade. Cover and chill for 15 minutes.
    • Drain the scallops and spread them on a baking sheet. Gently pat them dry with paper towel. It's fine if the zest and pepper stick to the scallops; you're just trying to remove any excess moisture.
    • Thread the scallops onto skewers. Season with salt and pepper.
    • Heat your griddle to medium-high.
    • Cook the skewers, flipping once, until both sides are golden and the scallops are opaque throughout, about 3 minutes per side.

    Notes

    • Don't marinate for longer than 30 minutes or they can become mushy when cooked. Also, take care not to overcook your scallops, as they can become tough and rubbery.
    • Some types of skewers may prevent all of the scallops from having direct contact with the surface of the griddle. If they don't have direct contact with the griddle surface while they're cooking, press on them gently.
    • This recipe is suitable for gluten-free and dairy-free diets.

    Nutrition

    Serving: 1skewerCalories: 171kcalCarbohydrates: 6.9gProtein: 18.4gFat: 7.9gCholesterol: 35mgSodium: 171mgFiber: 0.8gSugar: 3g
    Keyword 30 minute meals, blackstone cooking, blackstone griddle, scallop skewers, seared scallops
    Tried this recipe?Let us know how it was!

    May 11, 2024 Cast Iron Skillet Recipes

    14 Cheesy Cast-Iron Skillet Dips

    Bookmark this page because you'll be making these 14 irresistibly cheesy cast-iron skillet dips on repeat. Each recipe in this collection of warm melted dips is perfect for sharing with friends at your next gathering, and will make you the most popular person at the party.

    1
    Recipe and photo credit: Smoked Meat Sunday
    Smoked Buffalo Chicken Dip
    This smoked buffalo chicken dip recipe is perfect for anyone that wants a tasty snack or a really good appetizer. It's loaded with shredded chicken, four types of cheese, and bacon.
    Get the recipe: Smoked Buffalo Chicken Dip
    2
    A small skillet filled with beer cheese dip, topped with shredded cheese, tomatoes, and scallions with chips on the side.
    Skillet Beer Cheese Dip
    This beer cheese dip with cream cheese, smoked Gouda, Cheddar, and beer is easy to make in your cast iron skillet. It can be made over the campfire, on your camp stove, or on a regular stove.
    Get the recipe: Skillet Beer Cheese Dip
    3
    Recipe and photo credit: Simply Happy Foodie
    Hot Cheesy Corn Dip
    Hot Cheesy Corn Dip is a flavorful game day party appetizer made with corn, green chilis, cheese and a creamy sauce. The best party dip recipe!
    Get the recipe: Hot Cheesy Corn Dip
    4
    Recipe and photo credit: In Mama Maggie's Kitchen
    Chorizo Cheese Dip
    Chorizo Cheese Dip is a cheese-lovers dream. Ooey gooey, melted cheese that’s mixed with Mexican chorizo. Delicious party appetizer!
    Get the recipe: Chorizo Cheese Dip
    5
    A skillet filled with Guinness beer cheese dip, topped with chopped green onions, and cayenne, with pretzel crackers on the side.
    Guinness Cheese Dip
    Enjoy your favorite Irish stout in dip form! This cheesy Guinness dip is made with cream cheese and Irish cheddar and is perfect for sharing with friends.
    Get the recipe: Guinness Cheese Dip
    6
    Recipe and photo credit: Cooking with Curls
    Pizza Dip
    Easy, hot and cheesy pizza dip is layered with cream cheese, three different types of cheese, Italian sausage, mini pepperoni, and pizza sauce.
    Get the recipe: Pizza Dip
    7
    Recipe and photo credit: Cooking with Curls
    Queso Fundido (Mexican Melted Cheese)
    Queso fundido is a delicious Mexican melted cheese and spicy chorizo appetizer served with crispy tortilla chips or as a filling for tacos.
    Get the recipe: Queso Fundido
    8
    Recipe and photo credit: Little Sunny Kitchen
    3-ingredient Sausage Dip
    Cream Cheese Sausage Dip is made with just three simple ingredients and ready to eat in under 15 minutes. This is the best sausage dip ever, everyone loves it.
    Get the recipe: 3-Ingredient Sausage Dip
    9
    Recipe and photo credit: A Cedar Spoon
    Beef Taco Dip
    Simple taco inspired ingredients transform this beef dip into a flavor packed, creamy appetizer.
    Get the recipe: Beef Taco Dip
    10
    A skillet filled with Swiss cheese dip with two fondue forks resting on the side and a bowl of bread cubes in the background.
    Swiss Cheese Dip
    This cheesy dip is made with just 4 ingredients--Swiss cheese, sparkling wine, cream cheese, and mustard. It's perfect for dipping and dunking bread and crackers and is ideal for sharing with friends.
    Get the recipe: Swiss Cheese Dip
    11
    Recipe and photo credit: Life as a Strawberry
    Roasted Red Pepper Baked Ricotta
    This roasted red pepper baked ricotta dip is perfect for holiday entertaining! One of our favorite easy appetizers for a crowd.
    Get the recipe: Roasted Red Pepper Baked Ricotta
    12
    Recipe and photo credit: Small Town Woman
    Artichoke Dip
    Impress your guests with this deliciously creamy baked artichoke dip. With simple ingredients and easy preparation, it’s the perfect appetizer for any party or gathering.
    Get the recipe: Artichoke Dip
    13
    Recipe and photo credit: Quiche My Grits
    Smoked Cheese Dip
    This Smoked Cheese Dip is loaded with 3 different types of creamy cheese, Rotel tomatoes and savory spices to make the best smoked queso ever! Whether
    Get the recipe: Smoked Cheese Dip
    14
    Recipe and photo credit: A Southern Soul
    Easy Hot Crab Dip
    Rich, creamy Hot Crab Dip cooked in a cast-iron skillet is the ultimate appetizer loaded with fresh crab and perfectly seasoned.
    Get the recipe: Easy Hot Crab Dip

    May 10, 2024 Camping

    Tangy Cilantro Lime Coleslaw

    This tangy cilantro lime coleslaw recipe is perfect for all your summer picnics, potlucks, and backyard BBQs. The crunchy combination of crisp shredded cabbage and citrusy dressing makes it a crowd-pleasing favorite. It's also easy to make, can be prepared ahead of time, and is suitable for all diets.

    A bowl of cilantro lime coleslaw with lime wedges and cilantro in the background.

    Coleslaw is such a summer classic that it makes frequent appearances on our camping menus, as well as at any outdoor gathering. However, I'm always a little leery of creamy slaw on those warm summer days when you can't guarantee a safe temperature to store it at. Thankfully, this cilantro slaw with lime dressing is made without mayo or dairy, making it safe to enjoy outside on those hot days . . . not that it ever lasts long enough to spoil anyway.

    [feast_advanced_jump_to]

    Why This Recipe is Great for Camping

    • You can do most of the prep work before heading out to camp and toss it together shortly before serving.
    • This cilantro lime slaw recipe has no mayo, making it perfect for serving outside on warmer days.
    • It requires minimal ingredients and takes up little cooler space.

    Ingredients and Substitutions

    Ingredients for cilantro lime coleslaw--cabbage, lime, cilantro, and oil.
    • Lime--Your lime should yield 1 ½ to 2 tablespoons of juice. To help extract as much juice as possible, roll it firmly against a firm surface before juicing. Remember to zest your lime before cutting it!
    • Oil--Any vegetable-based oil will work for the dressing.
    • Cabbage--Crisp green cabbage is best here. Look for a cabbage with tightly closed unblemished leaves. Use a very sharp knife or mandolin to shred the cabbage as finely as possible.
    • Cilantro--Choose bright green cilantro that has perky leaves and firm stems. Pick out any stems that are drooping or have discolored leaves.

    Important Steps

    A measuring cup with lime dressing with a halved lime and a whisk next to it.
    A bowl of coleslaw and an empty measuring glass that had dressing in it.
    1. Whisk the lime juice, zest, and oil together in a small bowl or measuring glass. Season to taste with salt and pepper.
    2. Mix the shredded cabbage and cilantro in a large bowl. Pour the dressing over and toss to combine.

    FAQs

    Can I make this salad in advance?

    If you're taking the salad camping, or to a potluck or picnic, you can prep the cabbage and cilantro and the dressing up to 2 days in advance. Store them separately, and toss them together shortly before serving. This will give you a fresh and crunchy slaw.

    If you prefer a softer slaw, mix the dressing and cabbage slaw with cilantro together 3 to 4 hours before serving.

    How long can I store this salad?

    Your slaw will keep for up to 4 days in your fridge or cooler. It will soften as it sits, and will release liquid, but will remain tasty and is safe to eat.

    What should I serve with this?

    This classic BBQ side dish pairs perfectly with griddle turkey smash burgers, grilled pork tenderloin, smoked bratwurst, or grilled salmon recipes. It also makes a great addition or side to fish tacos.

    Tips and Troubleshooting

    • For the best texture, toss your salad together 30 to 60 minutes before serving.
    • This recipe is suitable for gluten-free, dairy-free, and vegan diets.
    A bowl of cilantro lime coleslaw with lime wedges and cilantro next to it.

    More Salad Recipes You'll Love

    A salad of potatoes and asparagus on a white platter with lemon wedges and dill on the side.
    Potato Salad with Asparagus
    A bowl filled with raw vegetable marinated salad.
    Overnight Marinated Vegetable Salad

    Tried This Recipe?

    If you've tried this recipe, please leave a comment below. Follow me on Instagram, Facebook, YouTube, or Pinterest for more great camping and grilling recipes.

    Recipe

    A bowl of cilantro lime coleslaw with lime wedges and cilantro in the background.

    Tangy Cilantro Lime Coleslaw

    A woman's face.Angie Zoobkoff
    The combination of crunchy shredded cabbage, tender cilantro leaves, and tangy lime dressing makes this easy coleslaw a summer favorite.
    No ratings yet
    Print Recipe Pin Recipe
    Prep Time 15 minutes mins
    Chill 30 minutes mins
    Total Time 45 minutes mins
    Course Salad, Side Dish
    Cuisine American
    Servings 4 servings
    Calories 138 kcal

    Ingredients
      

    • Zest and juice of 1 lime
    • 3 tablespoons vegetable oil
    • Salt and freshly ground black pepper
    • 6 cups shredded green cabbage
    • ½ cup cilantro leaves

    Instructions
     

    • In a bowl or measuring jug, whisk together the lime juice, zest, and oil. Season to taste with salt and pepper.
    • Combine the cabbage and cilantro in a large serving bowl.
    • Pour the dressing over and toss well to combine. Refrigerate for at least 30 minutes or until ready to serve. Stir again before serving.

    Notes

    • Get ahead--Prep the cabbage and cilantro and dressing up to 2 days before serving. Store the dressing and slaw mixture separately and toss together 30 to 60 minutes before serving.
    • Lime juice--Your lime should yield 1 ½ to 2 tablespoons of juice. If not, use an extra lime half or splash in a dash of bottled lime juice.
    • Dietary--This recipe is suitable for gluten-free, dairy-free, and vegan diets.

    Nutrition

    Serving: 1portionCalories: 138kcalCarbohydrates: 11.8gProtein: 2.4gFat: 10.5gFiber: 4.8gSugar: 5.3g
    Keyword coleslaw without mayo, tangy coleslaw
    Tried this recipe?Let us know how it was!

    May 8, 2024 Camping

    12 Easy Camping Lunches

    Ever struggle to come up with easy lunch ideas when you're camping that don't require a lot of prep or dishes? You're not alone. Everyone is usually hungry, but sometimes it feels like you've barely cleaned up from breakfast and you're hauling everything out again.

    Enter these 12 easy camping lunch recipes, that will let you have a meal ready quickly and with minimal effort. Choose from sandwiches, quesadilla recipes, pasta, and more. Many of them can even be prepared before you head out on your camping trip or can be packed along on a picnic, hike, or whatever outdoor adventure awaits you.

    1
    Two halves of a turkey ciabatta sandwich with tomatoes, pesto, and mozzarella, stacked on top of each other on a cutting board.
    Turkey Ciabatta Sandwich
    An easy handheld meal that's loaded with turkey, pesto, tomatoes, and cheese. Perfect for a casual camping meal or to take along on a hike or picnic.
    Get the recipe: Turkey Ciabatta Sandwich
    2
    Recipe and photo credit: An Edible Mosaic
    Buffalo Chicken Pasta Salad Recipe
    Buffalo chicken pasta salad combines chicken, carrots, celery, and pasta in a creamy, zippy sauce.
    Get the recipe: Buffalo Chicken Pasta Salad
    3
    Recipe and photo credit: Stef's Eats and Sweets
    Turkey & Bacon Bagels
    These meal prep turkey and bacon bagels are great cold or warmed up, and make a quick and easy lunch.
    Get the recipe: Turkey & Bacon Bagels
    4
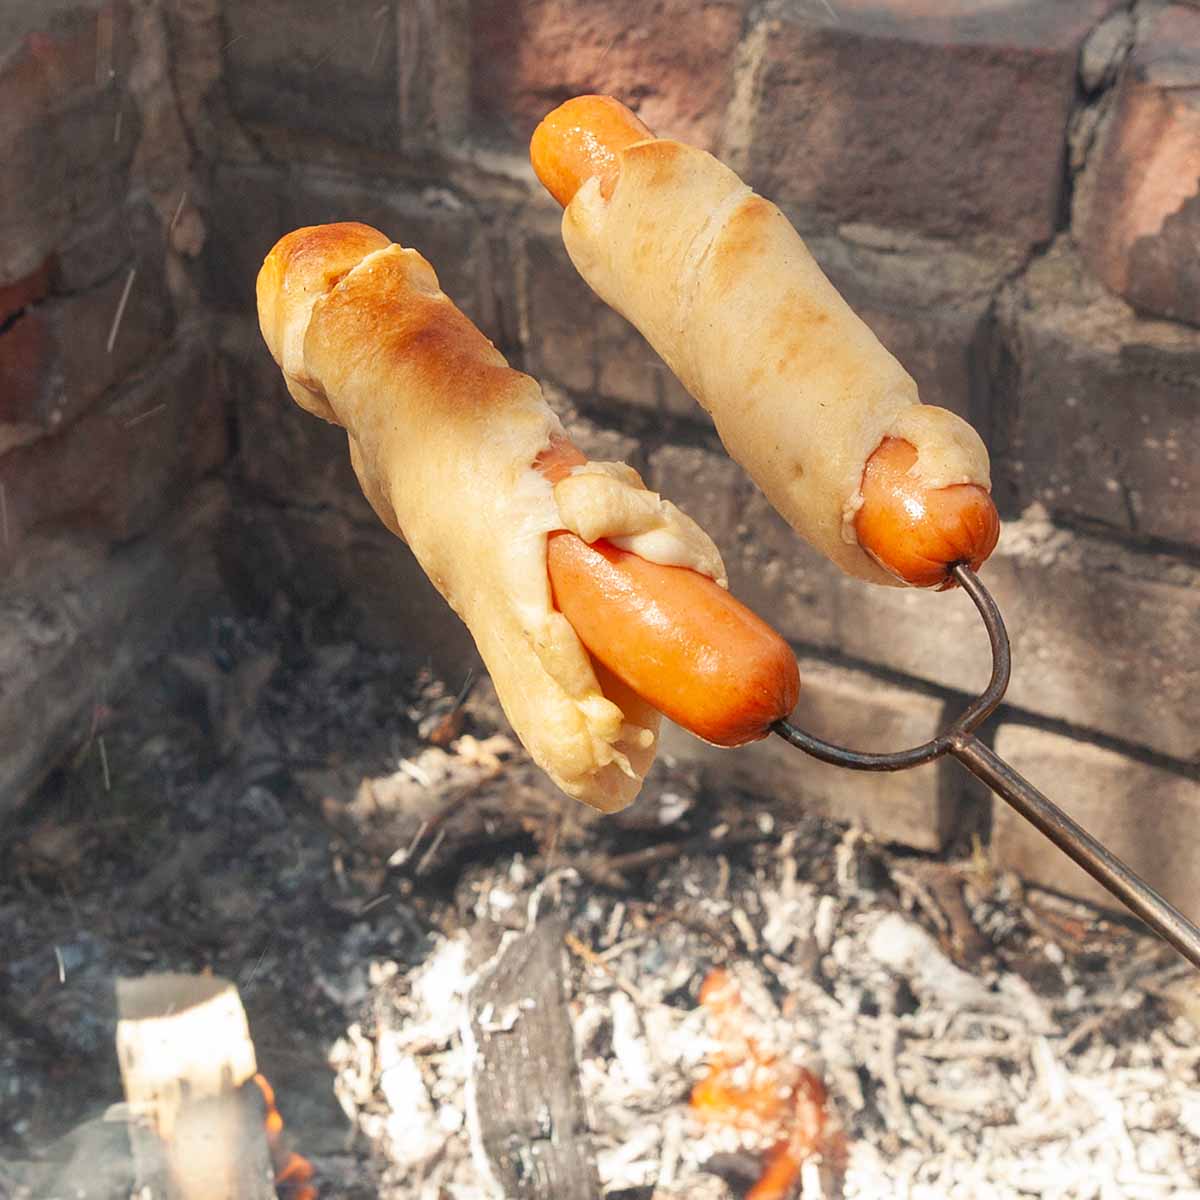
    Two hot dogs wrapped in pastry over a campfire.
    Crescent Roll Campfire Dogs
    Like a campfire version of pigs in blankets, these crescent roll campfire dogs are an easy meal or snack made with hot dogs and refrigerated crescent roll dough. They require just 2 ingredients and are ready in 15 minutes.
    Get the recipe: Crescent Roll Campfire Dogs
    5
    Pieces of Italian sausage quesadilla stacked on top of each other.
    Italian Sausage Quesadilla
    These quick and easy quesadillas are made with melted mozzarella cheese, spiced Italian sausage, and red onion, all sandwiched inside a crispy flour tortilla.
    Get the recipe: Italian Sausage Quesadilla
    6
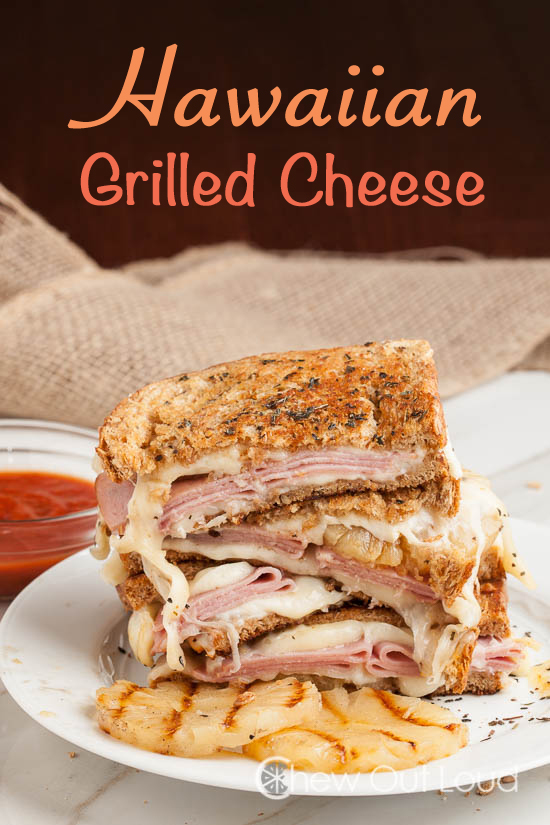
    Hawaiian Grilled Cheese
    Recipe and photo credit: Chew Out Loud
    Hawaiian Grilled Cheese
    This is not your everyday grilled cheese. We did it up Island style with this Hawaiian Grilled Cheese. Grilled pineapples are amazing here. Easy, delish!
    Get the recipe: Hawaiian Grilled Cheese
    7
    Recipe and photo credit: Roaming My Planet
    Campfire Potato Nachos
    Campfire Potato Nachos are a great snack or lunch choice for your camping trip.
    Get the recipe: Campfire Potato Nachos
    8
    A person pulling an English muffin grilled cheese sandwich apart.
    English Muffin Grilled Cheese
    Your favorite grilled cheese sandwich just got even better thanks to two(!) types of cheese and a crispy toasted English muffin.
    Get the recipe: English Muffin Grilled Cheese
    9
    Recipe and photo credit: xoxo Bella
    Easy Campfire French Dip Sandwiches
    You only need five ingredients to make the most delicious campfire foil pack French dip sandwiches and these meat and cheese treats are bursting with savory flavor appeal!
    Get the recipe: Campfire French Dip Sandwiches
    10
    Recipe and photo credit: Homemade Heather
    Foil Packet Fajitas
    This tinfoil packet fajita recipe is perfect to make while camping in the great outdoors. Be sure to add it to your camping list!
    Get the recipe: Foil Packet Fajitas
    11
    A white bowl filled with pasta salad.
    Camping Pasta Salad
    This make-ahead tortellini salad with artichokes, tomatoes, olives, and creamy Italian dressing is a summer staple for camping, potlucks, and picnics.
    Get the recipe: Camping Pasta Salad
    12
    Recipe and photo credit: xoxo Bella
    Campfire Hot Dog and Potato Foil Packs
    Eating around the campfire is one of life’s great pleasures, but you can also use a grill or the oven. Hot dog and potato foil packs are just always so good!
    Get the recipe: Campfire Hot Dog and Potato Foil Packs

    May 6, 2024 Blackstone Griddle Recipes

    English Muffin Grilled Cheese

    These rich and cheesy English muffin grilled cheese sandwiches are an easy camping (or anytime) lunch. They're made with crispy toasted English muffins and two types of cheese and are ready in just 15 minutes.

    A person pulling an English muffin grilled cheese sandwich apart.

    If you've never considered making grilled cheese with English muffins before, now is the time. With their airy pockets and crisp exterior, they're the perfect vehicle for gooey melted cheese. See for yourself and discover a new favorite sandwich recipe.

    [feast_advanced_jump_to]

    Why This Recipe is Great for Camping

    • They're easy to make and can be cooked in a cast iron skillet or on a griddle.
    • These crispy toasted sandwiches require only a few ingredients and are a great option when you're looking for cheap camping meals.
    • You can cook grilled cheese over the fire or on your camp stove.
    • They're a kid-friendly camping meal.

    Ingredients and Substitutions

    Ingredients for English muffin grilled cheese--cheddar, English muffins, Monterey Jack cheese, and mayo.
    • English muffins--Use your favorite type of English muffins here. I prefer either sourdough or extra-crispy, but plain or whole wheat will also work well.
    • Mayo--This gives you an extra crispy, golden-brown exterior on your sandwich. If you want to keep the meal egg-free, you can use butter, but you will need to watch the sandwich closely so that it doesn't burn. Don't substitute low-fat mayonnaise, as it can cause the sandwich to be soggy.
    • Cheese--For best flavor, use a couple types of cheese. I like the combination of Cheddar and Jack, but any good shredding cheese will work. Don't use preshredded cheese as it doesn't melt well.

    How to Make Grilled Cheese on a English Muffin

    Halved English muffins being spread with mayo.
    Assembled English muffin grilled cheese sandwiches.
    English muffin grilled cheese sandwiches being toasted on a griddle.
    1. Split the English muffins in half and spread the outside of each muffin with mayo.
    2. Divide the cheddar and Monterey Jack between two buns, then top with the top half of the buns.
    3. Toast on a griddle or in a skillet over medium-low heat until the buns are toasted and the cheese is melted.

    FAQs

    Why do you use mayo instead of butter on the grilled cheese?

    Because mayonnaise is made with oil, it has a higher smoke point than butter, which allows you to achieve a golden toasted exterior on your sandwich without burning it.

    Tips and Troubleshooting

    • The secret to perfectly toasted and melted grilled cheese sandwiches is to cook over medium-low heat. If you cook over a higher heat, the English muffin will burn before the cheese fully melts.
    • Let your sandwich sit for a minute before slicing it. They are quite hot immediately after cooking, and the cheese is runny. Letting them rest will allow everything to firm up and cool slightly.
    An English muffin grilled cheese on a plate.

    More Camping Lunch Recipes You'll Love

    Pieces of Italian sausage quesadilla stacked on top of each other.
    Italian Sausage Quesadilla
    Two halves of a turkey ciabatta sandwich with tomatoes, pesto, and mozzarella, stacked on top of each other on a cutting board.
    Turkey Ciabatta Sandwich

    Tried This Recipe?

    If you've tried this recipe, please leave a comment below. Follow me on Instagram, Facebook, YouTube, or Pinterest for more great camping and grilling recipes.

    Recipe

    A person pulling an English muffin grilled cheese sandwich apart.

    English Muffin Grilled Cheese

    A woman's face.Angie Zoobkoff
    Your favorite grilled cheese sandwich just got even better thanks to two(!) types of cheese and a crispy toasted English muffin.
    No ratings yet
    Print Recipe Pin Recipe
    Prep Time 5 minutes mins
    Cook Time 10 minutes mins
    Total Time 15 minutes mins
    Course Main Course
    Cuisine American
    Servings 2 sandwiches
    Calories 353 kcal

    Ingredients
      

    • 2 English muffins
    • 2 teaspoons full-fat mayonnaise
    • ½ cup Cheddar cheese shredded
    • ½ cup Monterey Jack cheese shredded

    Instructions
     

    • Split each English muffin in half.
    • Spread the outside of each English muffin half with about ½ teaspoon mayonnaise.
    • Pile ¼ cup of Cheddar and ¼ cup Monterey Jack on the bottom half of each bun, then top with the top half, mayo sides facing out.
    • Place the assembled sandwiches in a cast iron skillet or on a griddle set over medium-low heat (or on a grate over hot coals), and cook, flipping once, until the outsides are toasted and golden brown and the cheese is melted, about 5 minutes per side.
    • Slice in half and devour.

    Notes

    • Skip the pre-shredded cheese--Pre-shredded cheese doesn't melt well. Skip the bagged stuff and grate it yourself from a block.
    • Let it rest--Let your sandwich sit for a minute before slicing it. They are quite hot immediately after cooking, and the cheese is runny. Letting them rest will allow everything to firm up and cool slightly.

    Nutrition

    Serving: 1sandwichCalories: 353kcalCarbohydrates: 26.1gProtein: 19.1gFat: 20.1gCholesterol: 60mgSodium: 605mgFiber: 2gSugar: 2.3g
    Keyword grilled cheese, sandwiches
    Tried this recipe?Let us know how it was!

    May 4, 2024 Articles

    Stress-Free Long Weekend Camping Menu Plan

    If you're a seasoned camper, you likely have a long list of things you love about camping that keeps you returning to it year after year. For me, it's the fresh air, quiet early morning walks with my dog, listening to music around the campfire, and most of all, the food, which always seems to taste better when enjoyed outside.

    However, when it comes to cooking and cleaning on a camping trip, I often think it seems kind of like regular life with less convenience and more dirt. In other words, not exactly a holiday.

    [feast_advanced_jump_to]

    Over the years, I've learned to do two things that changed that entirely. The first is to keep meals simple. No one is expecting a gourmet feast, but it doesn't have to be hot dogs all weekend, either. The second is to do as much as possible before heading out. This results in less stress and more relaxing.

    This stress-free camping menu plan offers recipes and meal ideas for a long weekend with no hot dogs and no repeats! There are tips on what to do ahead of time so that you can spend your weekend enjoying the great outdoors and still enjoy amazing meals.

    Long Weekend Menu Plan

    Friday Dinner

    You've arrived, unpacked, and are set up. Whether the kids are begging you to take them to the park, or you want to sit and relax with a cold drink, this is the moment that you'll be incredibly grateful you took the time to make burritos prior to the trip. Purchase a veggie tray or pack along your favorite cut vegetables for an easy side to the dinner. Campfire banana boats make for a fun end to the meal, especially when everyone can customize their own.

    Two halves of a burrito on a plate with hot sauce drizzled over them.

    Get the recipe: Make-Ahead Camping Burritos

    Nine banana boats on a wooden table.

    Get the recipe: Campfire Banana Boats (recipe and photo credit: Fresh Off The Grid)

    Saturday Breakfast

    Start your day off with a hearty breakfast of French toast that's prepared in your cast iron skillet. Offer some sliced berries or a purchased fruit tray on the side. Don't forget to bring coffee!

    A skillet with three slices of French toast topped with strawberries and whipped cream.

    Get the recipe: Skillet French Toast (recipe and photo credit: Homemade Heather)

    Saturday Lunch

    Thankfully, when you prepped your make-ahead burritos, you cooked a double batch of the ground beef mixture. This just needs to be warmed up in your skillet and then everyone can assemble their own camping walking tacos.

    A walking taco with Doritos and cheese with lettuce, sour cream, and tomato surrounding it.

    Get the recipe: Camping Walking Tacos

    Saturday Dinner

    If you prepped your chicken and veggies in advance, these chicken foil packets come together in no time at all. Even if you need to do a little slicing and dicing at camp, the effort is pretty minimal. Serve some campfire garlic bread on the side and s'mores for dessert.

    Two Cajun chicken foil packets on plates with forks on the side.

    Get the recipe: Cajun Chicken Foil Packets

    Four pieces of toasted garlic bread on a wooden cutting board.

    Get the recipe: Campfire Garlic Bread

    Sunday Breakfast

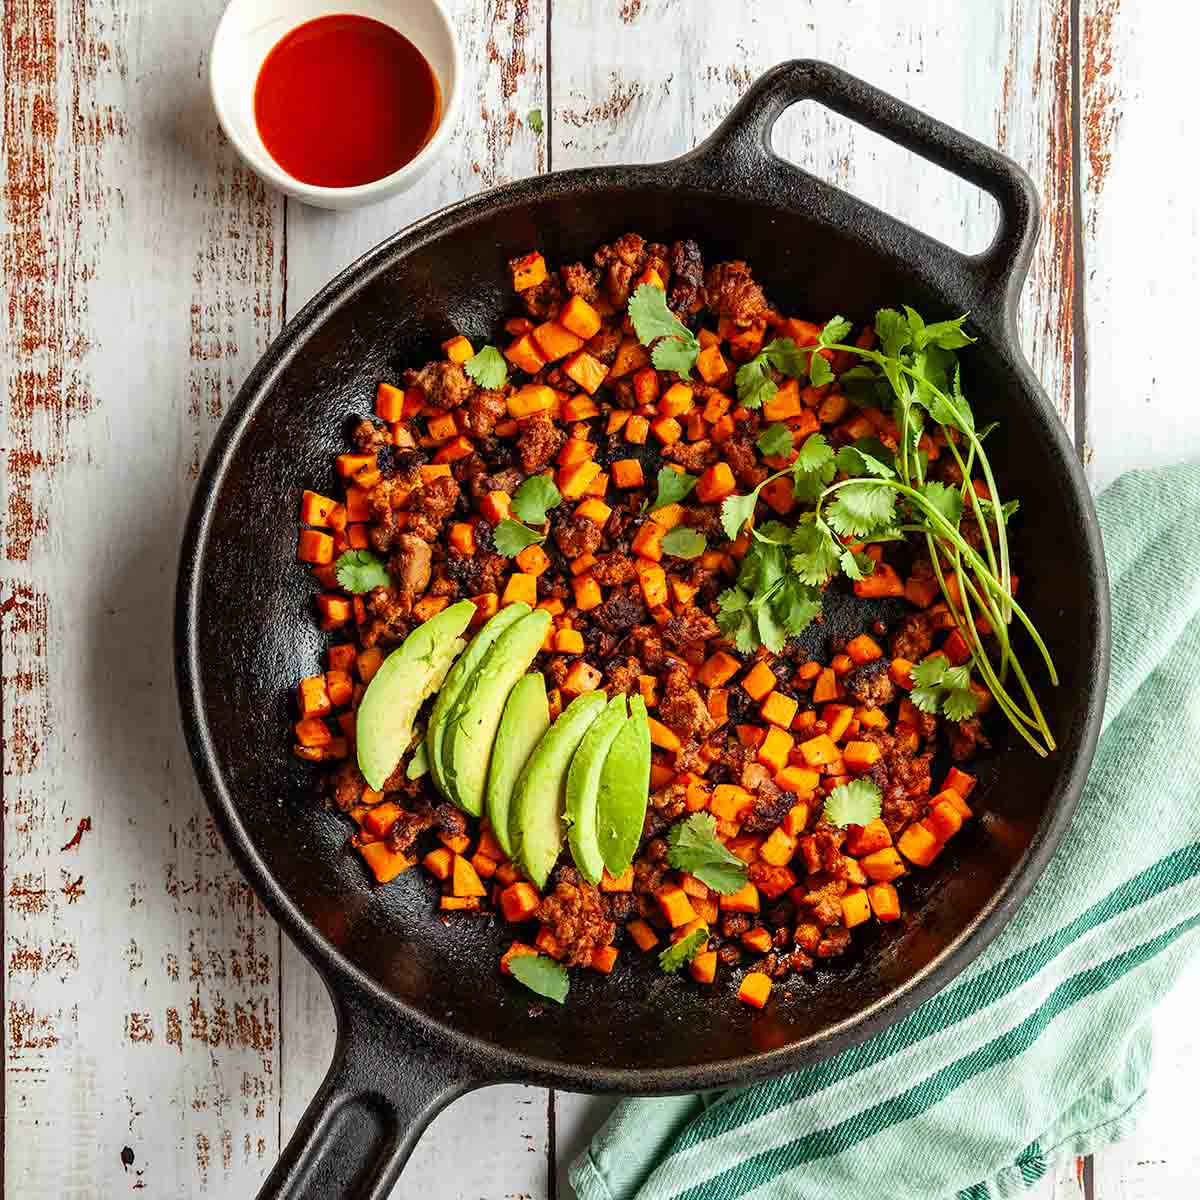
    Whether you choose to top it with a few fried eggs or eat it as-is, this chorizo and sweet potato hash is hearty and satisfying, and will keep you full until lunch.

    A cast iron skillet filled with chorizo and sweet potato hash with sliced avocado and cilantro on top.

    Get the recipe: Chorizo Sweet Potato Hash

    Sunday Lunch

    This ciabatta turkey sandwich feels fancy, but is easy to throw together. You can serve it warm or cold, so if you're heading out on a hike or picnic, feel free to make them up and toss them in your bag early in the day.

    Two halves of a turkey ciabatta sandwich with tomatoes, pesto, and mozzarella, stacked on top of each other on a cutting board.

    Get the recipe: Turkey Ciabatta Sandwich

    Sunday Dinner

    These Italian sausage sliders require little more than shaping some Italian sausage patties and cooking them in a skillet. Serve an Italian pasta salad (that you can make before you go) on the side. Campfire baked apples are a sweet end to the day.

    An Italian sausage slider topped with marinara on a plate with potato chips on the side.

    Get the recipe: Italian Sausage Sliders

    A white bowl filled with pasta salad.

    Get the recipe: Camping Pasta Salad

    A campfire apple on a plate, filled with granola and topped with whipped cream.

    Get the recipe: Campfire Baked Apples (recipe and photo credit: Fresh Off The Grid)

    Monday Breakfast

    Fill everyone's bellies up before the packing and trip home begins. Skillet pancakes and crispy bacon are the perfect end to the trip.

    A stack of pancakes, maple syrup, and blueberries on a plate with blueberries and bacon in the background.

    Get the recipe: Cast Iron Skillet Pancakes

    Several slices of maple sriracha bacon on a plate with maple syrup and sriracha in the background.

    Get the recipe: Maple Sriracha Griddle Bacon

    Bonus: Snacks!

    No camping trip is complete without snacks, and while I think a few bags of chips make a perfectly acceptable snack to nosh on all weekend, if you want to branch out, try this skillet beer cheese, or if you're looking for something fun for the kiddos, mix up a batch of s'mores trail mix.

    A small skillet filled with beer cheese dip, topped with shredded cheese, tomatoes, and scallions with chips on the side.

    Get the recipe: Skillet Beer Cheese Dip

    Two jars filled with Golden Grahams, chocolate cookies, mini marshmallows, and chocolate chips.

    Get the recipe: S'mores Trail Mix

    Get Ahead Tips

    There are a few things I recommend doing before heading out. Trust me on this. Your weekend self will love you for it.

    • Up to 1 month before your trip, make the camping burritos and freeze them. While you're at it, make a double batch of the meat and freeze that to use in your walking tacos.
    • Up to a week before the trip, mix up the dry ingredients for your pancakes and store them in a resealable plastic bag.
    • A few days before the trip, mix up the filling (without the butter) for your campfire apples and store it in resealable plastic bag.
    • The day before or the day of your trip, make the pasta salad. Store it in a sealed container.
    • The day of your trip, slice up the onions and peppers and cube the chicken thighs for your Cajun chicken foil packets. Store the chicken and vegetables in separate sealed containers.
    • The day of your trip, prepare the garlic bread (but don't cook it) and wrap it in foil.

    Equipment You'll Need

    All of these recipes are designed to be made with minimal equipment and can be prepared over a campfire using a cast iron skillet or griddle. You will need to pack the following few items (in addition to regular utensils and plates/cups):

    • Cast iron skillet or griddle
    • Long handled tongs
    • A roll of aluminum foil
    • Heat resistant gloves or a pot holder

    Happy camping and bon appétit!

    May 3, 2024 Blackstone Griddle Recipes

    Turkey Smash Burgers with Caramelized Onions

    These crispy-edged turkey smash burgers with caramelized onions are incredibly easy to make on your Blackstone (or any griddle). They're nestled inside toasted buns and topped with melted Cheddar cheese, sweet red onion, and a spicy mayo. It's a burger recipe you're going to want to keep taped to your fridge.

    Two turkey smashburgers with melted cheese and caramelized red onion on plates with potato wedges.

    If you're unfamiliar with turkey smash burgers, they're simply a ball of seasoned ground turkey that's placed on a griddle and firmly smashed to create a patty with irregular edges and plenty of surface area to crisp up. Like the juicy beef patty in Blackstone patty melts and Blackstone smash burgers with onions, they're loved for the crisp crust that develops and locks in flavor to create a juicy, tender burger.

    Smash burger recipes are ideal for making on a Blackstone griddle, or other large surface area griddle, but if you've only got a small electric griddle or a cast-iron pan, follow the directions in the FAQ below. The process will take a little longer, but you'll still be rewarded with an amazing smashed turkey burger.

    [feast_advanced_jump_to]

    Why This Recipe is Perfect for Blackstone Griddles

    • The large surface area of the griddle allows you to cook everything at once, so you've got a meal in just 30 minutes.
    • Using a griddle with two (or more) burners gives you great temperature control and allows you to cook the onions over low heat while searing the burgers over high.
    • Clean up is easy!

    Ingredients and Substitutions

    Ingredients for turkey smashburgers--buns, red onion, oil, turkey, cheese, mayo, Sriracha, and Worcestershire sauce.
    • Ground turkey--Ground turkey is pretty lean, and since these turkey burgers are made without egg, look for ground turkey that contains some dark meat. This will give your burgers a little fat and keep them juicy.
    • Worcestershire sauce--This adds flavor and umami to the burgers. In a pinch, you can swap in soy sauce.
    • Red onion--I love the flavor of red onions, but white or yellow onions will work here, too.
    • Cheese--Cheddar is classic, but if you've got another favorite, go ahead and use it. Provolone would work well, as would Monterey or Pepper Jack.
    • Buns--I've tried this turkey smash burger recipe with several different types of buns, depending on what was available. My favorite version was made with brioche buns, but any good-quality burger bun will work.

    How to Make Turkey Smash Burgers

    Mayo and sriracha sauce mixed in a small bowl.

    1. Combine the mayonnaise and Sriracha sauce in a small bowl and mix well. Cover and refrigerate until ready to use.

    Four balls of ground turkey on a baking sheet.

    2. Mix the ground turkey, Worcestershire sauce, and ¼ teaspoon of salt and pepper in a large bowl. Gently shape the mixture into 4 balls.

    A pile of red onions on a griddle surface.

    3. Warm 1 tablespoon oil on one side of your griddle over medium-low heat. Add the sliced onions and cover, stirring occasionally, for 10 to 15 minutes.

    A person smashing a turkey burger on a griddle.

    4. Heat the other side of the griddle to medium high. Using a large spatula or burger press firmly on the balls to create thin patties, about ⅜ inch thick. Cook, flipping once until golden brown and cooked through.

    Four turkey smash burgers topped with cheese on a Blackstone griddle with red onion and buns.

    5. Top the burgers with cheese and let it melt. Place the buns cut side down on the griddle and toast them while the cheese is melting. Assemble the burgers.

    FAQs

    Can I make these on a regular griddle or in a cast iron skillet?

    Definitely. If you have a small griddle or cast iron skillet, cook the onions first over medium-low heat, until soft and caramelized, then transfer them to a bowl and keep warm.

    Increase the heat to medium-high and add the burgers, smashing them to create a thin patty. Cook, flipping once, until golden and cooked through. Add the cheese and let it melt. Transfer the burgers to a plate.

    Toast the buns on the hot griddle or skillet, if desired, then assemble your burgers with spicy mayo, burger patties, and caramelized onions.

    How do I stop ground turkey from sticking to my hands?

    As you mix and shape your burgers, the heat from your hands causes the fat in the mixture to soften and become sticky. To avoid having the meat stick to your hands and prevent overworked tough burgers, try to handle the meat gently and just cup your hands around the meat as you shape it into balls. To further prevent a sticky mess, you can rub your hands with an ice cube or dip them in cold water before shaping, or coat your hands with oil or cooking spray.

    What can I use for smashing my burgers?

    There are burger press tools on the market specifically made for smashing burgers, and these are ideal because they allow you to apply pressure evenly over the surface of the patty. They are available online or at bbq or kitchen retailers.

    You can also use a large metal spatula, and press down firmly in the center of the spatula as you smash the burgers. Don't use spatulas that have holes or openings in the middle though as the burger will push up through the openings and stick to the spatula.

    What should I serve with these?

    Serve your favorite burger sides, like potato chips, fries, raw vegetables and dip, or marinated vegetable salad.

    Tips and Troubleshooting

    • You can prepare the spicy mayo and shape the turkey burgers up to 8 hours before serving. Keep them covered and stored in the refrigerator until you're ready to cook.
    • Be sure that your griddle surface is well seasoned to prevent the burgers from sticking. If you're unsure, add a little oil or cooking spray to the griddle surface before cooking.
    • Covering the onions for the first part of cooking allows them to soften more quickly. If you need to leave them uncovered, add an extra 5 minutes of cooking time.
    • The turkey burger mixture can be sticky. If you're concerned about them sticking when you smash the patty, spray the bottom of your smasher with cooking spray.
    A turkey smashburger on a plate with potato wedges and a beer and raw veggies in the background.

    More Griddle Recipes You'll Love

    Four garlic butter shrimp skewers on a rectangular platter, sprinkled with fresh parsley.
    Garlic Butter Shrimp Skewers
    Several slices of maple sriracha bacon on a plate with maple syrup and sriracha in the background.
    Maple Sriracha Bacon

    Tried This Recipe?

    If you've tried this recipe, please leave a comment below. Follow me on Instagram, Facebook, YouTube, or Pinterest for more great camping and grilling recipes.

    Recipe

    Two turkey smash burgers with melted cheese and caramelized red onion on plates with potato wedges.

    Turkey Smash Burgers with Caramelized Onions

    A woman's face.Angie Zoobkoff
    These juicy turkey burgers are a perfect griddle meal. They're tucked inside a toasted bun and topped with melted cheese, sweet caramelized onions, and spicy mayo.
    No ratings yet
    Print Recipe Pin Recipe
    Prep Time 10 minutes mins
    Cook Time 25 minutes mins
    Total Time 35 minutes mins
    Course Main Course
    Cuisine American
    Servings 4 burgers
    Calories 466 kcal

    Ingredients
      

    • 2 tablespoons mayonnaise
    • 1 teaspoon Sriracha sauce
    • 1 tablespoon vegetable oil
    • 1 medium red onion sliced
    • Table salt
    • 1 pound (454 g) ground turkey
    • 1 ½ teaspoons Worcestershire sauce
    • Freshly ground black pepper
    • 4 slices Cheddar cheese
    • 4 burger buns

    Instructions
     

    • In a small bowl, mix the mayonnaise and Sriracha. Refrigerate until you're ready to serve.
    • Heat one side of your Blackstone griddle to medium-low. Add the oil and onion and season with salt. Cover the griddle and cook, stirring occasionally, until onions are softened, 10 to 15 minutes.
    • While the onions are cooking, combine the turkey, Worcestershire sauce, ¼ teaspoon salt, and ¼ teaspoon pepper in a bowl. Mix well and divide the mixture into 4 pieces. Shape each piece into a ball, taking care not to pack the meat too tightly.
    • Heat the other side of the griddle to medium-high. Place each burger ball on the griddle and use a burger press or large spatula to firmly press down on each burger until they're "smashed" to about ⅜-inch thick.
    • Cook, flipping once, until cooked through, 4 to 5 minutes per side.
    • Top each patty with cheese.
    • While the cheese is melting, push the onions off to one side (they should be soft and golden at this point), and place the buns, cut side down on the griddle. Let them toast for 1 to 2 minutes.
    • To assemble, spread about 1 ½ teaspoons of Sriracha mayo on the top half of each bun. Place a burger patty on the bottom half of each bun, top with onions, and the top bun. Devour.

    Notes

      • Get ahead--You can prepare the spicy mayo and shape the turkey burgers up to 8 hours before serving. Keep them covered and stored in the refrigerator until you're ready to cook.
      • Season your griddle--Be sure that your griddle surface is well seasoned to prevent the burgers from sticking. If you're unsure, add a little oil or cooking spray to the griddle surface before cooking.
      • Cover the onions--Covering the onions for the first part of cooking allows them to soften more quickly. If you need to leave them uncovered, add an extra 5 minutes of cooking time.
      • Spray your smasher--The turkey burger mixture can be sticky. If you're concerned about them sticking when you smash the patty, spray the bottom of your smasher with cooking spray.

    Nutrition

    Serving: 1burgerCalories: 466kcalCarbohydrates: 26.4gProtein: 34gFat: 26.1gCholesterol: 115mgFiber: 1.5gSugar: 5g
    Keyword blackstone cooking, griddle burgers, smash burgers
    Tried this recipe?Let us know how it was!

    May 1, 2024 Collections

    19 Quick & Easy Skewer Recipes

    Skewer or kabob recipes are popular throughout the world, thanks to their quick cooking time, flavorful marinades, and variety of cooking methods. Plus, food on a stick is so much fun to eat!

    This collection of 19 quick and easy skewer recipes includes options for everyone, from easy appetizers, to grilled meats, to flavor-packed vegetarian kabobs. Some require marinating time, but they're all fast to prepare and cook, making them completely doable on a weeknight. Add a make-ahead salad on the side and you've got yourself an effortless meal.

    1
    The Greek Foodie
    Greek Pork Skewers With Yogurt Lemon Sauce
    Aromatic Greek pork skewers are exactly what you want for a night of summer grilling. Smoked paprika, sesame, lemon juice, and yogurt make the marinade and dipping sauce.
    Get the recipe: Greek Pork Skewers with Yogurt Lemon Sauce
    2
    Four garlic butter shrimp skewers on a rectangular platter, sprinkled with fresh parsley.
    Garlic Butter Shrimp Skewers
    These garlic butter shrimp skewers are quickly cooked on your griddle until sweet and buttery. They're an easy camping or weeknight meal that's ready in just 20 minutes.
    Get the recipe: Garlic Butter Shrimp Skewers
    3
    Homemade Hooplah
    Italian Style Meatball Kabobs
    Savory meatballs and classic kabob veggies marinated in an Italian style sauce. These meatball kabobs have twice the flavor for half the effort!
    Get the recipe: Italian Style Meatball Kabobs
    4
    Homemade Hooplah
    Teriyaki Beef Skewers
    Soaked in a delicious homemade teriyaki marinade to tender perfection, these teriyaki beef skewers make for an easy appetizer or a savory weeknight dinner.
    Get the recipe: Teriyaki Beef Skewers
    5
    Six chicken skewers on a rectangular platter with a dish of sauce on the side.
    Grilled Bang Bang Chicken Skewers
    This bang bang grilled chicken is an easy meal of grilled boneless chicken breast that's finished with a creamy, tangy, slightly spicy sauce.
    Get the recipe: Grilled Bang Bang Chicken Skewers
    6
    Olivia's Kitchen
    Grilled Chimichurri Shrimp Skewers
    These grilled chimichurri shrimp skewers are the perfect summer protein! With fresh flavours of lemon, parsley, and a bit of spice—these skewers grill up fast in just 5 minutes. They are gluten-free, dairy-free & perfect on salad, tacos, or rice. These Grilled Chimichurri Shrimp Skewers are the perfect addition to your summer BBQ!
    Get the recipe: Grilled Chimichurri Shrimp Skewers
    7
    The Sage Apron
    Turkish Lamb Skewers
    These tender lamb skewers are marinated in a Middle Eastern spice blend and paired with sumac onions, labneh and grilled vegetables.
    Get the recipe: Turkish Lamb Skewers
    8
    Urban Farm & Kitchen
    Authentic Shish Tawook (Grilled Chicken Skewers)
    This Authentic Shish Tawook recipe is so delicious and versatile that I guarantee you’ll add it to your summer grilling rotation.
    Get the recipe: Authentic Shish Tawook
    9
    The Feathered Nester
    Tortellini Caprese Skewers
    Easy Tortellini Caprese skewers served with balsamic drizzle! These easy appetizers make the perfect party snack food. So tasty that everyone will love them!
    Get the recipe: Tortellini Caprese Skewers
    10
    Masala & Chai
    Cheese-Stuffed Chicken Seekh Kebabs
    Indian-style “log shaped” chicken seekh kebabs flavored with Indian spices and stuffed with ooey gooey mozzarella cheese and grilled to golden brown.
    Get the recipe: Cheese-Stuffed Chicken Seekh Kebabs
    11
    Delightful Plate
    Asian Pork Skewers
    These Asian Pork Skewers are fragrant and juicy with a Japanese-inspired flavor. It is so quick and easy to make them in an air fryer or on the grill. Serve with cucumber sticks.
    Get the recipe: Asian Pork Skewers
    12
    xoxo Bella
    Antipasto Skewers
    One of the best Italian appetizer recipes if you’re looking for a nice addition to a charcuterie board or tasty, colourful food on a stick type snacks, this antipasto salad in kabob form makes easy finger food everyone will enjoy.
    Get the recipe: Antipasto Skewers
    13
    Fresh Off The Grid
    Grilled Chicken Kabobs
    Skewers of fresh veggies and juicy chicken make the ultimate summertime grilling meal! These grilled chicken kabobs are fun to eat and easy to make.
    Get the recipe: Grilled Chicken Kabobs
    14
    The Forked Spoon
    Easy Grilled Veggie Skewers
    Veggie Skewers, grilled to perfection and drizzled with tangy balsamic vinegar and brushed with a fresh garlic herb sauce.
    Get the recipe: Easy Grilled Veggie Skewers
    15
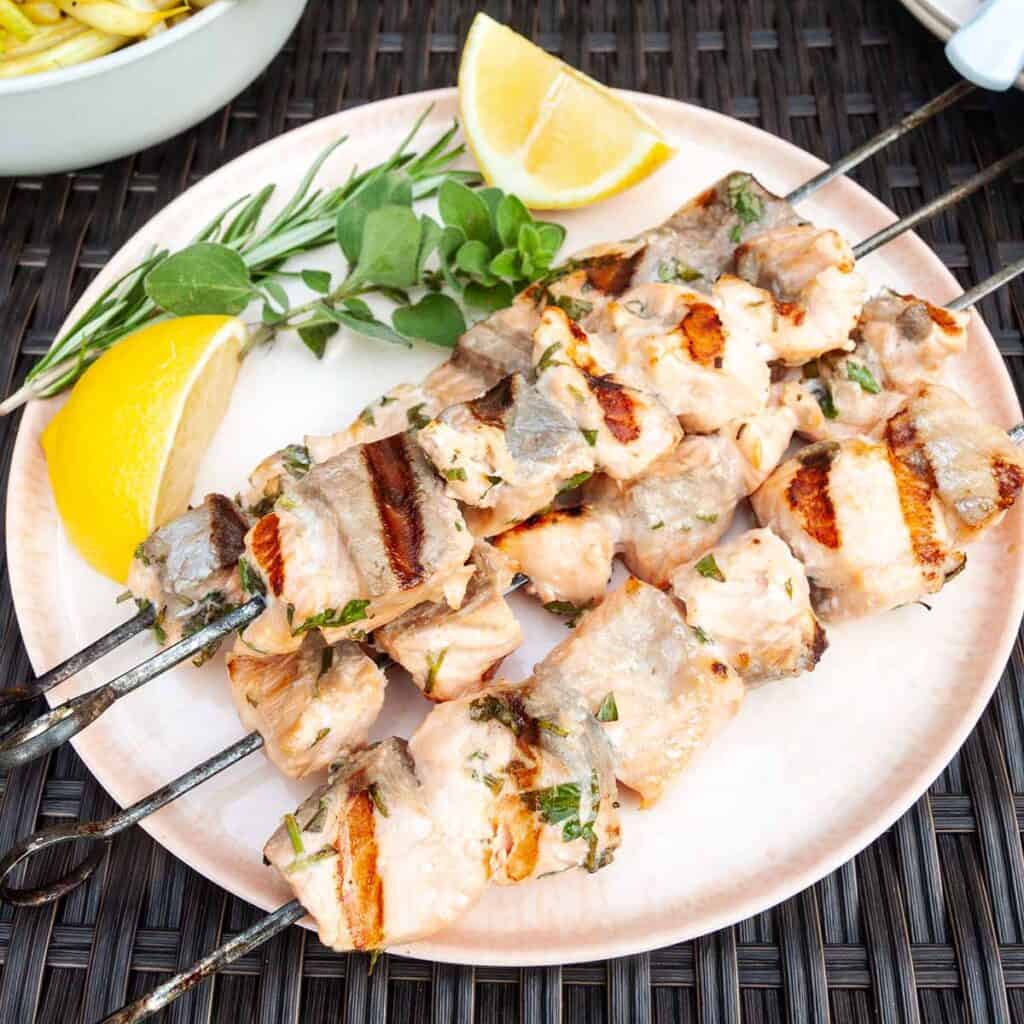
    Four grilled salmon kabobs on a pink plate with lemon wedges and fresh herbs next to them.
    Grilled Salmon Kabobs
    For this quick, healthy summer main, fresh salmon is marinated with garlic, herbs, and lemon, then grilled until tender and flaky.
    Get the recipe: Grilled Salmon Kabobs
    16
    My Pure Plants
    Grilled Buffalo Tofu Skewers
    Experience buffalo tofu’s bold and spicy flavors combined with a crispy caramelized crust. The best way is to grill marinated tofu on skewers.
    Get the recipe: Grilled Buffalo Tofu Skewers
    17
    Cooking with Wine
    Marinated Steak and Potato Skewers
    It’s time to fire up your summer grill and make these Marinated Steak and Potato Skewers with our ridiculously good steak marinade!
    Get the recipe: Marinated Steak and Potato Skewers
    18
    Champagne Tastes
    Grilled Sea Scallops with Bourbon Sauce
    This easy seafood recipe features sea scallops cooked on skewers, with a butter bourbon sauce.
    Get the recipe: Grilled Sea Scallops with Bourbon Sauce
    19
    Valerie's Kitchen
    Greek Chicken Kabobs with Feta Dill Sauce
    A lemon and herb-infused marinade creates incredibly flavorful Grilled Greek Chicken Kabobs served with a creamy Feta Dill Sauce.
    Get the recipe: Greek Chicken Kabobs with Feta Dill Sauce

    April 29, 2024 Camping

    S'mores Trail Mix

    This crispy, crunchy s'mores trail mix combines everything you love about s'mores without any mess or need for a campfire. Toss it together for a quick camping snack for the kiddos, put out a bowl for a party treat, or nosh on it during movie night.

    Two jars filled with Golden Grahams, chocolate cookies, mini marshmallows, and chocolate chips.

    The combination of graham crackers, chocolate, and marshmallows is a classic for a reason, and s'more-inspired desserts are probably one of the first things that you think of when it comes to camping food. For good reason, too. They're delicious, and you can have them in so many forms, like s'more nachos, campfire cones, and, of course, the classic version.

    However, you're not going to be able to build a fire, toast a marshmallow, assemble s'mores, and clean up in under 5 minutes. So, when you want a quick and easy snack or dessert that delivers those familiar flavors with none of the mess, fire building, or clean-up, this easy s'mores mix is perfect.

    [feast_advanced_jump_to]

    Why This Recipe is Great for Camping

    • You can toss it together in less than 5 minutes.
    • It works perfectly as a portable snack or dessert when you don't have access to a fire for making actual s'mores.
    • It's a nut-free trail mix, so it's suitable for people with nut allergies.
    • Kids love them!

    Ingredients and Substitutions

    Ingredients for s'mores trail mix--marshmallows, chocolate cookies, chocolate chips, graham cereal.
    • Cereal--Golden Grahams cereal works best here to deliver that crunchy graham cracker flavor and texture, but you could substitute a similar cereal. For a sweeter, cinnamon-flavored snack mix, try Cinnamon Toast Crunch.
    • Chocolate cookies--Most supermarkets carry some type of animal-shaped chocolate cookie. Teddy Grahams or Annie's are popular choices that will work here. You can use a honey-flavored cookie, if you prefer.
    • Chocolate chips--I use semi-sweet chocolate chips for the trail mix, which helps keep the sweetness level down, but milk chocolate chips or dark chocolate chips will work.
    • Mini marshmallows--Stick with the mini sized ones here, but feel free to swap in the colorful ones, if you prefer.

    FAQs

    How long does the s'mores mix stay fresh?

    Unfortunately, the mini marshmallows go stale pretty quickly. Stored properly, it will only stay fresh for about 24 hours before the marshmallows start to get tough. If you want to get ahead, you can prep the remaining ingredients up to 5 days in advance and toss in the marshmallows shortly before serving.

    What's the best way to store it?

    Keep the Golden Grahams snack mix in sealed containers or zip-top bags in a cool place.

    Tips and Troubleshooting

    • Keep your s'mores trail mix in a cool place out of direct sunlight or you'll have a sticky, gooey mess.
    A jar filled with Golden Grahams, chocolate cookies, mini marshmallows, and chocolate chips.

    More Trail Mix Recipes You'll Love

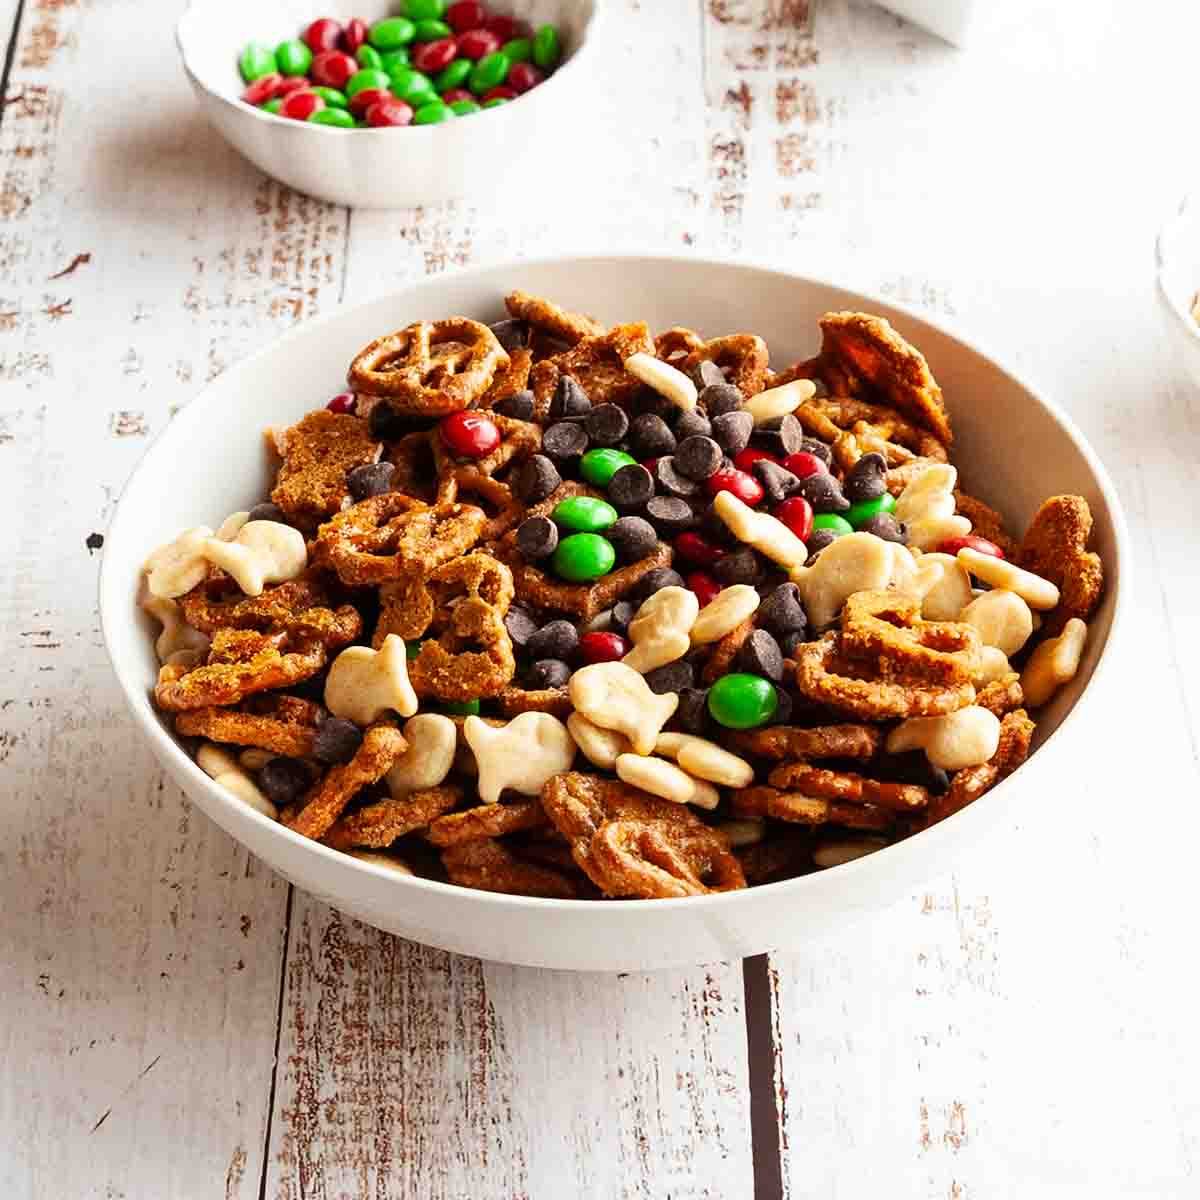
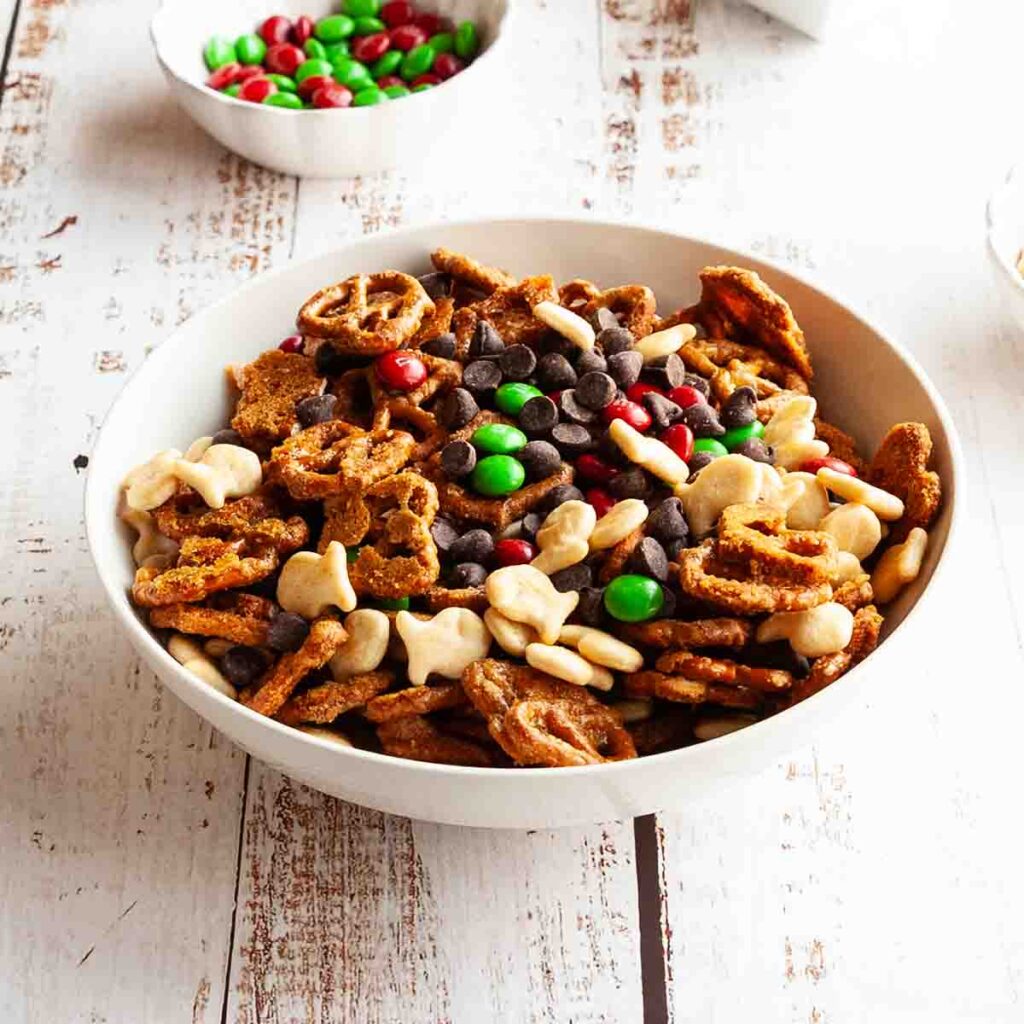
    A bowl of pretzel rail mix with small bowls of M&Ms and fish crackers nearby.
    Butter Toffee Pretzel Trail Mix
    A bowl of nut free grail mix.
    Nut-Free Trail Mix

    Tried This Recipe?

    If you've tried this recipe, please leave a comment below. Follow me on Instagram, Facebook, YouTube, or Pinterest for more great camping and grilling recipes.

    Recipe

    Two jars filled with Golden Grahams, chocolate cookies, mini marshmallows, and chocolate chips.

    S'mores Trail Mix

    A woman's face.Angie Zoobkoff
    A quick and easy snack mix that delivers all the classic s'mores flavors with none of the mess!
    5 from 1 vote
    Print Recipe Pin Recipe
    Prep Time 5 minutes mins
    Total Time 5 minutes mins
    Course Dessert, Snack
    Cuisine American
    Servings 8 servings
    Calories 122 kcal

    Ingredients
      

    • 2 cups Golden Grahams cereal
    • 1 cup mini marshmallows
    • 1 cup chocolate cookies like Teddy Grahams or Annie's
    • ½ cup semi-sweet chocolate chips

    Instructions
     

    • Combine all of the ingredients in a large bowl and mix well. Store in an airtight container or resealable bag for up to 24 hours.

    Notes

    • Storage--Store it in a cool place out of direct sunlight or you'll have a sticky, gooey mess.

    Nutrition

    Serving: 0.5cupCalories: 122kcalCarbohydrates: 18.6gProtein: 1.8gFat: 4.5gCholesterol: 2mgSodium: 87mgFiber: 0.8gSugar: 10.9g
    Keyword s'mores, snack mix, trail mix
    Tried this recipe?Let us know how it was!

    April 27, 2024 Chicken & Turkey

    17 Grilled Chicken Recipes to Make on Repeat All Summer

    If it feels like you're always getting stuck in the same-old-grilled-chicken rut, then these 17 grilled chicken recipes are exactly what you need. From crispy grilled wings, to juicy drumsticks, there's a new favorite chicken recipe for everyone, and no reason to ever get bored with a grilled chicken dinner.

    1
    Adore Foods
    Grilled Chicken Kabobs
    Grilled chicken kabobs are one of my favorite quick summer meals. They are easy to make and always a crowd-pleaser. The beauty of kabobs is that you can customize them to your liking.
    Get the recipe: Grilled Chicken Kabobs
    2
    A platter of crispy grilled chicken wings with salad and bbq sauce in the background.
    Crispy Grilled Chicken Wings
    Grilling chicken wings is quick and easy using this foolproof, low-heat method. Find out how to cook them so that they turn out perfectly golden and crispy every time.
    Get the recipe: Crispy Grilled Chicken Wings
    3
    The Oregon Dietitian
    Spicy Southwest Salad (with Spicy Ranch Dressing)
    This copycat Chick Fil A Spicy Southwest Salad is what dreams are made of! With an easy spicy ranch dressing & avocado, it’ll be your new go-to salad!
    Get the recipe: Spicy Southwest Salad
    4
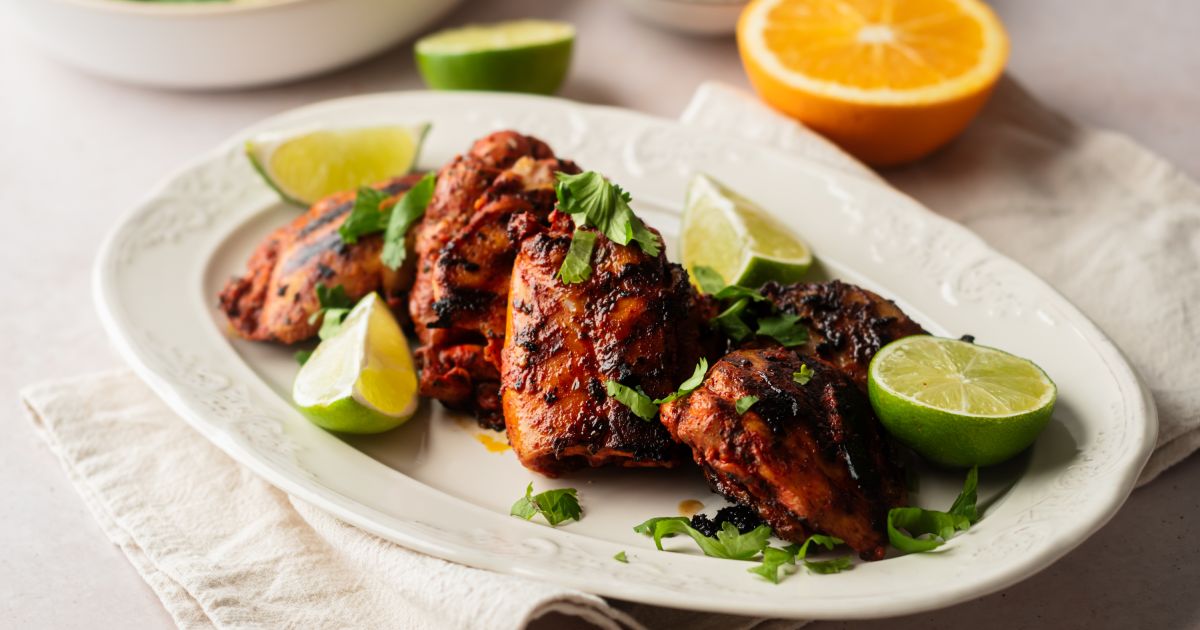
    Pollo Asado (Mexican Grilled Chicken)
    Slender Kitchen
    Pollo Asado (Mexican Grilled Chicken)
    No more boring chicken! This Mexican grilled chicken is packed with flavor, easy to make, and incredibly versatile. Authentic Mexican flavor.
    Get the recipe: Pollo Asado
    5
    Guinness Grilled Chicken
    BBQ Grill Recipes
    Guinness Grilled Chicken
    This Guinness Grilled Chicken recipe is juicy and tender with the rich flavours of Guinness beer marinade to perfectly flavour your chicken.
    Get the recipe: Guinness Grilled Chicken
    6
    Six chicken skewers on a rectangular platter with a dish of sauce on the side.
    Grilled Bang Bang Chicken Skewers
    This bang bang grilled chicken is an easy meal of grilled boneless chicken breast that's finished with a creamy, tangy, slightly spicy sauce.
    Get the recipe: Grilled Bang Bang Chicken Skewers
    7
    Valerie's Kitchen
    Grilled Paprika Chicken
    This tender and smoky Grilled Paprika Chicken is marinated in a flavor-packed Greek yogurt marinade spiked with smoked paprika.
    Get the recipe: Grilled Paprika Chicken
    8
    Valerie's Kitchen
    Grilled Greek Chicken
    Lemony-herbed grilled chicken served with freshly made Tzatziki Sauce. Grilled Greek Chicken is the perfect meal for a warm summer evening.
    Get the recipe: Grilled Greek Chicken
    9
    Grilled Bruschetta Chicken
    The Cookin' Chicks
    Grilled Bruschetta Chicken
    Grilled Bruschetta Chicken is a delicious, low-carb meal that packs big flavor. Tomatoes, Garlic, Basil, and more combined into a tasty dish!
    Get the recipe: Grilled Bruschetta Chicken
    10
    Deb's Daily Dish
    Grilled Lemon Pepper Wings
    Grilled lemon pepper wings with lemon aioli are perfect for a weeknight family meal or to serve a crowd on game day or at a fun summer barbecue.
    Get the recipe: Grilled Lemon Pepper Wings
    11
    Simply Suwanee
    Gai Yang Thai Grilled Chicken
    Enjoy the Thai street food experience with Gai Yang Thai grilled chicken, a delightful bbq dish from Isaan Thailand. Authentic and tasty!
    Get the recipe: Gai Yang Thai Grilled Chicken
    12
    Homemade Heather
    Teriyaki Grilled Chicken Drumsticks
    Satisfy your taste buds with these flavorful teriyaki grilled chicken drumsticks. Perfect for a summer BBQ or a quick weeknight dinner.
    Get the recipe: Teriyaki Grilled Chicken Drumsticks
    13
    Budget Delicious
    Lemon Oregano Grilled Chicken Tenders
    Grilled chicken tenders in a quick marinade are quick and easy to make in just minutes. You’ll love this tasty grilled chicken strips recipe!
    Get the recipe: Lemon Oregano Grilled Chicken Tenders
    14
    Four skewers on an oval platter of cucumber, greens, and pomegranate seeds.
    Recipes From a Pantry
    Coconut Lime Grilled Chicken Kabobs
    These easy coconut lime chicken kabobs, made with pantry staples, are tender bite-sized pieces of chicken grilled to perfection.
    Get the recipe: Coconut Lime Grilled Chicken Kabobs
    15
    Chew Out Loud
    The Best Grilled Chicken Legs
    These grilled chicken legs are immensely flavorful and easy. The marinade sets this recipe apart from all the rest.
    Get the recipe: The Best Grilled Chicken Legs
    16
    Keto Focus
    Blackened Chicken
    This quick-cooking method makes incredibly tender & juicy Blackened Chicken with the perfect charred crust from a smoky Cajun spice blend.
    Get the recipe: Blackened Chicken
    17
    Fresh Off The Grid
    Grilled Chipotle Chicken Tacos
    Smoky, spicy, and ready to party, these chipotle grilled chicken tacos are a great way to capture those summertime camping vibes.
    Get the recipe: Grilled Chipotle Chicken Tacos

    April 26, 2024 Blackstone Griddle Recipes

    Garlic Butter Shrimp Skewers

    Garlic butter and shrimp are a perfect match, and what better way to enjoy them in the great outdoors than threading them onto skewers, slathering them with garlic butter and quickly cooking them on the griddle? No flare-ups and you'll be sitting down to sweet garlicky shrimp in just 20 minutes.

    Four garlic butter shrimp skewers on a rectangular platter, sprinkled with fresh parsley.

    If you've never considered cooking shrimp on your Blackstone griddle (or any griddle), you should. This amazing seafood dinner is so easy to make, cook quickly and evenly, thanks to the constant contact with the griddle surface, and develop deliciously buttery, garlicky edges, while still staying crisp and juicy.

    [feast_advanced_jump_to]

    Why You'll Love This Recipe

    • Cooking shrimp on the griddle means that they soak up the garlic butter with no flare-ups that you'd get on a grill.
    • It's a quick and easy skewer recipe that's ready in just 20 minutes!

    Ingredients and Substitutions

    Ingredients for garlic butter shrimp skewers--lemon, butter, shrimp, parsley, and garlic.
    • Shrimp--Use jumbo shrimp (16/20 count) or larger. Smaller shrimp will be difficult to thread onto skewers. You can use fresh or frozen shrimp, but frozen shrimp need to be thawed before cooking.
    • Butter--I use salted butter and skip salting the shrimp, but if you are using unsalted butter, add a big pinch of salt to your melted garlic butter mixture before brushing it on the shrimp kabobs.

    How to Cook Shrimp on a Blackstone Griddle

    Butter melting in a saucepan.
    Garlic butter in a saucepan.
    1. Melt the butter in a saucepan over medium-low heat.
    2. Stir in the garlic and cook for 30 seconds. Remove from the heat and divide the garlic butter between two small bowls.
    Raw shrimp in a bowl alongside two shrimp skewers.
    A person brushing garlic butter onto shrimp skewers.
    1. Thread the shrimp onto skewers.
    2. Place the shrimp skewers on a griddle over medium heat and brush with garlic butter from one bowl. Cook until they're beginning to turn pink, flip, and brush with more garlic butter. Serve with the extra butter, lemon wedges, and parsley.

    FAQs

    How can I tell when the shrimp are cooked?

    As the shrimp cook, they'll change from grey in color to a bright pink. They will also become slightly firm. You'll know that they're ready when they are pink, opaque, and firm to the touch when pressed. Take care not to overcook them though, as they become tough and rubbery.

    My shrimp are still frozen. How can I quickly defrost them?

    Place your shrimp in a sealed bag, fill a large bowl with cold water and submerge the bag in the bowl. Place a plate or heavy object on top to keep it submerged. They'll be thawed in about 20 minutes.

    What should I serve with this?

    Whip up an easy salad, like coleslaw or potato salad with asparagus, and throw down a loaf of good crusty bread for sopping up all that extra garlic butter. You'll have an impressive seafood meal with barely any effort.

    Tips and Troubleshooting

    • Some types of skewers may prevent all of the shrimp from having direct contact with the surface of the griddle. If the shrimp don't have direct contact with the griddle surface while they're cooking, press on them gently.
    • These garlic butter shrimp kabobs are suitable for gluten-free diets.
    Four garlic butter shrimp skewers on a rectangular platter, sprinkled with fresh parsley.

    More Fish & Seafood Recipes You'll Love

    Four grilled salmon kabobs on a pink plate with lemon wedges and fresh herbs next to them.
    Grilled Salmon Kabobs
    Two plates of grilled tuna salad with a bowl of pepitas, a dish of salt, and a jar of vinaigrette on the side.
    Grilled Tuna Salad

    Tried This Recipe?

    If you've tried this recipe, please leave a comment below. Follow me on Instagram, Facebook, YouTube, or Pinterest for more great camping and grilling recipes.

    Recipe

    Four garlic butter shrimp skewers on a rectangular platter, sprinkled with fresh parsley.

    Garlic Butter Shrimp Skewers

    A woman's face.Angie Zoobkoff
    These garlic butter shrimp skewers are quickly cooked on your griddle until sweet and buttery. They're an easy camping or weeknight meal that's ready in just 20 minutes.
    5 from 1 vote
    Print Recipe Pin Recipe
    Prep Time 10 minutes mins
    Cook Time 10 minutes mins
    Total Time 20 minutes mins
    Course Main Course
    Cuisine American
    Servings 4 skewers (Serves 2)
    Calories 414 kcal

    Equipment

    • 4 metal or wooden skewers

    Ingredients
      

    • 4 tablespoons salted butter
    • 2 cloves garlic minced
    • 14 ounces (400 g) jumbo shrimp peeled and deveined
    • Cooking spray or oil for the griddle
    • Chopped Italian parsley for serving
    • Lemon wedges for serving

    Instructions
     

    • In a small saucepan over medium-low heat, melt the butter. Stir in the garlic and cook for 30 seconds.
    • Remove from the heat and divide the garlic butter between two small bowls. Reserve one bowl for serving.
    • Thread the shrimp onto skewers.
    • Heat a griddle to medium. Coat with cooking spray or brush lightly with oil.
    • Lay the skewers on the griddle with a little space between each one. Brush the exposed side with garlic butter.
    • Cook until the shrimp are beginning to turn pink on the bottom, 2 to 3 minutes. Flip and brush with more butter. Cook until they are pink and opaque throughout, about 2 minutes more.
    • Transfer to a serving platter, drizzle with the reserved butter, and sprinkle with parsley. Serve with lemon wedges.

    Notes

      • Some types of skewers may prevent all of the shrimp from having direct contact with the surface of the griddle. If the shrimp don't have direct contact with the griddle surface while they're cooking, press on them gently.
      • This garlic butter shrimp recipe is suitable for gluten-free diets.

    Nutrition

    Serving: 2skewersCalories: 414kcalCarbohydrates: 3gProtein: 42.3gFat: 25.2gCholesterol: 448mgSodium: 610mgFiber: 0.2gSugar: 0.1g
    Keyword garlic shrimp, shrimp kabobs, shrimp skewers
    Tried this recipe?Let us know how it was!

    April 25, 2024 Cast Iron Skillet Recipes

    12 Desserts to Make In Your Cast Iron Skillet

    Cast iron skillets are ideal for making desserts. They're sturdy, provide even heat distribution, and are wonderful at creating those crispy edges that we all love. You can also use them on your stovetop, grill, in your oven, or even over a campfire.

    From crisp crumbles to jammy galette to sweet cakes and chocolate brownies, there are so many incredible desserts you can make in your cast iron skillet. Here are 12 of my favorites. What's your favorite cast iron skillet dessert? Let me know in a comment below.

    1
    The Worthey Life
    Peach Galette
    This Peach Galette is made with sweet summer peaches all done up in butter, sugar, and warm spices! Then all of that peach goodness folded up in a flaky and buttery pie crust!
    Get the recipe: Peach Galette
    2
    A cast iron skillet. filled with apple crisp and two scoops of ice cream on top.
    Skillet Bourbon Apple Crisp
    This cast-iron skillet apple crisp is made on the grill with sweetly spiced apples and the crispiest oat topping imaginable. An ample splash of bourbon makes it extra special.
    Get the recipe: Skillet Bourbon Apple Crisp
    3
    Chenée Today
    Skillet Blueberry Cobbler with Smoked Sugar
    An easy, old-fashioned homemade blueberry cobbler recipe in a cast-iron skillet with fresh OR frozen blueberries, smoked sugar and the best biscuit crust!
    Get the recipe: Skillet Blueberry Cobbler
    4
    Stefs Eats and Sweets
    Smoked Berry Cherry Pie
    Ready for the ultimate Summer dessert. Try this Smoked Berry Cherry Pie made right out on the smoker or grill.
    Get the recipe: Smoked Berry Cherry Pie
    5
    Homemade Hooplah
    Baked S’mores Dip
    This baked s’mores dip offers the classic mix of melted chocolate, gooey marshmallows, and crunchy graham crackers, all easily baked in your oven at home.
    Get the recipe: Baked S'mores Dip
    6
    Emily Leary
    Skillet Brownie
    Can you make a whole batch of brownies in a skillet? You can and you won’t be disappointed with this skillet brownie recipe!
    Get the recipe: Skillet Brownie
    7
    A whole cast iron skillet blueberry cake, dusted with powdered sugar, with a sieve full of powdered sugar on the side.
    Cast Iron Skillet Blueberry Cake
    This sweet and slightly tangy lemon blueberry skillet cake is easy to make and can be baked in your oven or on the grill. It's perfect for dessert or as a breakfast coffee cake.
    Get the recipe: Cast Iron Skillet Blueberry Cake
    8
    A plum galette in a cast iron skillet.
    Grilled Plum Galette
    This rustic plum dessert, cooked in your cast iron skillet on the grill, is so good you'll be sneaking a second slice.
    Get the recipe: Grilled Plum Galette
    9
    All That's Jas
    Greek Skillet Orange Fillo Cake - Portokalopita
    Need a dessert that requires less effort but delivers quite an impression? This easy Greek Skillet Orange Fillo Cake will stun your taste buds with its citrusy and aromatic fusion of oranges and cinnamon.
    Get the recipe: Greek Skillet Orange Fillo Cake
    10
    Chew Out Loud
    Skillet Chocolate Chip Cookie Cake
    Welcome to the ultimate Skillet Chocolate Chip Cookie Cake. This treat boasts crispy edges and a chewy center, thanks to our cast iron pan.
    Get the recipe: Skillet Chocolate Chip Cookie Cake
    11
    Scotch & Scones
    Mini Skillet Mixed Berry Crisp
    This mini skillet Berry Crisp features your choice of juicy berries bubbling under a crunchy, buttery topping. Use a butter substitute for a dairy-free
    Get the recipe: Mini Skillet Mixed Berry Crisp
    12
    Classic Peach Cobbler Skillet
    Glamper Life
    Classic Peach Cobbler Skillet
    This classic peach cobbler skillet recipe will delight young and old! Bake in an oven or over a campfire. Serve a la mode or with some fresh whipped cream for the perfect camping dessert! When I was a…
    Get the recipe: Classic Peach Cobbler Skillet
    Three cast iron skillet desserts -- cobbler, chocolate chip cookie, and blueberry cake.

    April 24, 2024 Blackstone Griddle Recipes

    Maple Sriracha Griddle Bacon

    This maple Sriracha griddle bacon takes your everyday crispy breakfast meat to the next level. For this epic griddle breakfast, thick cut bacon is slowly cooked on a griddle, then finished with a sweet and spicy glaze. It's the perfect accompaniment to your camping pancakes, cinnamon roll French toast, waffles, or fried eggs.

    Several slices of maple sriracha bacon on a plate with maple syrup and sriracha in the background.

    I'll be the first to admit that there's nothing wrong with regular crispy griddle bacon, and it's a staple in our camping (and weekend) breakfast plans. But when you want a little change or flavor boost, this sweet and spicy bacon is the way to go. A simple maple Sriracha glaze that gets brushed on in the final minutes of cooking makes this a truly indulgent bacon recipe.

    [feast_advanced_jump_to]

    Why This Recipe is Great for Camping

    • You can cook it on a portable griddle, like a Blackstone or Camp Chef, or on a griddle surface directly over your fire.
    • It requires only 3 ingredients.
    • You can adjust the heat and sweetness levels depending on preference.

    Ingredients and Substitutions

    Ingredients for maple sriracha griddle bacon--thick cut bacon, Sriracha sauce, maple syrup.
    • Maple syrup--You can use any type of maple syrup, depending on your flavor preference. Golden syrup has the lightest maple flavor, followed by amber. Dark and very dark syrups have a strong maple flavor.
    • Sriracha--Using 1 teaspoon of Sriracha sauce in the glaze gives the bacon a subtle spiciness, but not a strong heat. If you want a lot of heat, up the Sriracha to 1 ½ or 2 teaspoons.
    • Bacon--I strongly recommend using thick-cut bacon here. It cooks more evenly than the thin stuff and is less likely to stick. If you've got any extra, use it to make grilled bacon wrapped pork tenderloin. The bacon keeps it extra juicy!

    How to Cook Bacon on a Griddle

    A small bowl of maple syrup and Sriracha with an empty bowl of Sriracha nearby.
    A person brushing maple sriracha sauce on bacon on a Blackstone griddle.
    1. Mix the maple syrup and Sriracha together in a small bowl.
    2. Cook the bacon over medium-low heat on a griddle until almost crisp. Brush the maple-Sriracha glaze on for the final 2 minutes of cooking.

    FAQs

    What's the best temperature to cook bacon on a griddle?

    Cook the bacon on medium-low heat to allow the fat to render and the meat to slowly crisp. If you cook it on high heat, the meat will cook before the fat renders and you'll have unevenly cooked bacon that may also stick to your griddle.

    How do I stop bacon from sticking to the griddle?

    First, always use a well-seasoned cast iron griddle, like a Blackstone, or a non-stick electric griddle. If in doubt, add a very thin layer of oil to the griddle before cooking.

    Second, don't rush it. Cook your bacon on medium-low heat so that the fat can render onto the surface of your griddle. Cooking on high heat will cause the meat to stick to the surface before the fat renders.

    Do I have to use a griddle?

    No. A griddle is ideal due to its large flat top surface, but this will work just fine in a cast iron skillet over medium-low heat, or if you prefer to bake your bacon in the oven, brush the maple-Sriracha glaze on for the final few minutes of baking.

    Tips and Troubleshooting

    • Clean your griddle while it's still warm. The maple glaze will become hard, sticky, and difficult to clean when it cools.
    • Store leftover bacon in a resealable bag or container for up to 3 days. It's excellent tucked into a BLAT sandwich or chop it up and mix it into your loaded skillet hash browns or your Blackstone breakfast quesadilla.
    • This griddle bacon recipe is suitable for gluten-free and dairy-free diets.
    Slices of bacon cooking on a Blackstone griddle.

    More Breakfast Recipes You'll Love

    A cast iron skillet filled with chorizo and sweet potato hash with sliced avocado and cilantro on top.
    Chorizo Sweet Potato Hash
    A stack of pancakes, maple syrup, and blueberries on a plate with blueberries and bacon in the background.
    Cast Iron Skillet Pancakes

    Tried This Recipe?

    If you've tried this recipe, please leave a comment below. Follow me on Instagram, Facebook, YouTube, or Pinterest for more great camping and grilling recipes.

    Recipe

    Several slices of maple sriracha bacon on a plate with maple syrup and sriracha in the background.

    Maple Sriracha Griddle Bacon (on a Blackstone)

    A woman's face.Angie Zoobkoff
    This sweet and spicy bacon is easy to make in only 20 minutes and with just 3 ingredients. Try it today and take your breakfast to the next level.
    5 from 1 vote
    Print Recipe Pin Recipe
    Prep Time 3 minutes mins
    Cook Time 17 minutes mins
    Total Time 20 minutes mins
    Course Breakfast
    Cuisine American
    Servings 4 servings
    Calories 199 kcal

    Equipment

    • Griddle such as Blackstone, Camp Chef, or electric

    Ingredients
      

    • 2 tablespoons maple syrup
    • 1 teaspoon Sriracha sauce
    • 1 pound (454 g) thick-cut bacon

    Instructions
     

    • In a small bowl, mix the maple syrup and Sriracha together.
    • Set your griddle to medium-low heat. Arrange the bacon strips in a single layer.
    • Cook, turning occasionally, until the bacon is beginning to crisp and is almost fully cooked, about 15 minutes.
    • When there is 1 to 2 minutes of cooking left, brush the glaze over the bacon. Let it cook for about 30 seconds, then flip and repeat with the remaining glaze.
    • Transfer to a plate lined with paper towels. Serve immediately.

    Notes

      • Make it spicier--If you want extra spice, increase the Sriracha to 1 ½ or 2 teaspoons.
      • Cleaning--Clean your griddle while it's still warm. The maple glaze will become hard, sticky, and difficult to clean when it cools.
      • Dietary--This recipe is suitable for gluten-free and dairy-free diets.

    Nutrition

    Serving: 3slicesCalories: 199kcalCarbohydrates: 7.4gProtein: 11.8gFat: 13.3gCholesterol: 35mgSodium: 743mgSugar: 6g
    Keyword blackstone cooking, blackstone griddle, maple sriracha glaze, sweet and spicy bacon
    Tried this recipe?Let us know how it was!

    April 19, 2024 Chicken & Turkey

    Crispy Grilled Chicken Wings

    These easy grilled chicken wings require only 4 ingredients and are ready in just over 30 minutes. They turn out perfectly golden brown with crispy skin and juicy, tender meat every time. Try them slathered with hot honey bbq sauce, spicy mustard bbq sauce, rhubarb bbq sauce, or enjoy them as plain salt and pepper wings.

    A platter of crispy grilled chicken wings with salad and bbq sauce in the background.

    If you've avoided grilling chicken wings because they always seem to end up blackened or stuck to the grill, then this grilled chicken wing recipe is for you. The key to crispy-skinned wings that aren't burned is to coat them in oil, cook them over low heat, and turn them every 10 minutes. You'll be rewarded with perfectly cooked crispy chicken wings every time that are perfect for dunking into chunky blue cheese dressing.

    [feast_advanced_jump_to]

    Why You'll Love This Recipe

    • They're easy to cook and come out with super crispy skin and soft, juicy meat.
    • You can finish them with your favorite homemade bbq sauce, or leave them plain.

    Ingredients and Substitutions

    Ingredients for crispy grilled chicken wings--chicken wings, olive oil, and salt and pepper.
    • Chicken wings--If your chicken wings are sold as whole wings, you'll need to split them. To do this, lay the wing on a flat surface and use a sharp knife to cut through the joint between the drumette and the flat. You can leave the tip attached to the flat, if you like, or you can cut it off.
    • Oil--I use olive oil here because I always have it on hand, but any vegetable-based oil will work for this recipe.

    How to Grill Chicken Wings

    A person brushing chicken wings with olive oil.
    Chicken wings cooking on a grill.
    1. Brush the chicken wings with olive oil and season well with salt and pepper.
    2. Grill over low heat, turning every 10 minutes, until the skin is crispy and golden and the chicken is cooked through.

    FAQs

    How do you stop the chicken from sticking to the grill?

    There are a few steps you can take to ensure that your chicken doesn't stick to the grill. First, make sure you brush each chicken wing with oil. Second, start with a clean grill and be sure to oil the grill grate before placing the chicken on it. Third, if the chicken isn't releasing when you go to flip it, let it cook for a few minutes longer. It will release when it's ready.

    What should I serve with grilled wings?

    A make-ahead salad, like overnight marinated vegetable salad or camping pasta salad is a great choice to accompany the chicken and make it an easy-peasy meal that's easy enough for a weeknight.

    Tips and Troubleshooting

    • Grill the chicken over low heat. Trying to rush it and cook over high heat will result in flare-ups and burned wings.
    • If you want to add bbq sauce to your chicken, brush it on during the last 5 minutes of cooking. You can increase the heat slightly at this point to help it caramelize.
    • This recipe is suitable for gluten-free and dairy-free diets.
    A white plate filled with crispy grilled chicken wings.

    More Grilling Recipes You'll Love

    Pesto crusted salmon topped with lemon slices on a cutting board.
    Pesto-Crusted Salmon
    A whole cast iron skillet blueberry cake, dusted with powdered sugar, with a sieve full of powdered sugar on the side.
    Cast Iron Skillet Blueberry Cake

    Tried This Recipe?

    If you've tried this recipe, please leave a comment below. Follow me on Instagram, Facebook, YouTube, or Pinterest for more great camping and grilling recipes.

    Recipe

    A platter of crispy grilled chicken wings with salad and bbq sauce in the background.

    Crispy Grilled Chicken Wings

    A woman's face.Angie Zoobkoff
    Grilling chicken wings is quick and easy using this foolproof, low-heat method. Find out how to cook them so that they turn out perfectly golden and crispy every time.
    5 from 1 vote
    Print Recipe Pin Recipe
    Prep Time 5 minutes mins
    Cook Time 30 minutes mins
    Total Time 35 minutes mins
    Course Main Course, Snack
    Cuisine American
    Servings 4 servings
    Calories 810 kcal

    Equipment

    • Grill

    Ingredients
      

    • 3 pounds (1.36 kg) chicken wings split
    • 2 tablespoons olive oil
    • Salt and freshly ground black pepper

    Instructions
     

    • Preheat your grill over medium heat. Clean and oil the grill grate well. Reduce the heat as low as it can go.
    • Arrange the chicken wings on a baking sheet and brush each wing with oil. Season well with salt and pepper.
    • Arrange the wings on the grill surface, evenly spaced apart (they should not be touching.) Cook, with the grill covered, turning every 10 minutes, until the wings are golden, crispy, and cooked through, about 30 minutes total.

    Video

    Notes

    • Add some sauce--If you want to add bbq sauce to your chicken, brush it on during the last 5 minutes of cooking. You can increase the heat slightly at this point to help it caramelize.
    • Dietary--This recipe is suitable for gluten-free and dairy-free diets.

    Nutrition

    Serving: 1portionCalories: 810kcalProtein: 63gFat: 61gCholesterol: 255mg
    Keyword grilled chicken, homemade chicken wings
    Tried this recipe?Let us know how it was!

    April 18, 2024 Collections

    23 Make-Ahead Salads for Any Occasion

    Whether you're headed out camping or have been asked to bring something to a summer picnic or backyard barbecue, this collection of make-ahead salad recipes is perfect for any occasion. Each of these salads can be prepared in advance, will travel well, and will hold up long enough to be devoured by everyone who tries it.

    1
    The Art of Food and Wine
    Pesto Pasta Salad
    Pesto Pasta Salad is an easy quick side dish with just five ingredients. Perfect for picnics and pot lucks! Add protein for a complete meal.
    Get the recipe: Pesto Pasta Salad
    2
    A salad of potatoes and asparagus on a white platter with lemon wedges and dill on the side.
    Potato Salad with Asparagus
    This spring-inspired potato salad with asparagus showcases baby potatoes and crisp-tender fresh asparagus in the best possible way. See for yourself.
    Get the recipe: Potato Salad with Asparagus
    3
    Miss in the Kitchen
    Cucumber Onion Salad with Sweet Vinegar Dressing
    Cucumber onion salad is a simple and delicious side dish to add to any dinner. So delicious with a sweet & tangy dressing with fresh dill.
    Get the recipe: Cucumber Onion Salad
    4
    Erica's Recipes
    Coleslaw Pasta Salad
    Coleslaw pasta salad has all the crunch and flavor of coleslaw in a delicious macaroni salad perfect for a potluck or summer barbecue.
    Get the recipe: Coleslaw Pasta Salad
    5
    Carrie's Kitchen
    Mediterranean Chopped Salad with Feta
    Quick and tasty Mediterranean chopped salad with feta. Crisp, refreshing, & full of flavour. Perfect for a healthy meal. Get the recipe now!
    Get the recipe: Mediterranean Chopped Salad
    6
    Delectable Food Life
    Broccoli Crunch Salad with Bacon and Honey Mayonnaise Dressing
    This delicious Broccoli Crunch Salad with Bacon and Honey Mayonnaise Dressing will be on your salad recipe roster all summer! Fresh chopped broccoli, crisp bacon, sunflower seeds, cranberries, and red onion combine with a creamy homemade dressing. This crunchy broccoli salad can act as a side or main dish.
    Get the recipe: Broccoli Crunch Salad
    7
    A white bowl filled with pasta salad.
    Camping Pasta Salad
    This make-ahead tortellini salad with artichokes, tomatoes, olives, and creamy Italian dressing is a summer staple for camping, potlucks, and picnics.
    Get the recipe: Camping Pasta Salad
    8
    Homemade in the Kitchen
    Green Onion Salad
    Green Onion Salad with cucumber, bell pepper and lemon ginger vinaigrette is a healthy and easy vegan side dish.
    Get the recipe: Green Onion Salad
    9
    CC's Table
    Simple Lemon Orzo Salad with Feta
    Lemon Orzo Salad with feta, garlic, and dill is the perfect simple pasta salad for a spring or summer bbq, picnic, or potluck.
    Get the recipe: Lemon Orzo Salad
    10
    Our Plant Based World
    Green Lentil Tabbouleh Salad
    Tired of eating the same boring salads? Try out this tantalizing and nutritious Green Lentil Tabbouleh Salad! Not only is it delicious, but it’s also packed with a nutritious ingredients.
    Get the recipe: Green Lentil Tabbouleh Salad
    11
    A bowl filled with raw vegetable marinated salad.
    Overnight Marinated Vegetable Salad
    This easy marinated salad is a colorful combination of crunchy raw vegetables tossed in a simple vinaigrette dressing. Healthy never tasted so good.
    Check out this recipe
    12
    Dished
    Greek Quinoa Salad with Feta
    Loaded with fresh, Mediterranean ingredients, tossed with a zesty lemon dressing and creamy feta, this Greek quinoa salad is my go-to for meal prep, entertaining and the holiday season. Serve with creamy tzatziki and lamb koftas for a Greek-style feast.
    Get the recipe: Greek Quinoa Salad with Feta
    13
    Picnic Lifestyle
    Creamy Crunchy Coleslaw
    You can’t go past a great coleslaw recipe especially for a picnic. This creamy and crunchy coleslaw recipe is easy to make and oh so versatile.
    Get the recipe: Creamy Crunch Coleslaw
    14
    A bowl of bean salad with corn.
    Marinated Bean Salad
    Made with several types of beans, corn, and a tangy lime dressing, this make-ahead salad is perfect for camping trips, potlucks, backyard cookouts, and more.
    Get the recipe: Marinated Bean Salad
    15
    A bowl of potato salad with parsley on top.
    Potato Salad with Dill Pickles
    This creamy potato salad has all the best parts of the classic salad, with the addition of a healthy dose of dill pickles to take it over the top.
    Get the recipe: Dill Pickle Potato Salad
    16
    The Art of Food and Wine
    Black Bean and Corn Salad
    Black Bean and Corn Salad loaded with corn, black beans, avocado, bell pepper, and red onion. Also called Texas or Cowboy Caviar.
    Get the recipe: Black Bean and Corn Salad
    17
    Get Inspired Everyday
    Healthy Chicken Salad
    Easy to make, this Healthy Chicken Salad has 2 dressing options! Choose from a Greek yogurt dressing or an avocado dressing for dairy-free.
    Get the recipe: Healthy Chicken Salad
    18
    Plant-Based on a Budget
    Peanut Noodle Salad
    This Thai Peanut Noodle Salad [Glass Noodle Salad] is ready in just 20 minutes and is so delicious! It’s naturally gluten free and perfect for a quick and tasty weeknight meal!
    Get the recipe: Peanut Noodle Salad
    19
    The All Natural Vegan
    Sweet Pepper Cucumber Crunch Salad
    This healthy take on the viral cucumber salad is packed full of veggies and complete with the perfect healthy dressing. It only takes 10 minutes to make, and you can pick up everything at your local grocery store. This recipe is vegan, gluten-free, and refined sugar-free!
    Get the recipe: Sweet Pepper Cucumber Crunch Salad
    20
    Easy Mango Salad
    Moon and Spoon and Yum
    Easy Mango Salad
    This is an easy, fresh, and delicious mango salad recipe with a flavorful homemade dressing.
    Get the recipe: Easy Mango Salad
    21
    A bowl of potato salad with parsley on top.
    Potato Salad with Dill Pickles
    This creamy potato salad has all the best parts of the classic salad, with the addition of a healthy dose of dill pickles to take it over the top.
    Get the recipe: Potato Salad with Dill Pickles
    22
    An Edible Mosaic
    Mediterranean Bean Salad
    In this healthy Mediterranean bean salad recipe, savory herbs, tangy lemon, and fresh vegetables brighten the flavor of canned butter beans, and feta cheese and kalamata olives pack a punch!
    Get the recipe: Mediterranean Bean Salad
    23
    A Foodcentric Life
    Lentil Quinoa Salad with Feta and Lemon Vinaigrette
    This colorful gluten-free salad recipe salad recipe bursts with flavor and health. Lentils and quinoa provide protein, vegetables for crunch, feta for
    Get the recipe: Lentil Quinoa Salad

    April 17, 2024 Everyday Staples

    Hot Honey BBQ Sauce

    If you love the sweet-spicy flavor of hot honey, this bbq sauce is for you. It's a perfect balance of sweet, spicy, and tangy, and is ready in 15 minutes. One taste and you'll be slathering it on chicken and pork all summer long.

    A jar of hot honey bbq sauce with a spoon held above it.

    If you've avoided making your own barbecue sauce for fear that it is too difficult or time-consuming, think again. This hot honey bbq sauce recipe comes together in minutes, and can be made up to a week before you need it. It's the perfect addition to your collection of homemade everyday staples.

    [feast_advanced_jump_to]

    Ingredients and Substitutions

    Ingredients for hot honey bbq sauce--tomato sauce, spices, vinegar, and hot honey.
    • Tomato sauce--Most barbecue sauce recipes use ketchup as a base, but since there is plenty of sweetness from the honey, I prefer to use plain tomato sauce.
    • Hot honey--This is available at many supermarkets or online retailers and I recommend using Mike's hot honey, if available to you. If you can't find it, or would prefer a milder version of the sauce, you can make it with regular honey, and add cayenne pepper to taste.
    • Vinegar--I used apple cider vinegar here as I think it lends the sauce the most well-rounded flavor, but plain white vinegar or rice vinegar will work fine if that's what you've got in your pantry.

    How to Make Hot Honey BBQ Sauce

    Tomato sauce and spices combined in a saucepan with a whisk.
    Hot honey bbq sauce cooking in a saucepan.
    1. Combine all of the ingredients in a saucepan and whisk until smooth.
    2. Bring to a simmer over medium-low heat and cook until thickened.

    FAQs

    What should I use this on?

    This spicy honey barbecue sauce is particularly good on chicken and pork. Brush it onto crispy grilled chicken wings or back ribs during their last few minutes of cooking, or use it on this bacon-wrapped pork tenderloin instead of the honey bourbon glaze.

    Can you freeze hot honey barbecue sauce?

    Yes. Freeze the sauce in an airtight container or jar for up to 3 months. Thaw in the refrigerator overnight before using.

    Tips and Troubleshooting

    • If your sauce is too thin, simmer it for a few extra minutes. It should be thick enough to thickly coat the back of a spoon.
    • Store in a sealed container in the refrigerator for up to 1 week, or freeze for longer storage. Always use a clean spoon when scooping it out of the jar to prevent spoilage.
    • This recipe is suitable for gluten-free, dairy-free, and vegetarian diets.
    A jar of hot honey bbq sauce.

    More Everyday Staples You'll Love

    A jar of nut-free pesto on a cutting board with fresh basil, garlic, and parmesan on the side.
    Nut-Free Pesto
    A jar of lemon thyme vinaigrette wit ha lemon and bunch of thyme behind it.
    Lemon Thyme Vinaigrette

    Tried This Recipe?

    If you've tried this recipe, please leave a comment below. Follow me on Instagram, Facebook, YouTube, or Pinterest for more great camping and grilling recipes.

    Recipe

    A jar of hot honey bbq sauce with a spoon held above it.

    Hot Honey BBQ Sauce

    A woman's face.Angie Zoobkoff
    This homemade spicy honey bbq sauce is made with tomato sauce, hot honey, vinegar, and spices. It's easy to make and ready in just 15 minutes.
    5 from 1 vote
    Print Recipe Pin Recipe
    Prep Time 5 minutes mins
    Cook Time 10 minutes mins
    Total Time 15 minutes mins
    Course Condiment
    Cuisine American
    Servings 1.25 cups
    Calories 62 kcal

    Ingredients
      

    • 1 cup tomato sauce
    • ½ cup hot honey
    • ¼ cup apple cider vinegar
    • 1 teaspoon mustard powder
    • ½ teaspoon smoked paprika
    • ½ teaspoon garlic powder
    • ½ teaspoon onion powder
    • ½ teaspoon salt

    Instructions
     

    • Combine the tomato sauce, honey, vinegar, and spices in a small saucepan.
    • Set over medium-low heat and bring to a boil. Adjust the heat to maintain a simmer and cook until the sauce is slightly thickened and darkened in color, about 10 minutes.
    • Cool before using. The sauce will thicken as it cools.

    Notes

      • Thickening--If your sauce is too thin, simmer it for a few extra minutes. It should be thick enough to thickly coat the back of a spoon.
      • Storage--Store in a sealed container in the refrigerator for up to 1 week, or freeze for up to 3 months. Always use a clean spoon when scooping it out of the jar to prevent spoilage.
      • Dietary--This recipe is suitable for gluten-free, dairy-free, and vegetarian diets.

    Nutrition

    Serving: 2tablespoonsCalories: 62kcalCarbohydrates: 15.4gProtein: 1gFat: 0.7gFiber: 2gSugar: 13g
    Keyword grilling condiments, homemade bbq sauce, sweet and spicy
    Tried this recipe?Let us know how it was!

    April 13, 2024 Collections

    10 Glamorous Grilled Salmon Recipes

    If you're stuck in the same old rut when it comes to cooking salmon, it's time to try one of these 10 glamorous grilled salmon recipes. Each of these recipes features fresh salmon that is cooked on your grill so you can enjoy a delicious, healthy meal with no lingering odors.

    1
    Ask Chef Dennis
    Easy Marinated Grilled Salmon
    Do you have someone in your family that doesn’t like salmon? My marinated grilled salmon is guaranteed to make salmon lovers out of them!
    Get the recipe: Easy Marinated Grilled Salmon
    2
    Pesto crusted salmon topped with lemon slices on a cutting board.
    Pesto-Crusted Salmon
    This easy grilled salmon is topped with pesto and lemon for a bright, summery, no-fuss meal that's ready in less than 30 minutes.
    Get the recipe: Pesto Crusted Salmon
    3
    Get Inspired Everyday
    Greek Salmon
    This Greek Salmon is truly stunning and it couldn't be easier to make or healthier! It’s gluten free and perfect for celebrations & entertaining.
    Get the recipe: Greek Salmon
    4
    My Pocket Kitchen
    Simple Grilled Salmon with Spice Rub
    This Grilled Salmon with Spice Rub is so simple and easy you can whip it together any night of the week and will also impress any guest!
    Get the recipe: Simple Grilled Salmon with Spice Rub
    5
    Foxes Love Lemons
    Grilled Sockeye Salmon with Pineapple Salsa
    This Best Grilled Salmon Recipe takes the fear out of grilling fish by giving you a plan to cook it perfect without it sticking to the grill!
    Get the recipe: Grilled Sockeye Salmon with Pineapple Salsa
    6
    A grilled salmon fillet with a fork cutting into it.
    A Cedar Spoon
    Honey Mustard Salmon
    This Honey Mustard Salmon uses a delicious tangy honey mustard marinade to flavor the fish. It is then grilled to create a crispy outer layer and a tender inner piece of salmon.
    Get the recipe: Honey Mustard Salmon
    7
    The Forked Spoon
    Salmon Sliders with Garlic Lemon Aioli
    These Grilled Salmon Sliders are the perfect game day, weeknight dinner, or summertime snack! Made with fresh salmon grilled to perfection on mini brioche buns and topped with fresh greens and creamy lemon garlic aioli.
    Get the recipe: Salmon Sliders with Garlic Lemon Aioli
    8
    Teriyaki Salmon
    Chew Out Loud
    Teriyaki Salmon
    Grilled Teriyaki Salmon is tender and packed with amazing flavor. This sauce is the BEST - we use it on everything…
    Get the recipe: Teriyaki Salmon
    9
    Four grilled salmon kabobs on a pink plate with lemon wedges and fresh herbs next to them.
    Grilled Salmon Kabobs
    For this quick, healthy summer main, fresh salmon is marinated with garlic, herbs, and lemon, then grilled until tender and flaky.
    Get the recipe: Grilled Salmon Kabobs
    10
    Umamiology
    Sweet Soy Smoked Salmon
    The first thing to notice about this Sweet Soy Smoked Salmon is that it is moist & melt-in-your-mouth soft. It’s tender & deliciously sweet and salty from the soy sauce marinade.
    Get the recipe: Sweet Soy Smoked Salmon

    April 12, 2024 Beef Recipes

    Camping Walking Tacos

    These camping walking tacos are an easy handheld meal that's perfect for camping. They're made with spiced ground beef and your favorite taco fixings all stuffed into an individual bag of nacho chips. They're fun, customizable, and a completely kid-friendly camping meal.

    A walking taco with Doritos and cheese with lettuce, sour cream, and tomato surrounding it.

    If you're anything like me, tacos are a staple on the dinner table, and appear weekly in various forms. Fish, chicken, beef, mushroom, potato . . . you name it, we've probably put it in a taco. So it's not a surprise that they make a regular appearance on our camping menu as well.

    However, if you love tacos as much as I do, you also know that they tend to involve a lot of dishes to get all the various toppings arranged, as well as plates and spoons, and so on. Which is no fun at all on a camping trip.

    This camping walking tacos recipe mostly eliminates that problem. You'll need a skillet to cook (or warm up) the taco meat, but feel free to assemble your favorite toppings on one big plate or a cutting board, and let everyone load up their taco bags. Since there's no fire required to make these walking tacos, they're also a great fire-ban camping meal.

    [feast_advanced_jump_to]

    Why This Walking Taco Recipe is Great for Camping

    • You can cook the beef ahead of time so you've got less to do at camp.
    • They're handheld and portable so you won't be dirtying a lot of dishes.
    • Everyone can customize them to suit their tastes and they're a very fun meal to enjoy.

    Ingredients and Substitutions

    Ingredients for camping walking tacos--ground beef, cheese, spices, oil, and Doritos.
    • Ground beef--I recommend lean ground beef (85/15). This will give off a little bit of fat which adds plenty of flavor to the meat and helps to distribute the seasoning.
    • Cheese--I like using Cheddar cheese, but you can substitue any type of good shredding cheese, such as Monterey or Pepper Jack. Grate the cheese yourself instead of using pre-shredded cheese, as it doesn't melt well.
    • Doritos--You will need to use the individual 1-ounce bags of Doritos for this recipe. You can usually buy them in bulk packs at supermarkets, or in wholesale stores, like Costco.
    • Toppings (not shown)--Get creative with your favorite taco toppings. At a minimum, I suggest lettuce, diced tomatoes, sour cream, and hot sauce, but feel free to try other add-ins, like pickled jalapeños, guacamole, cilantro, or beans.

    How to Make Walking Tacos

    Ground beef being cooking in a cast iron skillet.
    Spices being mixed into cooked ground beef in a skillet.
    1. Heat the oil in a large cast iron skillet over medium heat. Add the ground beef and cook until browned.
    2. Sprinkle in the spices and cook for a couple of minutes. Remove from the heat and let cool.
    A person pressing on a bag of Doritos to break up the chips.
    A person sprinkling cheese over ground beef inside a bag of Doritos to make a walking taco.
    1. Open each bag of Doritos and press gently to lightly break up the chips.
    2. Add a scoop of the beef to each bag, then top with cheese, and any desired toppings. Mix with a fork and devour.

    What are Walking Tacos?

    Known also as taco in a bag, walking tacos are a handheld meal consisting of your favorite taco toppings piled on top of crushed tortilla or nacho chips inside the chip bag. They're ideal for camping or picnics as they are easy to assemble, portable, and require only minimal dishes.

    Tips and Troubleshooting

    • To get ahead, cook your ground beef mixture at home and freeze or refrigerate it in a resealable bag. Rewarm it in a cast iron skillet over your camp stove or campfire before assembling the tacos in a bag.
    • If you're cooking your meat in advance, make a double batch and whip up some make-ahead camping burritos, or another ground beef camping recipe for your trip.
    A walking taco with Doritos and cheese with lettuce, sour cream, and tomato surrounding it.

    More Camping Recipes You'll Love

    A bowl filled with raw vegetable marinated salad.
    Overnight Marinated Vegetable Salad
    Pieces of Italian sausage quesadilla stacked on top of each other.
    Italian Sausage Quesadillas

    Tried This Recipe?

    If you've tried this recipe, please leave a comment below. Follow me on Instagram, Facebook, YouTube, or Pinterest for more great camping and grilling recipes.

    Recipe

    A walking taco with Doritos and cheese with lettuce, sour cream, and tomato surrounding it.

    Camping Walking Tacos

    An easy handheld camping meal made with spiced ground beef and all your favorite taco fixings piled into a bag of nacho chips. Easy, fast, and kid-friendly.
    5 from 1 vote
    Print Recipe Pin Recipe
    Prep Time 15 minutes mins
    Cook Time 10 minutes mins
    Total Time 25 minutes mins
    Course Main Course
    Cuisine American
    Servings 4 bags
    Calories 577 kcal

    Ingredients
      

    • 1 tablespoon vegetable oil
    • 1 pound lean ground beef
    • 2 tablespoons chili powder
    • ½ teaspoon garlic powder
    • ½ teaspoon onion powder
    • ½ teaspoon cumin
    • Salt and freshly ground black pepper
    • Four (1-ounce) bags nacho chips (Doritos)
    • 1 cup shredded Cheddar cheese for serving
    • Diced tomatoes for serving (optional)
    • Shredded iceberg lettuce for serving (optional)
    • Sour cream for serving (optional)
    • Hot sauce for serving (optional)

    Instructions
     

    • In a large skillet over medium heat, warm the oil.
    • Add the ground beef and cook, stirring frequently to break it up, until browned, about 5 minutes.
    • Sprinkle in the chili powder, garlic powder, onion powder, cumin, and cook for 1 to 2 minutes. Season to taste with salt and pepper.
    • Open the top of each chip bag. Holding each bag upright, place your hand around the outside of the bag and gently crush the chips.
    • Assemble the walking tacos by adding warm ground beef, cheese, tomatoes, lettuce, sour cream, and hot sauce to each bag.

    Notes

    • Get ahead--Cook your ground beef mixture at home and freeze or refrigerate it in a resealable bag. Rewarm it in a cast iron skillet over your camp stove or campfire before assembling the tacos in a bag.
    • Make a double batch of meat--If you're cooking your meat in advance, make a double batch and whip up some make-ahead camping burritos for your trip. The ground beef mixture is the same!

    Nutrition

    Serving: 1bagCalories: 577kcalCarbohydrates: 21.5gProtein: 38.8gFat: 37.1gCholesterol: 130mgSodium: 413mgFiber: 3gSugar: 1g
    Keyword ground beef recipes, taco in a bag, walking tacos
    Tried this recipe?Let us know how it was!

    April 11, 2024 Collections

    16 Fresh Spring Vegetable Recipes

    The arrival of spring brings warmer days and a selection of stunning vegetables, including asparagus, radishes, peas, artichokes, and fiddleheads. This collection of fresh spring vegetable recipes offers plenty of ideas to make the most of spring's bounty, from easy sides to hearty main dishes.

    1
    Give Recipe
    Stuffed Artichokes
    Enjoy baked Italian stuffed artichokes with a flavorful breadcrumb, Parmesan, garlic, parsley stuffing. Perfect appetizer or side dish.
    Get the recipe: Stuffed Artichokes
    2
    A salad of potatoes and asparagus on a white platter with lemon wedges and dill on the side.
    Potato Salad with Asparagus
    This spring-inspired potato salad with asparagus showcases baby potatoes and crisp-tender fresh asparagus in the best possible way. See for yourself.
    Get the recipe: Potato Salad with Asparagus
    3
    A Taste for Travel
    Chojín - Guatemalan Radish Salad with Chicharrón
    Chojín is a refreshing Guatemalan salad of fresh radishes, mint and smoky, salty chicharrones (fried pork rinds).
    Get the recipe: Chojíin
    4
    Healthy Green Kitchen
    Grilled Spring Greens with Homemade Lemon Parsley Butter
    Simple grilled spring greens with homemade lemon parsley butter make the perfect side dish to celebrate spring.
    Get the recipe: Grilled Spring Greens
    5
    Maple + Mango
    Warm Roasted Asparagus Salad With Eggs
    This simple warm asparagus salad recipe features roasted asparagus, eggs (poached or soft boiled), parmesan shavings and toasted pine nuts.
    Get the recipe: Warm Roasted Asparagus Salad
    6
    Fab Food 4 All
    Cream of Asparagus & Celery Soup
    Cream of Asparagus & Celery Soup is a great way to make a little asparagus go a long way by adding celery which enhances the flavour! So quick, easy & delicious!
    Get the recipe: Cream of Asparagus & Celery Soup
    7
    Strength and Sunshine
    Fresh Spring Salad
    This perfect healthy & fresh Spring Salad Recipe is the only one you need! Bright delicious flavors of crisp springtime veggies in an easy green salad!
    Get the recipe: Fresh Spring Salad
    8
    Skinny Spatula
    Sausage Asparagus Pasta
    This sausage asparagus pasta is a true weeknight wonder! Bursting with fresh flavors and succulent, hearty sausage, this cozy pasta dish is super simple to whip up but tastes like a gourmet feast!
    Get the recipe: Sausage Asparagus Pasta
    9
    West Coast Kitchen Garden
    Easy Sautéed Fiddleheads With Garlic And Ginger
    Easy sautéed fiddlehead recipe with garlic and ginger is quick and delicious. A great way to cook up this wild green spring vegetable.
    Get the recipe: Easy Sautéed Fiddleheads
    10
    Little Sunny Kitchen
    Easy Asparagus Quiche
    This delicious and easy to make Asparagus Quiche features fresh spring vegetables and plenty of cheese inside a flaky buttery crust.
    Get the recipe: Easy Asparagus Quiche
    11
    Kalyn's Kitchen
    Asparagus and Radish Salad with Feta
    If you’ve never tried raw asparagus salad, I am urging you to make this Asparagus and Radish Salad with Feta!
    Get the recipe: Asparagus and Radish Salad with Feta
    12
    The Suburban Soapbox
    Creamed Peas
    Creamy, savory, and Creamed Peas recipe is a delightful combination of tender peas and sweet pearl onions in this rich and flavorful dish.
    Get the recipe: Creamed Peas
    13
    Naturallie Plant Based
    Herb Butter Roasted Artichokes
    These roasted artichokes are marinated in a luscious herb butter and baked until they are tender with golden brown, crisp edges. This is a simple recipe that pairs well with so many meals!
    Get the recipe: Herb Butter Roasted Artichokes
    14
    Primavera Kitchen
    Asparagus Tart
    This Asparagus Tart recipe features fresh asparagus and melted cheese atop flaky puff pastry. It’s easy, delicious, and perfect for Spring!
    Get the recipe: Asparagus Tart
    15
    My Quiet Kitchen
    Air Fryer Radishes
    Roasting radishes transforms them from crisp and peppery to tender and mellow, and an air fryer makes the process so easy! These air fryer radishes are lightly seasoned with lemon and garlic and make a deliciously healthy snack or side dish. Ready in 25 minutes.
    Get the recipe: Air Fryer Radishes
    16
    Sprig & Spoon
    Lemon Spring Orzo Pasta Salad with Feta and Asparagus
    Sure to be a crowd pleaser, this lemon orzo salad with feta and asparagus is delicious and healthy. Great for meal prep and parties.
    Get the recipe: Lemon Spring Orzo Salad

    April 10, 2024 Camping

    Potato Salad with Asparagus

    This easy potato salad with asparagus is perfect for spring, when baby potatoes and fresh asparagus are in season. Paired with a tangy mustard and lemon vinaigrette, this simple and healthy spring vegetable salad will be on repeat all season long.

    A salad of potatoes and asparagus on a white platter with lemon wedges and dill on the side.

    Given my general love for potatoes, it's no surprise that I adore potato salad. Whether it's a rich and creamy version, or something closer to this tangy and mustardy one, I love them all.

    However, taking the creamy mayo-based ones on a camping trip, or to a potluck, picnic, or bbq is always a little tricky because you never really know whether there will be a cool, shady spot or ice on hand to prevent it from spoiling.

    This recipe for potato and asparagus salad solves that problem entirely. There's no mayo or dairy in the salad, and it's best served at room temperature. It also keeps well for a few days, so it's ideal for making ahead of time.

    [feast_advanced_jump_to]

    Why This Recipe is Great for Camping

    • You can make the salad ahead of time so you've got less to do at camp.
    • It stores well for several days.
    • There's no mayo in the potato and asparagus salad, making it less likely to spoil at warmer temperatures.

    Ingredients and Substitutions

    Ingredients for potato salad with asparagus--potatoes, dill, wine vinegar, lemon, oil, Dijon, and asparagus.
    • Asparagus--I prefer the thin stalks of asparagus as they are the most tender and cook quickly. If you only have the thicker stalks, they'll work, but they may need an extra minute of cooking time. Snap or cut off the woody bottom inch of the asparagus spears before cooking. If you've got extra asparagus, make Blackstone asparagus for a quick and easy asparagus side dish.
    • Baby potatoes--Red baby potatoes are ideal for this salad as they hold their shape well. If you can't get baby potatoes, cut regular red potatoes into 1 ½-inch pieces after cooking.
    • Dressing--This lemon-dill vinaigrette is the same dressing as this lemon-thyme dressing, except it's made with dill instead of thyme. Dill is a classic pairing for potato salad, but if you prefer the flavor of thyme, feel free to use the lemon-thyme version.

    Important Steps

    Dressing ingredients combined in a jar.
    A person shaking up a jar of dressing.
    1. Combine the olive oil, vinegar, lemon juice, mustard, dill, and salt and pepper in a lidded jar or container.
    2. Shake well to combine.
    Chopped asparagus in a steamer basket.
    Baby red potatoes in a pot of water.
    1. Steam the asparagus until just tender. Rinse under cold water.
    2. Place the potatoes in a pot of cold salted water and bring to a boil. Cook until tender, then drain and cool slightly.
    Potatoes tossed with some vinaigrette and a jar of dressing on the side.
    A bowl filled with potato salad with asparagus.
    1. Cut the warm potatoes into quarters and toss with 2 tablespoons of dressing.
    2. Combine the asparagus and potatoes in a large serving bowl and add enough dressing to coat. Season to taste with salt and pepper and garnish with fresh dill.

    FAQs

    Can I make this salad in advance?

    Yes. You can make this asparagus and potato salad up to 3 days before serving. Store it in a sealed container in the refrigerator and bring to room temperature before serving. Give it a good stir before serving as the dressing will settle to the bottom of the bowl.

    How should I serve it?

    This potato and asparagus salad is best served at room temperature, or even slightly warm. Feel free to serve it immediately after making, or let it sit for an hour at room temperature to let all of the flavors mingle. If you won't be serving it within 2 hours, store it in the fridge.

    Why do you start cooking potatoes in cold water?

    Starting your potatoes in cold water helps them to cook evenly. Adding your potatoes directly to hot water will cause the outside to cook faster than the inside, resulting in mealy potatoes. to cook evenly

    Tips and Troubleshooting

    • If your salad is refrigerated, remove it from the fridge about 20 minutes before serving.
    • Keep some extra dressing on hand to add to the salad if it seems dry. If the dressing solidifies in the fridge, let it sit at room temperature for 10 minutes, then give it a good shake.
    • The recipe can easily be doubled or tripled if serving a crowd.
    • This recipe is suitable for gluten-free, dairy-free, and vegan diets.
    A salad of potatoes and asparagus on a white platter with lemon wedges and dill on the side.

    More Make-Ahead Salads You'll Love

    A bowl filled with raw vegetable marinated salad.
    Overnight Marinated Vegetable Salad
    A white bowl filled with pasta salad.
    Camping Pasta Salad

    Tried This Recipe?

    If you've tried this recipe, please leave a comment below. Follow me on Instagram, Facebook, YouTube, or Pinterest for more great camping and grilling recipes.

    Recipe

    A salad of potatoes and asparagus on a white platter with lemon wedges and dill on the side.

    Potato Salad with Asparagus

    This spring-inspired potato salad with asparagus showcases baby potatoes and crisp-tender fresh asparagus in the best possible way. See for yourself.
    5 from 1 vote
    Print Recipe Pin Recipe
    Prep Time 20 minutes mins
    Cook Time 20 minutes mins
    Total Time 40 minutes mins
    Course Salad, Side Dish
    Cuisine American
    Servings 4 servings
    Calories 216 kcal

    Ingredients
      

    • 4 tablespoons olive oil
    • 1 ½ tablespoons white wine vinegar
    • 1 tablespoon lemon juice
    • 1 teaspoon Dijon mustard
    • 1 teaspoon chopped fresh dill plus more for garnish
    • Salt and freshly ground black pepper
    • 8 ounces asparagus cut into 2-inch pieces
    • 1 pound baby red potatoes

    Instructions
     

    • In a lidded jar or container, combine the oil, vinegar, lemon juice, mustard, and dill.
    • Cover and shake well to combine. Season to taste with salt and pepper.
    • Place the asparagus in a steamer basket and set it over a pan of simmering water. Cover and steam until the asparagus is bright green and just tender, 2 to 4 minutes.
    • Run the asparagus under cold water to cool it. Drain and transfer it to a large serving bowl.
    • Place the potatoes in a pot of cold salted water. Bring to a boil and cook until the potatoes are tender when pierced with the tip of a sharp knife, about 15 minutes.
    • Drain the potatoes and let them cool slightly.
    • When the potatoes are cool enough to handle, cut them into quarters and toss with 2 tablespoons of the dressing. Let them cool completely.
    • Add the potatoes to the serving bowl with the asparagus. Drizzle in enough dressing to coat the asparagus and potatoes. You may not need all of the dressing. Season to taste with salt and pepper and garnish with fresh dill.

    Notes

      • Storage--Store the asparagus potato salad in a sealed container in the fridge for up to 3 days. If your salad is refrigerated, remove it from the fridge about 20 minutes before serving. Give it a good stir before serving as the dressing will settle in the bottom of the bowl.
      • Use extra dressing--Keep some extra dressing on hand to add to the salad if it seems dry. If the dressing solidifies in the fridge, let it sit at room temperature for 10 minutes, then give it a good shake.
      • Scaling--The recipe can easily be doubled or tripled if serving a crowd.
      • Dietary--This recipe is suitable for gluten-free, dairy-free, and vegan diets.

    Nutrition

    Serving: 1portionCalories: 216kcalCarbohydrates: 21gProtein: 3.7gFat: 14.3gFiber: 3.4gSugar: 2.6g
    Keyword mustard dressing, potato salad, tangy viniagrette
    Tried this recipe?Let us know how it was!

    April 6, 2024 Chicken & Turkey

    10 Easy Chicken Foil Packet Dinner Recipes

    Like all foil packet recipes, the appeal of these foil-wrapped chicken dinner recipes is endless. They're easy to make, mess-free, require minimal dishes, and can be made on your grill, in the oven, or over the campfire. Find your favorite from this collection of unique chicken meals.

    1
    This Silly Girl's Kitchen
    Italian Lemon Chicken Foil Packet
    Made in the oven in under an hour this Italian Lemon Chicken Foil Packet is a great dinner time meal with vegetables, chicken, lemon and seasonings.
    Get the recipe: Italian Lemon Chicken Foil Packet
    2
    Two Cajun chicken foil packets on plates with forks on the side.
    Cajun Chicken Foil Packets
    These easy 5-ingredient chicken and veggie foil packs are a healthy meal that's filled with tender boneless chicken thighs, peppers, and onions, all gently infused with Cajun seasoning.
    Get the recipe: Cajun Chicken Foil Packets
    3
    Dinner at the Zoo
    Bacon Ranch Chicken Foil Packets
    These bacon ranch chicken foil packets are chicken cooked with potatoes and ranch flavored butter, then topped with melted cheese and bacon.
    Get the recipe: Bacon Ranch Chicken Foil Packets
    4
    Budget Delicious
    Easy Chicken Fajita Foil Packets
    These 5 ingredient Chicken Fajita Foil Packets are a minimal prep lunch or weeknight dinner that can be made on the campfire, grill or oven.
    Get the recipe: Easy Chicken Fajita Foil Packets
    5
    Easy Chicken Recipes
    Teriyaki Chicken Foil Packets
    This foil packed chicken teriyaki has juicy chicken, fresh vegetables, sweet pineapple, and teriyaki sauce to satisfy all of your cravings!
    Get the recipe: Teriyaki Chicken Foil Packets
    6
    Kalyn's Kitchen
    Greek Chicken Foil Packets Recipe
    This Greek Chicken Foil Packets Recipe cooks on the grill in about 15 minutes or you can cook the foil dinners in the oven for a bit longer.
    Get the recipe: Greek Chicken Foil Packets
    7
    Mom Does Reviews
    Air Fryer Ranch Chicken Foil Packs Recipe
    Need inspiration for a super easy meal for the night? If so, then look no further than these delicious Air Fryer Ranch Chicken Foil Packs!
    Get the recipe: Air Fryer Ranch Chicken Foil Packs
    8
    Chicken, carrots, and potatoes in bite size pieces in a foil packet over the fire.
    Campfire Chicken and Potato Foil Packets
    A healthy campfire foil packet meal of chicken, potatoes, and carrots that's ready in under an hour.
    Get the recipe: Campfire Chicken and Potato Foil Packets
    9
    DIY & Fun
    Campfire Chicken Nacho Foil Packets
    Campfire Chicken Nacho Foil Packets, a simple no mess recipe for foil pack nachos that can be made while camping or on a grill.
    Get the recipe: Campfire Chicken Nacho Foil Packets
    10
    Princess Pinky Girl
    Easy Chicken Foil Packets
    This recipe for chicken foil packets is an easy way to make cheesy chicken and potatoes in the oven, on the grill, or over a campfire.
    Get the recipe: Easy Chicken Foil Packets

    Looking for some great foil pack accompaniments? Try this campfire garlic bread or these foil-wrapped spiced grilled plums on the side.

    April 5, 2024 Articles

    How to Make a Foil Packet

    Whether you're camping or just want a dishes free meal in the oven or on the grill, knowing how to make a foil packet will serve you well. You can create flavorful, healthy food with minimal mess. Here's how to do it.

    Four foil packets cooking over an open fire.

    Benefits of Foil Pack Cooking

    • The food stays tender and juicy because it cooks in steam.
    • It's a healthy way to cook, since you don't need to add a lot of extra fat to your meal.
    • There are no dishes to clean up!

    How to Make a Foil Packet

    Creating a foil packet is easy to do by following a few simple steps. While it may seem simpler to just fold each edge over the food, the reason I prefer to fold mine this way is that is easy to check your food for doneness without opening the entire pouch. You can simply pull the center open and, if necessary, it's easy to fold back up.

    A sheet of aluminum foil.
    1. For each foil packet you'd like to create, lay a large sheet of heavy duty aluminum foil on a flat surface.

    Tip: If your aluminum foil isn't labeled as 'heavy-duty' use two sheets to create your foil packet.

    A pile of uncooked food on top of a sheet of foil.
    1. Pile a serving of food in the center of the foil, leaving plenty of space around it. Don't be tempted to overfill your packets as the food won't cook as evenly. Ideally, create a foil packet for each serving, or if you're making side dishes, like these grilled beets with goat cheese, use one pouch for every 3 to 4 servings.

    Tip: Add a little butter or oil to your meal, or spray your foil with cooking spray to ensure your food doesn't stick.

    A person folding up the two sides of a foil packet.
    1. Lift the long edges of the aluminum foil up so that the edges meet above the food. Fold the joined edges over a couple of times until they create a flat seam on top of the food. Don't fold it too tightly--you want the steam to be able to circulate around the food in your foil packet.
    A person folding in the ends of a foil packet.
    1. Fold each side of the flattened foil pack in to create a sealed pouch.
    A corn and tomato gnocchi foil packeto n a wooden tree stump.
    Corn and tomato gnocchi foil packets

    How to Cook Your Foil Packet

    On the Grill

    For best results when cooking foil packets on a grill, prepare your grill for medium-low or medium heat, ideally with all your burners on low heat. For most recipes, you can place your foil packets directly over low flame.

    If your recipe calls for indirect cooking, place your foil packets over an unlit burner, and leave the other burners lit. This is important when cooking foods that cook very quickly, or are prone to burning.

    Over a Campfire

    When cooking over a campfire, it's important to use hot coals, not strong flames. Start your fire well in advance of cooking, and let the fire burn until the coals are glowing. The hot coals will distribute even heat, which will allow your food to cook evenly. Strong open flame will likely result in food that is unevenly cooked, or burned.

    In the oven

    Most foil packet recipes can also be prepared in the oven. To minimize any potential mess or spills in the oven, I recommend placing your foil packets on a baking sheet in the oven. It also makes it easier to transfer them in and out of the oven.

    Tip: Be careful when opening your foil pouch after cooking. There will be plenty of steam trapped inside, which can burn you.

    April 3, 2024 Camping

    Cajun Chicken Foil Packets

    These Cajun chicken foil packets are an easy camping or grilling meal made with boneless chicken thighs and sliced peppers and onions that are gently infused with Cajun seasoning. They're a mess-free chicken meal that's ready in 30 minutes.

    Two Cajun chicken foil packets on plates with forks on the side.

    We all want easy, fuss-free (and dishes-free) meals when we're camping, which is why chicken foil packs make a regular appearance on our camping menu. I love that this version is packed full of flavor, but requires only a handful of simple ingredients. Serve these easy Cajun chicken and veggie foil packs with campfire garlic bread or Dutch oven soda bread to make it a complete meal. Don't forget the Dutch oven chocolate cake for dessert!

    [feast_advanced_jump_to]

    Why This Recipe is Great for Camping

    • You can prep the veggies and meat before heading out and then quickly assemble these at camp.
    • These campfire chicken foil packs are ready in just 30 minutes and can be made over the campfire or on your portable grill.
    • Almost no dishes to do!

    Ingredients and Substitutions

    Ingredients for Cajun chicken foil packets--chicken thighs, onion, pepper, garlic, oil, and Cajun seasoning.
    • Chicken thighs--I like using chicken thighs because they have plenty of flavor, and are less likely to become overcooked and dry. You can make these with cubed boneless skinless chicken breasts, but watch them closely to avoid overcooking the meat.
    • Pepper--Any type of bell pepper will work here. Slice the strips into similarly-sized pieces so that they cook at the same rate.
    • Onion--I like using red onion here as it has a little sweetness to it, but any type of onion will work.
    • Cajun seasoning--You can use your favorite store-bought Cajun seasoning or make your own. Do check the ingredient label of yours as they have varying amounts of spice. If yours doesn't contain salt, or it's very low on the list, you'll need to season the foil packets with a little extra salt.

    Important Steps

    A mixture of chicken, sliced peppers, and sliced onions in a spiced oil in a bowl.
    A pile of uncooked food on a piece of aluminum foil.
    1. Combine the chicken, vegetables, oil, and seasoning in a large bowl and mix to coat everything thoroughly.
    2. Divide the mixture among four sheets of heavy-duty aluminum foil.
    A person folding up the ends of a foil packet.
    Four foil packets cooking over open fire.
    1. Fold each piece of foil around the food to create a foil packet.
    2. Place packets over a campfire or on a grill and cook until the chicken is cooked through and the vegetables are tender.

    FAQs

    Can I make Cajun chicken foil packs in the oven?

    Absolutely. Place your prepared foil packets on a rimmed baking sheet and cook in a 375°F oven until the chicken is cooked through, and the vegetables are tender, 18-20 minutes.

    Can I swap in different vegetables?

    Yes. Feel free to add small cobs of corn or small pieces of carrot. You can add other vegetables, like green beans or zucchini, but they will cook faster than the chicken and will likely be quite soft when the chicken is finished cooking.

    Tips and Troubleshooting

    • To get ahead, slice your veggies and cube your chicken before heading out on your trip. Store the meat and vegetables separately, then assemble them at camp, just before cooking.
    • Be careful when opening the foil packs as there will be plenty of hot steam trapped inside.
    • This recipe is suitable for gluten-free and dairy-free diets.
    Two Cajun chicken foil packets on plates with forks on the side.

    More Camping Recipes You'll Love

    Two halves of a burrito on a plate with hot sauce drizzled over them.
    Make-Ahead Camping Burritos
    A pot of camping chili with two mugs of chili next to it, topped with cheese and cilantro.
    Dutch Oven Campfire Chili

    Tried This Recipe?

    If you've tried this recipe, please leave a comment below. Follow me on Instagram, Facebook, YouTube, or Pinterest for more great camping and grilling recipes.

    Recipe

    Two Cajun chicken foil packets on plates with forks on the side.

    Cajun Chicken Foil Packets

    A woman's face.Angie Zoobkoff
    These easy 5-ingredient chicken and veggie foil packs are a healthy meal that's filled with tender boneless chicken thighs, peppers, and onions, all gently infused with Cajun seasoning.
    5 from 1 vote
    Print Recipe Pin Recipe
    Prep Time 10 minutes mins
    Cook Time 20 minutes mins
    Total Time 30 minutes mins
    Course Main Course
    Cuisine American
    Servings 4 servings
    Calories 313 kcal

    Ingredients
      

    • 1 ½ pounds boneless, skinless chicken thighs cut into bite-size pieces
    • 1 bell pepper sliced
    • 1 medium red onion cut into wedges
    • 3 tablespoons olive oil
    • 2 tablespoons Cajun seasoning

    Instructions
     

    • Preheat the grill for medium heat (375°F) or prepare a campfire with hot coals.
    • Combine the chicken, pepper, onion, olive oil, and Cajun seasoning in a large bowl and mix well to combine.
    • Divide the chicken mixture among 4 large sheets of heavy duty aluminum foil. Fold the foil around the food to create foil packets.
    • Cook over the grill or hot coals until the chicken is cooked through and the vegetables are tender, 18 to 20 minutes.

    Notes

      • Get ahead--Slice your veggies and cube your chicken before heading out on your trip. Store the meat and vegetables separately, then assemble them at camp, just before cooking.
      • Check for salt--Take a peek at the label on your Cajun seasoning. If it doesn't contain salt, or it's the last ingredient on the list, sprinkle the uncooked mixture with a few pinches of salt before cooking.
      • Don't burn yourself!--Be careful when opening the foil packs as there will be plenty of hot steam trapped inside.
      • Dietary--This recipe is suitable for gluten-free and dairy-free diets.

    Nutrition

    Serving: 1packetCalories: 313kcalCarbohydrates: 5.3gProtein: 33.8gFat: 16.6gCholesterol: 140mgFiber: 1gSugar: 1.1g
    Keyword cajun chicken, chicken foil packets, foil pack cooking
    Tried this recipe?Let us know how it was!

    April 1, 2024 Breakfast

    10 Cast Iron Skillet Breakfasts for Camping

    Camping breakfasts should be hearty and satisfying, yet easy to make, and use minimal dishes. Enter these 10 cast iron skillet breakfasts, which are perfect for your next camping trip. They can be prepared on your camp stove, grill, or over the campfire and make a great addition to your list of favorite cast iron skillet recipes for camping.

    Choose from breakfast skillets loaded with potatoes, eggs, and sausage, or try your hand at making cast iron biscuits or pancakes. You'll have an amazing breakfast ready in no time, and plenty of fuel for your outdoor adventures.

    1
    Non-Guilty Pleasures
    Shakshuka With Feta and Harissa
    Shakshuka with feta is a breakfast dish of eggs cooked in a fragrant tomato sauce with rose harissa and red peppers, topped with feta.
    Get the recipe!
    2
    A cast iron skillet filled with chorizo and sweet potato hash with sliced avocado and cilantro on top.
    Chorizo Sweet Potato Hash
    This hearty and satisfying sweet potato chorizo hash is made in your cast iron skillet with fresh sausage, diced sweet potatoes, red onion, and is topped with avocado and cilantro.
    Get the recipe!
    3
    Get Inspired Everyday
    Turkey Breakfast Sausage
    Easy to make and a protein-packed healthy breakfast option, this Turkey Breakfast Sausage is full of flavor and incredibly juicy.
    Get the recipe!
    4
    The Short Order Cook
    Breakfast Sausage, Egg, & Cheese Scramble
    For a tasty & easy breakfast sausage, egg, & cheese scramble, try this quick 20-minute recipe. Just 5 ingredients for the best morning meal.
    Get the recipe!
    5
    A stack of pancakes, maple syrup, and blueberries on a plate with blueberries and bacon in the background.
    Easy Camping Pancakes
    These fluffy camping pancakes, made on your cast-iron skillet or griddle, are soft and buttery, with crisp edges. Top them with plenty of maple syrup for the ultimate breakfast treat.
    Get the recipe!
    6
    Fresh Off The Grid
    Mountain Man Breakfast Skillet
    This classic camping breakfast features cheesy eggs, sausage, and veggies and cooks up in just one skillet.
    Get the recipe!
    7
    Erica's Recipes
    Grilled Honey Biscuits with Thyme
    Grilled Honey Biscuits with Thyme are savory buttermilk biscuits with honey and thyme baked in the Big Green Egg or gas grill. Enjoy biscuits with the hint of smoky grill flavor at your next barbecue.
    Get the recipe!
    8
    Champagne Tastes
    Campfire Breakfast Tacos
    These campfire breakfast tacos are a savory and hearty start to the day. They’re perfect for if you’re camping with a cooler.
    Get the recipe!
    9
    Chili Pepper Madness
    Johnny Cakes Recipe
    This johnny cakes recipe, aka hoe cakes, makes fluffy, flavorful cornmeal pancakes that are perfect for breakfast or for topping with savory ingredients. So delicious!
    Get the recipe!
    10
    Gypsy Plate
    Tex-Mex Migas
    These easy and delicious Tex-Mex Migas feature crispy fried tortillas mixed with soft scrambled eggs and topped with plenty of fixings.
    Get the recipe!

    What's your favorite camping breakfast? Let me know in a comment below.

    March 30, 2024 Collections

    16 Supremely Comforting Gnocchi Recipes

    Regardless of the season, sometimes we all need a big bowl of comforting gnocchi goodness. Whether you prefer your pillowy potato dumplings smothered in creamy sauce or roasted until crispy, these gnocchi recipes are certain to satisfy.

    1
    Delightful Plate
    Gnocchi and Asparagus in Cream Sauce
    This Gnocchi with Asparagus features pillowy gnocchi and sweet, crisp-tender asparagus in a rich yet not too heavy cream sauce. Great for easy daily meals as well as special dinners.
    Get the recipe!
    2
    A cast iron skillet filled with French onion gnocchi with a bunch of thyme on the side.
    French Onion Skillet Gnocchi
    This easy skillet gnocchi combines the classic flavors of French onion soup with tender plump potato dumplings. It's made entirely in your cast iron skillet and is a great side or main dish for camping.
    Get the recipe!
    3
    Dinner at the Zoo
    Chicken Gnocchi Soup
    This chicken gnocchi soup is a hearty and creamy blend of diced chicken, vegetables and potato gnocchi, all simmered together to perfection.
    Get the recipe!
    4
    Winding Creek Ranch
    Crispiest Air Fryer Gnocchi
    Make ultra-crispy Air Fryer Gnocchi for an easy weeknight dinner, side dish, or appetizer! These little bites of deliciousness are ready in just 10 minutes!
    Get the recipe!
    5
    Pinch Me, I'm Eating
    Pumpkin Gnocchi Recipe with Sage Brown Butter Sauce
    Homemade pumpkin gnocchi is made from mashed potato, pureed pumpkin, and a hint of warming spices that make this dish feel like fall!
    Get the recipe!
    6
    The Savory Cipolla
    Lemon Butter Gnocchi with Crispy Prosciutto
    Pan fried gnocchi are tossed in a lemon butter sauce, and topped with crispy prosciutto, sage, and freshly grated parmesan cheese.
    Get the recipe!
    7
    Inside the Rustic Kitchen
    Gnocchi alla Sorrentina
    Gnocchi alla Sorrentina is an incredible Italian comfort food dish made with gnocchi baked in a tomato sauce with bubbling mozzarella cheese.
    Get the recipe!
    8
    Creamy and Delicious Gnocchi Carbonara
    Marcellina in Cucina
    Creamy and Delicious Gnocchi Carbonara
    This Gnocchi Carbonara is the ultimate comfort food! In just 15 minutes and with a handful of ingredients, you’ll have the most satisfying, creamy carbonara on the table. #GnocchiCarbonara
    Get the recipe!
    9
    Garlic & Zest
    Italian Gnocchi with Sautéed Spinach and Crispy Pancetta
    Want an easy gnocchi recipe? Italian Gnocchi with Sauteed Spinach and Crispy Pancetta uses frozen gnocchi for a quick 20 minute meal anytime.
    Get the recipe!
    10
    Stefs Eats and Sweets
    Easy Skillet Taco Gnocchi
    This Easy Skillet Taco Gnocchi make a great quick weeknight dinner with just six ingredients that the whole family will love.
    Get the recipe!
    11
    Scarlati Family Kitchen
    Easy Sausage and Gnocchi Recipe
    This easy sausage and gnocchi recipe is made in just 20 minutes for a delicious one skillet meal that is perfect for a busy weeknight.
    Get the recipe!
    12
    The Jam Jar Kitchen
    Sheet Pan Roasted Tomato Gnocchi
    This simple sheet pan roasted tomato gnocchi is absolutely packed with flavor and takes only a few minutes to throw together!
    Get the recipe!
    13
    An open foil packet filled with gnocchi, corn, tomatoes, and basil on a wooden tree stump.
    Corn and Tomato Gnocchi Foil Packets
    These vegetarian campfire foil packets are made with tender gnocchi, sweet summer tomatoes and corn, all bathed in a buttery sauce. It's fun, easy camping food that requires minimal cooler space and uses only one bowl.
    Get the recipe!
    14
    Wholesome Made Easy
    Gnocchi with White Beans and Spinach
    This easy Gnocchi with White Beans and Spinach is cooked with diced tomatoes and Parmesan for a satisfying meatless meal in under 30 minutes!
    Get the recipe!
    15
    Modern Honey
    Bacon Cheddar Gnocchi Soup
    Bacon Cheddar Gnocchi Soup. Creamy Gnocchi Soup with Crispy Bacon and Cheddar Cheese. This is one of the most flavorful, easy homemade soups to make. Everyone loves this soup recipe!
    Get the recipe!
    16
    Life as a Strawberry
    Summer Gnocchi
    This easy summer gnocchi is ready in 30 minutes and the perfect way to use your favorite summer veggies! With plenty of substitution ideas.
    Get the recipe!

    Gnocchi FAQs

    Do I need to boil gnocchi before baking or frying?

    No, it's not necessary. The gnocchi will become soft and tender from cooking in the skillet or oven. Pre-boiling them can cause them to become overcooked and gummy.

    Can you freeze gnocchi?

    Yes. Homemade gnocchi can be frozen for up to 3 months. I recommend cooking them directly from frozen as they can become gummy when thawed.

    How can I tell when they're cooked?

    If you're boiling gnocchi, or cooking them in a soup, they'll float to the top when they're done, just like other dumplings. If you're making skillet gnocchi or roasting them in the oven, they should be golden brown and tender to the bite.

    What's your favorite way to enjoy gnocchi? Let me know in a comment below.

    March 29, 2024 Dinner

    Pesto-Crusted Salmon

    When you need an easy, no-fuss fish dinner, make this grilled pesto-crusted salmon, that requires just five ingredients (including salt and pepper!) and is ready in under 30 minutes.

    Pesto crusted salmon topped with lemon slices on a cutting board.

    Recipe at a Glance: Pesto-Crusted Salmon

    • DETAILS
      • Total Time: 25 minutes
      • Preparation method: Grill
    • HIGHLIGHTS
      • This simple grilled salmon recipe uses pesto and fresh lemon to create a flavorful meal in less than 30 minutes.
      • The salmon is cooked on a bed of foil so you don't have to worry about the skin sticking to the grill. The foil also makes it easy to transfer the fish to and from the grill surface.
      • Serve your grilled pesto salmon with a couple of grilled side dishes to create a simple summer meal.

    This easy pesto-topped grilled salmon is a simple, way to make the most of fresh or frozen salmon. Ready in about 30 minutes, it's packed with flavor, perfect for busy weeknights, and pairs beautifully with easy grilled sides like grilled carrots or Blackstone zucchini fritters for a fuss-free meal.

    [feast_advanced_jump_to]

    Why You'll Love This Recipe

    • It's a nutritious, easy to make fresh fish recipe, and requires only 5 ingredients (including salt and pepper!)
    • It's ready in less than 30 minutes.
    • It's cooked on the grill on foil so there is no stinky fish smell inside and no dishes!

    Ingredients and Substitutions

    Ingredients for pesto-crusted salmon--salmon, lemon, pesto.
    • Salmon--You can use your favorite type of salmon. I love wild salmon, but it does have a stronger flavor than farmed salmon. Use what you prefer. If you only have individual salmon filets, arrange them side by side on the foil so that they are snuggled up against each other.
    • Pesto--Use your favorite store-bought or homemade pesto. I always use my homemade nut-free pesto, because then I know that it's safe for the nut allergies in my house (and I love that fresh basil flavor), but feel free to use your preferred brand or recipe. Use leftover pesto for adding to mozzarella-stuffed chicken breasts, or in any of these great ways to use pesto.

    How to Make Grilled Pesto Salmon

    A sheet of foil with seven lemon slices arrange in a single layer.

    1. Arrange a double layer of foil on a flat surface and fold up the edges to create a tray. Spray the foil with cooking spray and arrange half of the lemon slices in a single layer on the foil.

    A fillet of salmon with pesto spread on top.

    2. Place the salmon filet on top of the lemon slices. Season with salt and pepper and spread the pesto evenly over the salmon.

    A fillet of salmon with pesto and lemon slices on top on a sheet of foil.

    3. Top with the remaining lemon slices.

    A fillet of salmon with pesto and lemon slices on top on a sheet of foil on a grill.

    4. Grill the salmon until flaky and cooked through.

    FAQs

    What's that white stuff coming out of my fish?

    That gunky white stuff you may see on the surface of your salmon when you cook it is called albumin. It's a liquid protein that solidifies when heated. It may not look particularly appetizing, but it is completely harmless and safe to eat.

    Albumin typically solidifies when the fish is cooked over high heat or cooked for too long. To prevent it from forming, cook your salmon over medium or medium-low heat, and take care not to overcook it.

    Can I make this in the oven?

    Yes! Cook the salmon on a foil-lined baking sheet in a 350°F oven until cooked through, 15 to 17 minutes.

    Storage & Reheating

    Leftover salmon can be stored in a sealed container in the fridge for up to 3 days. Discard the lemon slices before storing.

    You can enjoy the leftovers cold, or, if you prefer to reheat them, transfer the fish to a new foil liner and heat in a 300°F (150°C) oven or over low on the grill until warmed through.

    Tips and Troubleshooting

    • To check for doneness, gently prod the center of the salmon with a fork or knife. When it's done, it should flake apart easily.
    • Use a baking sheet or metal tray under the foil when transporting it to and from the grill. The foil can be pretty flimsy.
    • This pesto-crusted salmon recipe is suitable for gluten-free diets.
    Pesto crusted salmon topped with lemon slices on a cutting board.

    More Easy Salmon Recipes You'll Love

    Four grilled salmon kabobs on a pink plate with lemon wedges and fresh herbs next to them.
    Grilled Salmon Kabobs
    A piece of blackened salmon on a Caesar salad.
    Grilled Blackened Salmon Caesar Salad

    Tried This Recipe?

    If you've tried this recipe, please leave a comment below. Follow me on Instagram, Facebook, YouTube, or Pinterest for more great camping and grilling recipes.

    Recipe

    Pesto crusted salmon topped with lemon slices on a cutting board.

    Pesto-Crusted Salmon

    A woman's face.Angie Zoobkoff
    This easy grilled salmon is topped with pesto and lemon for a bright, summery, no-fuss meal that's ready in less than 30 minutes.
    5 from 1 vote
    Print Recipe Pin Recipe
    Prep Time 10 minutes mins
    Cook Time 15 minutes mins
    Total Time 25 minutes mins
    Course Main Course
    Cuisine American
    Servings 4 servings
    Calories 254 kcal

    Ingredients
      

    • Cooking spray
    • 1 lemon thinly sliced
    • 1 ¼ pound salmon filet
    • Salt and freshly ground black pepper
    • ¼ cup pesto

    Instructions
     

    • Preheat the grill for medium heat (350°F). Arrange two slices of aluminum foil on a baking sheet and fold up the edges to create a tray. Spray the foil with cooking spray.
    • Arrange half of the lemon slices on the foil in a single layer about the same size as the piece of fish.
    • Place the salmon on top of the lemon slices and season with salt and pepper.
    • Spread the pesto over the salmon and top with the remaining lemon slices.
    • Grill until the salmon is cooked through, 15 to 17 minutes.

    Notes

      • Checking for doneness--To check for doneness, gently prod the center of the salmon with a fork or knife. When it's done, it should flake apart easily.
      • Transporting the fish--Use a baking sheet or metal tray under the foil when transporting it to and from the grill. The foil can be pretty flimsy.
      • Make it in the oven--Cook the salmon on a baking sheet in a 350°F oven for 15 to 17 minutes.
      • Dietary--This pesto-crusted salmon recipe is suitable for gluten-free diets.

    Nutrition

    Serving: 1portionCalories: 254kcalCarbohydrates: 2gProtein: 33gFat: 12gCholesterol: 92mgFiber: 1gSugar: 1g
    Keyword grilled salmon, summer grilling
    Tried this recipe?Let us know how it was!

    March 27, 2024 Camping

    Overnight Marinated Vegetable Salad

    This overnight marinated vegetable salad is a bright and colorful collection of your favorite vegetables tossed in an Italian-style vinaigrette. It's fresh and healthy, makes plenty, and is the perfect side dish to pack along on your camping trip or picnic, or to serve at your next backyard barbecue or potluck.

    A bowl filled with raw vegetable marinated salad.

    There never seems to be enough space in the cooler to haul along an abundance of different vegetables on a camping trip, so we tend to be stuck with the same thing over and over again (hello sad bag of baby carrots and carton of hummus!). Not anymore! This make-ahead overnight vegetable salad means you can enjoy the rainbow and feel happy about your getting your daily dose of vegetables in. (Did I mention it's also a great no-cook camping meal option?)

    This recipe was passed along to me many, many years ago by my mother-in-law and has graced the table of countless family gatherings, so you'll have to trust me when I say it's the best marinated vegetable salad recipe you're going to try. I mean, how often does everyone in the same family agree on something?

    [feast_advanced_jump_to]

    Why This Recipe is Great for Camping

    • You can make the salad before heading out on your trip so you've got less work to do at camp.
    • It's a satisfying and healthy make-ahead camping dish that's perfect for lunch or dinner.
    • It stores well and stays fresh and crunchy for multiple days so you can enjoy it throughout your trip.

    Ingredients and Substitutions

    Ingredients for overnight marinated vegetable salad--vegetables, vinegar, oil, spices, and sugar.
    • Oil and vinegar--This forms the base of the Italian dressing. Over the years, I've tweaked it to be a little more tangy than the original recipe, but if you prefer a milder dressing, feel free to reduce the vinegar and increase the oil. I use plain white vinegar, but apple cider vinegar will work here, too.
    • Spices--The dressing uses a combination of mustard powder, garlic powder, salt, and pepper. I also add a pinch of cayenne pepper for a tiny bit of heat, but that is optional.
    • Vegetables--I use a combination of cauliflower, broccoli, carrots, celery, bell pepper, and onion for a colorful and crunchy combination. I've included amounts for each vegetable, but feel free to adjust the amounts to suit your personal preference and what is available to you.
    • Canned corn--We love those little baby corn in a can, plus you can get them year-round, but if you've got fresh corn in season, feel free to cook it, slice it off the cobs, and add it to the salad.
    • Canned mushrooms--Purchase sliced canned mushrooms. Trust me, you don't want to try and slice canned whole mushrooms. You can also substitute fresh mushrooms, if you prefer.

    How to Make Marinated Vegetable Salad

    A person whisking dressing together in a glass measuring cup.
    A bowl of raw mixed vegetables
    1. Whisk the oil, vinegar, sugar, and spices in a measuring cup.
    2. Combine all of the vegetables in a large bowl.
    A person pouring salad dressing into a bowl of raw vegetables.
    A person mixing up a bowl of marinated vegetable salad.
    1. Pour the dressing over the vegetables.
    2. Toss the salad to combine everything. Cover and marinated overnight in the refrigerator before serving.

    FAQs

    Can I use different vegetables?

    Sure. This marinated vegetable salad recipe makes use of a multitude of vegetables, and you can adjust the amount or types of vegetables you use. Try using different types of peppers, or add in some cherry tomatoes. Stay away from leafy greens as they'll wilt in the dressing.

    How long will the salad keep?

    You can store your make-ahead salad in a sealed container or resealable bag in your fridge or cooler for up to 5 days.

    What should I serve with this salad?

    This salad is excellent alongside a simple grilled protein, like bang bang chicken skewers or grilled bacon-wrapped pork tenderloin. Serve it with a side of campfire garlic bread for a complete meal.

    Tips and Troubleshooting

    • For easy storage, toss your marinated raw vegetable salad into a resealable bag.
    • If you prefer a less tangy dressing, reduce the vinegar to ⅓ cup and increase the oil to ⅔ cup.
    • If your dressing clumps up after chilling, let it sit at room temperature for 10 to 15 minutes, then give it a good stir.
    • Stir the salad well before serving.
    • This recipe is suitable for gluten-free and dairy-free diets.
    A bowl filled with raw vegetable marinated salad.

    More Make-Ahead Camping Recipes You'll Love

    Two halves of a burrito on a plate with hot sauce drizzled over them.
    Make-Ahead Camping Burritos
    Several no-bake energy bites in a dish with almonds scattered around.
    No-Bake Fruit and Nut Energy Bites

    Tried This Recipe?

    If you've tried this recipe, please leave a comment below. Follow me on Instagram, Facebook, YouTube, or Pinterest for more great camping and grilling recipes.

    Recipe

    A bowl filled with raw vegetable marinated salad.

    Overnight Marinated Vegetable Salad

    A woman's face.Angie Zoobkoff
    This easy marinated salad is a colorful combination of crunchy raw vegetables tossed in a simple vinaigrette dressing. Healthy never tasted so good.
    5 from 1 vote
    Print Recipe Pin Recipe
    Prep Time 20 minutes mins
    Marinating 12 hours hrs
    Total Time 12 hours hrs 20 minutes mins
    Course Side Dish
    Cuisine American
    Servings 8 servings
    Calories 185 kcal

    Ingredients
      

    • ½ cup vegetable oil
    • ½ cup white vinegar
    • 2 teaspoons granulated sugar
    • 1 teaspoon mustard powder
    • 1 teaspoon garlic powder
    • 1 teaspoon salt
    • ½ teaspoon pepper
    • Pinch cayenne optional
    • 3 cups chopped cauliflower
    • 2 cups chopped broccoli
    • 2 medium carrots peeled and sliced
    • 2 stalks celery sliced
    • ½ large bell pepper
    • ½ cup diced red onion
    • One (10-ounce) can sliced mushrooms drained
    • One (14-ounce) can baby corn drained

    Instructions
     

    • In a liquid measuring cup, whisk together the vinegar, oil, sugar, mustard powder, garlic powder, salt, pepper, and cayenne, if using. Taste and adjust the seasoning, if needed.
    • In a large bowl, combine all of the vegetables.
    • Give the dressing another good whisk to combine everything, then pour it over the vegetables.
    • Stir well to combine, taking care to coat all of the vegetables.
    • Cover and store in the fridge overnight, giving it a stir a few times while it marinates. Stir well before serving.

    Notes

    • Easy storage and packing--Keep your marinated raw vegetable salad in a resealable bag.
    • Dressing ratio--If you prefer a less tangy dressing, reduce the vinegar to ⅓ cup and increase the oil to ⅔ cup.
    • Let it warm up--If your dressing clumps up after chilling, let it sit at room temperature for 10 to 15 minutes, then give it a good stir.
    • Storage--The salad will keep well for up to 5 days, if stored in the refrigerator.
    • Dietary--This recipe is suitable for gluten-free and dairy-free diets.

    Nutrition

    Serving: 1portionCalories: 185kcalCarbohydrates: 12.2gProtein: 3.9gFat: 14gFiber: 4.6gSugar: 5.2g
    Keyword easy camping salads, marinated vegetables
    Tried this recipe?Let us know how it was!

    March 22, 2024 Camping

    13 Best Make-Ahead Desserts for Camping

    We've all got our favorite easy camping desserts, including s'mores, banana boats, Dutch oven cobbler, and more. But sometimes, nature has other plans, and it's too rainy, or restrictions won't permit campfires. And sometimes you just need a little something sweet that doesn't require the effort of building a fire.

    Enter these 13 fantastic make-ahead camping desserts. Each one can be prepped at home and enjoyed at camp with minimal effort. Whether you need a sweet s'mores cookie to nibble on with your cup of dark hot chocolate, or a whole apple crumb pie to share with family and friends, you'll find so many great options here.

    Have you got a favorite easy camping dessert recipe that you never leave on a camping trip without? Let me know in a comment below!

    1
    7 Layer Bars (Magic Cookie Bars)
    organicallyaddison.com
    7 Layer Bars (Magic Cookie Bars)
    These 7 layer bars feature a buttery graham crack crust and crunchy chocolaty topping! This classic dessert is fun for any occasion.
    Get the recipe!
    2
    Chocolate S'mores Cookies
    recipesfromleftovers.com
    Chocolate S'mores Cookies
    Indulge with these delectable chocolate smores cookies—a perfect fusion of gooey marshmallows, rich chocolate, and graham crackers.
    Get the recipe!
    3
    A layered lemon curd dessert cup in a small jar with a marshmallow on top.
    Lemon Curd Dessert Cups
    These easy layered lemon dessert cups are a perfect springtime or Easter Mason jar dessert idea. They're made with just 4 ingredients and can be partially prepared in advance, making them ideal for camping.
    Get the recipe!
    4
    No Bake Peanut Butter Oat Bars
    livslittlemuffins.com
    No Bake Peanut Butter Oat Bars
    When you’re out of things like eggs and milk, but need a quick dessert, make these delicious chocolate covered no bake peanut butter oat bars
    Get the recipe!
    5
    Chocolate Sandwich Cookies
    vintagekitchennotes.com
    Chocolate Sandwich Cookies
    Made from the best chocolate pie crust, these cookies can be sandwiched with different fillings. They are wonderfully simple to make, can be frozen, made in advance, and cut out any shape you want.
    Get the recipe!
    6
    Easy Individual Tropical Trifles
    ericasrecipes.com
    Easy Individual Tropical Trifles
    This layered dessert uses fresh Lime Curd, pineapple, Macadamia nuts, and toasted coconut layered with bits of coconut crème pie as a kitchen hack to give you a beautiful treat worthy of your Easter table or holiday spread. Assemble in advance in individual mason jars for easy service.
    Get the recipe!
    7
    KitKat Brownies
    amummytoo.co.uk
    KitKat Brownies
    This layered KitKat Brownies recipe takes a classic chocolate brownie batter and sandwiches a layer of KitKat wafer biscuits!
    Get the recipe!
    8
    Dutch Apple Pie (Amish Apple Crumb Pie)
    gourmandelle.com
    Dutch Apple Pie (Amish Apple Crumb Pie)
    Enjoy a delicious Dutch apple pie, a classic and comforting dessert, perfect to delight the taste buds of the whole family.
    Get the recipe!
    9
    Easy Rocky Road Cake (No Bake)
    recipesfromapantry.com
    Easy Rocky Road Cake (No Bake)
    Are you looking for the BEST Rocky Road Cake recipe? You will love this one! This no-bake Rocky Road Cake features marshmallows, chocolate, mini eggs and a delicious secret ingredient. Find out exactly how to make it in this post!
    Get the recipe!
    10
    A spoonful of no-bake mini pumpkin cheesecake resting on top of a mason jar filled with the cheesecake.
    Mini Pumpkin Cheesecake
    These no-bake mini pumpkin cheesecakes are perfect for packing along on your Thanksgiving camping trip. They're made in advance and can be stashed in your cooler or fridge for up to 4 days. They'll never last that long though as everyone will be fighting over these easy treats that are made with crunchy Biscoff cookie crust and creamy spiced whipped topping.
    Get the recipe!
    11
    homemadehooplah.com
    Gooey S’mores Bars
    Layered with chocolate chips, mini marshmallows, and a graham cracker crust, these gooey s’mores bars can be made and served any time, melted or chilled.
    Get the recipe!
    12
    Peanut Butter Rice Krispie Treats
    artofnaturalliving.com
    Peanut Butter Rice Krispie Treats
    Crunchy, creamy, chocolatey and easy to make, Peanut Butter Rice Krispie Treats (aka Scotcheroos) are a summer staple for picnics and BBQs.
    Get the recipe!
    13
    No-Bake Apple Pie Cups
    hauteandhealthyliving.com
    No-Bake Apple Pie Cups
    These No-Bake Apple Pie Cups offer all the flavours of apple pie with no oven required, no added sugar and a healthy dose of fibre and healthy fats! Whip up a batch of these cups and store in the fridge or freezer for a quick and healthy snack or treat! {Gluten-free, dairy-free & vegan}
    Get the recipe!

    March 20, 2024 Beef Recipes

    Make-Ahead Camping Burritos

    Want a great camping meal that you can make ahead of time and warm up at camp? Look no further than these easy make ahead camping burritos. They're stuffed with all your favorite burrito fillings, including beans, rice, cheese, and spiced ground beef and only need to be warmed up over your fire, portable grill, or in a pan on your camp stove.

    Two halves of a burrito on a plate with hot sauce drizzled over them.

    I'm all about the make ahead camping meals. Because camping is supposed to be relaxing, right? So, if there's any prep I can do before heading out, I do it. If I can prepare the whole meal before leaving my house, that's an even bigger bonus.

    Which is why these campfire burritos (and breakfast burritos) make a frequent appearance on our camping menu plans. Everyone loves that they can customize their own to suit their tastes, and I love that all I have to do is toss them on the fire grate and let them warm up.

    [feast_advanced_jump_to]

    Why This Recipe is Great for Camping

    • You can customize each burrito based on personal tastes.
    • They're great for all ages and are easy to eat at camp or on the go, so you can toss them in your bag or cooler for a picnic or hike.
    • No dishes at camp!

    Ingredients and Substitutions

    Ingredients for make-ahead camping burritos--rice, beans, cheese, oil, beef, and spices.
    • Ground beef--I recommend lean ground beef (85/15). This will give off a little bit of fat which adds plenty of flavor to the meat and helps to distribute the seasoning.
    • Refried beans--If the beans are difficult to spread, warm them in a saucepan over low heat or in the microwave and give them a good stir before spreading. You can substitute canned black beans, if you prefer.
    • Cheese--I like using Cheddar cheese, but you can substitue any type of good shredding cheese, such as Monterey or Pepper Jack. Grate the cheese yourself instead of using pre-shredded cheese, as it doesn't melt well.
    • Rice--You can use white or brown rice. If you're making the burritos in advance, let your rice cool before assembling the burritos as the heat can cause the cheese to melt.
    • Tortillas (not shown)--Use your favorite type of tortilla. If you want a heartier burrito, go ahead and use whole wheat tortillas. Regardless of what you choose, be sure to get the large or burrito size, as the smaller ones won't be able to hold all the filling.

    How to Make Burritos for Camping

    Ground beef cooking in a cast iron skillet.
    Spices added to a cast iron skillet filled with ground beef.
    1. Heat the oil in a large cast iron skillet over medium heat. Add the ground beef and cook until browned.
    2. Sprinkle in the spices and cook for a couple of minutes. Remove from the heat and let cool.
    A person spreading refried beans on a flour tortilla.
    A flour tortilla topped with burrito filling--beans, ground beef, rice, and cheese.
    1. Top each tortilla with ¼ cup of refried beans, spreading it evenly over the tortilla, and leaving a border around the edge.
    2. Add ¼ of the beef, ¼ cup rice, and ¼ cup cheese to each burrito.
    A person rolling up a burrito.
    Two foil-wrapped burritos heating over a fire.
    1. Roll each burrito and wrap it in foil. Store it in the fridge, freezer, or cooler until you're ready to heat it.
    2. Warm the burritos until the filling is heated through and the cheese is melted.

    Variations

    Got a picky crowd that wants different fillings? Me, too. Here are a few of the variations I've tried over the years for those who don't enjoy a taco meat filling.

    • Chicken--Cook diced chicken breast with the same spice mixture as in the recipe and use that instead of ground beef in the filling.
    • Pork--Shredded slow-cooked pork shoulder or pork butt is a great filling. This roast pork butt recipe is my favorite, but feel free to use your go-to shredded pork recipe. Carnitas also work really well, as they add amazing Mexican flavors to the dish. Use the pork in place of the ground beef.
    • Vegetarian--Omit the meat. Add extra beans or cooked vegetables, such as onions, corn, and peppers.

    How Far in Advance Can I Make Them?

    If you're storing your camping burritos in the fridge or cooler, you can make them 3 days before eating them.

    If you're freezing the burritos, you can prepare them up to 3 months ahead of time. To avoid freezer burn, keep them wrapped in foil and stored in a sealed bag or container. You can let them thaw in your cooler or cook them directly from frozen, adding an extra 5 to 10 minutes to your cooking time.

    Tips and Troubleshooting

    • Make a double batch of the meat and use it for another ground beef camping recipe, like walking tacos.
    • To keep things organized, stash your burritos in a large freezer resealable bag. I can usually fit all four burritos in a single gallon-size bag.
    • If everyone has customized their own with different fillings, remember to write names or initials on the foil with a Sharpie.
    • If you freeze the burritos before heading out, they'll double as an ice block in your cooler until they thaw.
    • If you're heating the burritos over the campfire, place them over hot coals or very low flame. Do not attempt to heat them over strong flames as they will burn.
    Two halves of a burrito on a plate with hot sauce drizzled over them.

    More Camping Recipes You'll Love

    Pieces of Italian sausage quesadilla stacked on top of each other.
    Italian Sausage Quesadillas
    A Dutch oven filled with campfire chili with a metal spoon resting inside.
    Dutch Oven Campfire Chili

    Tried This Recipe?

    If you've tried this recipe, please leave a comment below. Follow me on Instagram, Facebook, YouTube, or Pinterest for more great camping and grilling recipes.

    Recipe

    Two halves of a burrito on a plate with hot sauce drizzled over them.

    Make-Ahead Camping Burritos

    A woman's face.Angie Zoobkoff
    These cheesy meat, bean, and rice burritos are the ideal make-ahead camping meal. They're easy to prepare and quick to reheat at camp.
    5 from 1 vote
    Print Recipe Pin Recipe
    Prep Time 30 minutes mins
    Cook Time 20 minutes mins
    Total Time 50 minutes mins
    Course Main Course
    Cuisine Mexican
    Servings 4 burritos
    Calories 678 kcal

    Ingredients
      

    • 1 tablespoon vegetable oil
    • 1 pound lean ground beef
    • 2 tablespoons chili powder
    • ½ teaspoon garlic powder
    • ½ teaspoon onion powder
    • ½ teaspoon ground cumin
    • Salt and freshly ground black pepper
    • 4 large flour tortillas
    • 1 cup refried beans or black beans
    • 1 cup cooked rice cooled
    • 1 cup shredded Cheddar cheese
    • Hot sauce for serving (optional)

    Instructions
     

    • In a large skillet over medium heat, warm the oil.
    • Add the ground beef and cook, stirring frequently to break it up, until browned, about 5 minutes.
    • Sprinkle in the chili powder, garlic powder, onion powder, cumin, and cook for 1 to 2 minutes. Season to taste with salt and pepper. Let the ground beef cool before assembling the burritos.
    • Lay the tortillas on a flat surface. Spread ¼ cup beans over the surface of each tortilla, leaving a 2-inch border around the edges.
    • Top each tortilla with ¼ of the ground beef, ¼ cup of rice, and ¼ cup of cheese.
    • Roll each burrito up by folding in the sides and then firmly rolling from one edge, keeping the sides tucked in. Wrap each burrito in foil, and label if necessary. Refrigerate or freeze until you're ready to cook.
    • To heat the burritos, set them on a campfire grate over hot coals, or on a portable grill over low flame, or in a skillet on a camp stove over medium heat. Cook until the filling is heated through and the cheese is melted, about 20 minutes for thawed burritos. Frozen burritos will require an additional 5 to 10 minutes.
    • Serve with hot sauce, if desired.

    Notes

      • Storing--To keep things organized, stash your burritos in a large freezer resealable bag. I can usually fit all four burritos in a single gallon-size bag.
      • Use them as an ice block--If you freeze the burritos before heading out, they'll double as an ice block in your cooler until they thaw.
      • Avoid direct flame--If you're heating the burritos over the campfire, place them over hot coals or very low flame. Do not attempt to heat them over strong flames as they will burn.

    Nutrition

    Serving: 1burritoCalories: 678kcalCarbohydrates: 56gProtein: 41gFat: 32gCholesterol: 118mgSodium: 989mgFiber: 6gSugar: 3g
    Keyword make-ahead meals, picnic food
    Tried this recipe?Let us know how it was!

    March 13, 2024 Camping

    Dutch Oven Irish Soda Bread

    This Dutch oven Irish soda bread is simple to make (no kneading!) with just five everyday ingredients--flour, sugar, salt, baking soda, and buttermilk. Make it in your oven or over the campfire and enjoy warm fresh bread in just over an hour.

    A loaf of Irish soda bead with a couple of slices cut from it.

    The beauty of Irish soda bread is that it comes together quickly with minimal ingredients, and doesn't require any rising time, unlike traditional yeast breads. You can make this easy recipe in your Dutch oven in your oven at home or over the campfire.

    Learning to make fresh bread in your cast iron Dutch oven definitely requires some practice and patience, but once you've done it a few times, you'll be whipping up a loaf every time you make Guinness cheese dip, campfire chili or Dutch oven beef stew, because it's perfect for dunking and sopping up juices from soups and stews.

    [feast_advanced_jump_to]

    Why This Recipe is Great for Camping

    • You can mix up the dry ingredients ahead of time so you've got less to do at camp.
    • You can make fresh camping bread in just over an hour!
    • It's great for serving alongside dinner, and toasting over the fire then next morning for breakfast.

    Ingredients and Substitutions

    Ingredients for Irish soda bread--buttermilk, sugar, baking soda, flour, and salt.
    • Buttermilk--The acid in the buttermilk reacts with baking soda to help the bread to rise. You can make your own buttermilk by mixing 1 ¼ cups milk with 4 teaspoons of white vinegar or lemon juice. Let it sit for 5 to 10 minutes before using.
    • Sugar--This adds just a little bit of sweetness to the loaf. You can omit it if you prefer.
    • Baking soda--The baking soda is necessary to help your bread rise. To make sure that your baking soda is still fresh and reactive, you can test it by placing ¼ teaspoon of baking soda in a bowl. Drizzle 2 teaspoons of vinegar over the baking soda. If it fizzes, it's still good; if not, it's time to replace it.

    How to Make Dutch Oven Soda Bread

    A person whisking dry ingredients in a glass bowl.
    Buttermilk being added to a bowl of dry ingredients.
    1. Whisk the flour, sugar, baking soda, and salt in a large bowl.
    2. Pour 1 ¼ cups buttermilk into the dry ingredients.
    Wet and dry ingredients being mixed in a glass bowl with a red silicone spatula.
    A ball of dough on a sheet of parchment.
    1. Stir gently to combine. Add more buttermilk as needed to get a sticky dough.
    2. Shape the dough into a ball, kneading lightly if desired. Place on a sheet of parchment paper.
    A person scoring a ball of dough in a Dutch oven.
    A Dutch oven with hot coals on top.
    1. Place the dough into the Dutch oven and score a deep X on the top of the loaf.
    2. Bake in a 350°F oven or on a bed of hot coals with coals on top until golden brown and cooked through.

    FAQs

    What is buttermilk soda bread?

    It's a type of dense bread that is made without yeast. Instead it uses the reaction of acid in buttermilk with baking soda to create gas which causes the bread to rise while baking. Since there is no yeast required, it doesn't need any rising time before baking.

    How can I tell when my bread is done?

    The soda bread is done when it is deep golden brown in color with a firm crust. It should sound hollow when tapped. To be absolutely certain of doneness, you can use an internal thermometer, which should read between 190°F and 200°F for cooked bread.

    Help! I burned the bottom of my loaf.

    It happens, particularly when you're cooking on coals, and the bottom of the Dutch oven gets too hot. Simply cut off the burned section and enjoy the rest of the loaf. The next time, try using a few less coals on the bottom, or prop your Dutch oven up so that it isn't directly in the coals.

    Tips and Troubleshooting

    • To get ahead, mix your dry ingredients in a resealable plastic bag before heading out on your camping trip.
    • If you like lots of crusty craggly bits on the outside of your loaf, don't overwork it when bringing it all together. Stop pressing it together when it still has some loose uneven edges.
    • If you're making your Dutch oven camping bread on a bed of hot embers or coals and are using a smaller Dutch oven (3 to 5 quarts), you can use less coals, but always keep the same ratio of 2:1 coals on top to coals on bottom. I recommend using 8 below and 16 on top for smaller pots.

    Storage

    Store any leftover bread wrapped in plastic at room temperature for up to 3 days. If you'd like to reheat it, wrap the remaining loaf or slices of bread in foil and rewarm in the oven or over hot coals.

    A whole loaf of Dutch oven Irish soda bread on a cutting board with a serrated knife nearby.

    More Camping Bread Recipes You'll Love

    Four pieces of toasted garlic bread on a wooden cutting board.
    Campfire Garlic Bread
    A cheese biscuit on a white plate with a bowl of biscuits nearby.
    Dutch Oven Biscuits

    Tried This Recipe?

    If you've tried this recipe, please leave a comment below. Follow me on Instagram, Facebook, YouTube, or Pinterest for more great camping and grilling recipes.

    Recipe

    A loaf of Irish soda bead with a couple of slices cut from it.

    Dutch Oven Irish Soda Bread

    This homemade Irish soda bread is prepared in your Dutch oven and can be cooked in your oven at home or in a bed of hot coals while camping. It's a great side dish for pairing with soups, stews, and dips.
    5 from 1 vote
    Print Recipe Pin Recipe
    Prep Time 10 minutes mins
    Cook Time 1 hour hr
    Total Time 1 hour hr 10 minutes mins
    Course Side Dish
    Cuisine Irish
    Servings 4 servings (1 loaf)
    Calories 339 kcal

    Equipment

    • Dutch oven (any size)

    Ingredients
      

    • 3 ½ cups all-purpose flour
    • 2 teaspoons granulated sugar
    • 1 teaspoon baking soda
    • 1 teaspoon salt
    • 1 ¼ to 1 ½ cups buttermilk

    Instructions
     

    • Preheat the oven to 350°F (180°C) or prepare hot coals or embers in a fire pit.
    • In a large bowl, whisk the flour, sugar, baking soda, and salt.
    • Pour in 1 ¼ cups of buttermilk and fold to combine. Add more buttermilk, 1 tablespoon at a time until you have a dough that sticks together, but isn't wet.
    • Place the dough on a sheet of parchment paper and shape into a round ball.
    • Transfer the parchment and dough to the Dutch oven and score a deep X on the loaf with a sharp knife.
    • Cover the Dutch oven with its lid and transfer to the oven or to the fire pit. If cooking in a fire pit, place 9 hot coals or embers underneath the Dutch oven and 18 on top of the lid. (See note below if you are using a small Dutch oven.)
    • If cooking in the oven, bake covered for 30 minutes, then uncover and cook until golden brown, about 35 minutes more.
      If cooking in the fire pit, bake the loaf, replenishing coals as needed, until deep golden brown, about 55 minutes.
    • Remove from the Dutch oven and let cool for 30 minutes before slicing.

    Notes

    • Get ahead--Mix your dry ingredients in a resealable plastic bag before heading out on your camping trip.
    • More crusty bits--If you like lots of crusty craggly bits on the outside of your loaf, don't overwork it when bringing it all together. Stop pressing it together when it still has some loose uneven edges.
    • Smaller Dutch ovens--If you're making your Dutch oven camping bread on a bed of hot embers or coals and are using a smaller Dutch oven (3 to 5 quarts), you can use less coals, but always keep the same ratio of 2:1 coals on top to coals on bottom. I recommend using 8 below and 16 on top for smaller pots.

    Nutrition

    Serving: 0.25loafCalories: 339kcalCarbohydrates: 70.4gProtein: 10.1gFat: 1.1gCholesterol: 1mgFiber: 2.4gSugar: 3.8g
    Keyword camping bread, homemade bread, soda bread
    Tried this recipe?Let us know how it was!

    March 8, 2024 Blackstone Griddle Recipes

    Italian Sausage Quesadilla

    These Italian sausage quesadillas are loaded with flavorful Italian sausage, red onion, and plenty of gooey mozzarella cheese. Served with your favorite marinara on the side for dipping, quesadilla recipes are a great lunch or dinner recipe that will make everyone a happy camper.

    Pieces of Italian sausage quesadilla stacked on top of each other.

    Just like with my Italian sausage sliders and Italian sausage meatballs, this Italian sausage quesadilla recipe requires only a handful of ingredients and is ready in less than 30 minutes, making it perfect for a quick lunch or dinner. They're hearty and satisfying, and who doesn't love dipping triangles of cheesy goodness into marinara sauce?

    [feast_advanced_jump_to]

    Why This Recipe is Great for Camping

    • It's made in a single skillet and is ready in less than 30 minutes.
    • You can prepare it on your camp stove, portable grill, or over your campfire.
    • You can prepare the filling ahead of time so you've got less to do at camp.

    Ingredients and Substitutions

    Ingredients for Italian sausage quesadilla--tortillas, marinara, mozzarella, Italian sausage, and red onion.
    • Italian sausage--Use your favorite type of Italian sausage here. I like hot, but mild or sweet will also work perfectly. You'll need to remove the sausage from the casing, if necessary, or if you're using loose sausage, you'll need 9 to 10 ounces of meat. Got extra sausage? Try one of these amazing Italian sausage recipes.
    • Mozzarella--To avoid having a soggy filling in your sausage quesadilla, use a low-moisture mozzarella, like pizza mozzarella. I recommend using full-fat cheese, and avoid pre-shredded cheese, as it doesn't melt well.
    • Tortillas--Choose burrito size (10-inch or larger) to hold all of the filling. You can make them with smaller tortillas, but you may need to reduce the amount of filling you add to each one.

    How to Make Italian Sausage Quesadillas

    Ground sausage being browned in a cast iron skillet.
    Red onion and ground sausage cooking in a cast iron skillet.
    1. Cook the sausage in a cast iron skillet, breaking it up, until browned.
    2. Stir in the onion and cook until softened. Transfer the mixture to a bowl and set aside. Wipe out the skillet.
    Two quesadillas being assembled in a cast iron skillet.
    Two cooked quesadillas in a cast iron skillet.
    1. Arrange two tortillas in the cast iron skillet, so that they're folded in half. On each half, layer ¼ of the cheese, ½ of the sausage mixture, and the remaining ¼ cup cheese.
    2. Cook, flipping once, until the cheese is melted and the tortilla is golden brown. Slice into triangles and serve with marinara sauce, for dipping.

    FAQs

    Do I need to grease my skillet?

    Nope. The tortilla won't stick to your skillet.

    What should I serve with these sausage quesadillas?

    These are very filling, so you don't need much to round out your meal. A plate of raw veggies with dip, or a Caesar salad would be a great side dish to serve with them.

    Can I add peppers?

    Definitely. If you'd like to up the veggie content of your meal, go ahead and stir in diced peppers at the same time as you add the onion.

    Tips and Troubleshooting

    • To get ahead, cook your sausage and onion mixture before heading out to camp. Store it in a sealed container in your cooler or fridge for up to 3 days.
    • I don't recommend adding additional salt to the sausage mixture because I have found that the combination of cheese, sausage, and marinara sauce already has plenty of saltiness. If you're using a low sodium sauce, or your sausage mixture needs a little bit of oomph, go ahead and season the sausage to taste after browning it.
    • I recommend layering cheese on either side of the sausage mixture in the quesadilla. This will help to glue the whole thing together.
    • A pizza cutter works well for slicing your quesadilla into even triangles.

    Storage & Reheating

    Store leftovers wrapped in foil in your cooler or fridge for up to 1 day. Reheat in a warm oven, or in a skillet until heated through and the cheese is melted.

    Four triangles of quesadilla on a plate, with one resting in a bowl of marinara sauce.

    More Camping Recipes You'll Love

    An Italian sausage slider topped with marinara on a plate with potato chips on the side.
    Italian Sausage Sliders
    Two halves of a turkey ciabatta sandwich with tomatoes, pesto, and mozzarella, stacked on top of each other on a cutting board.
    Turkey Ciabatta Sandwich

    Tried This Recipe?

    If you've tried this recipe, please leave a comment below. Follow me on Instagram, Facebook, YouTube, or Pinterest for more great camping and grilling recipes.

    Recipe

    Pieces of Italian sausage quesadilla stacked on top of each other.

    Italian Sausage Quesadilla

    These quick and easy quesadillas are made with melted mozzarella cheese, spiced Italian sausage, and red onion, all sandwiched inside a crispy flour tortilla.
    5 from 2 votes
    Print Recipe Pin Recipe
    Prep Time 5 minutes mins
    Cook Time 20 minutes mins
    Total Time 25 minutes mins
    Course Main Course
    Cuisine Tex-Mex
    Servings 2 quesadillas
    Calories 611 kcal

    Equipment

    • 12-inch cast iron skillet

    Ingredients
      

    • 2 large Italian sausages (4 to 5 ounces each) casing removed
    • ¼ medium red onion diced
    • 2 large flour tortillas
    • 1 cup shredded mozzarella cheese
    • Marinara sauce for serving

    Instructions
     

    • Set a large cast iron skillet over medium heat. Add the sausage and cook, breaking it up with a wooden spoon, until browned, about 5 minutes.
    • Stir in the onion, and cook, stirring frequently, until softened, 4 to 5 minutes.
    • Remove the skillet from the heat. Scoop the sausage and onion mixture into a bowl. Using tongs and a paper towel, carefully wipe out the skillet.
    • Arrange two tortillas side by side in the skillet so that half of each tortilla is resting on the skillet. (The other half will get folded over the filling.)
    • Sprinkle ¼ of the cheese on each tortilla. Top each quesadilla with ½ of the sausage mixture, then divide the remaining cheese between them. Fold the tortillas over to create two half-moons.
    • Cook over medium low heat, flipping once, until the tortilla is golden brown and the cheese is melted, about 5 minutes on the first side and 3 minutes on the second side.
    • Slice the quesadillas into triangles and serve with marinara sauce on the side, for dipping.

    Video

    Notes

      • Get ahead--Cook your sausage and onion mixture before heading out to camp. Store it in a sealed container in your cooler or fridge for up to 3 days.
      • Seasoning--I don't recommend adding additional salt to the sausage mixture because I have found that the combination of cheese, sausage, and marinara sauce already has plenty of saltiness. If you're using a low sodium sauce, or your sausage mixture needs a little bit of oomph, go ahead and season the sausage to taste after browning it.
      • Glue it together--I recommend layering cheese on either side of the sausage mixture in the quesadilla. This will help to glue the whole thing together.
      • Slicing--A pizza cutter works well for slicing your quesadilla into even triangles.
      • Storage & reheating--Store leftovers wrapped in foil in your cooler or fridge for up to 1 day. Reheat in a warm oven, or in a skillet until heated through and the cheese is melted.
    •  

    Nutrition

    Serving: 1quesadillaCalories: 611kcalCarbohydrates: 36.3gProtein: 23.4gFat: 39.8gCholesterol: 84mgSodium: 1317mgFiber: 1.3gSugar: 0.5g
    Keyword cast iron cooking, quesadilla
    Tried this recipe?Let us know how it was!

    March 6, 2024 Camping

    Guinness Cheese Dip

    Whether you need a great snack for celebrating St. Patrick's Day, or you just love a great creamy beer cheese, this Guinness dip with cream cheese, Irish cheddar, and mustard is perfect for sharing with friends. It's made in your cast iron skillet and can be cooked over the campfire, on the grill, or on your stovetop at home.

    A skillet filled with Guinness beer cheese dip, topped with chopped green onions, and cayenne, with pretzel crackers on the side.

    There's something truly irresistible about a great warm cheesy dip, particularly one laced with beer or wine. I've tried a lot of them, ranging from simple lager-based dips to the fancier Swiss cheese and Prosecco dip. They're all fantastic, but if you're in the mood for something that really delivers strong Cheddar flavor with subtle chocolate and coffee notes from the classic Irish stout, this Guinness beer cheese recipe is the one for you.

    [feast_advanced_jump_to]

    Why This Recipe is Great for Camping

    • It can be prepared and served in your cast iron skillet. No other dishes needed!
    • It's incredibly easy to make and ready in just 15 minutes.
    • It's a great snack or appetizer to enjoy around the campfire.

    Ingredients and Substitutions

    Ingredients for Guinness cheese dip--Irish cheddar, cream cheese, Dijon, and Guinness.
    • Guinness--This is a classic for a reason, and I recommend using Guinness, if available to you. If it's not, you can substitute your favorite stout.
    • Cream cheese--This helps to thicken the dip and also helps to stabilize the mixture so that you get a thick, creamy, scoop-able dip. Use full-fat cream cheese for best results. Cutting it into cubes will help it melt quicker.
    • Irish Cheddar--This has a strong, sharp flavor that pairs well with stout. You can also make this with Dubliner cheese for a similar flavor. Always grate the cheese yourself instead of buying pre-shredded cheese, as it won't melt well.
    • Mustard--This cuts through the richness of the cheese and adds flavor to the dip. Dijon mustard is best for this, but you can substitute ½ teaspoon mustard powder.

    How to Make Guinness Cheese Dip

    A small skillet filled with Guinness and cheese with a bowl of cheese on the side.
    Cheese melting into Guinness in a skillet.
    1. Combine all of the ingredients in a small cast-iron skillet.
    2. Set over low or indirect heat and cook, stirring frequently until the cheese is melted and the sauce is smooth.

    FAQs

    How should I serve this?

    Serve your dip warm, directly from the cast iron skillet. You can top it with scallions and a pinch of cayenne, if you like, but it's also great on its own. Crackers, chips, cubes of Dutch oven Irish soda bread, tater tots, and pretzels all make great dippers to serve alongside.

    What should I do if my Guinness beer cheese separates?

    If your stout dip separates and becomes grainy or lumpy, it can be very difficult to fix. Set it over very low heat and whisk vigorously to try and get the fat and liquid to emulsify. You can also try moving it to a larger skillet and adding two more tablespoons of cream cheese to help emulsify it.

    Tips and Troubleshooting

    • This Guinness beer dip recipe was created for a small 6-inch skillet, which is perfect for feeding 4 to 5 people. To make a big batch, double the amounts and prepare it in a 10-inch skillet.
    • Melt the cheese over low heat. I can't stress the importance of this enough. Don't try to rush it. Letting the mixture get too hot can cause the cheese to separate and become grainy.
    • The dip will thicken considerably as it sits. To keep it from setting up, keep it on the edge of your grill grate or over very low heat on your stove.

    Storage & Reheating

    Store leftover Irish beer dip in a sealed container in your cooler or fridge for up to 3 days. Reheat in a skillet over low heat until warmed through.

    A person scooping up some Guinness cheese dip with a pretzel cracker.

    More Cheese Dip Recipes You'll Love

    A small skillet filled with beer cheese dip, topped with shredded cheese, tomatoes, and scallions with chips on the side.
    Skillet Beer Cheese Dip
    A cube of bread on a fondue fork, covered in Swiss cheese dip.
    Swiss Cheese Dip

    Tried This Recipe?

    If you've tried this recipe, please leave a comment below. Follow me on Instagram, Facebook, YouTube, or Pinterest for more great camping and grilling recipes.

    Recipe

    A person scooping up some Guinness cheese dip with a pretzel cracker.

    Guinness Cheese Dip

    A woman's face.Angie Zoobkoff
    Enjoy your favorite Irish stout in dip form! This cheesy Guinness dip is made with cream cheese and Irish cheddar and is perfect for sharing with friends.
    5 from 1 vote
    Print Recipe Pin Recipe
    Prep Time 5 minutes mins
    Cook Time 10 minutes mins
    Total Time 15 minutes mins
    Course Appetizer, Snack
    Cuisine Irish
    Servings 4 servings
    Calories 306 kcal

    Equipment

    • 6-inch cast iron skillet

    Ingredients
      

    • ⅓ cup Guinness or stout
    • 2 cups (200 g) Irish Cheddar grated
    • 4 ounces (113 g) cream cheese (½ block) cut into cubes
    • 1 teaspoon Dijon mustard
    • Cayenne pepper for serving (optional)
    • Sliced scallions for serving (optional)

    Instructions
     

    • Prepare a campfire, grill, stovetop or camp stove for low heat. You can use the edge of the grill grate, away from the hot coals and flames, or set it on your stove on the lowest setting.
    • Combine the Guinness, Irish Cheddar, cream cheese, and Dijon in the skillet. Gently warm over low heat, stirring occasionally, until melted and smooth, about 10 minutes.
    • Top with a pinch of cayenne and scallions, if using, and serve with your favorite dippers.

    Video

    Notes

      • Scaling--This Guinness cheese dip recipe was created for a small 6-inch skillet, which is perfect for feeding 4 to 5 people. To make a big batch, double the amounts and prepare it in a 10-inch skillet.
      • Keep the heat low--Melt the cheese over low heat. I can't stress the importance of this enough. Don't try to rush it. Letting the mixture get too hot can cause the cheese to separate and become grainy.
      • Keep it warm--The dip will thicken considerably as it sits. To keep it from setting up, keep it on the edge of your grill grate or over very low heat on your stove.
      • Storage and reheating--Store leftover dip in a sealed container in your fridge or cooler for up to 3 days. Reheat in a skillet over low heat until warmed through.

    Nutrition

    Serving: 0.25recipeCalories: 306kcalCarbohydrates: 1.3gProtein: 14.4gFat: 25.7gCholesterol: 75mgSodium: 430mgSugar: 0.1g
    Keyword beer cheese, cheese dip, hot dip
    Tried this recipe?Let us know how it was!

    March 1, 2024 Articles

    Cooking on a Campfire: 10 Expert Tips

    Campfire cooking is a fantastic way to enjoy the great outdoors, and if you do it right, you'll be rewarded with some outstanding meals. These 10 tips will help you to cook over a campfire successfully and safely.

    Foil packets cooking over a fire.
    [feast_advanced_jump_to]

    1. Use hot embers, not raging fires

    There are two types of fires we generally enjoy when camping. There are the ones we gather around with dancing, flickering flames that are fantastic to look at and give off tremendous heat, keeping us warm and cozy on cool nights.

    Then there are the beds of hot embers from a slow burning fire. These are the campfires that we want to cook on. They give off steady even heat, which is perfect for cooking.

    If you've ever had a marshmallow catch fire while trying to toast it over open flame, you've already experienced the difference. Those dancing flames are hot, and give off uneven heat, creating hot spots. Not only is it difficult (and dangerous) to cook food that's engulfed in flames, it's also a quick way to end up with burned food.

    For the most even heat, which will mimic stovetop or grill cooking, let your fire burn down until there are hot, glowing embers, and perhaps a low flame, before beginning to cook.

    2. Choose the right cooking vessel

    There are dozens of outdoor campfire cooking tools available to you, including everything from coffee pots, to campfire toasters, to nested cooking pots and pans, which are all designed to make cooking over a campfire easy. You don't need (and won't have space for) all of them.

    A camp Dutch oven with coals on top.

    I recommend selecting a couple of sturdy cooking vessels that you'll use over and over again. It will depend on the type of food that you cook the most. These are a few of my favorites.

    Cast Iron Skillet

    This is my favorite cooking pan for both cooking over fire, and on the stovetop or grill at home. Cast iron skillets are sturdy, reliable, available in many sizes, and will last you a lifetime if you care for them.

    Dutch Oven

    When you think about campfire cooking, a camp Dutch oven may be the first cooking vessel that you think of. For good reason, too. It holds plenty of food, and is ideal for so many camping recipes, like beef stew, campfire chili, soup, one-pot mac and cheese, turkey, and even bread or dessert.

    They tend to be quite heavy and bulky, so I don't recommend packing them for a hike-in camping trip, but if your campsite is easily accessible, then I highly recommend purchasing one. For an average-sized family of 4 to 6 people, a 6 to 7-quart Dutch oven will work well.

    Griddle

    Griddles offer the same functionality as cast iron skillets, however, they are available in a multitude of shapes and sizes, and because they don't have the high sides that a cast iron skillet does, they are ideal for cooking foods that require flipping, like pancakes and burgers, or ones that require a larger rectangular space, like bacon.

    Grill Basket

    Grill baskets consist of a wire cage to enclose food and a long handle to hold the basket over the flame. They're ideal for cooking whole fish, or smaller pieces of vegetables or potatoes that may otherwise fall through the cooking grate.

    Roasting Sticks

    These are lightweight and there are many retractable ones available on the market. This is your go-to tool for marshmallows and hot dogs, but can also be used for making your favorite meat or vegetable kabobs, like these bang bang chicken skewers. Of course, you can always just use a stick, but avoid conifer branches so that you don't end up with extra sticky pine-flavored food.

    A child holding a s'more with a bite out of it.

    Pie Iron

    I wouldn't exactly say this is a necessary tool for campfire cooking, but it's sure a fun one to use, particularly for the kids. Pie irons are ideal for making anything that's encased in bread or pastry where you want a soft, melted center. Try making grilled ham and cheese sandwiches, pizza pockets, or hand pies with your favorite pie filling.

    Aluminum Foil

    This is the workhorse of campfire cooking. Don't leave home without a roll of foil as you can use it to cook almost anything, including chicken and potato foil packets, spiced plums, or even garlic bread. I recommend using a double layer of heavy duty foil when cooking over a fire.

    3. Not all fires are created equal

    The heat of your fire is going to be impacted by the type of wood that you're burning. Hardwoods, like oak, hickory, or birch are going to burn hotter and give off more heat than softwoods, like pine and cedar. Understanding this can help you determine where (or how high) to place your cooking grate, and how large the fire should be.

    4. Remember that EVERYTHING is hot on a campfire

    Cooking over an open fire is different from cooking on your stovetop. Spoons left resting in a Dutch oven, skillet handles, and the whole length of your hot dog fork are going to get very very hot during campfire cooking. Keep an oven mitt nearby, or on your hand while cooking so that you don't accidentally burn yourself.

    5. Have room to move

    Fires are unpredictable and the amount of heat can change without warning. Since you can't just turn down a campfire, always have a "cool zone" available on your cooking grate.

    This is as simple as building your fire on one side of the grate and leaving the other side untouched. This way, if you need to turn down the heat to your skillet, you can simply slide it over to the cool side of the grate.

    6. Give yourself plenty of time

    Sometimes it gets windy. Sometimes it rains. Or snows. All of these things can make starting a fire and cooking a meal take longer than you might expect. Expect the unexpected and start early.

    A campfire.

    7. Expect it to be a little different every time

    Cooking with fire can be incredibly satisfying, but it can also be incredibly frustrating because each time will be a little different. The type of wood you're using, the distance from the heat, and the outdoor conditions are all going to have an impact on the cook time.

    Expect that each fire will be a little different, and don't rely on exact timing for your recipes. Use visual cues, and when cooking meat or poultry, use an instant read thermometer to determine doneness.

    8. Keep feeding the fire

    There's nothing quite as disappointing as having your fire go out while you're in the middle of cooking dinner. Once you've got an established fire with hot embers, continue to slowly feed the fire as you're cooking. Don't add a lot of wood at once, as this will result in large flames, but continue to add small pieces of wood or charcoal to maintain steady heat.

    9. Have a plan for how you're going to cook

    You've got your hot coals and something delicious to cook. Now what? You're not going to be able to just stand there and hold it over the fire unless it's on a skewer, stick, or in a pie iron. If you're cooking in a Dutch oven, you can go ahead and nestle the pot right into the coals, but for skillet or griddle meals, foil packs, or when you want to grill over the fire, you'll need a flat(ish) surface.

    Many campgrounds and picnic areas have fire pits with cooking grates attached to them, which is ideal for most campfire recipes. But if you're off the grid, or in a remote area, or even your backyard, you might need something different. You can improvise by building up some rocks to support a metal rack, or you can purchase a portable rack with folding legs.

    10. Use the correct utensils

    The good news is that you don't need a lot of utensils. The goal is to be able to cook and remove your food from the heat without burning yourself, so if you bring nothing else along, remember a long handled spoon and a pair of tongs. Metal utensils are great, since they won't catch fire, but remember that they'll get hot, so always grab them with a cooking mitt or potholder.

    February 28, 2024 Breakfast

    Cast Iron Skillet Blueberry Cake

    This sweet blueberry skillet cake is a fantastic dessert, coffee cake, or even breakfast. It's a tender, dense cake, with a slightly tangy flavor, thanks to the addition of lemon and Greek yogurt. And just like with my mini skillet cookie, skillet bourbon apple crisp or grilled peach cobbler, it can be made in the oven or on the grill.

    A whole cast iron skillet blueberry cake, dusted with powdered sugar, with a sieve full of powdered sugar on the side.

    If you're wondering if it's worth it to bake a cake in a cast iron skillet, the answer is a resounding yes, for two important reasons. First, the heat retention of the skillet allows the edges of the cake to become deeply golden and crispy (the best part, IMO), while keeping the center of the cake moist and tender.

    Second, your skillet is sturdy enough to go anywhere, including on the grill. And yes, you can bake a cake on the grill. In fact, there's an abundance of amazing dessert recipes you can make on the grill. So, when it's too hot to turn on that oven, but you swore you'd bring a cake to dinner, fire up the grill, and get baking. Prefer to stick with the oven? There are instructions for that, too.

    [feast_advanced_jump_to]

    Why You'll Love This Recipe

    • It's easy to make and requires minimal dishes. No stand mixer required!
    • Baking in cast iron gives the blueberry skillet cake perfectly crispy edges while still keeping the center moist and tender.
    • You can make it in your oven or on the grill, making it ideal for those days when it's too hot to turn on the oven.

    Ingredients and Substitutions

    Ingredients for cast iron skillet blueberry cake--flour, sugar, eggs, butter, yogurt, lemon, blueberries, milk, and vanilla.
    • Butter--I use unsalted butter for baking since the salt levels in salted butter can vary. If you're substituting salted butter, reduce the amount of salt in the recipe to ¼ teaspoon.
    • Milk--You can make this with regular or your favorite non-dairy milk.
    • Yogurt--I developed this recipe using plain Greek yogurt, but you can substitute full fat regular yogurt, or sour cream.
    • Lemon zest--This lends the cake a little tartness to balance the sweetness and lemon pairs wonderfully with blueberries.
    • Blueberries--Both fresh and frozen blueberries work well in this recipe. If your berries are frozen, don't thaw them. Just toss them into the batter frozen.

    How to Bake a Cake in a Cast Iron Skillet

    A buttered cast iron skillet.
    A bowl with flour and sugar and a whisk resting inside.
    1. Butter a 12-inch cast iron skillet. (Seasoning your cast iron will keep it mostly nonstick, but a little extra butter in the pan ensures that it releases cleanly.)
    2. Whisk the dry ingredients together in a bowl.
    A bowl of yogurt, milk, eggs, and lemon zest with a whisk resting inside.
    Wet and dry ingredients being combined in a bowl.
    1. In a separate bowl, mix the wet ingredients together.
    2. Add the dry ingredients to the wet and mix until they're just combined.
    Blueberries being mixed into a bowl of cake batter.
    A blueberry skillet cake cooking on a grill.
    1. Fold the blueberries into the cake batter.
    2. Bake in a 375°F oven or covered grill until the cake is golden and a tester comes out clean.

    Baking a Cake on the Grill

    Using a grill to bake a cake isn't complicated, as long as you remember a few key things. We're treating the grill like an oven, so it needs to remain covered as much as possible. That means no peeking! Only open the lid to check on it when it's getting close to the 30 minute mark.

    The other critical thing to remember is that the skillet needs to be over indirect heat. Any direct flame under your skillet is going to result in a burned cake. Ideally, you want low heat on either side of your skillet, but if your grill isn't large enough to accommodate this, heat the burner on one side of the grill, place the skillet on the other side, and turn it once during baking.

    FAQs

    Is this cast iron skillet cake the same as a dump cake?

    No. Dump cakes don't require any mixing and are made in one dish. This requires a couple of bowls, as well as a skillet, and you do need to mix the ingredients together.

    Can I make this with a different size skillet?

    You can, but be aware that the baking time will be different. If you use a smaller (10-inch) skillet, take care to not overfill it. The cooking time will be a little longer. If you use a larger skillet, you'll get a thinner cake, which will cook faster.

    How should I serve this lemon blueberry skillet cake?

    This cast iron skillet dessert can be served on its own, with a dusting of powdered sugar, or your can get a little fancy and top it with a dollop of whipped cream and fresh berries, or a scoop of vanilla ice cream.

    Tips and Troubleshooting

    • If you're concerned about the cake sticking to the skillet, you can line it with parchment. If you're baking the cake on the grill, make sure there is no paper hanging over the edges as it could ignite.
    • Avoid lifting the lid on the grill as much as possible as the temperature will fluctuate each time it's opened.
    • I find that it typically takes a little longer to bake the cake on the grill than in the oven.

    Storage Instructions

    The cake can be stored at room temperature, covered with plastic wrap or foil for up to 3 days. The cake will lose its crispiness along the edges as it sits, but it will still be delicious.

    A piece of blueberry skillet cake on a plate with a fork resting beside it.

    More Dessert Recipes You'll Love

    A layered lemon curd dessert cup in a small jar with a marshmallow on top.
    Lemon Curd Dessert Cups
    Two plates of cranberry cobbler on a wooden table with fir branches nearby.
    Dutch Oven Cranberry Cobbler

    Tried This Recipe?

    If you've tried this recipe, please leave a comment below. Follow me on Instagram, Facebook, YouTube, or Pinterest for more great camping and grilling recipes.

    Recipe

    A whole cast iron skillet blueberry cake, dusted with powdered sugar, with a sieve full of powdered sugar on the side.

    Cast Iron Skillet Blueberry Cake

    This sweet and slightly tangy lemon blueberry skillet cake is easy to make and can be baked in your oven or on the grill. It's perfect for dessert or as a breakfast coffee cake.
    5 from 2 votes
    Print Recipe Pin Recipe
    Prep Time 15 minutes mins
    Cook Time 35 minutes mins
    Total Time 50 minutes mins
    Course Breakfast, Dessert
    Cuisine American
    Servings 8 servings
    Calories 316 kcal

    Equipment

    • 12-inch cast iron skillet

    Ingredients
      

    • 1 stick unsalted butter melted, plus more for the skillet
    • 1 ⅔ cups all-purpose flour
    • ¾ cup granulated sugar
    • 2 teaspoons baking powder
    • ½ teaspoon salt
    • 2 large eggs
    • ½ cup milk
    • ½ cup plain Greek yogurt
    • 2 teaspoons lemon zest
    • 1 teaspoon vanilla extract
    • 1 ½ cups blueberries

    Instructions
     

    • Preheat the oven or grill to 375°F. If using a grill, prepare it for indirect cooking. (I use two low burners on either side of the grill.)
    • Butter a 12-inch cast iron skillet well, making sure it's completely coated.
    • In a medium bowl, whisk the flour, sugar, baking powder, and salt.
    • In a large bowl, combine the melted butter, eggs, milk, yogurt, lemon zest, and vanilla.
    • Add the dry ingredients to the wet and mix just until they're combined and no dry patches remain. The batter will be thick.
    • Fold in the blueberries. Spread the batter in the prepared skillet.
    • Bake the cake in the oven, or in a covered grill over indirect heat until the cake is golden and a tester inserted in the center comes out clean, 30 to 40 minutes. If using a grill, adjust the burners as needed to maintain temperature, and avoid opening the lid frequently. If using a grill with burners lit on only one side of the grill, rotate the skillet once during baking.
    • Let cool for at least 30 minutes before serving. Serve warm or at room temperature.

    Notes

      • Using parchment--If you're concerned about the cake sticking to the skillet, you can line it with parchment. If you're baking the cake on the grill, make sure there is no paper hanging over the edges as it could ignite.
      • Don't peek!--Avoid lifting the lid on the grill as much as possible as the temperature will fluctuate each time it's opened.
      • Timing--I find that it typically takes a little longer to bake the cake on the grill than in the oven.
      • Storage--Store the cake, loosely covered with plastic, at room temperature for up to 3 days.

    Nutrition

    Serving: 1portionCalories: 316kcalCarbohydrates: 47.9gProtein: 7.6gFat: 12gCholesterol: 76mgFiber: 2.1gSugar: 24.3g
    Keyword blueberry cake, coffee cake, grilled dessert, skillet cake
    Tried this recipe?Let us know how it was!

    February 21, 2024 Camping

    French Onion Skillet Gnocchi

    This French onion gnocchi skillet combines the rich, cheesy goodness of French onion soup with plump, slightly crisped gnocchi. It's a hearty and satisfying meal or side dish that is made entirely in your cast-iron skillet. It's perfect for a cool-weather camping meal or a cozy night in.

    A cast iron skillet filled with French onion gnocchi with a bunch of thyme on the side.

    Most skillet gnocchi recipes are ideal because they, like this recipe, are made in a single pan. However, many of them require the use of a broiler for melting the cheese, which isn't exactly ideal when you're camping. Unless, of course, you've got an RV with a little broiler in the oven. If you do, broil away to get melted browned cheese on top.

    For everyone else making this on their camp stove or campfire, a broiler is out of the question. Thankfully, a lid or a piece of foil works wonders for trapping enough heat to get the cheese melted and the gnocchi nice and plump.

    [feast_advanced_jump_to]

    Why This Recipe is Great for Camping

    • It's a satisfying gnocchi recipe that is hearty enough to serve as a one-pot meal.
    • This French onion skillet gnocchi recipe requires only one skillet.
    • Many of the ingredients are shelf-stable, so they won't take up precious cooler space.

    Ingredients and Substitutions

    Ingredients for French onion skillet gnocchi--thyme, oil, onions, gnocchi, beef broth, Swiss cheese, and Worcestershire sauce.
    • Oil--Any neutral flavored oil, such as vegetable or sunflower oil will work well here.
    • Onions--It will seem like a lot of onions, but they do shrink as they cook. Don't panic if your skillet is completely full in the beginning.
    • Gnocchi--I find that shelf-stable dry gnocchi works best for this recipe. You can also use refrigerated "skillet" gnocchi, if you prefer.
    • Beef broth--I use beef broth here because it delivers that French onion soup flavor, but you can substitute vegetable broth.
    • Worcestershire sauce--This adds a layer of umami to the finished dish and I highly recommend using it. If you don't have any, you could add a splash of soy sauce.
    • Fresh thyme--This herb adds a subtle flavor to the dish. If you can't get fresh thyme, add ½ teaspoon of dried thyme, instead.
    • Swiss cheese--This is a readily available, reasonably priced cheese. Don't use pre-shredded cheese, as it doesn't melt well. For a very authentic flavor, splurge on Gruyère cheese and use that instead.

    How to Make French Onion Gnocchi

    A cast iron skillet filled with sliced onions.
    Unccoked gnocchi with caramelized onions in a cast iron skillet.
    1. Heat the oil in a large cast iron skillet over medium-low heat. Add the onions and reduce the heat to low. Cook until the onions are soft and caramelized.
    2. Add the gnocchi and stir well to combine. Cook, stirring occasionally, until the gnocchi are beginning to brown and crisp.
    Cooked gnocchi and onions and a bunch of fresh thyme in a cast iron skillet.
    A skillet covered with foil.
    1. Pour in the broth and Worcestershire sauce and nestle the thyme sprigs in the mixture.
    2. Cover and cook until the gnocchi are plump and the liquid is reduced.
    Gnocchi topped with shredded Swiss cheese in a cast iron skillet.
    A skillet covered with foil.
    1. Sprinkle with cheese.
    2. Cover and cook until the cheese is melted.

    FAQs

    Do I need to pre-boil my gnocchi?

    No, it's not necessary. The gnocchi will become soft and tender from cooking in the skillet and simmering in the broth. Pre-boiling them can cause them to become overcooked and gummy.

    Can I make this with frozen gnocchi?

    I don't recommend it. The cold frozen gnocchi don't toast well in the skillet and tend to be gummy after pan-frying.

    What should I serve with French onion gnocchi?

    You can serve this as an entree or a side dish. If you're serving it as a main, a side salad is a great accompaniment. This is also an excellent side dish alongside a lean protein, like Dutch oven turkey breast.

    Tips and Troubleshooting

    • To avoid crying while slicing your onions, always use a sharp knife and keep the root end of the onion intact while slicing.
    • If your onions are sticking while you're caramelizing them, add a splash of water.
    • If you don't have foil for covering your skillet, you can use a lid, baking sheet, or other larger skillet to cover the gnocchi.

    Storage and Reheating Instructions

    Store leftover gnocchi in a sealed container in your fridge or cooler for up to 4 days. Reheat in a skillet over low heat, adding a splash of broth to help loosen the mixture. I don't recommend freezing it.

    A cast iron skillet filled with French onion gnocchi with a bunch of thyme on the side.

    More Camping Gnocchi Recipes You'll Love

    An open foil packet filled with gnocchi, corn, tomatoes, and basil on a wooden tree stump.
    Corn and Tomato Gnocchi Foil Packets
    Gnocchi, tomatoes, mozzarella and basil in a foil packet on a plate.
    Caprese Gnocchi Foil Packets

    Tried This Recipe?

    If you've tried this recipe, please leave a comment below. Follow me on Instagram, Facebook, YouTube, or Pinterest for more great camping and grilling recipes.

    Recipe

    A cast iron skillet filled with French onion gnocchi with a bunch of thyme on the side.

    French Onion Skillet Gnocchi

    A woman's face.Angie Zoobkoff
    This easy skillet gnocchi combines the classic flavors of French onion soup with tender plump potato dumplings. It's made entirely in your cast iron skillet and is a great side or main dish for camping.
    5 from 1 vote
    Print Recipe Pin Recipe
    Prep Time 10 minutes mins
    Cook Time 35 minutes mins
    Total Time 45 minutes mins
    Course Main Course, Side Dish
    Cuisine French, Italian
    Servings 4 servings
    Calories 360 kcal

    Equipment

    • 12-inch (or larger) cast-iron skillet

    Ingredients
      

    • 2 tablespoons vegetable oil
    • 2 pounds onions (about 6) thinly sliced into half-moons
    • Salt and pepper
    • One package (18 oz/500 g) gnocchi
    • 1 cup beef broth
    • 1 tablespoon Worcestershire sauce
    • 4 sprigs fresh thyme
    • 1 cup grated Swiss cheese

    Instructions
     

    • Set a cast iron skillet over medium low heat on a stove top or camp stove. Add the oil and let it heat for 2 minutes.
    • Pile the onions into the skillet and season with salt and pepper. Don't worry if your skillet seems very full. The onions will reduce as they cook.
    • Reduce the heat to low and cook until the onions are soft and golden brown, stirring occasionally, about 20 minutes.
    • Add the gnocchi to the skillet and stir well to combine with the onions. Cook, stirring occasionally, until the gnocchi begin to develop browned spots, about 5 minutes.
    • Pour in the broth and Worcestershire sauce and nestle the thyme in the mixture. Cover with a lid, foil, or baking sheet and cook until the gnocchi are plump and most of the liquid is absorbed, about 5 minutes.
    • Discard the thyme and adjust seasoning to taste, if needed.
    • Sprinkle the cheese over. Cover and cook until the cheese is melted, about 2 minutes. Serve immediately.

    Notes

      • Tear-free onion slicing--To avoid crying while slicing your onions, always use a sharp knife and keep the root end of the onion intact while slicing.
      • Stop them from sticking--If your onions are sticking while you're caramelizing them, add a splash of water.
      • Storage and reheating--Store leftover gnocchi in a sealed container in your fridge or cooler for up to 4 days. Reheat in a skillet over low heat, adding a splash of broth to help loosen the mixture.
    •  

    Nutrition

    Serving: 1portionCalories: 360kcalCarbohydrates: 41.9gProtein: 12.3gFat: 15.5gCholesterol: 25mgSodium: 835mgFiber: 4gSugar: 3.3g
    Keyword cast iron cooking, french onion soup gnocchi, one pan meals, skillet gnocchi
    Tried this recipe?Let us know how it was!

    February 14, 2024 Camping

    Lemon Curd Dessert Cups

    These lemon curd dessert cups are an easy no-bake camping dessert (that doesn't require freezing!) that combines buttery graham crackers, tangy lemon curd, and sweet toasted marshmallow. Think of it as a camping-inspired riff on lemon meringue pie.

    A layered lemon curd dessert cup in a small jar with a marshmallow on top.

    Lemon meringue pie has been a favorite of mine for as long as I can remember, but it's not exactly a quick and easy dessert to toss together. Particularly not when you're camping! However, with this recipe, you can enjoy the next best thing with almost no effort.

    This lemon dessert in a cup relies on only 4 ingredients--a no-bake butter and graham cracker base, lemon curd, and a toasted marshmallow for the top. Best of all, you can assemble everything except the marshmallow before heading out to camp, so all you need to do is toast a marshmallow and plop it on top before digging in.

    [feast_advanced_jump_to]

    Why This Recipe is Great for Camping

    • You can make this camping dessert in advance and stash them in the cooler before you head out on your camping trip.
    • They're portioned into individual servings, so you don't have to worry about eating it all at once or figuring out how to store leftovers.
    • These easy mini Mason jar desserts will keep for up to 4 days, so you can enjoy them at your leisure.

    Ingredients and Substitutions

    Ingredients for lemon curd dessert cups--butter, graham crackers, marshmallows, and lemon curd.
    • Butter--I use salted butter for the crust, but if you've only got unsalted on hand, just add a big pinch of salt to your crushed graham cracker and butter mixture.
    • Graham crackers--These are inexpensive and you likely have them on hand as part of your camping s'mores stash. If you want to get a little fancy, Biscoff cookies would also work here.
    • Lemon curd--You can make your own lemon curd or use good-quality store-bought curd. My favorite is Bonne Maman Lemon Curd.
    • Jumbo marshmallows--These are the perfect size to fit in ½-pint Mason jars. If you're using smaller marshmallows, you may be able to fit 2 on top of each lemon dessert cup.

    How to Make Lemon Curd Dessert Cups

    A person crushing graham crackers in a Ziploc bag.
    A person mixing crushed graham crackers and butter in a bowl.
    1. Place the graham crackers in a resealable bag and crush with a rolling pin. Alternatively, you can grind them in a food processor.
    2. Pour in the butter and use a fork to mix well.
    Crushed graham crackers in four small jars.
    A person spooning lemon curd on top of crushed graham crackers in small jars.
    1. Divide the graham cracker mixture among four ½-pint wide mouth Mason jars and pack them firmly into the base of the jar.
    2. Spoon the lemon curd over the graham cracker base.
    A marshmallow being toasted over open fire.
    Four small jars, two filled with lemon curd and two topped with large toasted marshmallows.
    1. Toast the marshmallows until golden.
    2. Top each dessert with one toasted marshmallow.

    FAQs

    Can I toast marshmallows without a campfire?

    Yes! If you'd prefer to use an oven, set it to broil. Arrange the marshmallows on a foil-lined baking sheet and broil them until golden brown on top, about 2 minutes. Remove the baking sheet from the oven, carefully turn each marshmallow over, and broil the other side until golden. Watch them carefully so that they don't burn.

    What can I do with leftover lemon curd?

    To make a quick dessert with lemon curd, fold it into whipped cream to make an easy lemon mousse. It's also fantastic spooned onto scones or biscuits, or dolloped onto skillet pancakes.

    Can you freeze lemon curd cups?

    Yes. You can freeze the lemon curd and graham cracker base in their jars for up to 3 months. Do not freeze with the marshmallow topping.

    To freeze the lemon dessert cups, assemble the cups without the marshmallow topping, and cover with a canning lid. Freeze for up to 3 months. Thaw in the refrigerator overnight before topping with marshmallows and serving.

    Tips and Troubleshooting

    • Use the base of a small glass or smaller sized jar to pack the graham cracker base into the bottom of the jar.
    • Don't toast your marshmallows until just before serving. Once the marshmallows sit and firm up, they become difficult to eat.

    Storage Instructions

    Store the assembled lemon desserts without the marshmallow topping in your fridge or cooler for up to 4 days or freeze for up to 3 months. Top with the toasted marshmallow just before serving.

    Four layered lemon desserts in small jars with marshmallows on top.

    More Camping Dessert Recipes You'll Love

    A serving of cranberry cobbler on a white plate.
    Dutch Oven Cranberry Cobbler
    A spoonful of no-bake mini pumpkin cheesecake resting on top of a mason jar filled with the cheesecake.
    Mini Pumpkin Cheesecake

    Tried This Recipe?

    If you've tried this recipe, please leave a comment below. Follow me on Instagram, Facebook, YouTube, or Pinterest for more great camping and grilling recipes.

    Recipe

    A layered lemon curd dessert cup in a small jar with a marshmallow on top.

    Lemon Curd Dessert Cups

    These easy layered lemon dessert cups are a perfect springtime or Easter Mason jar dessert idea. They're made with just 4 ingredients and can be partially prepared in advance, making them ideal for camping.
    5 from 1 vote
    Print Recipe Pin Recipe
    Prep Time 10 minutes mins
    Cook Time 5 minutes mins
    Total Time 15 minutes mins
    Course Dessert
    Cuisine American
    Servings 4 servings
    Calories 447 kcal

    Equipment

    • 4 ½-pint wide-mouth Mason jars with lids
    • Marshmallow toasting stick

    Ingredients
      

    • 3 ounces graham crackers (about 13)
    • 2 tablespoons salted butter melted
    • 1 cup lemon curd
    • 4 jumbo marshmallows

    Instructions
     

    • Prepare a campfire, camp stove, or grill for toasting marshmallows.
    • Place the crackers in a resealable bag and seal it. Use a rolling pin to crush the crackers until they are coarsely ground. Alternatively, you can do this in a food processor.
    • Combine the crushed crackers and melted butter in a medium bowl and use a fork to mix well. Divide the cracker mixture among four wide-mouth jars (½ pint size) and press the crackers firmly into the bottom of each jar.
    • Spoon ¼ cup of lemon curd on top of the graham crackers in each jar.
    • Just before serving, toast your marshmallows over a campfire, camp stove, or grill. (See FAQs above for instructions for oven toasting.)
    • Top each jar with one toasted marshmallow and serve immediately.

    Notes

    • Getting ahead--The crust and lemon curd can be assembled in the jars up to 4 days before serving. Cover with lids and store in your fridge or cooler. Top with the toasted marshmallows just before serving.
    • Packing the crust--Use the base of a small glass or smaller sized jar to pack the graham cracker base into the bottom of the jar.
    • Don't toast the marshmallows ahead of time--Once the marshmallows sit and firm up, they become difficult to eat.

    Nutrition

    Serving: 1jarCalories: 447kcalCarbohydrates: 47.5gProtein: 6.3gFat: 32.1gCholesterol: 215mgSodium: 395mgFiber: 0.6gSugar: 33.7g
    Keyword camping desserts, lemon dessert, mason jar dessert ideas, no-bake dessert
    Tried this recipe?Let us know how it was!
    • « Go to Previous Page
    • Page 1
    • Interim pages omitted …
    • Page 5
    • Page 6
    • Page 7
    • Page 8
    • Page 9
    • Go to Next Page »

    Primary Sidebar

    A woman's face.

    Hi, I'm Angie! I'm so glad you're here. I can't wait to share my favorite camping and grilling recipes with you.

    More about me →

    Summer Favorites

    • Skewers of grilled strawberries on a plate, drizzled with dark syrup.
      Grilled Strawberries
    • Four grilled shrimp skewers on a platter with lemon wedges and cocktail sauce on the side.
      Grilled Old Bay Shrimp
    • A whole skillet peach cobbler with two spoons resting on top.
      Grilled Skillet Peach Cobbler
    • Two Cajun chicken foil packets on plates with forks on the side.
      Cajun Chicken Foil Packets

    Popular Recipes

    • A small skillet filled with caramelized bananas.
      Campfire Bananas Foster
    • A mini cast iron skillet filled with cornbread.
      Mini Skillet Cornbread
    • A grilled cheese sandwich cut in half and a handful of potato chips.
      Campfire Grilled Cheese Two Ways
    • A skillet with three chicken breasts and a skillet filled with cheesy gnocchi.
      18 Easy Cast Iron Skillet Meals for Camping

    Footer

    ↑ back to top

    About

    • Privacy Policy

    Newsletter

    • Sign Up for Emails

    Let's Connect

    • Contact

    Copyright © 2025 Camp.Grill.Eat.

    Rate This Recipe

    Your vote:


    A rating is required
    A name is required
    An email is required