• Skip to main content
  • Skip to primary sidebar

Camp.Grill.Eat. logo

menu icon
go to homepage
  • Recipes
  • About
  • Subscribe
  • Contact
    • Facebook
    • Pinterest
    • YouTube
  • search icon
    Homepage link
    • Recipes
    • About
    • Subscribe
    • Contact
    • Facebook
    • Pinterest
    • YouTube
  • ×
    Home » Recipes

    Recipe Index

    February 9, 2024 Beef Recipes

    Dutch Oven Campfire Chili

    This campfire chili recipe is a comforting one-pot camping meal made in your Dutch oven over the fire. It's made with ground beef, onions, peppers, tomatoes, and kidney beans, in a spiced tomato sauce. It's perfect for cool weather camping days.

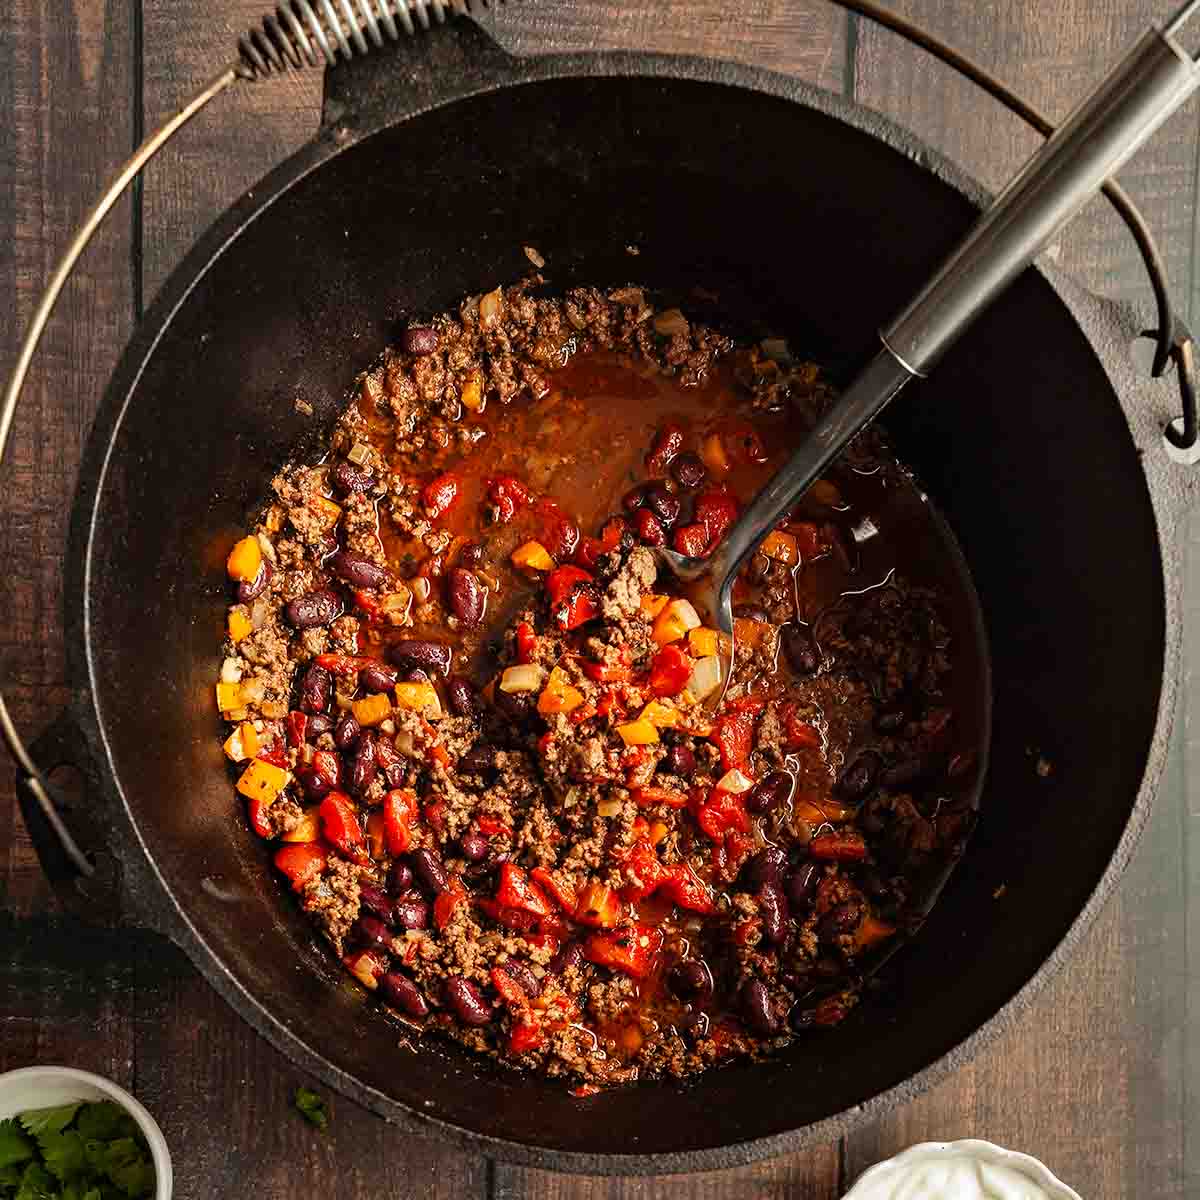
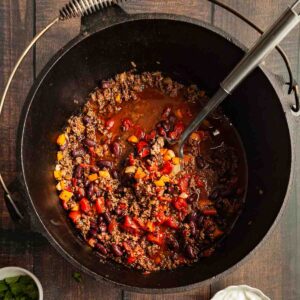
    A Dutch oven filled with campfire chili with a metal spoon resting inside.

    Recipe at a Glance: Campfire Chili

    • DETAILS
      • Total Time: 1 hour 50 minutes
      • Preparation method: Campfire cooking (Dutch oven)
    • HIGHLIGHTS
      • This hearty campfire chili recipe is chock full of ground beef, vegetables, and beans in a spicy tomato sauce. Cook it in your Dutch oven over the fire or on your camp stove.
      • This classic camping meal makes a big pot of food, which will feed a large family (with leftovers!), and can easily be customized to suit your spice preference.
      • Top your Dutch oven chili with all your favorite fixings, including cheese and sour cream, and offer homemade Dutch oven bread on the side.

    When I think about Dutch oven camping recipes, chili (or chili mac) is usually what pops into my brain first, and it makes a frequent appearance on our cold weather camping menu plans. I love that it's satisfying and nourishing while still definitely ticking off the "comfort food" box. Plus, it makes plenty, and the leftovers are even better the next day.

    [feast_advanced_jump_to]

    Why This Recipe is Great for Camping

    • It's prepared entirely in one pot and cooked over the fire so you've got minimal clean up and don't need any special equipment.
    • It makes a big batch and will store well in your cooler or RV fridge for several days. Use it for multiple meals!

    Ingredients and Substitutions

    Ingredients for Dutch oven campfire chili--onion, pepper, spices, tomatoes, beef, beans, beer, oil, and garlic.
    • Ground beef--I recommend using lean ground beef for this chili. It will give off a little bit of fat that will be great for sautéing your vegetables, and it will add plenty of flavor to the dish, but it won't be swimming in fat, either.
    • Chili powder--Use a chili powder that you're familiar with. If you're opening a new jar, taste a little to make sure that you're comfortable with the heat level. If you're unsure, start with less chili powder, and add as you go, until it reaches a heat level you like.
    • Beer--No fancy beer required here. Use whatever you've got in your cooler. If you're avoiding alcohol, you can use an alcohol-free beer, or substitute beef broth.
    • Fire-roasted tomatoes--These are tomatoes that have been roasted over an open flame before canning, which gives them a smoky, sweet flavor. You'll find them in most large grocery stores with the rest of the canned tomatoes, or you can order them online.
    • Kidney beans--Make sure to drain and rinse your beans before adding them to the chili. You can even do this at home, then stash them in a resealable bag or container in your cooler.

    How to Cook Chili Over a Campfire

    Ground beef browning in a Dutch oven over a campfire.

    1. Brown the beef in oil a large cast iron Dutch oven over the fire.

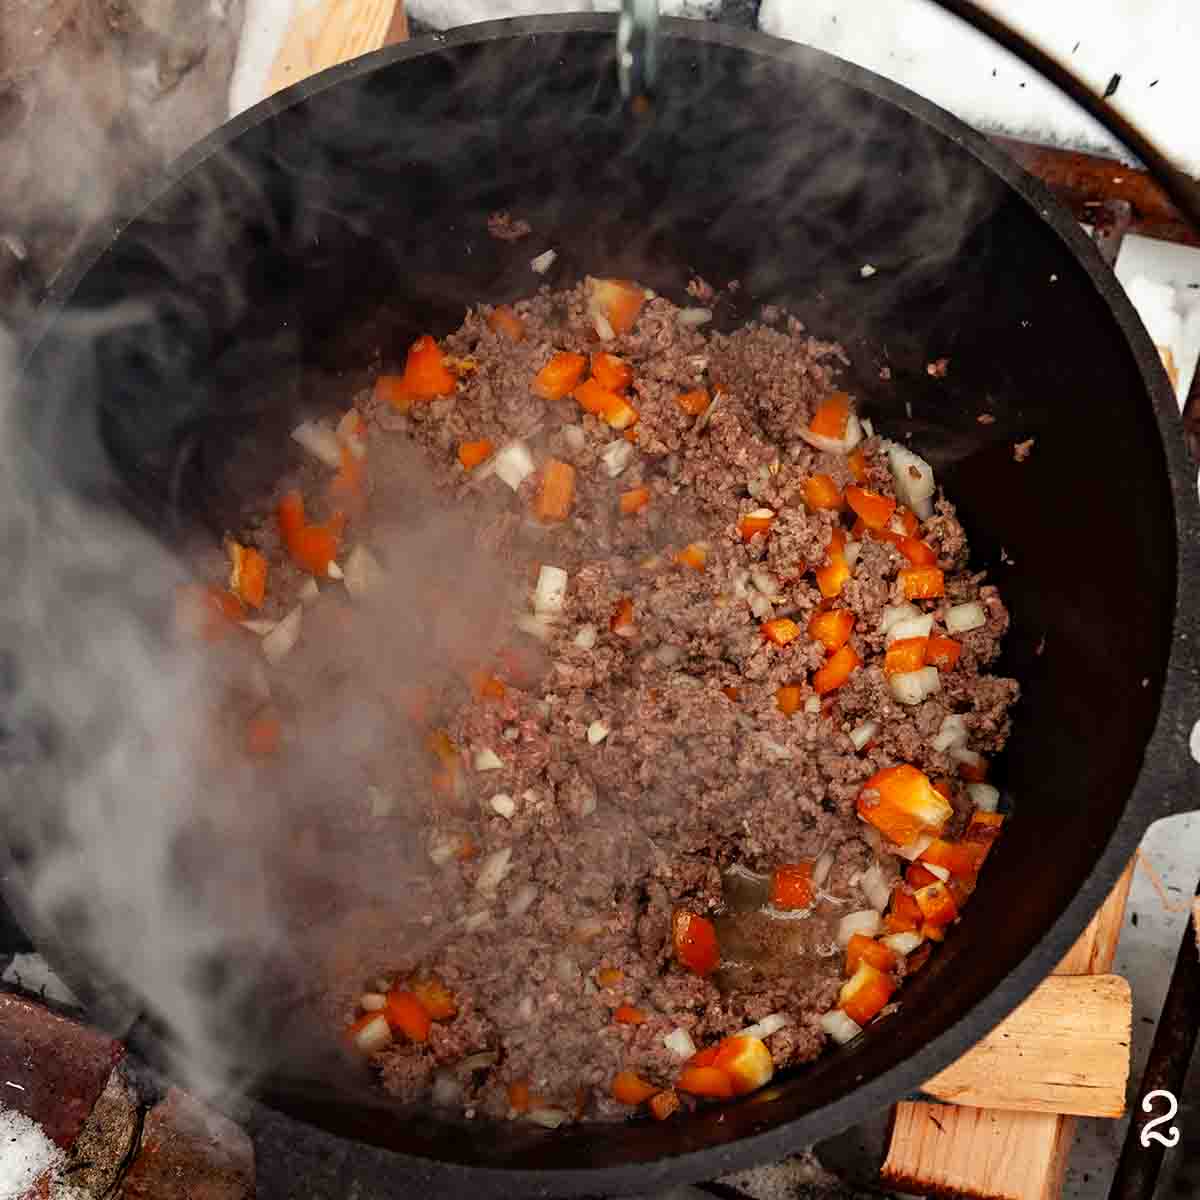
    Peppers and onions cooking with ground beef in a Dutch oven over a fire.

    2. Stir in the chopped onions, peppers, and garlic, and cook until softened.

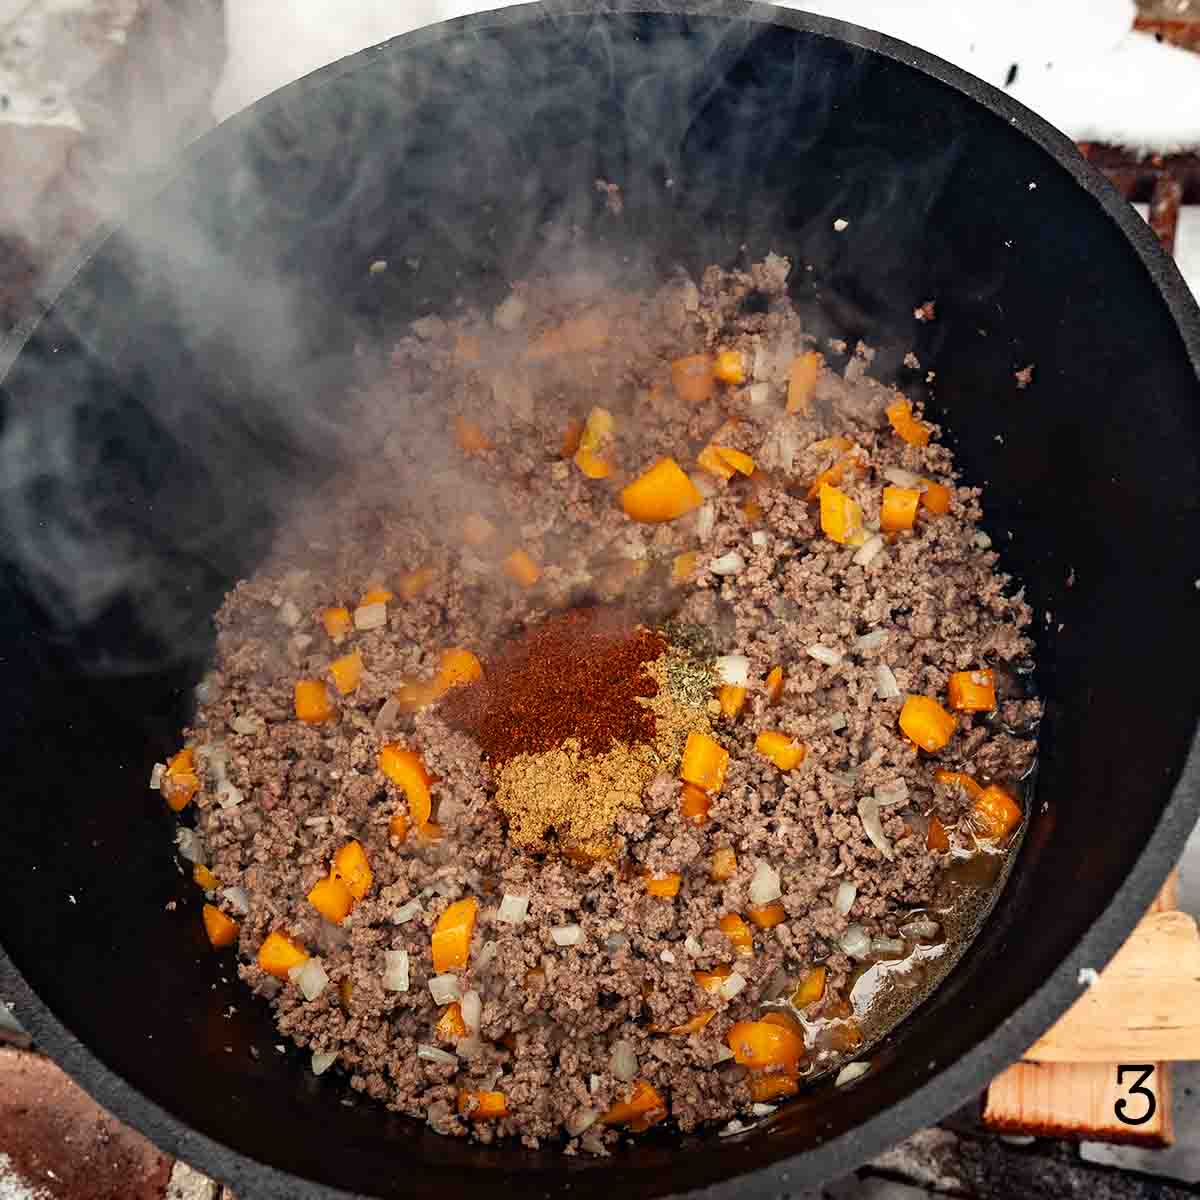
    Spices added to a pot of campfire chili.

    3. Mix in the spices and cook for 1 minute.

    Tomatoes being stirred into a Dutch oven filled with chili over a campfire.

    4. Stir in the beer and tomatoes.

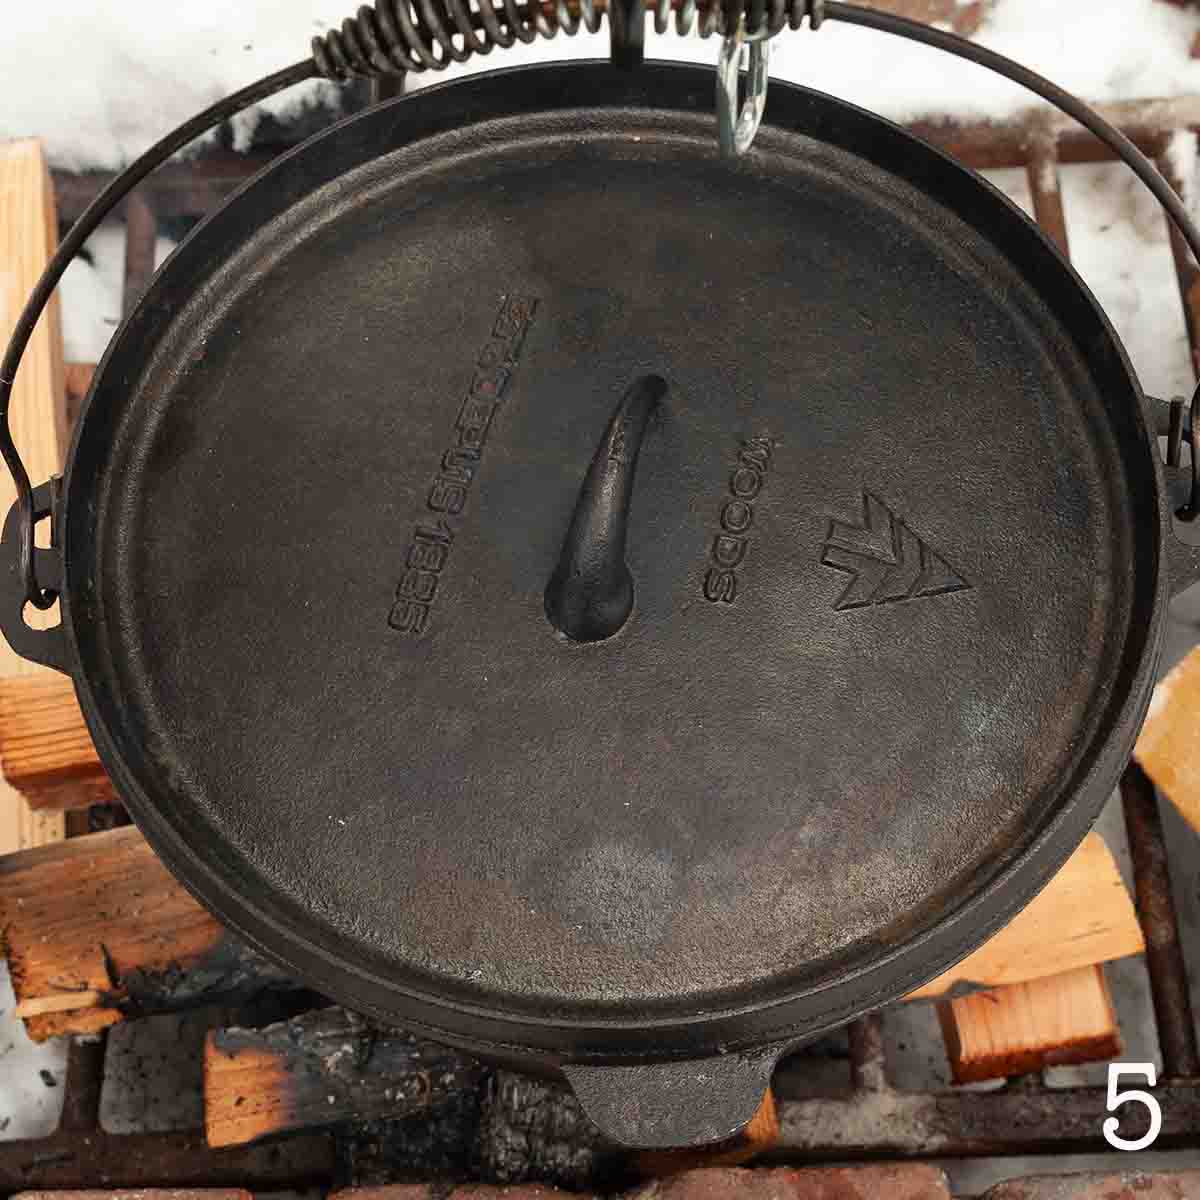
    A covered Dutch oven over a campfire.

    5. Cover and simmer for 1 hour, stirring occasionally.

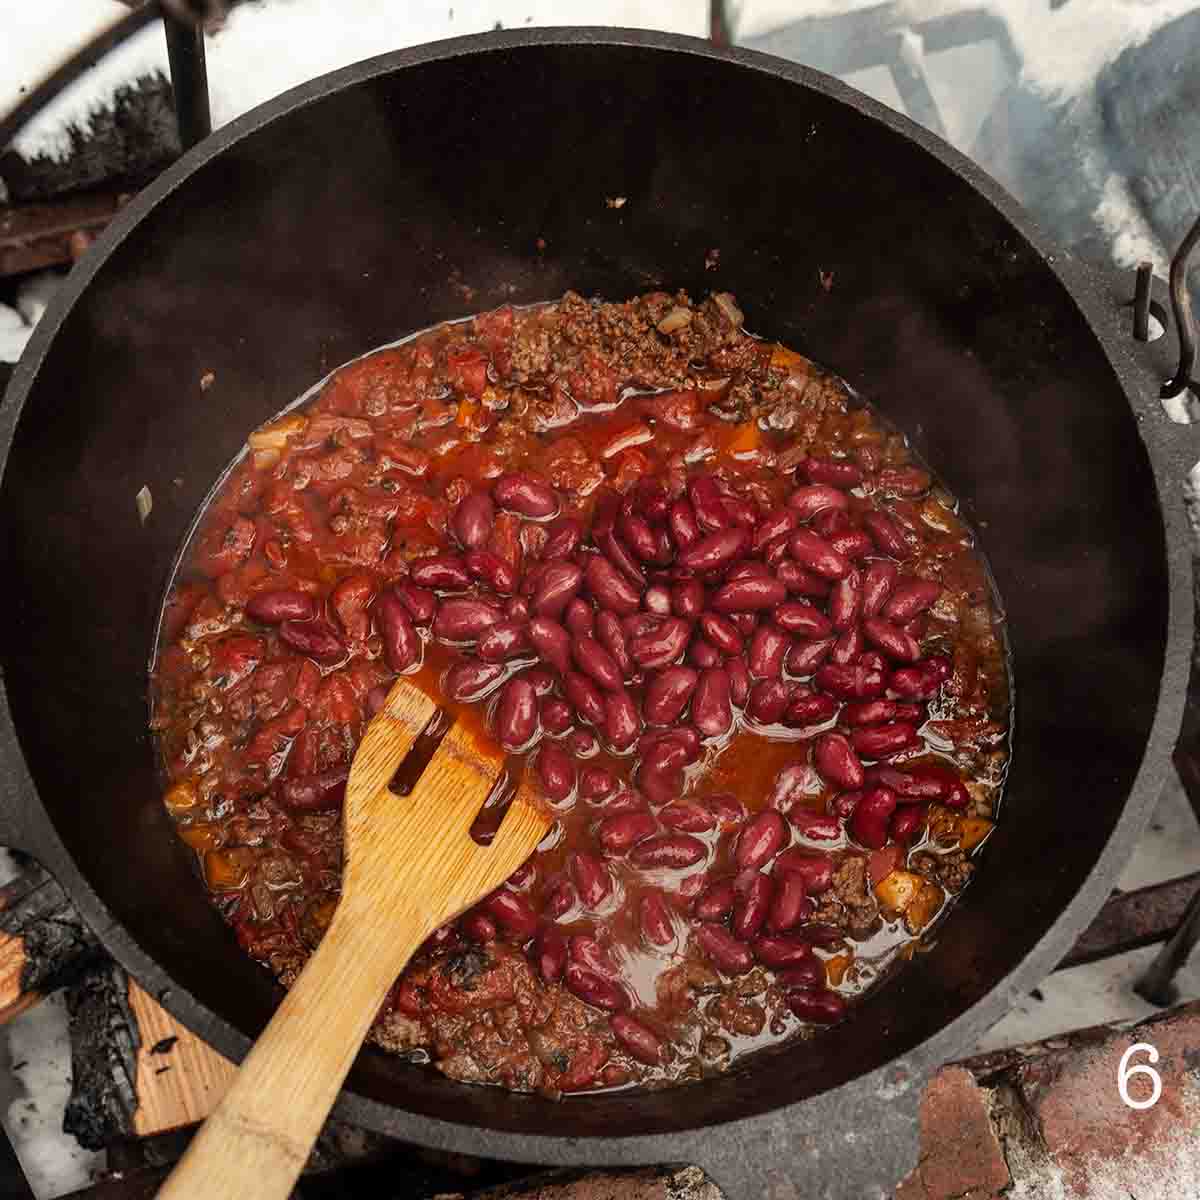
    Red kidney beans being stirred into a pot of chili over a fire.

    6. Uncover, stir in the beans, and cook until the beans are warmed through. Season to taste with salt and pepper.

    Storage and Reheating

    Store your leftover chili in a sealed container in your fridge or cooler for up to 4 days. Reheat it in a pot over low heat on your camp stove or over the fire until warmed through.

    This chili can be frozen for up to 3 months in a freezer safe container. Thaw overnight in your fridge or cooler before reheating.

    What to Serve with Camping Chili

    This chili is a hearty meal all by itself and can be topped with any of your favorite fixings, including shredded cheese, sour cream, green onions, and hot sauce. Serve it with Dutch oven cornbread or campfire garlic bread.

    Tips and Troubleshooting

    • Get ahead by chopping up your onion and peppers and draining and rinsing your beans before heading out to camp.
    • Leftover chili is a very good thing and a big pot of campfire chili can get you through several camping meals. Spoon it on top of hot dogs or smoked bratwurst, pile it on campfire nachos, or mix it into pasta.
    • This recipe is suitable for dairy-free diets. To make it gluten-free, use a gluten-free beer, or substitute beef stock.
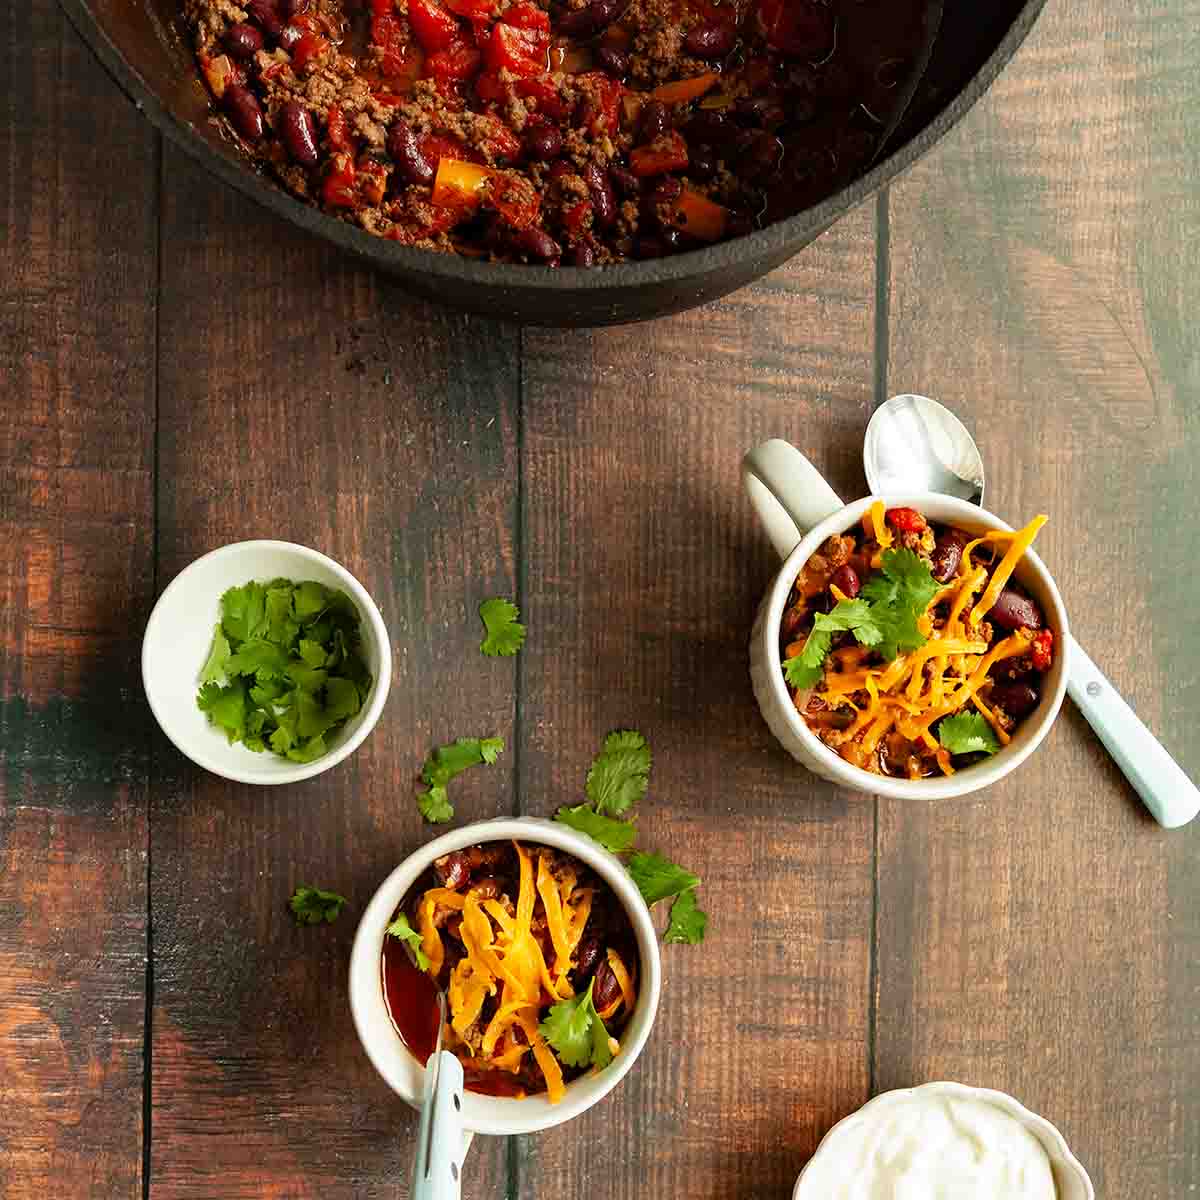
    A pot of camping chili with two mugs of chili next to it, topped with cheese and cilantro.

    More Chili Recipes You'll Love

    Two bowls of Dutch oven turkey chili with cornbread and sour cream on the side.
    Dutch Oven Turkey Chili
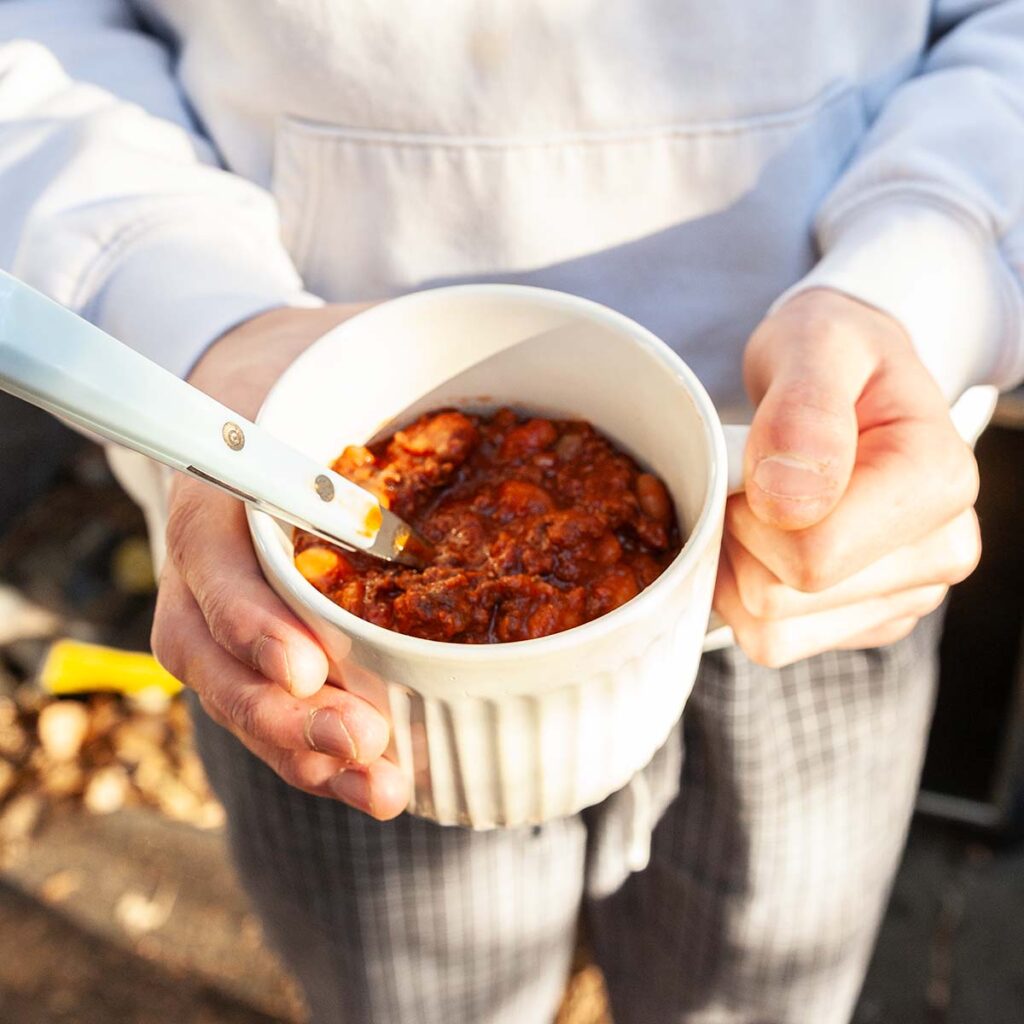
    A person holding a mug of chili.
    Bison Chili

    Tried This Recipe?

    If you've tried this recipe, please leave a comment below. Follow me on Instagram, Facebook, YouTube, or Pinterest for more great camping and grilling recipes.

    Recipe

    A Dutch oven filled with campfire chili with a metal spoon resting inside.

    Dutch Oven Campfire Chili

    A woman's face.Angie Zoobkoff
    This ground beef chili for camping is made in your cast iron Dutch oven over the campfire. It's hearty and satisfying and easily the best chili recipe I've ever tried.
    5 from 1 vote
    Print Recipe Pin Recipe
    Prep Time 20 minutes mins
    Cook Time 1 hour hr 30 minutes mins
    Total Time 1 hour hr 50 minutes mins
    Course Main Course
    Cuisine American
    Servings 6 to 8 servings
    Calories 365 kcal

    Equipment

    • Cast iron Dutch oven with lid

    Ingredients
      

    • 2 tablespoons vegetable oil
    • 2 pounds ground beef
    • Salt and pepper
    • 1 medium (5 oz) onion chopped
    • 1 medium (5 oz) sweet bell pepper diced
    • 2 cloves garlic minced
    • 2 tablespoons chili powder
    • 1 ½ teaspoons ground cumin
    • 1 ½ teaspoons dried oregano
    • 1 cup beer
    • One (28-oz) can fire-roasted tomatoes
    • One (15-oz) can red kidney beans drained and rinsed
    • Shredded cheese, sour cream, and green onions for serving (optional)

    Instructions
     

    • Prepare a campfire and let it burn until the coals are hot (some low flame is ok). Set a large Dutch oven over the fire. Alternatively, if you have a cooking tripod for campfire cooking, you can use that. You can also make this on your camp stove.
    • Add the oil and let it heat for 1 minute.
    • Dump the ground beef into the pot and season with salt and pepper. Cook, stirring frequently to break up the meat, until the meat is browned all over, about 10 minutes.
    • Stir in the onion, pepper, and garlic. Cook, stirring frequently until the onion is translucent and the pepper is starting to soften, about 10 minutes.
    • Sprinkle in the spices and cook, stirring, for 1 minute.
    • Pour in the beer and add the entire can of tomatoes, juices and all. Mix it well to combine everything and let the chili come to a simmer. Cover the Dutch oven and let it cook for 1 hour, replenishing the fire as needed to maintain hot coals.
    • Remove the lid and stir in the kidney beans. Let it cook until the beans are warmed through, about 5 minutes. Taste and adjust the seasoning, if needed.
    • Remove from the heat and serve, topped with all your favorite fixings, if desired.

    Notes

      • Get ahead--Chop up your onion and peppers and drain and rinse your beans before heading out to camp.
      • Storage and reheating--Store leftover chili in a sealed container in your fridge or cooler for up to 4 days or freeze for up to 3 months. Reheat over low heat until warmed through.
      • Using leftovers--Spoon it on top of hot dogs or smokies, pile it on campfire nachos, or mix it into pasta.
      • Dietary--This recipe is suitable for dairy-free diets. To make it gluten-free, use a gluten-free beer, or substitute beef stock.

    Nutrition

    Serving: 1 bowlCalories: 365kcalCarbohydrates: 12.6gProtein: 30.7gFat: 20.5gCholesterol: 89mgSodium: 343mgFiber: 4.2g
    Keyword beef chili, dutch oven cooking, ground beef recipes
    Tried this recipe?Let us know how it was!

    February 7, 2024 Camping

    Campfire Garlic Bread

    Camping garlic bread is a campfire side dish staple. The warm toasted bread with melted garlic and herb butter is quick and easy to make (just 20 minutes!), and can be partially prepared before heading out to camp.

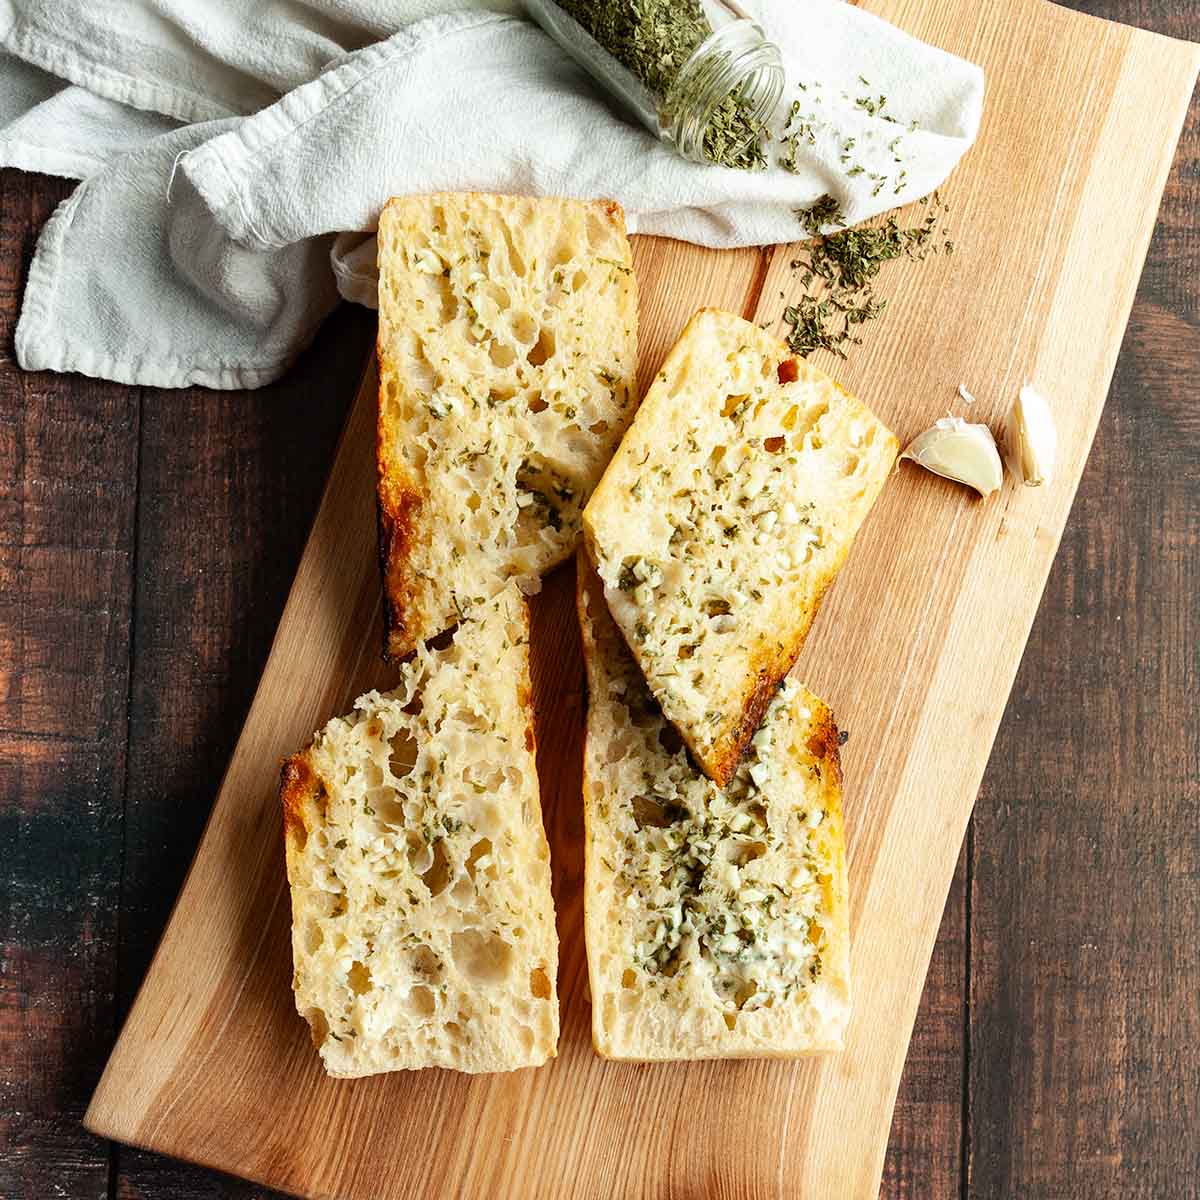
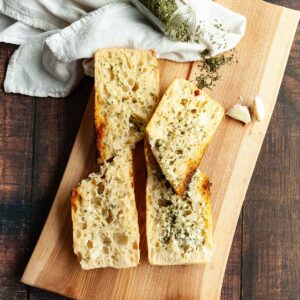
    Four pieces of toasted garlic bread on a wooden cutting board.

    I'm not sure if I even really need to sell you on this campfire garlic bread recipe. I mean, who doesn't love warm toasted bread smothered in garlicky butter? It will disappear so fast that you'll probably want to make extra.

    [feast_advanced_jump_to]

    Why This Recipe is Great for Camping

    • You can mix up the garlic butter ahead of time so you've got less to do at camp.
    • It's a fun and easy camping recipe that is quick to make. Even the kids can help with it.
    • It's a great side dish for many camping meals, including campfire chili, Dutch oven beef stew, campfire Dutch oven lasagna, and more.

    Ingredients and Substitutions

    Ingredients for campfire garlic bread--bread, dried parsley, butter, and garlic.
    • Butter--Mixing up the garlic butter will be easiest if your butter is very soft, but not melted. Leave it in a warm spot for 30 minutes, or give it a quick 10 second zap in the microwave to soften it. I use salted butter for my campfire foil garlic bread but if you've only got unsalted on hand, add a big pinch of salt to your butter mixture.
    • Garlic--Since the garlic doesn't really get cooked, three cloves will give it plenty of pungent flavor. If you like your garlic bread to be a little more mellow, cut it back to two cloves.
    • Dried parsley--This adds flavor and color to your bread. Feel free to substitute fresh, if you prefer.
    • Bread--I highly recommend that you get a sturdy artisan-style baguette loaf that has lots of holes in the interior. This makes it perfect for catching and soaking up all that garlicky goodness. I use a small loaf (about 8 ounces), which is perfect for 4 servings but if you get a large loaf, be sure to double the amount of garlic butter.

    Important Steps

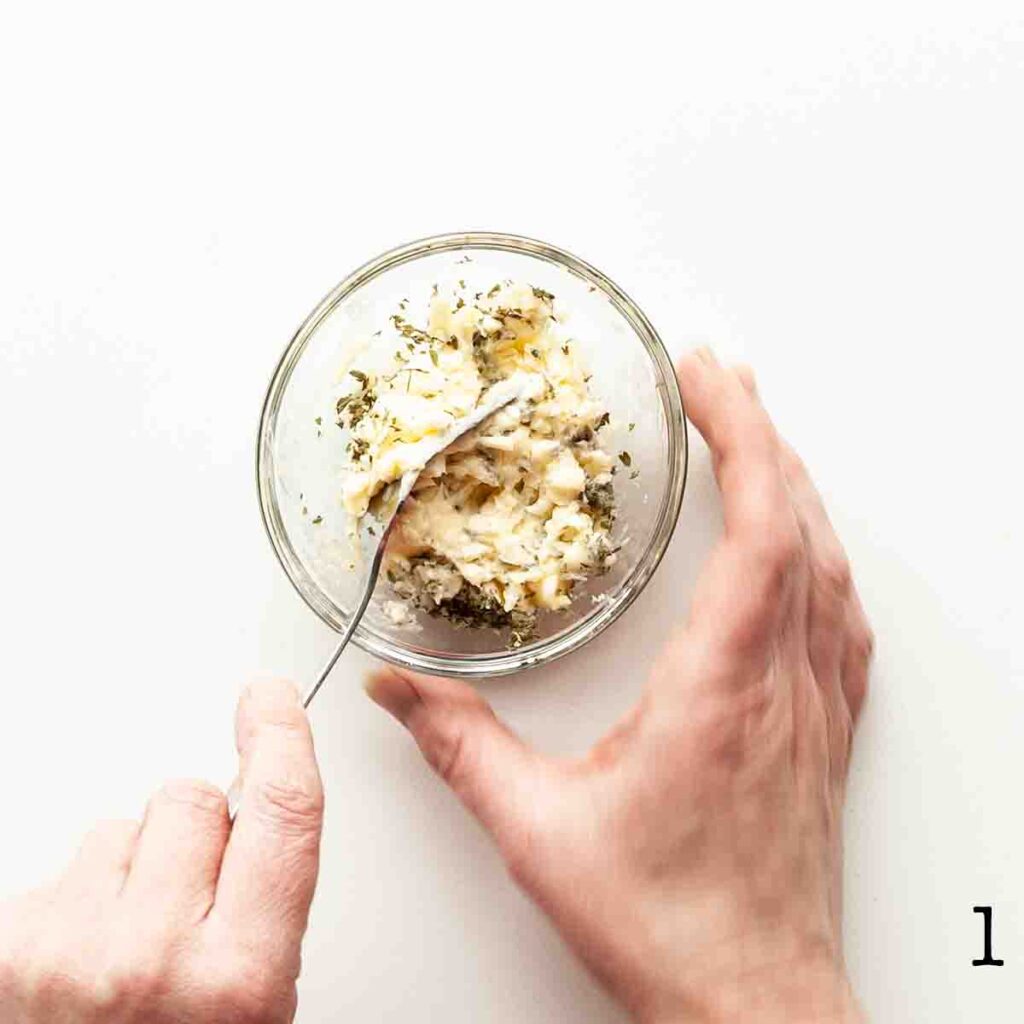
    A person mixing garlic butter in a bowl.
    A halved loaf of bread.
    1. Mix the softened butter, garlic, and dried parsley in a bowl.
    2. Slice the loaf of bread in half lengthwise.
    Garlic butter being spread onto the cut sides of a halved loaf of bread.
    Foil-wrapped garlic bread over the fire.
    1. Divvy the butter between the two halves of the bread and spread the butter evenly over each half.
    2. Place the two bread halves together, butter sides touching, and wrap the closed loaf in foil. Place on a campfire grate over hot coals and let the bread toast, flipping occasionally, until the butter is melted.

    FAQs

    Can I make this bread in advance?

    You can prepare the garlic-parsley butter before heading out on your camping trip and keep it in the fridge for up to 1 week or wrap it in plastic and freeze it for up to 3 months.

    The bread can be halved, spread with butter, and wrapped in foil up to 1 day before cooking, if stored in the fridge. You can also prepare it and freeze it, wrapped in plastic, for up to 1 month. Thaw at room temperature before cooking, or cook directly from frozen, adding about 10 extra minutes to the cooking time.

    Can I make it on the grill?

    Yes. Prepare your grill for indirect medium heat. When hot, place the foil wrapped garlic bread on the cool zone of the grill and cover. Let it heat until the garlic butter is melted and everything is hot.

    Tips and Troubleshooting

    • To get ahead, make your garlic butter before heading out on your camping trip.
    • To avoid burning your bread, never place it over direct campfire flames. Always keep it over hot embers or coals. If it smells like it's burning, it probably is, and should be moved to a cooler area of the grate.
    • Make extra garlic butter and use it for stirring into plain pasta or for melting atop seared or grilled steak.
    A piece of garlic bread on a wooden cutting board with a garlic clove and dried parsley nearby.

    More Easy Camping Side Dish Recipes You'll Love

    A shucked ear of corn on top of several other unshucked cooked ears of corn.
    Campfire Corn
    A white bowl filled with pasta salad.
    Camping Pasta Salad

    Tried This Recipe?

    If you've tried this recipe, please leave a comment below. Follow me on Instagram, Facebook, YouTube, or Pinterest for more great camping and grilling recipes.

    Recipe

    Four pieces of toasted garlic bread on a wooden cutting board.

    Campfire Garlic Bread

    A woman's face.Angie Zoobkoff
    This easy camping garlic bread recipe is made with homemade garlic butter that's schmeared over bread, and the whole shebang is wrapped in foil and toasted over the campfire. It's an easy camping side dish that goes well with pasta, stew, chili, and soup.
    5 from 1 vote
    Print Recipe Pin Recipe
    Prep Time 10 minutes mins
    Cook Time 10 minutes mins
    Total Time 20 minutes mins
    Course Side Dish
    Cuisine American
    Servings 4 pieces
    Calories 269 kcal

    Ingredients
      

    • 4 tablespoons salted butter very soft
    • 3 cloves garlic minced
    • 1 teaspoon dried parsley
    • 1 small (8-oz) artisan style baguette

    Instructions
     

    • Prepare a campfire and let it burn down to hot embers. Do not cook the bread over open flame.
    • In a small bowl, mix the butter, garlic, and parsley.
    • Slice the bread in half lengthwise.
    • Spread the garlic butter evenly over both cut sides of the bread. Sandwich the two halves of bread back together and wrap the loaf tightly in aluminum foil.
    • Place it on a campfire grate over hot coals and let it cook, flipping once until warmed through, lightly toasted on the edges, and the butter is melted into the bread, 5 to 10 minutes per side.
    • Carefully unwrap and slice the loaf in half to create 4 pieces. Enjoy!

    Video

    Notes

      • Get ahead--Make your garlic butter up to 1 week before heading out on your camping trip.
      • Avoid direct flame--To avoid burning your bread, never place it over direct campfire flames. Always keep it over hot embers or coals. If it smells like it's burning, it probably is, and should be moved to a cooler area of the grate.
      • Scaling the recipe--If using a large (1 pound) loaf, double the garlic butter mixture.

    Nutrition

    Serving: 1pieceCalories: 269kcalCarbohydrates: 32.7gProtein: 6.9gFat: 12.6gCholesterol: 31mgSodium: 450mgFiber: 1.4gSugar: 1.5g
    Keyword easy camping sides, garlic bread, homemade garlic butter
    Tried this recipe?Let us know how it was!

    January 31, 2024 Blackstone Griddle Recipes

    Italian Sausage Sliders

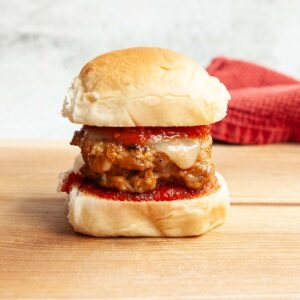
    Whether you want a quick (just 20 minutes!) camping lunch or dinner, or a great addition to your game-day grub, these Italian sausage sliders will keep everyone happy. They're tasty handheld bites that are made with Italian sausage, and topped with melted provolone and plenty of marinara sauce. Bet you can't stop at one.

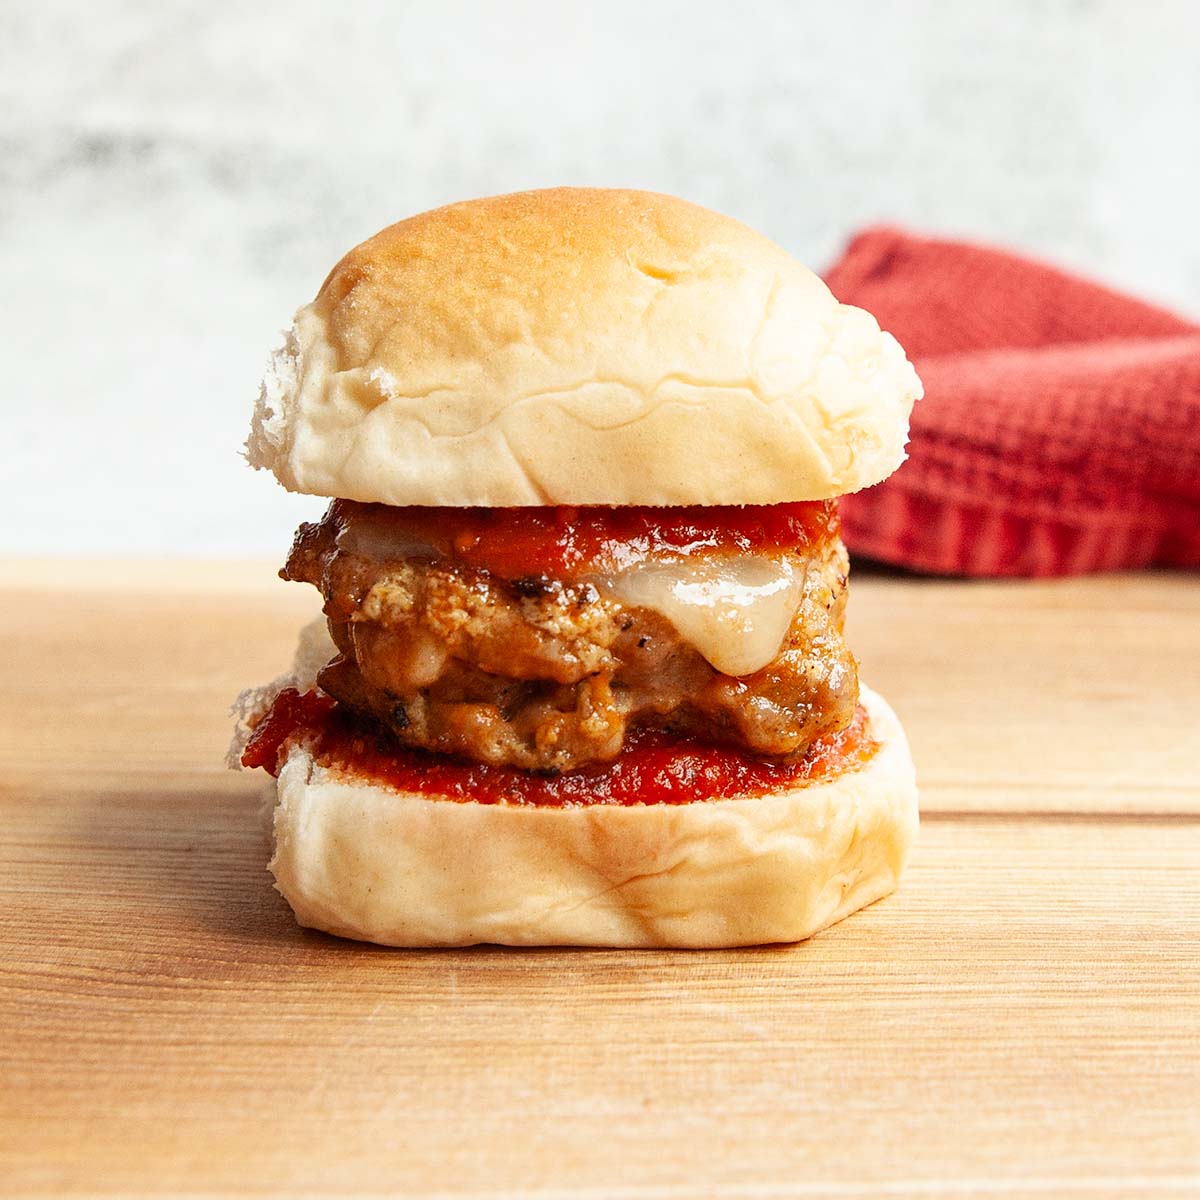
    A sausage slider topped with cheese and marinara sauce.

    Recipe at a Glance: Italian Sausage Sliders

    • DETAILS
      • Total Time: 20 minutes
      • Preparation method: Griddle or cast iron skillet
    • HIGHLIGHTS
      • These Italian sausage sliders are mini burgers made with sausage and topped with cheese and marinara sauce. They're perfect for an easy camping meal or game day snacking.
      • You'll love that this comes together in just 20 minutes and requires only a handful of ingredients.
      • For this easy meal, an Italian sausage, egg, and breadcrumb mixture is quickly shaped into patties and cooked until juicy and tender. Cheese and marinara sauce crown the slider patties before being tucked inside a bun.

    There's something so incredibly fun about sliders. Just like with Italian sausage quesadillas, they're the perfect handheld size, and you can devour them long before they start to become all drippy and messy, like full size burgers tend to do.

    I love this Italian slider recipe because, like my Italian sausage meatballs recipe, it's so easy to make with just a handful of ingredients, so it's perfect for packing along on your next camping trip. The combination of rich sausage, creamy melted provolone cheese, and tangy marinara sauce will make you feel like you're enjoying your favorite Italian meal with very little effort.

    [feast_advanced_jump_to]

    Ingredients and Substitutions

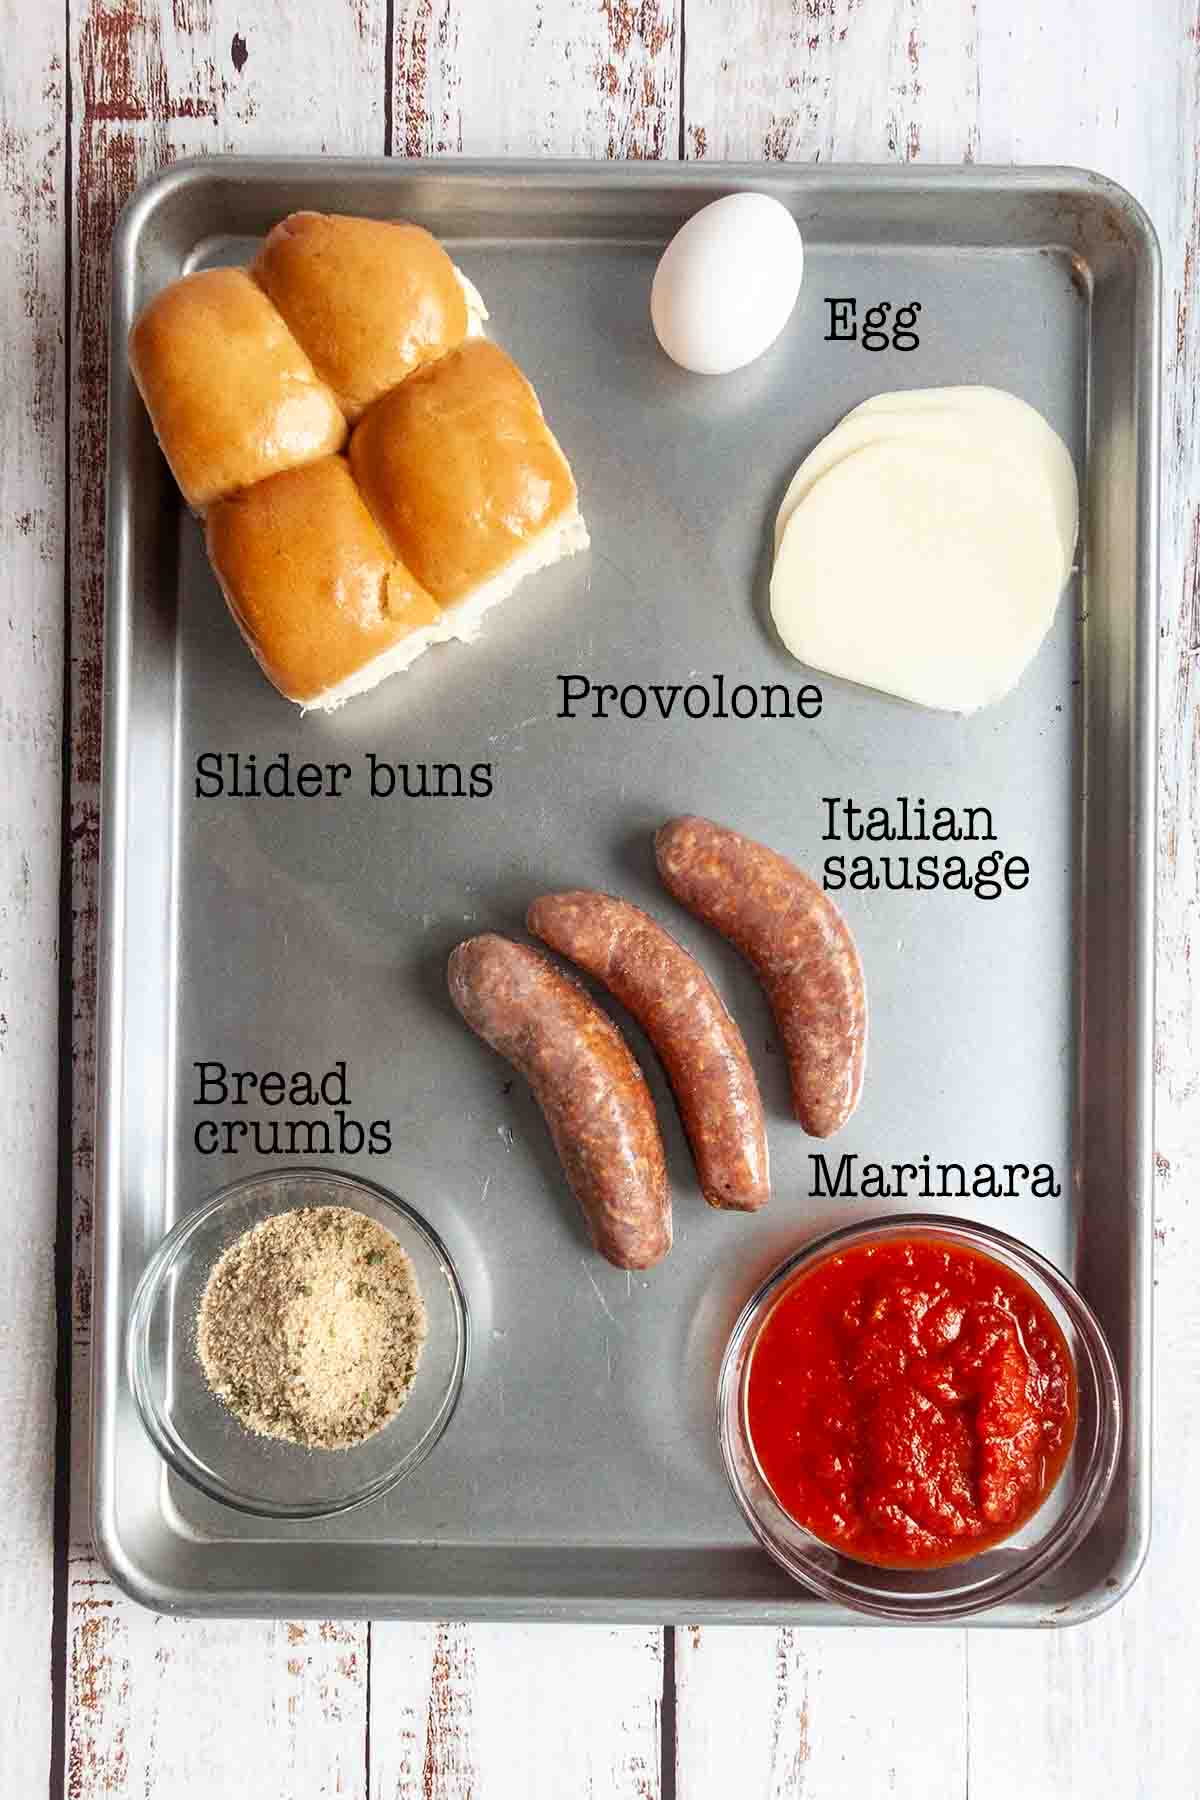
    Ingredients for Italian sausage sliders--buns, Provolone, egg, sausage, bread crumbs, and marinara.
    • Italian sausage--You can use mild, hot, or sweet sausage, depending on your preference. If your sausage comes with the casing on, you'll need to remove it. Use a sharp knife to slice through the casing down the length of each sausage and then pull it off. Got extra sausage? Try one of these amazing Italian sausage recipes.
    • Breadcrumbs--I recommend using dry seasoned breadcrumbs for the extra flavor that they add, but if you have plain ones, they're fine, too.
    • Egg--This, combined with the breadcrumbs, helps bind the meat mixture together and keeps it from being tough and dry.
    • Provolone cheese--I love Provolone for these because it melts easily and the flavor works well with sausage and marinara. You could substitute your favorite good melting cheese, like mozzarella, havarti, or pepper Jack if you prefer.
    • Marinara sauce--Use a good-quality store-bought or homemade marinara for these. I recommend getting a thick sauce, as runny marinara will soak into the bun and make it soggy. My favorite is Rao's Marinara.
    • Buns--Slider rolls are becoming more widely available in grocery stores, and there are several popular varieties, including King's Hawaiian rolls, which have a slightly sweet flavor. You can also substitute small dinner rolls.

    How to Make Italian Sliders

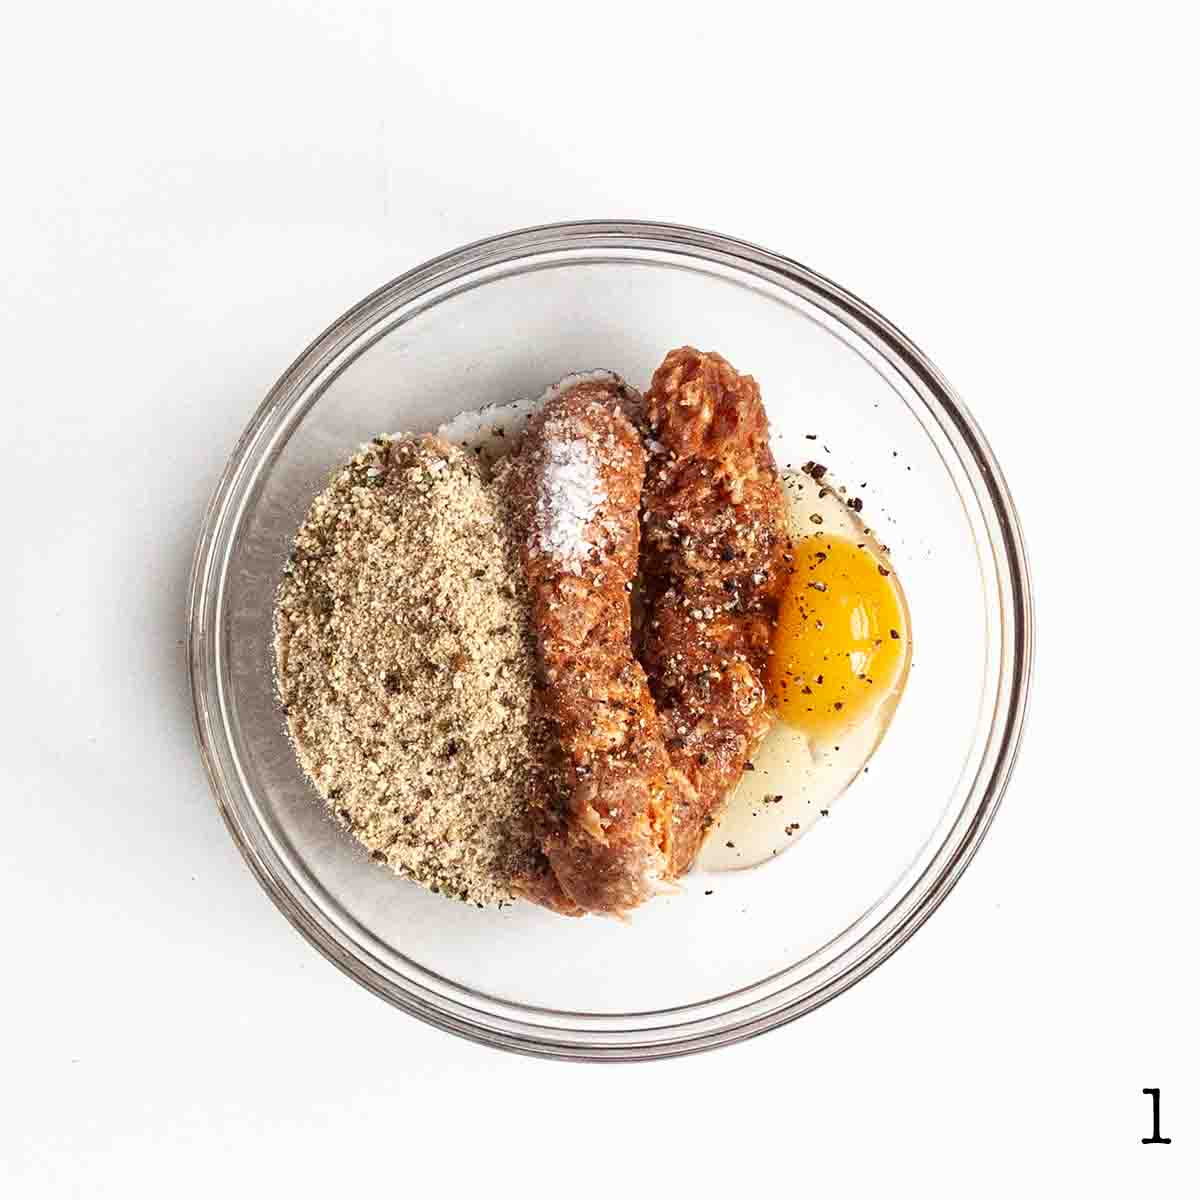
    Italian sausage, egg, and bread crumbs in a glass bowl.

    1. Mix the sausage, egg, breadcrumbs, salt, and pepper in a large bowl.

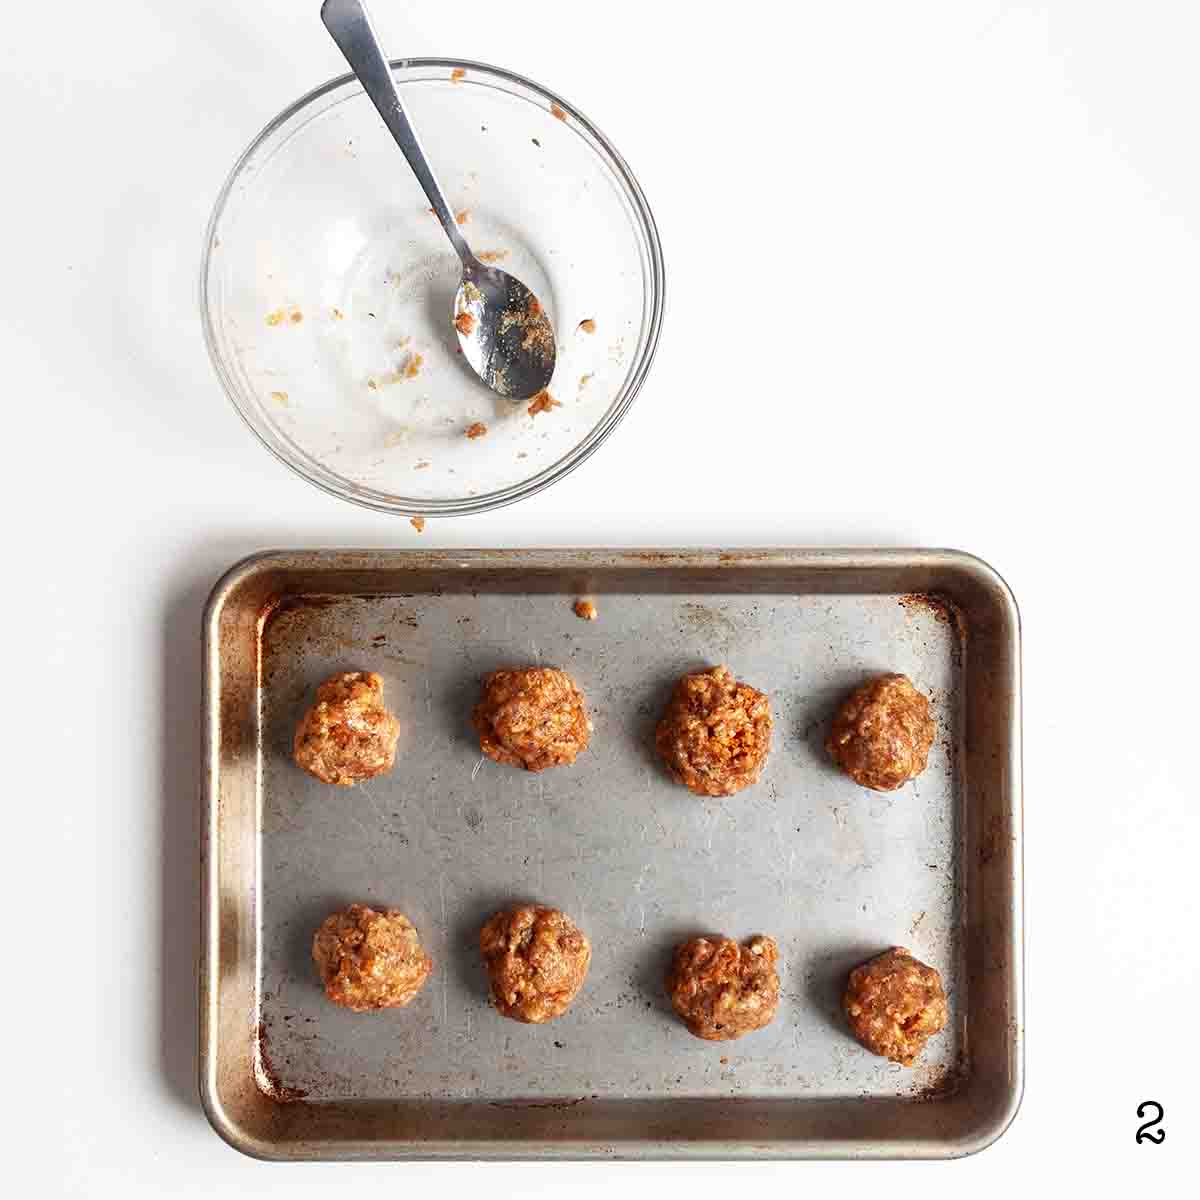
    Eight Italian sausage slider balls with an empty mixing bowl nearby.

    2. Use your hands to gently shape the meat mixture into eight 2-inch balls.

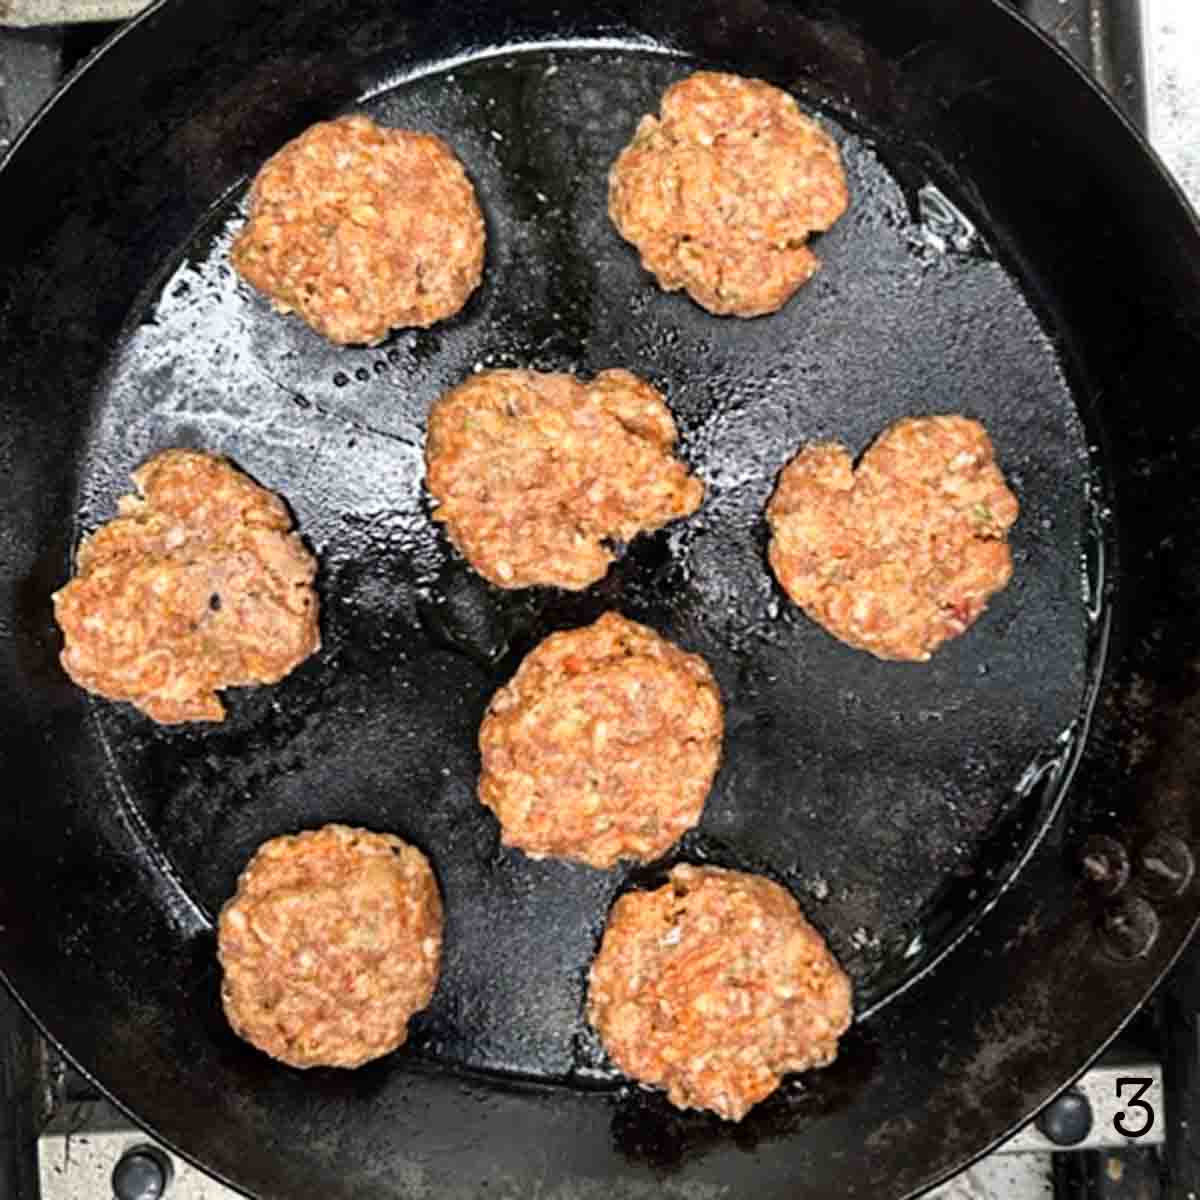
    Eight Italian sausage slider patties in a skillet.

    3. Place the slider patties in a large cast iron skillet or on a griddle and press gently to flatten them slightly. Cook over medium heat until they are almost done, flipping once.

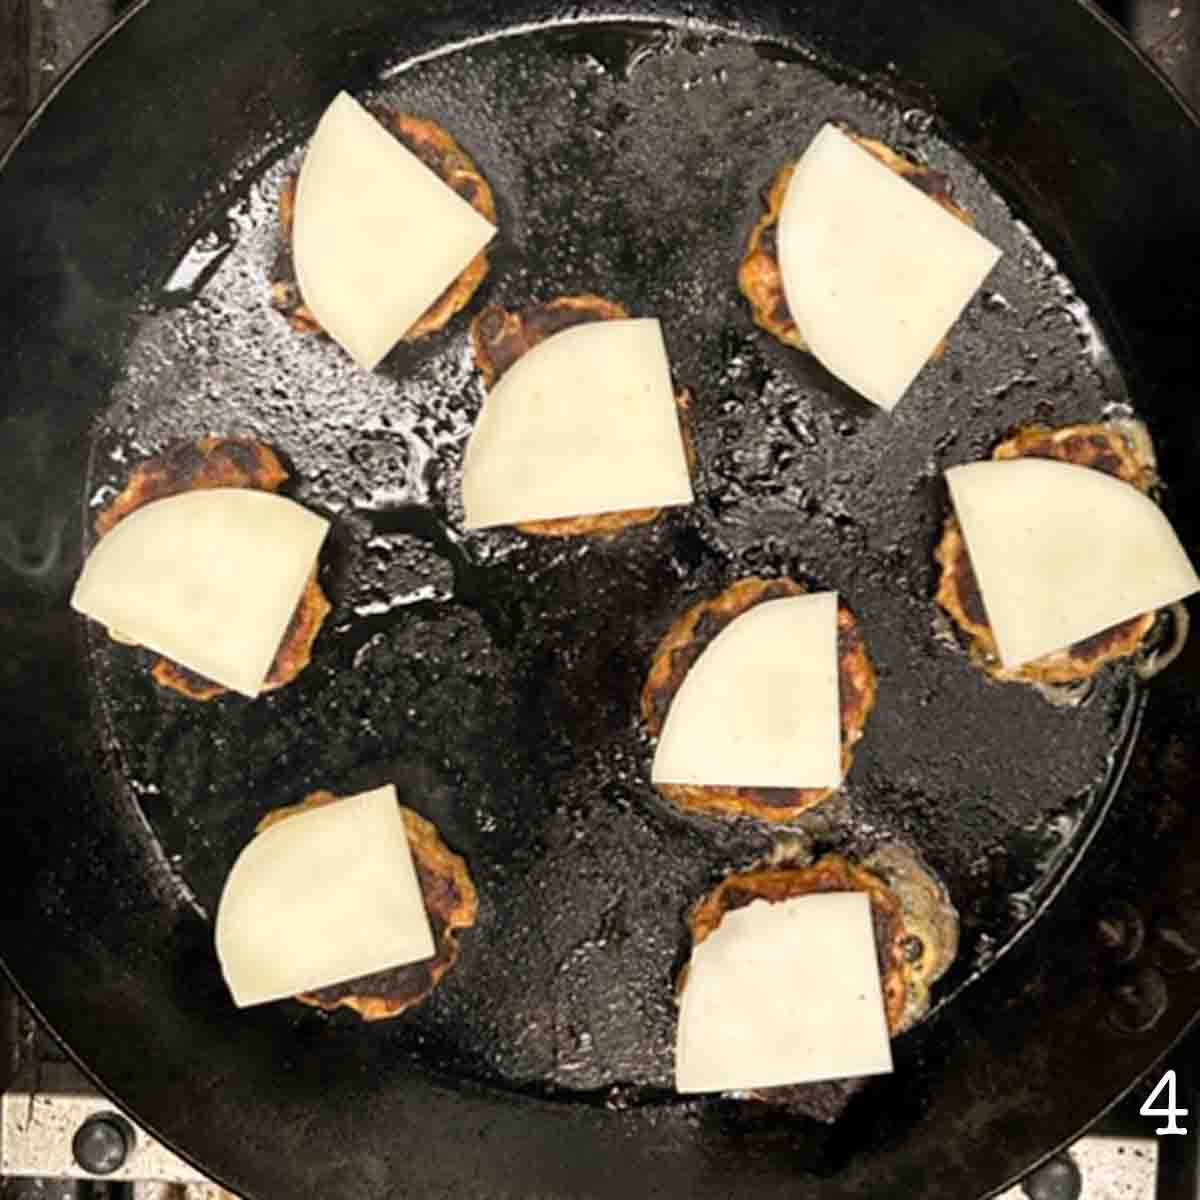
    Eight sausage slider patties in a skillet with pieces of provolone melting on top.

    4. Top with cheese and let it melt. Assemble the sliders by spreading marinara sauce on the bottom of each bun, then top with an Italian sausage slider, more marinara, and the top bun.

    FAQs

    Can I make these over the campfire?

    Yes, you can. To make campfire sliders, prepare a bed of hot coals. Set the skillet or griddle on a grate a few inches above the coals and cook as directed in the recipe. If the meat begins to burn or brown too quickly, move the skillet to a cooler part of the fire.

    How do I know when my Italian slider patties are done?

    The best way to tell is to check with an instant-read thermometer. The internal temperature of your slider patties should be 160°F (71°C). If you don't have access to a thermometer, you can cut into one of the sliders. It should be uniform in color throughout with no pink remaining.

    Can I make these into Italian sausage burgers?

    Sure. Follow the directions, but shape the meat mixture into four burger patties and use full size buns. For a leaner patty, try these beef and sausage burgers.

    Storage & Reheating

    Store leftover sausage slider patties in a sealed container in the fridge or cooler for up to 4 days. Reheat on the griddle or in a skillet over medium low heat until warmed through. Don't store assembled sliders as the bun will become soggy.

    What to Serve with Italian Slider Sandwiches

    For a light meal, serve these sausage sliders with potato chips and Caesar salad or camping pasta salad. If you want to offer these as part of a selection of snacks for a party, serve them with skillet beer cheese and tortilla chips.

    Tips and Troubleshooting

    • When shaping your slider patties, press them firmly enough so that they hold together but don't pack them tightly or they may become tough when cooked. If you find that the mixture is very sticky and difficult to work with, run your hands under cold water or rub them with a little oil before handling the meat. Keep the meat chilled until right before shaping the patties to prevent it from becoming too sticky.
    • Your slider may or may not need extra salt and pepper, depending on the type of sausage that you use. To check the seasoning level in your sausage, fry up a small piece of the slider mixture before shaping and taste it for seasoning.
    • If you like the crispiness of a toasted bun, place your buns, cut sides down in the skillet after cooking the sausage sliders. Toast for 1 to 2 minutes, or until golden.
    • If you're cooking these outdoors in cooler weather and the cheese isn't melting as quickly as you like, cover your skillet loosely with foil to help it melt.
    An Italian sausage slider topped with marinara on a plate with potato chips on the side.

    More Italian Sausage Recipes You'll Love

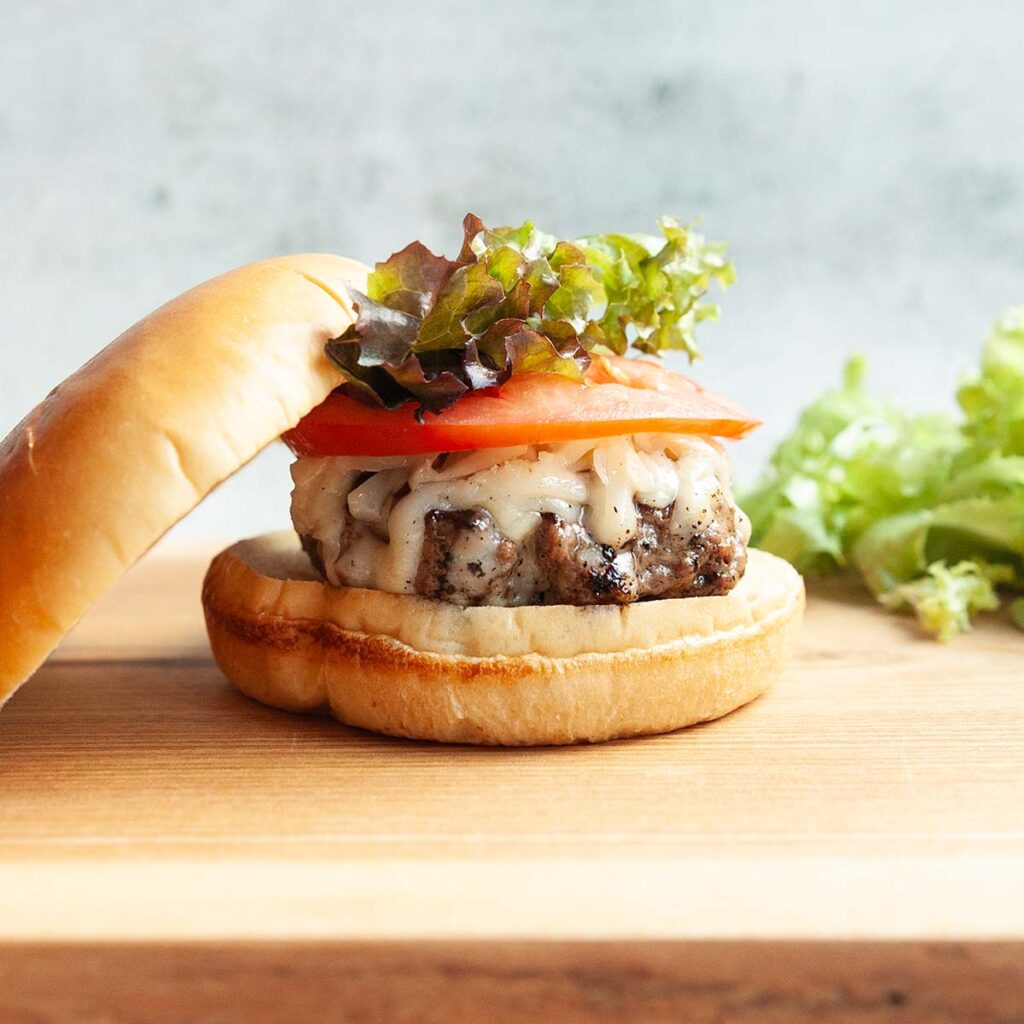
    A burger topped with melted cheese, tomato, and lettuce.
    Beef and Sausage Burgers
    Pieces of Italian sausage quesadilla stacked on top of each other.
    Italian Sausage Quesadilla

    Tried This Recipe?

    If you've tried this recipe, please leave a comment below. Follow me on Instagram, Facebook, YouTube, or Pinterest for more great camping and grilling recipes.

    Recipe

    A sausage slider topped with cheese and marinara sauce.

    Italian Sausage Sliders

    A woman's face.Angie Zoobkoff
    These easy Italian sliders are made with ground sausage patties and topped with melted provolone cheese and marinara sauce. They're an easy skillet meal that's ready in just 20 minutes.
    5 from 1 vote
    Print Recipe Pin Recipe
    Prep Time 10 minutes mins
    Cook Time 10 minutes mins
    Total Time 20 minutes mins
    Course Main Course
    Cuisine Italian
    Servings 8 sliders
    Calories 360 kcal

    Equipment

    • 12-inch cast iron skillet

    Ingredients
      

    • 1 pound (454 g) Italian sausage casings removed
    • 1 large egg beaten
    • ¼ cup seasoned breadcrumbs
    • ½ teaspoon salt optional
    • Freshly ground black pepper optional
    • 1 cup marinara sauce plus more for serving (optional)
    • 2 large slices provolone cheese cut into quarters
    • 8 slider buns

    Instructions
     

    • In a large bowl, combine the sausage, egg, and breadcrumbs. Season with salt and pepper if needed (see note below). Use your hands or a spoon to mix everything well.
    • Use your hands to shape the meat mixture into 8 meatballs.
    • Set a large cast iron skillet over medium heat. You can do this on your stovetop, camp stove, or grill. If using a griddle, like a Blackstone, heat it to medium. Arrange the meatballs on the skillet and press each one down to flatten slightly.
    • Brown until the sausage patties are cooked through, flipping once, about 4 minutes per side.
    • Add a piece of cheese to each patty and let it melt, about 1 minute.
    • To assemble the sliders, spoon about 1 tablespoon marinara sauce on the bottom half of each bun. Top with a slider patty, followed by another tablespoon of marinara, and finish with the top half of the bun. Serve immediately, with extra marinara for dipping, if desired.

    Video

    Notes

    • Seasoning--Your slider may or may not need extra salt and pepper, depending on the type of sausage that you use. To check the seasoning level in your sausage, fry up a small piece of the slider mixture before shaping and taste it for seasoning.
    • Handle the meat gently--When shaping your slider patties, press them firmly enough so that they hold together but don't pack them tightly or they may become tough when cooked. If you find that the mixture is very sticky and difficult to work with, run your hands under cold water or rub them with a little oil before handling the meat. Keep the meat chilled until right before shaping the patties to prevent it from becoming too sticky.
    • Toast your buns--If you like the crispiness of a toasted bun, place your buns, cut sides down in the skillet after cooking the sausage sliders. Toast for 1 to 2 minutes, or until golden.
    • Helping the cheese melt--If you're cooking these outdoors in cooler weather and the cheese isn't melting as quickly as you like, cover your skillet loosely with foil to help it melt.

    Nutrition

    Serving: 1 sliderCalories: 360kcalCarbohydrates: 22.1gProtein: 16gFat: 23.1gCholesterol: 148mgSodium: 983mgFiber: 1.3g
    Keyword camping dinner ideas, camping lunch ideas, game day snacks, sausage sliders
    Tried this recipe?Let us know how it was!

    January 24, 2024 Breakfast

    Cranberry Energy Balls

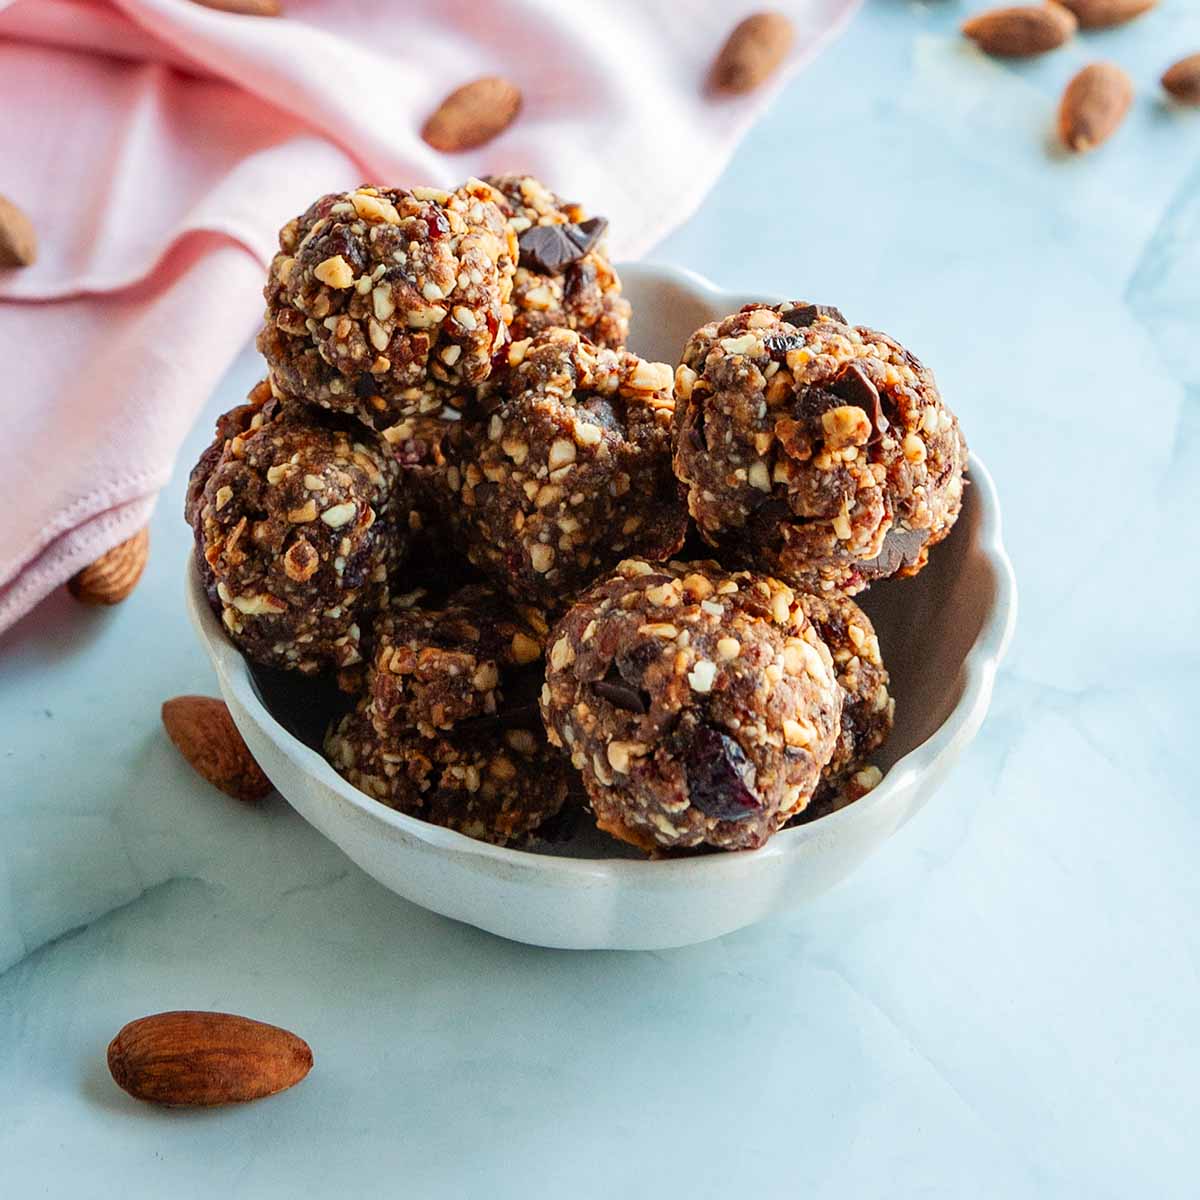
    These portable no-bake cranberry almond energy bites are loaded with good-for-you ingredients, including dried cranberries, raisins, dates, and almonds, with a little chocolate for good measure. They're perfect for snacking on when you're on the go, or to make ahead and pack along on a picnic or hike.

    A bowl of cranberry energy balls with almonds scattered around.

    Recipe at a Glance: Cranberry Energy Bites

    • DETAILS
      • Total Time: 20 minutes
      • Preparation method: No cook
    • HIGHLIGHTS
      • These are a fantastic make-ahead snack for hiking, camping, or post-workout.
      • They're quick and easy to put together and will keep for up to 2 weeks (or can be frozen for longer storage).

    These tasty little no-bake energy bites are the perfect solution when a craving for something sweet hits, but you're still looking for a nutritious snack recipe. They're packed with dried fruit, nuts, and just enough dark chocolate to balance it all out. I love them (along with homemade pear chips) for on-the-go breakfasts, post-workout snacks, and to tuck in my bag for hikes and picnics.

    [feast_advanced_jump_to]

    Ingredients and Substitutions

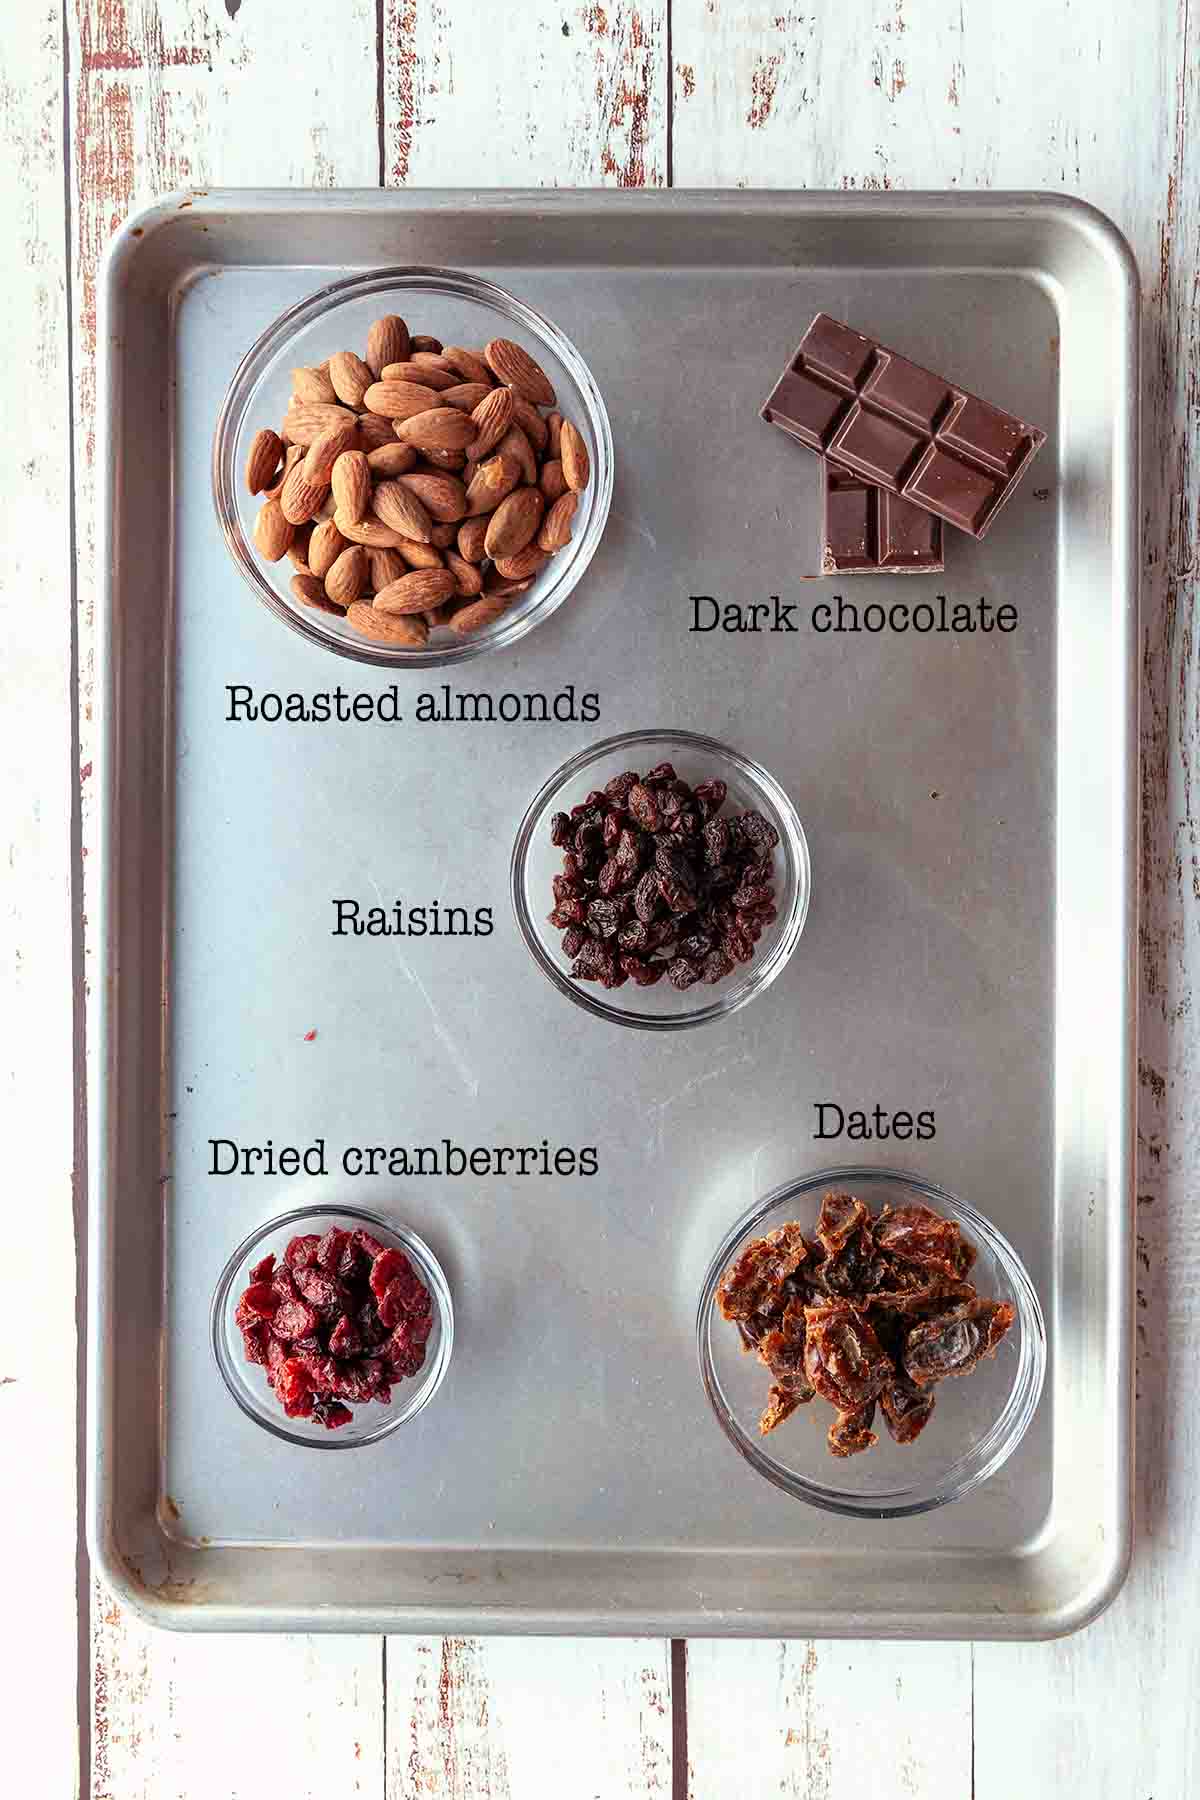
    Ingredients for cranberry energy balls--roasted almonds, dark chocolate, raisins, cranberries, and dates.
    • Almonds--I prefer the flavor of roasted unsalted almonds here, but you can use raw ones, if you like. You can also substitute a different type of nut. Pecans or walnuts will work well. To roast your nuts, spread them on a baking sheet and stick them in a 350°F oven. Roast until they smell fragrant and are turning a darker shade of brown, 10 to 15 minutes. Cool them completely before using.
    • Dates--These add the necessary sweetness and stickiness to stick everything together. If your dates have pits, simply slice them open and pop the pits out before soaking them or adding them to the food processor.
    • Dried cranberries and raisins--Feel free to play around with the combination of dried fruits here. Try swapping in golden raisins, dried blueberries, or dried cherries.
    • Dark chocolate--I love dark chocolate and it pairs wonderfully with the dried fruit in this recipe, but if you prefer milk chocolate, feel free to use that. You can also substitute chocolate chips, if you've got them on hand. If you do, simply stir them into the mixture by hand. If you're keeping this recipe dairy-free, be sure to choose a dairy-free chocolate, such as the Enjoy Life brand chocolate chips or chocolate bars.

    How to Make Energy Bites

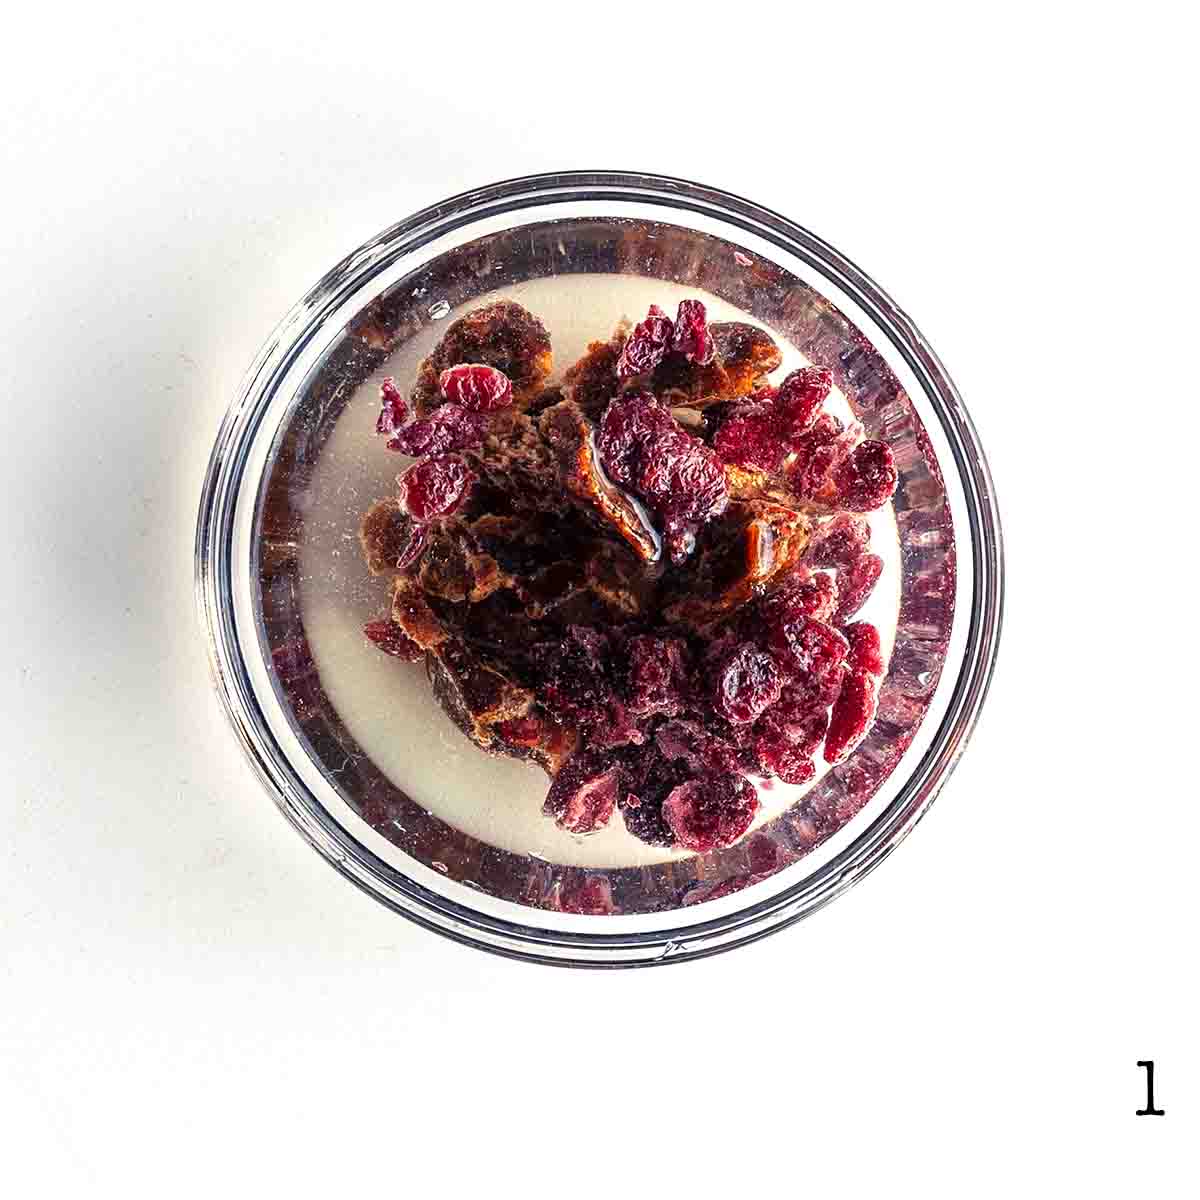
    Cranberries, raisins, and dates soaking in a bowl of water.

    1. Soak the dried fruit in a bowl of warm water for 10 minutes.

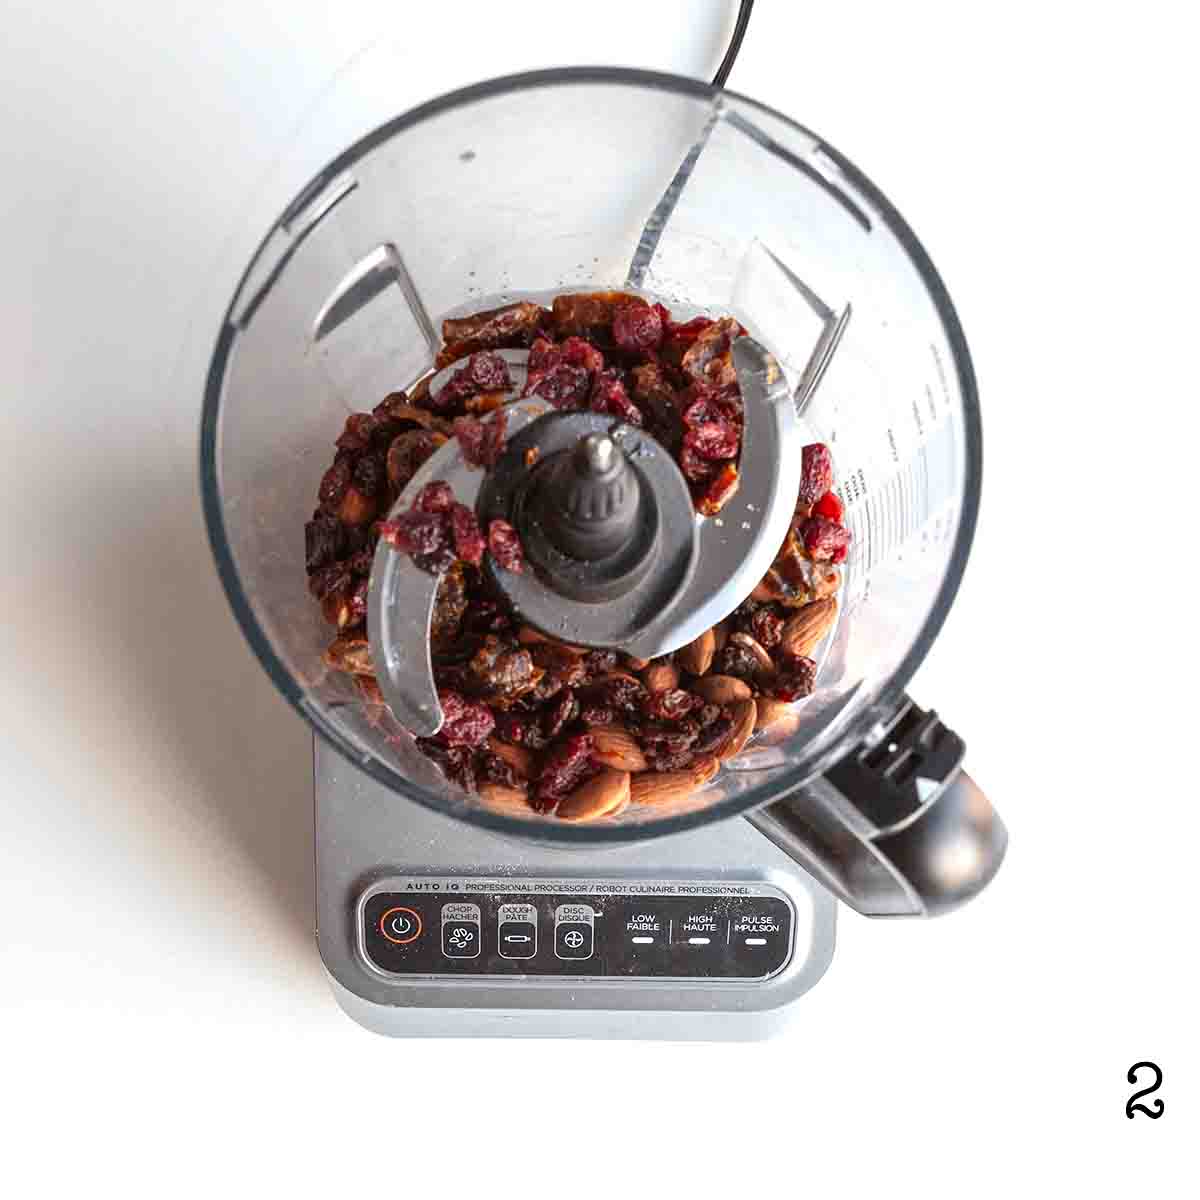
    Dried cranberries, raisins, dates, and almonds in a food processor.

    2. Blitz the dried fruit and nuts in a food processor until coarsely ground.

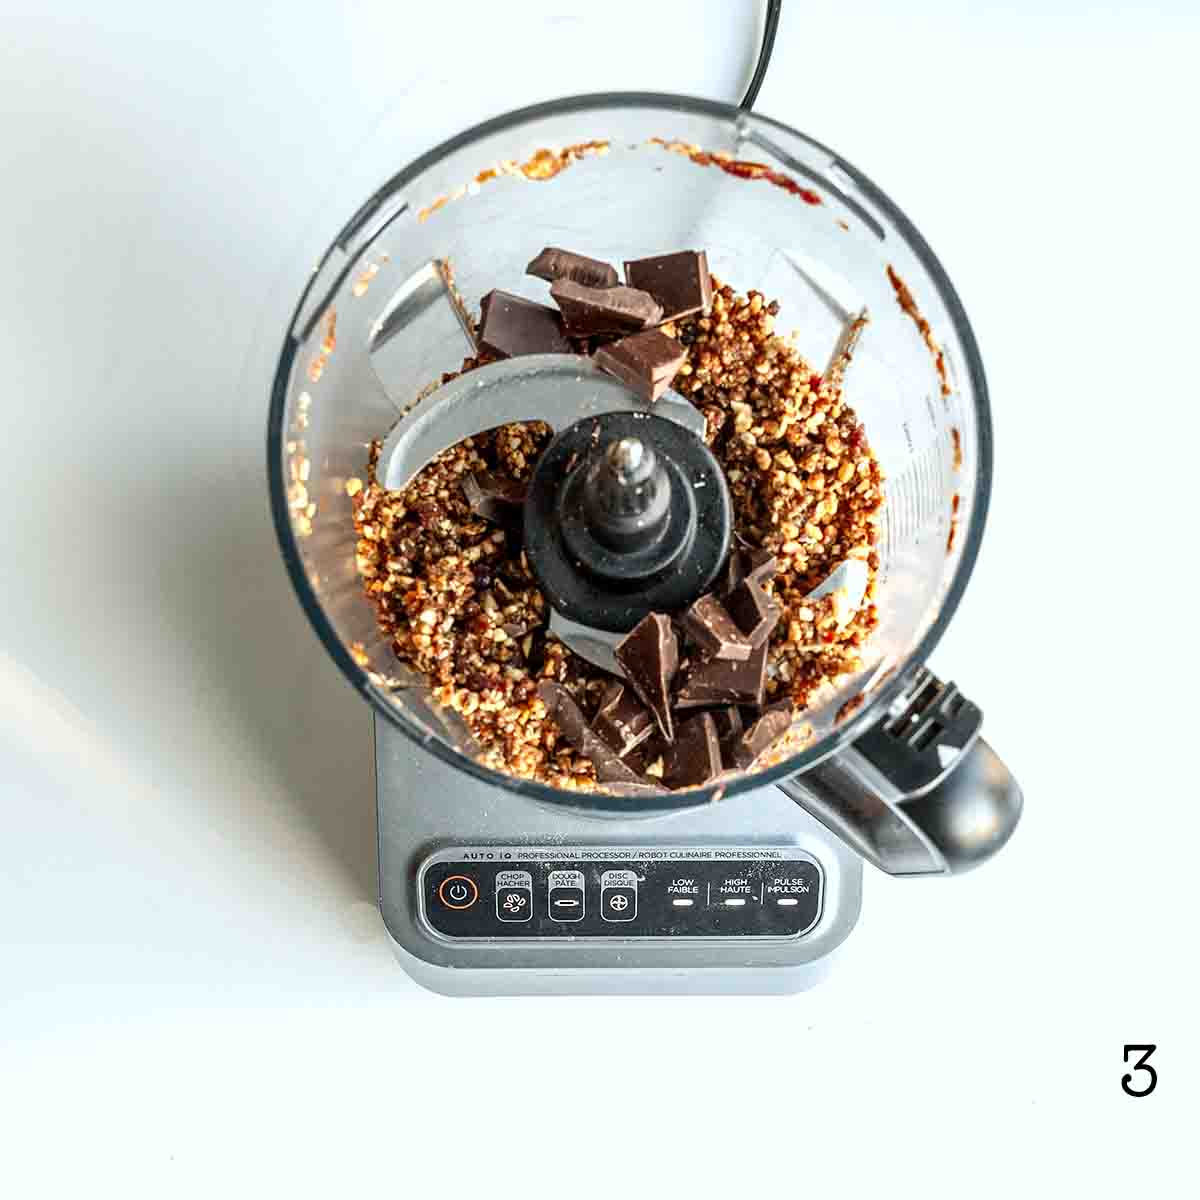
    Chocolate in a food processor with energy bite mixture.

    3. Add the chocolate and pulse to combine.

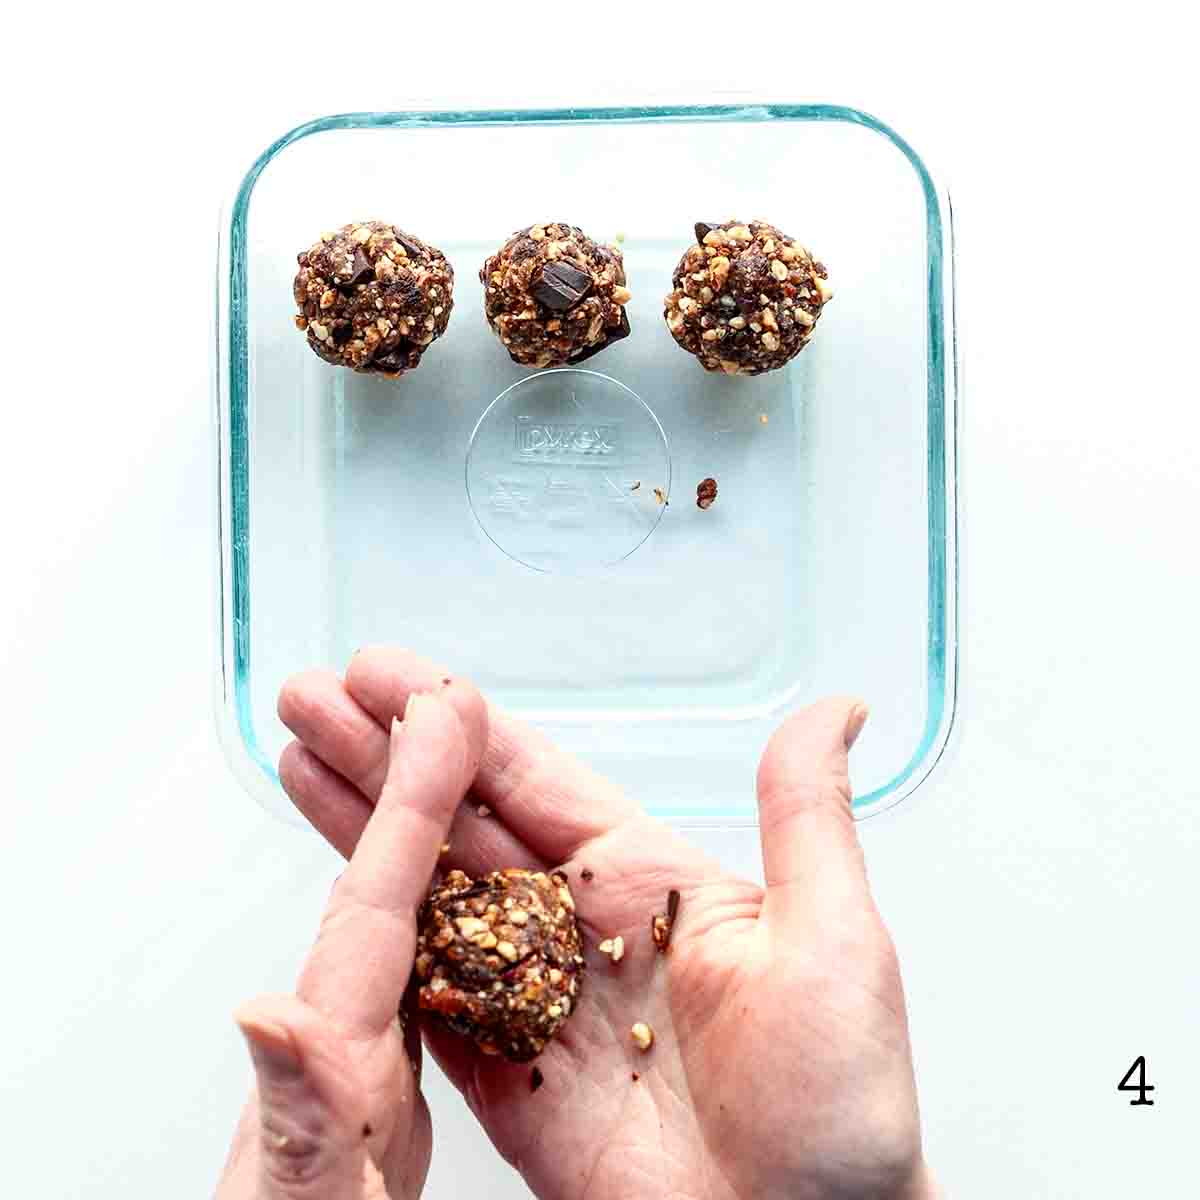
    A person shaping energy balls.

    4. Roll the mixture into golf ball-sized bites and store in the fridge or freezer.

    FAQs

    Can I make these into energy bars?

    Definitely. Instead of rolling the mixture into individual balls, press it into an even layer in a 8-by-8-inch square pan. For easy removal, line the pan with parchment. Chill the bars in the fridge for an hour (or in the freezer for 20 minutes), then slice them into bars.

    Can you freeze them?

    Yes. Store the energy bites in a sealed container or resealable bag in the freezer for up to 6 months. You can thaw them in the refrigerator before eating, or munch on them while they're still a little frozen. Either way, they're delicious!

    Storage

    Store in a sealed container in the fridge or freezer. Your homemade cranberry almond energy balls will keep for up to 2 weeks in the fridge or up to 6 months in the freezer. If frozen, let them sit at room temperature for 30 minutes before enjoying, but keep them out of direct sunlight and avoid leaving them somewhere warm as they will become sticky, messy, and difficult to handle.

    Tips and Troubleshooting

    • To get ahead, make these before heading out on your camping trip. Store them in your cooler.
    • To avoid having the mixture stick to your hands, wet your hands before shaping them, re-wetting them as needed. Work quickly to avoid having the mixture warm up in your hands.
    • These cranberry energy bites are suitable for gluten-free, dairy-free, and vegan diets.
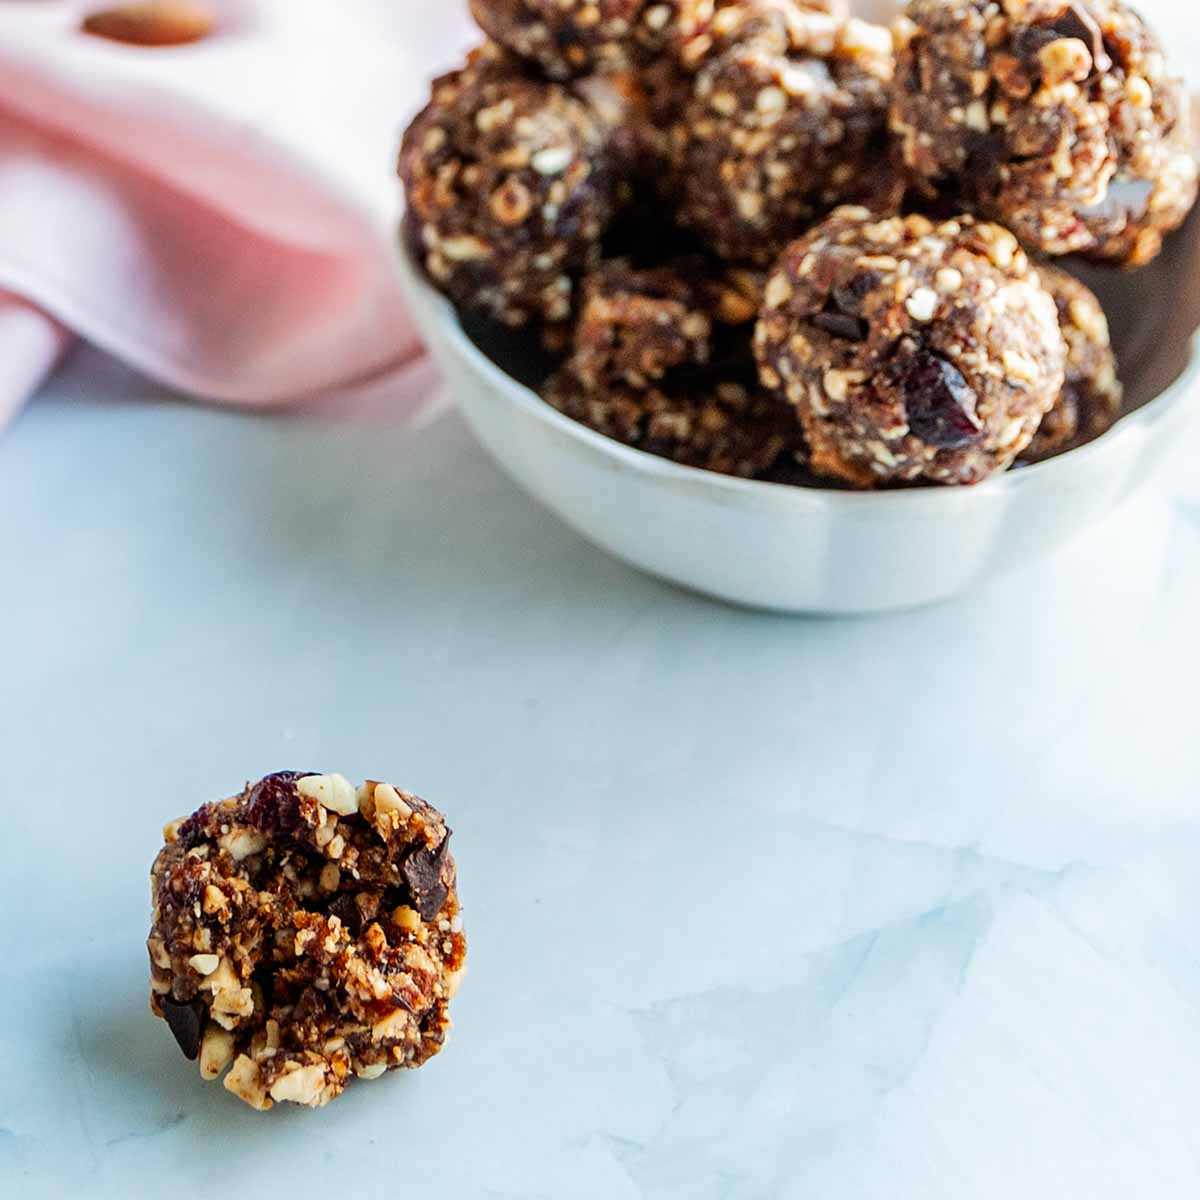
    A single energy bite next to a dish of several.

    More Camping Snack Recipes You'll Love

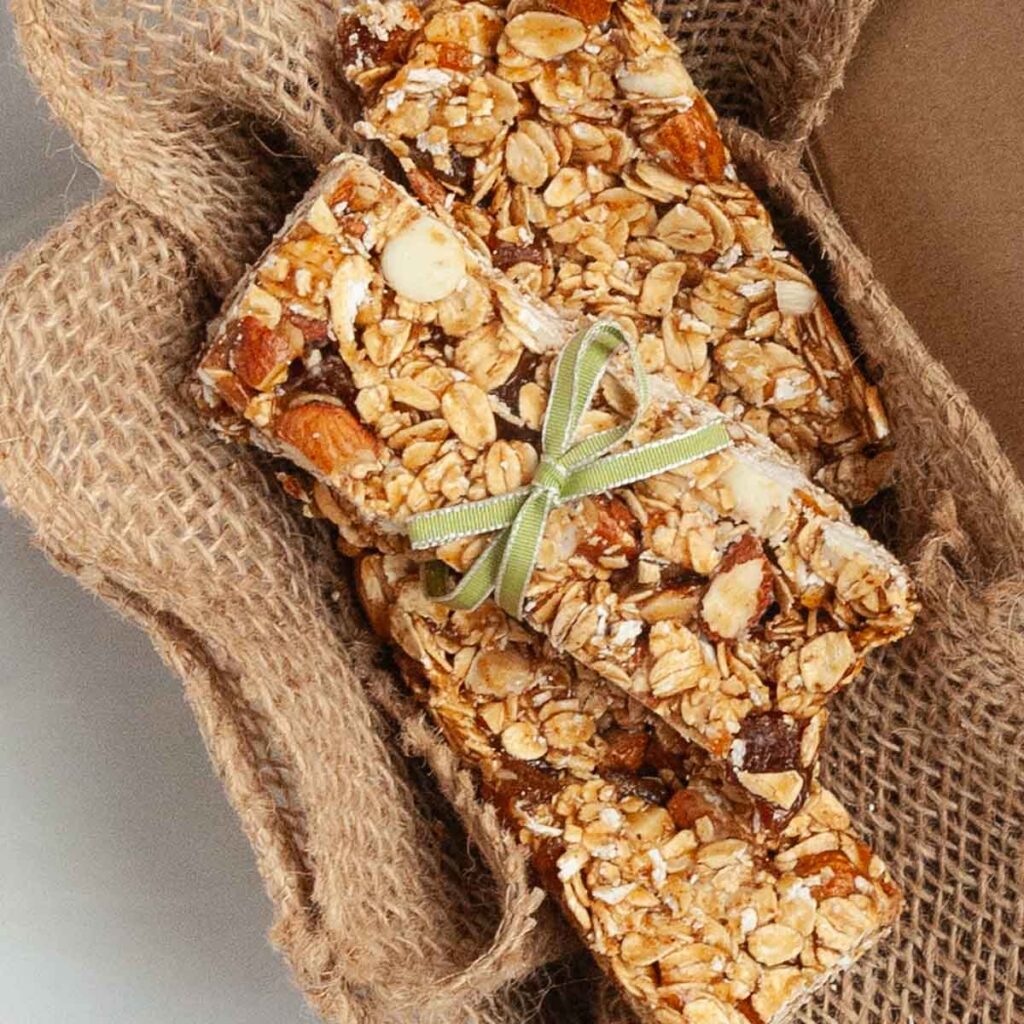
    Three homemade granola bars in a box.
    Apricot and White Chocolate Granola Bars
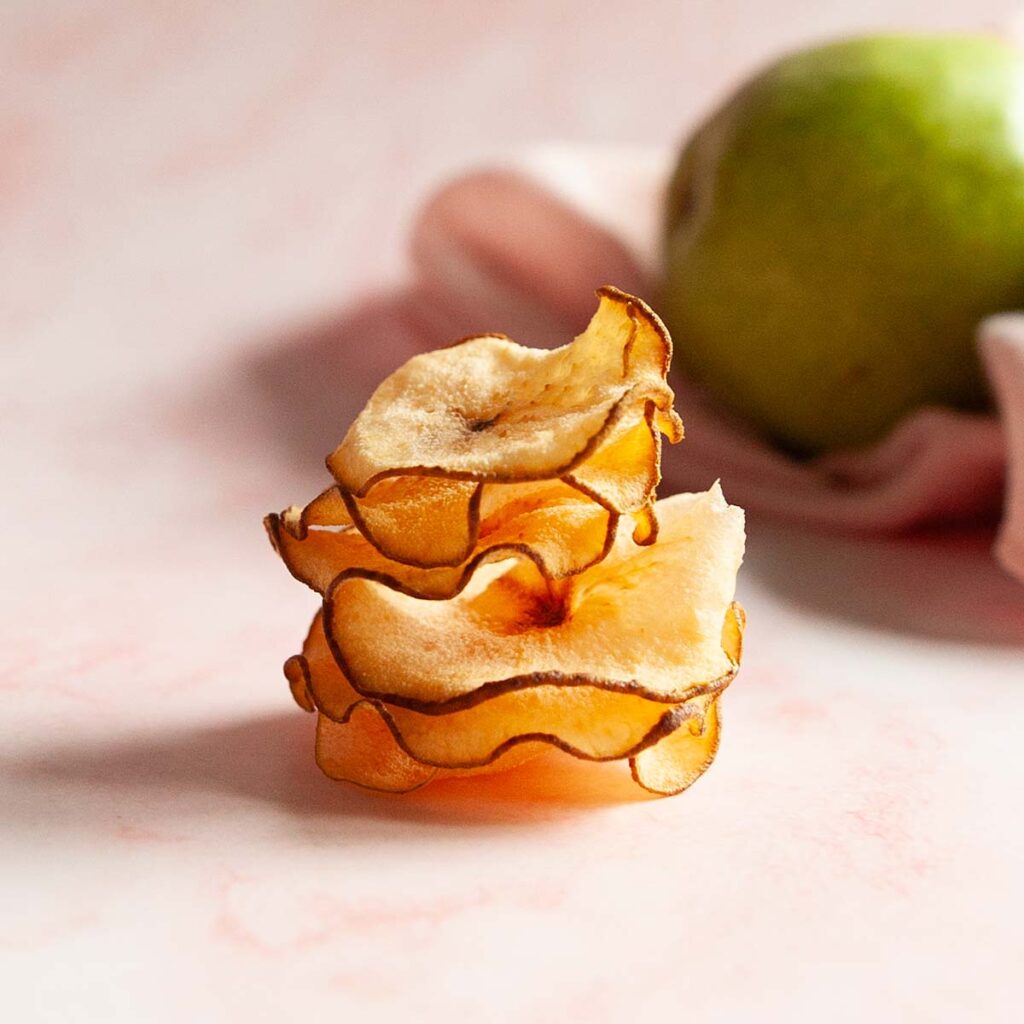
    A stack of pear chips with a pear in the background.
    Pear Chips

    Tried This Recipe?

    If you've tried this recipe, please leave a comment below. Follow me on Instagram, Facebook, YouTube, or Pinterest for more great camping and grilling recipes.

    Recipe

    A bowl of cranberry energy balls with almonds scattered around.

    Cranberry Energy Balls

    A woman's face.Angie Zoobkoff
    These sweet and nutty energy bites are quick and easy to make and loaded with plenty of nutritious ingredients (plus a little chocolate).
    5 from 1 vote
    Print Recipe Pin Recipe
    Prep Time 20 minutes mins
    Total Time 20 minutes mins
    Course Snack
    Cuisine American
    Servings 12 bites
    Calories 111 kcal

    Equipment

    • Food processor

    Ingredients
      

    • ½ cup (70 g) pitted dates
    • ¼ cup dried cranberries
    • ¼ cup raisins
    • 1 cup roasted almonds
    • 1 pinch salt
    • 2 ounces (57 g) dark chocolate chopped (⅓ cup)

    Instructions
     

    • Place the dates, cranberries, and raisins in a medium bowl and cover with hot water. Let sit for 10 minutes to soften, then drain. (If your fruit is already very soft, you can skip this step.)
    • Combine the drained fruit, nuts, and a pinch of salt in the bowl of a food processor. Process until the mixture is uniformly chopped and sticks together when pinched. This should take 1 to 2 minutes.
    • Add the chocolate and pulse until it's finely chopped and incorporated into the mixture.
    • Roll the date mixture into golf-ball sized pieces. Chill for 30 minutes before serving.

    Notes

      • Get ahead--Make these before heading out on your camping trip. Store them in your cooler.
      • Keep them cool--Keep the energy bites out of direct sunlight and avoid leaving them somewhere warm as they will become sticky, messy, and difficult to handle.
      • Storage--They can be stored in an airtight container in the fridge for up to 2 weeks or in the freezer for up to 6 months.
      • Dietary--These date energy bites are suitable for gluten-free, dairy-free, and vegan diets.

    Nutrition

    Serving: 1 biteCalories: 111kcalCarbohydrates: 10.5gProtein: 2.9gFat: 7.5gCholesterol: 1mgFiber: 2.2gSugar: 7g
    Keyword energy balls, energy bites, no-bake snacks
    Tried this recipe?Let us know how it was!

    January 17, 2024 Dutch Oven Recipes

    Cheesy Garlic Mashed Potatoes

    These comforting cheddar garlic mashed potatoes are rich and creamy, thanks to two(!) types of cheese, sour cream, and a healthy dose of garlic. The best part? You can make them in advance so you can indulge any time you please.

    A pot of mashed potatoes with a wooden spoon resting inside.
    [feast_advanced_jump_to]

    I have a serious love for mashed potatoes. Ok, potatoes. I have a serious love for potatoes. Roasted potatoes, scalloped potatoes, grilled twice-baked potatoes, cheesy foil packet potatoes, French fries, and of course, mashed potatoes. I have yet to meet a potato that I don't like.

    I am a little picky when it comes to mashed spuds, though. They have to be a good balance between creamy and fluffy, not gluey, be flavorful, and contain a decent amount of fat.

    This recipe for cheesy garlic mashed potatoes ticks all of those boxes. They're rich and creamy, thanks to the addition of cream cheese, cheddar, and sour cream, and have just enough garlic to give it a little bite and take the flavor up a notch.

    Cheesy mashed potatoes aren't typically associated with camping, but if you're headed out in cool weather, I don't see why they shouldn't be camping food. They're perfect for ladling Dutch oven beef stew or cranberry meatballs over, and if you want to make a pot of Dutch oven shepherd's pie, these potatoes are the perfect consistency for piling on top. And since you can easily make them in advance and tuck them into your cooler before heading out, that's one less thing to do at camp. Win-win.

    Ingredients and Substitutions

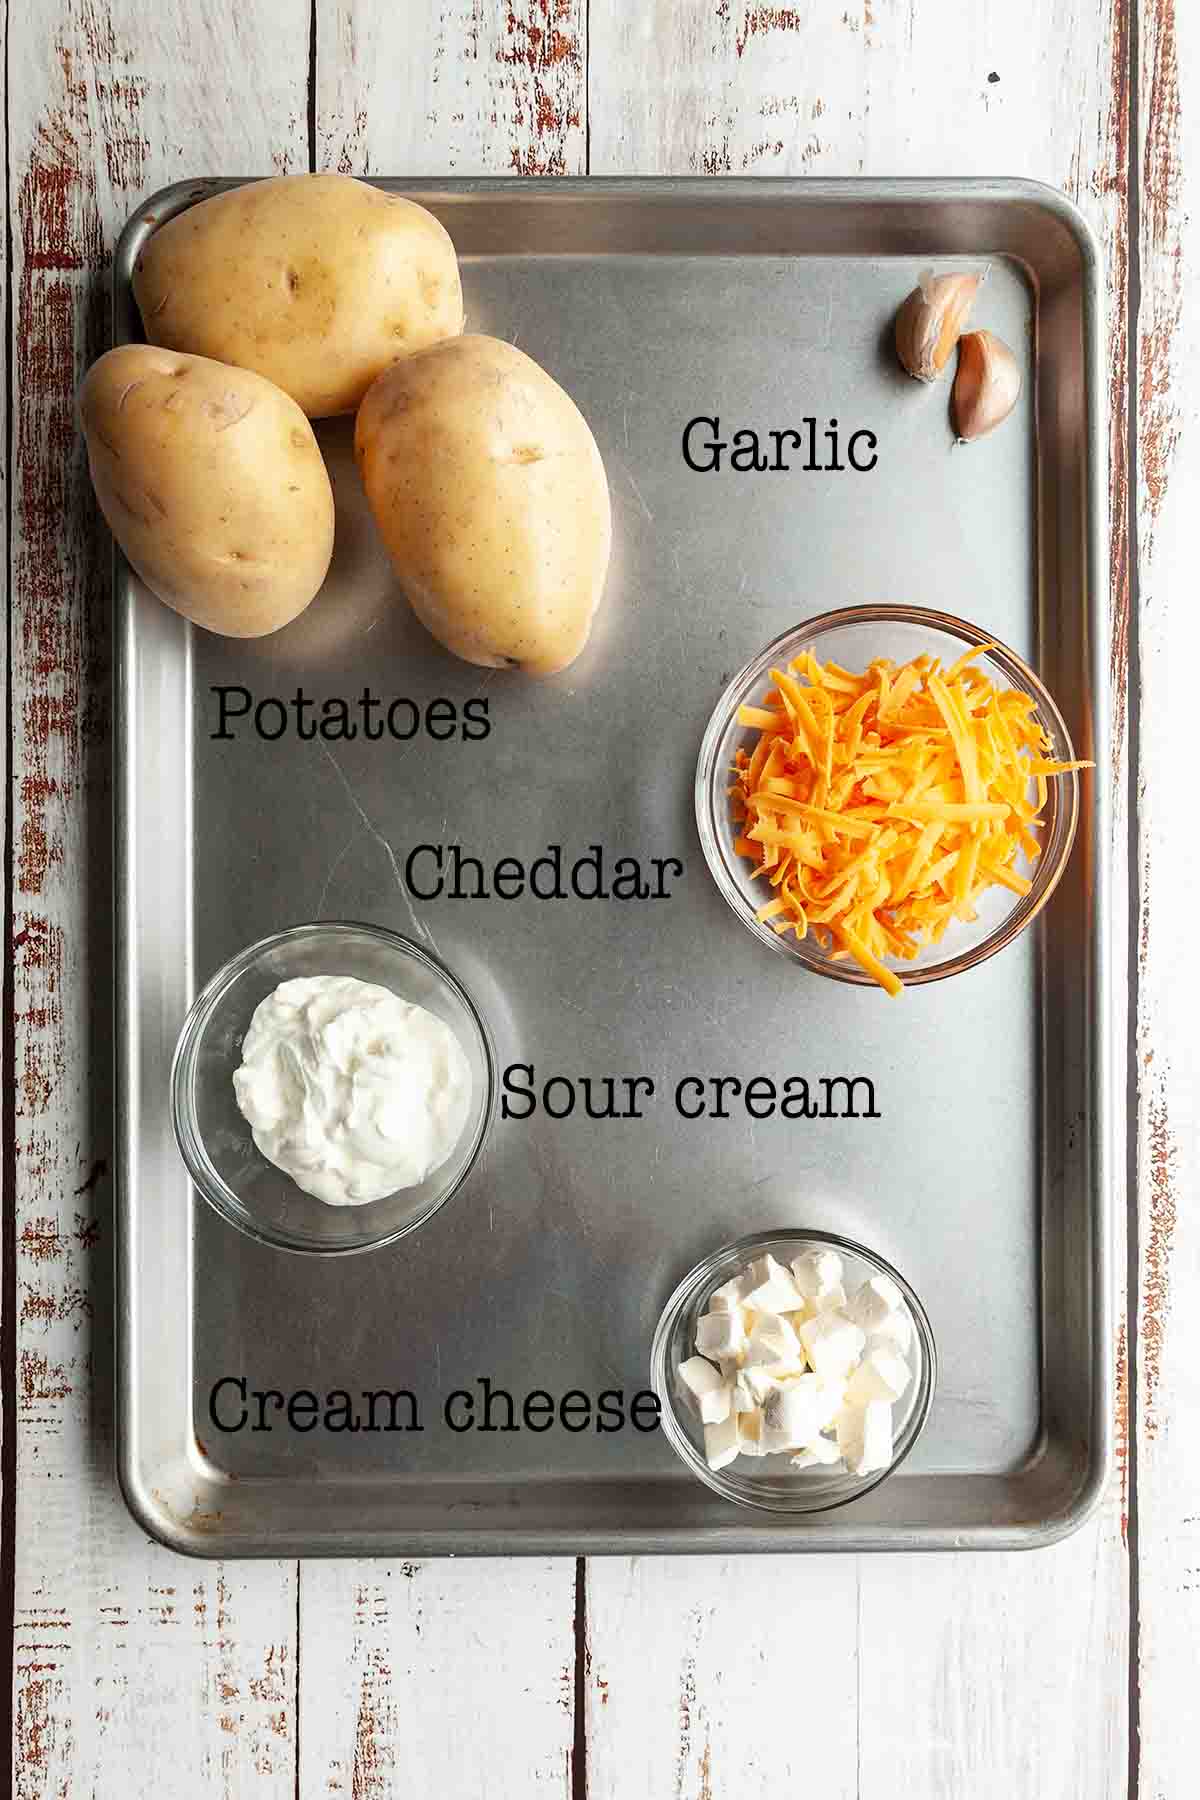
    Ingredients for cheesy garlic mashed potatoes--potatoes, garlic, cheddar, sour cream, and cream cheese
    • Potatoes--I prefer to use Yukon gold or yellow potatoes for the best flavor and consistency, but you can substitute Russet potatoes, or use a combination.
    • Garlic--If you like a slight garlic flavor to your potatoes, use 2 large cloves. If you love garlic, use 4, or more.
    • Cream cheese--This adds richness to the potatoes. Use full-fat cream cheese for best results.
    • Sour cream--For the tastiest potatoes, use full-fat sour cream.
    • Cheddar--Use full-fat cheddar cheese, and always grate it from a block. Pre-shredded cheese doesn't melt well.

    How to Make Cheesy Garlic Mashed Potatoes

    A Dutch oven with cubed potatoes and whole garlic cloves in water on an induction burner.
    A covered Dutch oven on an induction burner.
    1. Place the cubed potatoes and garlic cloves in a large pot or Dutch oven and cover with 1 to 2 inches of water. Season well with salt.
    2. Bring to a boil, cover, and simmer until the potatoes are fork tender.
    Drained cooked cubes of potato in a colander with a liquid measuring cup next to it.
    A person mashing potatoes in a Dutch oven.
    1. Drain the potatoes in a colander, reserving ¾ cup of the starchy potato water.
    2. Return the potatoes to the pot, add ½ cup of starchy water, and mash until smooth. Add a little extra water, if needed.
    A person using a wooden spoon to stir sour cream and cream cheese into mashed potatoes.
    A person stirring Cheddar cheese into mashed potatoes in a Dutch oven.
    1. Stir in the cream cheese and sour cream until well combined.
    2. Fold in the cheddar cheese.

    FAQs

    What's the secret to perfect mashed potatoes?

    To get the best mashed potatoes, there are a few things to keep in mind:
    - Choose the right potato. Yukon Gold or Russet potatoes work well, but avoid waxy potatoes that won't mash well.
    - Don't over or undercook your potatoes. Overcooked potatoes will be dry and mealy, and undercooked potatoes will be difficult to mash. You'll know they're ready when they are tender when poked with a fork, but not falling apart.
    - Don't over mash your spuds. Mash them until there are no visible lumps remaining, but don't overdo it. Overworking will make them gluey.

    Why do you start cooking potatoes in cold water?

    Starting your potatoes in cold water helps them to cook evenly. Adding your potatoes directly to hot water will cause the outside to cook faster than the inside, resulting in mealy potatoes.

    Do I need to peel my potatoes?

    It's up to you. If I'm using Yukon Gold or yellow potatoes that have thin skins, then I usually don't bother peeling, but if using a thicker-skinned potato, then I recommend removing the peel before cutting and cooking.

    Can I make these garlic and cheese mashed potatoes in advance?

    Yes. You can prepare and store the potatoes in the fridge for up to 4 days before serving, or freeze for up to 1 month. If you want to prepare them just a couple of hours before serving, you can keep them warm by setting the pot of mashed potatoes over a pan of barely simmering water.

    Storing & Reheating Garlic Cheesy Mashed Potatoes

    You can store mashed potatoes in the fridge for up to 4 days in a sealed container, or freeze for longer storage. To reheat, place the potatoes in a pot or Dutch oven, and add a splash of milk or cream. Rewarm them over very low heat, stirring occasionally, until heated through.

    If you've packed them along in a foil container for a camping trip, you can reheat them directly in the container. Set it on a warm area of the campfire grill, but not over direct heat. Let them heat, stirring occasionally, and adding milk, cream, or some butter, if needed, until warmed through.

    How to Freeze Mashed Potatoes

    Let your potatoes cool completely before freezing. Pack them into freezer safe airtight containers and store in the freezer for up to 1 month. If you're heading out camping, I recommend using foil containers, so that you can reheat them directly in the container. Thaw in the fridge (or your cooler) before reheating.

    Tips and Troubleshooting

    • Cut your potatoes into even-sized pieces, no smaller than 1-inch so that they cook evenly.
    • For the smoothest, fluffiest potatoes, use a potato ricer instead of a hand masher.
    • Use room temperature ingredients. Slightly warm dairy will be much easier to blend into the potatoes than cold.
    • Mash your potatoes and mix in the cheese and sour cream while they are still hot. If your potatoes cool too much, you can place them over low heat to warm through.
    • This potato side dish recipe is suitable for gluten-free diets.
    A portion of shepherd's pie on a plate.

    More Potato Recipes You'll Love

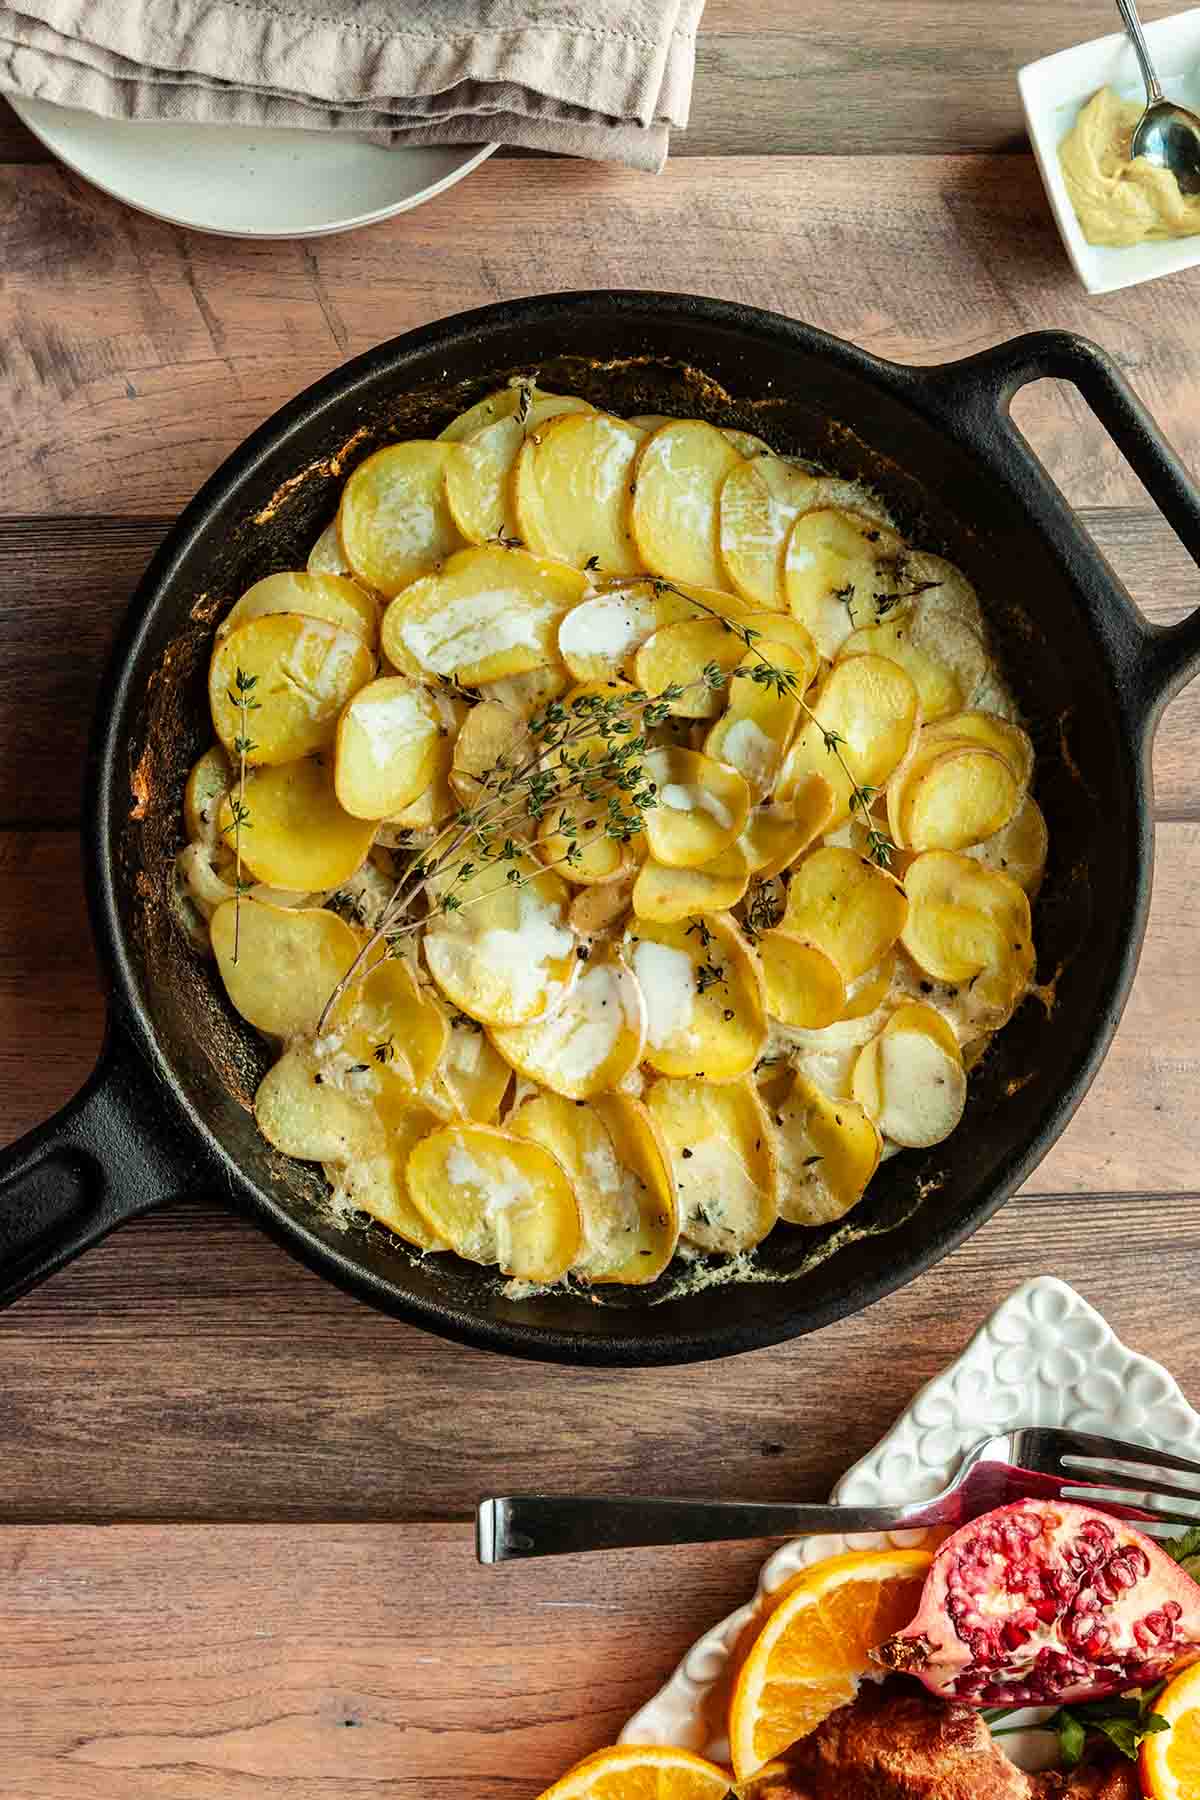
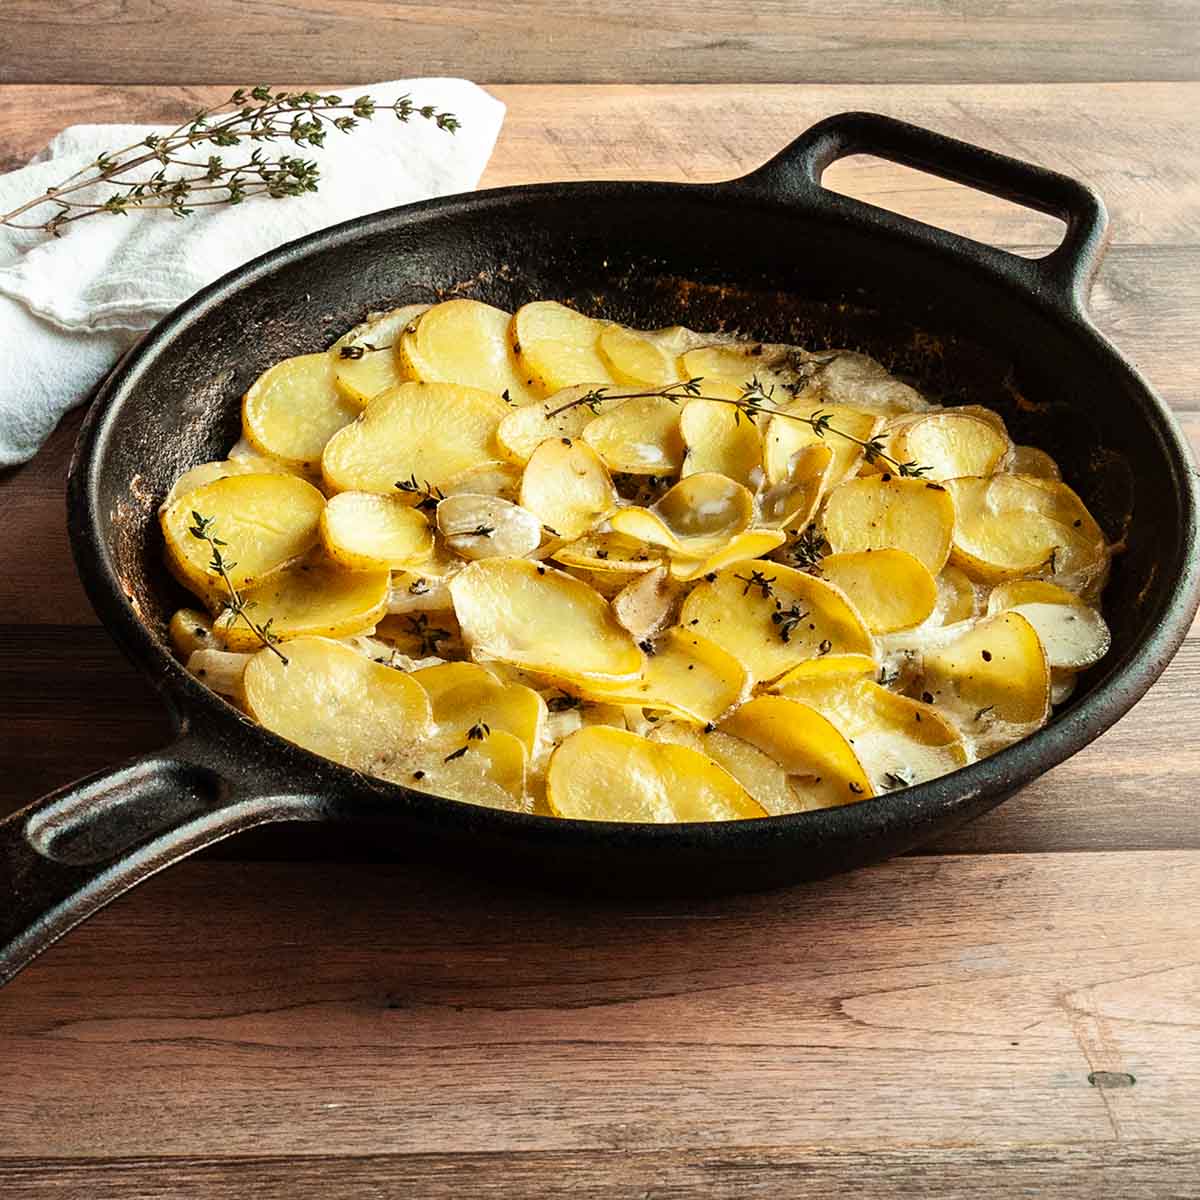
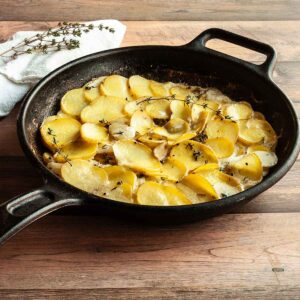
    A cast iron skillet filled with scalloped potatoes with sprigs of thyme on top.
    Grilled Scalloped Potatoes
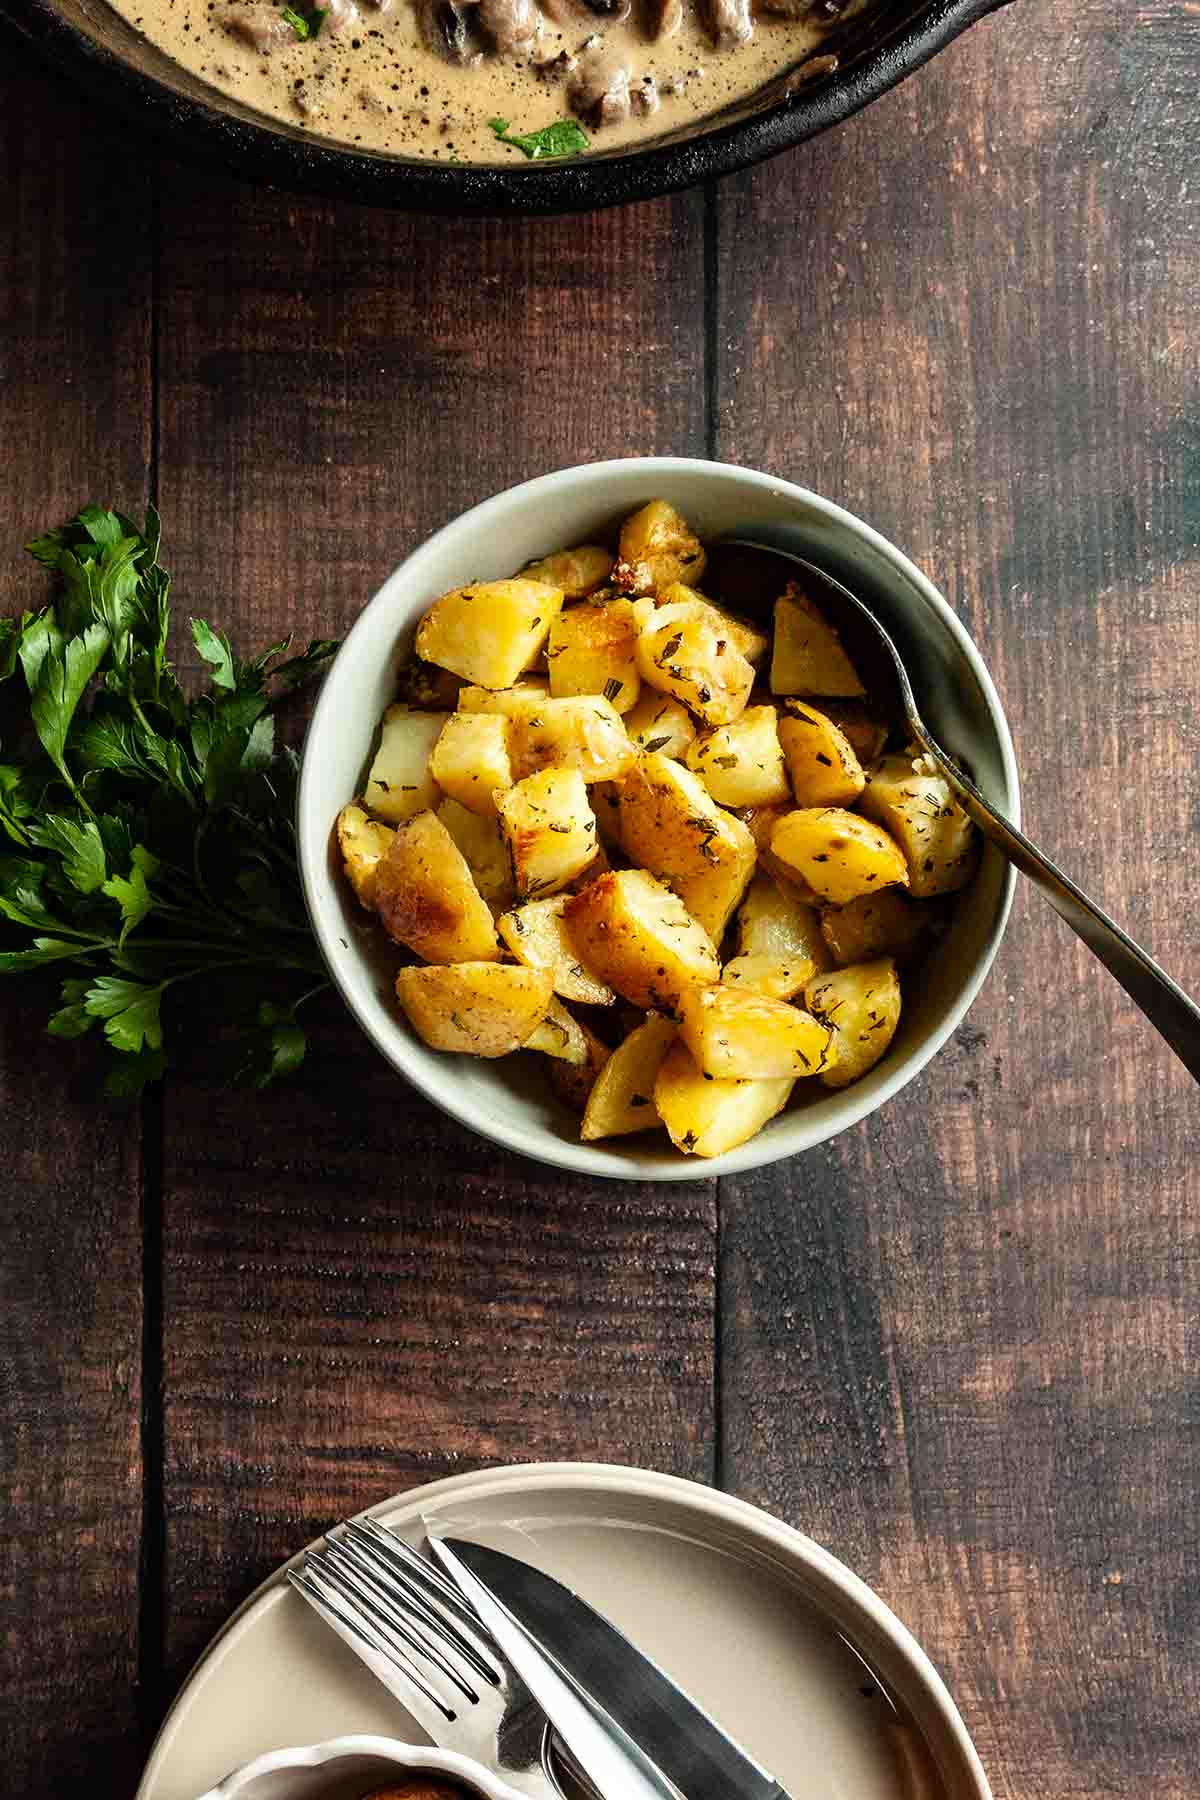
    A bowl of make ahead roasted potatoes with fresh herbs and some parsley on the side.
    Make-Ahead Roasted Potatoes

    Tried This Recipe?

    If you've tried this recipe, please leave a comment below. Follow me on Instagram, Facebook, YouTube, or Pinterest for more great camping and grilling recipes.

    Recipe

    A pot of mashed potatoes with a wooden spoon resting inside.

    Cheesy Garlic Mashed Potatoes Recipe

    A woman's face.Angie Zoobkoff
    These creamy mashed potatoes are loaded with garlic, two types of cheese, and tangy sour cream. They're the perfect holiday (or anytime!) side dish and can be prepared ahead of time.
    5 from 1 vote
    Print Recipe Pin Recipe
    Prep Time 10 minutes mins
    Cook Time 25 minutes mins
    Total Time 35 minutes mins
    Course Side Dish
    Cuisine American
    Servings 6 servings
    Calories 306 kcal

    Equipment

    • Large pot or Dutch oven
    • Colander
    • Potato masher

    Ingredients
      

    • 2 ½ pounds Yukon Gold or yellow potatoes (about 5 large) cut into 1-inch cubes
    • 2 to 4 large cloves garlic peeled
    • Salt
    • ¼ cup cream cheese room temperature, cut into small cubes (if using block-style)
    • ¼ cup sour cream room temperature
    • ½ cup cheddar cheese shredded
    • Freshly ground black pepper

    Instructions
     

    • Combine the potatoes, garlic, and 1 teaspoon salt in a large pot or Dutch oven. Cover with 2 inches (5 cm) of cold water.
    • Set over medium high heat and bring to a boil. Reduce heat to low, cover, and cook until the potatoes are fork tender, 18 to 20 minutes. Adjust the heat as needed to maintain the water at a simmer.
    • Scoop out ¾ cup of the potato water, then drain the potatoes in a colander. Return the potatoes to the pot.
    • Add ½ cup of potato water to the potatoes and mash until smooth. Add more water, if needed to achieve a smooth consistency.
    • Stir in the cream cheese and sour cream just until combined.
    • Fold in the cheddar cheese.
    • Season to taste with salt and pepper and serve immediately.

    Notes

      • Cutting the potatoes--Cut your potatoes into even-sized pieces, no smaller than 1-inch so that they cook evenly.
      • Make it smoother--For the smoothest, fluffiest potatoes, use a potato ricer instead of a hand masher.
      • Room temperature ingredients--Use room temperature ingredients. Slightly warm dairy will be much easier to blend into the potatoes than cold.
      • Mash it hot--Mash your potatoes and mix in the cheese and sour cream while they are still hot. If your potatoes cool too much, you can place them over low heat to warm through.
      • Dietary--This recipe is suitable for gluten-free diets.

    Nutrition

    Serving: 1portionCalories: 306kcalCarbohydrates: 49.4gProtein: 8.6gFat: 8.8gFiber: 7.4gSugar: 3.6g
    Keyword holiday side dishes, mashed potatoes, potato side dishes
    Tried this recipe?Let us know how it was!

    January 17, 2024 Beef Recipes

    Dutch Oven Shepherd's Pie

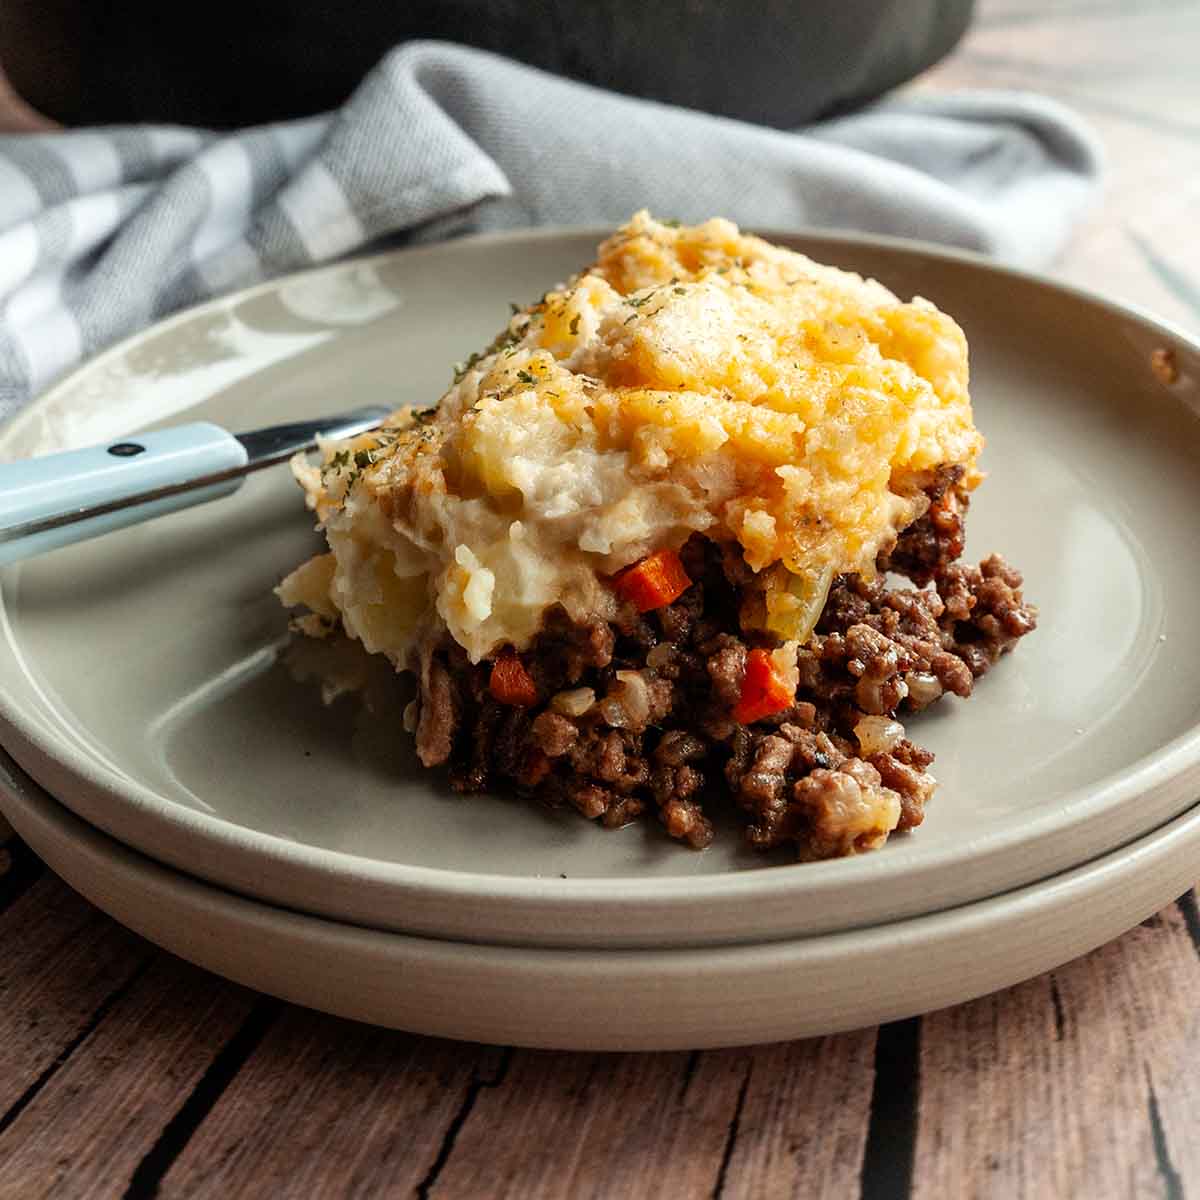
    Shepherd's pie, or cottage pie (when made with beef) is classic comfort food made with meat and vegetables under a blanket of creamy mashed potatoes. It's ideal for cool-weather camping and if you make your potato topping before heading out on your trip then this hearty meal is ready in just over an hour.

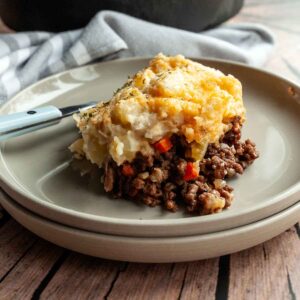
    A serving of shepherd's pie on a plate.

    Although traditional shepherd's pie is made with lamb, I've given you the choice to use lamb or beef, depending on your preference and what you have available to you. The recipe is designed with camping in mind, to minimize dishes and use ingredients that can be stored in your cooler, so it has some departures from the traditional version of the dish. I hope that you enjoy it as much as we do!

    [feast_advanced_jump_to]

    Why This Recipe is Great for Camping

    • You can prepare the mashed potatoes ahead of time so that you've got less to do at camp.
    • It can be cooked over the campfire or on your grill.
    • It's made entirely in your cast-iron Dutch oven, so there is minimal clean up.

    Ingredients and Substitutions

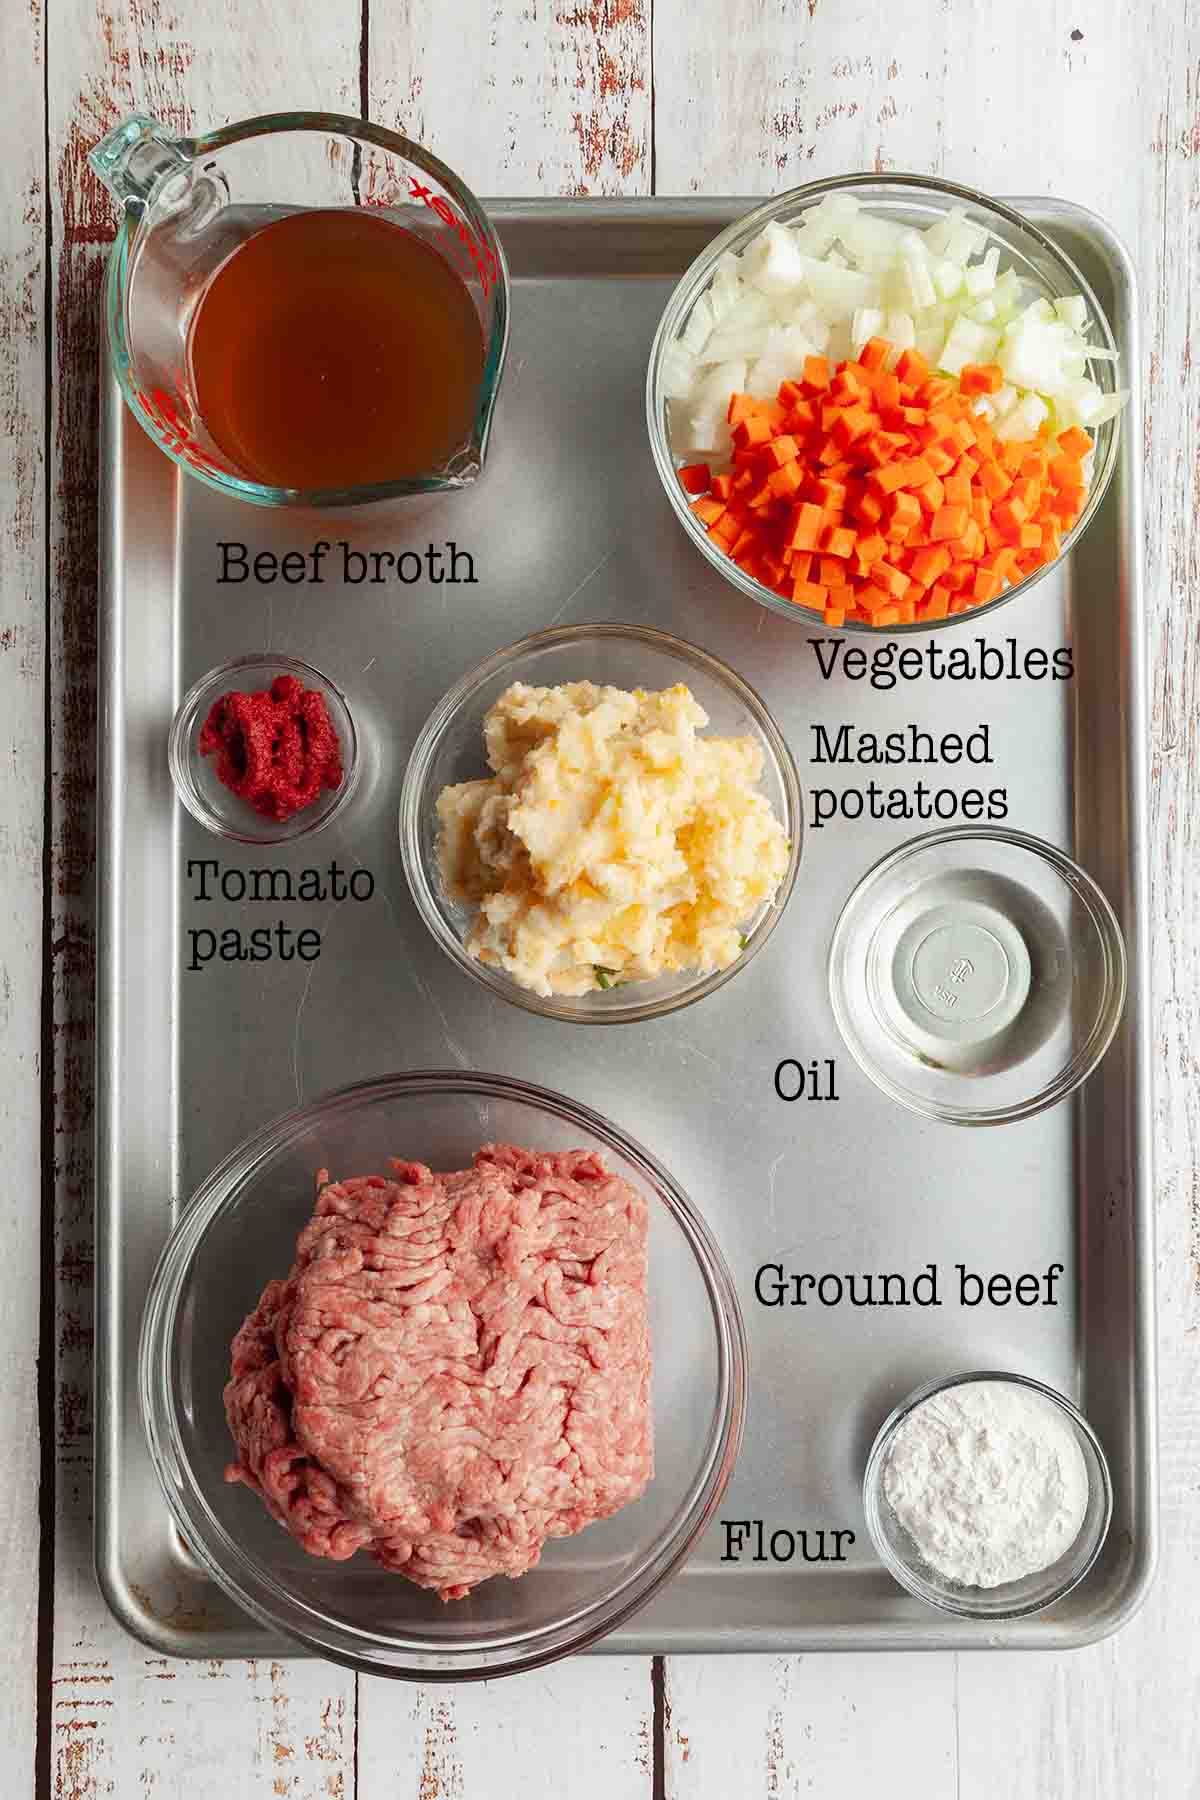
    Ingredients for Dutch oven shepherd's pie--beef, vegetables, broth, tomato paste, oil, flour, and mashed potatoes.
    • Ground beef--When made with ground beef, this dish is technically called cottage pie, but you can use ground beef or ground lamb. If using beef, I recommend lean ground beef. If you use extra-lean, add an extra splash of oil when browning it.
    • Vegetables--I use a mix of onion, carrot, and celery, since they aren't frozen and can be stored in your cooler. If you're at home, or have access to a freezer, feel free to swap in frozen peas or corn or a mixture.
    • Tomato paste--I highly recommend using concentrated tomato paste that comes in a tube when camping. Then there's no need for a can opener or to figure out where to store the extra paste. Just pop the lid back on and toss it in your cooler.
    • Flour--This is used to thicken the meat layer. To make the recipe gluten-free, substitute cornstarch.
    • Mashed potatoes--I recommend topping the dish with cheesy garlic mashed potatoes for best flavor, but you can absolutely use your favorite mashed potato recipe.

    How to Make Campfire Dutch Oven Shepherd's Pie

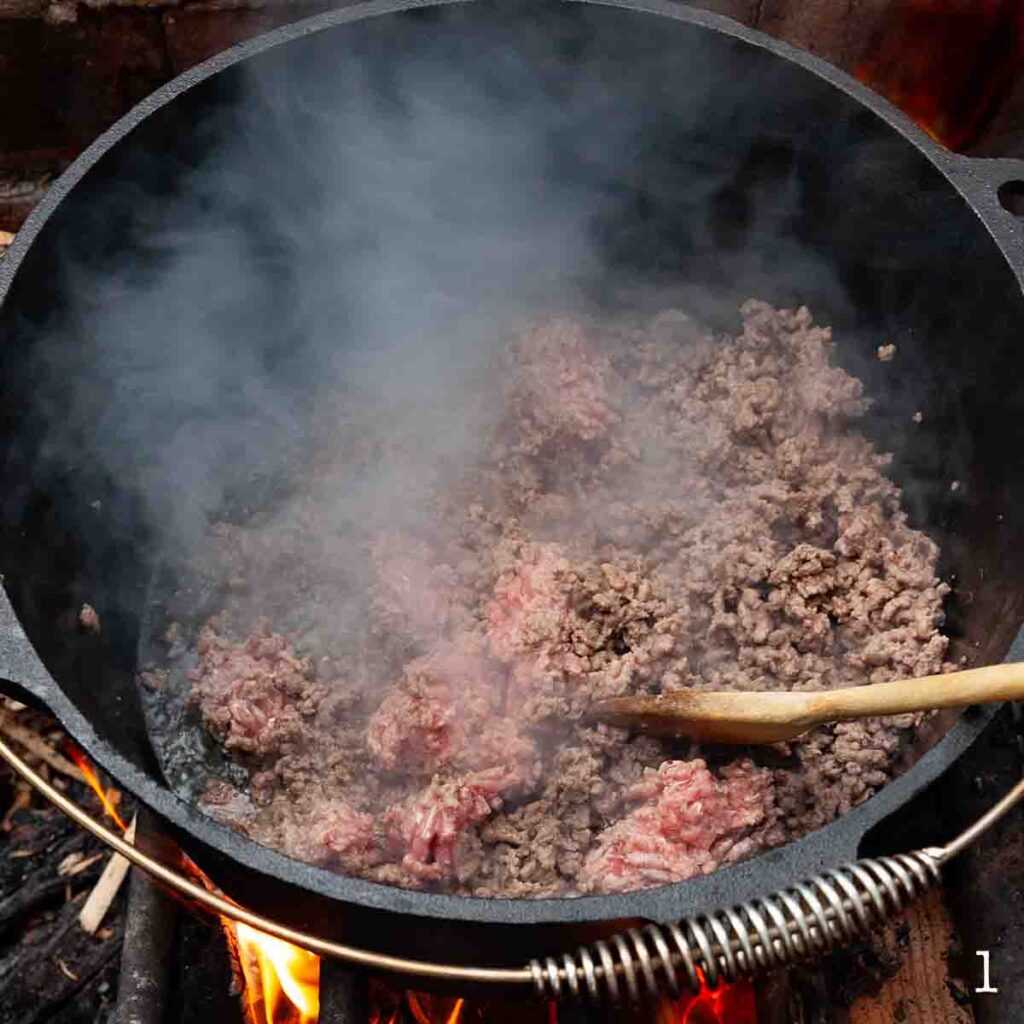
    Meat being browned in a cast iron Dutch oven over a fire.
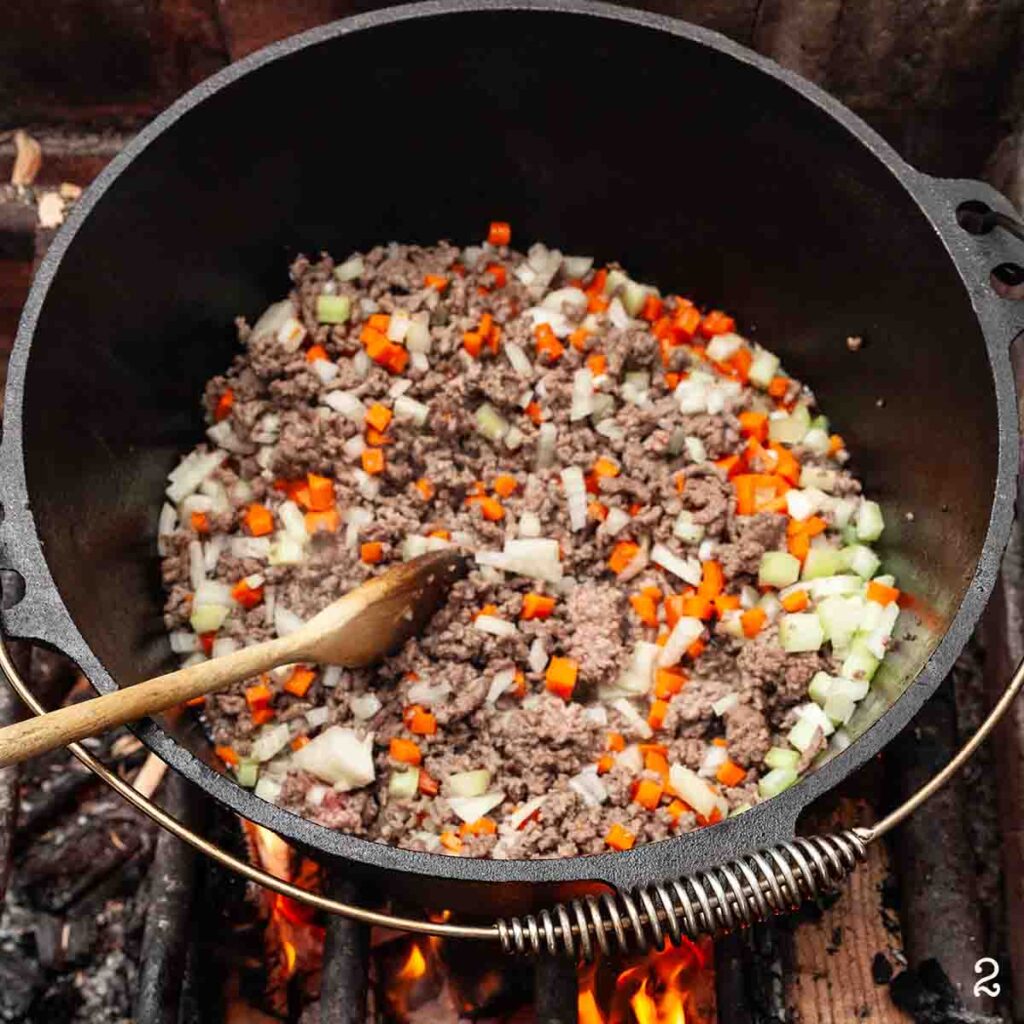
    Raw carrot, onion, and celery in a Dutch oven with cooked ground meat over a fire.
    1. Set a large Dutch oven over a campfire and add the oil. Stir in the beef and cook until browned.
    2. Add the vegetables and sauté until softened.
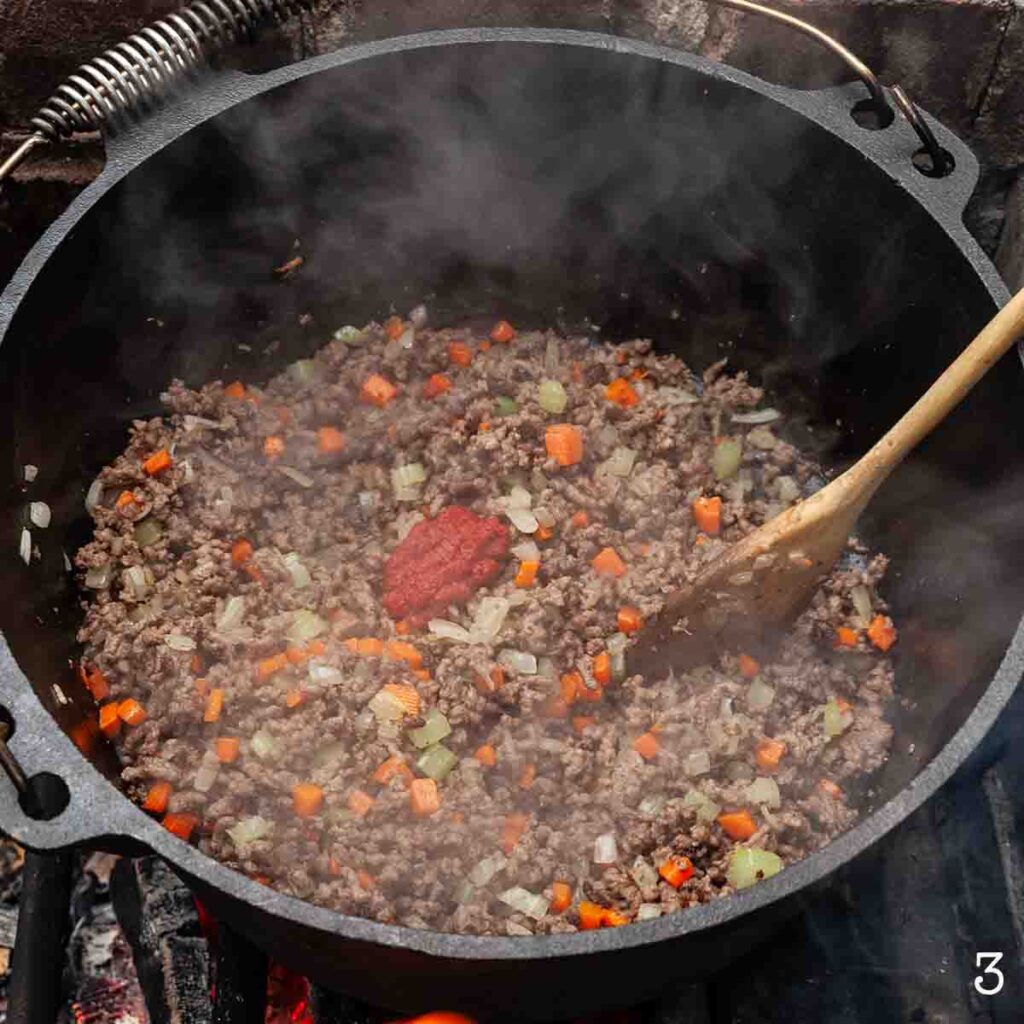
    A Dutch oven filled with ground beef, onion, carrots, and celery with a dollop of tomato paste in the center.
    Ground meat and vegetables being cooked in a Dutch oven over a fire.
    1. Stir in the tomato paste and let it cook for 1 minute. Sprinkle the flour over the meat mixture.
    2. Pour in the broth and cook until the mixture is thickened.
    Mashed potatoes spread in a layer in a cast iron Dutch oven.
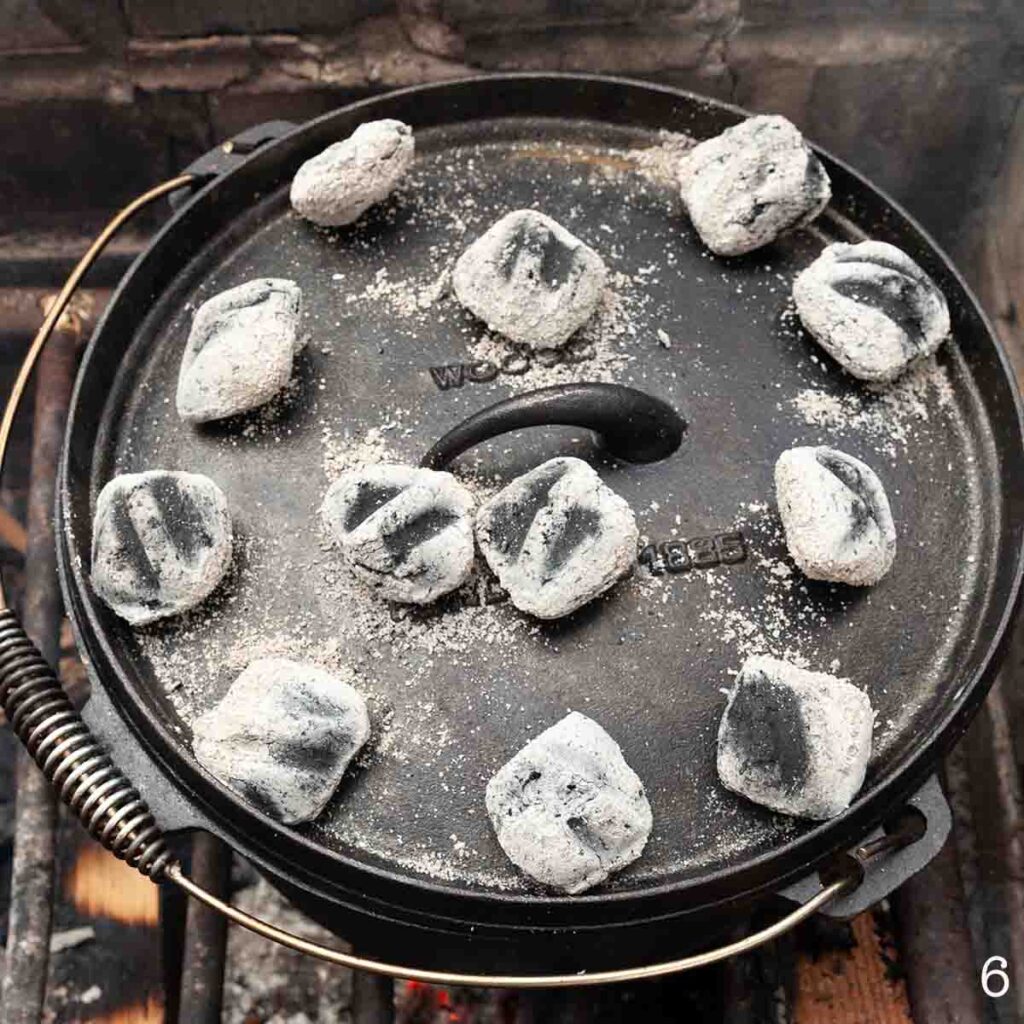
    Hot coals on the lid of a Dutch oven over a fire.
    1. Spread the mashed potatoes over the meat layer.
    2. Cover the Dutch oven and place hot coals on the lid. Cook over the fire until the potatoes are heated through and the mixture is bubbling.

    Shepherd's Pie Potato Topping

    You've got a few options when it comes to the potato topping for this Dutch oven shepherd's pie recipe. I recommend using cheesy garlic mashed potatoes, since they can be made in advance before you head out on your trip. They're the perfect consistency for topping and hold together well for serving. You can definitely substitute your own favorite mashed potato recipe, if you prefer.

    Alternatively, if you don't want to prep your potatoes in advance, bring a few large Russet potatoes along with you. Wrap them in foil and toss them in the fire for an hour or so before you begin making your shepherd's pie. When they're soft, let them cool until you can handle them, scoop out the flesh, and mash it with some salt and butter.

    FAQs

    How can I tell when it's done?

    The shepherd's pie is done when the potatoes are hot and the filling is starting to bubble up around the edges of the potatoes. The potatoes will begin to pull away from the edge of the pot.

    Should the meat mixture be soupy?

    Your mixture will be a little soupy after adding the broth. The flour will help to thicken it, and you do want to have a little bit of liquid in the meat mixture when you top it with potatoes so that the bottom doesn't burn during the last part of cooking.

    If your mixture is very liquidy, cook the mixture until some of the liquid evaporates and you can see a thin layer of broth on the bottom of the Dutch oven. If your mixture is dry, add extra broth or water to ensure that there is a thin layer of liquid in the pot before topping with the mashed potatoes.

    Can I make this in advance?

    Yes. I highly recommend making your mashed potatoes in advance, but if you want to make the entire dish in advance, you can.

    Cook the meat mixture and place it in a foil container. Once it's cool, top it with the mashed potatoes and cover with foil or a lid. Refrigerate for up to 3 days or freeze for up to 3 months. Reheat it directly in the foil container over hot coals or on your grill.

    Can I make it in my oven at home?

    Definitely. Cook your meat and vegetables as directed in your Dutch oven. After topping with the mashed potatoes, slide the Dutch oven into a 350°F oven, uncovered, and cook until golden and bubbling around the edges. For extra browning on top, you can turn your oven to broil for a couple of minutes at the end of cooking.

    What to Serve with this Recipe

    This is a hearty one-pot meal that will fill you up, so it's not necessary to serve anything with it. A green salad and some cornbread muffins would make great additions to the meal, if you'd like.

    Tips and Troubleshooting

    • To get ahead, prepare your mashed potatoes in advance and dice up your vegetables before heading out on your camping trip.
    • Chop your carrots finely so that they cook in the same time as the onion and celery.
    • Let the shepherd's pie rest for 10 minutes before serving. This will let everything firm up a bit so that it doesn't fall apart when served.

    Storage & Reheating

    Store leftovers in a sealed container in your fridge or cooler for up to 3 days. If you're camping, I recommend using disposable foil containers so that you can reheat it directly in the container. Reheat over medium-low heat until warmed through.

    A cooked Dutch oven shepherd's pie with a spoon resting inside.

    More Dutch Oven Recipes You'll Love

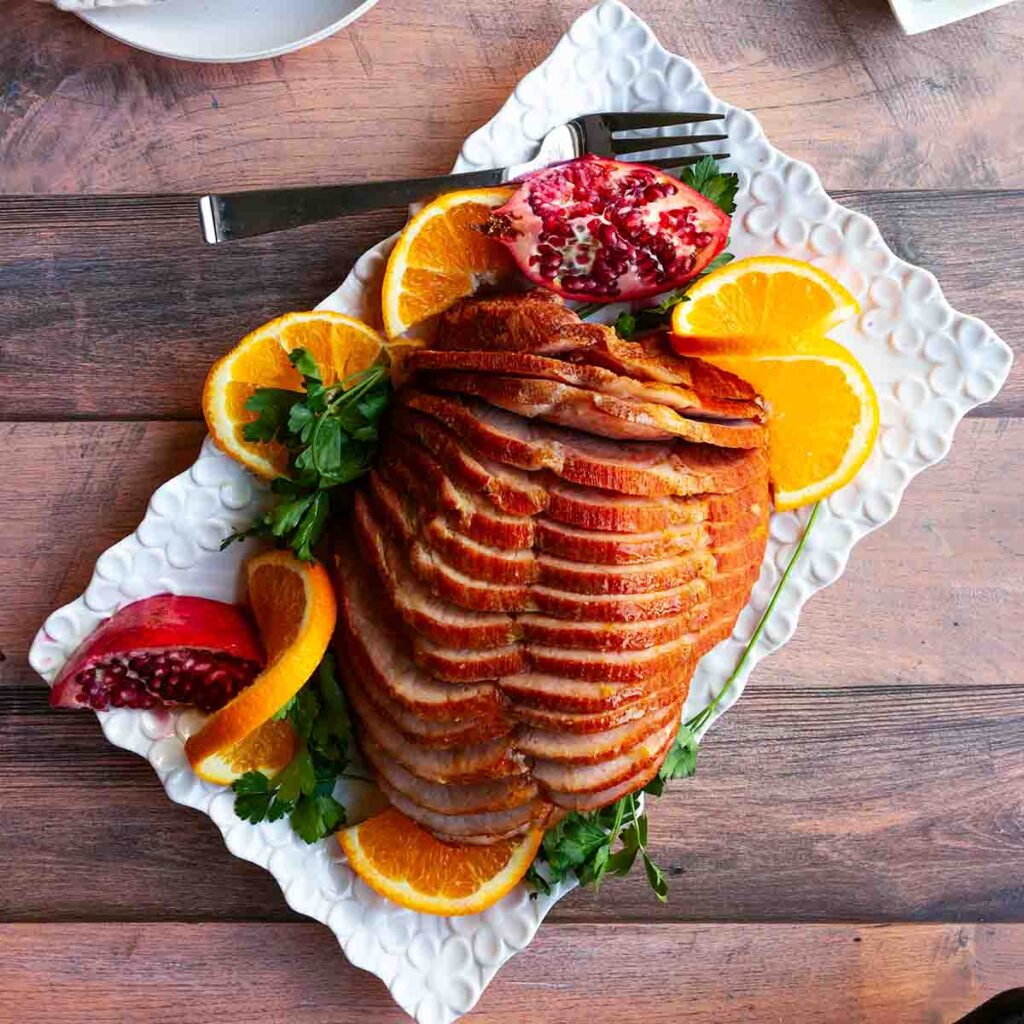
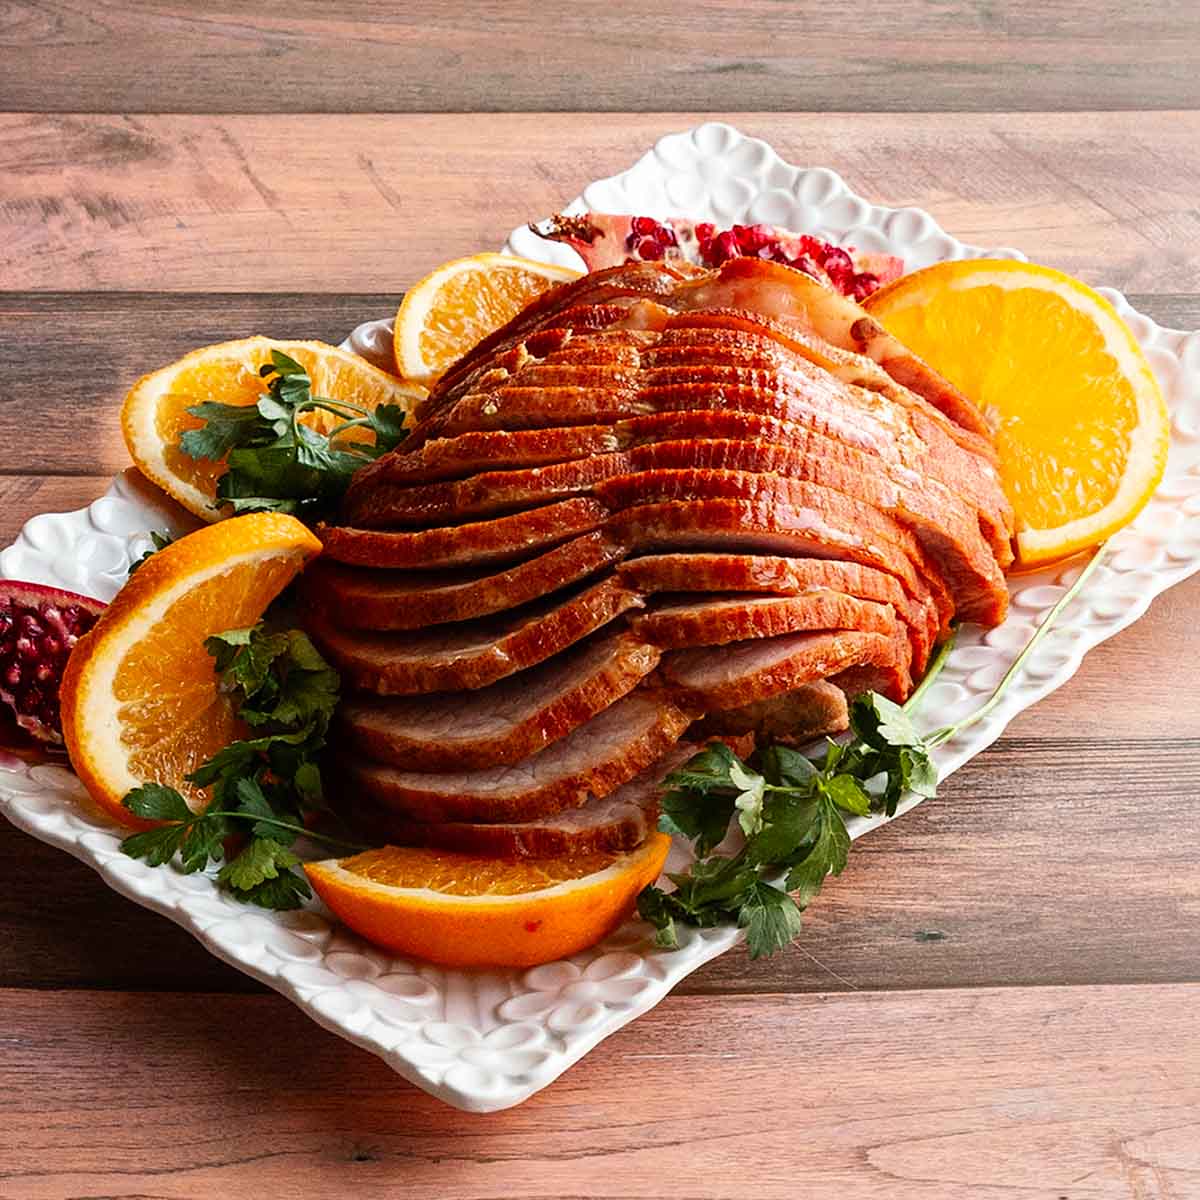
    A spiral cut ham on a rectangular platter with orange slices, pomegranate wedges, and parsley sprigs.
    Dutch Oven Ham
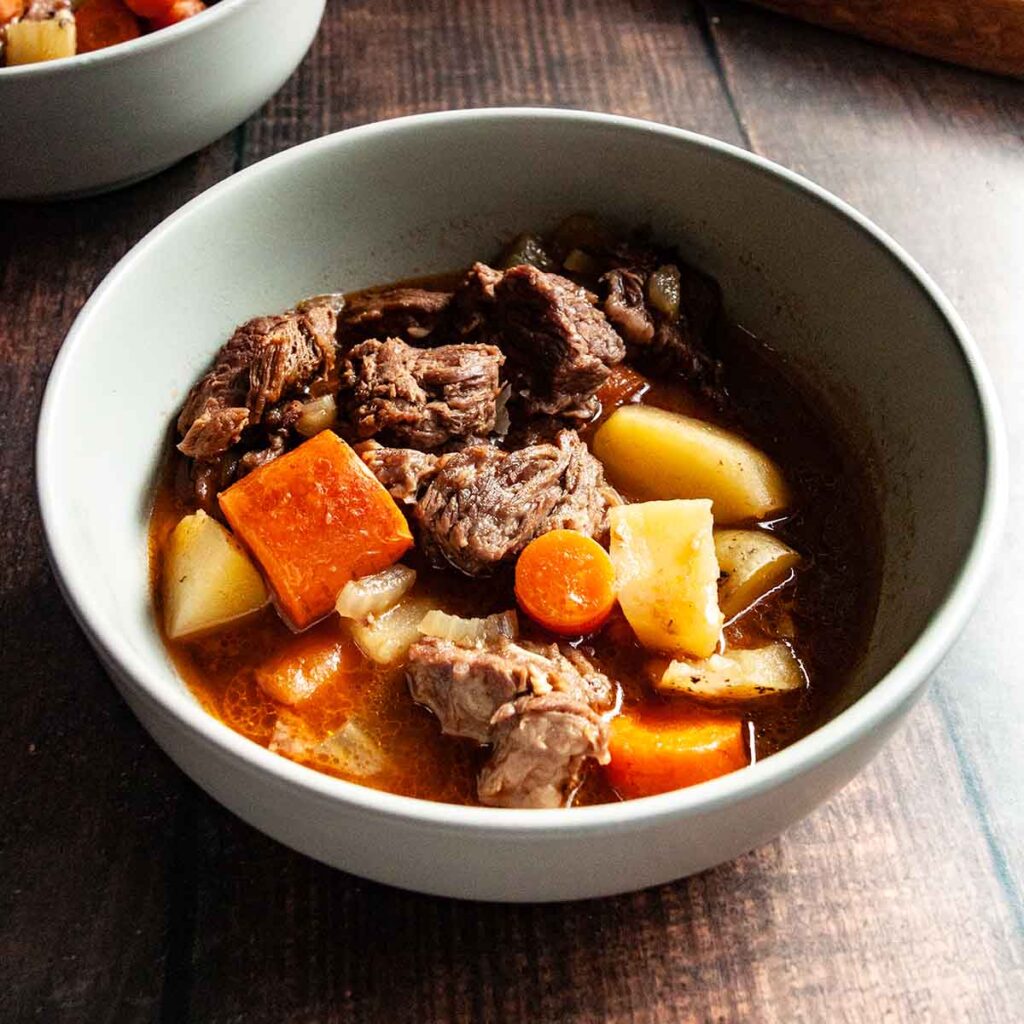
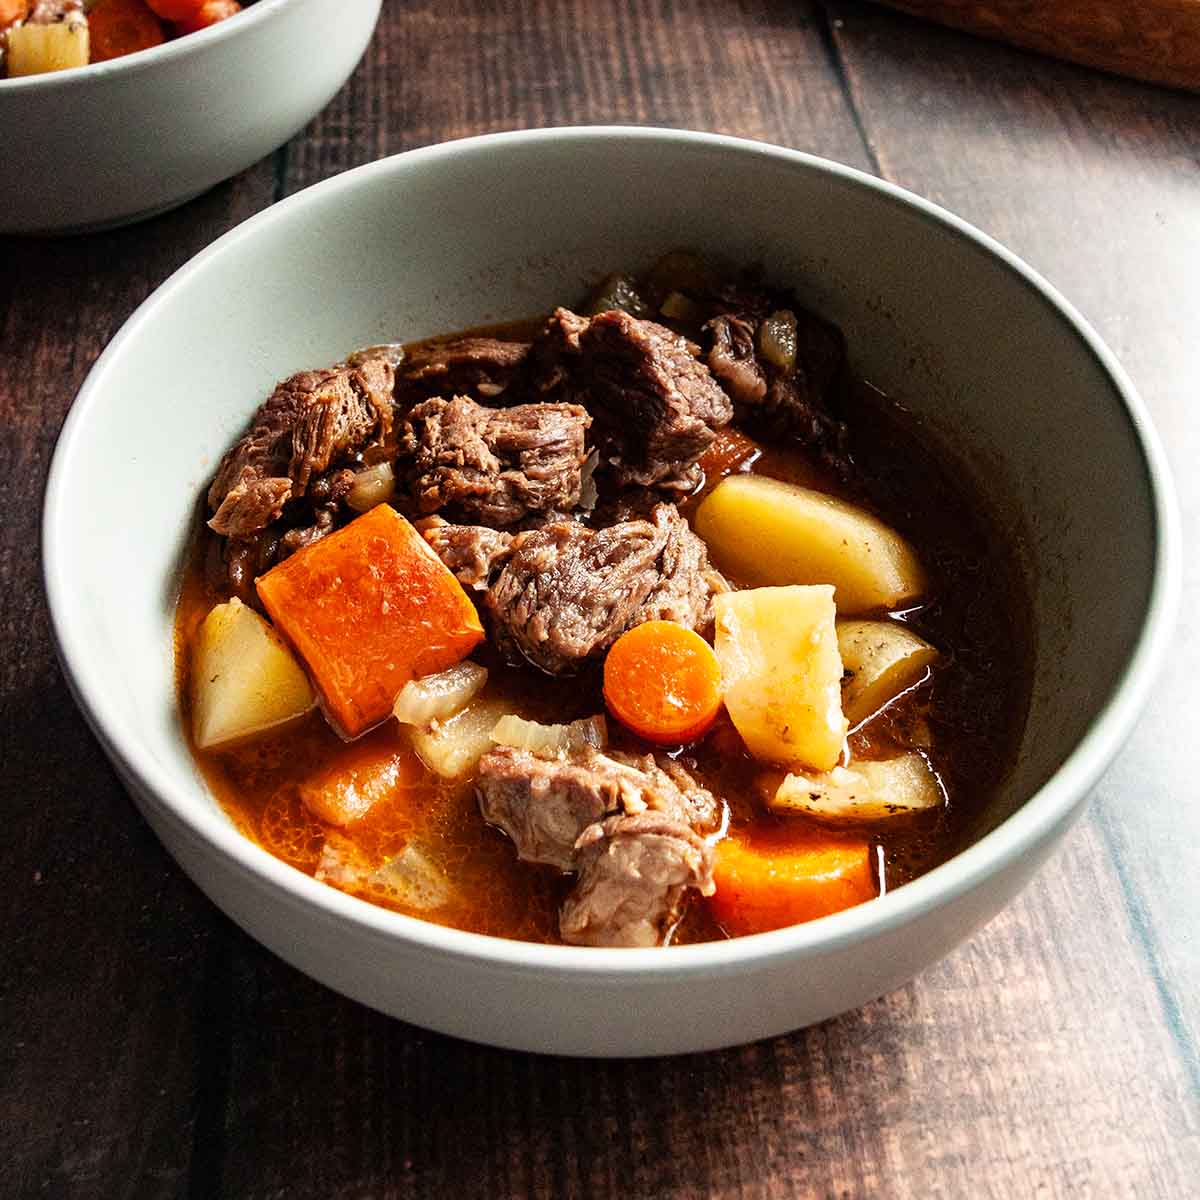
    A bowl of beef stew with carrots and potatoes on a wooden table.
    Campfire Dutch Oven Beef Stew

    Tried This Recipe?

    If you've tried this recipe, please leave a comment below. Follow me on Instagram, Facebook, YouTube, or Pinterest for more great camping and grilling recipes.

    Recipe

    A serving of shepherd's pie on a plate.

    Dutch Oven Shepherd's Pie Recipe

    A woman's face.Angie Zoobkoff
    This campfire shepherd's pie is filled with ground beef or lamb and vegetables under a blanket of creamy mashed potatoes. It's perfect cool-weather comfort food.
    5 from 1 vote
    Print Recipe Pin Recipe
    Prep Time 15 minutes mins
    Cook Time 1 hour hr
    Total Time 1 hour hr 15 minutes mins
    Course Main Course
    Cuisine Irish
    Servings 6 servings
    Calories 680 kcal

    Equipment

    • 5-to 7-quart Dutch oven

    Ingredients
      

    • 2 tablespoons vegetable oil
    • 2 pounds ground beef or lamb
    • Salt and pepper
    • 1 medium onion (6 oz) chopped
    • 1 large carrot (4 oz) finely chopped
    • 2 medium celery stalks (3 oz) chopped
    • 2 tablespoons tomato paste
    • 2 tablespoons all-purpose flour
    • 1 cup beef broth
    • 4 cups cheesy garlic mashed potatoes or your favorite mashed potato recipe

    Instructions
     

    • Prepare campfire and let the coals get hot before beginning to cook. Set the Dutch oven over the hot coals.
    • Add the oil and let it heat for 1 minute. Stir in the beef or lamb and season with salt and pepper. Cook, breaking it up with a wooden spoon until browned, 7 to 8 minutes.
    • Add the onion, carrot, and celery and cook until softened, stirring frequently, 9 to 10 minutes.
    • Stir in the tomato paste and cook for 2 minutes. Sprinkle the flour over the surface of the meat and mix to combine. Pour in the broth.
    • Bring the meat mixture to a simmer and cook until thickened, about 2 minutes. Taste and season with salt and pepper, if needed.
    • Remove the Dutch oven from the heat and carefully spread the potatoes over the meat mixture, covering the entire surface.
    • Place the lid on the Dutch oven and set it over the hot coals. Place 12 hot coals or embers on the lid of the Dutch oven. Cook until the potatoes are heated through and the meat mixture is bubbling up around the edges of the potatoes, about 30 minutes.
    • Let the shepherd's pie stand for 10 minutes before serving.

    Notes

    • Get ahead--Prepare your mashed potatoes in advance and dice up your vegetables before heading out on your camping trip.
    • Dice the carrots finely--Chop your carrots finely so that they cook in the same time as the onion and celery.
    • Storage and reheating--Store leftovers in a sealed container in your fridge or cooler for up to 3 days. Reheat over medium low heat.
    • Dietary--To make this gluten-free, use cornstarch instead of flour.

    Nutrition

    Serving: 1portionCalories: 680kcalCarbohydrates: 56.7gProtein: 41.9gFat: 31.7gFiber: 9gSugar: 6.2g
    Keyword campfire cooking, cold weather camping, dutch oven cooking, one-pot meals
    Tried this recipe?Let us know how it was!

    January 10, 2024 Breakfast

    Chorizo Sweet Potato Hash

    This chorizo sweet potato hash is a hearty and satisfying breakfast made with spicy chorizo sausage, sweet potato, red onion, and topped with avocado and cilantro. It's a fantastic camping breakfast that will keep you full all morning long.

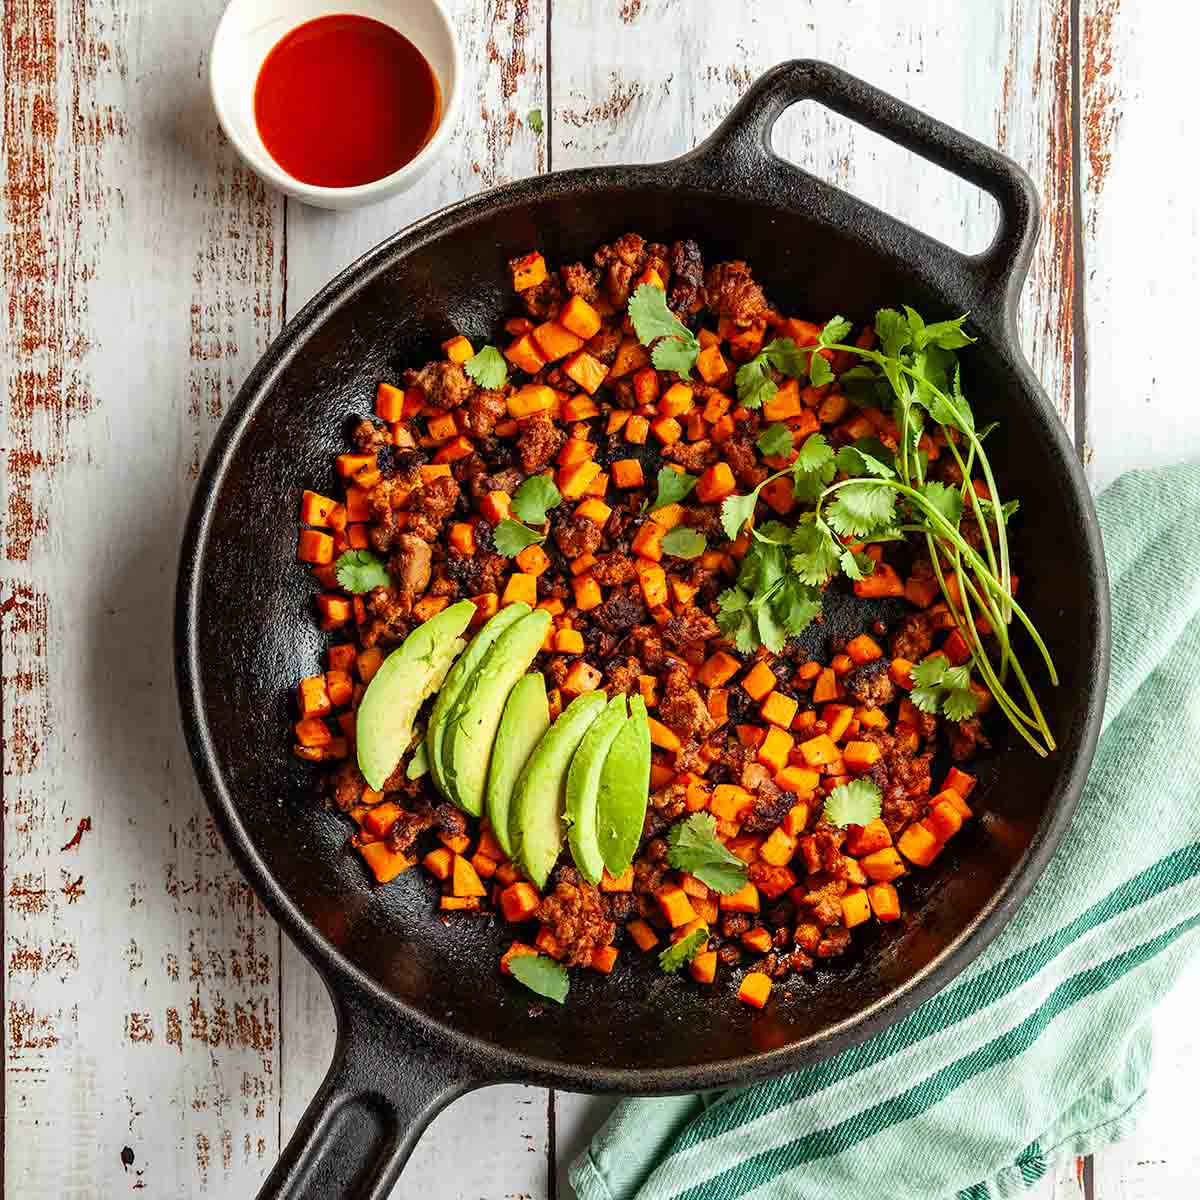
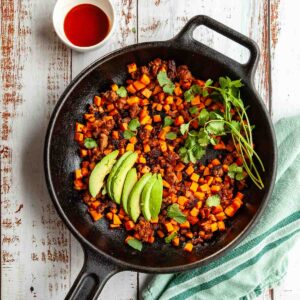
    A cast iron skillet filled with chorizo and sweet potato hash with sliced avocado and cilantro on top.

    Recipe at a Glance: Sweet Potato Chorizo Hash

    • DETAILS
      • Total Time: 35 minutes
      • Preparation method: Stovetop/camp stove or campfire cooking
    • HIGHLIGHTS
      • This easy camping breakfast for two requires only a single skillet, meaning less clean up for you!
      • It's completely customizable to suit your tastes or whatever meats and veggies you have on hand.
      • It's a hearty and satisfying cast iron skillet breakfast made with spicy chorizo sausage and sweet potatoes that will keep you full for all your outdoor adventures.

    If I'm being completely honest, my regular camping breakfast hash is usually far less planned and composed than this. We make breakfast poutine or a loaded breakfast hash on the last day of every camping trip for breakfast and it's a great way to use up bits and bobs of meat, potatoes, and roasted vegetables that we've got hanging around.

    Think of this sweet potato and chorizo hash as a foundation for a great breakfast or lunch, but don't be afraid to make a few swaps, if you need to. Got some leftover Dutch oven ham or Dutch oven meatloaf? Use that instead of chorizo. Or swap in those last few crispy roasted potatoes for the sweet potatoes.

    [feast_advanced_jump_to]

    Ingredients and Substitutions

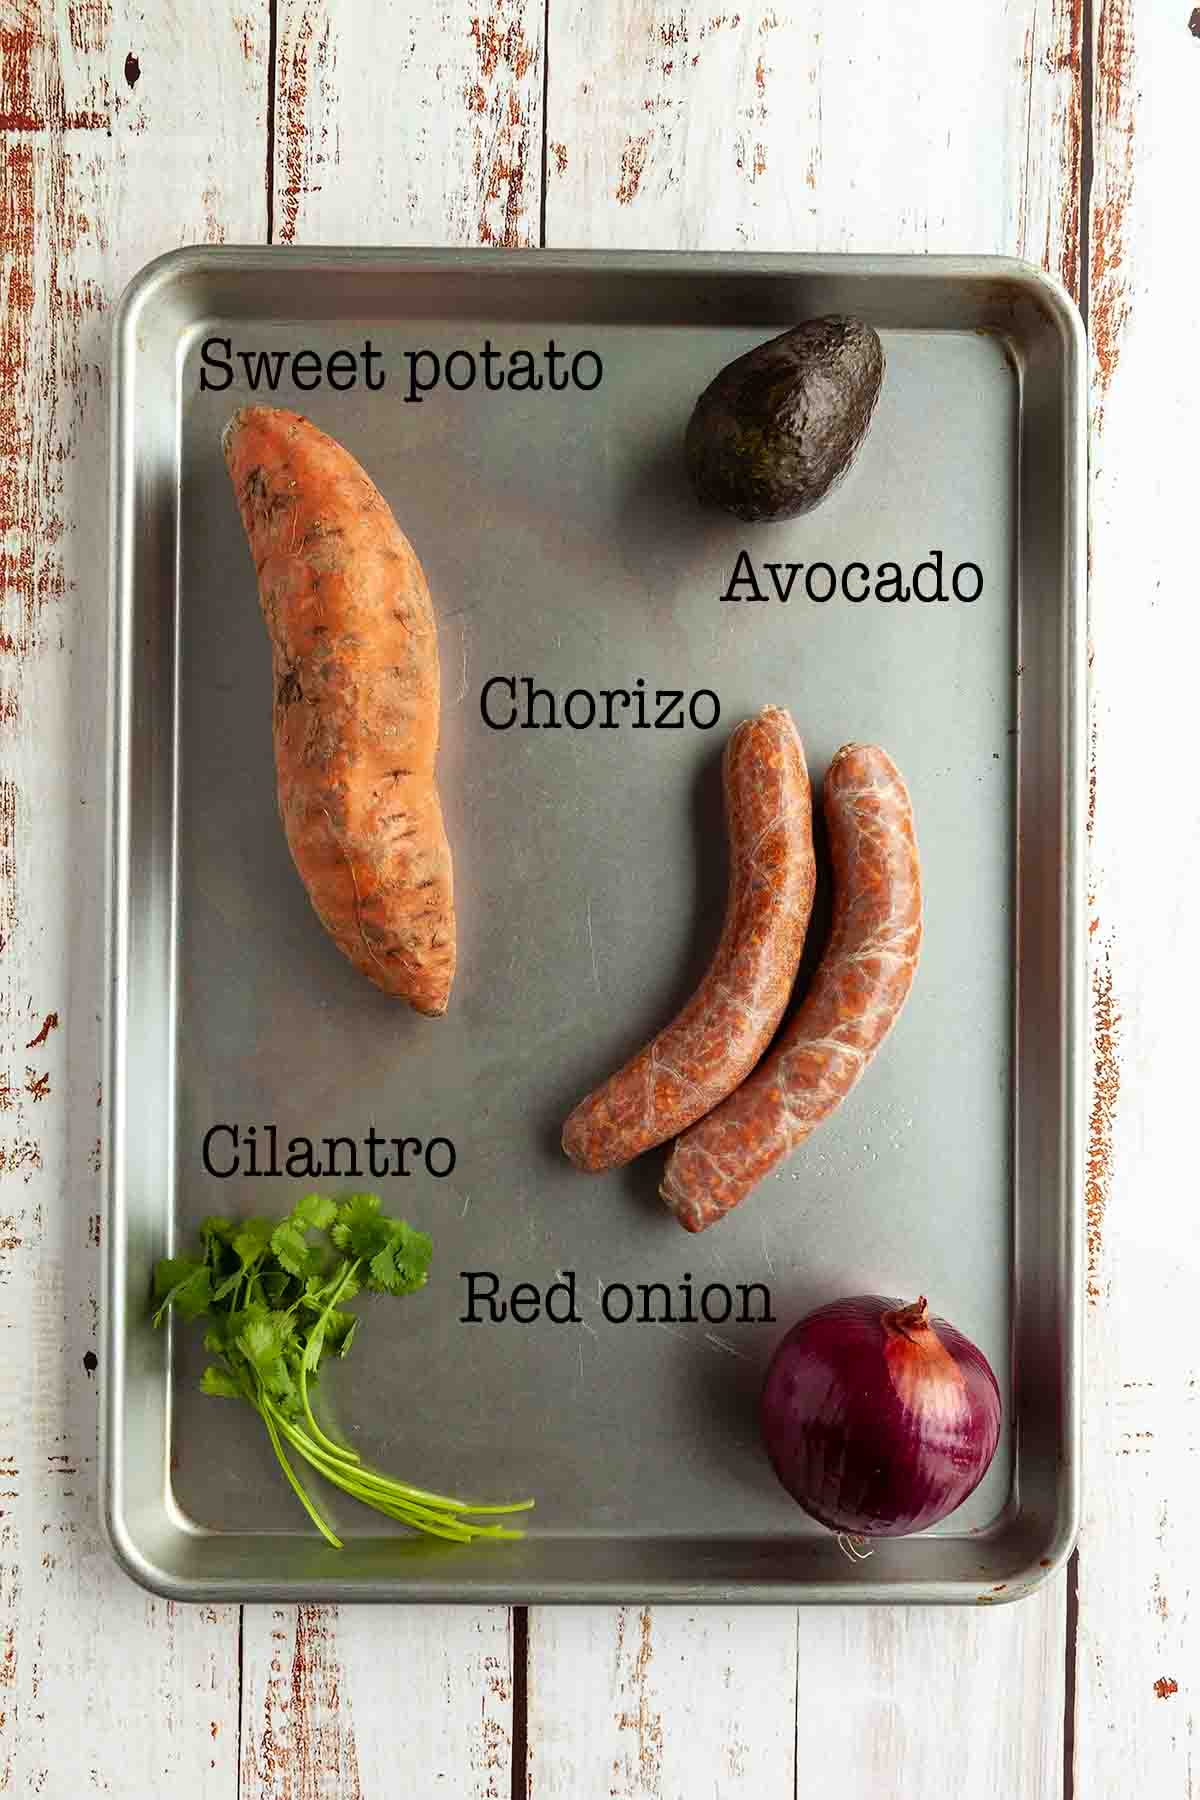
    Ingredients for chorizo sweet potato hash--sweet potato, avocado, chorizo sausage, cilantro, and red onion.
    • Chorizo--You want to purchase raw chorizo sausage, sometimes called Mexican chorizo, for this recipe. Cured sausage (Spanish chorizo) won't work well here. If your sausage comes with casings on, you'll need to remove the casings before cooking the sausage.
    • Sweet potato--This pairs so well with the spicy sausage, but if you prefer regular potatoes, feel free to substitute them. If you do, I recommend using a yellow potato as it will hold its shape better than a floury potato, like Russet.
    • Red onion--I like the sweetness and mild flavor of red onion in this sausage breakfast hash, but yellow or white onion will work well, too.

    How to Make Chorizo and Sweet Potato Hash

    A skillet filled with chorizo being cooked.

    1. Cook the sausage in a cast-iron skillet over medium heat until browned and cooked through. Push the sausage to the edges of the skillet, and add oil if needed.

    A skillet with chorizo, diced sweet potato, and red onion.

    2. Add the sweet potato and onion to the center of the skillet and cook until the sweet potato is tender. Mix everything together and serve, topped with avocado, cilantro, and hot sauce, if desired.

    FAQs

    Can I add eggs to this breakfast hash?

    Definitely. When the sweet potato is cooked through, make a well for each egg in the skillet. Drop an egg into each well and cook until they're set to your desired doneness. Covering the skillet with a lid, plate, or a piece of foil will help it to set more quickly.

    How do I double the recipe?

    In order to double the recipe you'll need to scoop the sausage out and put it in a separate bowl while you cook the potato and onion. Add the sausage back in to reheat before serving.

    What size of skillet do I need to make this hash?

    You want to be able to fit everything in a single layer so that it crisp instead of steams. I recommend using a 12-inch cast iron skillet, or larger.

    Storage and Reheating

    Store leftover hash in a sealed container in your fridge or cooler for up to 3 days. To reheat, warm 1 to 2 teaspoons of oil in a cast iron skillet over medium heat. Add the leftover hash and heat, stirring frequently, until hot throughout and the edges are crisped. Leftover hash makes a great filling for chorizo and potato tacos.

    Tips and Troubleshooting

    • To get ahead, dice your sweet potato and red onion before heading out to camp.
    • Be sure to cut the pieces of potato no larger than ½ inch so that it cooks through quickly.
    • This breakfast hash recipe is suitable for gluten-free and dairy-free diets.
    A skillet and two plates topped with sweet potato chorizo hash, avocado, and cilantro.

    More Camping Breakfast Recipes You'll Love

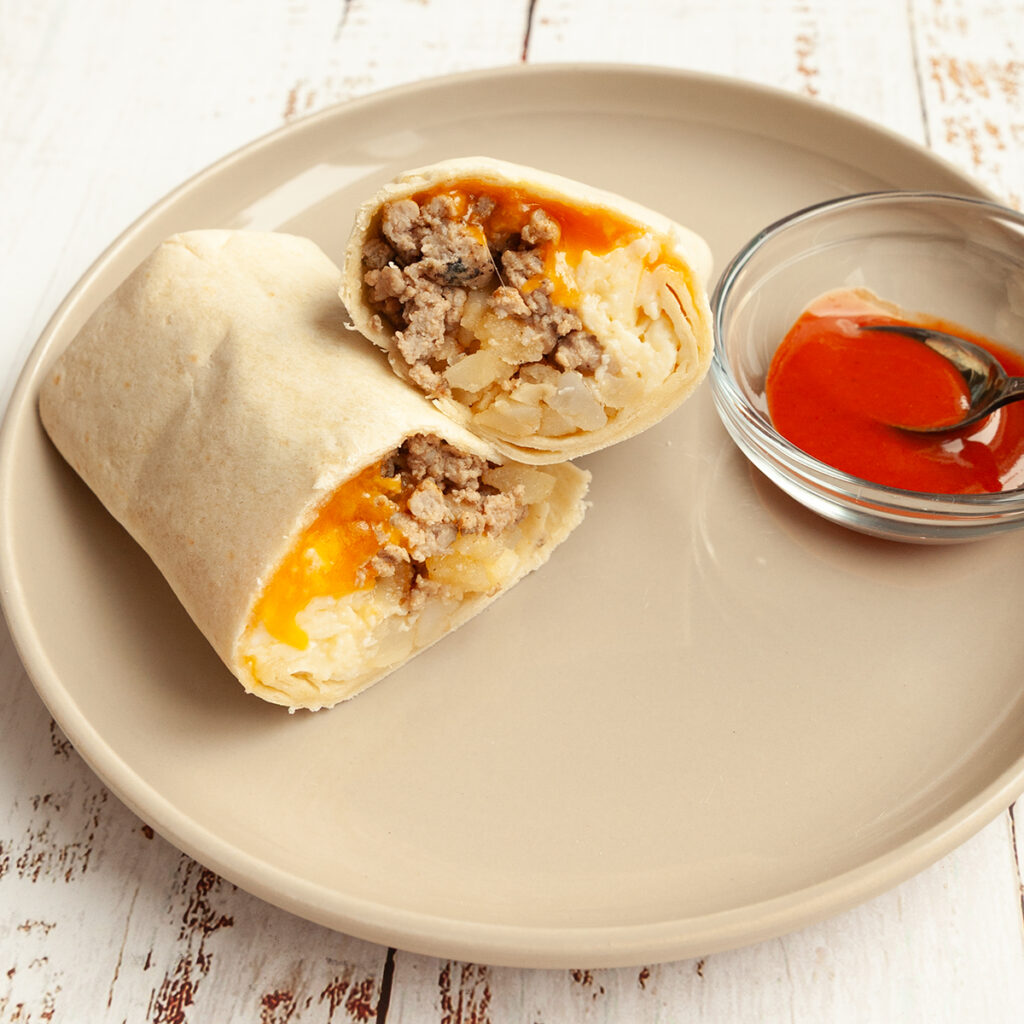
    A breakfast burrito cut in half on a plate with hot sauce on the side.
    Breakfast Burritos
    A stack of pancakes, maple syrup, and blueberries on a plate with blueberries and bacon in the background.
    Cast Iron Skillet Pancakes

    Tried This Recipe?

    If you've tried this recipe, please leave a comment below. Follow me on Instagram, Facebook, YouTube, or Pinterest for more great camping and grilling recipes.

    Recipe

    A cast iron skillet filled with chorizo and sweet potato hash with sliced avocado and cilantro on top.

    Chorizo Sweet Potato Hash

    A woman's face.Angie Zoobkoff
    This hearty and satisfying sweet potato chorizo hash is made in your cast iron skillet with fresh sausage, diced sweet potatoes, red onion, and is topped with avocado and cilantro.
    5 from 1 vote
    Print Recipe Pin Recipe
    Prep Time 10 minutes mins
    Cook Time 25 minutes mins
    Total Time 35 minutes mins
    Course Breakfast
    Cuisine American
    Servings 2 servings
    Calories 676 kcal

    Equipment

    • 12-inch (or larger) cast-iron skillet

    Ingredients
      

    • 8 to 9 ounces fresh chorizo from 2 links, casings removed
    • Vegetable oil optional
    • 1 medium sweet potato diced into ½-inch (1-cm) cubes
    • ¼ cup diced red onion
    • Salt and pepper
    • 1 medium avocado sliced
    • 1 handful cilantro
    • Hot sauce for serving (optional)

    Instructions
     

    • Set a cast iron skillet over medium heat on a camp stove, stovetop, or campfire grate. Add the sausage and cook, stirring frequently to break it up, until browned and cooked through, about 10 minutes. If the sausage is browning too quickly or becoming too dark, reduce the heat.
    • Push the cooked sausage to the edges of the skillet to create a large opening in the center. There should be a visible sheen of oil in the skillet, but if there isn't, drizzle in a tablespoon or so of oil.
      TIP: This recipe was designed to minimize dishes while camping, but if you find it awkward to have the sausage on the edges of the skillet while you cook the potato, feel free to scoop it out into a separate bowl and add it back to the hash at the end.
    • Dump the sweet potato and onion in the center of the skillet, and cook, stirring occasionally, until the sweet potato is tender, 12 to 15 minutes. Try to keep the sausage on the edges of the skillet, but it's ok if a few pieces sneak their way into the center as you're cooking.
    • Mix the sausage with the cooked sweet potato and onion. Season to taste with salt and pepper and divide the mixture between two plates.
    • Top with sliced avocado and cilantro. Serve immediately, with hot sauce, if desired.

    Notes

    • Get ahead--Dice your sweet potato and red onion before heading out to camp.
    • Cut your potato small--Be sure to cut the pieces of potato no larger than ½ inch so that it cooks through quickly.
    • Storage & reheating--Store leftover hash in a sealed container in your fridge or cooler for up to 3 days. Reheat in a cast-iron skillet with a little oil to help crisp everything up.
    • Dietary--This recipe is suitable for gluten-free and dairy-free diets.

    Nutrition

    Serving: 0.5recipeCalories: 676kcalCarbohydrates: 19.8gProtein: 29.8gFat: 53.3gCholesterol: 100mgFiber: 5.9gSugar: 4.6g
    Keyword camping breakfast, cast iron cooking, healthy breakfast hash, sausage breakfast hash
    Tried this recipe?Let us know how it was!

    January 3, 2024 Camping

    Dutch Oven Chicken Noodle Soup

    This warm and cozy Dutch oven chicken noodle soup is an ideal cool-weather camping meal, made with tender shredded chicken thighs, carrots, celery, onion, and egg noodles in a flavorful broth. You can make it over your campfire or on your camp stove, or stovetop at home.

    Two bowls of chicken noodle soup with a bun next to one bowl and some fresh parsley next to the other.

    Few things are better than a steaming bowl or mug of soup when it's cold outside, and chicken noodle is always a favorite at our house, along with split pea and ham soup, and always with some fresh Dutch oven dinner rolls on the side. Since this cast iron Dutch oven chicken noodle soup recipe was designed to be made at camp, I've streamlined the recipe so that everything is done in your Dutch oven, including shredding the boneless chicken thighs into tender pieces. This makes it very easy to prepare, and even easier to clean up!

    [feast_advanced_jump_to]

    Why This Recipe is Great for Camping

    • You can prep all of your veggies and your seasoning before heading out to camp to get ahead.
    • The Dutch oven chicken soup is prepared in a single pot, so there are no extra dishes.
    • It's a hearty and satisfying one-pot meal, perfect for cold weather camping.

    Ingredients and Substitutions

    Ingredients for Dutch oven chicken noodle soup--carrots, egg noodles, onion, chicken thighs, all-purpose seasoning, chicken broth, celery, and oil.
    • Carrots, celery, and onion--This combination of vegetables adds flavor to the soup. If you like lots of vegetables in your Dutch oven soup, feel free to add more. If you do, you may need some extra chicken stock.
    • Boneless chicken thighs--Just like with my Dutch oven butter chicken recipe, I prefer to use chicken thighs for this soup, since they have more flavor than breasts, and are easier to shred. You can use boneless chicken breasts if you prefer, but I recommend cutting them in half or in thirds before adding them to the soup.
    • All-purpose seasoning--My homemade all-purpose seasoning blend is an ideal combination of spices to elevate the flavor of the soup, and since it includes garlic, there's no need to fuss with chopping garlic at camp. You can use your own favorite seasoning blend, if you prefer, but I recommend choosing one that has garlic in it, or sauté a couple chopped cloves of garlic with your vegetables, if it doesn't.
    • Chicken broth--Keep a little extra broth on hand in case you prefer to thin your finished soup.
    • Egg noodles--These are traditionally used in chicken noodle soup and are ideal because they are so tender, but you can substitute another type of short pasta, such as fusili or rotini. To make it gluten-free, use gluten-free pasta.

    How to Make Chicken Noodle Soup in a Dutch Oven

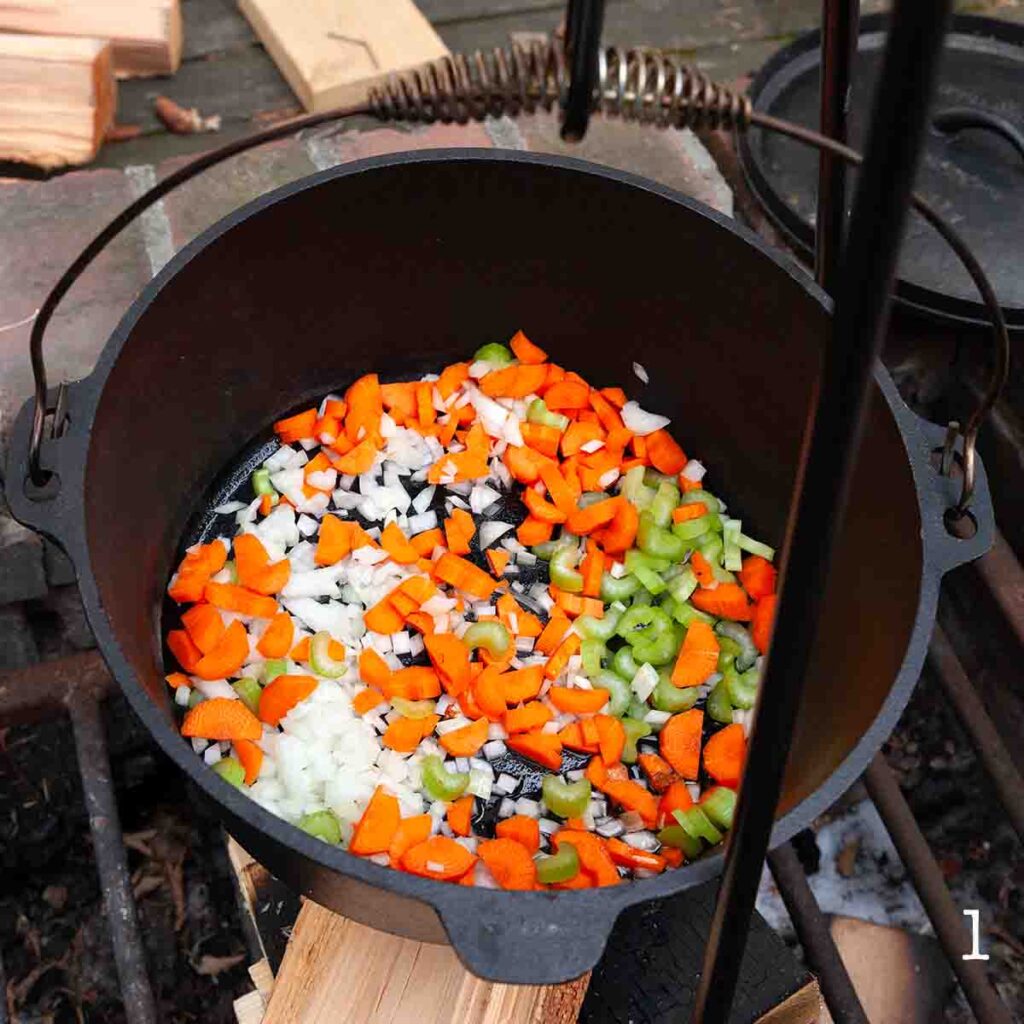
    Celery, carrots, and onion in a Dutch oven over a fire.
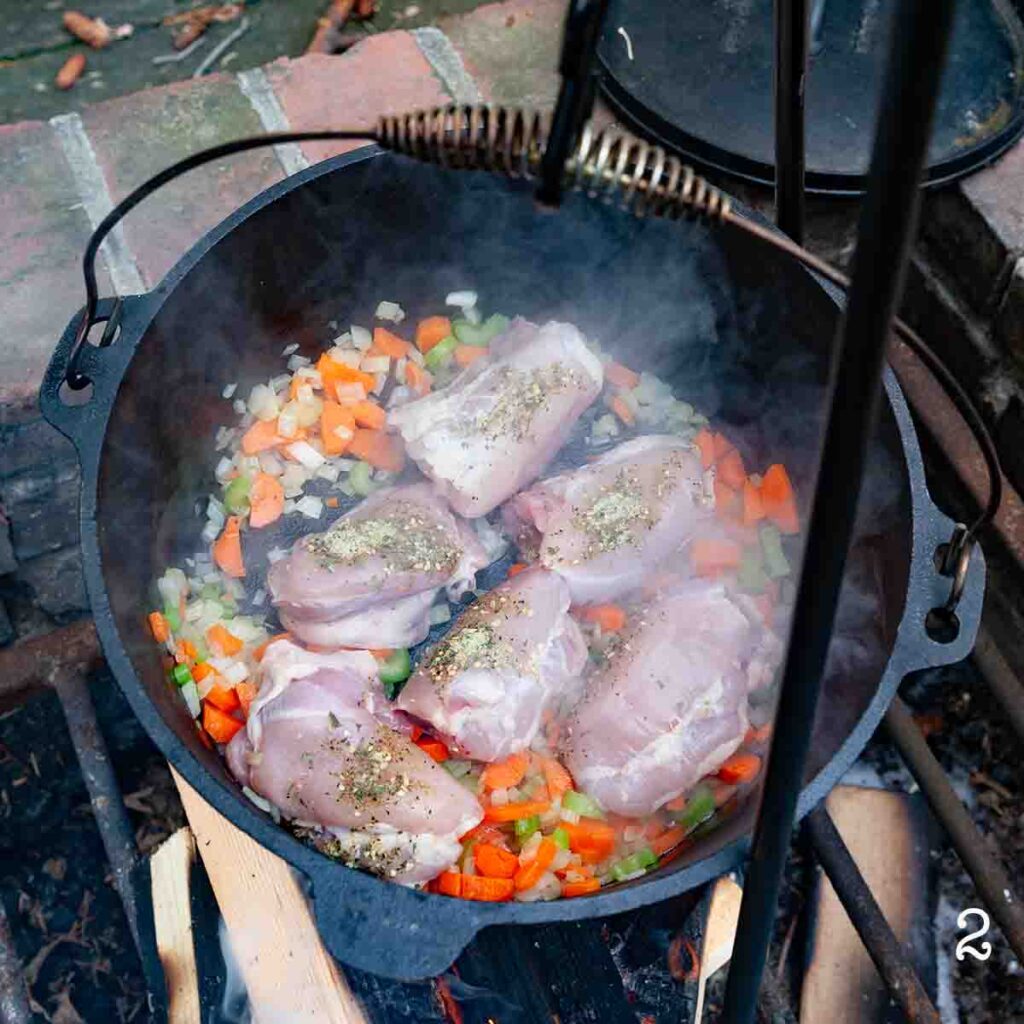
    Seasoned chicken thighs on top of sautéed vegetables in a Dutch oven over a fire.
    1. Heat the oil in a Dutch oven. Add the carrot, celery, and onion, and sauté until tender.
    2. Season the chicken thighs with the all-purpose seasoning, then arrange them in a single layer in the Dutch oven.
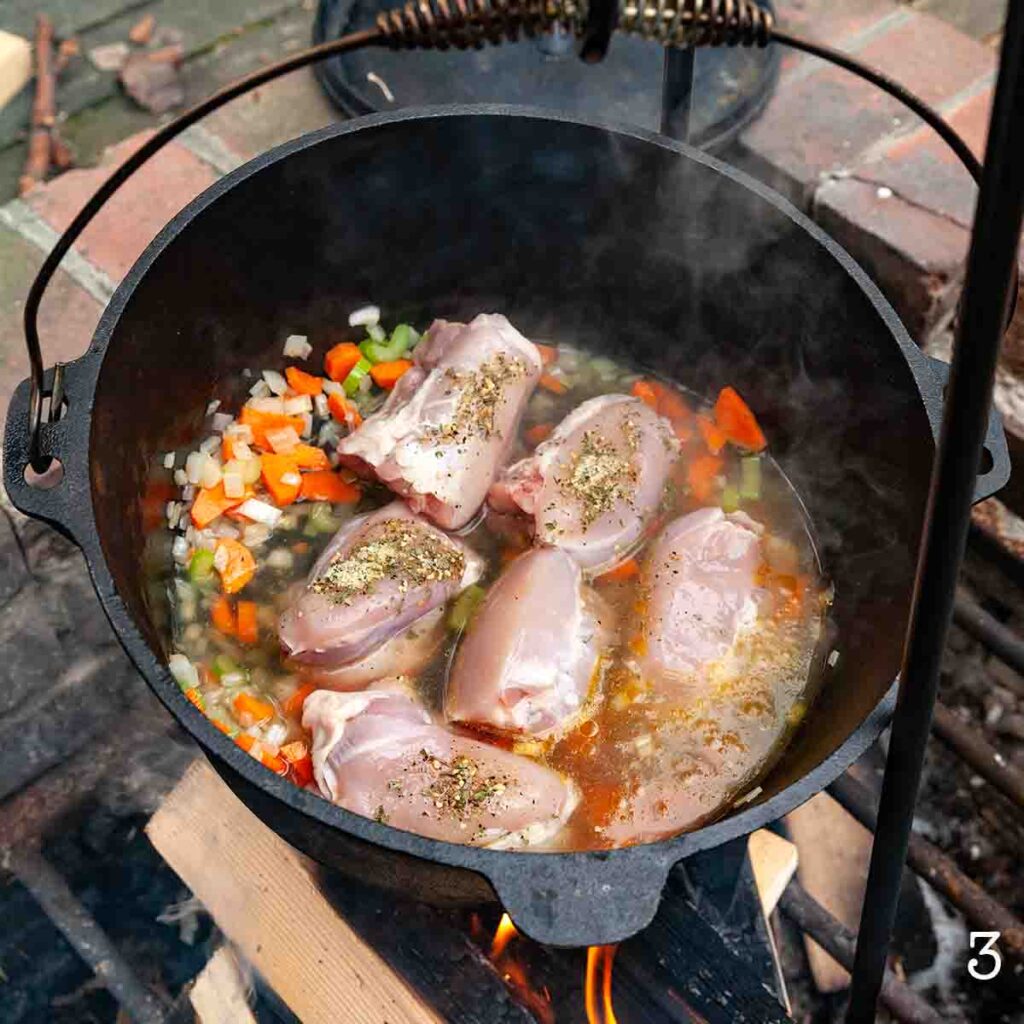
    Chicken broth in a Dutch oven with sautéed vegetables and chicken thighs.
    A covered Dutch oven set over a fire.
    1. Pour the broth into the Dutch oven.
    2. Cover and bring to a simmer. Let the soup cook until the chicken is very tender.
    A person shredding chicken thighs with two forks in a Dutch oven.
    Egg noodles added to a Dutch oven filled with chicken noodle soup, set over a fire.
    1. Remove the Dutch oven from the heat and use two forks to shred the chicken thighs.
    2. Return the Dutch oven to the heat and bring to a simmer. Stir in the egg noodles, cover, and cook until they are tender.

    FAQs

    Can I make this soup in advance?

    You can make the soup through the step where you shred the chicken up to 3 days before serving. Cool completely before storing in a sealed container in your cooler or fridge. When you're ready to serve it, bring it to a simmer, add the noodles and cook until they are tender.

    Can I use bone-in chicken?

    You can, but you will need to remove it from the soup after cooking so that you can remove the chicken from the bones. The cooking time for the chicken may be a few minutes longer, as well.

    Can you freeze Dutch oven chicken noodle soup?

    I don't recommend freezing leftover chicken noodle soup because the noodles become mushy when reheated. However, you can prepare the soup through the step where you shred the chicken, then cool and freeze it for up to 6 months. After thawing, bring the soup to a simmer, add the noodles, and cook until they're tender.

    Tips and Troubleshooting

    • To get ahead, chop your carrots, celery, and onion and mix up your all-purpose seasoning before heading out to camp.
    • This soup can be stored in a sealed container in your cooler or fridge for up to 3 days after making. Reheat in a Dutch oven or pot over medium-low heat. The noodles will break down a bit, and you may need to add extra broth to the soup when reheating.
    • If you're making this Dutch oven soup with leftover shredded chicken or rotisserie chicken, add it to the soup when you add the noodles.
    • This recipe is suitable for dairy-free diets. To make it gluten-free, use gluten free pasta instead of egg noodles.
    A bowl of chicken noodle soup with a spoon resting inside and a bun on the side.

    More Dutch Oven Recipes You'll Love

    A spiral cut ham on a rectangular platter with orange slices, pomegranate wedges, and parsley sprigs.
    Dutch Oven Ham
    A bowl of beef stew with carrots and potatoes on a wooden table.
    Campfire Dutch Oven Beef Stew

    Tried This Recipe?

    If you've tried this recipe, please leave a comment below. Follow me on Instagram, Facebook, YouTube, or Pinterest for more great camping and grilling recipes.

    Recipe

    A bowl of chicken noodle soup with a spoon resting inside and a bun on the side.

    Dutch Oven Chicken Noodle Soup

    This comforting chicken noodle soup recipe is made in your Dutch oven and can be cooked over your campfire, camp stove, or on your stovetop at home. It's chock full of tender chicken thighs, vegetables, and egg noodles.
    5 from 1 vote
    Print Recipe Pin Recipe
    Prep Time 15 minutes mins
    Cook Time 45 minutes mins
    Total Time 1 hour hr
    Course Soup
    Cuisine American
    Servings 5 servings
    Calories 399 kcal

    Equipment

    • Dutch oven (minimum 4-quart)

    Ingredients
      

    • 2 tablespoons vegetable oil
    • 1 medium (7 oz | 200 g) onion diced
    • 2 large (5 oz | 143 g) carrots peeled and sliced into ¼-inch-thick half-moons
    • 2 celery stalks sliced
    • 2 teaspoons all-purpose seasoning blend
    • 1½ pounds (680 g) boneless, skinless chicken thighs (about 6)
    • 6 cups chicken broth plus more if needed
    • 6 ounces (170 g) dried egg noodles
    • Salt and freshly ground black pepper

    Instructions
     

    • If cooking over a fire, prepare a fire for direct cooking.
    • Set a Dutch oven over medium heat over the fire, or on a camp stove or stovetop. Add the oil and let it heat for 1 minute.
    • Stir in the onion, carrots, and celery, and cook, stirring frequently, until softened, about 10 minutes. If the vegetables are starting to brown, reduce the heat or move the Dutch oven to a cooler part of the fire.
    • Sprinkle the seasoning blend over the chicken thighs and arrange them in a single layer in the Dutch oven. Pour in the chicken broth.
    • Cover the Dutch oven and bring the soup to a simmer. Let it cook until the chicken is cooked through and tender enough to shred, 20 to 25 minutes.
    • Remove from the heat and use two forks to shred the chicken thighs directly in the pot.
    • Return the soup to medium heat and bring to a simmer. Stir in the noodles, cover, and cook until tender, according to the package directions.
    • Season the soup with salt and pepper, to taste, and thin with extra broth, if desired. Serve immediately.

    Notes

      • Get ahead--Chop your carrots, celery, and onion and mix up your all-purpose seasoning before heading out to camp.
      • Making ahead and freezing--The soup can be prepared without the noodles and refrigerated for up to 3 days or frozen for up to 6 months.
      • Storage and reheating--Store in a sealed container in your cooler or fridge for up to 3 days. Reheat in a Dutch oven or pot over medium-low heat. The noodles will break down a bit, and you may need to add extra broth to the soup when reheating.
      • Using leftover chicken--If you're making this with leftover shredded chicken or rotisserie chicken, add it to the soup when you add the noodles.
      • Dietary--This recipe is suitable for dairy-free diets. To make it gluten-free, use gluten free pasta instead of egg noodles.

    Nutrition

    Serving: 1large bowlCalories: 399kcalCarbohydrates: 55.2gProtein: 21.3gFat: 9gCholesterol: 27mgSodium: 477mgFiber: 5gSugar: 2.8g
    Keyword chicken noodle soup, dutch oven cooking, dutch oven soup
    Tried this recipe?Let us know how it was!

    December 27, 2023 Camping

    Swiss Cheese Dip

    What's not to love about a rich, gooey warm Swiss cheese dip? Particularly one that requires only four ingredients and is ready in just 15 minutes? This easy snack or appetizer is perfect for dipping, dunking, scooping, and sharing.

    A cube of bread on a fondue fork, covered in Swiss cheese dip.

    Recipe at a Glance: Hot Swiss Cheese Dip

    • DETAILS
      • Total Time: 15 minutes
      • Preparation method: Stovetop, camp stove, or campfire
    • HIGHLIGHTS
      • The cheese dip is prepared and served in a single skillet, making clean up quick and easy.
      • Serve this creamy Swiss dip with bread cubes or crackers for an easy snack. It's perfect for holiday celebrations or romantic evenings.

    Like my skillet beer cheese dip, this hot Swiss cheese dip is made in a cast iron skillet with just a handful of ingredients. The addition of sparkling wine and Swiss cheese make it a little fancier than beer cheese, but it's no more difficult to make and will be devoured just as quickly.

    [feast_advanced_jump_to]

    Ingredients and Substitutions

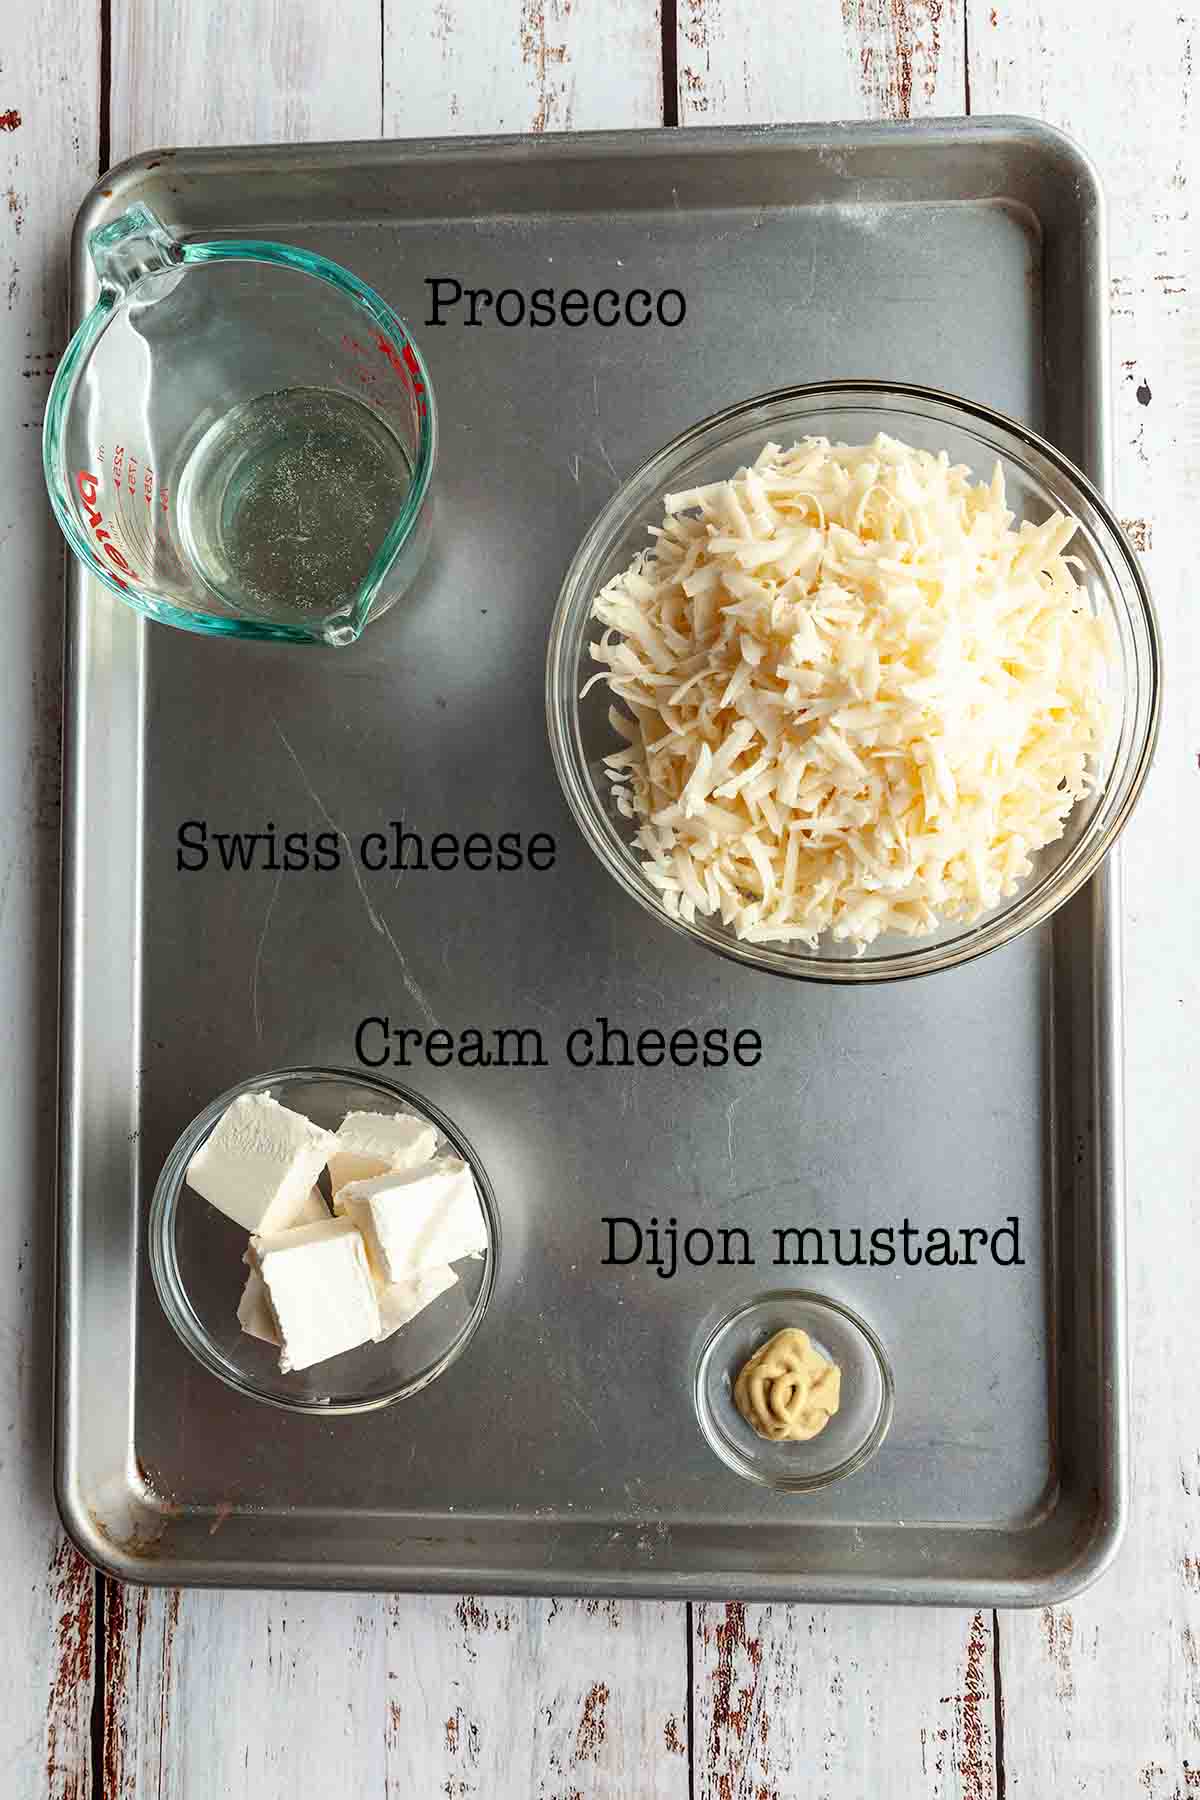
    Ingredients for Swiss cheese dip--Prosecco, Swiss cheese, cream cheese, and Dijon mustard.
    • Sparkling wine--I prefer to use Prosecco here, but any dry sparkling wine will work. Don't use sweet wine as it will change the flavor of the dip.
    • Cream cheese--This helps to thicken the dip and also helps to stabilize the mixture so that you get a thick, creamy, scoop-able dip. Use full-fat cream cheese for best results. Cutting it into cubes will help it melt quicker.
    • Swiss cheese--You can use regular Swiss cheese, or your favorite Alpine cheese, such as Emmental or Gruyère. Don't use pre-grated cheese as it doesn't melt well.
    • Mustard--This cuts through the richness of the cheese and adds flavor to the dip. Dijon mustard is best for this, but you can substitute ¼ teaspoon mustard powder.

    How to Make Skillet Swiss Cheese Dip

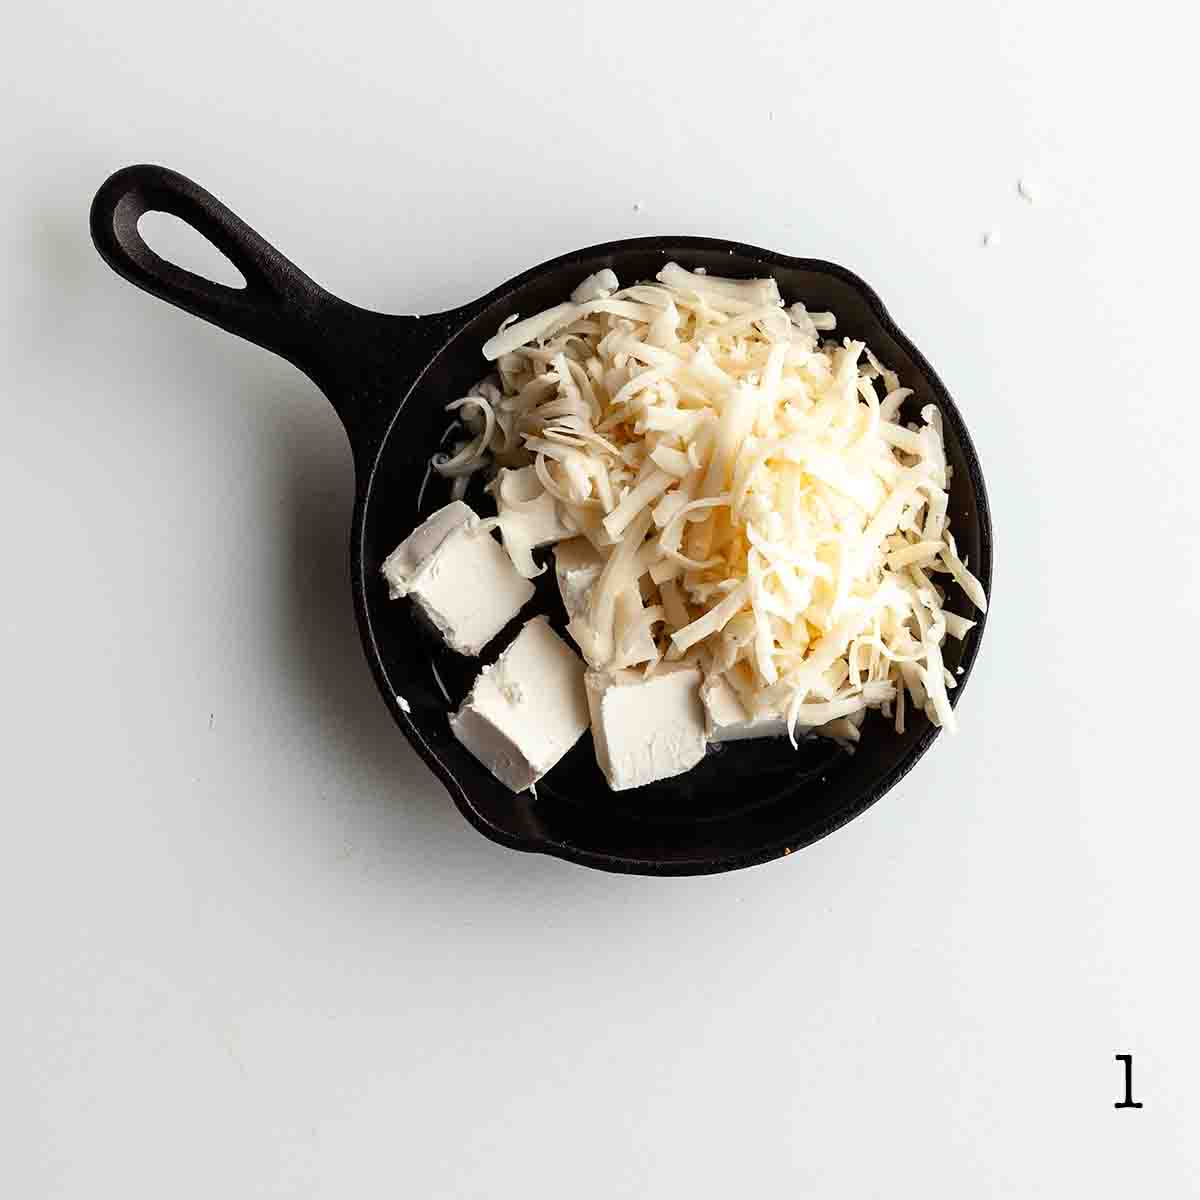
    Cream cheese and grated Swiss cheese in a cast iron skillet.

    1. Combine the Prosecco, cream cheese, Swiss cheese, and mustard in a 6-inch cast iron skillet.

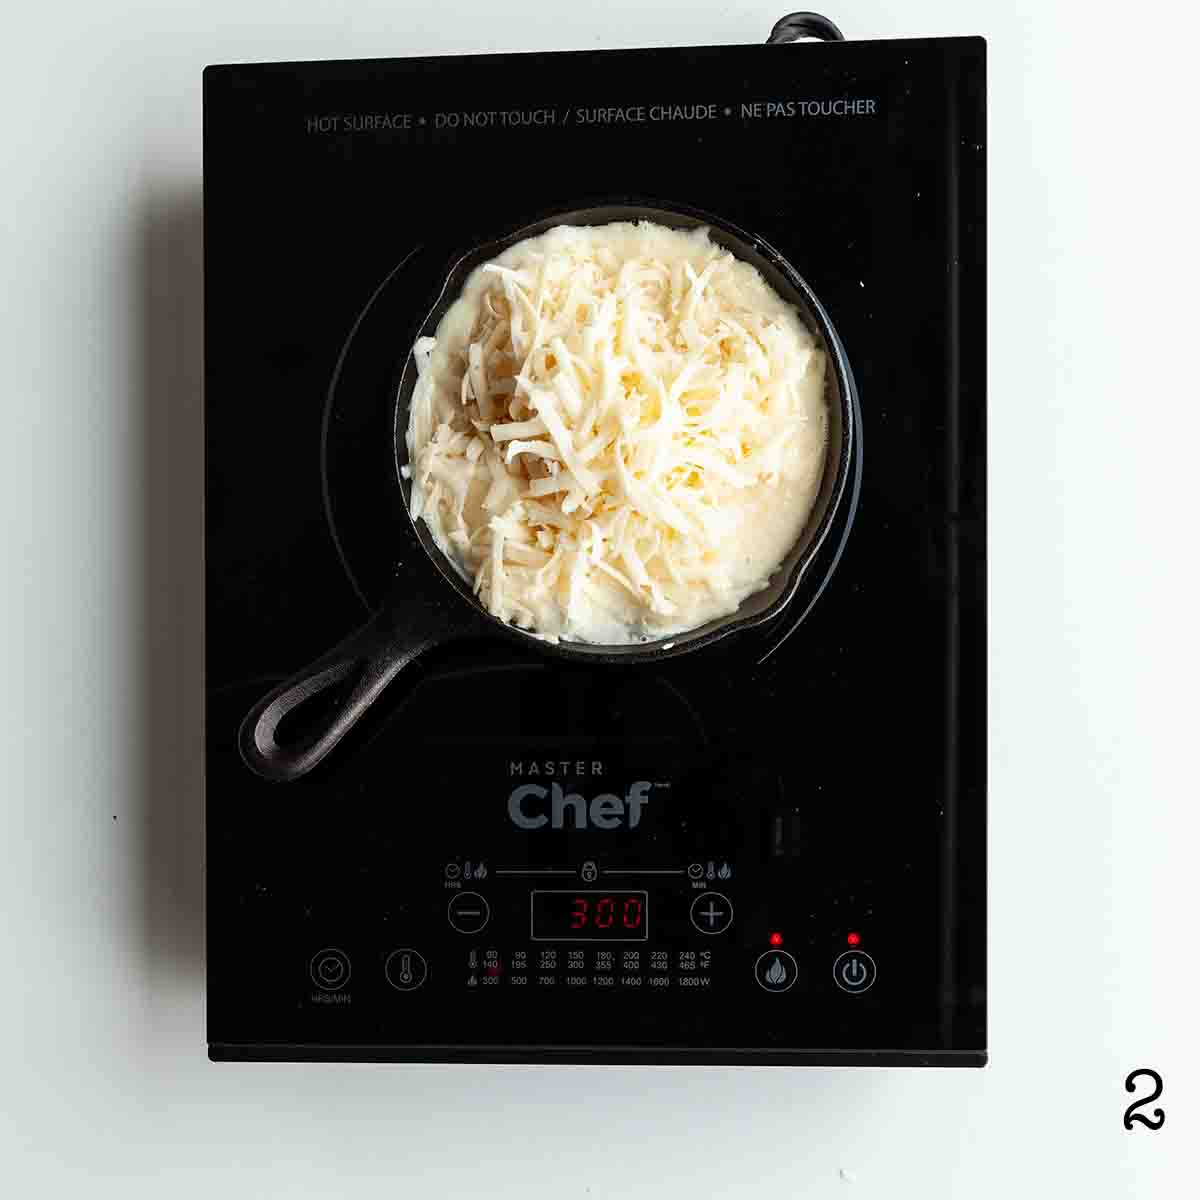
    Swiss cheese dip melting in a skillet on an induction burner.

    2. Place the skillet over low heat on a stovetop, grill, camp stove, or campfire and let the cheese melt slowly, stirring occasionally, until smooth.

    FAQs

    What's the best type of Swiss cheese to use for this dip?

    Regular Swiss cheese is going to work perfectly in this recipe. It melts well and has great flavor. You can substitute another Alpine cheese, such as Emmental or Gruyère, or a combination, but they do tend to be more expensive.

    Is this the same as fondue?

    If you've experienced Swiss fondue, you may find that the flavor of this melted Swiss cheese dip is very similar, but it is prepared differently. It uses cream cheese to thicken the sauce instead of flour, and it is a bit thicker than traditional fondue.

    Can I make Swiss cheese dip in advance?

    You can prepare the dip a day before serving, but I don't recommend storing it in your skillet. Transfer the melted dip to a container and store it in the fridge or your cooler.

    To reheat, scrape it back into the skillet and rewarm over low heat. If you have access to a microwave, you can soften it in 15-second bursts before transferring it to the skillet.

    My dip is too thin. How can I make it thicker?

    To thicken your dip, stir in extra cream cheese, 1 tablespoon at a time, until you achieve your desired consistency. Keep in mind that the dip will thicken as it cools. When hot, it should be thin enough to coat a dipper but still drip off.

    Alternatively, if your dip is too thick, add extra wine, 1 tablespoon at a time, until it reaches your desired consistency.

    Serving Suggestions

    Bread cubes are a great vehicle for dipping, dunking, and scooping up your cheesy cast iron skillet dip. Rustic, chewy breads like sourdough, or strong flavored breads like rye are great choices to pair with the dip. If you're serving gluten-free folks, offer gluten-free bread or rice crackers as an alternative.

    Storage and Reheating

    Store leftover cheese in a sealed container in your fridge or cooler for up to 3 days. Reheat in a skillet over low heat, or in 15-second bursts in your microwave until warmed through.

    Tips and Troubleshooting

    • This cast iron skillet cheese dip recipe was created for a small 6-inch skillet, which is perfect for feeding 4 to 5 people. To make a big batch, double the amounts and prepare it in a 10-inch skillet.
    • Melt the cheese over low heat. I can't stress the importance of this enough. Don't try to rush it. Letting the mixture get too hot can cause the cheese to separate and become grainy.
    • The skillet will be very full. If you are concerned about it overflowing, add half of the Swiss cheese to begin with, then stir in the rest after it melts.
    • This recipe is suitable for gluten-free diets.
    A skillet filled with Swiss cheese dip with two fondue forks resting on the side and a bowl of bread cubes in the background.

    More Cast Iron Skillet Dip Recipes You'll Love

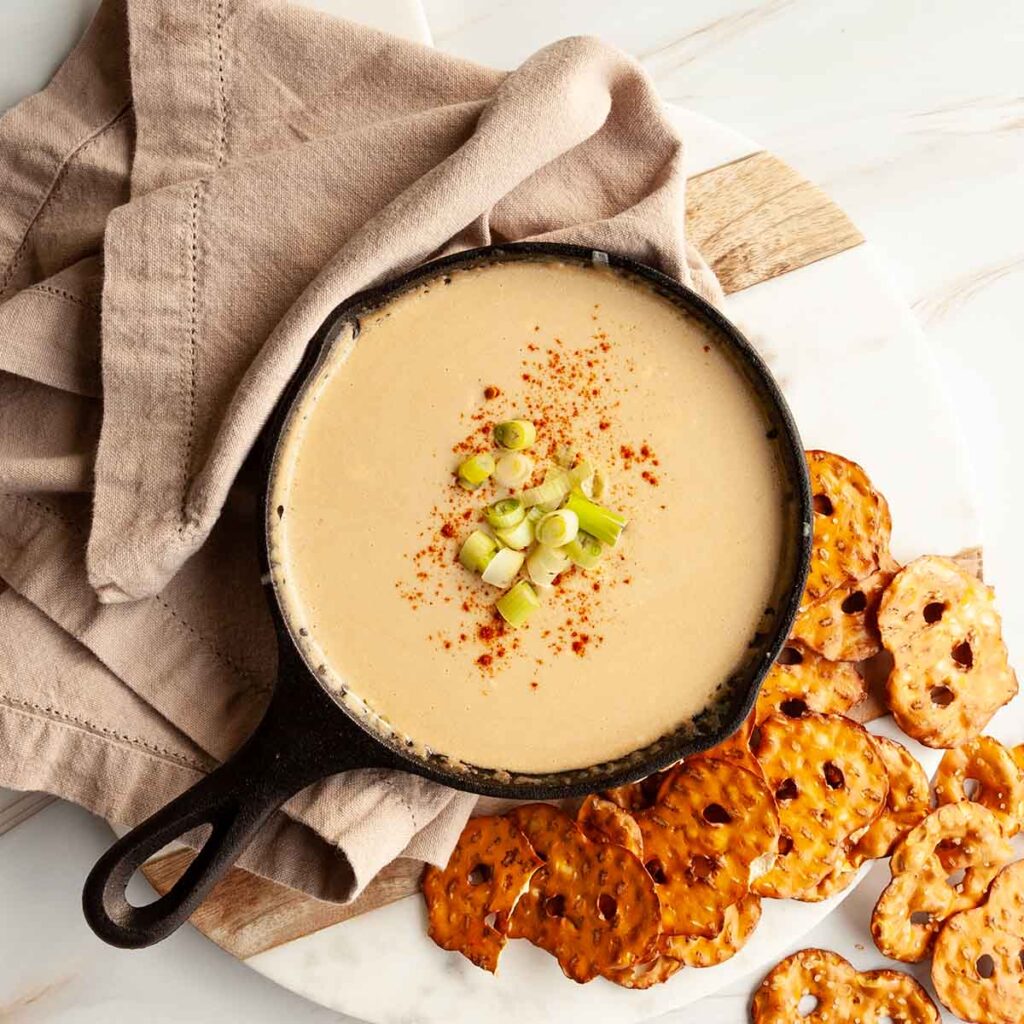
    A skillet filled with Guinness beer cheese dip, topped with chopped green onions, and cayenne, with pretzel crackers on the side.
    Guinness Cheese Dip
    A small skillet filled with caramel apple dip with chopped almonds on top and apples on the side.
    Caramel Apple Dip

    Tried This Recipe?

    If you've tried this recipe, please leave a comment below. Follow me on Instagram, Facebook, YouTube, or Pinterest for more great camping and grilling recipes.

    Recipe

    A cube of bread on a fondue fork, covered in Swiss cheese dip.

    Swiss Cheese Dip

    A woman's face.Angie Zoobkoff
    This cheesy dip is made with just 4 ingredients--Swiss cheese, sparkling wine, cream cheese, and mustard. It's perfect for dipping and dunking bread and crackers and is ideal for sharing with friends.
    5 from 1 vote
    Print Recipe Pin Recipe
    Prep Time 5 minutes mins
    Cook Time 10 minutes mins
    Total Time 15 minutes mins
    Course Appetizer
    Cuisine French
    Servings 4 servings
    Calories 315 kcal

    Equipment

    • 6-inch cast iron skillet

    Ingredients
      

    • ⅓ cup Prosecco or other dry sparkling wine
    • 4 ounces cream cheese cut into cubes
    • 2 cups (7 oz | 200 g) shredded Swiss cheese
    • 1 teaspoon Dijon mustard
    • Bread cubes for dipping

    Instructions
     

    • Combine the wine, cream cheese, Swiss cheese, and mustard in a cast-iron skillet.
    • Set it over low heat on your stovetop, grill, campfire, or camp stove and let it melt, stirring occasionally, until smooth, 10 to 15 minutes.
      PRO TIP: When you combine all of the ingredients, the skillet will be very full. To make it easier to stir, add half of the Swiss cheese at first, then add the remaining half once everything is melted.
    • Serve immediately, with bread cubes for dipping.

    Notes

      • Scaling--This cast iron skillet cheese dip recipe was created for a small 6-inch skillet, which is perfect for feeding 4 to 5 people. To make a big batch, double the amounts and prepare it in a 10-inch skillet.
      • Keep it on low heat--Melt the cheese over low heat. I can't stress the importance of this enough. Don't try to rush it. Letting the mixture get too hot can cause the cheese to separate and become grainy.
      • Storage and reheating--Store leftover cheese in a sealed container in your fridge or cooler for up to 3 days. Reheat in a skillet over low heat, or in 15-second bursts in your microwave until warmed through.
      • Dietary--This recipe is suitable for gluten-free diets.

    Nutrition

    Serving: 1portionCalories: 315kcalCarbohydrates: 3.9gProtein: 16.7gFat: 24.9gSodium: 202mgSugar: 1g
    Keyword cast iron cooking, cheese dip, easy snacks
    Tried this recipe?Let us know how it was!

    December 20, 2023 Breakfast

    Dark Hot Chocolate

    This rich and creamy dark hot chocolate, made with milk, chocolate, sugar, vanilla, and a little cinnamon, is so delicious and easy to make that you'll never go back to pre-made mix.

    Two mugs of dark hot chocolate with cinnamon sticks in them, sitting in the snow.

    If your camping hot chocolate experience has been limited to adding hot water to a packaged mix, it's time to switch to real homemade hot cocoa. You can make it in the same time it would take you to heat water, and the flavor of this creamy dark chocolate hot chocolate will have you licking the bottom of your mug. Serve it alongside Dutch oven cinnamon rolls or cinnamon roll French toast for a truly indulgent camping breakfast.

    [feast_advanced_jump_to]

    Why This Recipe is Great for Camping

    • It's quick and easy to make and requires just one pot.
    • You can make this classic camping drink over your campfire or on your camp stove.
    • It's a rich, satisfying, warming drink that's suitable for all ages and can be customized to suit your tastes.

    Ingredients and Substitutions

    Ingredients for dark hot chocolate--dark chocolate, milk, sugar, vanilla, and cinnamon.
    • Milk--Use any type of milk that you like here. The higher the fat content, the creamier your hot chocolate will be. If using non-dairy milk, I recommend oat or coconut milk for the creamiest texture.
    • Dark chocolate--Use good-quality chocolate with a cacao content of about 70%. I recommend using bar chocolate, instead of chocolate chips, as it will melt more easily and smoothly.
    • Sugar--This adds just a little bit of sweetness to temper the bitterness of the chocolate. If you find that the dark hot cocoa is not sweet enough for your taste, stir in extra sugar, ½ teaspoon at a time, until you reach your desired sweetness.
    • Cinnamon--This gives the drink a flavor that is reminiscent of Mexican hot chocolate. To further that experience, you could also add a pinch of cayenne pepper to the drink mixture.

    Important Steps

    A pot of milk with a whisk resting inside.
    A whisk in a pot of dark hot chocolate.
    1. Combine the milk and sugar in a medium saucepan and warm over low heat until bubbles appear on the edges of the milk. Don't let the milk boil. Remove from the heat.
    2. Stir in the chopped chocolate, vanilla, and cinnamon, and whisk until smooth.

    FAQs

    How should I serve this?

    Top your warm drink with marshmallows or whipped cream and a sprinkle of cinnamon or a drizzle of chocolate syrup. Cinnamon sticks make it fun for stirring, but are definitely not necessary.

    Is dark hot chocolate bitter?

    It will depend on the type of chocolate you use. The higher the cacao percentage, the more bitter it will taste. I recommend sticking with chocolate that is around 70%, but if you use a darker chocolate, you can add extra sugar to temper the bitterness.

    Tips and Troubleshooting

    • To get ahead, chop your chocolate and combine it with the cinnamon in a resealable plastic bag before heading out on your camping trip.
    • Chop your chocolate very finely so that it melts quickly and easily.
    • If you love the combination of sweet and spicy, try adding a pinch of cayenne pepper to your hot chocolate.
    • This recipe is suitable for gluten-free diets. To make it dairy-free, use non-dairy milk, preferably oat or coconut.
    A mug of dark hot chocolate, topped with mini marshmallows.

    More Holiday Camping Recipes You'll Love

    A bowl of pretzel rail mix with small bowls of M&Ms and fish crackers nearby.
    Butter Toffee Pretzel Trail Mix
    A glass bowl filled with gingerbread pancake mix, with a whisk resting inside and a pitcher of milk and two eggs in the background.
    Gingerbread Pancake Mix

    Tried This Recipe?

    If you've tried this recipe, please leave a comment below. Follow me on Instagram, Facebook, YouTube, or Pinterest for more great camping and grilling recipes.

    Recipe

    Two mugs of dark hot chocolate with cinnamon sticks in them, sitting in the snow.

    Dark Hot Chocolate

    A woman's face.Angie Zoobkoff
    This rich and creamy dark hot chocolate, made with milk, dark chocolate, sugar, vanilla, and cinnamon is so easy to make that you'll never go back to the packaged mix.
    5 from 1 vote
    Print Recipe Pin Recipe
    Prep Time 5 minutes mins
    Cook Time 10 minutes mins
    Total Time 15 minutes mins
    Course Drinks
    Cuisine American
    Servings 2 drinks
    Calories 369 kcal

    Ingredients
      

    • 2 cups milk
    • 2 teaspoons granulated sugar
    • 4 ounces dark chocolate finely chopped
    • ½ teaspoon vanilla
    • ¼ teaspoon cinnamon
    • Whipped cream or marshmallows for serving (optional)

    Instructions
     

    • In a medium saucepan set over low heat (you can do this on a regular stove, your camp stove, or over hot coals), combine the milk and sugar. Heat, whisking occasionally, until the sugar is dissolved and the milk is hot but not boiling. You should see bubbles appearing around the edge of the pot.
    • Remove from the heat and add the chocolate, vanilla, and cinnamon. Whisk until smooth. Return to low heat to rewarm, if necessary.
    • Divide between two mugs and serve, topped with whipped cream or marshmallows, if desired.

    Notes

    • Get ahead--Chop your chocolate and combine it with the cinnamon in a resealable plastic bag before heading out on your camping trip.
    • Chop it fine--Chop your chocolate very finely so that it melts quickly and easily.
    • Make it spicy--If you love the combination of sweet and spicy, try adding a pinch of cayenne pepper to your hot chocolate.
    • Dietary--This recipe is suitable for gluten-free diets. To make it dairy-free, use non-dairy milk, preferably oat or coconut.

    Nutrition

    Serving: 1mugCalories: 369kcalCarbohydrates: 33.5gProtein: 9.3gFat: 29.1gCholesterol: 16mgSodium: 47mgFiber: 6.2gSugar: 10.4g
    Keyword dark chocolate hot chocolate, hot chocolate, hot cocoa, hot drinks
    Tried this recipe?Let us know how it was!

    December 13, 2023 Breakfast

    Gingerbread Pancake Mix

    This gingerbread pancake mix makes the best gingerbread pancakes or waffles and is perfect for the holidays. Mix it up ahead of time and add milk and eggs when you're ready to cook.

    A glass bowl filled with gingerbread pancake mix, with a whisk resting inside and a pitcher of milk and two eggs in the background.

    Your fluffy breakfast flapjacks just got a holiday makeover, and it starts with this easy peasy mix. Rye flour, brown sugar, and a classic combination of gingerbread spices make this version a festive favorite you'll return to every year.

    [feast_advanced_jump_to]

    Why You'll Love This Recipe

    • You can mix it up as much as 6 months before using.
    • It's a great mix for pancakes or waffles to take along on your holiday camping trips, and it doesn't take up any precious cooler space.
    • It makes a great homemade food gift for Christmas.

    Ingredients and Substitutions

    Ingredients for gingerbread pancake mix--salt, flour, spices, baking powder and soda, rye flour, brown sugar.
    • Rye flour--I incorporated a little bit of rye flour in the pancake mix to give it a deeper, nuttier flavor, that is reminiscent of gingerbread.
    • Dark brown sugar--This adds sweetness to the pancake mix, while also giving it a toasty caramel flavor.
    • Ginger, cinnamon, and allspice--This combination is classic gingerbread spice. If you love ginger, feel free to increase the amount to 1 ½ teaspoons.

    Important Steps

    Several bowls with the ingredients for gingerbread pancake mix.
    A bowl filled with gingerbread pancake mix with a whisk resting inside.
    1. Combine the ingredients in a large bowl.
    2. Whisk until thoroughly mixed. Transfer to an airtight container and store in a cool, dry place.

    How to Make Gingerbread Pancakes

    To make pancakes with this mix, combine 2 cups of the mix with 2 beaten eggs and ¾ cup of buttermilk or non-dairy milk. Whisk until the batter is mostly smooth (it's ok if there are a few lumps.) Drizzle in extra milk if the batter is too thick. Cook the pancakes in a nonstick skillet, on a griddle, or follow these instructions for cooking pancakes in a cast-iron skillet.

    FAQs

    Can I make gingerbread waffles with this mix?

    Yes. Prepare the batter the same way as you would for pancakes and cook in a waffle maker until golden.

    What should I serve with gingerbread pancakes?

    Serve this indulgent holiday breakfast topped with maple syrup or cranberry syrup and whipped cream. Fresh fruit and bacon or sausage are great accompaniments to serve on the side, along with a steaming mug of dark hot chocolate.

    How can I give these a stronger gingerbread flavor?

    This pancake mix will make pancakes with a gingerbread spice flavor, but if you want to really boost the flavor to taste like true gingerbread, replace 2 tablespoons of the milk with 2 tablespoons of molasses when mixing the batter. If your batter is too thick, add a little extra milk before cooking.

    Tips and Troubleshooting

    • Store in an airtight container in a cool dark place for up to 6 months.
    • This recipe scales easily. Feel free to double, triple, or quadruple it depending on how much you need.
    • For the fluffiest pancakes, keep your wet and dry ingredients separate until just before cooking. Only flip your pancakes once during cooking.
    • This recipe is suitable for vegetarian diets. To make dairy-free gingerbread pancakes, use non-dairy milk when mixing the batter, and cook the pancakes in a skillet coated with a neutral cooking oil, instead of butter.
    A stack of gingerbread pancakes on a plate with a pitcher of maple syrup and a plate of bacon in the background.

    More Camping Breakfast Recipes You'll Love

    A stack of pancakes, maple syrup, and blueberries on a plate with blueberries and bacon in the background.
    Cast Iron Skillet Pancakes
    A glazed cinnamon roll on a plate with an unglazed one in the background.
    Dutch Oven Cinnamon Rolls

    Tried This Recipe?

    If you've tried this recipe, please leave a comment below. Follow me on Instagram, Facebook, YouTube, or Pinterest for more great camping and grilling recipes.

    Recipe

    A glass bowl filled with gingerbread pancake mix, with a whisk resting inside and a pitcher of milk and two eggs in the background.

    Gingerbread Pancake Mix

    This easy gingerbread pancake mix recipe is perfect for the holidays. Made with rye flour, dark brown sugar, and warm spices, it's ideal for gifting or mixing up for Christmas breakfast.
    5 from 1 vote
    Print Recipe Pin Recipe
    Prep Time 10 minutes mins
    Total Time 10 minutes mins
    Course Breakfast
    Cuisine American
    Servings 2 generous cups
    Calories 200 kcal

    Ingredients
      

    • 1 ½ cups all-purpose flour
    • ½ cup rye flour
    • 2 tablespoons dark brown sugar
    • 2 teaspoons baking powder
    • 1 teaspoon baking soda
    • 1 teaspoon ground ginger
    • ½ teaspoon ground cinnamon
    • ½ teaspoon ground allspice
    • ½ teaspoon table salt

    Instructions
     

    • In a large bowl, whisk together the flours, sugar, baking powder, baking soda, spices, and salt.
    • Transfer to an airtight container.

    Notes

      • Storage--Store in an airtight container in a cool dark place for up to 6 months.
      • Scaling--This recipe scales easily. Feel free to double, triple, or quadruple it depending on how much you need.
      • To cook pancakes--To make gingerbread pancakes, add 2 eggs and ¾ cup of buttermilk to a single batch of the dry ingredients. Cook in a buttered skillet over medium heat until golden.
      • Dietary--This recipe is suitable for vegetarian diets. To make dairy-free gingerbread pancakes, use non-dairy milk when mixing the batter, and cook the pancakes in a skillet coated with a neutral cooking oil, instead of butter.

    Nutrition

    Serving: 0.5cupsCalories: 200kcalCarbohydrates: 43.8gProtein: 5.7gFat: 0.8g
    Keyword camping pancakes, christmas breakfast, edible gifts, gingerbread spice
    Tried this recipe?Let us know how it was!

    December 8, 2023 Camping

    Scalloped Potatoes on the Grill

    These grilled scalloped potatoes are an easy potato side dish that's cooked in your cast iron skillet. For this 5-ingredient dish, thinly sliced potatoes and onions are cooked in a cream sauce until soft and tender, with smoky caramelized edges.

    A cast iron skillet filled with scalloped potatoes with sprigs of thyme on top.

    Confession time. For years, I never really liked scalloped potatoes, even though we ate them frequently. I always found them kind of bland and the sauce seemed too runny and the potatoes too firm. (If you've tried my make-ahead roasted potatoes or smoked sweet potatoes, you already know that my preference is for soft creamy potatoes with crispy edges.)

    My opinion completely changed when I made these scalloped potatoes on the grill. They were so simple to make, and the sauce thickened up and absorbed into the potatoes, creating a dish that was creamy, tender, and slightly smoky. At that point, the slightly caramelized edges were just a bonus. I was already sold and I'm guessing you will be, too.

    [feast_advanced_jump_to]

    Why You'll Love This Recipe

    • There are only 5 ingredients and the entire dish is made in one skillet.
    • You can make it in advance and reheat it before serving.
    • They are the most tender and creamy potatoes imaginable.

    Ingredients and Substitutions

    Ingredients for scalloped potatoes--potatoes, cream, onion, thyme, and broth.
    • Potatoes--Use a medium-starch potato, such as Yukon Gold for this recipe. You can peel your potatoes if you want, but it's not necessary.
    • Broth--I use chicken broth for this recipe because I always have some in the fridge, but you can use vegetable broth if you prefer, or if you want to keep the dish vegetarian.
    • Cream--Use full fat whipping cream for these potatoes. Milk and light cream won't thicken up enough, and don't have the same richness.
    • Thyme--If you don't have fresh thyme on hand, feel free to use dried. You'll need about ½ teaspoon total, if using dried thyme.

    How to Make Scalloped Potatoes on the Grill

    A buttered cast-iron skillet.
    A layer of sliced potatoes and onions in a buttered cast iron skillet.
    1. Generously butter a 10-to 12-inch cast iron skillet. (Regular cast iron maintenance will keep your skillet mostly nonstick, but potatoes can be tricky. Plenty of butter ensures that they don't stick.)
    2. Shingle a layer of potatoes (about ⅓ of the total), overlapping them slightly, in the skillet. Top with ⅓ of the onions and ½ teaspoon fresh thyme. Season well with salt and pepper and repeat the layering to create 3 layers of potatoes and onions.
    A person pouring cream over sliced potatoes in a cast iron skillet.
    A foil-covered cast-iron skillet on the grill.
    1. Pour the broth and cream evenly over the potatoes.
    2. Cover tightly and grill over medium-low heat until cook until very tender when pierced with a knife.

    FAQs

    Can I add cheese to these cast iron skillet scalloped potatoes?

    Definitely. I recommend adding cheddar or a Swiss cheese, such as Gruyère. Simply grate about ¾ cup of cheese and sprinkle it over the top layer of potatoes before pouring the cream mixture over.

    Can I make these in advance?

    You sure can. Prepare and cook the scalloped potatoes on the grill up to 1 day before serving. Let them cool, then cover the skillet and store it in the fridge. When you're ready to serve them, heat the covered potatoes over medium heat until warmed through.

    What's the best type of potatoes to use for scalloped potatoes?

    Use a medium-starch potato, such as Yukon Gold or other yellow potatoes. Don't use waxy potatoes, as they don't release enough starch to thicken the sauce, and avoid Russet potatoes as they don't hold their shape well.

    What should I serve with these?

    Scalloped potatoes are a classic side dish to serve with Dutch oven ham at holidays like Christmas and Easter, and are a great option if you want to make a Thanksgiving dinner on the grill. They would be equally welcome alongside grilled bacon-wrapped pork tenderloin. Serve with grilled beets or a salad on the side.

    Tips and Troubleshooting

    • Be generous when buttering your skillet. The butter will add some fat and richness to the dish and plenty of butter means the potatoes won't stick.
    • Use a mandoline to get evenly sliced potatoes, but always use the finger guard to avoid cutting yourself.
    • Store leftover potatoes in a sealed container in the fridge for up to 3 days. Reheat in the microwave or in a skillet over medium-low heat until warmed through.
    • This recipe is suitable for gluten-free diets. To make it vegetarian, use vegetable broth.
    A cast iron skillet filled with scalloped potatoes with sprigs of thyme on top.

    The Most Important Thing to Remember

    The most helpful piece of advice I can give you when making these potatoes is to remember to season between each layer of potatoes. This is key to avoiding bland potatoes.

    More Potato Recipes You'll Love

    A bowl of make ahead roasted potatoes with fresh herbs and some parsley on the side.
    Make-Ahead Roasted Potatoes
    A bowl of cubed smoked sweet potatoes with crispy edges, with several thyme sprigs on the side.
    Smoked Sweet Potatoes

    Tried This Recipe?

    If you've tried this recipe, please leave a comment below. Follow me on Instagram, Facebook, YouTube, or Pinterest for more great camping and grilling recipes.

    Recipe

    A cast iron skillet filled with scalloped potatoes with sprigs of thyme on top.

    Scalloped Potatoes on the Grill

    A woman's face.Angie Zoobkoff
    These grilled scalloped potatoes are creamy and tender, with slightly smoky caramelized edges. They're an easy side dish with just 5 ingredients.
    5 from 1 vote
    Print Recipe Pin Recipe
    Prep Time 15 minutes mins
    Cook Time 35 minutes mins
    Total Time 50 minutes mins
    Course Side Dish
    Cuisine American
    Servings 4 servings
    Calories 234 kcal

    Equipment

    • 10-to-12-inch cast-iron skillet

    Ingredients
      

    • Butter for the skillet
    • 2 pounds (908 g) Yukon Gold or yellow potatoes thinly sliced
    • 1 medium yellow onion thinly sliced
    • 1 ½ teaspoons fresh thyme leaves
    • Salt and freshly ground black pepper
    • ¾ cup whipping cream
    • ¼ cup chicken broth

    Instructions
     

    • Prepare a grill for medium heat (375°F), ideally with multiple burners on low.
    • Butter a 10-to-12-inch cast iron skillet well.
    • Arrange ⅓ of the potatoes in the skillet, overlapping slightly. Scatter ⅓ of the onion slices and ½ teaspoon fresh thyme leaves over the potatoes. Season well with salt and pepper.
    • Repeat with the remaining potatoes, onions, and thyme to create two more layers, seasoning after each layer. You should have a total of three layers of potatotes.
    • Combine the broth and cream in a measuring cup and pour over the potatoes. Try to do this gently so that you don't wash away the thyme and seasoning on top.
    • Cover the skillet tightly with foil and place on the grill, ideally over a low burner. Close the grill and let the potatoes cook until they are very tender when pierced in the center with a knife, 30 to 40 minutes.
    • Let the scalloped potatoes rest for 10 minutes before serving.

    Notes

    • Butter, butter, butter--Be generous when buttering your skillet. The butter will add some fat and richness to the dish and plenty of butter means the potatoes won't stick.
    • Get evenly sliced potatoes--Use a mandoline to get evenly sliced potatoes, but always use the finger guard to avoid cutting yourself.
    • Storage--Store leftover potatoes in a sealed container in the fridge for up to 3 days. Reheat in the microwave or in a skillet over medium-low heat until warmed through.
    • Dietary--This recipe is suitable for gluten-free diets. To make it vegetarian, use vegetable broth.

    Nutrition

    Serving: 1portionCalories: 234kcalCarbohydrates: 42.1gProtein: 6gFat: 8.8gCholesterol: 21mgSodium: 57mg
    Keyword creamy potatoes, grilled potatoes, grilling vegetables, scalloped potatoes
    Tried this recipe?Let us know how it was!

    December 8, 2023 Camping

    Dutch Oven Ham

    This cast iron Dutch oven spiral ham is a holiday main dish that can be made over your campfire, on your camp stove, or on your stovetop at home. It's juicy and tender, thanks to a brown sugar, mustard, and orange glaze that coats each slice.

    A spiral cut ham on a rectangular platter with orange slices, pomegranate wedges, and parsley sprigs.

    Recipe at a Glance: Dutch Oven Ham

    • DETAILS
      • Total Time: 1 hour 30 minutes
      • Preparation method: Dutch oven cooking
    • HIGHLIGHTS
      • This spiral cut ham recipe is designed to be made in your cast iron Dutch oven over the fire or on a stovetop or camp stove, making it perfect for your holiday camping trip.
      • The steam in the Dutch oven keeps your ham juicy and tender, without drying it out.
      • A simple brown sugar, orange, and mustard glaze coats each slice, giving it incredible flavor.

    If you've ever wondered if you can cook ham in a Dutch oven, the answer is yes! Cooking ham in your Dutch oven keeps the meat beautifully juicy and tender and allows you to enjoy a fancier meal, even when you're enjoying the great outdoors. This makes it an ideal meal for holiday camping trips at Thanksgiving, Christmas, or Easter.

    [feast_advanced_jump_to]

    Why This Recipe is Great for Camping

    • You can make the glaze ahead of time so you've got less to do at camp.
    • The ham can be cooked over the fire or on your grill or camp stove.
    • Cleanup is quick and easy.

    Ingredients and Substitutions

    Ingredients for Dutch oven ham--spiral cut ham, orange juice, butter, Dijon mustard, brown sugar.
    • Ham--I recommend using a spiral cut ham for this recipe. It will heat through evenly, and the glaze will soak down between each slice. You can make it with uncut hams, but the cook time will be a little longer.
    • Orange juice--This adds some acidity to the glaze and also keeps the ham moist while it cooks.
    • Brown sugar--This adds sweetness to the glaze.
    • Dijon mustard--The tang of the mustard pairs nicely with the sweetness of the glaze. You can substitute any other type of mustard, if you prefer. Even regular yellow mustard will work fine.

    How to Cook Ham in a Dutch Oven

    A person pouring orange juice over a spiral cut ham in a Dutch oven.

    1. Place the ham in a parchment-lined Dutch oven. Pour half of the orange juice over the ham.

    Orange juice mustard ham glaze being heated in a saucepan.

    2. In a small saucepan, make the ham glaze by combining the remaining orange juice, brown sugar, butter, and Dijon mustard. Bring to a boil over medium heat, and simmer for 5 minutes.

    A Dutch oven with its lid on over a campfire.

    3. Cover the Dutch oven and place it over hot coals or over medium-low heat on a stovetop or grill. Cook until the ham is almost heated through.

    A person brushing glaze over a ham in a Dutch oven.

    4. Brush liberally with glaze and continue to cook until the ham reaches an internal temperature of 145°F (63°C).

    Choosing the Right Ham

    When selecting a ham at your local store, you'll be faced with several options. The majority you will encounter have already been cooked, whether cured or smoked. While it is possible to get raw ham, it usually requires acquiring from a specialty butcher. While you can make this with an uncut bone-in or boneless ham, I highly recommend using spiral cut ham for several reasons.

    • It will cook more quickly and evenly than an uncut ham.
    • It's extremely easy to carve, which is a huge bonus if you're camping.
    • It's ideal for Dutch oven cooking. Because they are already cut, spiral hams can tend to dry out when baked in the oven. Because this recipe uses a covered Dutch oven, moisture is trapped inside the pot and the slices stay juicy and tender.

    FAQs

    How long does it take to cook ham in a Dutch oven?

    It depends on the size of the ham. If you're cooking spiral ham in your Dutch oven, plan for about 15 minutes per pound for boneless ham and 18 to 20 minutes per pound for bone-in ham. If you're cooking your ham over the fire, the temperature of the coals and the distance that you have your pot from the coals will also impact the cooking time.

    What size of Dutch oven do I need?

    I recommend using a 7-quart Dutch oven if your ham is between 3 and 6 pounds. This should fit comfortably.

    How can I use my leftover ham?

    Leftover ham makes a great addition to your morning breakfast hash or breakfast quesadillas. You can also tuck it into a sandwich if you're heading out for a hike the next day, or if you want something more indulgent, use it to make a Monte Cristo.

    What to Serve with Your Campfire Dutch Oven Ham

    Ham and potatoes is a classic pairing, particularly at a holiday dinner so I highly recommend serving it with grilled scalloped potatoes or make-ahead roasted potatoes. Round out the meal with a green salad, green bean casserole, or some carrots roasted in a foil packet.

    Storage & Reheating

    Store leftover ham in a sealed container in your fridge or cooler for up to 3 days. Reheat in your Dutch oven over medium heat or hot coals with a little water or orange juice in the bottom, until warmed through.

    Tips and Troubleshooting

    • To get ahead, you can make the glaze up to 3 days before cooking. Store it in a sealed jar or container in your cooler or fridge until you're ready to use it.
    • Lining your Dutch oven with parchment makes for quick clean up, and makes it easy to lift the ham out of the pot.
    • Don't toss out your ham bone! It's perfect for making Dutch oven split pea soup.
    • This Dutch oven ham recipe is suitable for gluten-free diets.
    A spiral cut ham on a rectangular platter with orange slices, pomegranate wedges, and parsley sprigs.

    More Dutch Oven Camping Recipes You'll Love

    A sliced turkey breast on a plate with onions on top.
    Dutch Oven Turkey Breast
    A bowl of beef stew with carrots and potatoes on a wooden table.
    Campfire Dutch Oven Beef Stew

    Tried This Recipe?

    If you've tried this recipe, please leave a comment below. Follow me on Instagram, Facebook, YouTube, or Pinterest for more great camping and grilling recipes.

    Recipe

    A spiral cut ham on a rectangular platter with orange slices, pomegranate wedges, and parsley sprigs.

    Dutch Oven Ham

    A woman's face.Angie Zoobkoff
    This Dutch oven ham is coated in a brown sugar, orange, and mustard glaze and can be made over your campfire or on your stovetop or camp stove. It's perfect for your holiday camping trip.
    5 from 1 vote
    Print Recipe Pin Recipe
    Prep Time 10 minutes mins
    Cook Time 1 hour hr 20 minutes mins
    Total Time 1 hour hr 30 minutes mins
    Course Main Course
    Cuisine American
    Servings 8 servings
    Calories 296 kcal

    Equipment

    • 6-to-8-quart cast iron Dutch oven

    Ingredients
      

    • One (4-pound | 1.6-kg) spiral cut ham preferably bone-in
    • ½ cup orange juice divided
    • ⅓ cup brown sugar
    • 2 tablespoons butter
    • 2 tablespoons Dijon mustard

    Instructions
     

    • If cooking over a campfire, prepare a fire and let it reduce to hot coals.
    • Line a large Dutch oven with parchment paper. Place the ham in the Dutch oven and pour ¼ cup of the orange juice over it.
    • In a small saucepan, combine the remaining ¼ cup of orange juice, sugar, butter, and mustard and bring to a simmer over medium heat, stirring occasionally. Simmer for 3 minutes, then remove from the heat.
    • Cover the Dutch oven and place it over the hot coals or over medium-low heat on a camp stove or stovetop. Let it cook until the ham is heated to 130°F (55°C), about 1 hour. Replenish the coals if necessary to maintain even heat.
    • Remove the lid and brush the ham generously with the glaze, letting it run down between any slices that have started to separate. Cover the Dutch oven and continue cooking until the ham has reached an internal temperature of 145°F (63°C), 10 to 15 minutes more.
    • Slice and serve.

    Notes

    • Get ahead--Make the glaze up to 3 days before using. Store it in a sealed container in your fridge or cooler.
    • Line the Dutch oven--Lining your Dutch oven with parchment or foil makes for quick clean up, and makes it easy to lift the ham out of the pot.
    • Save the ham bone--Don't toss out your ham bone! It's perfect for making soup.
    • Storage and reheating--Store leftover ham in a sealed container in your fridge or cooler for up to 3 days. Reheat in your Dutch oven over medium heat with a little water or orange juice in the bottom until warmed through.
    • Dietary--This Dutch oven ham recipe is suitable for gluten-free diets.

    Nutrition

    Serving: 1 portionCalories: 296kcalCarbohydrates: 8gProtein: 9.7gFat: 25.6gSodium: 1081mgFiber: 1.5gSugar: 4.8g
    Keyword brown sugar glaze, dutch oven cooking, sliced ham
    Tried this recipe?Let us know how it was!

    December 4, 2023 Camping

    Butter Toffee Pretzel Trail Mix

    This easy pretzel trail mix is made with butter toffee pretzels, Goldfish crackers, chocolate chips, and M&Ms. It's a festive nut-free snack mix that's perfect for snacking and sharing (hello, Christmas potluck) all season long.

    A bowl of pretzel rail mix with small bowls of M&Ms and fish crackers nearby.

    If you've ever tried the enduringly popular Christmas cracker candy, made with toffee-coated saltine crackers and chocolate, you're already familiar with the flavor of this Christmas trail mix. Like my everyday nut-free trail mix, this holiday trail mix is doesn't contain nuts, and it's a great kid-friendly snack for noshing on at camp, offering as a celebratory party snack mix, or packing up for a simple holiday gift for teachers and friends.

    [feast_advanced_jump_to]

    Why This Recipe is Great for Camping

    • You can mix up the trail mix ahead of time, so you've got a snack packed and ready for your trip.
    • This can be stored at room temperature, so it doesn't take up precious cooler space.

    Ingredients and Substitutions

    Ingredients for butter toffee trail mix--pretzels, baking soda, M&Ms, corn syrup, brown sugar, butter, chocolate chips, and fish crackers.
    • Pretzels--I recommend using pretzel twists instead of sticks as they'll be easier to coat and arrange on your baking sheet without having them stick together.
    • Goldfish crackers--These add extra crunch to the pretzel snack mix, but feel free to substitute another small soup cracker, like oyster crackers, if you prefer. Be sure to choose the plain ones, as the flavor of cheese crackers doesn't work well here.
    • Corn syrup--The addition of a little corn syrup to your butter toffee helps to stop the sugar from crystallizing and will give you a smooth coating.
    • Baking soda--The soda gives the toffee mixture plenty of bubbles which makes a light, airy toffee coating for your pretzels. Keep in mind that the addition of baking soda will make the toffee foam up, so use a medium-sized pot for making the toffee mixture.
    • Chocolate chips--You can use your favorite types of chocolate chips here. I prefer semi-sweet to keep the holiday trail mix from being overly sweet, but feel free to use milk or even white chocolate chips, if you prefer it a little sweeter.

    Important Steps

    A pot with melted toffee sauce.
    Butter toffee being poured over a bowl of pretzels.
    1. Melt the butter, brown sugar, and corn syrup together in a small saucepan over medium-low heat. Bring to a boil, then remove from the heat and stir in the baking soda.
    2. Place the pretzels in a large bowl coated with cooking spray. Pour the hot toffee over the pretzels and mix to evenly coat the pretzels.
    Toffee-coated pretzels arranged in a single layer on a foil-lined baking sheet.
    A bowl filled with toffee pretzels, chocolate chips, M&Ms, and fish crackers.
    1. Arrange the pretzels in a single layer on a foil-lined baking sheet that has been sprayed with cooking spray. Bake in a 225°F oven for 1 hour. Cool completely.
    2. Combine the butter toffee pretzels, chocolate chips, fish crackers, and M&Ms in a large bowl. Mix well.

    FAQs

    How do I stop my pretzels from sticking together?

    Spray your mixing bowl and your foil-lined baking sheet with cooking spray. Once you dump the toffee-coated pretzels onto the baking sheet, use a fork or a wooden skewer to arrange them in a single layer. If you still end up with some overlapping and touching, you should be able to snap them apart after they've baked and cooled completely.

    Can I make this in advance?

    Definitely. If stored properly, this trail mix can be prepared up to 1 month before using.

    How should I store butter toffee pretzel trail mix?

    Store your snack mix in an airtight container or resealable plastic bag at room temperature for up to 1 month.

    Tips and Troubleshooting

    • Be sure to spray your pretzel mixing bowl and baking sheet well with cooking spray to avoid having the toffee stick.
    • Spread the pretzels in a single layer on the baking sheet. This will help the toffee set evenly and prevent the pretzels from sticking together. A fork works well for arranging them in a single layer. If any pretzels do stick together, simply break them apart after they've cooked completely.
    • Give the pretzel snack mix a good stir before serving as the chocolate chips and M&Ms tend to sink to the bottom of the bowl.
    A bowl of pretzel rail mix with small bowls of M&Ms and fish crackers nearby.

    More Camping Recipes You'll Love

    Two glasses of cranberry pomegranate cocktail with orange twists on the rims.
    Cranberry Pomegranate Cocktail
    Two plates of cranberry cobbler on a wooden table with fir branches nearby.
    Dutch Oven Cranberry Cobbler

    Tried This Recipe?

    If you've tried this recipe, please leave a comment below. Follow me on Instagram, Facebook, YouTube, or Pinterest for more great camping and grilling recipes.

    Recipe

    A bowl of pretzel rail mix with small bowls of M&Ms and fish crackers nearby.

    Butter Toffee Trail Mix

    This easy homemade holiday trail mix includes butter toffee pretzels, crackers, chocolate chips, and M&Ms. It's a festive snack perfect for your holiday camping trip or Christmas parties.
    5 from 1 vote
    Print Recipe Pin Recipe
    Prep Time 15 minutes mins
    Cook Time 1 hour hr 5 minutes mins
    Total Time 1 hour hr 20 minutes mins
    Course Snack
    Cuisine American
    Servings 9 cups
    Calories 403 kcal

    Ingredients
      

    • Cooking spray
    • 4 cups (200 g) pretzel twists
    • 4 tablespoons (57 g) butter
    • ½ cup (105 g) brown sugar
    • 2 tablespoons corn syrup
    • ¼ teaspoon baking soda
    • 2 cups (110 g) Goldfish crackers
    • 1 cup (185 g) chocolate chips
    • 1 cup red and green M&Ms

    Instructions
     

    • Preheat the oven to 225°F (107°C). Line a rimmed baking sheet with foil and coat with cooking spray.
    • Coat a large bowl with cooking spray. Add the pretzels to the bowl.
    • In a medium saucepan over medium-low heat, combine the butter, sugar, and corn syrup. Heat, stirring frequently, until the butter melts and the mixture reaches a boil.
    • As soon as the mixture boils, remove it from the heat, add the baking soda, and stir well. The mixture will foam up; this is normal. Pour the toffee over the pretzels and stir well to evenly coat the pretzels.
    • Arrange the pretzels in a single layer on the baking sheet. Bake, stirring every 15 minutes, for 1 hour. Let the pretzels cool completely before removing them from the baking sheet.
    • In a large mixing bowl combined the cooled toffee pretzels, Goldfish crackers, chocolate chips, and M&Ms.

    Notes

    • Be liberal with the cooking spray--Be sure to spray your pretzel mixing bowl and baking sheet well with cooking spray to avoid having the toffee stick.
    • Don't let the pretzels clump--Spread the pretzels in a single layer on the baking sheet. This will help the toffee set evenly and prevent the pretzels from sticking together. A fork works well for arranging them in a single layer. If any pretzels do stick together, simply break them apart after they've cooked completely.
    • Stir before serving--Give the pretzel snack mix a good stir before serving as the chocolate chips and M&Ms tend to sink to the bottom of the bowl.

    Nutrition

    Serving: 1cupCalories: 403kcalCarbohydrates: 58.2gProtein: 6.3gFat: 16.2gCholesterol: 23mgSodium: 529mgFiber: 2.3gSugar: 25.7g
    Keyword campfire snacks, christmas party snacks, hiking food, snack mix, trail mix
    Tried this recipe?Let us know how it was!

    December 1, 2023 Drinks

    Cranberry Pomegranate Cocktail

    This festive ruby-hued pomegranate cranberry cocktail is made with sweet-tart cranberry syrup, pomegranate juice, orange liqueur, and sparkling wine. It's perfect for holiday parties and celebrating with friends.

    Two glasses of cranberry pomegranate cocktail with orange twists on the rims.

    I'll be the first to admit that this cranberry pomegranate Prosecco cocktail really doesn't have anything to do with camping or grilling. (A hot apple cider cocktail might be better suited to that.) And while I definitely don't suggest you take your crystal champagne flutes on your next trip, if you want to tuck a bottle of sparkling wine in the cooler and whip up a batch of cranberry syrup (it's great for hot drinks and pancakes, too!), I'm sure you'll find others at the campground who'd love to celebrate any occasion with you. I certainly would.

    [feast_advanced_jump_to]

    Why You'll Love This Recipe

    • You can easily scale the cranberry cocktail recipe for as many drinks as you need to make.
    • It's very easy to make, and can be partially prepared ahead of time, making it perfect for your holiday cocktail party.
    • You can adapt it to be alcohol-free, if you like.

    Ingredients and Substitutions

    Ingredients for cranberry pomegranate cocktail--cranberry syrup, Grand Marnier, pomegranate juice, and Prosecco.
    • Cranberry syrup--The homemade cranberry syrup adds lovely color and a slightly tart sweetness to the drink. You can substitute regular simple syrup, if you prefer.
    • Grand Marnier--You can use any orange liqueur.
    • Pomegranate juice--I love the tartness of 100% pomegranate juice in this cocktail, but feel free to play around with juice blends, such as pomegranate-cranberry.
    • Prosecco--You can use any sparkling wine here, but I recommend choosing one that is dry. Sweet wines will make the cocktail overly sweet.

    Important Steps

    Two champagne flutes with dark red liquid inside them and three empty glass bowls nearby.
    Prosecco being poured into a champagne flute.
    1. Divide the pomegranate juice, cranberry syrup, and Grand Marnier between two flutes.
    2. Top with Prosecco and serve immediately.

    FAQs

    Can I make this into a pomegranate cranberry mocktail?

    Definitely. Use orange juice in place of the Grand Marnier and top with ginger ale or club soda instead of sparkling wine.

    Can I make this cocktail in a large-batch for a party?

    Yes. Scale the recipe as many times as necessary to fill your pitcher or punch bowl. You can combine the cranberry syrup, pomegranate juice, and orange liqueur up to an hour before serving, but top with the Prosecco or sparkling wine just before you plan to serve it. When calculating how much you'll need to scale the recipe, keep in mind that a single recipe makes about 1 cup.

    Tips and Troubleshooting

    • You can combine the syrup, juice, and liqueur up to an hour ahead of time, but add the chilled sparkling wine just before serving.
    A glass of cranberry pomegranate cocktail with an orange twist.

    More Holiday Recipes You'll Love

    Two plates of cranberry cobbler on a wooden table with fir branches nearby.
    Dutch Oven Cranberry Cobbler
    A bowl of pretzel rail mix with small bowls of M&Ms and fish crackers nearby.
    Butter Toffee Pretzel Trail Mix

    Tried This Recipe?

    If you've tried this recipe, please leave a comment below. Follow me on Instagram, Facebook, YouTube, or Pinterest for more great camping and grilling recipes.

    Recipe

    Two glasses of cranberry pomegranate cocktail with orange twists on the rims.

    Cranberry Pomegranate Cocktail

    A woman's face.Angie Zoobkoff
    This festive ruby-hued cocktail is made with sweet-tart cranberry syrup, pomegranate juice, orange liqueur, and sparkling wine. Perfect for celebrations all year round.
    5 from 1 vote
    Print Recipe Pin Recipe
    Prep Time 5 minutes mins
    Total Time 5 minutes mins
    Course Drinks
    Cuisine American
    Servings 2 drinks
    Calories 100 kcal

    Ingredients
      

    • ½ ounce (1 tablespoon) cranberry syrup
    • ½ ounce (1 tablespoon) Grand Marnier (or other orange liqueur)
    • 2 ounces (4 tablespoons) pomegranate juice
    • Chilled Prosecco or dry sparkling wine

    Instructions
     

    • Divide the cranberry syrup, Grand Marnier, and pomegranate juice between two champagne flutes.
    • Top with Prosecco or sparkling wine. Serve immediately.

    Notes

    • Get ahead--You can combine the syrup, juice, and liqueur up to an hour ahead of time, but add the chilled sparkling wine just before serving.
    • Make it a mocktail--Use orange juice instead of orange liqueur, and replace the sparkling wine with ginger ale or club soda.

    Nutrition

    Serving: 1glassCalories: 100kcalCarbohydrates: 10g
    Keyword pomegranate juice cocktail, prosecco cocktail, sparkling wine cocktail
    Tried this recipe?Let us know how it was!

    December 1, 2023 Breakfast

    Cranberry Simple Syrup

    This cranberry syrup is an easy condiment made with just five ingredients. The orange and cinnamon-infused syrup is perfect for mixing into drinks, or drizzling over skillet pancakes, French toast, or ice cream.

    A glass bottle filled with cranberry simple syrup.

    Want to add a little festive flair to your holiday cocktails, mocktails, and breakfast treats? This stunning ruby-hued simple syrup is exactly what you need.

    Add it to a cranberry pomegranate cocktail, or mix it with ginger ale or club soda for an easy holiday mocktail. Stir it into your morning tea, or drizzle it over gingerbread pancakes, French toast, waffles, or ice cream.

    [feast_advanced_jump_to]

    Ingredients and Substitutions

    Ingredients for cranberry simple syrup--cranberries, water, cinnamon, sugar, and orange zest.
    • Cranberries--You can use fresh or frozen cranberries here. If using frozen, you don't need to thaw them, but it will take slightly longer for the mixture to come to a simmer.
    • Cinnamon stick--I recommend using a cinnamon stick instead of ground cinnamon here. Ground spices will give you a cloudy syrup.
    • Orange zest--You can substitute lemon zest, if you prefer.

    How to Make Cranberry Simple Syrup

    Cranberries cooking in a pot with a wooden spoon resting inside.
    Cooked cranberries being strained through a sieve.
    1. Combine the cranberries, water, sugar, cinnamon, and orange zest in a medium saucepan. Bring to a gentle simmer over medium heat, and cook gently just until the cranberries begin to burst. Remove from the heat and let it steep for 5 minutes.
    2. Strain the mixture through a fine-mesh sieve.

    FAQs

    My syrup thickened into cranberry sauce when it cooled. What should I do?

    If you're going to be using it mixed into something, such as a warm cup of tea or a cocktail, just give it a good stir. It will dissolve when you mix it with another liquid. If you're using it on its own for pouring over pancakes or waffles, you can warm it up to help it dissolve, or stir in a little warm water to loosen the sauce.

    What can I do with the leftover cooked cranberries?

    The leftover cooked cranberries from this cranberry syrup recipe are a sweet spiced treat that are perfect for spooning over ice cream or swirling into yogurt or your morning oatmeal.

    Can you freeze cranberry syrup?

    Yes. If you want to be able to use it in small quantities, freeze it in ice cube trays. Once frozen, place the cubes in a resealable bag and keep in the freezer for up to 3 months. Thaw as much as you need at a time.

    Tips and Troubleshooting

    • Don't simmer the syrup for longer than instructed in the recipe. Cranberries are very high in pectin, and if you cook it too long, you'll end up with cranberry sauce.
    • Store in a sealed container in the fridge for up to 1 month or freeze for up to 3 months.
    • The recipe can be doubled or tripled easily.
    • This recipe is suitable for gluten-free, dairy-free, and vegan diets.
    A glass bottle filled with cranberry simple syrup.

    The Most Important Thing to Remember

    The most helpful advice I can give you when making this homemade cranberry simple syrup recipe is don't boil it for too long or too rapidly. Keep it at a gentle simmer and don't cook it for any longer than 10 minutes or it will thicken to the consistency of cranberry sauce when it cools.

    More Camping Recipes You'll Love

    A jar of nut-free pesto on a cutting board with fresh basil, garlic, and parmesan on the side.
    Nut-Free Pesto
    A jar of lemon thyme vinaigrette wit ha lemon and bunch of thyme behind it.
    Lemon Thyme Vinaigrette

    Tried This Recipe?

    If you've tried this recipe, please leave a comment below. Follow me on Instagram, Facebook, YouTube, or Pinterest for more great camping and grilling recipes.

    Recipe

    A glass bottle filled with cranberry simple syrup.

    Cranberry Simple Syrup

    A woman's face.Angie Zoobkoff
    Add some festive flair to your holiday cocktails and breakfast treats with a drizzle of this cranberry-infused syrup.
    5 from 1 vote
    Print Recipe Pin Recipe
    Prep Time 10 minutes mins
    Cook Time 10 minutes mins
    Total Time 20 minutes mins
    Course Condiment
    Cuisine American
    Servings 20 tablespoons (1 ¼ cups)
    Calories 44 kcal

    Ingredients
      

    • 2 cups (210 g) cranberries
    • 1 cup (200 g) granulated sugar
    • 1 cup (237 ml) water
    • 1 cinnamon stick
    • 1 tablespoon orange zest

    Instructions
     

    • In a medium saucepan, combine the cranberries, sugar, water, cinnamon stick, and orange zest.
    • Bring to a boil over medium heat, then reduce the heat to maintain a gentle simmer. Cook at a gentle simmer until the cranberries are just beginning to split, and the liquid is red, 8 to 10 minutes. Don't cook for longer than 10 minutes.
    • Remove the saucepan from the heat and let the mixture steep for 5 minutes.
    • Strain through a fine mesh sieve. Let the syrup cool completely before refrigerating.

    Notes

      • Don't overcook--Don't simmer the syrup for longer than instructed in the recipe. Cranberries are very high in pectin, and if you cook it too long, you'll end up with cranberry sauce.
      • Storage and freezing--Store in a sealed container in the fridge for up to 1 month or freeze for up to 3 months.
      • Scaling--The recipe can be doubled or tripled easily.
      • Dietary--This recipe is suitable for gluten-free, dairy-free, and vegan diets.

    Nutrition

    Serving: 1tablespoonCalories: 44kcalCarbohydrates: 11.1gFiber: 0.4gSugar: 10.4g
    Keyword breakfast syrup, cranberry syrup, holiday condiments, simple syrup
    Tried this recipe?Let us know how it was!

    November 27, 2023 Beef Recipes

    Campfire Dutch Oven Beef Stew

    This hearty and satisfying camp beef stew is made in your cast iron Dutch oven and can be prepared over the campfire, on a camp stove, or grill. It's chock-full of tender beef, potatoes, carrots, celery, onions that are gently simmered in a rich beef gravy. A perfect cool-weather one-pot camping meal.

    Two bowls of Dutch oven beef stew on a wooden table with a partially sliced loaf of French bread.

    Recipe at a Glance: Dutch Oven Beef Stew

    • DETAILS
      • Total Time: 2 hours 40 minutes (20 minutes hands-on)
      • Preparation method: Campfire, camp stove, or stovetop
    • HIGHLIGHTS
      • You'll only need one pot to make this recipe.
      • The beef stew can be partially prepared in advance.
      • It's made without wine, making it suitable for all ages.

    When I think about cool-weather camping foods, Dutch oven chicken noodle soup, Texas cowboy stew, Dutch oven campfire chili, and creamy mac and cheese all come to mind, with this campfire beef stew at the very top of the list. It's satisfying stick-to-your-ribs comfort food that's perfect for slurping up around the fire.

    [feast_advanced_jump_to]

    Ingredients and Substitutions

    Ingredients for camp stew--beef, oil, tomato paste, mushroom powder, flour, potatoes, carrots, celery, garlic, broth, and onions.
    • Beef--I prefer to use a whole chuck or blade roast for this campfire beef stew recipe and cut it into cubes. This will allow you to trim the meat of excess fat easily. You can substitute pre-cut beef stew meat, if you prefer.
    • Tomato paste--I highly recommend using concentrated tomato paste that comes in a tube when camping. Then there's no need for a can opener or to figure out where to store the extra paste. Just pop the lid back on and toss it in your cooler.
    • Onions--I use pearl onions here because I like the flavor and it's nice to find a decent sized piece of onion in your stew. They can be annoying to peel, so feel free to substitute regular chopped onion, if you prefer.
    • Potatoes--Use medium-starch or waxy potatoes, such as Yukon gold or red, for the stew as they'll hold their shape the best. Avoid high starch potatoes, like Russets, as they'll disintegrate into the stew while cooking.
    • Shiitake mushroom powder--This is optional, but highly recommended as it adds incredible flavor to the gravy. You can purchase mushroom powder online, at some supermarkets, or make your own by grinding dried mushrooms in a spice or coffee grinder until powdery.

    How to Make Beef Stew in a Dutch Oven

    Cubes of stew meat coated in flour in a resealable plastic bag.

    1. Combine the beef, flour, and ½ teaspoon each of salt and pepper in a resealable bag. Seal and shake well to coat each piece of beef evenly.

    Beef being browned in a Dutch oven over a campfire.

    2. Heat oil in a Dutch oven over hot campfire coals or medium heat on a camp stove or grill. Add the beef and cook until browned all over.

    Carrots, celery, and onion in a camp Dutch oven with browned stew beef.

    3. Stir in the carrots, onion, celery, and garlic and sauté until softened. Add the tomato paste and cook for about 1 minute.

    Potatoes being stirred into a Dutch oven of beef stew.

    4. Pour in the broth and bring to a simmer, scraping up browned bits from the bottom of the Dutch oven. Stir in the potatoes, and mushroom powder, if using. Cover and simmer until the beef is very tender.

    FAQs

    How do I make this on the stovetop?

    Yes. To make this in a regular enamel-coated Dutch oven on your stovetop, follow the recipe as written, adjusting the heat as needed to let the stew simmer gently, covered, until the beef is tender.

    Can you freeze Dutch oven beef stew?

    Yes. Beef stew freezes exceptionally well. Store it in a sealed, freezer safe-container and freeze for up to 3 months. Thaw in the refrigerator or your cooler overnight before reheating.

    Why is my beef stew meat tough?

    The most common reason for tough meat is not cooking it for long enough. Stew meats typically come from the more muscular parts of the cow, which have plenty of collagen and muscle fibers running through them. While they offer fantastic flavor, long, slow cooking is needed to break these tissues down and make them tender. For stew, this typically takes between 2 and 3 hours.

    Stew meat can also become tough if it is cooked at a temperature that is too high. Avoid boiling your stew rapidly, as this can cause the muscle fibers to tighten and become tough, rather than soft. Keep your stew at a gentle simmer. Boiling it will not speed up the cooking process.

    What should I serve with this?

    This is a hearty one-pot meal, so it's not necessary to serve anything else with it, however, a loaf of crusty French bread or a batch of Dutch oven biscuits will always be welcome for sopping up that extra gravy.

    Tips and Troubleshooting

    • To get ahead before heading out to camp, cube your stew meat and place it in a resealable bag. Peel your onions and dice your carrots and celery and store them in a separate container or bag in your cooler.
    • Avoid letting the stew boil vigorously as this can make the meat tough. You may need to move the Dutch oven to a cooler or warmer part of the fire throughout cooking in order to keep it at a gentle simmer.
    • Store leftover stew in an airtight container in your cooler or fridge for up to 3 days.
    • Reheat in a Dutch oven over low heat until warmed through.
    A bowl of beef stew with carrots and potatoes on a wooden table.

    More Dutch Oven Camping Recipes You'll Love

    A bowl of butter chicken with a wedge of naan bread in it.
    Dutch Oven Butter Chicken
    A cooked pizza in a Dutch oven.
    Dutch Oven Pizza

    Tried This Recipe?

    If you've tried this recipe, please leave a comment below. Follow me on Instagram, Facebook, YouTube, or Pinterest for more great camping and grilling recipes.

    Recipe

    A bowl of beef stew with carrots and potatoes on a wooden table.

    Campfire Dutch Oven Beef Stew

    A woman's face.Angie Zoobkoff
    This cool-weather camping stew is made with tender beef, potatoes, carrots, celery, and onions, gently simmered in a rich beef gravy.
    5 from 2 votes
    Print Recipe Pin Recipe
    Prep Time 20 minutes mins
    Cook Time 2 hours hrs 20 minutes mins
    Total Time 2 hours hrs 40 minutes mins
    Course Main Course
    Cuisine American
    Servings 4 servings
    Calories 656 kcal

    Equipment

    • 5-to 7-quart cast iron Dutch oven

    Ingredients
      

    • 2 pounds (900 g) beef chuck or blade roast trimmed and cut into 1 ½-inch chunks
    • Salt and freshly ground black pepper
    • 3 tablespoons all-purpose flour
    • 2 tablespoons vegetable oil
    • 2 large carrots peeled if desired, and cut into 1-inch chunks
    • 20 pearl onions peeled
    • 2 stalks celery sliced
    • 2 cloves garlic minced
    • 2 tablespoons tomato paste
    • 3 cups beef broth
    • 1 pound Yukon gold or red potatoes peeled if desired, and cut into 1-inch cubes
    • 1 tablespoon mushroom powder optional

    Instructions
     

    • Prepare hot campfire coals or a grill or camp stove for medium heat.
    • Season the beef with ½ teaspoon each of salt and pepper. Toss the seasoned beef into a resealable bag and add the flour. Seal the bag and give it a good shake to evenly coat each piece with flour.
    • Set a Dutch oven over the coals or on the camp stove or grill and add the oil. When the oil is hot, but not smoking, add the beef and arrange it in a single layer on the bottom of the Dutch oven. Let it cook, turning occasionally, until golden brown all over, about 10 minutes.
    • Add the carrots, onions, celery, and garlic, and sauté until beginning to turn golden, about 5 minutes. Add the tomato paste and cook for 1 minute, stirring constantly.
    • Pour in the beef broth and bring the stew to a simmer, scraping the bottom of the Dutch oven to release any browned bits stuck to the bottom of the pot.
    • Stir in the potatoes and mushroom powder, if using. Cover the Dutch oven and simmer gently until the meat is very tender, adjusting the heat and adding more coals, as needed, about 2 hours.
    • Season to taste with salt and pepper, and serve hot.

    Notes

    • Get ahead--To get ahead before heading out to camp, cube your stew meat and place it in a resealable bag. Peel your onions and dice your carrots and celery and store them in a separate container or bag in your cooler.
    • Watch the heat level--Avoid letting the stew boil vigorously as this can make the meat tough. You may need to move the Dutch oven to a cooler or warmer part of the fire throughout cooking in order to keep it at a gentle simmer.
    • Storage--Store leftover stew in an airtight container in your cooler or fridge for up to 3 days.
    • Reheating--Reheat in a Dutch oven over low heat until warmed through.

    Nutrition

    Serving: 1 portionCalories: 656kcalCarbohydrates: 23gProtein: 64gFat: 33gCholesterol: 202mgSodium: 775mgFiber: 4gSugar: 5g
    Keyword beef stew, beef stew without wine, campfire cooking, dutch oven cooking
    Tried this recipe?Let us know how it was!

    November 22, 2023 Everyday Staples

    Nut-Free Pesto

    This homemade nut-free pesto is made with fresh basil, Parmesan cheese, olive oil, and garlic. It's a quick, easy, and versatile homemade everyday staple that's ready in less than 10 minutes and is completely safe for those with nut allergies.

    A jar of nut-free pesto on a cutting board with fresh basil, garlic, and parmesan on the side.

    Recipe at a Glance: Nut Free Pesto

    • DETAILS
      • Total Time: 10 minutes
      • Preparation method: No cook
    • HIGHLIGHTS
      • Preserve fresh basil at its peak with this easy pesto recipe that doesn't contain any nuts.
      • You can use it for adding flavor to your meals as a sauce, or by swirling it into pasta, or as a sandwich spread, and so much more.
      • Freeze it into small portions in ice cube trays so you've got pesto any time you need it.

    If you or your loved ones suffer from a nut allergy, you likely already have experience scouring the labels of pesto containers at the store, hoping for a safe nut-free version. This recipe for pesto without nuts eliminates that concern so that you can enjoy the flavors of this classic condiment without worry. Go on, spread it on turkey ciabatta sandwiches, twirl into pasta, stuff it into cheesy mozzarella-stuffed chicken breasts, and drizzle it over roasted vegetables with reckless abandon.

    [feast_advanced_jump_to]

    Ingredients and Substitutions

    Ingredients for nut-free pesto--basil, Parmesan, olive oil, and garlic.
    • Basil--Fresh basil should be brightly colored and fragrant. It doesn't like to be cold, so don't store it in your fridge. Discard any brown, mushy, or shriveled leaves.
    • Parmesan--Don't use pre-shredded Parmesan cheese here. The texture is too coarse. Grate it by hand from a block of Parmesan.
    • Olive oil--Use a good-quality olive oil for best results.

    How to Make Nut-Free Pesto

    Fresh basil leaves and garlic in a food processor.

    1. Combine the basil leaves and garlic in a food processor. Blitz until coarsely chopped.

    A food processor filled with chopped basil and Parmesan cheese.

    2. Add the Parmesan cheese and pulse a few times to incorporate.

    A person pouring oil into a food processor filled with pesto ingredients.

    3. With the processor running, pour the oil through the feed tube.

    Blended pesto in a food processor.

    4. Process until the pesto is smooth.

    How to Use Pesto

    Homemade basil nut-free basil pesto is a great condiment to keep on hand as it's a terrific way to add flavor to pantry staples, or to elevate your meals. Here are a few suggestions for how to use pesto:

    • Use it as a sandwich spread, like on this turkey caprese panini
    • Stir it into pasta
    • Use it as a filling, along with cheese, to make mozzarella stuffed chicken breasts
    • Dollop atop pizza, or use it instead of pizza sauce
    • Stir it into soups
    • Toss it with roasted potatoes
    • Mix it with sour cream or Greek yogurt to make a quick dip
    • Use it as a topping for pesto-crusted salmon

    FAQs

    Should you blanch basil for pesto?

    It's entirely up to you. Blanching the basil will preserve the bright green color, however, the blanching process will mute the flavor of the basil. I prefer for the flavor to shine, so I don't blanch my basil when I'm making pesto, but you absolutely can.

    Can I make this without a food processor?

    Yes. You've got a couple of choices here. You can whisk everything together in a medium bowl, adding the oil slowly while whisking, to create a smooth emulsion, or place everything in a lidded jar and shake until smooth and creamy.

    Regardless of which method you choose, you will need to make sure your basil is very finely chopped (use a sharp knife to avoid bruising the basil), the Parmesan is very finely grated, and the basil is finely minced or grated before mixing.

    How can I tell if my pesto has spoiled?

    If there are any visible signs of mold on your pesto, or it develops a sour smell, it's no good and should be tossed. It's normal for the color to dull as it sits, but if it turns very dark or black, it has likely spoiled.

    To prevent spoilage, keep it in a sealed jar or container and always use a clean spoon when removing it from the jar. Fresh pesto should be used within a week or frozen.

    How to Freeze Homemade Pesto

    For easily accessible portions, divvy the pesto among the wells of an ice cube tray and freeze until solid. Pop the pesto cubes into a resealable bag and stash in the freezer. Alternatively, you can freeze large portions of the pesto in freezer safe containers or resealable plastic bags. It will keep for up to 6 months.

    Tips and Troubleshooting

    • Store in a covered container in the refrigerator for up to 1 week, or freeze for up to 6 months.
    • This nut-free pesto recipe is suitable for gluten-free and vegetarian diets.
    A jar of nut-free pesto on a cutting board with fresh basil, garlic, and parmesan on the side.

    More Homemade Condiment Recipes You'll Love

    A bowl of guacamole with chips and lime wedges on the side.
    3-Ingredient Guacamole
    A small glass pitcher half full of lemon thyme vinaigrette.
    Lemon Thyme Vinaigrette

    Tried This Recipe?

    If you've tried this recipe, please leave a comment below. Follow me on Instagram, Facebook, YouTube, or Pinterest for more great camping and grilling recipes.

    Recipe

    A jar of nut-free pesto on a cutting board with fresh basil, garlic, and parmesan on the side.

    Nut-Free Pesto

    A woman's face.Angie Zoobkoff
    This homemade pesto is made with basil, Parmesan, olive oil, and garlic, and contains no nuts, making it safe for those with allergies.
    5 from 1 vote
    Print Recipe Pin Recipe
    Prep Time 10 minutes mins
    Total Time 10 minutes mins
    Course Condiment
    Cuisine Italian
    Servings 16 tablespoons (1 cup)
    Calories 67 kcal

    Equipment

    • Food processor

    Ingredients
      

    • 2 cups fresh basil leaves
    • 2 cloves garlic
    • ½ cup (50 g) grated Parmesan cheese
    • ½ cup (118 ml) olive oil
    • Salt

    Instructions
     

    • Combine the basil and garlic in the bowl of a food processor fitted with the s-blade. Pulse until coarsely chopped, about 15 1-second pulses.
    • Add the Parmesan and pulse a couple of times to combine.
    • With the food processor running, pour the oil through the feed tube and process until mixed, about 30 seconds. Stop the food processor, scrape down the sides, and process again until smooth, about 10 seconds more.
    • Season to taste with salt.

    Notes

      • Storage and freezing--Store in a covered container in the refrigerator for up to 1 week, or freeze for up to 6 months.
      • Dietary--This nut-free pesto recipe is suitable for gluten-free and vegetarian diets.

    Nutrition

    Serving: 1 tablespoonCalories: 67kcalCarbohydrates: 1gProtein: 1gFat: 7gCholesterol: 3mgSodium: 33mg
    Keyword fresh herb condiment, nut-free
    Tried this recipe?Let us know how it was!

    November 22, 2023 Blackstone Griddle Recipes

    Turkey Ciabatta Sandwich

    This turkey ciabatta sandwich has all of the classic caprese flavors, conveniently packaged into a delicious handheld meal. For this easy sandwich, roasted turkey, fresh tomatoes, creamy mozzarella, and garlicky pesto are loaded onto ciabatta rolls, then toasted in your cast iron skillet until golden.

    Two halves of a turkey ciabatta sandwich with tomatoes, pesto, and mozzarella, stacked on top of each other on a cutting board.

    We all need a few back-pocket meals that we can prepare quickly at camp or at home, and this, along with easy Italian sausage sliders and chicken and bacon sandwiches, is one of mine. I love this turkey pesto ciabatta sandwich because it's simple to prepare, and can be enjoyed hot or cold, making it perfect for a light dinner or lunch at camp, or packed up for a picnic or hike.

    [feast_advanced_jump_to]

    Why This Recipe is Great for Camping

    • These ciabatta sandwiches are a satisfying meal that can be served hot or cold. They're a fantastic camping lunch recipe.
    • They can be customized to suit your taste.
    • They're a great way to use up Thanksgiving leftovers (just like these turkey quesadillas.)
    • You only need a cast-iron skillet and panini lid (or something heavy) for cooking them. No extra fancy equipment required!

    Ingredients and Substitutions

    Ingredients for a turkey ciabatta sandwich--turkey, tomatoes, balsamic vinegar, mozzarella, ciabatta, pesto.
    • Ciabatta rolls--These rolls are sturdy without being too dense or heavy. You can use a different type of roll or sliced bread, but choose a firm artisan style bread or roll. Soft sandwich breads will get mushy and fall apart.
    • Pesto--Use your favorite store-bought or homemade pesto.
    • Turkey--You can use sliced deli turkey or sliced roast turkey breast here. Feel free to substitute a different type of meat if you prefer. Chicken, ham, or roast beef will all work well.
    • Cheese--Fresh mozzarella is my favorite for this sandwich, because it's rich and creamy. Feel free to use your favorite. Provolone or Swiss cheese would both work well.
    • Balsamic vinegar--You want a good-quality aged balsamic vinegar or a balsamic glaze for this turkey caprese sandwich. It should be thick and syrupy so that it doesn't leak out of the sandwich. If your vinegar is thin, you can make your own reduction by boiling balsamic vinegar until it thickens.

    Important Steps

    Pesto spread onto two cut halves of a ciabatta bun.
    A person seasoning the fresh mozzarella on a turkey ciabatta sandwich with salt.
    1. Slice the ciabatta rolls in half and spread each side with pesto.
    2. Top the bottom half of the bun with tomato slices, turkey, and mozzarella, then sprinkle with salt and pepper.
    A ciabatta bun topped with sliced turkey, tomato slices, and balsamic vinegar.
    A person putting a panini press onto a sandwich in a skillet.
    1. Drizzle with balsamic vinegar, then place the top half of the bun on top of the pesto turkey sandwich.
    2. Place the sandwiches in a cast iron skillet over medium heat. Cover with a panini press and cook until the cheese is beginning to mel.

    FAQs

    Can I make this without a panini press?

    Sure. You can enjoy these crave-worthy sandwiches hot or cold, but if you'd like to make a crispy toasted sandwich and don't have a panini press lid to use with your cast-iron skillet, you can use something heavy to set on top, like a smaller cast-iron skillet or a brick wrapped in foil. Alternatively, you can place the sandwich inside a campfire sandwich maker, and toast it that way.

    Can I make these turkey mozzarella sandwiches in advance?

    You can assemble the sandwiches up to 1 day in advance. Wrap them in foil and store them in your cooler or fridge until you're ready to enjoy them cold, or toast them.

    Tips and Troubleshooting

    • Use a sharp serrated knife for cutting your sandwich so that all of the fillings slice cleanly.
    • Store leftover sandwiches in your cooler or fridge, wrapped in foil or plastic wrap, and enjoy within 1 day.
    Two halves of a turkey ciabatta sandwich with tomatoes, pesto, and mozzarella, stacked on top of each other on a cutting board.

    More Camping Recipes You'll Love

    A white bowl filled with pasta salad.
    Camping Pasta Salad
    A blue Dutch oven filled with mac and cheese and a wooden spoon resting inside.
    Dutch Oven Mac & Cheese

    Tried This Recipe?

    If you've tried this recipe, please leave a comment below. Follow me on Instagram, Facebook, or Pinterest for more great camping and grilling recipes.

    Recipe

    Two halves of a turkey ciabatta sandwich with tomatoes, pesto, and mozzarella, stacked on top of each other on a cutting board.

    Turkey Ciabatta Sandwich

    A woman's face.Angie Zoobkoff
    An easy handheld meal that's loaded with turkey, pesto, tomatoes, and cheese. Perfect for a casual camping meal or to take along on a hike or picnic.
    5 from 2 votes
    Print Recipe Pin Recipe
    Prep Time 10 minutes mins
    Cook Time 20 minutes mins
    Total Time 30 minutes mins
    Course Main Course
    Cuisine American
    Servings 4 sandwiches
    Calories 641 kcal

    Equipment

    • Cast iron skillet
    • Panini press lid

    Ingredients
      

    • 4 ciabatta rolls
    • 5 to 6 tablespoons store-bought or homemade pesto
    • 12 slices roasted turkey breast, leftover turkey, or deli turkey
    • 1 large tomato thinly sliced
    • 1 ball (8 oz | 227 g) fresh mozzarella thinly sliced
    • Salt and freshly ground black pepper
    • 2 tablespoons thick balsamic vinegar or balsamic reduction

    Instructions
     

    • Slice the ciabatta buns in half. Spread about 2 teaspoons of pesto on each half of the buns.
    • Top the bottom half of each bun with turkey, tomato slices, and mozzarella, dividing each equally among the sandwiches.
    • Season generously with salt and pepper and drizzle each sandwich with 1 to 2 teaspoons of balsamic vinegar. Top with the other halves of the buns.
    • If toasting your sandwiches, set a cast-iron skillet over medium heat on your stove, camp stove, grill, or over hot campfire coals.
    • Working with two sandwiches at a time, place the sandwiches in the skillet and press down with the panini press. Cook until the bread is toasted and the cheese is beginning to melt, 8 to 10 minutes. Transfer the sandwiches to a cutting board and repeat with the remaining sandwiches.
    • Slice on the diagonal and serve.

    Notes

    • Slicing--Use a sharp serrated knife for cutting your sandwich so that all of the fillings slice cleanly.
    • Storage--Store leftover sandwiches in your cooler or fridge, wrapped in foil or plastic wrap, and enjoy within 1 day.

    Nutrition

    Serving: 1sandwichCalories: 641kcalCarbohydrates: 41.9gProtein: 40.8gFat: 27.3gSodium: 1779mgFiber: 2.4gSugar: 1g
    Keyword campfire cooking, camping lunch, cast iron cooking, hiking food, sandwiches
    Tried this recipe?Let us know how it was!

    November 17, 2023 Camping

    Make-Ahead Roasted Potatoes

    Wondering if you can prepare roasted potatoes ahead of time? The answer is yes! With these crispy make-ahead roasted potatoes, you can have them ready to be finished in your oven, over your grill, or over the campfire, for a classic side dish that's perfect for the holidays or year-round.

    A bowl of roasted potatoes on a table with plates and utensils, fresh parsley, and a skillet meal.

    If you've tried my smoked sweet potatoes, then you know I'm all about the crispy edges when it comes to roasted spuds, and these make-ahead roasted potatoes are no exception. However, the key to getting it right is to parboil the potatoes before roasting, and I don't know anyone who wants to be fiddling around with boiling and draining and then roasting potatoes in a campground. With this make-ahead version, you can take care of the parboiling step at home, tuck these potatoes in your cooler or freezer, and cook them whenever you like.

    [feast_advanced_jump_to]

    Why This Recipe is Great for Camping

    • You can prepare the potatoes at home and keep them in your cooler or freezer until you're ready to finish them.
    • They can be cooked over the fire or on your grill.

    Ingredients and Substitutions

    Ingredients for make-ahead roasted potatoes--potatoes, olive oil, fresh herbs.
    • Potatoes--I love Yukon Gold potatoes for roasting as they hold their shape, but have a creamy flavor and break down enough to create some rough edges that crisp up while they roast. You can substitute another medium-starch potato, such as yellow or white potatoes, but avoid Russets as they won't hold their shape.
    • Fresh herbs--Use any combination of fresh herbs that you have. My favorites are rosemary and thyme, but sage and oregano are also good choices. If you need to substitute dried herbs, use about 2 teaspoons dried.

    Important Steps

    Chunks of cut up potato in a pot with water.
    Parboiled potatoes and fresh herbs in a pot.
    1. Place the potatoes in a medium saucepan and add enough cold water to cover by 1 inch (25 mm). Bring to a boil and cook until the potatoes are tender.
    2. Drain the potatoes and return them to the saucepan. Add the olive oil, herbs, salt, and pepper and mix to combine. Put the lid on the pot and shake well to create crispy edges.
    Parboiled potatoes and fresh herbs in a foil roasting pan.
    A foil covered pan on a grill grate.
    1. Dump the potatoes into a foil pan large enough to hold them in a single layer. If cooking them over the campfire, cover tightly with foil.
    2. Cook the potatoes over hot campfire coals or over medium heat on a grill until crispy and tender, about 30 minutes. Serve hot.

    Smoked Potatoes Variation

    If you'd like to add a little smoke flavor to your roasted potatoes, prepare a smoke packet by wrapping wood chips or chunks in foil. Poke several holes in the smoke packet and set it over your campfire coals or grill burner. As the potatoes roast, they'll absorb the smoke flavor.

    FAQs

    How far in advance can I prepare roast potatoes?

    The parboiled potatoes can be stored in your fridge or cooler for up to 2 days before roasting. For longer storage, you can freeze the potatoes in their foil pan for up to 1 month. They can be cooked directly from frozen.

    What's the best type of potato to use?

    Use a medium-starch potato, such as Yukon Gold for the best results. These potatoes will hold their shape after boiling, but are starchy enough to develop some rough edges for crisping during the roasting period.

    Avoid waxy potatoes, such as red, as they won't develop soft creamy centers when roasted, and also won't have crispy edges. Don't use high-starch potatoes, such as Russets, as they won't hold their shape after boiling.

    Do I need to peel my potatoes?

    It's optional. Most medium-starch potatoes are thin-skinned and their skin provides another edge to crisp up. That said, if you have potatoes that have a lot of dirt stuck on them that won't come off with a good scrub, or you don't enjoy the taste or texture of potato skin, you can peel them.

    Can I make these in a regular oven?

    Yes. If you're at home and want to roast the potatoes in a regular oven, preheat the oven to 425°F and roast until they are crispy and golden, turning the potatoes once or twice, about 30 minutes. If you are roasting them in the oven, do not cover the pan.

    Tips and Troubleshooting

    • Take care not to crowd the potatoes in the pan. They need space to roast evenly. If you are going to double the recipe, use a large rectangular foil pan, or divide the potatoes between two pans.
    • If you chose to freeze your potatoes, you don't need to thaw them before cooking, but note that the cooking time will be a little longer.
    • If you are finishing the potatoes in the oven or on a covered grill, they do not need to be covered with foil. They must be covered if cooking over a campfire.
    • This roasted potato recipe is suitable for gluten-free, dairy-free, and vegan diets.
    A bowl of roasted potatoes with herbs and a platter of turkey and gravy in the background.

    More Camping Recipes You'll Love

    Three pork chops in a cast-iron skillet with mushroom gravy on top and around the pork chops.
    Skillet Pork Chops with Mushroom Gravy
    Cranberry cobbler with biscuit topping in a Dutch oven.
    Dutch Oven Cranberry Cobbler

    Tried This Recipe?

    If you've tried this recipe, please leave a comment below. Follow me on Instagram, Facebook, or Pinterest for more great camping and grilling recipes.

    Recipe

    A bowl of make ahead roasted potatoes with fresh herbs and some parsley on the side.

    Make-Ahead Roasted Potatoes

    A woman's face.Angie Zoobkoff
    These crispy roasted potatoes can be parboiled and stored in your fridge, cooler, or freezer until you're ready to roast them. The soft, creamy centres and crispy edges will make them a favorite all year round.
    5 from 1 vote
    Print Recipe Pin Recipe
    Prep Time 10 minutes mins
    Cook Time 1 hour hr
    Total Time 1 hour hr 10 minutes mins
    Course Side Dish
    Cuisine American
    Servings 4 servings
    Calories 128 kcal

    Equipment

    • 8-by-8-inch foil pan

    Ingredients
      

    • 2 pounds (908 g) Yukon Gold potatoes scrubbed and cut into 1 ½-inch (18-mm) chunks
    • 2 tablespoons olive oil plus more for the pan
    • 1 ½ tablespoons chopped fresh herbs
    • Kosher salt and freshly ground black pepper

    Instructions
     

    • Place the potatoes in a large saucepan and add enough cold water to cover them by 1 inch (25 mm).
    • Set over medium high heat and bring to a boil. Reduce the heat to maintain a gentle simmer, and cook until the potatoes are just tender when pierced with a knife, 10 to 15 minutes.
    • Drain the potatoes and return them to the saucepan. Stir in the oil and herbs and season well with salt and pepper.
    • Place the lid on the saucepan and give everything a really good shake. This part is important as it will give you your extra crispy bits by roughing up the edges of the potatoes.
    • Coat an 8-inch (20-cm) square foil pan with oil and dump the potatoes into it. Shake gently so that they lay in a single layer. Cover tightly with aluminum foil.
    • Refrigerate or freeze until you are ready to roast.
    • Prepare your grill for medium heat (425°F) or prepare hot coals in a campfire.
    • Place the covered foil pan on the cooking grate and roast until the edges are golden brown and crispy, 25 to 30 minutes. Serve hot.

    Notes

      • Don't crowd your spuds--Take care not to crowd the potatoes in the pan. They need space to roast evenly. If you are going to double the recipe, use a large rectangular foil pan, or divide the potatoes between two pans.
      • Cooking from frozen--If you chose to freeze your potatoes, you don't need to thaw them before cooking, but note that the cooking time will be a little longer.
      • To cover or not to cover--If you are finishing the potatoes in the oven or on a covered grill, they do not need to be covered with foil. They must be covered if cooking over a campfire.
      • Dietary--This roasted potato recipe is suitable for gluten-free, dairy-free, and vegan diets.
    •  

    Nutrition

    Calories: 128kcal
    Keyword foil pan cooking, make-ahead side dishes, roasted potatoes
    Tried this recipe?Let us know how it was!

    November 14, 2023 Camping

    Skillet Pork Chops with Mushroom Gravy

    These cast iron skillet pork chops come together in just 20 minutes in your cast-iron skillet and can be cooked on your camp stove, grill, over the campfire, or on your stovetop at home. For this easy skillet meal, tender chops are lightly breaded and smothered in a creamy make-ahead mushroom sauce.

    A skillet filled with pork chops with mushroom gravy, a bowl of roasted potatoes, and a bowl of mushrooms on top of some plates.

    Recipe at a Glance: Skillet Pork Chops

    • DETAILS
      • Total Time: 20 minutes (5 minutes hands-on)
      • Preparation method: Campfire, camp stove, or stovetop
      • Equipment: Cast iron skillet
    • HIGHLIGHTS
      • This simple boneless pork chop recipe uses a homemade mushroom sauce that can be prepared in advance. No canned soup!
      • The dish is cooked entirely in a single cast iron skillet.

    Pan-fried pork chops with mushroom gravy has been a staple at our house forever. While many recipes call for condensed mushroom soup, I found that it never really agreed with me and that I couldn't get the sauce to be nice and smooth without mixing it up in a separate bowl.

    Since camping is all about less dishes and less effort, I devised this easy recipe that utilizes a make-ahead mushroom sauce. All you need to do at camp is shake your pork chops in breadcrumbs, sear them in your skillet, and top with the creamy sauce.

    [feast_advanced_jump_to]

    Ingredients and Substitutions

    Ingredients for skillet pork chops with mushroom gravy--olive oil, cream cheese mushroom sauce, pork chops, and seasoned bread crumbs
    • Seasoned breadcrumbs--I prefer to use seasoned breadcrumbs, as they give the finished dish a little more flavor. You can substitute plain breadcrumbs and add your own seasoning, if you prefer. Don't use panko, as it won't adhere to the pork evenly.
    • Pork chops--Just like in my Blackstone pork chops recipe, I use center cut pork loin chops for this recipe. You can use your preferred cut, but choose ones that are at least ¾-inch (18-mm) thick.
    • Cream cheese mushroom sauce--If you're headed out to camp, I recommend making the cream cheese mushroom sauce in advance. It's not difficult to make, but it will save you a lot of time and dishes once you're there. You can keep it in your cooler for a few days, or freeze it for up to 3 months.

    How to Make Cast-Iron Skillet Pork Chops

    A person seasoning three pork chops with salt on a baking sheet.

    1. Season the pork with salt and pepper.

    Three seasoned pork chops in a zip top bag.

    2. Place the seasoned breadcrumbs in a bag and add the pork chops. Seal the bag and give it a good shake to evenly coat the pork.

    Three pork chops coated with fine bread crumbs in a cast iron skillet.

    3. Heat the oil in a cast-iron skillet over medium heat. Add the pork chops and sear on both sides until almost cooked through.

    Three cooked breaded pork chops in a cast iron skillet with mushroom gravy simmering around them.

    4. Pour in the mushroom sauce and let it simmer until the pork chops are cooked through and the sauce is reduced to your desired consistency.

    FAQs

    Can I add onions to the mushroom gravy?

    Absolutely. I recommend sautéing your onions in some oil in the skillet before cooking your meat. When the onions are soft, push them off to the side and cook the pork, adding more oil, if needed. Once you add the mushroom sauce, mix the onions into it.

    What should I serve with smothered mushroom pork chops?

    You're going to want something to sop up any extra mushroom gravy. Mashed or roasted potatoes, rice, or French bread are all great choices. If you've got extra mushrooms, try one of these mushroom recipes.

    Can I make these with bone-in pork chops?

    Yes. Depending on the thickness of the pork chops, the cooking time may be slightly longer. Use an instant read thermometer to ensure that your chops have reached an internal temperature of 145°F (63°C) before serving.

    How do I avoid tough pork chops?

    Pork chops generally become tough if they are overcooked. Center cut chops are quite lean, so it doesn't take much extra cooking to make them tough. Check the internal temperature of your chops frequently, and avoid cooking them over 145°F (63°C).

    After removing them from the heat, let the chops rest for 3 to 5 minutes before serving. This will help the juices absorb into the meat, ensuring a juicy, tender bite.

    Storing and Reheating Skillet Pork Chops

    Leftover pork chops and mushroom gravy can be stored in a sealed container in your fridge or cooler for up to 3 days. Rewarm them gently in a skillet over medium-low heat until warmed through.

    Tips and Troubleshooting

    • The cooking time for your pork is going to be dependent on how thick they are. If you are cooking thin-cut chops, start checking the internal temperature early.
    • If your pork chops are browning too quickly, reduce the heat. This will allow the pork to cook through without burning the breadcrumb coating.
    • If you prefer extra gravy, increase the amount of mushroom sauce to 2 cups.
    • Use your extra mushroom sauce to make creamy mushroom ravioli for another easy meal on your camping trip.
    Three pork chops in a cast-iron skillet with mushroom gravy on top and around the pork chops.

    More Pork Chop Recipes You'll Love

    A platter of seared pork chops topped with apples and onions.
    Pork Chops with Apples and Onions
    Four sweet and sour pork skewers with pork cubes, pineapple, pepper, and onion.
    Sweet and Sour Pork Skewers

    Tried This Recipe?

    If you've tried this recipe, please leave a comment below. Follow me on Instagram, Facebook, YouTube, or Pinterest for more great camping and grilling recipes.

    Recipe

    Three pork chops in a cast-iron skillet with mushroom gravy on top and around the pork chops.

    Skillet Pork Chops with Mushroom Gravy

    A woman's face.Angie Zoobkoff
    This easy camping meal of cast-iron skillet pork chops with make-ahead mushroom gravy can be made on your camp stove, grill, or over the fire and is ready in just 20 minutes.
    5 from 2 votes
    Print Recipe Pin Recipe
    Prep Time 5 minutes mins
    Cook Time 15 minutes mins
    Total Time 20 minutes mins
    Course Main Course
    Cuisine American
    Servings 3 servings
    Calories 660 kcal

    Equipment

    • 10-to-12-inch cast-iron skillet

    Ingredients
      

    • Three (¾-inch-thick) boneless pork loin chops (about 1 ½ lbs | 680 g)
    • Salt and freshly ground black pepper
    • ½ cup seasoned breadcrumbs
    • 2 tablespoons olive oil
    • 1 ½ cups cream cheese mushroom sauce
    • Chopped fresh parsley for garnish (optional)

    Instructions
     

    • Season the pork chops with salt and pepper
    • Place the pork chops in a zip-top bag and add the bread crumbs. Shake well to evenly coat the meat.
    • Set a 10-to-12-inch cast-iron skillet over medium heat on your stove, camp stove, grill, or over hot coals. Let the skillet heat up for a couple of minutes, then pour in the oil.
    • Lay the pork chops in the hot oil and sear, turning once, until golden brown on both sides and almost cooked through, about 4 minutes per side.
    • When the pork chops have reached an internal temperature of about 135°F (57°C), or are nearly cooked through, reduce the heat to medium low (or move the skillet to a slightly cooler part of the fire), and pour in the mushroom sauce. Let it simmer until heated through and reduced to your desired consistency, 2 to 3 minutes.
    • Garnish with parsley, if using, and serve immediately.

    Notes

    • Thickness matters--The cooking time for your pork chops is going to be dependent on how thick they are. If you are cooking thin-cut chops, start checking the internal temperature early.
    • Browning--If your pork chops are browning too quickly, reduce the heat. This will allow the pork to cook through without burning the breadcrumb coating.
    • Make it saucier--If you prefer extra gravy, increase the amount of mushroom sauce to 2 cups.
    • Leftover mushroom sauce--Mix your extra mushroom sauce with pasta or egg noodles for another easy meal on your camping trip.

    Nutrition

    Serving: 1 portionCalories: 660kcalCarbohydrates: 19gProtein: 48gFat: 28gCholesterol: 117mgFiber: 1gSugar: 1g
    Keyword breaded pork chops, cast iron cooking, mushroom gravy, pan-seared pork chops, skillet pork chops
    Tried this recipe?Let us know how it was!

    November 10, 2023 Camping

    Dutch Oven Cranberry Cobbler

    Want an easy, festive, holiday dessert that you can cook in your Dutch oven at camp? This Dutch oven cranberry cobbler is exactly that. It's made with tender spiced cranberries that are topped with a sweet biscuit dough. It comes together in one pot and can be made in your fire pit or in your oven at home.

    Two plates of cranberry cobbler on a wooden table with fir branches nearby.

    When it comes to easy Dutch oven desserts, cobblers and crisps top the list. They're quick to toss together in a single pan or pot, and can be made with virtually any type of fruit. The bright red color of this cranberry cobbler is perfect for the holidays, when fresh cranberries are available, but don't let the season stop you from swapping in a different type of fruit, or making it with frozen berries.

    [feast_advanced_jump_to]

    Why This Recipe is Great for Camping

    • You can mix up the dry ingredients ahead of time so you've got less to do at camp.
    • You can make it with just one bowl and your Dutch oven, and clean up is easy (as long as you line your Dutch oven before cooking!)
    • It's a festive dessert that's perfect for the holidays and a great way to use cranberries, but can easily be adjusted to use whatever fruit you've got with you.

    Ingredients and Substitutions

    Ingredients for cranberry cobbler--flour, sugar, butter, orange, cranberries, baking powder, and milk.
    • Cranberries--You can use fresh or frozen cranberries for this recipe. If you use frozen, you don't need to defrost them, but your cooking time may be slightly longer.
    • Sugar--You can reduce the amount of sugar, if you want, but remember that cranberries are very tart. Cutting back on the sugar in the filling will make for a tart cranberry cobbler.
    • Milk--You can use any milk you have on hand, whether skim, whole, or non-dairy. You can even use light cream or half and half. The higher the fat content, the more tender your cobbler topping will be.

    How to Make Dutch Oven Cobbler

    A person mixing cranberries, orange zest, flour, sugar, and cinnamon in a glass bowl.
    A person pouring milk into a bowl of dry ingredients.
    1. Combine the cranberries, orange zest and juice, ½ cup sugar, cinnamon, and 2 tablespoons of flour in a bowl. Mix well so that the cranberries are evenly coated.
    2. Whisk the remaining flour, sugar, baking powder, and salt in a bowl. Use your fingers or a fork to work the butter into the dry ingredients until it forms pea-sized balls. Pour the milk into the dough and use a fork to mix it gently.
    Uncooked cranberry cobbler in a Dutch oven.
    A Dutch oven with coals on top.
    1. Line your Dutch oven with parchment paper. Spread the cranberries in an even layer on the bottom of the Dutch oven and top with scoops of the batter.
    2. Place the cobbler on top of 8 coals with 16 coals on the lid. Cook until the cranberry filling is bubbling and the topping is cooked through, replenishing the coals as needed.
    Cranberry cobbler with biscuit topping in a Dutch oven.

    FAQs

    Can I substitute a different type of fruit or berry in the cobbler?

    Yes, but you will likely need to reduce the amount of sugar that you use. Cranberries are very tart, while other fruits are sweeter. If you are using ripe, juicy fruit, like in-season peaches or blueberries, they will be naturally sweet on their own, and you can reduce the sugar by half.

    Can I make this in the oven?

    Definitely. Follow the instructions, but assemble the cobbler in a regular Dutch oven or baking dish. Bake at 350°F (180°C), uncovered, until the filling is bubbly and the topping is golden, about 45 minutes.

    How should I serve this?

    If you're at home, or have access to a freezer, this is fantastic with vanilla ice cream. If you're at camp, bring along a can of whipped cream to spray on top. (You'll need it for topping your skillet pancakes, anyway!)

    Tips and Troubleshooting

    • To get ahead, mix your dry topping ingredients in a resealable plastic bag before heading out on your camping trip.
    • Start your coals about 15 minutes before you plan to start cooking your cobbler. They're ready when they are white.
    • This recipe was made with a 12-inch (7.4-quart) Dutch oven. If you are using a smaller 10-inch (5-quart) Dutch oven, use 7 coals underneath and 14 on top.
    • Be sure to line your Dutch oven with parchment paper for easy clean up.
    • Store extra cobbler in a sealed container in your cooler or fridge for up to 3 days. Leftover cobbler makes a great breakfast!
    A serving of cranberry cobbler on a white plate.

    The Most Important Thing to Remember

    Dutch oven campfire cooking is not an exact science. The cook time for the campfire cobbler is going to vary depending on the outside temperature, the frequency that you replace your coals, and how often you open the lid. Be patient!

    More Camping Dessert Recipes You'll Love

    A spoonful of no-bake mini pumpkin cheesecake resting on top of a mason jar filled with the cheesecake.
    Mini Pumpkin Cheesecake
    A cast iron Dutch oven filled with bread pudding.
    Dutch Oven Bread Pudding

    Tried This Recipe?

    If you've tried this recipe, please leave a comment below. Follow me on Instagram, Facebook, or Pinterest for more great camping and grilling recipes.

    Recipe

    Two plates of cranberry cobbler on a wooden table with fir branches nearby.

    Dutch Oven Cranberry Cobbler

    This festive Dutch oven cobbler has tender spiced cranberries topped with sweet biscuit dough. It's perfect for your holiday camping trip, or any time you're craving an easy dessert.
    5 from 1 vote
    Print Recipe Pin Recipe
    Prep Time 15 minutes mins
    Cook Time 1 hour hr
    Total Time 1 hour hr 15 minutes mins
    Course Dessert
    Cuisine American
    Servings 6 servings
    Calories 433 kcal

    Equipment

    • 7.4-quart Dutch oven

    Ingredients
      

    For the cranberries

    • 4 cups (1 lb | 454 g) fresh or frozen cranberries
    • ½ cup granulated sugar
    • 2 tablespoons all-purpose flour
    • Zest and juice of 1 orange
    • 1 ½ teaspoons cinnamon

    For the cobbler topping

    • 1 ½ cups all-purpose flour
    • ⅓ cup granulated sugar
    • 1 ½ teaspoons baking powder
    • ¾ teaspoons salt
    • 6 tablespoons unsalted butter cut into small cubes
    • ½ cup milk

    Instructions
     

    Prepare the coals and Dutch oven

    • Light a chimney of coals. You'll need 24 coals to start cooking. Line your Dutch oven with parchment paper.

    Prepare the cranberries

    • In a large bowl, mix the cranberries, sugar, flour, orange zest and juice, and cinnamon. Stir well so that all of the cranberries are coated.
    • Arrange the cranberries in an even layer on the bottom of the Dutch oven.

    Make the cobbler topping

    • Wipe out the bowl that you mixed the cranberries in. Add the flour, sugar, baking powder, and salt, and whisk them together.
    • Add the cubes of butter and use a fork or your fingers to work the butter into the dry ingredients until they're evenly dispersed and the size of small peas.
    • Pour in the milk and use a fork to gently mix the dough together until evenly moistened. Drop the dough in scoops over the top of the cranberries.

    Cook the cobbler

    • Arrange 8 hot coals (or embers) in your fire pit and set the covered Dutch oven on top. Place 16 coals on the lid of the Dutch oven.
    • Let the cobbler cook until the filling is bubbling and the biscuits are cooked through and tender, about 1 hour, replenishing the coals as necessary. You'll know that it's nearly ready when you can smell it. To check for doneness, you can gently pry the topping apart. It should be tender, but not wet inside.
    • Let it cool slightly before serving.

    Notes

    • Get ahead--Mix your dry topping ingredients in a resealable plastic bag before heading out on your camping trip.
    • Preparing your coals--Start your coals about 15 minutes before you plan to start cooking your cobbler. They're ready when they are white.
    • Dutch oven size--This recipe was made with a 12-inch (7.4-quart) Dutch oven. If you are using a smaller 10-inch (5-quart) Dutch oven, use 7 coals underneath and 14 on top.
    • Make clean up easy--Be sure to line your Dutch oven with parchment paper.
    • Storage and leftovers--Store extra cobbler in a sealed container in your cooler or fridge for up to 3 days. Leftover cobbler makes a great breakfast!

    Nutrition

    Calories: 433kcal
    Keyword campfire cobbler, cobbler, cranberry dessert, dutch oven cooking
    Tried this recipe?Let us know how it was!

    November 3, 2023 Foil Packet Recipes

    Smoked Sweet Potatoes

    These smoked sweet potatoes have it all -- creamy flesh, crisped edges, and an irresistible smoky, buttery flavor. They're tossed with sage and butter and cooked in a foil pan on your smoker or grill until perfectly tender.

    A bowl of cubed smoked sweet potatoes with crispy edges, with several thyme sprigs on the side.

    I've tried smoking whole sweet potatoes many times, and although they taste fantastic, they never seem to be smoky enough. Plus, they take forever. These cubed smoked sweet potatoes solved both of those issues, and gave me one added bonus -- crispy edges.

    The smaller pieces absorb more smoke as they cook, and they cook faster. As with any type of roasted potato, I love the contrast of crisped edges against the creaminess of the potato, but if you prefer to just have soft, tender, smoky potatoes without any crisping, there are instructions for that, too. It's definitely a choose-your-own-adventure situation.

    Serve this satisfying grilled side dish alongside your Thanksgiving turkey, your favorite pork chop recipe, or grilled bacon-wrapped pork tenderloin.

    [feast_advanced_jump_to]

    Why You'll Loved This Smoked Sweet Potato Recipe

    • Using cubed sweet potatoes means that they cook faster than smoking whole sweet potatoes and take on more smoke flavor.
    • You can make them on your smoker or grill.
    • It's easy to add crispy edges to your potatoes, if you like.
    • Cooking them in a foil pan makes for very easy clean up.

    Ingredients and Substitutions

    Ingredients for smoked sweet potatoes--sweet potatoes, olive oil, butter, and sage.
    • Sweet potatoes--You can substitute yams here if you want a starchier, less sweet vegetable. Whatever you use, be sure to cut your potatoes into similar sized pieces so that they cook evenly.
    • Oil and butter--I prefer to use both because the butter adds a lot of flavor to the smoked potatoes, while the oil helps it to cook and prevents the butter from burning.
    • Sage--This spice pairs beautifully with sweet potatoes and applewood smoke. If you want to use fresh sage, use about 1 tablespoon of minced fresh sage leaves.
    • Cayenne (not pictured)--Optional, but highly recommended. The heat of the pepper balances the richness of the butter and the sweetness of the potatoes.

    How to Smoke Sweet Potatoes

    A bowl filled with oil and spices.

    1. Whisk the olive oil, sage, and cayenne, if using, in a small bowl.

    A person pouring liquid into a foil tray filled with cubed sweet potatoes.

    2. Arrange the cubed sweet potatoes in a foil tray. Pour the spiced oil mixture over the potatoes and toss to combine.

    A foil tray filled with cubed sweet potatoes, topped with butter.

    3. Dot the butter over the potatoes.

    A tray of sweet potatoes on a grill.

    4. Smoke the sweet potatoes until fork tender, replenishing wood chips as needed.

    How to Get Crispy Edges on Your Smoked Potatoes

    The key to being able to crisp up the edges of your smoked sweet potatoes is access to direct heat, so this is easiest done if you're making them on a grill with a smoke box or smoking pouch, or another type of smoker that offers direct heat. You can just slide them over the flame for the last 10 to 15 minutes of cooking.

    If you're using a traditional offset smoker that offers only indirect heat, I recommend moving the potatoes to a direct heat source or a hot oven for the final 15 minutes of cooking, if you're aiming for those crisped edges.

    FAQs

    What's the best type of wood to use for smoking sweet potatoes?

    I recommend a fruit wood. Apple is my favorite for this recipe, but cherry will work as well.

    How long does it take to smoke sweet potatoes?

    For these cubed sweet potatoes, it will take about an hour and 15 minutes to cook at 275°F (135°C). If you are cooking whole sweet potatoes, it will take 2 to 2 ½ hours to cook them.

    What's the difference between sweet potatoes and yams?

    Although the terms sweet potato and yam are often used interchangeably, they are different. Sweet potatoes are orange colored and are commonly available in North American supermarkets. Yams have a darker skin, paler flesh, are more starchy, and less sweet.

    Can I make these into smoked mashed sweet potatoes?

    Definitely. Once you've smoked them until they are very tender, toss them into a bowl and mash with a potato masher or a fork until fluffy and smooth. Season to taste with salt and pepper. To really gild the lily, take your sweet potato mash to the next level and transform it into a smoked sweet potato casserole.

    Tips and Troubleshooting

    • Store leftovers in a sealed container in your fridge for up to 4 days. To reheat with crisped edges, warm them in a skillet over medium low heat until crisped and heated through. Alternatively, for uniformly soft sweet potatoes, you can reheat them in the microwave or in a baking dish in a 300°F (150°C) oven. Leftover smoked sweet potatoes also make a great addition to chorizo sweet potato hash.
    • Smoking your sweet potatoes at a higher temperature will allow them to cook more quickly, but they will taste less smoky than if cooked at 275°F (135°C).
    • This recipe is suitable for gluten-free diets.
    A bowl of cubed smoked sweet potatoes with crispy edges, with several thyme sprigs on the side.

    More Grilling Side Dish Recipes You'll Love

    Green bean casserole in a cast iron skillet with fried onions on the side.
    Skillet Green Bean Casserole
    Skewers of grilled Brussels sprouts and bacon.
    Grilled Brussels Sprouts with Bacon

    Tried This Recipe?

    If you've tried this recipe, please leave a comment below. Follow me on Instagram, Facebook, or Pinterest for more great camping and grilling recipes.

    Recipe

    A bowl of cubed smoked sweet potatoes with crispy edges, with several thyme sprigs on the side.

    Smoked Sweet Potatoes

    A woman's face.Angie Zoobkoff
    This is a fantastic side dish to enjoy at Thanksgiving or year round. It's made on your grill or smoker, where cubed sweet potatoes are tossed with sage, butter, and oil, and smoked until tender.
    5 from 1 vote
    Print Recipe Pin Recipe
    Prep Time 10 minutes mins
    Cook Time 1 hour hr 15 minutes mins
    Total Time 1 hour hr 25 minutes mins
    Course Side Dish
    Cuisine American
    Servings 4 servings
    Calories 206 kcal

    Equipment

    • Smoker or grill with smoke box or smoke pouch
    • Apple or cherry wood chips or chunks
    • 8-by-8-inch foil pan

    Ingredients
      

    • 2 large sweet potatoes (1.5 lbs | 680 g total) peeled and cut into ¾-inch cubes
    • 1 tablespoon olive oil
    • ½ teaspoon dried sage
    • ⅛ teaspoon cayenne pepper (optional)
    • Salt and freshly ground black pepper
    • 1 tablespoon butter cut into small cubes

    Instructions
     

    • Prepare a smoker or grill with smoke box or smoke pouch for indirect heat at 275°F (135°C). Get a steady stream of smoke going before you begin to cook your potatoes.
    • In a small bowl, whisk the oil, sage, and cayenne, if using.
    • Place the sweet potatoes in the foil pan and drizzle the spiced oil over the top. Season with salt and pepper and toss well to combine.
    • Dot the cubes of butter over the sweet potatoes.
    • Transfer the pan to the smoker or grill and cook at 275°F (135°C) for 45 minutes, replenishing the wood chips as needed.
    • If you want crispy edges, move the tray of sweet potatoes over direct heat and increase the heat to 350°F (180°C). Cook until the edges are crispy and the sweet potatoes are tender, stirring occasionally, about 15 minutes.
      If you want uniformly soft sweet potatoes, continue smoking at 275°F (135°C) until they are very tender, about 40 minutes more.
    • Transfer to a serving bowl and serve immediately.

    Video

    Notes

      • Storage--Store leftovers in a sealed container in your fridge for up to 4 days.
      • Reheating--To reheat with crisped edges, warm them in a skillet over medium low heat until crisped and heated through. Alternatively, for uniformly soft sweet potatoes, you can reheat them in the microwave or in a baking dish in a 300°F (150°C) oven.
      • Speed it up--Smoking your sweet potatoes at a higher temperature will allow them to cook more quickly, but they will taste less smoky than if cooked at 275°F (135°C).
      • Dietary--This recipe is suitable for gluten-free diets.
    •  
    •  

    Nutrition

    Serving: 1 portionCalories: 206kcalCarbohydrates: 38gFat: 6gCholesterol: 8mgFiber: 3gSugar: 29g
    Keyword smoked side dishes, smoking, sweet potatoes, Thanksgiving sides
    Tried this recipe?Let us know how it was!

    October 27, 2023 Camping

    Skillet Green Bean Casserole

    This easy green bean casserole in a skillet is made with creamy homemade mushroom sauce, fresh green beans, and crispy fried onions, just like the classic. It uses just one pan, can be cooked over your campfire, camp stove, grill, or on the stovetop, and can be partially prepped before heading out to camp.

    Green bean casserole in a cast iron skillet with fried onions on the side.
    [feast_advanced_jump_to]

    Creamy green bean casserole probably isn't something you imagine making on a camping trip. It's a classic holiday side dish, but the traditional baked version often requires a lot of dishes and effort, which is something we aim to avoid on camping trips. At least, I do.

    However, I love green bean casserole, and this skillet version has everything I adore about it -- snappy green beans, a homemade creamy mushroom sauce, and crispy fried onions. Best of all, the mushroom sauce can be prepared well in advance, which means this easy oven-free Thanksgiving side dish comes together in just 15 minutes and is a great addition to your simple Thanksgiving camping dinner.

    Why This Recipe is Great for Camping

    • It's made in your cast iron skillet and can be cooked on your camp stove, grill, campfire, or stovetop.
    • It's made with a homemade cream cheese mushroom sauce (no canned soup here!) that can be made in advance, making this casserole quick to assemble and cook at camp.
    • The extra mushroom sauce can be used in a variety of ways, making it a great base for another meal on your camping trip.

    Ingredients and Substitutions

    Ingredients for skillet green bean casserole--green beans, mushroom sauce, and fried onions.
    • Mushroom sauce--The cream cheese mushroom sauce can be made ahead of time and stashed in your cooler before you head out on your camping trip. Use leftover sauce as a gravy for pork chops, steak, or chicken, or toss it with pasta for an easy meal.
    • Green beans--Use fresh green beans for best results. If you are using the slender French green beans, or haricots vert, they will need less cooking time.
    • Fried onions--To get the classic green bean casserole texture, use store-bought crispy fried onions. My favorite are French's fried onions, but you can use whatever is available to you. The flavor and potency of them vary from brand to brand, so do taste them first and adjust the amount you sprinkle on top of the green bean skillet, if necessary.

    Important Steps

    Creamy mushroom sauce in a cast iron skillet.
    Green beans cooking in mushroom sauce in a cast-iron skillet.
    1. Pour the mushroom sauce into a 10-to-12-inch cast iron skillet and bring to a gentle simmer over medium heat.
    2. Stir in the green beans and cook until the beans are just tender, and the mushroom sauce has reduced to a thick coating. Top with crispy fried onions and serve directly from the skillet.

    FAQs

    Can you make this casserole ahead of time?

    Sort of. You can prepare the mushroom sauce and keep it refrigerated (or stashed in your cooler) for up to 4 days, or freeze it for up to 3 months before using. Simply thaw it and proceed with the recipe.

    Can I use frozen or canned green beans?

    Fresh green beans are best, but you can use frozen for this recipe. Add them directly from frozen to the skillet with the mushroom sauce. Once cooked, the casserole will have a slightly softer texture than if made with fresh beans.

    I don't recommend using canned beans here. They will become too soft and mushy after cooking in the mushroom sauce.

    What do you serve with green bean casserole?

    This is a classic Thanksgiving side dish, so it will pair perfectly with your Dutch oven turkey breast or grilled spatchcock turkey, but with a dish this easy to prepare, there's no need to limit it to just once a year. Try it alongside grilled bacon-wrapped pork tenderloin or grilled chicken skewers, and don't forget some Dutch oven cranberry cobbler for dessert.

    Tips and Troubleshooting

    • If you prefer an extra saucy casserole, use 2 ½ cups of mushroom sauce.
    • This green bean casserole skillet makes for tender, but still slightly crunchy green beans. If you prefer a softer bean, add an extra ½ cup of mushroom sauce and simmer the beans for an extra 5 minutes, or until they are softened to your liking.
    • Leftovers can be stored in a sealed container in your cooler or fridge for up to 3 days. Rewarm over low heat in a skillet, adding extra mushroom sauce, milk, or cream to loosen the sauce, if needed.
    A serving of green bean casserole removed from a skillet and on a plate next to the skillet.

    More Camping Recipes You'll Love

    A spoonful of no-bake mini pumpkin cheesecake resting on top of a mason jar filled with the cheesecake.
    Mini Pumpkin Cheesecake
    An open foil packet filled with gnocchi, corn, tomatoes, and basil on a wooden tree stump.
    Corn and Tomato Gnocchi Foil Packets

    Tried This Recipe?

    If you've tried this recipe, please leave a comment below. Follow me on Instagram, Facebook, or Pinterest for more great camping and grilling recipes.

    Recipe

    Green bean casserole in a cast iron skillet with fried onions on the side.

    Skillet Green Bean Casserole

    A woman's face.Angie Zoobkoff
    This easy green bean casserole is made in a skillet with homemade mushroom sauce, fresh green beans, and crispy fried onions. You can make it over your campfire, or on your camp stove, grill, or stovetop.
    5 from 1 vote
    Print Recipe Pin Recipe
    Prep Time 5 minutes mins
    Cook Time 10 minutes mins
    Total Time 15 minutes mins
    Course Side Dish
    Cuisine American
    Servings 4 servings
    Calories 167 kcal

    Equipment

    • 10-to-12-inch cast-iron skillet

    Ingredients
      

    • 2 to 2 ½ cups cream cheese mushroom sauce
    • 1 pound (454 g) fresh green beans trimmed and cut into 2-inch (5-cm) pieces
    • Salt and freshly ground black pepper
    • ½ cup crispy fried onions

    Instructions
     

    • Pour 2 cups of mushroom sauce into a 10-to-12-inch skillet and set it over medium heat. Bring the sauce to a gentle simmer.
    • Stir in the green beans and cook, stirring occasionally, until the beans are just tender and the mushroom sauce has reduced to a thick coating, 8 to 10 minutes. Season to taste with salt and pepper.
    • Remove from the heat and sprinkle with the fried onions. Serve directly from the skillet.

    Notes

      • Make it saucy--If you prefer an extra saucy casserole, use 2 ½ cups of mushroom sauce.
      • For soft green beans--This green bean casserole skillet makes for tender, but still slightly crunchy green beans. If you prefer a softer bean, add an extra ½ cup of mushroom sauce and simmer the beans for an extra 5 minutes, or until they are softened to your liking.
      • Storage and reheating--Leftovers can be stored in a sealed container in your cooler or fridge for up to 3 days. Rewarm over low heat in a skillet, adding extra mushroom sauce, milk, or cream to loosen the sauce, if needed.

    Nutrition

    Calories: 167kcal
    Keyword camping side dishes, cast iron cooking, green bean casserole
    Tried this recipe?Let us know how it was!

    October 27, 2023 Camping

    Cream Cheese Mushroom Sauce

    You're going to want to pour this luxurious cream cheese mushroom sauce over everything. We're talking potatoes, steak, chicken, veggies, and creamy mushroom ravioli. And since it's ready in just 20 minutes, can be made ahead, and is freezer-friendly, you'll be able to keep a stash on hand at all times.

    A jar filled with creamy mushroom sauce with some mushrooms next ot it.

    I love having sauces and condiments that can help me create multiple meals, particularly if they freeze well, which is why this make ahead mushroom sauce is a staple at my house. It's simple to make, and I love that it doesn't require making a roux or fighting with lumps in the sauce.

    Keep some on hand to stir into pasta, pour over rice, potatoes, or pan-seared pork chops. If you're heading out on a Thanksgiving camping trip, use it to make skillet green bean casserole, then use the rest the next evening to smother gnocchi, or as a gravy for your leftover Dutch oven turkey breast.

    [feast_advanced_jump_to]

    Why You'll Love This Recipe

    • It can be made ahead of time.
    • It freezes incredibly well.
    • It can be used for a variety of different meals, making it ideal for packing along on camping trips.

    Ingredients and Substitutions

    Ingredients for cream cheese mushroom sauce--cream cheese, cream, mushrooms, broth, butter, Dijon, garlic, and Worcestershire sauce.
    • Mushrooms--I use regular white mushrooms here, but brown (cremini) will also work well.
    • Broth--This thins the sauce and keeps it from being too rich. You can use vegetable broth, if you prefer, or for an extra boost in mushroom flavor, try substituting mushroom broth.
    • Whipping cream--This gives the sauce its richness and creaminess. I don't recommend substituting a low fat dairy produce here as your sauce will remain too thin and will lack flavor.
    • Cream cheese--Use full-fat cream cheese for the best results. The cream cheese acts as a thickener for the sauce, so you don't have to fuss with making a roux.
    • Worcestershire sauce--This adds some umami to the sauce. You can also substitute soy sauce here, if you prefer.

    How to Make Creamy Mushroom Sauce

    A person stirring butter and chopped garlic in a skillet.
    A person stirring mushrooms as they cook in a skillet.
    1. Melt the butter in a skillet over medium-low heat. Add the garlic and sautè for 1 minute.
    2. Add the mushrooms and cook over medium heat until they soften and release their liquid.
    A person pouring cream into a skillet of mushrooms.
    A skillet filled with mushroom sauce, with cream cheese melting into it.
    1. Pour in the broth and cream and bring to a gentle simmer.
    2. Add the cream cheese and stir until it melts. Whisk in the Dijon and Worcestershire sauce.

    FAQs

    How can I use this sauce?

    This sauce is the foundation for many great dishes, including this easy skillet green bean casserole. You can also use it as a sauce for pan seared pork chops, steak, or chicken, or toss it with pasta for a quick and easy dinner. Mushroom sauce is also a great topper for rice or mashed potatoes.

    How thick should the sauce be?

    The finished sauce will have a consistency that is not quite as thick as whipping cream. It may seem a little thin, however, it will reduce more when you cook with it in other dishes. If you want to use it immediately as a thick sauce or gravy, continue to simmer it until it thickens to your preferred consistency.

    Can I freeze mushroom sauce?

    Yes. The sauce freezes beautifully. Let it cool completely, then transfer it to a freezer safe container or resealable bags and stash in the freezer for up to 3 months. Thaw in the refrigerator before using.

    Tips and Troubleshooting

    • If you want a thicker sauce, simmer it until it reduces to your desired consistency.
    • Store the sauce in a sealed container in the refrigerator for up to 4 days or freeze for up to 3 months.
    • This recipe is suitable for gluten-free diets as long as you use gluten-free Worcestershire and broth. To make this vegetarian, use vegetable or mushroom broth and soy sauce, instead of Worcestershire.
    A spoonful of creamy mushroom sauce being lifted from a skillet.

    More Everyday Staples You'll Love

    A spoonful of seasoning mixture.
    All-Purpose Seasoning Blend
    A jar of lemon thyme vinaigrette wit ha lemon and bunch of thyme behind it.
    Lemon Thyme Vinaigrette

    Tried This Recipe?

    If you've tried this recipe, please leave a comment below. Follow me on Instagram, Facebook, or Pinterest for more great camping and grilling recipes.

    Recipe

    A jar filled with creamy mushroom sauce with some mushrooms next ot it.

    Cream Cheese Mushroom Sauce

    This classic creamy mushroom sauce is prepared in your skillet with fresh mushrooms, cream, cream cheese, and broth. It's easy to make, can be prepared in advance, and is freezer-friendly.
    5 from 4 votes
    Print Recipe Pin Recipe
    Prep Time 5 minutes mins
    Cook Time 15 minutes mins
    Total Time 20 minutes mins
    Course Condiment
    Cuisine American
    Servings 4 cups
    Calories 209 kcal

    Ingredients
      

    • 2 tablespoons butter
    • 2 cloves garlic minced
    • 1 pound white mushrooms sliced
    • 1 cup chicken broth
    • ¾ cup whipping cream
    • 6 tablespoons cream cheese cut into cubes
    • 2 teaspoons Dijon mustard
    • 2 teaspoons Worcestershire sauce
    • Salt and freshly ground black pepper

    Instructions
     

    • In a large skillet set over medium-low heat, melt the butter. Add the garlic and sauté until fragrant, about 1 minute.
    • Increase the heat to medium, stir in the mushrooms and cook until they soften and release their juices, 8 to 10 minutes.
    • Pour in the stock and cream and bring to a simmer.
    • Add the cream cheese and stir until it melts and is incorporated into the sauce. Whisk in the Dijon and Worcestershire sauce.
    • Remove from the heat. Season to taste with salt and pepper.

    Notes

      • Thickening the sauce--If you want a thicker sauce, simmer it until it reduces to your desired consistency. If you will be heating it again when you add it to another dish, remember that it will reduce more when you heat it.
      • Storage and freezing--Store the sauce in a sealed container in the refrigerator for up to 4 days or freeze for up to 3 months.
      • Dietary--This recipe is suitable for gluten-free diets as long as you use gluten-free Worcestershire and broth. To make this vegetarian, use vegetable or mushroom broth and soy sauce, instead of Worcestershire.

    Nutrition

    Calories: 209kcal
    Keyword creamy mushroom sauce, make ahead mushroom sauce
    Tried this recipe?Let us know how it was!

    October 20, 2023 Dinner

    Grilled Bacon-Wrapped Pork Tenderloin

    You're going to want to put this bacon-wrapped pork tenderloin at the top of your grilling rotation. It's easy to make, and the blanket of crispy bacon keeps the pork tender and juicy, while a bourbon hot honey glaze adds a welcome boost of flavor. It's easy enough for a casual weeknight, but spectacular enough to serve to guests.

    A partially sliced grilled bacon-wrapped pork tenderloin on a wooden cutting board with a dish of green beans on the side.

    Recipe at a Glance: Bacon Wrapped Grilled Pork Tenderloin

    • DETAILS
      • Total time: 50 minutes (15 minutes hands-on)
      • Preparation method: Grill (using indirect heat)
    • HIGHLIGHTS
      • A blanket of thick cut bacon keeps the pork juicy and tender while it grills.
      • A quick and easy bourbon mustard glaze adds a boost of flavor to the pork.
      • Can be easily scaled to feed as many people as you need.

    Let's be honest. Pork tenderloin can turn out dry and tough if it's even a tiny bit overcooked, particularly on the grill. Thankfully, there's an easy solution. Wrap it in a few slices of bacon and slather on a boozy mustard, bourbon, and honey glaze, and you've got the juiciest grilled pork tenderloin you'll ever try.

    Add us as a trusted site on Google
    [feast_advanced_jump_to]

    Ingredients and Substitutions

    Ingredients for grilled bacon-wrapped pork tenderloin--pork, Dijon mustard, hot honey, bacon, and bourbon.
    • Pork tenderloin--Choose a tenderloin with even thickness throughout so that it will cook evenly.
    • Bacon--Thick-cut bacon works best for this grilled pork tenderloin recipe. Thin cut bacon may become too crispy before the pork is cooked through. I recommend using good-quality bacon that won't shrink up too much as it cooks.
    • Hot honey--There are many brands of hot honey available for purchase online or at the supermarket. It won't make the pork overly spicy, but if you prefer to avoid any heat, you can use regular honey. Any extra can be used in these great hot honey recipes.

    How to Cook Bacon-Wrapped Pork Tenderloin on the Grill

    A bowl of sauce with an empty dish of Dijon mustard next to it.

    1. Mix the hot honey, Dijon mustard, and bourbon in a small bowl. Prepare a grill for medium heat (about 375°F/190°C).

    A person brushing sauce onto an uncooked pork tenderloin.

    2. Season the pork with salt and pepper, then brush with some of the glaze. Reserve the remaining glaze.

    An uncooked pork tenderloin wrapped in bacon.

    3. Wrap the pork tenderloin with the bacon slices, using toothpicks to secure it as needed.

    A bacon-wrapped pork tenderloin on a grill.

    4. Grill the pork tenderloin over very low flame or indirect heat, brushing with the remaining glaze once during grilling, and turning occasionally, until the bacon is crisped and the internal temperature of the pork reaches 145°F (63°C).

    FAQs

    How do I avoid flare-ups when cooking bacon on the grill?

    The key is to keep your bacon away from direct flame. As the bacon cooks, the fat will drip, which can flare easily. If you place your pork over indirect heat, or even between two burners set on low heat, you will minimize the risk of flare-ups.

    If your bacon does flare, move the pork to a different part of the grill and let any flames subside.

    What if my bacon is cooked before my pork reaches 145°F?

    If your bacon is cooked and crispy but your pork is still underdone, wrap the whole thing in foil and continue cooking until the pork reaches 145°F.

    Can I prepare this in advance?

    You can mix up your glaze and wrap your pork in bacon up to 1 day before grilling. Keep the pork and reserved glaze in the fridge, covered, until you're ready to grill.

    Serving Suggestions

    The tender pork and crispy bacon is the star of the show here, so serve this with simple sides, like steamed green beans, smoked sweet potatoes, or tortellini salad. Stash some mini pumpkin cheesecakes in the fridge for dessert, and you've got an easy meal.

    Storage & Reheating

    Store leftover pork tenderloin in a sealed container in the fridge for up to 3 days. Reheat individual slices in a skillet over low heat or in a 350°F (180°C) oven until heated through.

    Tips and Troubleshooting

    • If your pork tenderloin tapers off in thickness towards one end, fold the thin end under when wrapping it with bacon to create an evenly shaped pork tenderloin. This will help it to cook evenly.
    • If your bacon isn't as crispy as you'd like and the pork is nearly cooked through, move the pork to a higher heat zone, but monitor it carefully. If the bacon flares, move it to a cooler part of the grill and let the flames subside.
    • This simple pork recipe is suitable for gluten-free and dairy-free diets.
    A partially sliced grilled bacon-wrapped pork tenderloin on a wooden cutting board.

    More Grilled Pork Recipes You'll Love

    A grilled stuffed pork tenderloin on a platter with oranges, parsley, and cranberries.
    Stuffed Pork Tenderloin on the Grill
    Four sweet and sour pork skewers with pork cubes, pineapple, pepper, and onion.
    Grilled Sweet & Sour Pork Skewers

    Tried This Recipe?

    If you've tried this recipe, please leave a comment below. Follow me on Instagram, Facebook, or Pinterest for more great camping and grilling recipes.

    Recipe

    A partially sliced grilled bacon-wrapped pork tenderloin on a wooden cutting board with a dish of green beans on the side.

    Grilled Bacon-Wrapped Pork Tenderloin

    This bacon-wrapped pork tenderloin is slathered with a bourbon hot honey glaze, then grilled until tender. The crispy bacon and juicy meat will have you firing up the grill on repeat.
    5 from 1 vote
    Print Recipe Pin Recipe
    Prep Time 15 minutes mins
    Cook Time 35 minutes mins
    Total Time 50 minutes mins
    Course Main Course
    Cuisine American
    Servings 3 to 4 servings
    Calories 543 kcal

    Ingredients
      

    • 2 tablespoons hot honey
    • 1 tablespoon Dijon mustard
    • 1 tablespoon bourbon
    • 1 ¼ pounds pork tenderloin
    • Kosher salt and freshly ground black pepper
    • 3 slices thick-cut bacon

    Instructions
     

    • Prepare a grill for medium heat (375°F | 190°C) with an indirect zone or one burner on very low heat.
    • In a small bowl, mix the hot honey, Dijon mustard, and bourbon together.
    • Place the pork tenderloin on a baking sheet and sprinkle all over with salt and pepper.
    • Brush half the glaze all over the pork.
    • Starting at one end of the tenderloin, wrap the bacon snugly around the meat. Secure the end of each slice with a toothpick.
    • Grill the pork over indirect heat or a very low flame, turning occasionally and brushing with the remaining glaze after 15 minutes. Cook until the bacon is crispy and the internal temperature of the pork reaches 145°F (63°C), 35 to 40 minutes.
    • Let the pork rest for 5 minutes before slicing into medallions.

    Video

    Notes

      • Create even thickness--If your pork tenderloin tapers off in thickness towards one end, fold the thin end under when wrapping it with bacon to create an evenly shaped pork tenderloin. This will help it to cook evenly.
      • Getting the bacon crispy--If your bacon isn't as crispy as you'd like and the pork is nearly cooked through, move the pork to a higher heat zone, but monitor it carefully. If the bacon flares, move it to a cooler part of the grill and let the flames subside.
      • Storage and reheating--Store leftover pork tenderloin in a sealed container in the fridge for up to 3 days. Reheat in a skillet over low heat until warmed through.
      • Dietary--This recipe is suitable for gluten-free and dairy-free diets.

    Nutrition

    Serving: 1portionCalories: 543kcalCarbohydrates: 12.7gProtein: 45.9gFat: 32.2gCholesterol: 150mgSodium: 588mgFiber: 0.2gSugar: 11.5g
    Keyword bacon-wrapped pork, bourbon glaze, bourbon hot honey glaze, grilled pork tenderloin
    Tried this recipe?Let us know how it was!

    October 13, 2023 Camping

    Mini Pumpkin Cheesecake

    This no-bake pumpkin cheesecake recipe comes portioned into individual cheesecake cups with a crunchy, buttery Biscoff cookie crust and creamy spiced topping. Since they're made ahead of time, they're perfect for a Thanksgiving or Halloween dessert whether you're at camp or at home.

    A spoonful of no-bake mini pumpkin cheesecake resting on top of a mason jar filled with the cheesecake.

    Let's get one thing straight. I'm definitely not suggesting that you make these mini pumpkin cheesecakes while you are camping. I mean, you could, but the beauty of this recipe is that it's a make-ahead camping dessert, just like these lemon curd dessert cups or my caramel apple dip. And who doesn't want a stash of mini pumpkin desserts just waiting for them in the cooler?

    [feast_advanced_jump_to]

    Why This Mini Pumpkin Cheesecake Recipe is Great for Camping

    • You can make them in advance and stash them in the cooler before you head out on your Thanksgiving camping trip.
    • It's a no-bake dessert that doesn't need to be frozen.
    • They're portioned into individual servings, so you don't have to worry about eating it all at once or figuring out how to store leftovers.
    • These easy no-bake pumpkin desserts will keep for up to 4 days, so you can enjoy them at your leisure.

    Ingredients and Substitutions

    Ingredients for mini pumpkin cheesecake--cream cheese, cream, Biscoff cookies, sugar, butter, pumpkin, and pumpkin spice.
    • Biscoff cookies--I love the flavor of Biscoff cookies, but if they aren't available to you, substitute graham crackers, or make gingersnap crust with gingersnap cookies. You can easily crush the cookies in a food processor, or toss them into a resealable bag and use a rolling pin to grind them up.
    • Cream cheese--Use full-fat cream cheese for best results.
    • Pumpkin puree--This no-bake mason jar cheesecake recipe was developed using canned pumpkin puree. Don't use pumpkin pie filling. Homemade pumpkin puree tends to be wetter than the canned variety, so if you make your own pumpkin puree, blot any extra moisture with a paper towel before using. This will help to avoid watery filling.

    Important Steps

    A person pouring butter into a bowl of Biscoff cookie crumbs.
    Six mason jars filled with Biscoff cookie crust.
    1. Combine the crushed cookies, brown sugar, salt, and butter in a large bowl. Stir until the cookie crumbs form clumps.
    2. Divide the crust mixture among six serving dishes, such as wide-mouth ½-pint mason jars.
    A bowl of whipped cream with beaters resting above it.
    A bowl of beaten cream cheese with bowls of pumpkin puree and pumpkin spice next to it.
    1. Beat the whipped cream in a medium bowl until stiff peaks form.
    2. In a separate bowl, beat the cream cheese and powdered sugar until fluffy. Mix in the pumpkin puree and pumpkin pie spice.
    A person folding whipped cream into a bowl of pumpkin cheesecake filling.
    Six wide mouth mason jars filled with no-bake pumpkin cheesecake.
    1. Working with half of it at a time, gently fold the whipped cream into the cream cheese mixture.
    2. Divide the cheesecake filling among the serving dishes. Cover and chill overnight before serving.

    FAQs

    Can I make this as one large cheesecake?

    Yes. You can prepare this as one large no-bake pumpkin cheesecake in a 9-inch springform pan. The filling is softer and more mousse-like than traditional cheesecake filling so, in order to get clean slices, wipe your knife blade between each cut.

    How should I serve these?

    These work best in ½-pint (8-ounce) wide mouth mason jars if you're travelling since they seal and stack well, but you can use any small lidded containers or ramekins.

    Can I freeze no-bake mini pumpkin cheesecakes?

    Yes. Let the cheesecakes set in the fridge overnight, then store them in the freezer in their containers for up to 3 months. Thaw in the refrigerator overnight before serving.

    A spoonful of pumpkin cheesecake and Biscoff cookie crust.

    Tips and Troubleshooting

    • Use the bottom of a small jar to press the crust layer into your jar or serving dishes. The butter in the crust should prevent it from sticking to the glass, but if it does, spray the bottom of the glass with cooking spray.
    • Keep your cheesecakes covered with a lid or plastic wrap until you serve them.
    • Store the mini cheesecake in your cooler or refrigerator for up to 4 days.
    Several jars of no-bake mini pumpkin cheesecake with decorative pumpkins in the background.

    The Most Important Thing to Remember

    The most helpful piece of advice I can give you when making this mini pumpkin cheesecake recipe is to let it rest overnight. It will be tempting to dive in and sample it right away, but it's important to let it rest and chill because it will allow the filling to set up and the flavors to mingle, creating perfectly spiced filling. 

    More Camping Dessert Recipes You'll Love

    A cast iron skillet. filled with apple crisp and two scoops of ice cream on top.
    Skillet Bourbon Apple Crisp
    Spiced grilled plums in a bowl on a plate with a fork and checkered napkin on the side.
    Spiced Grilled Plums

    Tried This Recipe?

    If you've tried this recipe, please leave a comment below. Follow me on Instagram, Facebook, or Pinterest for more great camping and grilling recipes.

    Recipe

    A spoonful of no-bake mini pumpkin cheesecake resting on top of a mason jar filled with the cheesecake.

    Mini Pumpkin Cheesecake

    A woman's face.Angie Zoobkoff
    These no-bake mini pumpkin cheesecakes are perfect for packing along on your Thanksgiving camping trip. They're made in advance and can be stashed in your cooler or fridge for up to 4 days. They'll never last that long though as everyone will be fighting over these easy treats that are made with crunchy Biscoff cookie crust and creamy spiced whipped topping.
    5 from 1 vote
    Print Recipe Pin Recipe
    Prep Time 30 minutes mins
    Chill Time 1 day d
    Total Time 1 day d 30 minutes mins
    Course Dessert
    Cuisine American
    Servings 6 servings
    Calories 417 kcal

    Equipment

    • Six 8-ounce wide mouth Mason jars, lidded containers, or ramekins

    Ingredients
      

    • 1 package (8.8 ounce | 250 g) Biscoff cookies crushed
    • 6 tablespoons unsalted butter melted
    • ¼ cup brown sugar
    • ¼ teaspoon kosher salt plus more for the filling
    • ½ cup whipping cream
    • ¼ cup powdered sugar
    • 1 package (8 ounce | 227 g) cream cheese softened
    • ½ cup pumpkin puree
    • 1 tablespoon pumpkin pie spice

    Instructions
     

    • Combine the crushed Biscoff cookies, butter, brown sugar, and salt in a large bowl. Mix well until the cookie crumbs clump together.
    • Divide the crumb mixture among six Mason jars or individual serving dishes and press firmly to create a crust in each jar. Freeze the crusts while you prepare the topping.
    • Use a hand mixer or stand mixer to whip the cream to stiff peaks in a large bowl.
    • In a separate large bowl, beat the cream cheese and powdered sugar until light and fluffy, about 1 minute. Mix in the pumpkin puree, pumpkin pie spice, and a pinch of salt.
    • Working in two batches, gently fold the whipped cream into the cream cheese mixture.
    • Divide the topping among the chilled crusts, cover, and refrigerate overnight to allow the filling to set.

    Notes

    • Pressing the crust--Use the bottom of a small jar to press the crust layer into your jar or serving dishes. The butter in the crust should prevent it from sticking to the glass, but if it does, spray the bottom of the glass with cooking spray.
    • Homemade pumpkin puree--If you're using your own homemade pumpkin puree, blot it with a paper towel before using to remove any excess moisture. Homemade puree tends to be wetter than canned.
    • Keep them covered--Keep your cheesecakes covered with a lid or plastic wrap until you serve them.
    • Storage--Store the mini cheesecake in your cooler or refrigerator for up to 4 days.

    Nutrition

    Calories: 417kcal
    Keyword camping desserts, mini cheesecake, no bake cheesecake, thanksgiving camping
    Tried this recipe?Let us know how it was!

    October 6, 2023 Camping

    Dutch Oven Turkey Breast

    This Dutch oven boneless turkey breast recipe is easy as can be. Juicy, tender turkey breast gets gently cooked in onions and broth, which doubles as a silky gravy to drizzle over the finished dish. It can be made over your campfire, camp stove, grill, or on your stovetop at home.

    A sliced turkey breast on a plate with onions on top.

    The first time we camped at Thanksgiving, I went all out and cooked a turducken and multiple sides. While it was certainly memorable, attempting to make a fully turkey dinner in a campground, without all the conveniences of home definitely added an unnecessary amount of stress to the preparation. I learned my lesson quickly, and in future years kept my Thanksgiving camping recipes much simpler.

    Which is exactly what this campfire turkey is. Simple and easy. Boneless skinless turkey breast gets gently braised on a bed of onions in a Dutch oven, and then the braising liquid and onions becomes a silky gravy to drizzle over the turkey slices. Everything is in one pot, and all you need to do is keep an eye on the heat. Serve it with one of these easy oven-free Thanksgiving sides and you've got yourself a stress-free Thanksgiving camping dinner!

    [feast_advanced_jump_to]

    Why This Recipe is Great for Camping

    • The braised turkey breast and onion gravy is prepared entirely in one pot over the campfire, stove, or grill. The lidded cast iron Dutch oven locks in moisture, keeping your turkey juicy and tender.
    • It's easy to slice and serve. No need to take along any carving tools or deal with a big turkey carcass.
    • It's a filling and satisfying meal that's easy to prepare any time of the year, but also works perfectly for small gatherings at holiday dinners, such as Thanksgiving or Christmas.

    Ingredients and Substitutions

    Ingredients for Dutch oven turkey breast--turkey breast, broth, oil, onion, flour, and herbs.
    • Onion--This adds just a little sweetness to your gravy, and helps to flavor the turkey as it cooks. I recommend using yellow or white onion for the best results. Red onions tend to be a little too sweet.
    • Broth--You can use chicken or turkey broth.
    • Fresh herbs--Any combination of rosemary, thyme, oregano, parsley, and sage will work. Many stores sell fresh poultry herb mix, which is ideal for this Dutch oven turkey breast recipe. Tie the herbs together with twine to make it easier to remove them at the end.
    • Boneless turkey breast--This is going to be the easiest cut of turkey to cook. If your turkey breast has the skin on, you can leave it to add some fat and flavor during cooking, however, it won't become crispy, so you will likely want to remove it before serving.
    • Flour--This is used to thicken the gravy. You can adjust the amount of flour depending on how thick you prefer your gravy. To make the dish gluten-free, substitute cornstarch.

    Important Steps

    A person sautéing onions in a Dutch oven over a fire.
    A whole raw turkey breast on a baking sheet, sprinkled with salt and pepper.
    1. Heat the oil in a Dutch oven over medium heat. Add the onions and sauté until they begin to soften and take on some color.
    2. Brush the turkey breast with oil and season all over with salt and pepper.
    A whole turkey breast in a Dutch oven over a fire.
    A person stirring broth and onions in a Dutch oven over a fire.
    1. Place the turkey breast on top of the onions, add the herbs, and pour in the stock. When pouring the stock, take care to pour around the turkey and not on top so that you don't wash the seasoning away. Cover and cook until the turkey reaches an internal temperature of 165°F (74°C).
    2. Make the gravy. Transfer the turkey to a cutting board, and whisk the flour mixed with some broth into the pot. Boil, whisking frequently, until the gravy thickens.

    FAQs

    Can I make this with bone-in turkey breast?

    Yes. While bone-in turkey breasts require a little more effort to carve, they are very flavorful. If you cook a bone-in turkey breast in the Dutch oven, you may need to increase your cooking time slightly.

    What size of Dutch oven do I need?

    I would recommend using one that is at least 6 quarts in capacity. The campfire Dutch oven that I use is 7 quarts, and it holds everything nicely. If you use a pot that is significantly smaller, the turkey breast may end up submerged in the liquid, which is not what you want.

    How can I tell when my turkey is done?

    The easiest way to tell is with an instant read thermometer. You are aiming for an internal temperature of 165°F (74°C) in the thickest part of the breast. Don't cook to a higher temperature as it can result in dry, tough turkey.

    Can I make this on my stove at home?

    Definitely. Follow the directions, using your Dutch oven on your stovetop. Adjust the heat as needed to keep the liquid at a simmer.

    If you are cooking this on your grill, or want to cook it inside an oven, keep your grill or oven at 325°F (163°C).

    Tips and Troubleshooting

    • Always start with a fully thawed turkey breast so that it cooks evenly.
    • When cooking turkey over a campfire, monitor the heat level carefully, adding hot coals as needed. You will need to keep the Dutch oven over hot coals, but if the liquid in the pot begins boiling vigorously, move the Dutch oven to cooler coals or the edge of the grill grate to just maintain a simmer in the pot. Vigorous boiling can make the turkey tough and should be avoided.
    • Adjust the amount of flour in your gravy to determine the thickness. Less flour will give you a thinner, jus-like sauce, while more flour will give you a thick, pourable gravy.
    • Store leftover turkey and gravy in separate sealed containers in your cooler or refrigerator for up to 3 days. Rewarm the turkey in a Dutch oven over low heat, with a little additional broth. The gravy can be warmed in a small pot over low heat until warmed through.
    • Use leftovers to make turkey and cranberry sliders or one of these amazing leftover turkey recipes.
    A wooden table with sliced turkey, roasted potatoes, cranberry sauce, and gravy on it.

    The Most Important Thing to Remember

    The most helpful piece of advice I can give you when making this recipe is to watch your heat level carefully. You want the liquid inside the Dutch oven to be simmering so that it gently cooks the turkey breast. Allowing the liquid to boil rapidly can cause the turkey to become tough.

    Lift the lid periodically to see what's happening inside, and adjust the heat, if necessary. This may mean moving it to a hotter or cooler spot on your fire, or adjusting your grill or stove setting.

    More Camping Recipes You'll Love

    A bowl of beef stew with carrots and potatoes on a wooden table.
    Campfire Dutch Oven Beef Stew
    Chicken, carrots, and potatoes in bite size pieces in a foil packet over the fire.
    Campfire Chicken Foil Packets

    Tried This Recipe?

    If you've tried this recipe, please leave a comment below. Follow me on Instagram, Facebook, or Pinterest for more great camping and grilling recipes.

    Recipe

    A sliced turkey breast on a plate with onions on top.

    Dutch Oven Turkey Breast

    A woman's face.Angie Zoobkoff
    This simple, satisfying meal of braised boneless turkey breast and onion gravy is prepared in your Dutch oven over the campfire, or on the grill or stovetop. It's perfect for small gatherings at holiday dinners, or for celebrating Thanksgiving while camping.
    5 from 1 vote
    Print Recipe Pin Recipe
    Prep Time 10 minutes mins
    Cook Time 1 hour hr 20 minutes mins
    Total Time 1 hour hr 30 minutes mins
    Course Main Course
    Cuisine American
    Servings 4 servings
    Calories 530 kcal

    Equipment

    • 6 to 7-quart Dutch oven

    Ingredients
      

    • 3 tablespoons olive oil divided
    • 1 large onion thinly sliced
    • One (1 ¾-to-2-pound | 800-to-900-g) boneless, skinless turkey breast
    • Salt and freshly ground black pepper
    • 1 bunch fresh herbs such as rosemary, thyme, and sage, tied
    • 2 to 3 cups chicken or turkey stock
    • 2 to 4 tablespoons all-purpose flour

    Instructions
     

    • If making this over a campfire, prepare a bed of hot coals. If making this on the grill or stovetop, set it for medium-low heat.
    • Place a large Dutch oven over your hot coals or medium-low heat and warm 2 tablespoons of the oil. Add the onions and cook until softened and beginning to take on some color, 10 to 15 minutes.
    • Brush the turkey breast with the remaining 1 tablespoon oil, and season well with salt and pepper.
    • Nestle the turkey breast on top of the onions and add the herbs. Pour the broth into the Dutch oven, taking care not to pour the broth around the turkey and not directly on top. Add enough broth so that the liquid comes partially up the sides of the turkey breast but doesn't submerge it.
    • Cover and cook until the turkey reaches an internal temperature of 165°F (74°C), 45 to 60 minutes. Check occasionally to make sure the liquid is simmering. If necessary, adjust the heat or move the Dutch oven to a different part of the fire or grill to keep the liquid at a simmer.
    • Transfer the turkey to a cutting board and let it rest while you make the gravy. Discard the herb bundle.
    • Mix the flour with a few tablespoons of the remaining broth (or warm water) to create a slurry, then whisk that into the simmering liquid. Cook until the gravy thickens to your desired consistency, 3 to 4 minutes. Taste and adjust seasoning, if needed.
    • Slice the turkey and serve with the onion gravy.

    Notes

    • Monitor the heat--When cooking turkey over a campfire, monitor the heat level carefully, adding hot coals as needed. You will need to keep the Dutch oven over hot coals, but if the liquid in the pot begins boiling vigorously, move the Dutch oven to cooler coals or the edge of the grill grate to just maintain a simmer in the pot. Vigorous boiling can make the turkey tough and should be avoided.
    • Oven method--To make this in the oven, follow the recipe through step 4, then cover and transfer to a 325°F oven.
    • Gravy thickness--Adjust the amount of flour in your gravy to determine the thickness. Less flour will give you a thinner, jus-like sauce, while more flour will give you a thick, pourable gravy.
    • Storage and reheating--Store leftover turkey and gravy in separate sealed containers in your cooler or refrigerator for up to 3 days. Rewarm the turkey in a Dutch oven over low heat, with a little additional broth. The gravy can be warmed in a small pot over low heat until warmed through.

    Nutrition

    Serving: 1portionCalories: 530kcalCarbohydrates: 5.5gProtein: 63.7gFat: 26.9gCholesterol: 160mgSodium: 296mgFiber: 0.7gSugar: 1.2g
    Keyword boneless turkey breast, campfire cooking, dutch oven cooking, Dutch oven turkey
    Tried this recipe?Let us know how it was!

    September 29, 2023 Camping

    Skillet Beer Cheese Dip

    This easy beer cheese dip is made in a cast iron skillet, with cream cheese, Cheddar, and smoked Gouda, which gives it a slightly smoky flavor. You can make it over the campfire, on your camp stove, or on your stovetop at home. Like my Buffalo chicken dip, it's perfect for sharing with friends and can be scaled to feed a crowd.

    A small skillet filled with beer cheese dip, topped with shredded cheese, tomatoes, and scallions with chips on the side.

    If beer and snacks are a cherished part of your camping routine, this smoky beer cheese dip with cream cheese, Cheddar, and smoked Gouda is for you. You'll love this cheese dip for camping because, like my Swiss cheese dip, it's easy to toss together, requires only a grater and your trusty cast iron skillet, and it's ready in 15 minutes. It's definitely one of my favorite cast iron skillet recipes for camping.

    [feast_advanced_jump_to]

    Why This Recipe is Great for Camping

    • It can be prepared and served in your cast iron skillet. No other dishes needed!
    • It's incredibly easy to make and ready in just 15 minutes.
    • It's a great snack or appetizer to enjoy around the campfire.

    Ingredients and Substitutions

    Ingredients for skillet beer cheese dip--beer, Cheddar, smoked Gouda cheese, cayenne, mustard powder, and cream cheese.
    • Beer--Use a lager or pale ale, and choose one that you enjoy. They'll be extra to drink, and the flavor of the beer will be noticeable in the skillet cheese dip. To make alcohol free cheese dip, use alcohol-free beer.
    • Shredded cheese--This combination of Cheddar and smoked Gouda gives the dip a smoky flavor, but you can use other types of cheese, or only Cheddar, if you prefer. Don't use pre-shredded cheese as it does not melt well.
    • Cream cheese--This helps to thicken the dip and also helps to stabilize the mixture so that you get a thick, creamy, scoop-able dip. Use full-fat cream cheese for best results. Cutting it into cubes will help it melt quicker.
    • Spices--Mustard powder adds flavor, and cayenne adds a little bit of heat. If you are heat-averse, you can reduce the amount of cayenne (or increase it if you love spicy food!)

    Important Steps

    A small cast iron skillet filled with cheese and spices.
    A wooden spoon stirring a skillet of cheese dip.
    1. Combine all of the ingredients in a small cast-iron skillet
    2. Set over low or indirect heat and cook, stirring frequently until the cheese is melted and the sauce is smooth.

    FAQs

    How should I serve this?

    Serve your cheese dip warm, directly from the cast iron skillet. You can top it with tomatoes, extra cheese, and scallions, if you like, but it's also great on its own. Tortilla chips, bread cubes, and soft pretzels all make great dippers to serve alongside. The dip is also fantastic drizzled over smokies or hot dogs.

    What's the best type of beer to use for skillet beer cheese dip?

    Use a lager-style beer or pale ale for the dip. Choose one that you enjoy the taste of, but not one with an overpowering or specialty flavor. Beer and cheese is a perfect pairing, but a uniquely flavored beer can throw off the flavor of the dip.

    Can I make this on the stovetop or grill?

    Yes. Follow the recipe and cook it on low heat on the stovetop or grill. Take care to not heat it too quickly as the cheese can separate.

    Tips and Troubleshooting

    • This cast iron skillet cheese dip recipe was created for a small 6-inch skillet, which is perfect for feeding 4 to 5 people. To make a big batch, double the amounts and prepare it in a 10-inch skillet.
    • Melt the cheese over low heat. I can't stress the importance of this enough. Don't try to rush it. Letting the mixture get too hot can cause the cheese to separate and become grainy.
    • The dip will thicken considerably as it sits. To keep it from setting up, keep it on the edge of your grill grate or over very low heat on your stove.
    • To make this gluten-free, use gluten-free beer.
    • Store leftover cheese in a sealed container in your cooler or fridge for up to 3 days. Reheat in a skillet over low heat until warmed through. Leftover cheese dip works great as a queso to drizzle over foil pack chicken nachos!
    A small cast iron skillet filled with cheese on a grate above a fire.

    The Most Important Thing to Remember

    The most helpful piece of advice I can give you when making this recipe is to keep the dip over low heat at all times. It can be tempting to speed things along, but it is important that you don't. Heating the dip too quickly or over high heat will cause the cheese to separate and you will end up with a grainy dip. Low heat allows it to melt slowly and emulsify into a smooth sauce.

    More Camping Recipes You'll Love

    A white bowl filled with pasta salad.
    Camping Pasta Salad
    Chicken, carrots, and potatoes in bite size pieces in a foil packet over the fire.
    Campfire Chicken and Potato Foil Packets

    Tried This Recipe?

    If you've tried this recipe, please leave a comment below. Follow me on Instagram, Facebook, or Pinterest for more great camping and grilling recipes.

    Recipe

    A small skillet filled with beer cheese dip, topped with shredded cheese, tomatoes, and scallions with chips on the side.

    Skillet Beer Cheese Dip

    This beer cheese dip with cream cheese, smoked Gouda, Cheddar, and beer is easy to make in your cast iron skillet. It can be made over the campfire, on your camp stove, or on a regular stove.
    5 from 1 vote
    Print Recipe Pin Recipe
    Prep Time 5 minutes mins
    Cook Time 10 minutes mins
    Course Appetizer, Snack
    Cuisine American
    Servings 4 servings
    Calories 308 kcal

    Equipment

    • 6-inch cast iron skillet

    Ingredients
      

    • ⅓ cup beer
    • 4 ounces (½ block) full-fat cream cheese cut into cubes
    • 1 cup Cheddar cheese shredded
    • 1 cup smoked Gouda shredded
    • ¼ teaspoon mustard powder
    • ⅛ teaspoon cayenne pepper
    • Chopped tomatoes and scallions for topping (optional)
    • Chips, bread cubes, or pretzels for dipping

    Instructions
     

    • Prepare a campfire or camp stove for low heat. You can simply use the edge of the grill grate, away from the hot coals and flames, or set it on your stove on the lowest setting.
    • Combine the beer, cream cheese, Cheddar, smoked Gouda, mustard powder, and cayenne in the skillet. Gently warm over low heat, stirring occasionally, until melted and smooth, about 10 minutes.
    • Top with tomatoes and scallions, if using, and serve with your favorite dippers.

    Video

    Notes

      • Double the recipe--This cast iron skillet cheese dip recipe was created for a small 6-inch skillet, which is perfect for feeding 4 to 5 people. To make a big batch, double the amounts and prepare it in a 10-inch skillet.
      • Don't let it get too hot--Melt the cheese over low heat. I can't stress the importance of this enough. Don't try to rush it. Letting the mixture get too hot can cause the cheese to separate and become grainy.
      • Dietary--To make this gluten-free, use gluten-free beer. To make it alcohol-free, use alcohol-free beer.
      • Leftovers and reheating--Store leftover cheese in a sealed container in your cooler or fridge for up to 3 days. Reheat in a skillet over low heat until warmed through.

    Nutrition

    Serving: 0.25recipeCalories: 308kcalCarbohydrates: 2.1gProtein: 16.3gFat: 27.1gCholesterol: 93mgSodium: 491mgSugar: 0.9g
    Keyword beer cheese, campfire snacks, cast iron cooking, cheese dip
    Tried this recipe?Let us know how it was!

    September 22, 2023 Camping

    Skillet Bourbon Apple Crisp

    This skillet apple crisp is a grilled dessert recipe made in your cast iron skillet with a few basic ingredients including apples, brown sugar, oats, and cinnamon, and an ample splash of bourbon. The combination of sweetly spiced apples covered with the crispiest oat topping imaginable will have you devouring it directly from the skillet.

    A cast iron skillet filled with apple crisp with two scoops of ice cream on top.

    If you’ve come to dinner at my house during autumn, chances are I’ve probably served you apple crisp or pear crisp for dessert. They're ridiculously easy to make, can be made ahead, tucked in the freezer, and cooked up at a moment's notice. Plus, everyone likes it and it's the ideal way to enjoy autumn fruits.

    Not only that, since fruit crisps are made with fruit and oats, it’s practically breakfast. Or, at least that’s what we tell ourselves the next morning as we linger over the leftovers, sneaking spoonfuls.

    [feast_advanced_jump_to]

    Why You'll Love This Recipe

    • It requires only a few basic ingredients to make.
    • Just like with this grilled skillet peach cobbler, it's prepared in a cast iron skillet on the grill, so you can make it at home or on your next camping trip.
    • It's an easy dessert that smells and tastes amazing.

    Ingredients and Substitutions

    Ingredients for skillet bourbon apple crisp--apples, bourbon, flour, cinnamon, oats, sugar, and butter.
    • Apples--Use good baking apples that will hold up during cooking and won't become mushy. I recommend Honeycrisp or Pink Lady apples.
    • Brown sugar--This recipe uses less sugar than most apple crisps, but relies on the rich molasses undertones of the brown sugar to deliver just as much sweetness.
    • Butter--If you use salted butter, don't add the salt to the oat topping.
    • Oats--You can use regular or quick oats here, but not steel-cut oats.
    • Bourbon--This adds incredible flavor to the dessert, but you can skip it if you are feeding those who need to avoid alcohol.

    How to Make Bourbon Apple Crisp in a Skillet

    Apples, flour, brown sugar, and cinnamon in a glass bowl.

    1. Combine the apples, brown sugar, flour, cinnamon, and bourbon in a bowl and toss to coat.

    Apple slices coated with cinnamon and sugar in a cast iron skillet.

    2. Arrange them in an even layer in a cast iron skillet.

    Flour, oats, cinnamon, and brown sugar in a glass bowl.

    3. Mix the oats, flour, cinnamon, brown sugar, and salt in a bowl.

    A person tossing oats with cubs of butter.

    4. Work the butter into the oat topping until the butter is pea-sized and evenly dispersed.

    An uncooked apple crisp in a cast iron skillet.

    5. Scatter the oat topping over the apples.

    A cast iron apple crisp on the grill.

    6. Grill over indirect heat until the apples are tender and the topping is golden brown.

    FAQs

    What's the benefit to making an apple crisp in cast iron?

    The even heat that cast iron provides allows the apples to cook gently and evenly so that they soften without turning mushy. You can also use it in the oven or on the grill, and can even serve it directly from the skillet. The natural nonstick coating of cast iron means that it will be easy to serve and easy to clean up.

    Can I make this in the oven?

    Definitely. Prepare the crisp as directed, then transfer it to a 350°F oven and cook until the edges are bubbling and the top is golden brown, about 1 ¼ hours.

    What are the best type of apples to use for this?

    You want to use a good baking apple that will withstand the slow cooking process and will soften but won't turn mushy. I recommend Honeycrisp or Pink Lady apples. Save your crisp Granny Smith apples for dunking into homemade caramel apple dip.

    What should I serve with my skillet apple crisp?

    This cast iron skillet dessert is practically begging for a big scoop of ice cream or a drizzle of heavy cream on top. If you've got a sweet tooth, you could also add a little caramel sauce on top.

    Tips and Troubleshooting

    • Keep your skillet over indirect heat the entire time to avoid burning the apples.
    • Leftover apple crisp can be stored, covered, at room temperature for up to 3 days. Reheat on the grill or stovetop over low heat until warmed through.
    A cast iron skillet. filled with apple crisp and two scoops of ice cream on top.

    The Most Important Thing to Remember

    The most helpful piece of advice I can give you when making this recipe is to use indirect heat for grilling the apple crisp. Placing it over direct heat on your grill will cause the apples to break down and caramelize before the topping crisps. Indirect heat will allow the apples to cook slowly and soften, without creating a burnt, sticky mess on your skillet.

    More Camping Recipes You'll Love

    Spiced grilled plums in a bowl on a plate with a fork and checkered napkin on the side.
    Spiced Grilled Plums
    A white bowl filled with pasta salad.
    Camping Pasta Salad

    Tried This Recipe?

    If you've tried this recipe, please leave a comment below. Follow me on Instagram, Facebook, YouTube, or Pinterest for more great camping and grilling recipes.

    Recipe

    A cast iron skillet. filled with apple crisp and two scoops of ice cream on top.

    Skillet Bourbon Apple Crisp

    A woman's face.Angie Zoobkoff
    This cast-iron skillet apple crisp is made on the grill with sweetly spiced apples and the crispiest oat topping imaginable. An ample splash of bourbon makes it extra special.
    5 from 1 vote
    Print Recipe Pin Recipe
    Prep Time 15 minutes mins
    Cook Time 1 hour hr 15 minutes mins
    Total Time 1 hour hr 30 minutes mins
    Course Dessert
    Cuisine American
    Servings 6 servings
    Calories 392 kcal

    Equipment

    • 12-inch Cast iron skillet

    Ingredients
      

    For the apple filling

    • 3 large apples (26 oz | 740 g) peeled, cored, and sliced ¼-inch thick
    • ¼ cup brown sugar
    • 2 tablespoons all-purpose flour
    • 1 ½ tablespoons bourbon
    • 1 teaspoon cinnamon

    For the oat topping

    • 1 cup rolled oats
    • ¼ cup brown sugar
    • 6 tablespoons all-purpose flour
    • 1 teaspoon cinnamon
    • ¼ teaspoon salt
    • 6 tablespoons unsalted butter cut into small cubes

    Instructions
     

    Make the apple filling

    • Prepare a grill for indirect cooking over medium-low heat (350°F | 180°C).
    • In a large bowl, combine the apples, brown sugar, flour, bourbon, and cinnamon. Toss well to combine.
    • Arrange the apples in an even layer in a 12-inch (30-cm) cast iron skillet.

    Make the oat topping

    • In the same bowl used for the apples (no need to wash!) combine the oats, sugar, flour, cinnamon, and salt. Mix well.
    • Toss in the butter cubes and use your fingers or a pastry cutter to work the butter into the oat mixture until the butter is pea-sized and evenly dispersed.
    • Scatter the oat topping over the apples.
    • Place the skillet over indirect heat and grill until the apples are tender, the edges are bubbling, and the topping is golden brown and crisp, about 1 ¼ hours.
    • Cool slightly before serving.

    Video

    Notes

      • Keep your skillet over indirect heat the entire time to avoid burning the apples.
      • Serve the crisp with ice cream, heavy cream, or a drizzle of caramel sauce.
      • Leftover apple crisp can be stored, covered, at room temperature for up to 3 days. Reheat on the grill or stovetop over low heat until warmed through.
    •  

    Nutrition

    Calories: 392kcal
    Keyword apple crisp, cast iron cooking, cast iron grilling, grilled apple crisp, grilled dessert
    Tried this recipe?Let us know how it was!

    September 15, 2023 Camping

    Grilled Bang Bang Chicken Skewers

    Grilled bang bang chicken is a grilling dinnertime staple. Boneless chicken breast is quickly skewered and grilled and finished with a creamy, tangy, slightly spicy sauce that you'll want to drizzle on everything. These quick and easy skewers are ready in less than 30 minutes, making them doable any day of the week.

    Six chicken skewers on a rectangular platter with a dish of sauce on the side.

    Recipe at a Glance: Grilled Bang Bang Chicken

    • DETAILS
      • Total Time: 30 minutes
      • Preparation method: Grill
    • HIGHLIGHTS
      • This easy recipe makes juicy grilled chicken skewers with an irresistible sauce for dipping.
      • These grilled chicken skewers are ready in just 30 minutes, making them perfect for any night of the week.
      • You can make these in advance and cook when ready, making them a great meal-prep option, or make-ahead camping meal.

    In Canada, summer is far too short and no one wants to spend those precious days hovering over a stove or grill. Relaxed, easy summer meals like grilled chicken gyros, halibut tacos, and these bang bang chicken skewers are at the top of my list all season long.

    [feast_advanced_jump_to]

    Ingredients and Substitutions

    Ingredients for bang bang chicken skewers--chicken breast, rice vinegar, sriracha, chili sauce, seasonin, and mayo.
    • Sriracha sauce--The amount of sriracha that you use will determine how spicy your bang bang sauce is. This recipe makes a mildly spicy sauce, but feel free to add more or less to suit your taste.
    • Rice vinegar--Although the recipe only calls for a small amount, it does add some tang to the sauce. You can subsitute a different type of vinegar, such as apple cider or white wine, if needed.
    • Mayonnaise-This gives the sauce its creaminess. Use full-fat mayonnaise for best results.
    • Chicken breasts--These cook quickly and evenly. You can substitute boneless chicken thighs, however, the cooking time may be slightly longer. Cut the chicken into similar sized pieces so that they cook evenly.

    How to Make Grilled Bang Bang Chicken

    Several sauces in a glass bowl with a spoon resting inside.

    1. Combine the mayonnaise, sweet chili sauce, Sriracha, and rice vinegar in a small bowl.

    A person mixing up a sauce.

    2. Stir to thoroughly combine. This is your bang bang sauce. Divide the sauce between two bowls, reserving one for serving.

    A person seasoning cubes of chicken breast in a bowl.

    3. Season the chicken with all-purpose seasoning and toss to coat each piece. Thread the chicken onto skewers.

    Chicken skewers on a grill being brushed with sauce.

    4. Grill over medium heat, basting with the bang bang sauce, until cooked through. Serve with the reserved sauce.

    FAQs

    What is bang bang sauce?

    Bang bang sauce is a popular Asian-inspired condiment that is often used for topping chicken or shrimp. Made with mayo, Sriracha sauce, and sweet chili sauce, it is creamy, with a slightly spicy flavor that can be adjusted to suit your taste.

    Can I add vegetables to my bang bang chicken kabobs?

    You bet. Choose vegetables that will cook in the same amount of time as the chicken. Slices of onion, pepper, or mushrooms are all great choices.

    Can I make these in the oven?

    Yes. Bake them in a 400°F oven, turning once, until the chicken is cooked through, 10 to 15 minutes. To get a little char on the outside, turn the broiler on for a minute or so once they've finished cooking.

    How to Make Chicken Skewers in Advance

    The chicken skewers can be prepared and stored in the fridge for up to 1 day or in the freezer for up to 3 months before cooking. Thread the seasoned chicken onto soaked wooden or metal skewers and wrap tightly with plastic. Store in the fridge until just before cooking.

    To freeze, place the prepared chicken skewers on a parchment lined baking sheet and freeze until solid. This allows them to freeze without sticking together. Once frozen, transfer them to a zip-top bag, close and store in the freezer until you're ready to cook. You can thaw them overnight in the fridge or cook them directly from frozen, adding a few extra minutes to the cooking time.

    What to Serve with Bang Bang Chicken

    Your grilled chicken skewers need only a simple side dish like grilled beets drizzled with lemon thyme vinaigrette, or tortellini salad to make a complete meal. A mini skillet cookie is a great grilled dessert option.

    Storage and Reheating

    Remove any leftover chicken from the skewers and store in an airtight container in the fridge for up to 4 days. Reheat in a skillet over medium heat until warmed through. Extra bang bang sauce can be stored in a sealed container in the fridge for up to 5 days.

    Tips and Troubleshooting

    • If you are using wooden skewers, soak them for an hour before threading and grilling the chicken. Metal skewers don't require any preparation.
    • When grilling chicken, always start with a well-oiled grate. If the chicken doesn't want to release when you try to turn it, give it an extra minute. It will release when it's ready.
    Two plates topped with chicken skewers and pasta salad.

    More Grilled Chicken Recipes You'll Love

    A grilled chicken gyro on a plate with a bowl of fries and a bowl of dip in the background.
    Grilled Chicken Gyros
    A platter filled with crispy grilled chicken wings with a jar of bbq sauce and a salad in the background.
    Crispy Grilled Chicken Wings

    Tried This Recipe?

    If you've tried this recipe, please leave a comment below. Follow me on Instagram, Facebook, YouTube, or Pinterest for more great camping and grilling recipes.

    Recipe

    Six chicken skewers on a rectangular platter with a dish of sauce on the side.

    Grilled Bang Bang Chicken Skewers

    A woman's face.Angie Zoobkoff
    This bang bang grilled chicken is an easy meal of grilled boneless chicken breast that's finished with a creamy, tangy, slightly spicy sauce.
    5 from 1 vote
    Print Recipe Pin Recipe
    Prep Time 15 minutes mins
    Cook Time 10 minutes mins
    Total Time 25 minutes mins
    Course Main Course
    Cuisine American
    Servings 4 servings
    Calories 314 kcal

    Equipment

    • 4 to 6 Skewers for grilling (soaked if wooden)

    Ingredients
      

    • Oil for the grill
    • ½ cup mayonnaise
    • 2 tablespoons sweet chili sauce
    • 1 tablespoon sriracha sauce
    • 1 teaspoon rice wine vinegar
    • 2 tablespoon all-purpose seasoning
    • 1 ½ pounds boneless skinless chicken breasts cut into 1 ½-inch cubes

    Instructions
     

    • Preheat a grill for medium heat (400°F | 200°C). Oil the grill grate.
    • In a small bowl combine the mayonnaise, sweet chili sauce, sriracha, and vinegar and mix well. Divide the sauce between two bowls and reserve one bowl for serving.
    • Sprinkle the all-purpose seasoning over the chicken and toss (or use your hands) to coat each piece.
    • Thread the chicken onto skewers. You should get 4 to 6 skewers, depending on how tightly you pack the chicken.
    • Place the skewers on the grill and brush with the sauce. Grill until the chicken is cooked through to 165°F (74°C), flipping once, 5 to 6 minutes per side. Brush with the sauce again after flipping.
    • Serve the bang bang chicken skewers with the reserved sauce.

    Video

    Notes

      • Get ahead--Make the bang bang sauce up to 5 days before serving. Store it in a sealed container in the fridge. The chicken skewers can be prepared up to 3 months in advance if freezing, or 1 day in advance if storing in the fridge.
      • Cutting the chicken--Cut your chicken into similar sized pieces so that they cook evenly.
      • Soak wooden skewers--If you are using wooden skewers, soak them for an hour before threading and grilling the chicken. Metal skewers don't require any preparation.
      • If your chicken sticks--When grilling chicken, always start with a well-oiled grate. If the chicken doesn't want to release when you try to turn it, give it an extra minute. It will release when it's ready.

    Nutrition

    Serving: 1 skewerCalories: 314kcalCarbohydrates: 11gProtein: 39gFat: 12gCholesterol: 105mgSugar: 6g
    Keyword bang bang sauce, chicken breast skewers, chicken skewers, grilled chicken
    Tried this recipe?Let us know how it was!

    September 15, 2023 Camping

    Camping Pasta Salad

    This make-ahead pasta salad for camping is perfect for toting along on your next adventure, or sharing with friends on a picnic or at a backyard bbq. It's made with cheese tortellini, tomatoes, olives, artichokes, and a creamy Italian dressing. Pair it with spicy bang bang chicken skewers for an easy outdoor meal.

    A bowl of pasta salad on a table with chicken skewers, plates, and cutlery.

    Recipe at a Glance: Pasta Salad for Camping

    • DETAILS
      • Total Time: 25 minutes (15 minutes hands-on)
      • Preparation method: Stovetop
    • HIGHLIGHTS
      • For this easy tortellini salad, store-bought cheese tortellini is combined with tomatoes, olives, artichokes, and a creamy Italian dressing.
      • It's a great make-ahead side dish or meal for camping. Prepare it up to 3 days before serving and stash it in your cooler.
      • Customize it with your favorite veggies or add some protein to make it a heartier meal.

    Our camping meals almost always consist of something cooked on the campfire, grill, or Blackstone, along with a foil packet side dish or make-ahead salad. I particularly like the salads because they can be prepped at home and tucked into the cooler, they last for days, and they do double-duty as an easy camping lunch. This Italian tortellini salad is a personal favorite because it's a little heartier than your typical salad (thanks, pasta!), making it a great choice for hungry campers.

    [feast_advanced_jump_to]

    Ingredients and Substitutions

    Ingredients for camping pasta salad--olives, onion, tomatoes, tortellini, Italian dressing, parsley, and artichokes.
    • Cheese tortellini--This forms the base of the pasta salad. You can use plain cheese tortellini, or the colorful three cheese variety makes for a stunning side dish.
    • Olives--I prefer Kalamata olives for their distinct flavor, but you can use any type of olives you like.
    • Artichoke hearts--Choose artichoke hearts that are packed in oil, not water. They are generally labeled as marinated artichoke hearts. The oil that coats them adds extra flavor to the salad.
    • Italian dressing--Use a good-quality creamy Italian dressing, or if you have a favorite homemade version, use that!

    How to Make Camping Pasta Salad

    Tortellini boiling in a pot of water.

    1. Cook the tortellini in boiling water according to package directions. Drain and cool.

    A bowl filled with tortellini, olives, tomatoes, red onions, artichokes, and parsley.

    2. Combine the tomatoes, olives, artichoke hearts, onion, and parsley in a large bowl with the tortellini.

    A person pouring dressing into a bowl of salad.

    3. Drizzle the dressing over the salad.

    A person stirring a bowl of tortellini salad.

    4. Toss the salad until all the ingredients are thoroughly mixed. Refrigerate for at least 1 hour before serving.

    FAQs

    Do I need to rinse the tortellini after cooking?

    Rinsing the tortellini will help to cool it quickly and keep the pasta from getting mushy, so if you're at home, go for it. But if you're making this at a campsite, it's a step that you can skip. It will cool just fine on its own.

    How far in advance can I prepare this salad?

    The salad can be prepared up to 3 days before serving. Store it in a covered container in the refrigerator or your cooler. Drizzle and toss with extra dressing just before serving as the salad will absorb some dressing as it sits.

    How can I make this camping salad into a full meal?

    Definitely. Feel free to bulk up the salad by adding chopped salami or shredded chicken. You can also add pepperoncini, sun-dried tomatoes, or extra vegetables for more flavor. If you'd prefer a heartier tortellini meal, give this one-pot cheeseburger tortellini a try!

    Storage

    The salad will keep for up to 3 days if stored in the fridge or your cooler in a sealed container. Don't freeze the salad as the pasta and vegetables will become mushy when thawed.

    Tips and Troubleshooting

    • To get ahead, prepare the salad before heading out on your trip.
    • Keep some extra dressing on hand to add before serving. The make-ahead pasta salad will absorb dressing as it sits.
    A white bowl filled with pasta salad.

    More Make-Ahead Salad Recipes You'll Love

    A bowl of marinated bean salad with cilantro and a lime on the side.
    Marinated Bean Salad
    A bowl filled with raw vegetable marinated salad.
    Marinated Vegetable Salad

    Tried This Recipe?

    If you've tried this recipe, please leave a comment below. Follow me on Instagram, Facebook, YouTube, or Pinterest for more great camping and grilling recipes.

    Recipe

    A white bowl filled with pasta salad.

    Camping Pasta Salad

    This make-ahead tortellini salad with artichokes, tomatoes, olives, and creamy Italian dressing is a summer staple for camping, potlucks, and picnics.
    5 from 1 vote
    Print Recipe Pin Recipe
    Prep Time 15 minutes mins
    Cook Time 10 minutes mins
    Total Time 25 minutes mins
    Course Salad, Side Dish
    Cuisine American
    Servings 6 servings
    Calories 373 kcal

    Ingredients
      

    • 1 package (1 pound | 454 g) cheese tortellini
    • 1 cup diced tomato or halved grape tomatoes
    • ⅔ cup marinated artichoke hearts chopped
    • ½ small red onion diced
    • ⅓ cup pitted Kalamata olives
    • 1 tablespoon chopped Italian parsley
    • ⅓ cup creamy Italian salad dressing (store-bought or homemade) plus more for serving
    • Salt and freshly ground black pepper

    Instructions
     

    • Bring a large pot of water to a boil and cook the tortellini according to the package directions. Drain, rinse with cold water, and drain again.
    • In a large bowl, combine the cooled tortellini, tomatoes, artichoke hearts, red onion, Kalamata olives, and parsley.
    • Drizzle ⅓ cup salad dressing over the salad and toss well to combine. Season to taste with salt and pepper.
    • Chill the salad for at least 1 hour before serving. Taste and adjust the seasoning, if needed.

    Notes

    • Make ahead--Prepare the salad up to 3 days before serving.
    • Storage--Store the salad in a covered container in the refrigerator or your cooler for up to 3 days.
    • Take some extra dressing--Keep some extra dressing on hand to add before serving. The salad will absorb dressing as it sits.

    Nutrition

    Serving: 1 portionCalories: 373kcalCarbohydrates: 44gProtein: 10gFat: 19gCholesterol: 15mgSodium: 859mgFiber: 1gSugar: 3g
    Keyword camping side dishes, easy camping salads, italian tortellini salad, tortellini salad
    Tried this recipe?Let us know how it was!

    September 8, 2023 Camping

    Campfire Chicken and Potato Foil Packets

    These easy chicken and potato foil packets are made over the campfire (or on your grill) and are ready in just 30 minutes. They're a satisfying camping meal of chicken thighs, carrots, and potatoes, all tossed in a bright and peppery seasoning blend.

    Chicken, carrots, and potatoes in bite size pieces in a foil packet over the fire.

    Recipe at a Glance: Campfire Chicken

    • DETAILS
      • Total Time: 45 minutes
      • Preparation method: Campfire cooking (foil packet)
    • HIGHLIGHTS
      • These campfire chicken foil packets combine tender chicken thighs, carrots, and potatoes with a homemade seasoning blend to create a hearty meal. They're cooked in a foil packet over your campfire or portable grill.
      • This easy camping meal is cooked entirely in a single packet, so you have no mess or dishes to do.
      • You can customize your foil packs with different vegetables and seasoning, depending on your personal preferences and what you've got on hand.

    Foil pack meals are one of my favorite camping dinners—they're easy to make, cook in one packet, and leave virtually no cleanup. When my daughter requested chicken foil packets on our last camping trip, I put together this hearty combination of seasoned chicken, potatoes, and carrots. Wrapped in foil and cooked over the campfire for about 30 minutes, these simple ingredients turn into a delicious, satisfying meal that's perfect for summer camping.

    [feast_advanced_jump_to]

    Why This Recipe is Great for Camping

    • You can mix up the seasoning blend before heading out to save time and space.
    • Your entire meal cooks in one convenient package.
    • You can make it over the campfire or on your portable grill.

    Ingredients and Substitutions

    Ingredients for chicken and potato foil packets--chicken thighs, olive oil, carrots, potatoes, and seasoning.
    • Chicken thighs--I like using boneless skinless chicken thighs here because they are more forgiving and will stay moist even when overcooked. Chicken breast pieces may dry out before the vegetables are cooked through.
    • Potatoes--Small new potatoes work best here, although this is also great with pieces of Yukon Gold or other waxy potatoes. Don't use Russet potatoes here as they'll break down too much during cooking.
    • Carrots--Use carrots with an even thickness whenever possible. This will help them to cook evenly.
    • All-purpose seasoning--This is my favorite blend of spices for using on chicken. You can substitute your favorite store-bought or homemade seasoning blend, if you prefer.

    How to Make Campfire Chicken

    A metal bowl with olive oil and seasoning in it.

    1. Combine the olive oil and seasoning blend in a large bowl and stir well.

    A metal bowl with bite size pieces of chicken, potatoes, and carrots in it.

    2. Add the chicken, carrots, and potatoes and mix well so that the seasoned oil coats each piece.

    Pieces of chicken, potatoes, and carrots on a sheet of foil.

    3. Divide the chicken mixture among four pieces of aluminum foil, and fold each one up to enclose the contents.

    Four foil packets on a grate over the fire.

    4. Cook the campfire foil packets over a bed of hot coals until the chicken and vegetables are cooked through.

    FAQs

    Can I make these in the oven?

    Yes. Toss the foil packets on a rimmed baking sheet and cook in a 400°F (200°C) oven for about 30 minutes.

    Can I make these with different vegetables?

    You can, but choose vegetables that will cook through in the same time as the chicken. Bell pepper, onions, mushrooms, and small cubes of sweet potato will all work. Avoid quick-cooking vegetables, like zucchini and asparagus as they'll be overcooked by the time the chicken is done.

    What's the best way to fold a foil packet?

    Place your food in the center of the foil. Bring the long edges of the foil up to meet, and then fold them over a couple of times, creating a seam that runs over the top of your food. Then working with one end at a time, fold it over a few times to seal the end.

    I like this method for making foil packets because it's easy to open the seal on top to check them for doneness and then close, if necessary, and it also creates an easy pouch for eating when opened.

    Storage & Reheating

    Store leftover chicken and potatoes in a sealed container in your fridge or cooler for up to 4 days. Reheat the mixture in a skillet over medium-low heat, stirring frequently, until warmed through.

    Tips and Troubleshooting

    • To get ahead, mix your seasoning blend before heading out on your camping trip.
    • If making these over a campfire, use a bed of hot coals or very low flame to allow for even cooking. Don't cook them over high flames as that will cause uneven cooking and burning.
    • Don't flip your foil packets while cooking.
    • This chicken foil packet recipe is suitable for gluten-free and dairy-free diets.

    More Chicken Foil Packet Recipes You'll Love

    Two Cajun chicken foil packets on plates with forks on the side.
    Cajun Chicken Foil Packets
    A foil packet of chicken nachos with salsa and sour cream on the side.
    Chicken Nacho Foil Packets

    Tried This Recipe?

    If you've tried this recipe, please leave a comment below. Follow me on Instagram, Facebook, YouTube, or Pinterest for more great camping and grilling recipes.

    Recipe

    Chicken, carrots, and potatoes in bite size pieces in a foil packet over the fire.

    Campfire Chicken and Potato Foil Packets

    A woman's face.Angie Zoobkoff
    A healthy campfire foil packet meal of chicken, potatoes, and carrots that's ready in under an hour.
    5 from 2 votes
    Print Recipe Pin Recipe
    Prep Time 15 minutes mins
    Cook Time 30 minutes mins
    Total Time 45 minutes mins
    Course Main Course
    Cuisine American
    Servings 4 servings
    Calories 517 kcal

    Ingredients
      

    • 2 tablespoons olive oil
    • 2 tablespoons (1 batch) all-purpose seasoning blend
    • 8 (about 2 pounds | 900 g) boneless, skinless chicken thighs cut into 2-inch pieces
    • 1 pound carrots cut into 1-inch pieces
    • 1 pound new or waxy potatoes cut into 1-inch pieces

    Instructions
     

    • Prepare a bed of hot coals or preheat a grill for medium heat (400°F).
    • Stir the oil and seasoning blend together in a large bowl.
    • Add the chicken, carrots, and potatoes and mix well to combine. Try to get each piece coated with some of the seasoned oil.
    • Divide the mixture among four large sheets of aluminum foil. Fold up each sheet to create a pouch, enclosing the chicken and vegetables.
    • Set the foil packets over the fire and cook until the chicken reaches an internal temperature of 165°F (74°C) and the potatoes and carrots are tender, about 30 minutes. You should hear sizzling coming from your campfire foil packets.
    • Open carefully and let cool slightly before devouring.

    Notes

      • Plan ahead--To get ahead, mix your seasoning blend before heading out on your camping trip.
      • Keep your heat even--If making these over a campfire, use a bed of hot coals or very low flame to allow for even cooking. Don't cook them over high flames.
      • Don't flip--Don't flip your foil packets while cooking.
      • Storage--Leftover chicken and vegetables can be stored in a sealed container in your fridge or cooler for up to 4 days. Reheat in a skillet over medium-low heat.
      • Dietary--This chicken foil packet recipe is suitable for gluten-free and dairy-free diets.

    Nutrition

    Serving: 1 packetCalories: 517kcalCarbohydrates: 45gProtein: 49gFat: 16gFiber: 8g
    Keyword campfire cooking, chicken foil packets, chicken thigh recipes
    Tried this recipe?Let us know how it was!

    September 8, 2023 Camping

    All-Purpose Seasoning Blend

    Everyone needs an all-purpose seasoning blend that they can rely on to spice up grilled poultry and meats, roasted and grilled vegetables, salads, or to boost the flavor of a simple foil pack campfire chicken dinner. This easy 4 ingredient seasoning blend does exactly that.

    A spoonful of seasoning mixture.

    Recipe at a Glance: All Purpose Seasoning

    • DETAILS
      • Total Time: 5 minutes
      • Preparation method: No-cook
    • HIGHLIGHTS
      • This simple homemade spice blend works for many recipes, so you can bring just one jar along on your camping trip, instead of multiple individual spices.
      • The recipe scales easily and will stay fresh for up to 1 year, so you can make a big batch all at once.
      • It's a simple combination of everyday spices that pairs well with chicken, fish, pork, vegetables, and more.

    When we head out camping, it's a little tedious to think of all the possible spices you might need on a trip, and even more annoying to haul all of the individual bottles along with you. When I developed this homemade seasoning blend recipe, I wanted a simple combination of spices that could be tossed together in a few minutes and would work with an assortment of easy camping recipes.

    This blend is made from 4 ingredients that you probably already have in your spice drawer, and it's fantastic for seasoning everything from skewers to foil packets to grilled vegetables. Now I can mix up a big batch at the start of camping season, and it will last me all summer.

    [feast_advanced_jump_to]

    Why You'll Love This Recipe

    • Having homemade spice mix on hand means you can quickly and easily add flavor to your meal without having to pull out several spices each time you prepare a meal. This makes it perfect for packing along on camping trips.
    • You can mix up a big batch to keep on hand for anytime you need a flavor boost.

    Ingredients and Substitutions

    Ingredients for all-purpose seasoning blend--parsley flakes, lemon pepper, granulated garlic, and onion powder.
    • Lemon pepper--This adds a zippy brightness to the blend. Check your lemon pepper blend, as some contain salt and some do not. If you are using a salt-free blend, add ½ teaspoon of salt to the mixture.
    • Granulated garlic--I prefer to use granulated garlic instead of garlic powder as the size of it makes it blend better with the other ingredients. If you only have garlic powder, use ½ teaspoon instead of 1 teaspoon.
    • Dried parsley--You'll get a herbal note from the parsley, as well as a pop of color in your seasoning blend.

    How to Make All Purpose Seasoning

    A glass bowl with four different spices.

    1. Combine the lemon pepper, granulated garlic, parsley flakes, and onion powder in a small bowl.

    A glass bowl with spices mixed together and spoon resting inside.

    2. Mix well to combine, then transfer to an airtight container. Store in a cool, dry place for up to 1 year.

    FAQs

    What is all purpose seasoning?

    It's a blend of spices and herbs that is used to elevate the flavor of meat, poultry, vegetables, soups, salads, and dressings. The exact combination of spices can vary and be adjusted based on personal preference, but it is a convenient way to add flavor without having to constantly measure out several spices.

    How much should I use?

    As a general rule of thumb, use 2 to 3 teaspoons of seasoning per pound of food you're cooking.

    Can I customize my seasoning blend?

    Definitely. Use a little more garlic and less onion powder, if you prefer, or vice-versa. If you're watching your salt intake, use a salt-free lemon pepper, such as Mrs. Dash, and reduce or eliminate the salt in the blend.

    How to Use Your Homemade All Purpose Seasoning

    This particular all purpose seasoning mix can be used anytime you need some extra flavor, but I think it is best suited to chicken, fish, seafood, and grilled vegetable dishes. The zippy lemon flavor pairs exceptionally well with them. Here are a few of my favorite ways to use it:

    • Sprinkle it into your chicken and potato foil packet for a classic campfire dinner.
    • Rub it onto vegetables before grilling or roasting. It's fantastic on Blackstone asparagus!
    • Mix it into zucchini fritters for an added flavor boost.
    • Use it to season your Dutch oven chicken noodle soup.
    • Use it as a seasoning for grilled chicken skewers or crispy chicken cutlets.
    • Mix it with some oil and create a marinade for grilled salmon, chicken, or pork.

    Storage

    Store the seasoning blend in a cool, dry place in an airtight container. It will keep for up to 1 year. Shake or stir it to recombine before using.

    Tips and Troubleshooting

    • This recipe can be scaled easily. Feel free to double, triple, or quadruple it, depending on how much and how frequently you use it.
    • This all-purpose spice blend recipe is suitable for gluten-free, dairy-free, and vegan diets.
    A jar of spice blend tipped on its side with some spice mix spilling out.

    More Everyday Staples You'll Love

    A small glass pitcher half full of lemon thyme vinaigrette.
    Lemon Thyme Vinaigrette
    A small dish of BBQ rub with a spoon resting inside.
    BBQ Rub for Pork

    Tried This Recipe?

    If you've tried this recipe, please leave a comment below. Follow me on Instagram, Facebook, YouTube, or Pinterest for more great camping and grilling recipes.

    Recipe

    A spoonful of seasoning mixture.

    All-Purpose Seasoning Blend

    An easy mix of spices that's perfect for seasoning meats, poultry, vegetables, and more.
    5 from 1 vote
    Print Recipe Pin Recipe
    Prep Time 5 minutes mins
    Total Time 5 minutes mins
    Course Condiment
    Cuisine American
    Servings 2 tablespoons
    Calories 15 kcal

    Ingredients
      

    • 1 tablespoon lemon pepper (see note below)
    • 1 teaspoon granulated garlic
    • 1 teaspoon parsley flakes
    • ½ teaspoon onion powder

    Instructions
     

    • Combine the spices in a small bowl. Stir well to thoroughly combine.
    • Transfer to an airtight container and store in a cool, dark place. Shake or stir to recombine before using.

    Notes

      • Check your lemon pepper--If your lemon pepper does not contain salt, you will need to add ½ teaspoon to the blend.
      • Scaling--This recipe can be scaled easily. Feel free to double, triple, or quadruple it, depending on how much and how frequently you use it.
      • How much to use--As a general rule of thumb, use 2 to 3 teaspoons of seasoning per pound of food you're cooking.
      • Storage--Store the all-purpose seasoning blend in a cool, dry place in an airtight container. It will keep for up to 1 year. Shake or stir it to recombine before using.
      • Dietary--This recipe is suitable for gluten-free, dairy-free, and vegan diets.
    •  
    •  

    Nutrition

    Calories: 15kcal
    Keyword seasoning blend, spice mix
    Tried this recipe?Let us know how it was!

    September 1, 2023 Camping

    Spiced Grilled Plums

    These tender spiced grilled plums highlight sweet summer stone fruit in the best possible way. For this easy dessert that's ready in just 20 minutes, quartered plums are gently cooked in spiced orange butter in a foil packet on the grill or over your campfire.

    Spiced grilled plums in a bowl on a plate with a fork and checkered napkin on the side.

    Recipe at a Glance: Grilled Plums

    • DETAILS
      • Total Time: 20 minutes
      • Preparation method: Grill or campfire (in a foil packet)
    • HIGHLIGHTS
      • This simple 5-ingredient dessert features tender grilled plums in a sweet syrup. It's cooked in a foil packet on the grill or over a campfire. No dishes or mess to clean up!
      • Grilling your fruit in a foil packet allows the juices from the fruit to melt into the syrup, creating a thick sauce for drizzling over the plums.
      • Serve these spiced plums right from the foil packet just as they are, or with a scoop of ice cream on top.

    These plums are quartered, topped with a simple combination of butter, orange juice, brown sugar, and nutmeg, then wrapped up in a snug package and gently cooked on the grill or over a campfire. The result is meltingly tender plums that softly slump into a buttery spiced syrup. The hardest part of the whole process is waiting for them to be cool enough to eat.

    [feast_advanced_jump_to]

    Why This Recipe Works

    Most grilled plums recipes have you cook halved plums directly over the heat, creating a caramelized surface and soft juicy center. They are delicious, but any juices that cook out are lost to the grill. This recipe uses the steam created inside a foil packet to gently cook the plums while still capturing the flavorful juices. As these juices cool, they create a thick syrup that makes the perfect topping for your soft, grilled plum wedges.

    Ingredients and Substitutions

    Ingredients for spiced grilled plums--plums, butter, brown sugar, nutmeg, and orange juice.
    • Plums--This recipe is intended for plums that are ripe, but not overripe and juicy. Extremely ripe fruit will break down too much during cooking. Choose plums that give gently when squeezed but don't feel soft. Got extra plums? Make this plum galette!
    • Brown sugar--This adds just a little bit of sweetness to the plums.
    • Orange juice--If you want to get fancy, or make a grown-up version of this dessert, try swapping in an orange liqueur, such as Grand Marnier or Cointreau.

    How to Make Grilled Plums

    Quartered plums with butter and brown sugar on a foil sheet with bowls of nutmeg and orange juice on the side.

    1. Pile the quartered plums on a large sheet of foil. Top with butter, sugar, orange juice, and nutmeg. Fold up and seal the foil packet.

    A foil packet on a grill.

    2. Grill the plums over medium-low heat until tender when pierced with a knife. Let cool for at least 10 minutes before serving.

    Grilled Plum FAQs

    What's the best way to fold a foil packet?

    Place your food in the center of the foil. Bring the long edges of the foil up to meet, and then fold them over a couple of times, creating a seam that runs over the top of your food. Then working with one end at a time, fold it over a few times to seal the end.

    I like this method for folding a foil packet because it's easy to open the seal on top to check them for doneness and then close, if necessary, and it also creates an easy pouch for eating when opened.

    What's the best temperature for grilling plums?

    The key to grilling plums, or any stone fruit in a foil packet, is to keep the heat reasonably low. Around 300°F on a grill is good. If your foil packet is over a campfire, you should hear gentle sizzling, but not a lot of crackling and popping.

    Because the fruit is encased in a foil pouch, it can break down quite quickly if cooked at a high temperature. Cook it over gentle heat and check it frequently as it begins to soften.

    Storage & Reheating

    These are best served as soon as they're made, but if you've got leftovers, store them in a sealed container in your fridge or cooler for up to 3 days. Reheat them gently in a small skillet over low heat until warmed through.

    Tips and Troubleshooting

    • If you want to double or triple the recipe, I recommend making more foil packets. Attempting to fit everything into one packet will be awkward to handle and may result in uneven cooking.
    • Don't flip the foil packet while it is cooking.
    • To check your plums, gently open the foil packet from the top and give them a poke with a knife. When they're ready the knife will slip easily into the fruit. If they're not ready, close up the foil packet and wait a few minutes. Don't try to increase the heat to rush things along as this will result in the plums breaking down.
    • Don't skip the rest period! While the plums are resting and cooling, the syrup will thicken, resulting in a perfect sauce to drizzle over the grilled plums.
    • This spiced grilled plums recipe is suitable for gluten-free diets. To make it vegan, use plant-based butter.
    Quartered grilled plums in a foil packet in a red syrup.

    More Grilled Fruit Recipes You'll Love

    Two plates topped with grilled nectarines, candied pecans, and whipped cream.
    Grilled Nectarines with Praline Crunch
    Skewers of grilled strawberries on a plate, drizzled with dark syrup.
    Grilled Strawberries

    Tried This Recipe?

    If you've tried this recipe, please leave a comment below. Follow me on Instagram, Facebook, YouTube, or Pinterest for more great camping and grilling recipes.

    Recipe

    Spiced grilled plums in a bowl on a plate with a fork and checkered napkin on the side.

    Spiced Grilled Plums

    A woman's face.Angie Zoobkoff
    Sweet summer plums are gently cooked in a foil packet in a sweetly spiced orange butter sauce. An easy summer dessert.
    5 from 1 vote
    Print Recipe Pin Recipe
    Prep Time 10 minutes mins
    Cook Time 10 minutes mins
    Total Time 20 minutes mins
    Course Dessert
    Cuisine American
    Servings 2 servings
    Calories 225 kcal

    Ingredients
      

    • 4 medium plums quartered
    • 2 teaspoons salted butter
    • 1 tablespoon brown sugar
    • 2 big pinches nutmeg
    • 1 tablespoon orange juice

    Instructions
     

    • Preheat the grill for medium-low heat (300°F | 150°C) or prepare a bed of hot coals below a campfire grate.
    • Pile the plum quarters on a large sheet of aluminum foil.
    • Top with butter, brown sugar, and nutmeg. Drizzle over the orange juice.
    • Fold up and seal the foil packet.
    • Place the plum foil packet over direct low heat on the grill or your campfire grate. Grill until the plums are tender when pierced with a knife and just beginning to slump, 10 to 15 minutes.
    • Remove from the heat and open the top of the foil packet slightly to let steam escape. Let the plums sit in their juices for at least 10 minutes before serving. They will smell amazing and it will be incredibly difficult to be patient, but it's worth the wait.
    • Serve the warm plums with the syrup from the bottom of the pouch drizzled over the top.

    Notes

    • Don't use overripe fruit--Extremely ripe fruit will break down too much during cooking. Choose plums that are ripe, but still firm.
    • Scaling the recipe--If you want to double or triple the recipe, I recommend making more foil packets. Attempting to fit everything into one packet will be awkward to handle and may result in uneven cooking.
    • How to check your plums for doneness--Gently open the foil packet from the top and give them a poke with a knife. The knife should slip easily into the fruit. If they're not ready, close up the foil packet and wait a few minutes. Don't try to increase the heat to rush things along as this will result in the plums breaking down.
    • Let the plums rest--This is the most important part of the whole recipe. The plums will be very hot, so they need to cool, and as they cool, the buttery juices will thicken up into a sauce.
    • Dietary--This recipe is suitable for gluten-free diets. To make it vegan, use plant-based butter.

    Nutrition

    Serving: 1portionCalories: 225kcalCarbohydrates: 46gProtein: 2gFat: 6gFiber: 4gSugar: 27g
    Keyword grilled plums, orange butter sauce, spiced plums
    Tried this recipe?Let us know how it was!

    August 30, 2023 Camping

    Grilled Salmon Kabobs

    Marinated grilled salmon kabobs are my summer go-to for a quick high protein main dish. Fresh salmon is marinated with garlic, herbs, and lemon, then grilled until tender and flaky.

    Four grilled salmon kabobs on a pink plate with lemon wedges and fresh herbs next to them.

    Recipe at a Glance: Grilled Salmon Kabobs

    • DETAILS
      • Total Time: 45 minutes (10 minutes hands-on)
      • Preparation method: Grilling
    • HIGHLIGHTS
      • These salmon skewers cook quickly, and need only 10 minutes on the grill.
      • A quick marinade of lemon, garlic, and fresh herbs adds plenty of flavor to the fish and keeps them juicy and moist on the grill.
      • Cook them on your grill at home, or make them on a grill pan on the stove, camp stove, or over the campfire.

    Marinated salmon kabobs on the grill are an easy skewer recipe that's ready in under an hour. They're full of flavor, and, just like with my grilled pesto salmon, cooking them on the grill means that the fishy smell stays outside instead of lingering in your kitchen.

    For these easy skewers, cubes of salmon (or your fave fish) are quickly marinated in oil, garlic, lemon juice, and fresh herbs, then quickly grilled until flaky and tender.

    [feast_advanced_jump_to]

    Ingredients and Substitutions

    Ingredients for grilled salmon kabobs--salmon, lemon, garlic, herbs, and olive oil.
    • Salmon--You can use any type of salmon or substitute trout or another firm white fish, such as halibut. For ease of preparation, purchase skinless salmon fillets.
    • Fresh herbs--Use whatever you've got on hand, and feel free to play around with a combination of herbs. I love oregano, thyme, parsley, rosemary, and basil. If you don't have any fresh herbs on hand, you could also swap in 2 tablespoons nut-free pesto to replace the herbs and oil.
    • Lemon--This brings acidity to the dish and shouldn't be skipped. You should be able to get enough lemon juice from 1 half of a large lemon for the marinade, so hang on to the remaining half and serve it with your meal to squeeze over the kabobs.

    How to Cook Salmon Kabobs on the Grill

    A bowl of herb marinade with a whisk, squeezed lemon half, and empty dish of olive oil nearby.

    1. Whisk the herbs, garlic, lemon juice, and olive oil in a medium bowl.

    Cubed pieces of salmon in a zip-top bag with marinade and an empty bowl nearby.

    2. Place the cubed salmon in a resealable plastic bag and pour the marinade over the salmon. Seal the bag and marinate in the refrigerator for 20 to 30 minutes.

    Four salmon kebabs on a rimmed baking sheet.

    3. Thread the salmon pieces onto skewers.

    Four salmon kebabs on a grill.

    4. Grill the salmon kabobs over medium heat until cooked through, 8 to 10 minutes.

    FAQs

    What's that white stuff coming out of my fish?

    That gunky white stuff you may see on the surface of your salmon when you cook it is called albumin. It's a liquid protein that solidifies when heated. It may not look particularly appetizing, but it is completely harmless and safe to eat.

    Albumin typically solidifies when the fish is cooked over high heat or cooked for too long. To prevent it from forming, cook your salmon over medium or medium-low heat, and take care not to overcook it.

    Can I make these without a grill?

    Definitely. You can make these in a grill pan on your stovetop, or over hot coals on your campfire. Oil the grill pan well, and sear the skewers, turning once, until cooked through.

    You can also make them in your oven. Place the salmon skewers on a rimmed baking sheet and cook at 400°F (200°C) for about 10 minutes.

    Can I add vegetables to the kabobs?

    Of course! Adding vegetables allows you to play around with the flavors on your skewers, and you get an extra serving of vegetables in. Choose vegetables that will cook through in the same amount of time as the fish such as zucchini ribbons, mushrooms, or small slices of onion or pepper.

    Do I have to flip the skewers?

    I recommend that you do. Flipping them will allow the fish to cook evenly and develop some caramelization on a couple of sides. Don't overdo it though; one turn during cooking is enough.

    Storage

    Store leftover grilled salmon skewers covered in the fridge for up to 3 days. Rewarm in the oven or on a warm grill until heated through. The leftovers are also great served cold.

    Serving Suggestions

    For a light meal, serve them with a simple salad of grilled avocado and tomato or mixed greens tossed with lemon thyme dressing.

    Tips and Troubleshooting

    • If you're using wooden skewers, you'll need to soak them in water for at least 30 minutes before using them. Metal skewers don't require any soaking.
    • Don't cut your fish pieces too small or they will be difficult to thread onto the skewer.
    • Don't marinate your fish for longer than 30 minutes or it may become mushy.
    • Oil your grill grate well before cooking as fish tends to stick. When flipping the skewers, don't force them off the grill. They'll release when they're ready.
    • This recipe is suitable for gluten-free and dairy-free diets.
    Four grilled salmon skewers on a pink plate with fresh herbs and lemon wedges.

    More Grilled Salmon Recipes You'll Love

    A piece of blackened salmon on a Caesar salad.
    Grilled Salmon Caesar Salad
    Pesto crusted salmon topped with lemon slices on a cutting board.
    Pesto Crusted Salmon

    Tried This Recipe?

    If you've tried this recipe, please leave a comment below. Follow me on Instagram, Facebook, YouTube, or Pinterest for more great camping and grilling recipes.

    Recipe

    Four grilled salmon kabobs on a pink plate with lemon wedges and fresh herbs next to them.

    Grilled Salmon Kabobs

    For this quick, healthy summer main, fresh salmon is marinated with garlic, herbs, and lemon, then grilled until tender and flaky.
    5 from 1 vote
    Print Recipe Pin Recipe
    Prep Time 10 minutes mins
    Cook Time 10 minutes mins
    Total Time 45 minutes mins
    Course Main Course
    Cuisine American
    Servings 4 skewers
    Calories 259 kcal

    Equipment

    • 4 Skewers for grilling

    Ingredients
      

    • 2 tablespoons fresh lemon juice
    • 2 tablespoons olive oil
    • 2 tablespoons chopped mixed fresh herbs such as parsley, oregano, thyme, and rosemary
    • 1 clove garlic minced
    • ½ teaspoon kosher salt
    • 1 pound salmon fillet cut into 1-inch (25-mm) cubes
    • Oil for the grill
    • Lemon wedges for serving (optional)

    Instructions
     

    • In a small bowl, whisk the lemon juice, oil, herbs, garlic, and salt together.
    • Place the salmon cubes in a resealable plastic bag or in a medium bowl and pour the marinade over.
    • Marinate the fish in the refrigerator for 20 to 30 minutes.
    • While the fish is marinating Preheat a grill to medium heat (350 to 400°F). Oil the grill grate well.
    • Thread the fish onto skewers allowing the pieces of fish to touch, but not squishing them together.
    • Grill the skewers, turning once, until tender and just cooked through. The fish should flake easily with a fork when prodded. Serve with lemon wedges, if desired.

    Notes

    • Type of skewer--If you're using wooden skewers, you'll need to soak them in water for at least 30 minutes before using them. Metal skewers don't require any soaking.
    • Cutting the fish--Cut the fish into even-sized pieces, but don't cut the pieces too small or they will be difficult to thread onto the skewer.
    • Marinating time--Don't marinate your fish for longer than 30 minutes or it may become mushy.
    • Preparing the grill--Oil your grill grate well before cooking as fish tends to stick. When flipping the skewers, don't force them off the grill. They'll release when they're ready.

    Nutrition

    Serving: 1 skewerCalories: 259kcalCarbohydrates: 1gProtein: 29gFat: 15gCholesterol: 61mg
    Keyword fish kabobs, fish skewers, grilled fish, kabobs, salmon skewers
    Tried this recipe?Let us know how it was!

    August 27, 2023 Dinner

    Grilled Tuna Steak Salad

    This grilled tuna steak salad recipe is going to upend every notion you have about what tuna salad is. When fresh grilled tuna gets jumbled together with crisp greens, berries, and crunchy pumpkin seeds and tossed with lemon vinaigrette, it becomes a summertime staple in a whole new way.

    Two plates of grilled tuna salad with a bowl of pepitas, a dish of salt, and a jar of vinaigrette on the side.

    I'm definitely not knocking canned tuna salad. It's a staple around here, and tuna melts make a regular appearance at our table.

    But there is something to be said for a piece of lightly seared fresh tuna piled atop a bed of crisp greens, sweet blackberries, crunchy pumpkin seeds, and a light lemon dressing. And when it's hot and you're craving something fresh and light, it's the perfect solution.

    [feast_advanced_jump_to]

    Why You'll Love This Recipe

    • It's quick and easy to toss together, making it a great light meal, especially on a hot day.
    • You can make the dressing and pepitas ahead of time.

    Ingredients and Substitutions

    Ingredients for grilled tuna salad--tuna, greens, blackberries, olive oil, vinaigrette dressing, and spiced pepitas.
    • Tuna--Use good quality fresh tuna steaks for this grilled ahi tuna salad. Look for bright red steaks that have a mild, sea-like odor. Avoid any tuna that is brown or smells very fishy.
    • Greens--Mixed baby greens have a delicate flavor that pairs well with the tuna, but you can substitute butter lettuce or arugula, if you prefer.
    • Blackberries--The sweet berries balance the tartness of the vinaigrette and the spiciness of the pepitas. Blueberries will also work here.
    • Spiced pepitas--These spiced toasted pumpkin seeds add crunch to the salad and shouldn't be skipped. If you avoid spicy foods, feel free to use plain toasted pepitas or sunflower seeds. Got extra pepitas? Try one of these amazing ways to use pumpkin seeds.

    How to Make Grilled Tuna Steak Salad

    Two tuna steaks on a rimmed baking sheet with a bowl of olive oil and a brush on the side.

    1. Brush the tuna steaks with olive oil and season with salt and pepper.

      A tuna steak grilling on a metal grate.

      2. Grill the tuna over medium heat until seared to your desired doneness.

      A partially sliced tuna steak on a white cutting board.

      3. Slice the tuna against the grain.

      A partially assembled tuna salad with a bowl of blackberries, jar of dressing, and partially sliced tuna steak on the side.

      4. Assemble the salads with mixed greens, berries, pepitas, and sliced tuna steak. Drizzle with lemon thyme vinaigrette.

      FAQs

      What type of tuna is best for grilling?

      Look for ahi tuna, which can also be labeled as yellowfin tuna. It has a delicate flavor and is best enjoyed when just seared on the outside. When selecting tuna, choose steaks that are uniformly bright red, with no brown streaks or a rainbow hue. Avoid tuna with an overly fishy or unpleasant odor.

      Can I make this with a different type of fish?

      Absolutely. This salad would be great with grilled salmon skewers, trout fillets, or fresh grilled halibut.

      What should I serve with this?

      This grilled fresh tuna salad recipe is a meal in itself, but a loaf of crusty bread or garlic bread would be a great addition.

      How to Make This Over a Campfire

      If you're out camping and don't have a grill, fear not! You can easily make this using your hot campfire coals and your trusty cast iron skillet or grill pan. Set your skillet or grill pan over hot coals and coat it with oil. When it is very hot, add the tuna and sear to the desired doneness, flipping once.

      Tips and Troubleshooting

      • To get ahead, make your lemon thyme vinaigrette and your spiced pepitas ahead of time.
      • Use the freshest tuna you can find and take care not to overcook it as the tuna can become dry.
      • Keep everything separate until just before serving as the dressing will cause the greens to wilt.
      • This recipe is suitable for gluten-free and dairy-free diets.
      A white plate topped with grilled tuna, greens, blackberries, and spiced pepitas.

      More Grilling Recipes You'll Love

      Four grilled salmon kabobs on a pink plate with lemon wedges and fresh herbs next to them.
      Grilled Salmon Kabobs
      A white dish containing grilled beets topped with goat cheese and fresh mint.
      Grilled Beets with Goat Cheese

      Tried This Recipe?

      If you've tried this recipe, please leave a comment below. Follow me on Instagram, Facebook, or Pinterest for more great camping and grilling recipes.

      Recipe

      Two plates of grilled tuna salad with a bowl of pepitas, a dish of salt, and a jar of vinaigrette on the side.

      Grilled Tuna Steak Salad

      A woman's face.Angie Zoobkoff
      This tuna steak salad made with fresh grilled tuna, sweet blackberries, mixed greens, crunchy spiced pumpkin seeds, and a zesty lemon herb dressing is an easy, healthy meal.
      5 from 1 vote
      Print Recipe Pin Recipe
      Prep Time 12 minutes mins
      Cook Time 8 minutes mins
      Total Time 20 minutes mins
      Course Main Course
      Cuisine American
      Servings 3 servings
      Calories 404 kcal

      Ingredients
        

      • 2 teaspoons olive oil plus more for the grill
      • 1 pound fresh ahi tuna about 1 inch (25-mm) thick
      • Salt and freshly ground black pepper
      • ¼ cup spiced pepitas
      • 1 container (5 oz) blackberries
      • ¼ cup lemon thyme vinaigrette

      Instructions
       

      • Preheat the grill for medium heat (400°F). Lightly oil the grill grate.
      • Brush the tuna steaks with olive oil and season with salt and pepper.
      • Grill the tuna over direct heat, flipping once, until seared to the desired doneness, 3 to 4 minutes per side for medium-rare.
      • Let the tuna rest for a couple of minutes before slicing thinly against the grain.
      • Assemble the salads on plates or in bowls with a base of mixed greens topped with spiced pepitas, blackberries, sliced tuna, and a drizzle of lemon thyme vinaigrette.

      Notes

        • Get ahead--Make your lemon thyme vinaigrette and your spiced pepitas ahead of time.
        • Choose the best fish--Use the freshest tuna you can find and take care not to overcook it as the tuna can become dry.
        • Assemble at the last minute--Keep everything separate until just before serving as the dressing will cause the greens to wilt.
        • Dietary--This recipe is suitable for gluten-free and dairy-free diets.

      Nutrition

      Serving: 1 portionCalories: 404kcalCarbohydrates: 7gProtein: 47gFat: 21gCholesterol: 84mgFiber: 3gSugar: 3g
      Keyword fresh tuna, fresh tuna salad, grilled tuna
      Tried this recipe?Let us know how it was!

      August 26, 2023 Camping

      Grilled Beets with Goat Cheese

      These grilled beets with goat cheese are a simple salad of tender, earthy beets that are gently grilled in a foil packet, tossed with a bright dressing, and topped with creamy cheese.

      A bowl of grilled beets with crumbled goat cheese and fresh mint.

      I'm all for raw veggie trays and make-ahead salads when camping for their simplicity and zero effort. But every once in a while it's fun to change it up. And what better way to do it than with a dish of tender grilled beets tossed in tangy lemon vinaigrette and topped with creamy goat cheese?

      If you're thinking that this is bordering on "too fancy for camping", I hear you. It also makes a stunning grilled side dish to grilled bacon-wrapped pork tenderloin, or try it at Thanksgiving alongside this Dutch oven turkey breast.

      [feast_advanced_jump_to]

      Why This Recipe is Great for Camping

      • Just like with grilled carrots in foil, it's made in a foil packet so there is no messy clean-up required.
      • You can grill the beets on a portable grill or over hot coals on your campfire.
      • The dressing for the beets can be prepared ahead of time and stashed in your cooler.
      • It's a healthy, satisfying foil packet side dish that's perfect alongside any grilled meats, poultry, or fish.

      Ingredients and Substitutions

      Ingredients for grilled beets with goat cheese--baby beets, vinaigrette, olive oil, and goat cheese.
      • Beets--I prefer baby beets for this recipe as they are sweet and the skin sort of melts away during cooking, but you can use large beets. Just be sure to cut them into similarly sized pieces so that they cook evenly.
      • Lemon thyme vinaigrette--This is an easy homemade dressing that's perfect for brightening up the grilled beet salad.
      • Goat cheese--The creamy richness of goat cheese pairs beautifully with earthy beets and should not be skipped. You can use flavored goat cheese if you prefer.

      How to Cook Beets on the Grill

      Chopped raw beets on a sheet of foil with a dish of olive oil nearby.

      1. Cut the beets into 1 to 2-inch pieces and place on a large sheet of aluminum foil.

      Raw chopped beets drizzled with oil and sprinkled with salt and pepper on a sheet of foil.

      2. Drizzle with olive oil and season with salt and pepper.

      A foil pack on a rimmed baking sheet.

      3. Fold up the foil packet, enclosing the beets.

      A foil pack on a grill.

      4. Grill the beets until tender. Open the foil pack and drizzle with lemon thyme vinaigrette. Transfer to a bowl and top with goat cheese and fresh mint, if using.

      FAQs

      Do I need to peel the beets?

      No. As long as you've given your beets a good scrub, there is nothing wrong with eating the skin. It's got some good-for-you vitamins in it, so if it doesn't bother you, I recommend you leave it on.

      I love using baby beets for this grilled beets recipe as the skin isn't even noticeable. If you're using large beets and want to remove the skin, peel it with a vegetable peeler before cutting the beets into pieces.

      Can I make this ahead of time?

      You can prepare the vinaigrette dressing up to 1 week before using it. You can also grill the beets for up to 3 days before serving. Store them in a sealed container and toss them with the vinaigrette and cheese just before serving.

      What should I serve with grilled beets?

      These grilled beets are fantastic alongside any type of grilled meat, poultry, or fish. Try it with grilled salmon kabobs or grilled striploin steak skewers.

      Tips and Troubleshooting

      • These grilled beets in foil can be served warm or at room temperature.
      • Add your goat cheese just before serving as the the color of the beets will quickly stain the cheese.
      • To keep dishes to a minimum, feel free to add the dressing and cheese directly to the foil packet after grilling and dig in.
      • This recipe is suitable for gluten-free diets.
      Grilled beets in a foil pouch.

      More Camping Recipes You'll Love

      Four grilled salmon kabobs on a pink plate with lemon wedges and fresh herbs next to them.
      Grilled Salmon Kabobs
      An open foil packet filled with gnocchi, corn, tomatoes, and basil on a wooden tree stump.
      Corn and Tomato Gnocchi Foil Packets

      Tried This Recipe?

      If you've tried this recipe, please leave a comment below. Follow me on Instagram, Facebook, or Pinterest for more great camping and grilling recipes.

      Recipe

      A bowl of grilled beets with crumbled goat cheese and fresh mint.

      Grilled Beets with Goat Cheese

      A woman's face.Angie Zoobkoff
      An easy, healthy, side dish of tender grilled beets and creamy goat cheese with a bright and tangy lemon dressing.
      5 from 1 vote
      Print Recipe Pin Recipe
      Prep Time 10 minutes mins
      Cook Time 30 minutes mins
      Total Time 40 minutes mins
      Course Side Dish
      Cuisine American
      Servings 4 servings
      Calories 186 kcal

      Ingredients
        

      • 1 pound beets cut into 1 ½-inch pieces
      • 2 teaspoons olive oil
      • Salt and freshly ground black pepper
      • 2 tablespoons lemon thyme vinaigrette
      • ⅓ cup crumbled goat cheese
      • Fresh mint optional

      Instructions
       

      • Preheat the grill to medium (400°F), or prepare a bed of hot coals in a campfire.
      • Place the beets on a large sheet of heavy-duty aluminum foil.
      • Drizzle with olive oil and season with salt and pepper, to taste.
      • Fold up the sides and ends of the foil to create a pouch.
      • Place the foil packet on the grill or over the hot coals and cook until the beets are tender, about 30 minutes.
      • Remove from the heat and carefully open the foil packet to let the steam escape. Let the beets cool for 5 minutes, then drizzle with the lemon thyme vinaigrette.
      • Transfer the beets to a bowl and top with goat cheese and mint, if using, just before serving. The salad can be served warm or at room temperature.

      Notes

      • Hold the cheese--Add your goat cheese just before serving as the color of the beets will quickly stain the cheese.
      • Keep it simple--To keep dishes to a minimum, feel free to add the dressing and cheese directly to the foil packet after grilling and dig in.
      • Get ahead--The beets can be grilled up to 3 days before serving and the vinaigrette can be made up to 1 week before using.

      Nutrition

      Serving: 1 portionCalories: 186kcalCarbohydrates: 11gProtein: 8gFat: 13gCholesterol: 22mgFiber: 2gSugar: 9g
      Keyword beet salad, grilled vegetables, grilling vegetables, salad with goat cheese
      Tried this recipe?Let us know how it was!

      August 26, 2023 Everyday Staples

      Lemon Thyme Vinaigrette

      This bright, herby lemon thyme vinaigrette dressing comes together in just 5 minutes with a handful of everyday ingredients. It has so many uses that you'll want to keep a jar of it in the fridge all the time to brighten salads, vegetables, grain bowls, and more.

      A small glass pitcher half full of lemon thyme vinaigrette.

      Recipe at a Glance: Lemon Thyme Salad Dressing

      • DETAILS
        • Total Time: 5 minutes
        • Preparation method: No-cook
      • HIGHLIGHTS
        • This easy homemade vinaigrette comes together in just 5 minutes and is made with simple, recognizable ingredients.
        • Use it for salads, marinating, or to jazz up a simple grain bowl.

      I like to think of this easy vinaigrette as sunshine in a jar. Its bright lemon flavor is guaranteed to boost any dish, even in the dead of winter. I love drizzling it over simple salads, like this grilled tuna salad, or tossing it with grilled or roasted vegetables, like grilled beets.

      [feast_advanced_jump_to]

      Why This Recipe is a Great Everyday Staple

      • It's an easy homemade condiment with only 5 ingredients and comes together in less than 5 minutes.
      • The recipe scales easily, allowing you to make a big batch, or just as much as you need at once.
      • It stores well so you can always have some on hand.

      Ingredients and Substitutions

      Ingredients for lemon thyme vinaigrette--vinegar, oil, Dijon mustard, lemon, and oil.
      • Lemon juice--Use freshly squeezed lemon juice for best results.
      • Vinegar--My preference is to use white wine vinegar here, but red wine or apple cider vinegar will also work.
      • Thyme--Use fresh thyme for the lemon herb dressing. For an extra lemon boost, seek out lemon thyme.

      How to Make Lemon Thyme Dressing

      A jar of dressing next to a squeezed half lemon and an empty dish of Dijon mustard.

      1. Combine the dressing ingredients in a small jar or lidded container.

      A person shaking up a jar of lemon thyme vinaigrette next to a squeeze half lemon and an empty dish of Dijon mustard.

      2. Shake well to combine. Season to taste with salt and pepper.

      Storage

      Homemade dressing will keep for up to 1 week in the refrigerator. Store it in a sealed jar or container and shake well before using. You can freeze the vinaigrette for up to 3 months. Let it thaw overnight in the refrigerator before using.

      Serving Suggestions

      This lemon thyme dressing isn't just for salads, although it will certainly dress up a bowl of greens. Here are a few of my favorite ways to use it:

      • Use it as a marinade for chicken or grilled salmon kabobs.
      • Drizzle it over grilled vegetables or Blackstone asparagus.
      • Stir it into your cooked rice or grains to give your grain bowl a flavor boost.

      Tips and Troubleshooting

      • The dressing can be made up to 1 week in advance. Store it in the fridge until you're ready to use it. It will separate as it sits, so shake well before using. If the dressing solidifies, let it sit at room temperature until it becomes liquid again, then shake well to combine.
      • If you prefer a very tangy dressing, reduce the oil to 3 ½ tablespoons and increase the lemon juice to 1 ½ tablespoons. If you find the dressing too tart, add a teaspoon of honey or a big pinch of sugar.
      • This dressing is suitable for gluten-free, dairy-free, and vegan diets.

      More Salad Dressing Recipes You'll Love

      A bowl of chunky blue cheese dressing.
      Chunky Blue Cheese Dressing
      A jar of sun-dried tomato vinaigrette with tomatoes in the background.
      Sun-Dried Tomato Vinaigrette

      Tried This Recipe?

      If you've tried this recipe, please leave a comment below. Follow me on Instagram, Facebook, YouTube, or Pinterest for more great camping and grilling recipes.

      Recipe

      A small glass pitcher half full of lemon thyme vinaigrette.

      Lemon Thyme Vinaigrette

      I like to think of this easy lemon thyme vinaigrette as sunshine in a jar. Made with only a handful of everyday ingredients, it's guaranteed to brighten any dish it gets drizzled over.
      5 from 1 vote
      Print Recipe Pin Recipe
      Prep Time 5 minutes mins
      Total Time 5 minutes mins
      Course Condiment
      Cuisine French
      Servings 7 tablespoons
      Calories 123 kcal

      Ingredients
        

      • 1 tablespoon freshly squeezed lemon juice
      • 1 ½ tablespoons white wine vinegar
      • 1 teaspoon Dijon mustard
      • 1 teaspoon fresh thyme leaves chopped
      • 4 tablespoons olive oil
      • Salt and freshly ground black pepper

      Instructions
       

      • In a lidded jar or container, combine the lemon juice, vinegar, mustard, and thyme.
      • Pour in the olive oil, secure the lid, and shake well to combine.
      • Season to taste with salt and pepper.

      Notes

      • Storage--The dressing can be made up to 1 week in advance. Store it in the fridge until you're ready to use it. It will separate as it sits, so shake well before using. If the dressing solidifies, let it sit at room temperature until it becomes liquid again, then shake well to combine.
      • Adjust to taste--If you prefer a very tangy dressing, reduce the oil to 3 ½ tablespoons and increase the lemon juice to 1 ½ tablespoons. If you find the dressing too tart, add a teaspoon of honey or a big pinch of sugar.
      • Dietary--This dressing is suitable for gluten-free, dairy-free, and vegan diets.

      Nutrition

      Serving: 1.5 tablespoonsCalories: 123kcalFat: 14g
      Keyword lemon herb dressing, lemon salad dressing, lemon vinaigrette
      Tried this recipe?Let us know how it was!

      August 20, 2023 Camping

      Spiced Pepitas

      A little heat and a few spices transform crunchy pumpkin seeds into a snack that you'll want to be making on repeat. And with only 5 ingredients and 10 minutes of effort, there's no reason not to.

      A bowl of spiced pepitas with some spilling over the top.

      Whether it's something quick to grab on the way out the door, something to keep you fueled on a long hike, or a little nibble to enjoy when you're hanging around the campfire, we all need a go-to snack recipe. My favorites include pear chips, no-bake fruit and nut energy bites, and these tasty pepitas!

      This spicy pepitas recipe combines nutritious pumpkin seeds with a little cumin and cayenne to create a craveable snack that can serve double-duty as a salad topper or nut-free trail mix add-in.

      [feast_advanced_jump_to]

      Why This Recipe is Great for Camping

      • You can make these toasted pepitas ahead of time so you've got a quick and easy snack that's ready for all your outdoor adventures.
      • These can be stored at room temperature, so they don't take up precious cooler space.
      • They can be customized to suit your taste.

      Ingredients and Substitutions

      Ingredients in glass bowls for spiced pepitas--salt, olive oil, pepitas, and cayenne and cumin.
      • Pepitas--I recommend that you use raw, unsalted pepitas here, but if you can only find salted pepitas, omit the salt from the recipe. You can find pepitas in the bulk section of well-stock grocery stores, or in health food stores. Store the raw pepitas in the fridge until you're ready to toast them. Got extra pepitas? Try one of these amazing ways to use pumpkin seeds.
      • Cayenne--If you are sensitive to spice, feel free to reduce the amount of cayenne. If you're uncertain of how much to use, start with a small amount and add to taste.

      Important Steps

      Oil being heated in a small skillet on a portable induction stove.
      A person stirring pepitas and cayenne in a small skillet.
      1. Heat the oil in a small skillet over medium heat.
      2. Stir in the pepitas and spices. Cook until golden brown. Cool before serving.

      FAQs

      What are pepitas?

      The word "pepitas" translates to "little seeds of squash" in Spanish, and that is exactly what they are. They are the seeds found in specific varieties of pumpkins, and have no hull. They are commonly used in Mexican cuisine, but are popular throughout North America.

      Are pepitas healthy?

      Yes, pepitas are considered healthy as the contain healthy fats, iron, magnesium, and other nutrients.

      What's the difference between pepitas and pumpkin seeds?

      All pepitas are pumpkin seeds but not all pumpkin seeds are pepitas. Pepitas come from specific hull-less varieties of pumpkins, known as oil seed pumpkins. Unlike the large white pumpkin seeds you may be familiar with when carving jack-o-lanterns, the seeds in these varieties are a green color and have no hull. You can also make this recipe with regular white pumpkin seeds removed from their shells.

      How do I use these?

      These seasoned pepitas have so many uses. They make a great nutritious snack on their own or can be added to salads, like this grilled tuna salad, for extra crunch. Or, stir them into your favorite trail mix recipe or a batch of cooked grains.

      Tips and Troubleshooting

      • Store the spicy pepitas in an airtight container at room temperature for up to 2 weeks. Refrigerate or freeze for up to 2 months.
      • If you want to make a big batch of the spiced pepitas recipe, make them in the oven. Toss them with the oil and spices and roast at 350°F until golden, about 10 minutes.
      • These are suitable for gluten-free, dairy-free, and vegan diets.
      A bowl of spiced pepitas with a bottle of beer in the background.

      More Camping Recipes You'll Love

      A bowl of nut free grail mix.
      Nut-Free Trail Mix
      A blue Dutch oven filled with mac and cheese and a wooden spoon resting inside.
      Dutch Oven Mac & Cheese

      Tried This Recipe?

      If you've tried this recipe, please leave a comment below. Follow me on Instagram, Facebook, or Pinterest for more great camping and grilling recipes.

      Recipe

      A bowl of spiced pepitas with some spilling over the top.

      Spiced Pepitas

      These toasted spiced pepitas are an easy, nutritious snack that requires only 5 ingredients and are ready in just 10 minutes. Perfect for hiking, camping, or as an easy party snack.
      5 from 1 vote
      Print Recipe Pin Recipe
      Prep Time 5 minutes mins
      Cook Time 5 minutes mins
      Total Time 10 minutes mins
      Course Snack
      Cuisine Mexican
      Servings 4 servings (¼ cup)
      Calories 203 kcal

      Ingredients
        

      • 1 ½ teaspoons olive oil
      • 1 cup raw unsalted pepitas or hulled pumpkin seeds
      • ½ teaspoon kosher salt
      • ½ teaspoon ground cumin
      • ½ teaspoon cayenne pepper

      Instructions
       

      • Warm the oil in a small skillet over medium heat.
      • Add the pepitas, salt, and spices, and stir to coat with the oil. Cook, stirring frequently, until the pepitas begin to turn golden.
      • Remove from the heat and cool before serving.

      Video

      Notes

      • Storage--Store the spicy pepitas in an airtight container at room temperature for up to 2 weeks. Refrigerate or freeze for up to 2 months.
      • Making a big batch--If you want to make a big batch of the spiced pepitas recipe, make them in the oven. Toss them with the oil and spices and roast at 350°F until golden, about 10 minutes.
      • Dietary--These are suitable for gluten-free, dairy-free, and vegan diets.

      Nutrition

      Serving: 0.25cupCalories: 203kcalCarbohydrates: 6.4gProtein: 8.6gFat: 17.7gFiber: 1.4gSugar: 0.4g
      Keyword camping snacks, healthy snacks, spiced pumpkin seeds, spicy pepitas
      Tried this recipe?Let us know how it was!
      • « Go to Previous Page
      • Page 1
      • Interim pages omitted …
      • Page 6
      • Page 7
      • Page 8
      • Page 9
      • Go to Next Page »

      Primary Sidebar

      A woman's face.

      Hi, I'm Angie! I'm so glad you're here. I can't wait to share my favorite camping and grilling recipes with you.

      More about me →

      Summer Favorites

      • Skewers of grilled strawberries on a plate, drizzled with dark syrup.
        Grilled Strawberries
      • Four grilled shrimp skewers on a platter with lemon wedges and cocktail sauce on the side.
        Grilled Old Bay Shrimp
      • A whole skillet peach cobbler with two spoons resting on top.
        Grilled Skillet Peach Cobbler
      • Two Cajun chicken foil packets on plates with forks on the side.
        Cajun Chicken Foil Packets

      Popular Recipes

      • A small skillet filled with caramelized bananas.
        Campfire Bananas Foster
      • A mini cast iron skillet filled with cornbread.
        Mini Skillet Cornbread
      • A grilled cheese sandwich cut in half and a handful of potato chips.
        Campfire Grilled Cheese Two Ways
      • A skillet with three chicken breasts and a skillet filled with cheesy gnocchi.
        18 Easy Cast Iron Skillet Meals for Camping

      Footer

      ↑ back to top

      About

      • Privacy Policy

      Newsletter

      • Sign Up for Emails

      Let's Connect

      • Contact

      Copyright © 2025 Camp.Grill.Eat.

      Rate This Recipe

      Your vote:


      A rating is required
      A name is required
      An email is required